Page 3 of 13 multi_assy_053019.pdf
Soldering the chassis together:
One of the physical properties of solder is that it contracts when it cools. Knowing this, we can allow for
it. If two pieces of the pcb material are clamped 90° apart, and you apply solder at the joint, the joint will
close about 1°-2°, no matter how well you clamp it, the PCB material will flex and you will end up with
an 88° corner. That doesn’t sound like a lot, but you don’t want that to happen. If you try to straighten it
cold, you will lift off the solder pad from the PCB. To counteract this, you position the front panel at
slightly greater than 90º. When it’s tacked it will pull back to square (90º). Finally, adding the gussets
maintain this position and make a strong assembly.
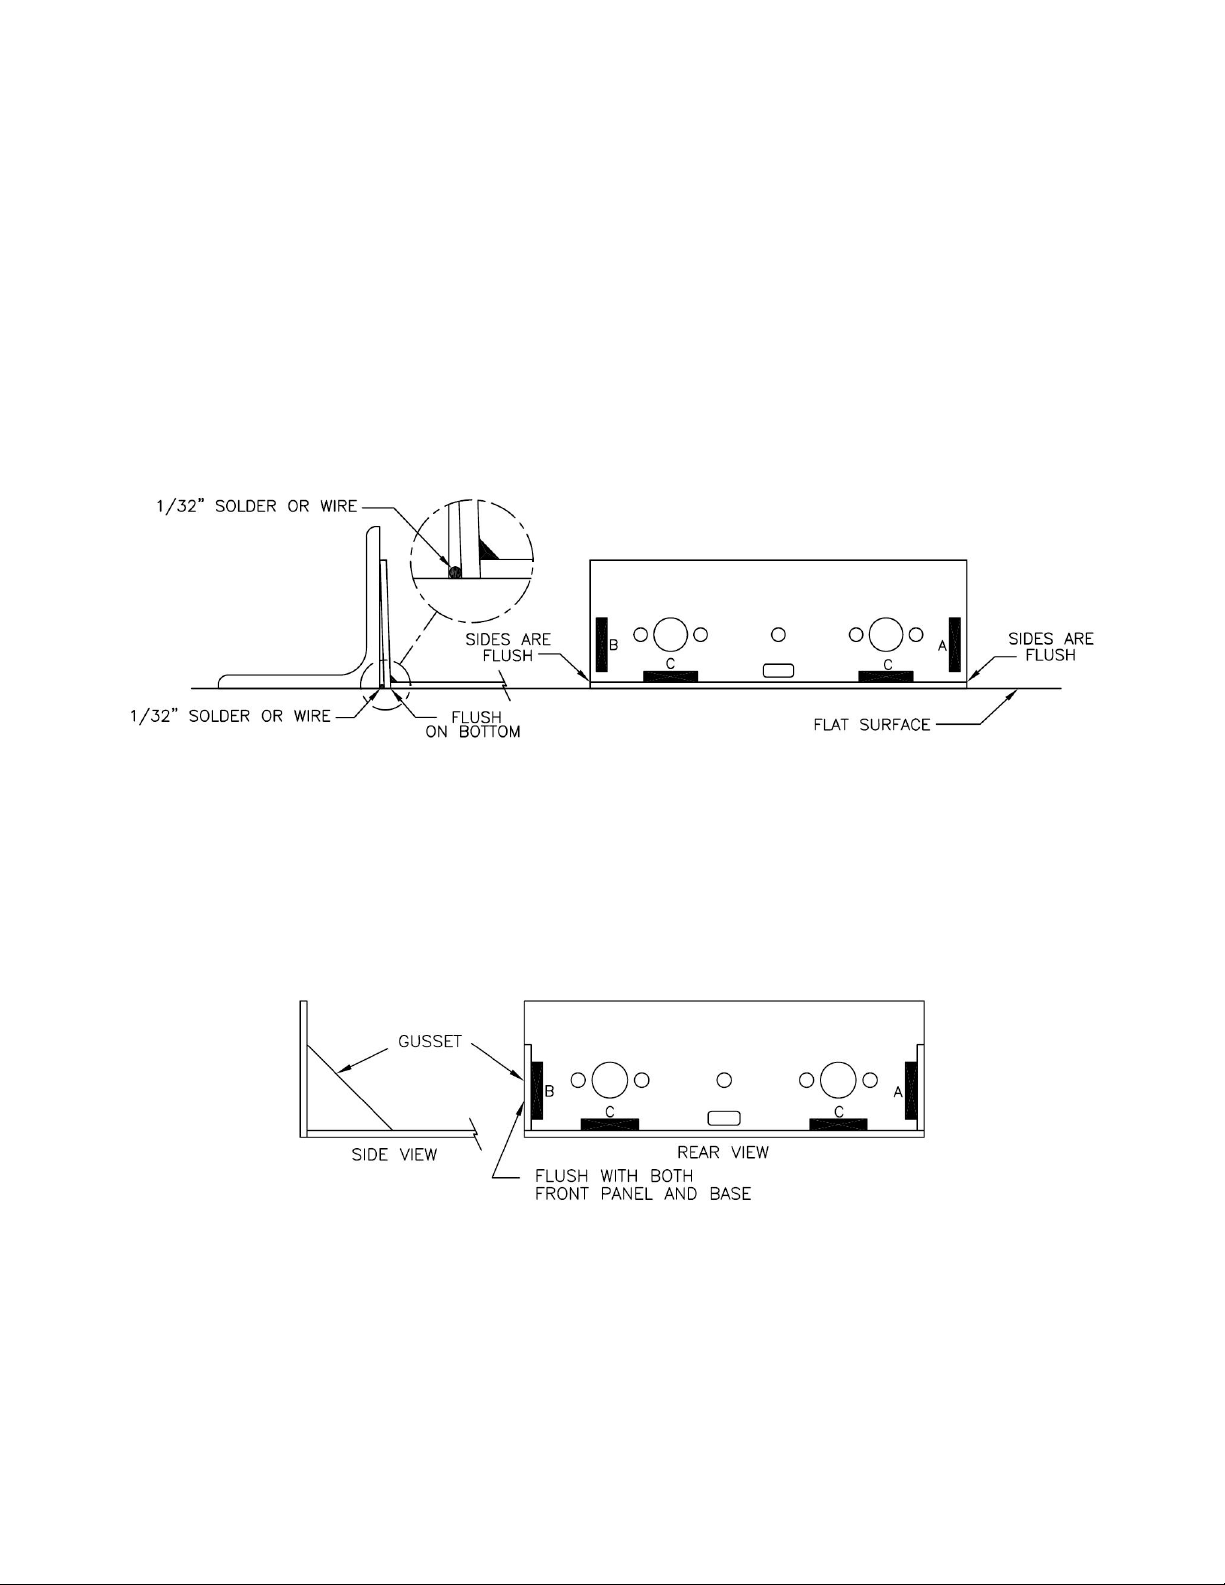
You will need to work on a flat surface. I use a 1 foot square piece of a Formica counter top, but any flat
surface will do. The first task is to position the front panel and the base with the “C’s” matching, so that
both side edges are flush with each other against something you have that is square. It can be a small
piece of angle iron, or a square piece of wood with sharp corners. Position a short piece of 1/32”
diameter solder or wire 4” long against the bottom of the square corner and lean the front panel back.
This gives you the greater than 90º you are looking for. See figures below.
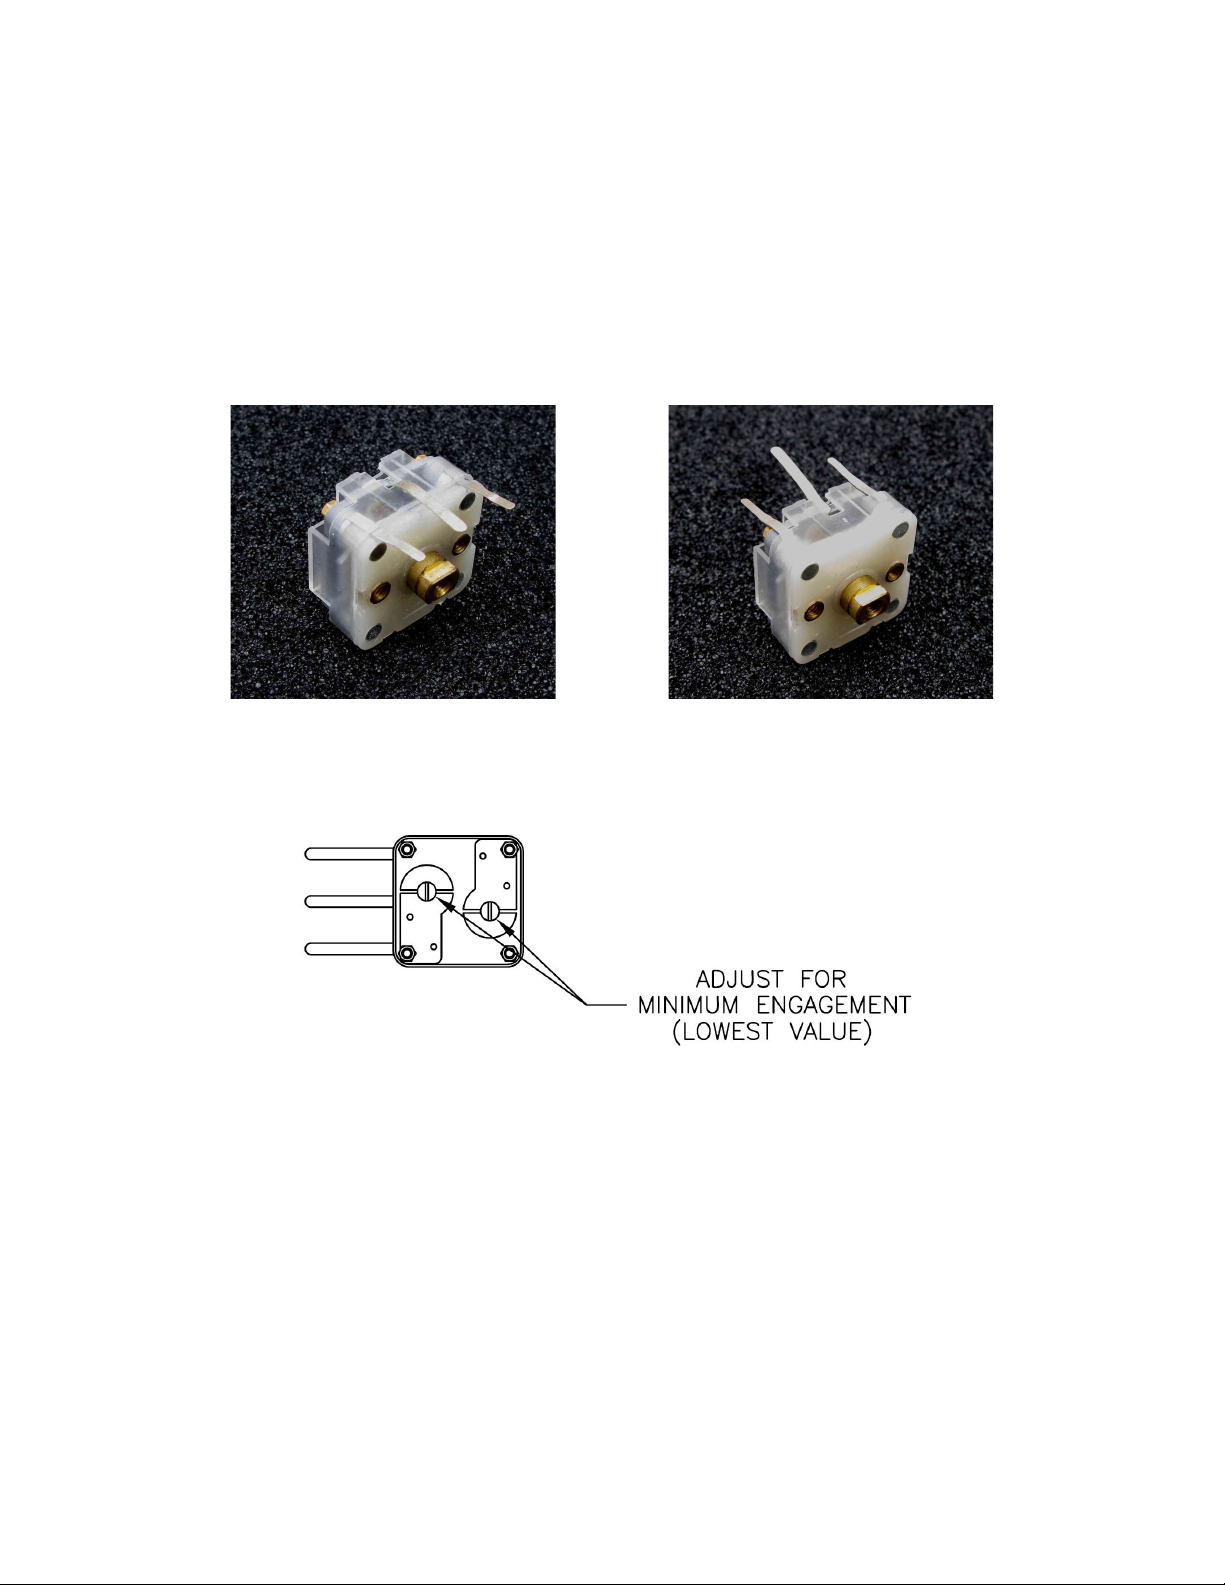
[ ] A small “tack” at one of the “C” pads is all that is required at this time. Check for squareness,
flush on both sides, and flush on the bottom. If not all these conditions are met you only have to
reheat the one tack and reposition the two pieces. When you are satisfied, “tack” the other “C”
pad. Do not completely solder the pads.
Position either of the side gussets against the inside edge of the previous assembly. Match the letters.
You can hold the small triangle of PCB material while you put a small “tack” on one of the pads. As
before, check for squareness, and a flush joint. See the figure below.
[ ] “Tack” the other pad on that side. Do not completely solder the pads.
[ ] Use the same technique with the other gusset.
[ ] When you are satisfied with the alignment and squareness of the “tacked” assembly you can go
back and complete the soldering of all the pads. Alternate between different pads and add a
small amount on each pad until the joints are complete.
This completes the chassis.