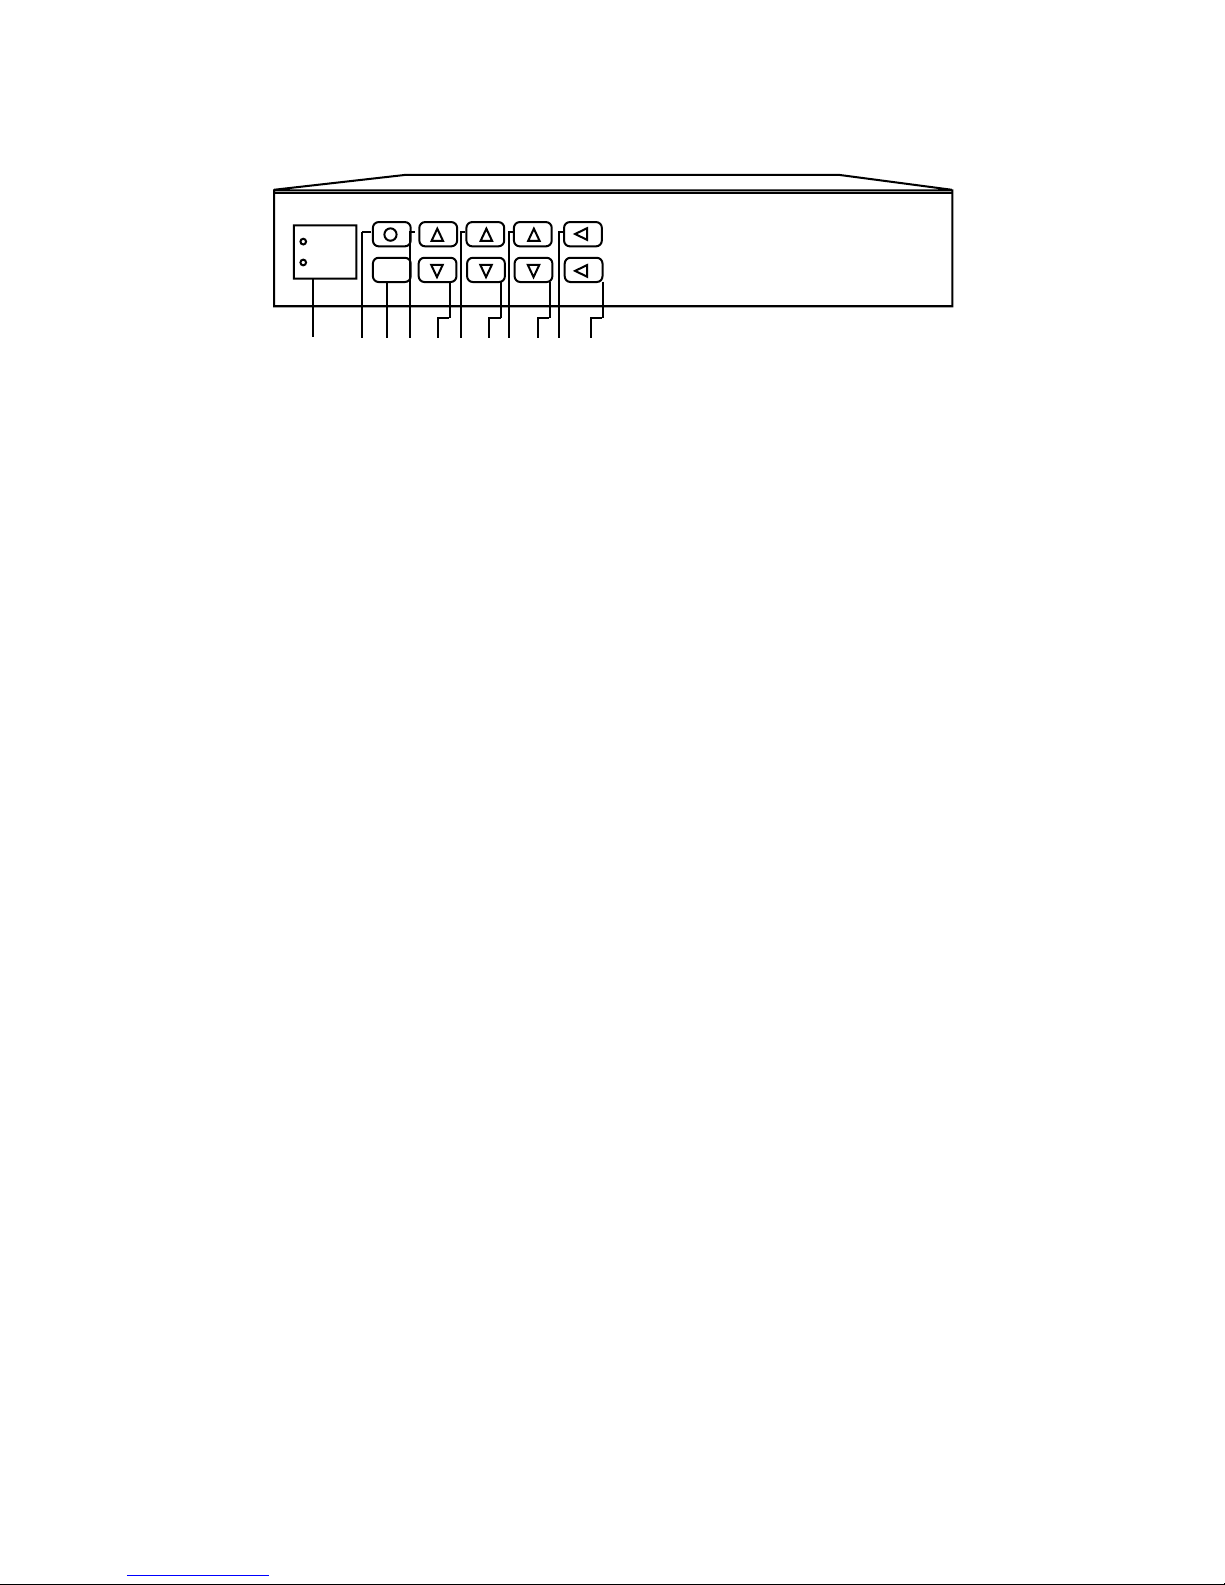
QRS Music Technologies 2000C User manual

OWNER’S MANUAL
QRS Music Technologies, Inc.
©2002
Item # 75390 –75395
Manual # OM75395
Rev. 1.01
2000C - 2000CD+

2
QRS Music Center
See piano rolls manufactured.
Ask for a demonstration of Pianomation MIDI.
Two tours daily, at 10 a.m. and 2 p.m.,
Monday through Friday year ‘round! We are
closed weekends and the days surrounding
major holidays. Any doubts as to “open”
dates can be resolved by letter or phone.
QRS Music Technologies, Inc.
1026 Niagara Street
Buffalo, NY 14213-2099
1-716-885-4600
1-716-885-7510 Fax
QRS Business Center
Stop by any time to see and hear the
vibrant sounds of Pianomation MIDI.
Our Naples, Florida location is devoted to the
development of automated record and playback
systems that can be installed in virtually any
acoustic piano. All the various options are on
display at this location.
QRS Pianomation Center
2011 Seward Avenue
Naples, FL 34109
1-239-597-5888
1-239-597-3936 Fax
Story & Clark Pianos
See pianos manufactured.
Ask for a demonstration of Pianomation MIDI.
QRS is the only manufacturer of Roll Player Pianos in the
world! In addition to producing player pianos, Story &
Clark also manufactures a line of console pianos, and
pianos equipped with Pianomation MIDI systems. Tours
are available—You will see every phase of making a piano.
Please call ahead for reservations.
Story & Clark Pianos
269 Quaker Drive
Seneca, PA 16346
1-814-676-6683
1-814-676-9340 Fax
West Coast Facility
Stop by any time to see and hear the
vibrant sounds of Pianomation MIDI.
Our newest location in Las Vegas, NV services the west
coast for all their Pianomation needs. In addition to a
Pianomation warehouse and installation facility, there is a
piano outlet, showcasing the entire Story & Clark piano
line.
QRS West Coast Center
6410 Sunset Corporate Drive
Las Vegas, NV 89120
1-702-947-5888
1-702-947-3936 Fax
www.qrsmusic.com

3
Table of Content.........................................................................3
Welcome......................................................................................4
Overview...................................................................................4
Choosing a Good Location .....................................................4
Precautions................................................................................4
Warnings...................................................................................5
Important Safety Instructions..................................................6
Remote Control Features................................................................7
2000C Front Panel Description ..................................................8
2000C Back Panel Description.............................................9-10
2000CD+ Front Panel Description.....................................11-12
2000CD+ Back Panel Description .....................................13-14
Warranty ....................................................................................15
2000CD+ Piano Hookup...........................................................16
2000CD+ Piano Hookup with dual wireless ...........................17
2000CD+ Piano Hookup with wireless from your PC............18
How to mic the piano for whole house distribution ................19
QRS Player Accessories......................................................20-23
Pianomation Wiring Diagram...................................................24
Helpful Hints .............................................................................25
Pianomation / Piano Information..............................................26
Table of Contents

4
Welcome
Congratulations on choosing the 2000C/2000CD+, one of our award-winning player piano
systems.
The 2000C/2000CD+ retrofit kit was designed to turn an acoustic piano into a state-of-the-art
player piano.
The system can be installed into almost any grand or upright piano, new or old.
Overview
2000C/2000CD+ ensures that your piano will retain its original beauty and sound. The moment
you insert a special CD into the almost invisible controller, 2000C/2000CD+ brings your piano
magically alive. Enjoying piano music at its best is as close as the touch of a button. The easy-to-
use remote control gives you the convenience you are accustomed to with your audio devices.
Familiar controls like Play, Stop, Preset Volume and Track Select make this sophisticated system
as easy to operate as your CD player.
A 2000C/2000CD+ equipped player piano captures all the musical expressions of the original
performing artist. Then 2000C/2000CD+ goes further, providing dazzling accompaniments
recorded by orchestras and bands. Many of the CDs have vocal tracks recorded by noted artists.
The expansive CD library will satisfy your every musical wish.
Choosing a Good Location
To prevent excessive internal heat buildup in the electronic components, place the piano in a
location with sufficient air circulation.
Do not install the piano:
• Near heat sources such as radiators or hot air ducts.
• In direct sunlight.
• In places where excessive dust, mechanical vibrations or shocks exist.
Precautions
Operate the unit only on 120 Volts AC, 60 Hz.
Unplug the unit from the wall outlet if it is not going to be used for an extended period.
NOTE: If the unit is plugged into an AC power source, it is still energized, even when the
switch is off.
Mail in your registration
Please take a few moments right now to fill in and mail the Registration Card. Doing so will
entitle you to full warranty protection, and enables us to better serve you.
Review all safety information
Please review all care and safety information included in this manual. This includes information
provided as part of compliance with UL and FCC standards.

5
Warnings
FCC INFORMATION
1. IMPORTANT NOTICE: DO NOT MODIFY THIS UNIT!
This product, when installed as indicated in the Installation Manual, meets FCC requirements. Modifications not expressly
approved by QRS Music Technologies, Inc. may void your authority, granted by the FCC, to use this product.
2. IMPORTANT: When connecting this product to accessories and/or another product use only high quality shielded cables.
Cables supplied with this product MUST be used. Follow all installation instructions. Failure to follow instructions could
void your FCC authorization to use this product in the United States of America.
3. NOTE: This product has been tested and found to comply with the requirements listed in the FCC Regulations, Part 15 for
Class “B” digital devices. Compliance with these requirements provides a reasonable level of assurance that your use of this
product in a residential environment will not result in harmful interference with other electronic devices. This equipment
generates/uses radio frequencies and, if not installed and used according to the instructions found in the Installation Manual,
may cause interference harmful to the operation of other electronic devices. Compliance with FCC regulations does not guar-
antee that interference will not occur in all installations. If this product is found to be the source of interference, which can be
determined by turning the unit “OFF” and “ON”, please try to eliminate the problem by using one of the following measures:
• Relocate either this product or the device that is being affected by the interference.
• Utilize power outlets that are on different circuits (circuit breaker or fuse) or install AC line filters.
If these corrective measures do not produce satisfactory results, please contact the local authorized distributor, or contact
QRS Music Technologies, Inc. 2011 Seward Ave. Naples, FL 34109.
INSTRUCTIONS PERTAINING TO A RISK OF FIRE, ELECTRIC SHOCK, OR INJURY
TO PERSONS
The lightning flash with arrowhead symbol, within an equilateral triangle, is intended to alert the user to the presence of un-
insulated “dangerous voltage” within the product’s enclosure that may be of sufficient magnitude to constitute a risk of
electric shock to persons.
The exclamation point within an equilateral triangle is intended to alert the user to the presence of important operating and
maintenance (servicing) instructions in the literature accompanying the product.
GROUNDING INSTRUCTIONS: This product must be grounded. If it should malfunction or breakdown, grounding
provides a path of least resistance for electric current to reduce the risk of electric shock. This product is equipped with a cord
having an equipment-grounding conductor and a grounding plug. The plug must be plugged into an appropriate outlet that is
properly installed and grounded in accordance with all local codes and ordinances.
DANGER - Improper connection of the equipment-grounding conductor can result in a risk of electric shock. Check with a
qualified electrician or serviceman if you are in doubt as to whether the product is properly grounded. Do not modify the plug
provided with the product. If it will not fit the outlet, have a proper outlet installed by a qualified electrician.

6
This instrument is capable of producing extremely high volume levels. Adjust the MASTER
VOLUME to the softest position before turning on or playing the piano. Gradually adjust the
volume to suit your taste by adjusting the MASTER VOLUME while playing the instrument.
You can damage your hearing by playing this instrument too loud. When using this instrument
at high-volume levels, such as public performance, use appropriate ear protection.
WARNING: When using electric products, basic precautions should always be followed,
including the following:
1. Read all instructions before using the product.
2. To reduce the risk of injury, close supervision is necessary when a product is used near
children.
3. Do not use this product near water - for example, near a bathtub, washbowl, kitchen sink, in
a wet basement, near a swimming pool, or the like.
4. This product, either alone or in combination with an amplifier and headphones or speakers,
may be capable of producing sound levels that could cause permanent hearing loss. Do not
operate for a long period of time at a high volume level or at a level that is uncomfortable.
If you experience any hearing loss or ringing in the ears, you should consult an audiologist.
5. The product should be located so that its location or position does not interfere with its
proper ventilation.
6. This product should only be located away from heat sources such as radiators, heat
registers, or other products that produce heat.
7. The product should only be connected to the type of power supply described in the
operating instructions or as marked on the product.
8. This product may be equipped with a polarized line plug (one blade wider than the other).
This is a safety feature. If you are unable to insert the plug into the outlet contact an
electrician to replace your obsolete outlet. Do not defeat the safety purpose of the plug.
9. The power-supply cord of the product should be unplugged from the outlet when left
unused for a long period of time.
10. Care should be taken so that objects do not fall and liquids are not spilled into the enclosure
through openings.
11. The product should be serviced by qualified service personnel when:
A) The power-supply cord or the plug has been damaged; or
B) Objects have fallen, or liquid has been spilled into the product; or
C) The product has been exposed to rain; or
D) The product does not appear to operate normally or exhibits a marked change in
performance; or
E) The product has been dropped, or the enclosure damaged.
12. Do not attempt to service the product beyond that described in the user maintenance
instructions. All other servicing should be referred to qualified service personnel.
SAVE THESE INSTRUCTIONS
Important Safety Instructions

7
Remote Control Features
MUTE POWER
4321
8765
+20+1009
RPTTRK+TRK-PGM
PAUSEPLAYSTOPRND
TRANSTEMPOTREBLEBASS
VOLUME UPBAL
F1
PIANO MASTER AUDIO
VOLUME DOWN
OR
S
R
PIANOMATION
MIDI
1
2
3
4
5
6
7
8
9
10
13
14
15
16
17
18
19
20
21
22
23
11
12 24
25
The PianomationTM 2000CD will “remember” all the settings
after you turn the system off. If the power cord is unplugged
and plugged back again, the system will power up with the
1. Mutes audio and piano tracks.
Displays Mu then track number.
2. To select Track # 1 - 9.
3. To select Track # 10 or 20,
press +10 or +20, then 0.
4. Allows you to program a sequence
of tracks to play.
(See right column - Program.)
5. Return to beginning of track or
to previous track.
6. Starts random play.
To quit random play, press STOP.
7. STOP.
8. Adjusts audio bass and treble.
Press once, then use volume UP arrows.
9. See left column (Balance).
10. Increases piano volume.
11. See right column (F1).
12. Decreases piano volume.
13. Turns complete system ON/OFF.
14. To select Track # 21 through 29.
(To select track 21, press this button
[+20], then 1.)
15. To select Track # 11 through 19.
(To select Track 15, press this button
[+10], then 5.)
16. Repeat. This will repeat the whole CD.
17. Move to beginning of next track.
18. PAUSE. Track number flashes until
Pause or Play is pressed.
19. PLAY.
20. Transpose music. (Not Available.)
21. Tempo control for the speed of the song.
(Not Available.)
22. Increases audio volume only.
23. Increases piano and audio volume.
24. Decreases audio volume.
25. Decreases piano and audio volume.
Balance
Pressed 1 time:
Balances between left and right for stereo
audio CD (not Pianomation CD). Use with any up and down volume key for panning left/
right.
Pressed 2 times:
Display reads d4 - Indicates no delay between audio & piano play.
Note: For speakers that are far from piano, adjustment will be required. To adjust the
synchronization of audio & piano play, use the track selection numbers: 0 to 3 decreases
delay time; 5 to 9 increases delay time.
Press 3 times then press any Volume UP arrow:
For recommended concert level playback.
Program
Display reads Pr. To set program, press
desired track numbers, then Play. To
F1 Control
Pressed 1 time:
Recognizes the 2000CD player. Displays "Cd".
Pressed 2 times:
Recognizes an auxiliary CD changer.
Displays "Ln".
Pressed 3 times:
Recognizes an auxiliary CD changer
with a wireless receiver. Displays "rF".

8
1
2
3
4
5
6
7
8
9
10
11
Pressing this button will power the entire system “ON” or “OFF”.
Use the “MUTE” button to silence both the piano and the orchestration.
Pressing the “PIANO VOLUME UP” button will increase the volume of the piano.
Pressing the “PIANO VOLUME DOWN” button will decrease the volume of the piano.
TIP: Pressing both buttons simultaneously will return the piano to the default level.
The “MASTER VOLUME UP” button increases the volume of the piano and orchestration.
The “MASTER VOLUME DOWN” button decreases the volume of the piano and orchestration.
TIP: Pressing both simultaneously will return all levels to their default volume.
Use the “AUDIO VOLUME UP” button to increase the volume of the orchestration.
Use the “AUDIO VOLUME DOWN” button to decrease the volume of the orchestration.
TIP: Pressing both of these buttons simultaneously will return the orchestration to its default value.
Press the “TREBLE” button and use the “AUDIO VOLUME UP or DOWN” button to boost or cut the high end
frequencies of orchestration.
Press the “BASS” button and the “AUDIO VOLUME UP or DOWN” button to boost or cut the low frequencies of the
orchestration.
TIP: Press the “TREBLE and BASS” buttons simultaneously to return to their default value.
This red LED indicates power ON, and when entering “TREBLE or BASS” mode will turn off, indicating that you
have entered the BASS or TREBLE adjust mode.
This is the “Infrared Sensor” that picks up your remote control commands. To avoid problems with the remote control function,
do not block this window.
Special function: “Piano Sync” (piano to orchestration synchronization) can be varied (+/-) 50 milliseconds to compensate for
large separations in piano and speaker placement. This adjustment is not recommended for normal system configurations
because misadjustment of sync will cause deterioration of the overall sound quality.
To enter sync mode, press the “PIANO DOWN” and the “MASTER UP” buttons simultaneously. The red power LED will turn
off indicating you have entered sync mode.
While in the sync mode, use the “PIANO UP” and “PIANO DOWN” buttons to make adjustments.
TIP: While in sync mode, pressing the “PIANO UP” and “PIANO DOWN” buttons simultaneously will set the sync back to the
default settings.
2000C Front Panel Description
QRS Pianomation 2000C
MUTE
Power
IR Sensor
ON/OFF
Piano
Volume Master
Volume Audio
Volume BASS
TREBLE
TIP: When adjusting parameters, briefly tap the buttons to make changes one increment at a time. Pressing and
holding a button will step through its entire range rapidly.
11 1 2 3 4 5 6 7 8 9

9
2000C Back Panel Description
NOTE: MAKE SURE POWER TO ENTIRE SYSTEM IS TURNED OFF BEFORE CONNECTING OR DISCONNECTING
ANY OF THESE CABLES.
TIP: Your 2000C has been designed to recognize the difference between a QRS MIDI signal and a standard music signal at the
line input jacks. This means if your system is configured for stereo sound you will be able to enjoy your standard compact disc
library in true stereo without having to push buttons. When you are playing QRS compact discs, the audio will be heard in
“emulated stereo” taking advantage of the stereo configuration.
NOTE: When using standard music discs through the 2000C, depending on the actual music, you may notice the very beginning
of the first song of the disc being clipped off. This is especially true for very slow fade ins. This is because the onboard
computer does not know what signal is coming in until it actually sees it. This possible muting is normal and helps assure that
when the 2000C is being driven with standard QRS MIDI discs, you won’t hear a burst of the MIDI data at the beginning of the
song.
Right channel line input. Connect to the right channel output of your CD player, VCR etc.
Left \ AMI channel line input. Connect to the left channel output of your CD player, VCR etc.
Right channel output. Connect to the right channel input of your powered speaker or stereo amplifier \ receiver. This
connection would be used as a single (mono) speaker.
Left Channel output. Connect to channel input of your powered speaker or stereo amplifier \ receiver. This connection
would be used as a single (mono) speaker.
MIDI OUT port. Connect to the MIDI input of any standard MIDI device. The MIDI source for the port is derived from the
left “LINE IN” \ AMI signal.
MIDI IN port. Connect to the MIDI output of any standard MIDI device.
TIP: When driving the Pianomation by means of the “MIDI IN” port, make sure that the device connected to the “LINE IN”
ports are not active. This will prevent 2 songs from playing at the same time.
MIDI THRU port. Connect to the “MIDI IN” port of the 2000C.
TO PROCESSOR BOARD port. This DB-15 connector is the port that connects to your Pianomation processor. Under no
circumstances should this connector be interfaced with any other device.
IN. This light is used to confirm that there is “AMI” signal present at the “LEFT/AMI” line in jack. This indicator is very
useful for basic system trouble shooting.
ER. This light indicates a condition has occurred within the Pianomation system. It is normal for this light to turn on
initially after powering the system on. The “ER” light should turn off within 3 seconds after turning the system on.
1
2
3
4
5
6
7
8
9
10
RIGHT
LINE IN LINE OUT MIDI OUT MIDI 1N MIDI THRU TO PROCESSOR BOARD
ANTENA
IN
ER
EXT. IR
SENSOR
POWER
9-13.5VDC
0.2A
LEFT/AMI RIGHT LEFT
+
1 2 3 4 5 6 7 8 9 10 11 12

10
2000C Back Panel Description
NOTE: It is normal for this ER light to remain on when the power is turned off as well as when the
2000C is powered on without being connected to the Pianomation processor.
TIP: If the piano system will not play, check to make sure this light is not flashing. If it is flashing, a
condition has occurred in the Pianomation system. Unplug the system from the AC outlet, wait 2
minutes and reconnect. Power up the system and if the condition occurs again, call your dealer or
QRS tech support for instructions.
EXT IR SENSOR. This port provides you with the ability to add an optional remote control sensor.
This is convient when you want to hide the 2000C under the piano while retaining remote control
functionality.
Power Inlet. This is where the low voltage end of the AC adaptor plugs in.
NOTE: Use only the power adaptor provided by QRS. An adaptor with the incorrect characteristics
could result in damage to your system.
11
12
RIGHT
LINE IN LINE OUT MIDI OUT MIDI 1N MIDI THRU TO PROCESSOR BOARD
ANTENA
IN
ER
EXT. IR
SENSOR
POWER
9-13.5VDC
0.2A
LEFT/AMI RIGHT LEFT
+
1 2 3 4 5 6 7 8 9 10 11 12
NOTES

11
2000CD Front Panel Description
Overview - The keypad is used for entering commands to the system. All of the main functions can be
accessed from this keypad. These functions are repeated on the handheld remote control. (See the remote
control manual for a description of remote control functions).
The Display Area provides the following information to the user:
Standby indicator lights when power is off. When power is turned on the two digit display lights up and
standby light goes out.
The two segment LED displays how many tracks are on a disc, which track is currently playing or a mode
and value when an adjust mode is active such as Bass, Treble, Volume etc.
Included at the bottom corner of each display segment is a LED dot. The left most segment dot blinks
when the 2000CD+ is receiving IR signal from the remote control and the right most segment dot blinks
when the CD is being played, indicating the drive is active.
Also included in the display area is the IR Sensor. There is no light associated with this sensor but be aware
not to cover or block this area as it will inhibit the remote control function.
The Standby Light is lit when the system is off. It will turn off when the ON/OFF button is pressed to
turn the Pianomation system ON.
POWER - When in standby mode, pressing this button will power the Pianomation system ON.
When the Pianomation system is ON, pressing this button will shut system off and the standby light
will turn on.
STOP - Stops the compact disc when playing from the internal CD drive.
RAN - Use this button to enter random play mode. The CD will play once through the disc in a
random order. Pressing STOP will cancel the random play mode.
PLAY -When in stop mode, pressing this button will start playing track one of the CD. Pressing the
Play button when the disc is playing will enter the PAUSE mode. Press play one more time to start
the disc playing. When in PAUSE, the two digit display flashes every second to indicate that the unit
is paused.
1
2
3
4
5
ON/OFF
ran
STOP PLAY
PIANO AUDIO
TRACK
VOLUME VOLUME
QRS
Pianomation2000CD+
Standby
IR Sensor
1 2 3 4 5 6 7 8 9

12
2000CD+ Front Panel Description
PIANO VOLUME UP and DOWN - Pressing these buttons will raise and lower the piano volume
respectively. Pressing both buttons simultaneously will reset the piano to its optimum performance
setting.
AUDIO VOLUME UP and DOWN - Pressing these buttons will raise and lower the audio volume
respectively. Pressing both buttons simultaneously will reset the audio to its optimum performance
setting.
NOTE: (To make small adjustments, quickly tap the buttons. Holding the buttons down for any length
of time will scan through the volume range rapidly.)
TRACK UP and TRACK DOWN - Pressing these buttons will skip through each track of the CD
respectively.
NOTE: (To select one track at a time, quickly tap the buttons. Holding the buttons down for any
length of time will scan through the discs tracks rapidly.)
EJECT - This button will open and close the CD tray.
6
7
8
9
ON/OFF
ran
STOP PLAY
PIANO AUDIO
TRACK
VOLUME VOLUME
QRS
Pianomation2000CD+
Standby
IR Sensor
1 2 3 4 5 6 7 8 9

13
2000CD+ Back Panel Description
AMI OUT - This RCA connector provides access to the AMI signal. The AMI is the encoded MIDI
information that makes the piano play. Use this connection to interface with a wireless transmitter,
QRS coin-op equipment or recording equipment. This signal is output at a nominal level of 150mv.
LINE OUT/ LEFT and RIGHT - This pair of RCA connectors provides standard line level signal to
feed an amplifier / speaker system such as a home entertainment system or powered speakers. The
signal at these connectors is dual mono when playing a QRS Pianomation disc and true stereo when
playing a standard music CD or when receiving a non QRS signal from an external source.
Whatever the input source, the 2000CD+ applies volume and tone control to these outputs.
LINE IN, AMI / LEFT - This connector provides a means of receiving an AMI signal from an external
source such as a VCR or remotely located CD player. When an external source is received at this
connector and is recognized as an AMI signal, the 2000CD+ automatically switches its LINE
OUTPUT (2 & 3) to dual mono. This allows both left and right speakers in a system to produce sound
without the need for a manual source selector. When the signal is a standard music source not
containing an AMI signal, the LINE OUTPUT (2 & 3) automatically switches to true stereo.
LINE IN RIGHT - This connector is used for the right channel of an external source. This input does
not detect for AMI signal but only provides a way of bringing in the right channel music of a QRS CD
or standard music CD. NOTE: For the LINE INPUT to be functional, you must select “IN” from the
F1 menu or press STOP then TRACK on the front panel.
MIDI OUT - is a standard MIDI output to drive external devices. Its source is either the internal CD
or LEFT/AMI LINE INPUT.
MIDI IN - is a standard MIDI input. Use this input to drive the Pianomation system from an external
MIDI source such as a computer. NOTE: This input is always active, Using this input at the same
time the 2000CD+ is receiving signal from its internal CD or an external source is not recommended.
1
2
3
4
5
LINE OUT LINE IN
LEFT
RIGHT
ami/LEFT
RIGHT
ANTENNA
TO PROCESSOR BOARD IN
ER
EXT. IR
SENSOR
AC POWER
90 TO 240 VAC,15VA max.MIDI OUT MIDI IN MIDI THRU
AMI OUT
QRS Pianomation 2000CD+
Serial:
QRS Music Inc.,P/N 75390
2011 Seward Avenue
Naples, FL 34109
Power Rating 90 - 240VAC 15VA max.
CAUTION
DO NOT OPEN
1 2 3 4 5 6 7 8 9 10 11 12

14
2000CD+ Back Panel Description
MIDI THRU - is a duplicate of the MIDI being received at the MIDI IN connector.
ANTENNA - For future use.
TO PROCESSOR BOARD - This DB-15 connector is connected to the Pianomation processor.
NOTE: DO NOT CONNECT THIS TO ANY OTHER DEVICE AS DAMAGE TO THE UNIT WILL
OCCUR.
IN - This indicator light should be lit whenever the 2000CD+ is playing from its internal CD or when
it is receiving AMI signal at its LEFT/AMI LINE IN. This light is helpful in troubleshooting problems
such as defective audio cables, CDs, external CD players, etc.
ER - This indicator should remain off during normal use of the Pianomation system. The ER light
does not indicate any conditions with the 2000CD+. When “on”, this light indicates a condition with
the Pianomation system itself. See Pianomation user manual for error descriptions.
EXT. IR SENSOR - This port makes it possible to locate the 2000CD+ in a hidden position and still
maintain line of sight operation from the hand held remote control.
AC POWER - Connect the 2000CD+ to your 120 VAC wall outlet with the provided power cable
only. This IEC power inlet is compatible with line voltage ranging from 90 to 240 AC, 50 or 60hz.
This wide input range makes international usage trouble free.
6.
7.
8.
9.
10.
11.
12.
LINE OUT LINE IN
LEFT
RIGHT
ami/LEFT
RIGHT
ANTENNA
TO PROCESSOR BOARD IN
ER
EXT. IR
SENSOR
AC POWER
90 TO 240 VAC,15VA max.MIDI OUT MIDI IN MIDI THRU
AMI OUT
QRS Pianomation 2000CD+
Serial:
QRS Music Inc.,P/N 75390
2011 Seward Avenue
Naples, FL 34109
Power Rating 90 - 240VAC 15VA max.
CAUTION
DO NOT OPEN
1 2 3 4 5 6 7 8 9 10 11 12

15
Warranty
Warranty
Warranty
Limited Warranty
2000C/2000CD+™ Limited Warranty
QRS Music Technologies, Inc. (Manufacturer) warrants 2000C/2000CD+ products to be free of manufacturing
defects in material or workmanship as described below:
If your 2000C/2000CD+ product should prove defective in material or workmanship within two (2) years from
the date of purchase, manufacturer will provide replacement parts without charge, upon verification and
presentation of satisfactory proof of purchase.
Manufacturer will provide, or arrange for, service (labor) to correct defects in workmanship for a period of one
(1) year at no cost.
This warranty does not apply to defects resulting from abuse, neglect, accident, improper repair, modification
or unreasonable use of the unit resulting in cracked or broken case parts or units damaged by excessive heat or
humidity.
This warranty also does not cover routine tuning or adjustments required because of normal use and wear or
damage caused by any repair or service by anyone other than a 2000C/2000CD+ dealer.
This warranty, and the extent of the responsibility of the Manufacturer hereunder, are subject to the following
conditions and limitations:
This warranty is non-transferable and extends only in favor of the original owner and shall be valid only if the
product is purchased from an authorized 2000C/2000CD+ dealer and remains in the possession of the original
owner. It is the owner’s responsibility to establish the date and place of purchase.
This warranty is void if the serial number has been altered or removed, if the product is modified in any manner
which Manufacturer concludes, after inspection, affects the reliability of the product, if the product has been
repaired or serviced by anyone other than a 2000C/2000CD+ dealer or if the product is damaged because of
improper operation and/or maintenance in accordance with the owner’s manual.
Manufacturer reserves the right to make changes in design and/or improvements upon its products without
obligation to include these changes in any products previously manufactured.
Except to the extent prohibited by applicable law, all implied warranties made by Manufacturer in connection
with this product are limited in duration to the applicable warranty period set forth before, and no warranties,
whether expressed or implied, including warranties of MERCHANTABILITY or fitness for particular
purposes, shall apply to this product after said has expired. The consumer’s sole remedy shall be such
replacement of defective parts as is expressly provided above; and under no circumstances shall manufacturer
be liable for any special, incidental, or consequential loss or damage. Some states do not allow limitations on
how long an implied warranty lasts or the exclusion of limitation of incidental or consequential damages, so the
above limitations or exclusions may not apply to you. This warranty gives you specific legal rights, and you
also may have other rights which vary from state to state.
This warranty is the only one you will receive and no other warranty is made to you. Manufacturer does not
authorize any person to modify, either orally or in writing, the terms of this warranty.
To obtain warranty service for your 2000C/2000CD+ product:
1 Contact the 2000C/2000CD+ dealer from whom you purchased the product, or the nearest authorized
dealer.
2 If no dealer is near you, call Manufacturer at (239)597-5888.
3 Do not attempt to repair or disassemble product yourself. Do not ship product without prior written
authorization from the Manufacturer.
4 Do not dispose of this warranty after it expires. In the event your product requires service, these
instructions should be helpful in enabling you to obtain proper service.

16
Optional External IR
Sensor
(Cat. No. 70394)
This can be mounted any
where on the piano to
make it more convenient
for you to use your
remote to control the
2000CD+. It plugs in
like a phone jack.
LINE OUT LINE IN
LEFT
RIGHT
ami/LEFT
RIGHT
ANTENNA
TO PROCESSOR BOARD IN
ER
EXT. IR
SENSOR
AC POWER
90 TO 240 VAC,15VA max.MIDI OUT MIDI IN MIDI THRU
AMI OUT
QRS Pianomation 2000CD+
Serial:
QRS Music Inc.,P/N 75390
2011 Seward Avenue
Naples, FL 34109
Power Rating 90 - 240VAC 15VA max.
CAUTION
DO NOT OPEN
The self amplified speaker
(Cat. No. 71040) is
mounted on one of the
beams under the piano. It
is connected by a standard
RCA audio cable. The
power cord from the
speaker is plugged into the
Pianomation power
supply.
The 2000CD+ must be
connected to the
Pianomation Processor.
(cat. No. 60108) This is
done with a DB15 User
Box Cable (Cat. No.
811460). The Processor is
mounted on the one of the
beams under the piano.
This cord provides
power to the
2000CD+ and the
Pianomation System.
It must be plugged
into the extension
cord provided.
DO NOT PLUG IT
INTO THE
POWER SUPPLY.
Cables Required
Item Cat. No.
6 Ft Male RCA to Male RCA cable 70131
User Box Cable 70329
Power Cord 70214
Extension Cord 70348
Basic 2000CD+ Piano Hookup

17
Basic 2000CD+ Piano Hookup W/Dual Wireless
This hookup is used if you want to use an external CD Player to operate your Pianomation System. It will
transmit the piano signal and the background music to the piano wirelessly.
Parts required: Cat. No. 50088 & 50089 Transmitters and Receivers.
A Smart Switch (Cat. No. 78000) can be used with a multi disc player if you want to mix normal CDs with
Pianomation CDs. This requires no button pushing to eliminate the piano signal from the speakers.
“V”
Optional External IR
Sensor
(Cat. No. 70394)
This can be mounted any
where on the piano to
make it more convenient
for you to use your
remote to control the
2000CD+. It plugs in
like a phone jack.
LINE OUT LINE IN
LEFT
RIGHT
ami/LEFT
RIGHT
ANTENNA
TO PROCESSOR BOARD IN
ER
EXT. IR
SENSOR
AC POWER
90 TO 240 VAC,15VA max.MIDI OUT MIDI IN MIDI THRU
AMI OUT
QRS Pianomation 2000CD+
Serial:
QRS Music Inc.,P/N 75390
2011 Seward Avenue
Naples, FL 34109
Power Rating 90 - 240VAC 15VA max.
CAUTION
DO NOT OPEN
The self amplified speaker
(Cat. No. 71040) is
mounted on one of the
beams under the piano. It
is connected by a standard
RCA audio cable. The
power cord from the
speaker is plugged into the
Pianomation power
supply.
The 2000CD+ must be
connected to the
Pianomation Processor.
(cat. No. 60108) This is
done with a DB15 User
Box Cable (Cat. No.
811460). The Processor
is mounted on the one of
the beams under the
piano.
This cord provides
power to the
2000CD+ and the
Pianomation System.
It must be plugged
into the extension
cord provided.
DO NOT PLUG IT
INTO THE
POWER SUPPLY.
Power
Remote
Sensor
TRACK NO. INDEX/PGM NO.
REPEAT MEMORY PLAY
OPEN/CLOSE STOP /II
MIN SEC
REPEAT MEMORY MUSIC SKIP
REMOTE
CONTROL
Your CD Player with Left and Right Channel outputs
Left Channel Right Channel
Wireless Transmitter /
Receiver “W” Channel
(Cat. No. 50089).
The Transmitter plugs into
the right channel output of
your CD Player and transmits
the background music to the
receiver which is mounted
under the piano.
The Receiver plugs into the
Right channel input on the
2000CD+.
“W”
Wireless Transmitter / Receiver “V” Channel
(Cat. No. 50088).
The Transmitter plugs into the Left channel
output of your CD Player and transmits the
piano signal to the receiver which is mounted
under the piano.

18
Optional External IR
Sensor
(Cat. No. 70394)
This can be mounted any
where on the piano to
make it more convenient
for you to use your
remote to control the
2000CD+. It plugs in
like a phone jack.
LINE OUT LINE IN
LEFT
RIGHT
ami/LEFT
RIGHT
ANTENNA
TO PROCESSOR BOARD IN
ER
EXT. IR
SENSOR
AC POWER
90 TO 240 VAC,15VA max.MIDI OUT MIDI IN MIDI THRU
AMI OUT
QRS Pianomation 2000CD+
Serial:
QRS Music Inc.,P/N 75390
2011 Seward Avenue
Naples, FL 34109
Power Rating 90 - 240VAC 15VA max.
CAUTION
DO NOT OPEN
The self amplified speaker
(Cat. No. 71040) is
mounted on one of the
beams under the piano. It
is connected by a standard
RCA audio cable. The
power cord from the
speaker is plugged into the
Pianomation power
supply.
The 2000CD+ must be
connected to the
Pianomation Processor.
(cat. No. 60108) This is
done with a DB15 User
Box Cable (Cat. No.
811460). The Processor
is mounted on the one of
the beams under the
piano.
This cord provides
power to the
2000CD+ and the
Pianomation System.
It must be plugged
into the extension
cord provided.
DO NOT PLUG IT
INTO THE
POWER SUPPLY.
This hookup is used if you want to use a computer to operate your Pianomation System from another room. It will transmit the piano
signal to the piano wirelessly.
Parts required:
Cat. No. 50088 Transmitter / Receivers.
Cat. No. 50060 AMI
Cat. No. 50105 Female Midi Game Cable.
Mac or
PC
Step 1
Plug cable into
Sound Card
MIDI Game Cable
Cat. No. 50105
Step 2
Plug male MIDI
connector into
MIDI IN on the AMI
Step 3
Plug the audio
cable into the
tape out of the
AMI
AMI
Cat. No. 50060
Wireless
Transmitter /
Receiver
Cat. No. 50088
Step 4
Plug the audio
cable into the
Left channel in
on the 2000CD+.
Basic 2000CD+ Piano Hookup W/Wireless
Transmission From Your Computer.

19
Optional External IR
Sensor
(Cat. No. 70394)
This can be mounted any
where on the piano to
make it more convenient
for you to use your
remote to control the
2000CD+. It plugs in like
a phone jack.
LINE OUT LINE IN
LEFT
RIGHT
ami/LEFT
RIGHT
ANTENNA
TO PROCESSOR BOARD IN
ER
EXT. IR
SENSOR
AC POWER
90 TO 240 VAC,15VA max.MIDI OUT MIDI IN MIDI THRU
AMI OUT
QRS Pianomation 2000CD+
Serial:
QRS Music Inc.,P/N 75390
2011 Seward Avenue
Naples, FL 34109
Power Rating 90 - 240VAC 15 VA max.
CAUTION
DO NOT OPEN
The self amplified speaker
(Cat. No. 71040) is
mounted on one of the
beams under the piano. It
is connected by a standard
RCA audio cable. The
power cord from the
speaker is plugged into the
Pianomation power
supply.
The 2000CD+ must be
connected to the
Pianomation Processor.
(cat. No. 60108) This is
done with a DB15 User
Box Cable (Cat. No.
811460). The Processor
is mounted on the one of
the beams under the
piano.
This cord provides
power to the
2000CD+ and the
Pianomation System.
It must be plugged
into the extension
cord provided.
DO NOT PLUG IT
INTO THE
POWER SUPPLY.
Amplifier
CD INAUX INAUX IN
Sound Module Output or Piano Mic output
Audio Output plugs into the audio input of the mixer
Background Music plugs
into the mixer input.
Adding an external sound module or a microphone,
mixing with the background music to broadcast
through the home or establishment.

20
1. Self-Powered Speaker (Cat. No. 71040)
USE: This speaker mounts under the piano and amplifies the
orchestrated music. Mounting Bracket included.
2. Wireless Transmitter/Receiver (Cat. No. 50088 or 50288)
USE: This unit is used for home hookups using the customer’s
CD Player to send the MIDI signal to the piano.
3. Wireless Transmitter/Receiver (Cat. No. 50089 or 50289)
USE: This unit is used for home hookups, using the
customer’s CD Player to send the audio background music to
the piano’s speaker.
4. IR Sensor (Cat. No. 70394)
USE: The IR sensor can be located anywhere on the piano to
extend the use of the remote control to different parts of the
room.
5. Pedal Solenoid (Cat. No. 70130)
USE: Raises and lowers the damper tray.
6. Sostenuto Cable Trap work
Push Type (Cat. No. 70895)
Pull Type (Cat. No. 70896)
Steinway Type (Cat. No. 70897)
USE: To make the sostenuto functional.
QRS Player Accessories
To order call 1-800-247-6557
This manual suits for next models
1
Table of contents
Other QRS Music Technologies Musical Instrument manuals
Popular Musical Instrument manuals by other brands

Studio Logic
Studio Logic Numa X Piano GT user manual

Best Choice Products
Best Choice Products SKY5584 instruction manual

Allen Organ Company LLC
Allen Organ Company LLC Renaissance 330 owner's manual

Studio Logic
Studio Logic Numa Compact 2 Operation manual

Generalmusic
Generalmusic RP100 GEM Service manual

Rodgers
Rodgers 795 user manual