PNO3WB MIDI Upgrade Kit Instrucons ‐83529
9
QRS Music Technologies, Inc. / Technical Support ‐800‐247‐6557 / www.qrsmusic.com
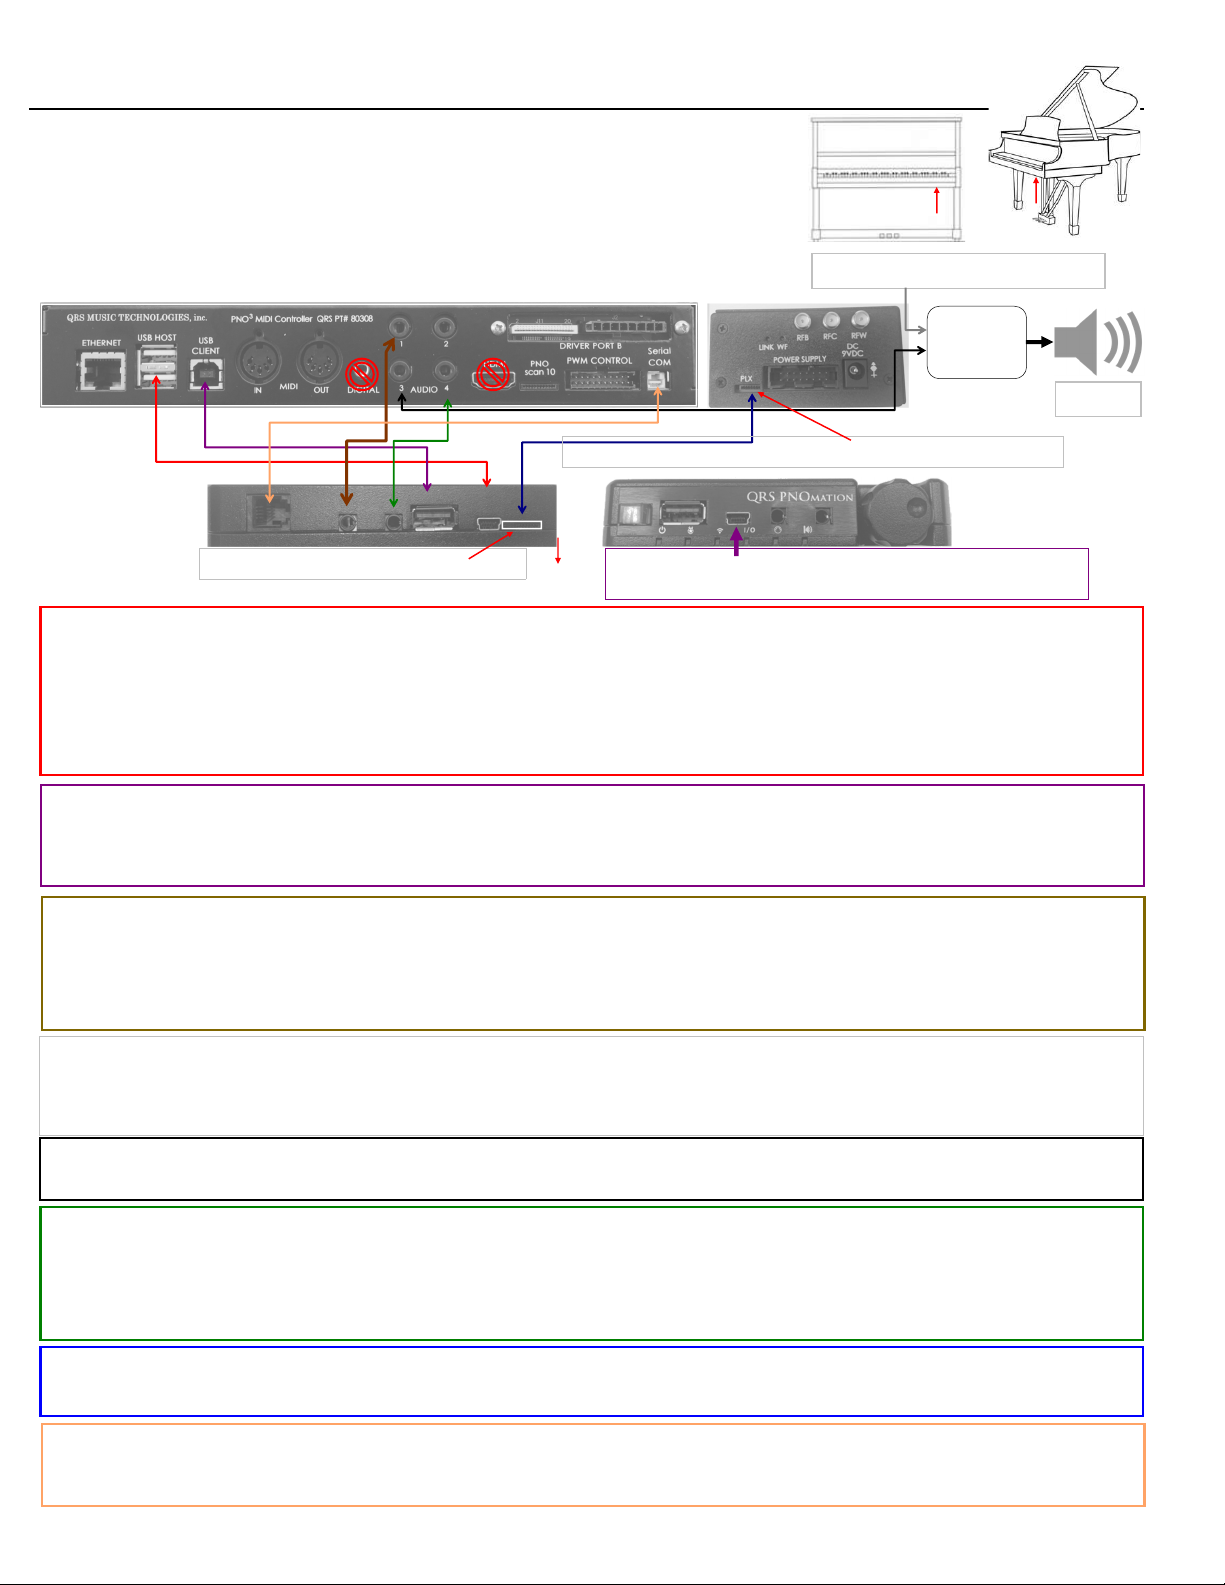
NetworkSetup
Current PNO3WB processors have built‐in Wi‐Fi and are shipped to operate in Standalone mode.
The default SSID is QRSPNO3_##### where the # numbers are the last five digits of the PNO3WB serial number.
WirelessStandaloneMode
Use your device [iPhone, iPad, iPod, Android phone/tablet or laptop] to wirelessly connecon to QRSPNO_#####
Password = qrsmusic
Open your web browser [Apple Safari / Android Browser / Google Chrome] and enter 10.3.2.1in the address bar.
You can ALWAYS connect to PNO3WB in Stand Alone Mode...even when running in Network Mode.
NetworkModeAdvantages
Your device stays connected to your home network to surf the internet OR to play the piano.
The PNO3WB system receives system and music updates over the Internet.
Music can be ordered directly from the PNO3 menu.
Purchased music is released over the Internet...no unlock keys to enter.
NetworkModes[Wired Network (LAN) OR Wireless Network]
Always keep the Wireless Standalone Wi‐Fi acve, as a backup, but onlyuseONEofthetwoNetworkmodesbelow.
WiredNetwork(LAN)A hard‐wire connecon from the PNO3WB’s Ethernet port to the home router or one of it’s extenders.
The home router will assign an IP address to the PNO3WB processor as soon as a viable connecon is made.
WirelessNetworkLink the PNO3WB to the home Wi‐Fi as follows...
System Setup / Network Sengs / Wireless Network‐Verify that the Network Mode is DHCP Client.
Tap the Connect to Client Wi‐Fi buon.
Select your home network from the list
Enter the password to your home network
Tap Connect
IF the PNO3WB links to your home network you should:
Hear the IP address announced over the piano speakers…notatetheinetaddr:numberdisplayedonyourscreen.
Also…in the UPPER LEFT CORNER of the Wireless Network page you should see:
Currently connected to…your home network name
On Channel X [if on 11, connue but, make the Channel11change.]
...signal of ‐xxdbm [Below‐65dbmisbest. –70 & above is not good]
Inet IP informaon which should display the number that you heard over the speakers.
Access the PNO3 menu with your smart device connected to your home Wi‐Fi instead of the QRS Wi‐Fi.
Close the open programs on your device, especially the QRS page you’ve been using.
Go to Sengs / Wi‐Fi on your smart device and connect to your home Wi‐Fi.
Open your web browser and enter the inetaddr:numberin the address bar and Enter.
Or, use the QRS Finder App from the Apple App or Goggle Play store.
This should take you back into the QRS Menu again.
established you can access the piano from any device on your home network.
Use the IP address announced or, download the QRSFinderAppfrom the Safari or Google Play Store
Channel11Go to System Setup / Network Sengs / Wireless Standalone
Change the Wi‐Fi AP Channel to 6 and tap the ApplyChangesbuon.
QRSFinderApp