Korg D1200 mkII User manual

3E

ii
Precautions
Location
Using the unit in the following locations can result in a mal-
function.
• In direct sunlight
• Locations of extreme temperature or humidity
• Excessively dusty or dirty locations
• Locations of excessive vibration
• Close to magnetic fields
Power supply
Please connect the designated AC/DC power supply to an
AC outlet of the correct voltage.Do not connect it to an AC
outlet of voltage other than that for which your unit is
intended.
Interference with other electrical devices
Radios and televisions placed nearby may experience
reception interference. Operate this unit at a suitable dis-
tance from radios and televisions.
Handling
To avoid breakage, do not apply excessive force to the
switches or controls.
Care
If the exterior becomes dirty, wipe it with a clean, dry cloth.
Do not use liquid cleaners such as benzene or thinner, or
cleaning compounds or flammable polishes.
Keep this manual
After reading this manual, please keep it for later refer-
ence.
Keeping foreign matter out of your equipment
Never set any container with liquid in it near this equip-
ment. If liquid gets into the equipment, it could cause a
breakdown, fire, or electrical shock.
Be careful not to let metal objects get into the equipment.
If something does slip into the equipment, unplug the AC/
DC power supply from the wall outlet.Then contact your
nearest Korg dealer or the store where the equipment was
purchased.
THE FCC REGULATION WARNING (for U.S.A.)
This equipment has been tested and found to comply with
the limits for a Class B digital device, pursuant to Part 15 of
the FCC Rules.These limits are designed to provide rea-
sonable protection against harmful interference in a resi-
dential installation.This equipment generates, uses, and
can radiate radio frequency energy and, if not installed and
used in accordance with the instructions, may cause harm-
ful interference to radio communications.However, there is
no guarantee that interference will not occur in a particular
installation. If this equipment does cause harmful interfer-
ence to radio or television reception, which can be deter-
mined by turning the equipment off and on, the user is
encouraged to try to correct the interference by one or
more of the following measures:
• Reorient or relocate the receiving antenna.
• Increase the separation between the equipment and
receiver.
• Connect the equipment into an outlet on a circuit differ-
ent from that to which the receiver is connected.
• Consult the dealer or an experienced radio/TV techni-
cian for help.
Unauthorized changes or modification to this system can
void the user’s authority to operate this equipment.
CE mark for European Harmonized Standards
CE mark which is attached to our company’s products of
AC mains operated apparatus until December 31, 1996
means it conforms to EMC Directive (89/336/EEC) and CE
mark Directive (93/68/EEC).And, CE mark which is
attached after January 1, 1997 means it conforms to EMC
Directive (89/336/EEC), CE mark Directive (93/68/EEC)
and Low Voltage Directive (73/23/EEC).
Also, CE mark which is attached to our company’s products
of Battery operated apparatus means it conforms to EMC
Directive (89/336/EEC) and CE mark Directive (93/68/
EEC).

1
Handling of the internal
hard disk
Do not apply physical shock to this device. In particu-
lar, you must never move this device or apply physi-
cal shock while the power is turned on. This can cause
part or all of the data on disk to be lost, or may dam-
age the hard disk or interior components.
When this device is moved to a location where the
temperature is radically different, water droplets may
condense on the hard disk. If the device is used in this
condition, it may malfunction, so please allow several
hours to pass before operating the device.
Do not repeatedly turn the power on/off. This may
damage the D1200.
This device begins to access the hard disk immedi-
ately after the power is turned on.
Never turn off the power while the HDD access indi-
cator is lit or blinking. Doing so can cause all or part
of the data on hard disk to be lost, or may cause mal-
functions such as hard disk damage.
If the hard disk has been damaged due to incorrect
operation, power failure, or accidental interruption
of the power supply, a fee may be charged for
replacement even if this device is still within its
warranty period.
COPYRIGHT WARNING
This professional device is intended only for use
with works for which you yourself own the copy-
right, for which you have received permission from
the copyright holder to publicly perform, record,
broadcast, sell, and duplicate, or in connection with
activities which constitute “fair use” under copy-
right law. If you are not the copyright holder, have
not received permission from the copyright holder,
or have not engaged in fair use of the works, you
may be violating copyright law, and may be liable
for damages and penalties. If you are unsure about
your rights to a work, please consult a copyright
attorney.
KORG TAKES NO RESPONSIBILITY
FOR ANY INFRINGEMENT COMMITTED
THROUGH USE OF KORG PRODUCTS.
* Appearance and specifications of this product are subject to change without notice.
• Company names, product names, and names of formats etc. are the trademarks or registered trademarks of their
respective owners.

2
Table of Contents
Introduction .................... 5
Main features ................................................................... 5
Conventions in this manual........................................... 6
Parts and their function..................................... 7
Top panel.......................................................................... 7
Front panel ..................................................................... 10
Rear panel....................................................................... 11
Objects in the display and their function ...............12
Basic operation .............................................13
1. Selecting a mode....................................................... 13
2. Selecting a tab page.................................................. 13
3. Selecting and editing a parameter ......................... 13
Preparations ................................................14
1. Connections............................................................... 14
2. Turning the power on/off....................................... 15
3. Display ....................................................................... 16
Listening to the demo song ...............................16
Quick Start Tutorial...........17
Step 1: Quick recording....................................17
1. Getting ready ............................................................ 17
2. Turning on the power.............................................. 17
3. Creating a new song ................................................ 18
4. Using the modeling mode....................................... 18
5. Setting up a rhythm ................................................. 20
6. Recording .................................................................. 20
7. Play back.................................................................... 21
Step 2: Overdubbing .......................................... 22
1. Assigning inputs to the mixer ................................ 22
2. Applying an insert effect to the keyboard. ........... 23
3. Overdubbing............................................................. 23
4. Overdubbing additional parts................................ 24
Step 3. Mixing ..............................................25
1. Applying an insert effect to a track ....................... 25
2. Adding EQ (equalization) to each track................ 26
3. Applying master effects to all tracks ..................... 27
Step 4. Mastering ............................................. 28
1. Applying the final effect.......................................... 28
2. Creating the master track........................................ 28
3. Writing to CD............................................................ 29
Operation...................... 31
Song and Locate ........................................... 31
1. Creating, naming and selecting songs ...................31
2. Using the counter display........................................32
3. Editing a song ............................................................34
Mixer......................................................... 35
1. Inputting audio to the mixer ...................................35
2. Adjusting the mixer ..................................................37
3. Registering and recalling a scene............................39
Effects ....................................................... 42
1. Using insert effects....................................................42
2. Using the master effects ...........................................43
3. Using the final effect.................................................43
4. Editing an effect.........................................................43
5. Controlling an effect from an external device ......44
6. Using an external effect............................................45
Modeling mode............................................. 45
1. Applying a modeling effect to your guitar ...........45
2. Applying a modeling effect to your bass ..............46
3. Applying a modeling effect to a mic ......................46
4. Saving your modeling effect settings.....................46
5. Operation in Modeling mode..................................47
Rhythm ...................................................... 48
1. Selecting and playing a rhythm ..............................48
2. Listening to the rhythm while you record a
performance...............................................................48
3. Recording the rhythm ..............................................48
4. Setting the tempo of a song .....................................49
The Recorder ............................................... 53
1. Recording ...................................................................53
2. Playback .....................................................................56
3. Track editing..............................................................57
Mastering ................................................... 64
1. Bounce-recording......................................................64
2. Creating an original CD ...........................................65
3. Recording to a master tape ......................................67
4. Using sub inputs .......................................................67
Data .......................................................... 68
1. Backing up and restoring song data.......................68
2. Backing up and restoring effect user data.............70
3. Reading and writing WAV files..............................71
4. Drive and data compatibility between models of
the
Digital Recording Studio
series ...........................74
Drive ......................................................... 75
1. Checking the hard disk ............................................75
2. Formatting the hard disk .........................................75
3. Erasing a CD-RW disc ..............................................76
4. Drive capacity............................................................76
USB .......................................................... 77
1. Saving data to your computer.................................77
MIDI.......................................................... 79
1. MIDI connections......................................................79
2. MIDI messages used by the D1200.........................79
3. Using MIDI ................................................................79

3
Upgrading the system .....................................81
1. Downloading the system file .................................. 81
2. Upgrading the system.............................................. 81
Reference ..................... 83
(COUNTER) ..................................................84
Counter: Counter display............................................. 84
MODELING...................................................84
Category: Select an effect category ............................. 84
Modeling 1...................................................................... 84
Modeling 2...................................................................... 85
INSERT EFFECT .............................................85
InsAss: Specify the insert location and type of the
insert effects............................................................... 85
InsEff1: Select and edit insert effect 1 ......................... 86
InsEff2: Select and edit insert effect 2 ......................... 87
InsEff3: Select and edit insert effect 3 ......................... 87
InsEff4: Select and edit insert effect 4 ......................... 88
InsEff5–8: Select and edit insert effects 5–8 ............... 88
EQ .............................................................88
Eq1–4: Adjust the EQ for mixer channels 1–4 ........... 88
Eq5–8: Adjust the EQ for mixer channels 5–8 ........... 88
Eq9–12: Adjust the EQ for mixer channels 9–12 ....... 89
MASTER EFFECT/AUX SEND ..............................89
MstEff1: Select and edit master effect 1...................... 89
MstEff2: Select and edit master effect 2...................... 90
EffSnd1: Adjust send levels to master effect 1........... 90
EffSnd2: Adjust send levels to master effect 2........... 90
AuxSend: Adjust the external send levels ................. 90
FINAL EFFECT ...............................................91
FinalEff: Select and edit the final effect ...................... 91
BOUNCE......................................................92
RecMode: Select the recording mode ......................... 92
Bounce: Parameters for bounce-recording................. 92
CD.............................................................93
Prepare: Prepare to create an audio CD..................... 93
CDR/RW: Create and play back an audio CD ......... 93
TUNER........................................................95
RHYTHM .....................................................95
SetUp: Specify the tempo and rhythm ....................... 95
TmpMap: Tempo map editing .................................... 96
TmpTrk: Create a tempo track..................................... 97
INPUT/OUTPUT/SOLO......................................98
Ch1–6: Select inputs for mixer channels 1–6 ............. 98
Ch7–12: Select inputs for mixer channels 7–12 ......... 98
InEq1–4: Adjust the EQ for inputs 1–4 ....................... 99
Solo: Select the signal to be soloed.............................. 99
Monitor: Parameters and settings ............................. 100
Phase: Specify the phase of the mixer channels...... 100
SYSTEM/USB.............................................. 101
Control: Foot switch and control change device
(pedal/MIDI) settings............................................ 101
MIDI: MIDI settings .................................................... 101
Sync: Synchronization settings.................................. 102
MMC: MMC settings................................................... 102
B-U/Rst: Backup and restore..................................... 102
DiskUtil: Disk drive management ............................ 105
TRACK ......................................................108
Vtr1–6: Select virtual tracks 1–6 ................................ 108
Vtr7–12: Select virtual tracks 7–12 ............................ 108
EditTrk: Perform track editing operations .............. 108
Import: Import WAV files.......................................... 113
Export: Export a WAV file ......................................... 114
SONG .......................................................116
SelSong: Select a song ................................................. 116
EditSong: Perform song edit operations.................. 116
PrgPlay: Program playback of songs........................ 118
IN/LOC1, OUT/LOC2, TO/LOC3, END/LOC4............118
MARK .......................................................119
Mark: Edit marks......................................................... 119
SCENE ......................................................120
ReadDel: Switch scene playback on/off, and edit
scenes ....................................................................... 120
MixView: Viewing pan and fader scene data ......... 121
AUTO PUNCH ..............................................122
AtPunch: Settings for auto punch-in/out
recording ................................................................. 122
LOOP........................................................123
Loop: Settings for loop playback and recording .... 123
TRIGGER ...................................................123
Trigger: Settings for trigger recording ..................... 123
SCRUB ......................................................124
METER/TRACK VIEW......................................125
UNDO .......................................................126
Effect Parameter List.......127
Insert (2in2outx2)/Master/Final Effect .................127
Insert (2in2outx2), Final .................................133
Insert (1in2outx2) .........................................134
Insert (1in1outx4) .........................................138
Insert (1in1outx8) .........................................140
Effect Control ..............................................141
Modeling effects ..........................................141
Other manuals for D1200 mkII
3
Table of contents
Other Korg Recording Equipment manuals
Korg
Korg nanoKONTROL Studio User manual

Korg
Korg D1600 User manual
Korg
Korg Triton-Rack User guide
Korg
Korg Electribe SX ESX-1SD User manual

Korg
Korg SQ-64 User manual

Korg
Korg DRV-1000 User manual
Korg
Korg D12 User manual
Korg
Korg D32XD Installation and operation manual
Korg
Korg D3200 User manual

Korg
Korg D16 User manual
Korg
Korg Toneworks AX10A Product information sheet
Korg
Korg A1 User manual
Korg
Korg PXR4 Errata User manual
Korg
Korg Soundlink DRS OASYS PCI User manual
Korg
Korg D16 Quick start guide

Korg
Korg SDD-1200 User manual
Korg
Korg EFGSCJ 3 User manual
Korg
Korg SQ-10 User manual

Korg
Korg M1 User manual
Korg
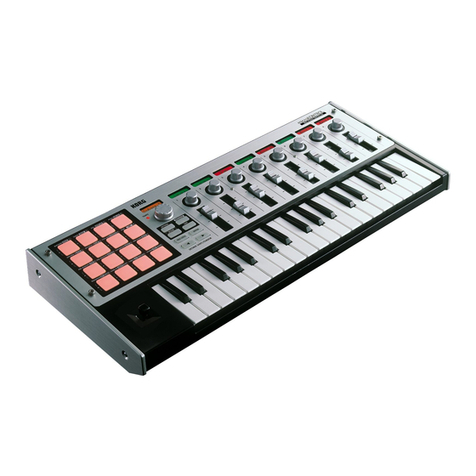
Korg microKONTROL User manual
