19.75”
©
2018,
Q-
Tran
Inc.
155
Hill
St.
Milford,
C
T06460. All
rights
reserved
-
203-367-8777
-
[email protected] -
www.q-tran.com ENLIGHTENEDTHINKING
®
INSTALLATION INSTRUCTION
iQA-FMZ-SELF and iQA-FLR-SELF
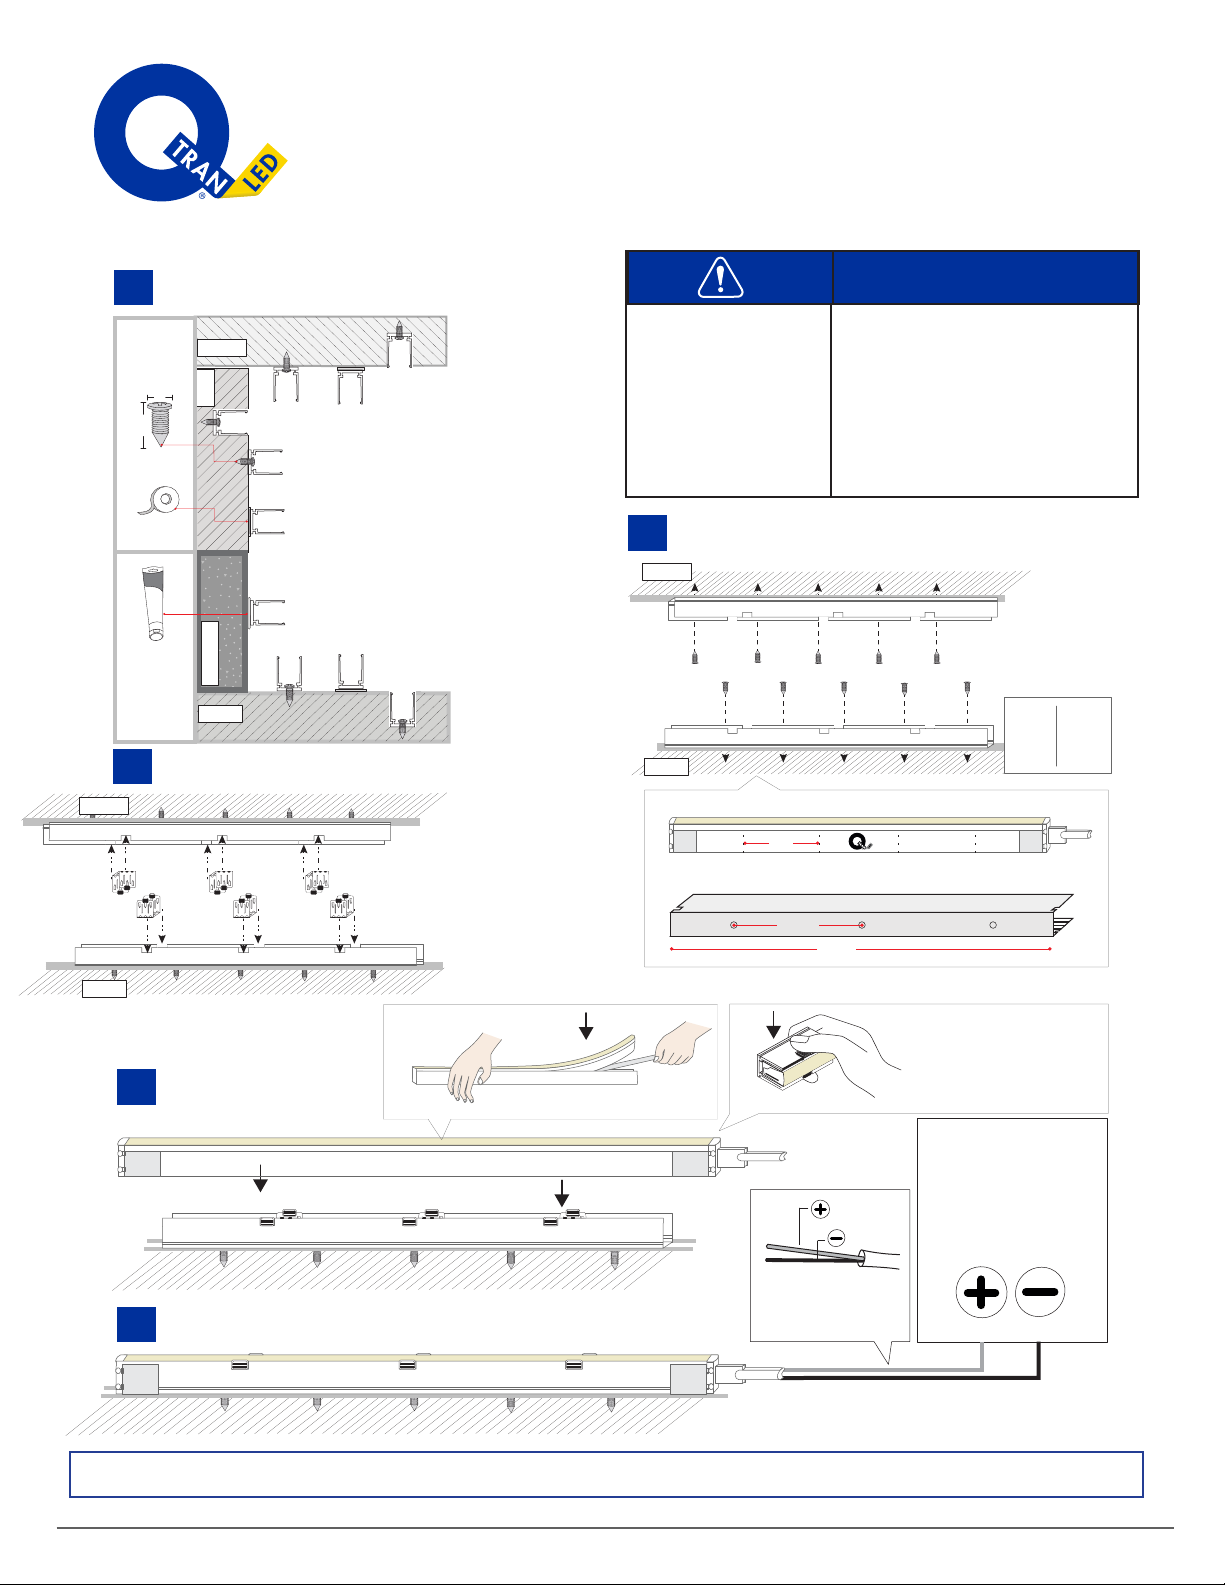
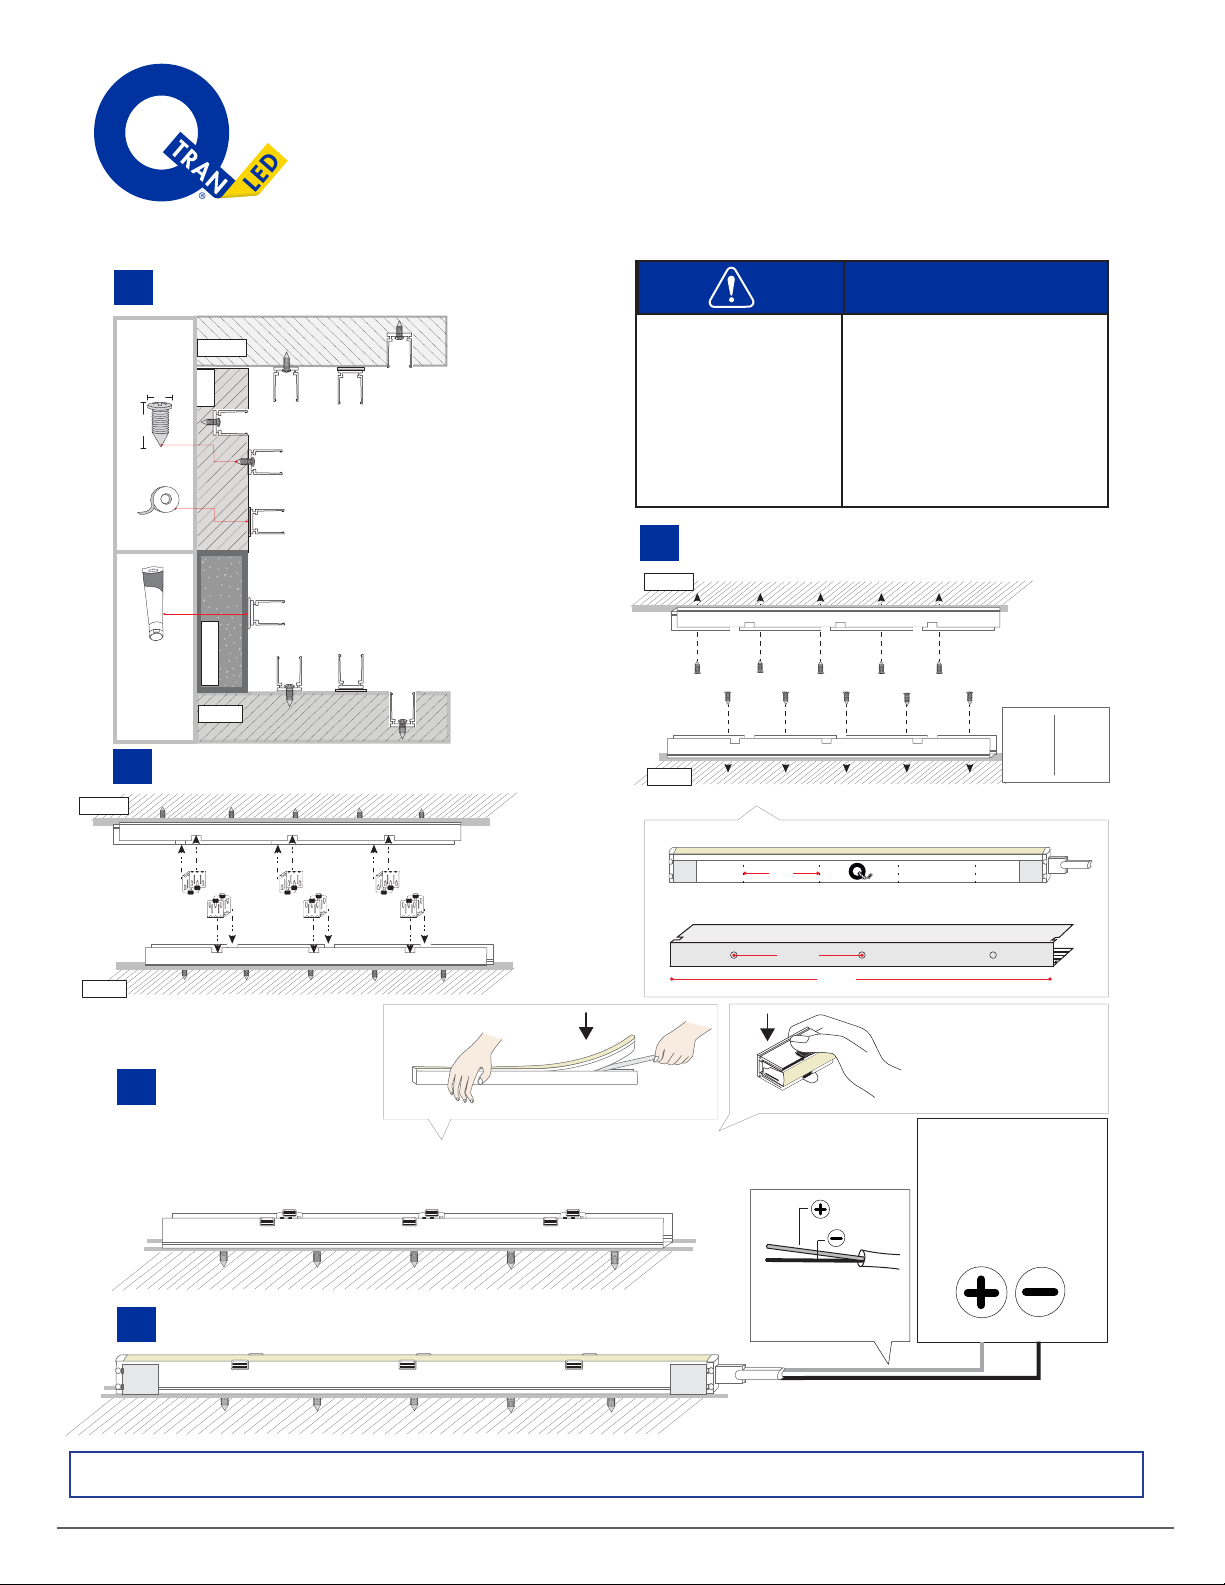
Ceiling
Floor
Concrete Wall
S
T
R
O
NG
STi
K
G
l
u
ing
M
ade
P
owerful
TM
Screw
VHB
Foam Tape
Strong stik
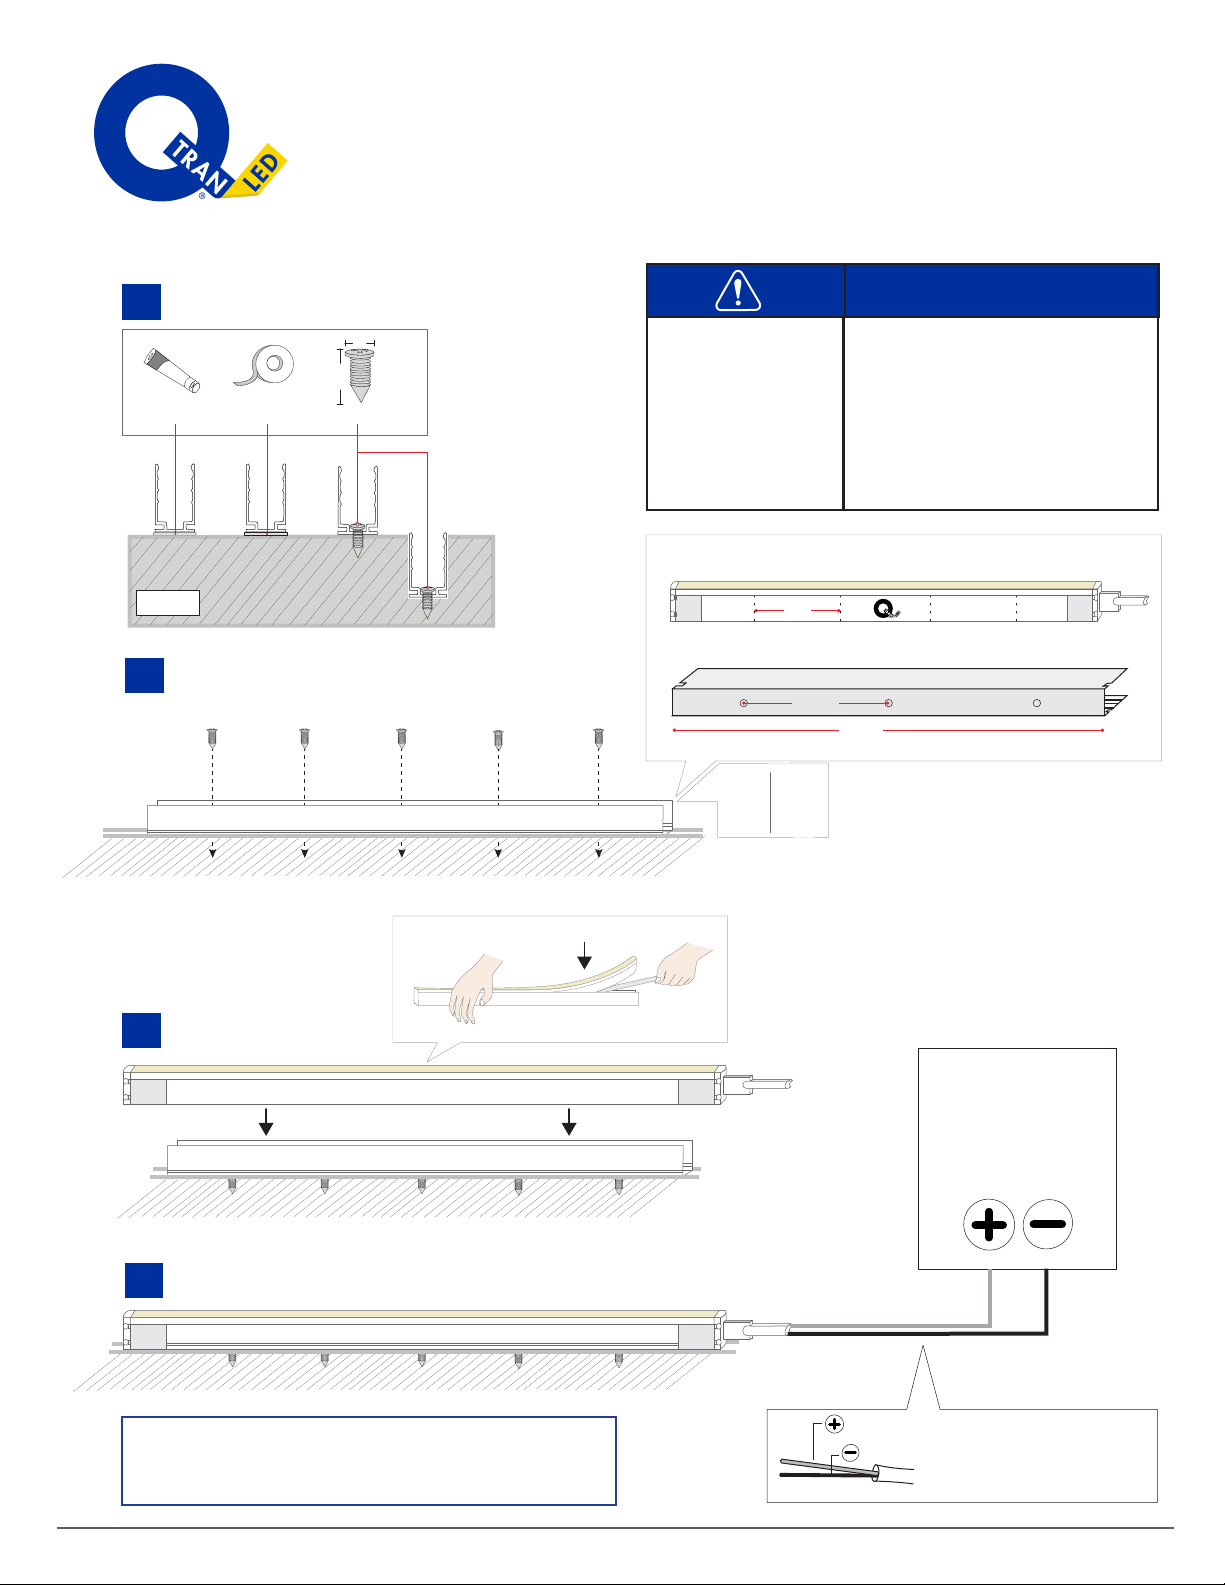
1. Select surface mounting.
.27”
.72”
3
4.
2. Insert screws and tighten them evenly but not to overtight it.
Put LED into aluminum profile
BlackRed
POWER
SUPPLY
LED Tape Light : Wire lead
can be trimmed to length
as needed.
Black
Red
5.
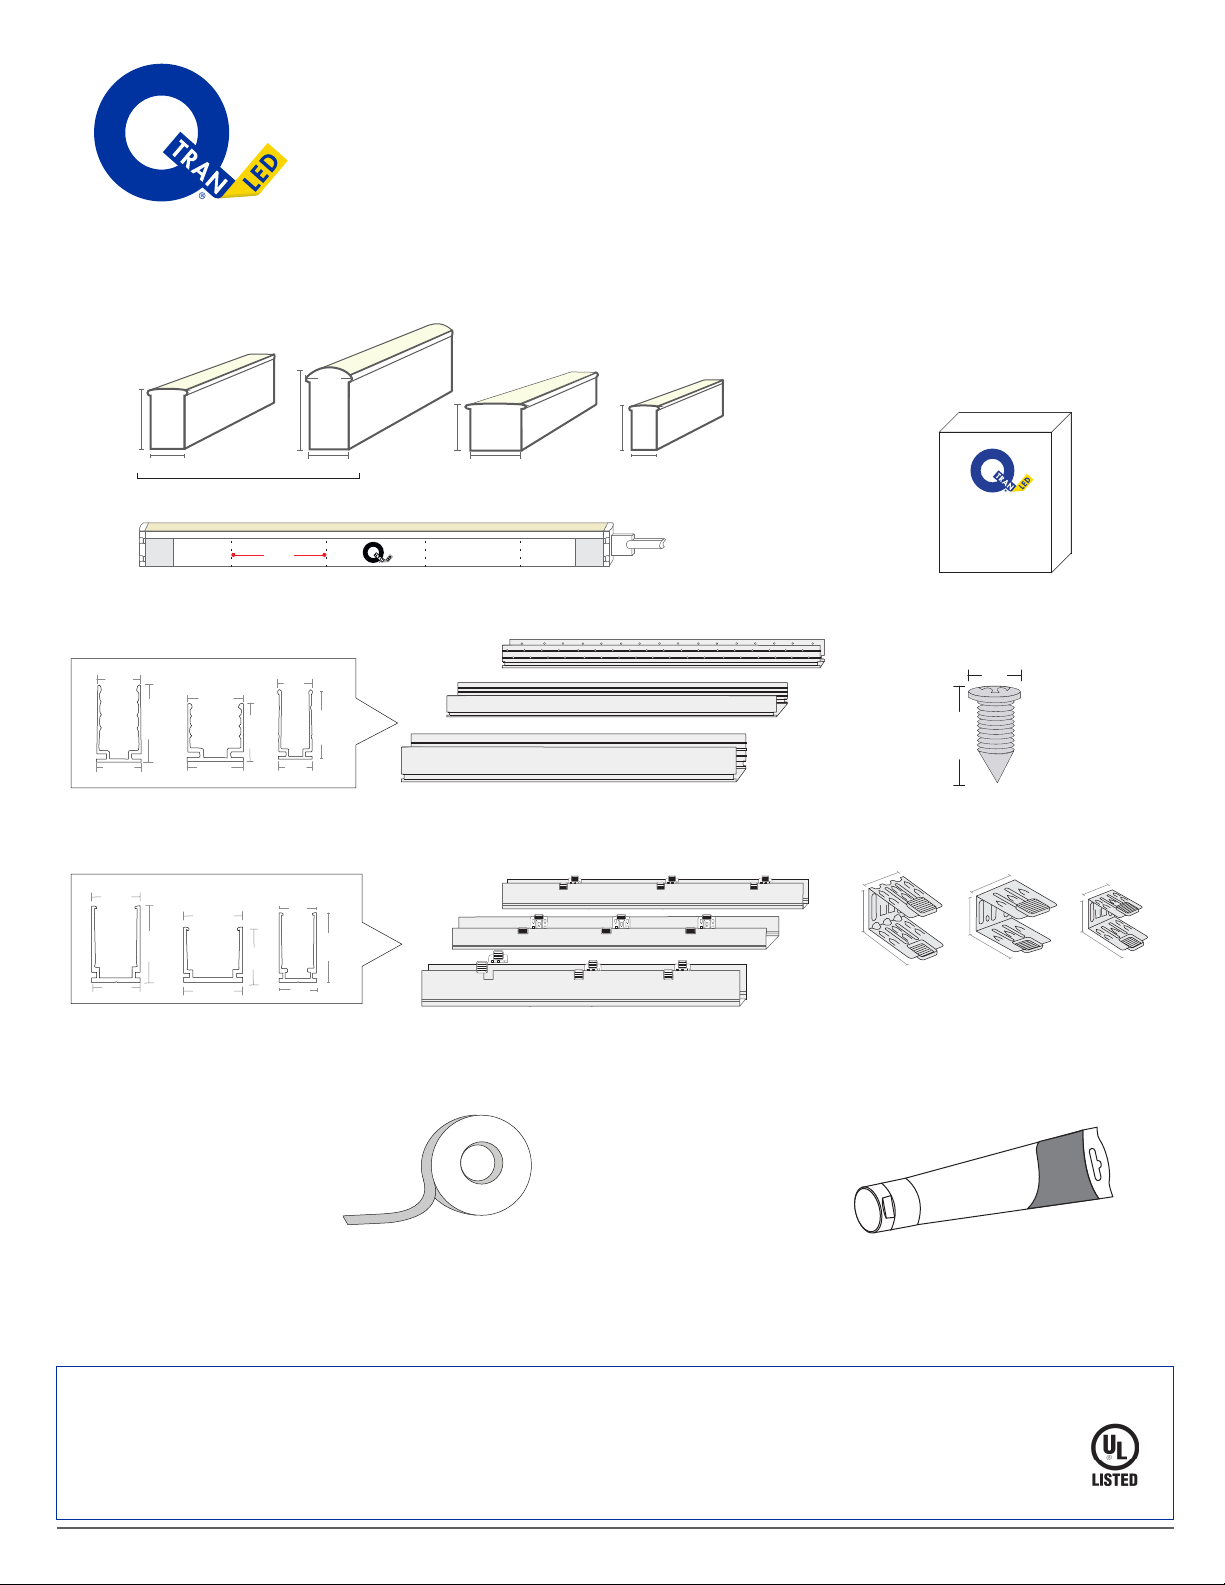
Flex Meza, Flex Round
Power Supply
iQA-FMZ-SELF, iQA-FLR-SELF
Screws
Strong Stik
• Q-Tran tests all factory
Flex Series before
shippping to ensure
LED is working.
•Throughly clean the
area where the Flex
light is to be installed.
Note
:Always test LED operation before installing. Connect LED to power supply to ensure it is working properly.
3. Put Clips into aluminum profile.
Self-locking Clips
Connect to Q-Tran power supply.
4”
01 02 01 02 01 02 01 0 2
Flex LED
7.85”
Bottom view
Ceiling
Floor
Ceiling
Floor
If you should need to remove
Flex LED, press and hold the
two raised buttons while you
gently pull Flex LED out from
the mount channel.
A1:
B:
E1:
D:
F1:
H:
Materials
1.5"
19.75"
39.5"
79"
1
3
5
10
Extrusion Screw Hole