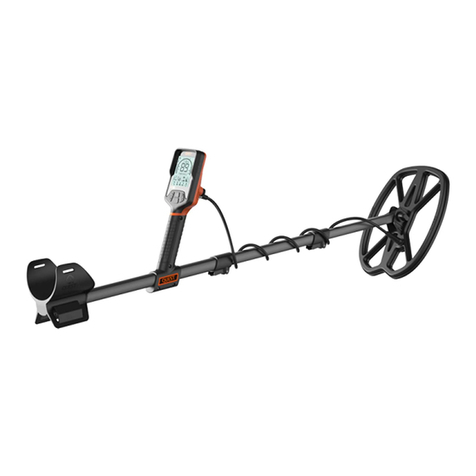
Quest Engineering V60 User manual

find
impossible
INSTRUCTION MANUAL
V80 V60
Version: V2308
As an innovative brand. We might change settings or tech
specs to improve users experience and may not always notify
you in advance. Thanks for your understanding~

Quick Start
1
Programing
Assembling
2
Detect
16
Flat Folding
2
Discrimination
16
Recharge
3
Tx power
17
Screen protector
3
Recovery speed
17
Users profiles
17
Controls
4
Sound
18
Power on/off
4
Tone numbers
18
Speaker Volume
4
Tone space
18
Backlight
4
Tone pitch
19
LED flashlight
4
Tone volume
19
Vibration
4
Ground
20
Pinpointing
4,12
Ferrous Bias
20
Ground Balance
4,13
Threshold
20
Sensitivity
4,8
Gyro Sensor
21
Noise Canceling
4,11
Auto power save
21
Frequency
4
Pump to G.B
21
Modes Selection
4
Auto ID stability
21
Wireless Headphones
5,23
Setups
22
Display
22
Interface
6
Backlight level
22
ID number
7
LCD refresh rate
22
Ground Effect Ball
7
Clock
22
Dynamic Signal Strength Meter
8
Wireless audio
23
Sensitivity Detail
8
Reset to default
24
FeScale
8
Firmware version
24
Frequencies
8,10
Firmware Upgrading
25
Essential Setting Gauges
9
Maintenance & Care
26
Other Infos
9
Parts
27
Search Modes
14
Specifications
28
Park
14
Troubleshooting
29
Field
14
Warranty
30
Beach
15
Gold Cache
15
MENU

NOISE CANCEL
READY TO SWING
10Sec
NOISE CANCEL
OK
SELECT MODE
PARK
FIELD
BEACH
GOLD
CACHE
Hold lower square button for 1 Sec for noise canceling
Click upper square button to change modes based on your location
Keep a 50% overlap and parallel sweeping over ground for best result.
Correct
Incorrect
POWER ON
Click upper right side button to power on
QUICK START
1

3
4
2
5
1 Remove the main unit, pry open the
locking lever at the bottom of the handle,
align the part of the handle with the groove
on the lower part of the main unit with the
raised rib on the rod, push into the bottom
of the rod, and press down the locking
lever."
2 Push the armrest into the rod according
to the method described above, and
tighten the two bolts."
3 Remove the search coil, loosen the nuts
and bolts, pass the yoke bracket through
the circular hole at the end of the lower
rod, assemble them in the order shown in
the diagram, and tighten the bolts and
nuts."
4 Connect the coil connector to the control
box and tight the locking ring to secure.
1
Lock
Unlock
To flat fold the search
coil, simply retract the
lower rod that connects
to the search coil to the
lowest position, and you
can then rotate the
search coil freely to
achieve the most
compact storage state.
INSTALLATION
ASSEMBLLING
FLAT FOLDING
2

6Hr
Before first use, it is recommended that you fully charge the battery for 6 hours. Use a high-
quality mobile phone charger plug to charge the detector. The specific steps are as follows:
Remove the charging cable, unscrew the protective cap of the detector, insert the larger end
of the charging cable into a socket or a computer with a standard plug, or a solar power
bank, and insert the smaller end (Type-C) into the metal detector plug
Apply LCD screen protective film
1. Take offthe thin plastic covering from the detector's screen. Check that there's no dust
or fingerprints on the screen."
2. Carefully remove the protective backing from the screen protector."
3. Hold the screen protector by its edges, line it up with the screen, and gently place it
down.If there are any bubbles, use a soft and clean cloth to push them to the edge."
4. Finally, remove the top layer from the screen protector.
PROTECT
Top layer
Protector
Back layer
RECHARGE
PREPARATION
3

1
6
7
KEY FUNCTION
ALTERNATIVE FUNCTION
IN-MENU FUNCTION
1
Power on
Hold 0.5 sec to Power off
2
Change modes
Hold for All-Metal
Confirm, Accept/Reject ID
3
Change frequency
Hold to perform noise
cancelling
Return to higher level MENU
4
MENU Setup
Exit MENU
5
Pinpoint
Hold for Ground Balance
6
Volume up
Hold to + volume quickly
7
Volume down /
Vibration
Hold to - volume quickly
8
Increase sensitivity
Hold to + sensitivity quickly
Scroll up/Increase
9
Decrease sensitivity
Hold to - sensitivity quickly
Scroll down/Increase
10
Backlight adjust
Hold to turn on/offflashlight
10
9
8
5
4
2
3
CONTROLS
BUTTONS
4

Instructions
Turn On/Off: Press and hold the "O" / ⏻button to
power the headphones on or off."
Adjust Volume: Press the upward arrow(+) to
increase the volume. Press the downward arrow(-)
to decrease the volume.)"
Pairing New Devices: Make sure the detector or
smartphone is under paring mode. When the
headphones are off, hold the power button for 5
seconds to enter pairing mode for connecting with
a new detector or smartphone."
Erase All Pairings(reset): To remove all previously
paired devices, turn offthe headphones and then
hold the power button for 10 seconds."
Fit Adjustment: If the headphones feel too tight on
your head, extend the arms to ensure your whole
ears fit comfortably inside the ear cups."
Volume Safety: For the safety of your hearing,
avoid setting the volume too high."
Wired Connection: If the battery is drained, use a
3.5mm to 3.5mm audio cable to connect the
headphones to the detector."
Initial Charge: Before using the headphones for
the first time, make sure to fully charge them.
HEADPHONES
WIREEFREE PRO
WIREFREE VIBE
5

A M
1
2
4
5
6
7
8
9
10
11
12
13
14
15
16
17
18
19
3
INTERFACE
PART 1
Essential info display
Programable info
1
Target ID
6
Frequency
2
Ground effect ball
7
Search modes
3
Signal strength
8
Tone space
4
Sensitivity
9
Target ID bars
5
Good target scale
Essential setup display
Utility function display
16
TX power
10
Speaker volume
17
Recovery speed
11
Wireless headphones
18
Ferrous sense
12
Clock
19
Gyro status
13
All metal status
14
Backlight
15
Battery status
6

2. Ground Effect Ball.
Salt-Water Condition (left half): This
refers to the presence of salt in water
environments, such as beaches. The
conductive nature of saltwater can create
interference similar to mineralization,
generating false signals and potentially
affecting the detector's ability to
differentiate between various metals.
Mineralization (right half): Mineralization
in metal detecting refers to the presence of
minerals like iron in the ground. These can
interfere with the detector's
electromagnetic field, causing false signals
and making it difficult to distinguish real
metal targets from minerals in the soil. The
higher the level, the more severe the
mineralization.
Correction Index (outside circle):This
shows the ground effect correction. The
microcontroller will apply preset programs
to balance the ground effects caused by
mineralization or saltwater, or even both,
automatically without setup. The Ground
Balance process will adjust the correction
index. Turn to Ground Balance page for
more info.
1. Target ID.
Target Identification (Target ID) in metal
detectors is a complex feature that offers a
numeric representation of a detected object,
ranging from 0 to 99. This number helps
identify a target's ferrous or non-ferrous
properties, such as a US quarter displaying
a Target ID of 82.
However, Target IDs can sometimes be
inconsistent. Factors like orientation, depth,
metal purity, corrosion, soil mineralization,
and the swing direction of coil can cause
multiple IDs for the same target. In certain
situations, the device may even fail to
provide an ID, especially for deep or smaller
targets, as a strong, clear signal is needed.
Different frequency or coils may cause minor
differences too.
HyperQ enhances Target ID accuracy,
especially in mineralized ground, maximizing
depth and stability. However, it may take
time and experience to make optimal use of
Target ID, as different detectors produce
varying numbers, and local variations in
metals and sizes may require testing and
adjustment.
PART 2
Mineralization
Saltwater
Correction index
6
7

3. Dynamic Signal Strength Meter
The V Series metal detectors introduce a
dynamic meter offers several unique
advantages that enhance the user's ability
to analyze and interpret signals:
1.Time-Based Signal Representation: Unlike
traditional depth gauges that only show the
most recent information, the dynamic meter
on the V Series displays a solid bar
representing the signal strength over a
specific period. This visual representation
provides a more comprehensive view of the
target's characteristics.
2. 3-Sec Signal Retention: The dynamic
meter retains the latest 3-second signal,
allowing users to compare it with recent
results. This extended retention enables a
more nuanced understanding of the target,
helping to find the strongest signal between
different places.
3. Real-Time Comparison and Analysis: By
dynamically displaying signal strength over
time, users can observe fluctuations and
patterns in real-time. This assists in
identifying the nature of the target, whether
it's a consistent, valuable object or
inconsistent, potentially undesirable debris.
PART 3
Recent level
4. Sensitivity. 99 levels sensitivity with
indication arrow. 99 is highest level.
Sensitivity higher than 80 might be noisy
in high EMI interference areas.
5. FeScale.
In the process of differentiating metals into
ferrous and non-ferrous categories, relying
solely on Target ID may sometimes be
inadequate. FeScale enhances the user's
ability to identify targets more precisely by
visually displaying the ratio between
ferrous and non-ferrous components.
Hot zone: 80-99
Numeric display
Good target
Bad target
Available frequencies :"
5kHz 10kHz 20kHz"
40kHz 60kHz*"
HyperQ (Multi-frequency)
INTERFACE
6. Frequencies
Choose the right frequency for your
detection scenarios. We offers up to 5
single frequencies and 1 HyperQ multi-
frequency to select. For more info check
out at Frequencies page.
Deep signal
Shallow signal
Med signal
Historical level
GLOBAL
SETTING
GLOBAL
SETTING
8

7
Search
Modes
8
Tone
space
The factory default setting for tone space is divided into five sections, each
corresponding to a specific range of Target ID values. These settings define
how different targets are identified by their corresponding audio tones. "
Customize yours at SOUND menu. These sections are as follows:"
0-19: Associated with an audio tone of 117Hz"
20-39: Associated with an audio tone of 351Hz"
40-59: Associated with an audio tone of 527Hz"
60-79: Associated with an audio tone of 790Hz"
80-99: Associated with an audio tone of 966Hz"
9
Target ID
bars
PART 4
10
Speaker
Vibration
Use the left side buttons on the control box to adjust the speaker's volume.
Click to increase or decrease, and a vibration symbol will appear when
muted, activating a tactile alert instead of sound.
11
Wireless
Audio
When wireless devices are connected the symbol will appear. Previously paired
headphones will be connected automatically. Go to SET-WIRELESS AUDIO.
12
Clock
Set clock at SET-CLOCK menu. The time will be reset when battery run out.
13
All-metal
status
When all-metal shortcut button been pressed the AM(all metal) symbol will show up
14
Backlight
Press the button on the lower right side to adjust 9 levels backlit. Hold for flashlight
15
Battery
Indicating the real time battery status
16
TX Power
Indicating the TX power level which can be set in DETECT-TX POWER menu
17
Recovery
speed
Indicating the recovery speed level which can be set in DETECT-RECOVERY menu
18
FeSen
Level
Indicating the Iron Volume level which can be set in SOUND-TONE VOLUME menu
19
Gyro
sensor
Indicating the Gyro status which can be set in GROUND-GYRO SENSOR menu
PARK
FIELD
BEACH
GOLD
CACHE
The factory default setting masks TIDs ranging from 1 to 19. You can
customize this range by selecting or deselecting any TID from 1 to 99 within
the DETECT-DISCRIMINATION menu."
To select all TIDs, simply hold down the upper square button. When this
action is performed, the "AM" symbol will appear in the upper right corner of
the display, indicating that all TIDs are selected."
During the detection process, the detected TID value will be indicated on the
display by a triangle pointing to the corresponding TID bar. This feature
helps you quickly identify the nature of the detected target.
Press the upper square button to toggle
through the five different search modes.
9

FREQUENCIES
Advantageous of HyperQ
Thanks to the high performance STM32H750
series micro controller with high sensitivity and
low noise ADC TLV320ADC5140, metal
detectors equipped with HyperQ technology
can transmit 4 essential frequencies from 7 to
80kHz to the ground, simultaneously. Key
features include:
• Higher detection frequency.
• Highly accurate results.
• Auto noise canceling by 1 click.
The V series detectors are equipped with HyperQ,
allowing them to operate with simultaneous multi-
frequency. Additionally, users have the option to
choose from specific single frequencies.
Adjusting the frequency only affects the current
Search Mode Profile, leaving other profiles
untouched.
How to Change the Frequency:
1 Select Frequency: Use the Frequency button to
cycle through the available frequencies. The
HyperQ symbol will be displayed when
HyperQ(simultaneous Multi-frequency) is selected.
Single frequencies are shown in kHz, with options
such as 5, 10, 15, 20, 40 kHz,60kHz*.
2 Noise Cancellation: Perform a Noise Cancel to
minimize interference (refer to page 25 in the
manual).
Multi-Frequency Operation (HyperQ):
HyperQ operates across the entire frequency
spectrum at once, enhancing the detection range.
It is generally recommended for its ability to detect
various targets while providing more stable and
precise target IDs.
Single Frequency Operation:
Certain situations might benefit from using a single
frequency. For example:
For detecting larger, highly conductive objects at
deep levels, 5 or 10kHz might be advantageous.
For finding fine gold jewelry at shallow depths, 40
kHz or 60 kHz* could yield better results in specific
environments, like dry sand at a beach.
However, in areas with high Electromagnetic
Interference where noise cancellation is less
effective, using a single frequency might reduce
noise. This might limit target sensitivity across a
broader range, but it could be preferable in specific
conditions.
By offering both multi-frequency and single-
frequency options, the V Series detectors provide
versatility to adapt to various detecting situations
and preferences.
10

2
3
1
NOISE CANCEL
Electromagnetic Interference (EMI) Noise
In metal detecting, 'EMI noise' refers to electrical or
electromagnetic interference from sources such as
power lines, electronic devices, or other detectors.
This interference can cause false signals,
inconsistent readings, reduced sensitivity, and
difficulty in pinpointing targets, leading to confusion
and potentially hindering the detection process.
Auto Noise Canceling and how it works
Auto noise canceling technology in metal detectors is
a sophisticated process that enhances the accuracy
of detection by filtering out unwanted interference.
Initially, the detector "listens" to all available
frequencies or channels, scanning the environment
to identify where the noise or unwanted signals are
coming from, much like scanning radio stations to
find static. The detector's internal algorithm consists
of specific rules and patterns that recognize the
particular patterns resembling interference. Once
identified, the detector picks the quietest frequency
or channel, where the noise is least pronounced, and
aligns itself to that frequency. By doing so, it
minimizes responsiveness to the noise and
maximizes focus on genuine metal signals. This
process of scanning, identifying, and aligning
ensures that the detector can operate in various
environments, providing clear readings and reducing
false detections, even in areas filled with electronic
devices or power lines.
How to perform a Auto Noise Canceling
1. Hold the detector still and keep the coil offthe
ground.
2. Press and hold noise canceling button.
3. Wait about 10 seconds until the speaker remind
with a beep and the LCD shows OK.
OK
LOCAL
SETTING
11

PINPOINTING
9
5
Pinpoint mode produces a continuous tone
with variable volume to help you accurately
locate the target's location before you start
digging.
It's essential for precise targeting and can be
applied in two ways:
Finding a Target with Pinpoint Mode
Step 1: Move the coil away from the estimated
target spot, then press the Pinpoint button to
activate Pinpoint Mode. A circle with four dots
and a one digit numeric number will be
displayed on the screen.
Step 2: Keep the coil level with the ground
and sweep over the target area slowly a few
times.
Step 3: Identify the target's center by listening
for the strongest signal or observing the
Pinpoint Visualization on the screen.
Step 4: Memorize the location with most
segments of the cross are active and the
highest digit show on screen. The target will
be positioned under the coil's center.
Step 5. Press pinpoint button again to exit
If pinpointing becomes challenging or the
detector becomes noisy, deactivate Pinpoint
Mode, then repeat from Step 1.
Note: When Pinpoint Mode is engaged, the
discrimination pattern is momentarily turned off
(i.e., All Metal mode is activated), and motion
detection is disabled, so targets can be
detected even if the coil is still.
0
Initial status of pinpoint mode
Middle signal strength
Strongest signal strength
VISUALIZATION OF PINPOINTING
Tip: Use a Xpointer
to speedup the
target locating.
12

GROUND BALANCE
Ground balance. Ground balance.
Ground balancing helps calibrate the
detector to the local ground, eliminating
false signals caused by mineralization or
saltwater effect. The Ground Balance
feature adjusts the detector to match the
specific conditions of the local soil, thereby
reducing false signals that can arise from
mineralization or saltwater effect.
There are two ways to balance the ground:
1 Auto Tracking.The V Series metal
detectors are equipped with intelligent
automatic ground tracking, allowing them
to operate without ground balancing on
most minor mineralized terrains. This
design offers flexibility and ease of use,
especially for beginners or in areas with
minimal ground mineralization.
2 Auto G.B. In highly mineralized or salty
grounds, or for more experienced users
seeking extra depth and stability, Auto
Ground Balance (Auto G.B.) becomes
essential.
With the V Series, Auto G.B. can be
performed in two ways:
1 Hold pinpoint button and pump coil on
ground. The device automatically adjusts to
the ground conditions. During the operation,
the LCD will display the Dynamic Ground
Effect Ball with a 2-digit real-time ground
balance value. When the number stops
changing dramatically and you don't hear
much noise from the detector, that means it's
ready. Then, let go of the Accept/Reject button
2 Just pump above ground when Gyro sensor
feature "pump to GB" is on.
21
2
It's important to note that Ground Balance
adjustment is local, meaning that only the
current Search Mode Search Profile is
affected by changes to this setting.
VISUALIZATION OF AUTO G.B.
Hold to AUTO G.B.
Release to cancel
13

Park Mode is the ideal
setting for metal detecting
in areas filled with metal
trash, such as urban parks,
recreational areas, or other
places where people often
gather. The recovery speed
is slightly tuned to detect in such trashy
conditions. In these locations, you might find
valuable items like coins and jewelry, but you'll
also encounter plenty of metallic debris like
aluminum foil, pull-tabs, and bottle caps.
Here's what makes Park Mode a standout
choice:
1. Versatility: It's not just for parks; it's also
suitable for general uses, including detecting in
freshwater.
2. Depth and Sensitivity:The default settings in
Park Mode offer excellent depth and precise
identification of targets, filtering out the junk
commonly found in recreational areas. By using
Multi-Frequency, it becomes highly sensitive to
various targets, ignoring most trash.
3. Frequency Options:You can choose single or
HyperQ based on the target type, with HyperQ
allowing for maximum depth and separation.
This might create a slight noise, but it's typically
manageable.
If you're new to an area or just starting with
metal detecting, Park Mode is often the best first
choice. Its combination of depth, sensitivity,
discrimination, and adaptability makes it a
reliable option for hunting coins and jewelry
amidst modern trash.
Tips: User FeScale feature to help identifying
the ferrous/non-ferrous ratio of the target,
helping you distinguish between valuable finds
and trash metals.
Some recommended places to detect:
School Playgrounds, Picnic Areas,Walking
Paths, Historical Sites, Near Food Vendors
Sports Fields, Parking Lots etc.
Field Mode is specifically designed for metal
detecting in open pastures, cultivated fields, and
areas rich in historical significance. This mode
excels in environments that are often littered with
ferrous trash such as iron nails, as well as coke
—a byproduct of coal combustion from past
human activities. The mode is especially useful
for discriminating against these unwanted items
while effectively identifying valuable finds like
ancient artifacts and hammered coins.
One of the standout features of Field Mode is its
adaptability to a wide range of target sizes,
making it ideal for those who are on the hunt for
a diverse set of items. When the frequency is set
to HyperQ the detector becomes highly sensitive
across a broad spectrum of targets. This
heightened sensitivity allows for more accurate
identification, even for objects that are located at
the edge of the detector's
depth range. In
comparison to single-
frequency options, Multi
frequency in Field Mode
offers a distinct advantage
in terms of both detection
depth and target identification accuracy.
In essence, Field Mode provides an optimized
setting that balances sensitivity, discrimination,
and depth, making it your go-to option for
challenging terrains laden with historical artifacts
and varying types of metal trash. Whether you
are an amateur treasure hunter or a seasoned
archaeologist, Field Mode offers a tailored
detecting experience that maximizes your
chances of making valuable finds.
SEARCH MODES
PART 1
PARK
FIELD
14

Cache Mode is specifically
designed for detecting
deeper targets, making it
ideal for treasure hunters
seeking older, more deeply-
buried items. By default, it
comes with a Recovery
Speed set at 1, the lowest setting, which
increases the detector's depth sensitivity. This
enables the device to pick up signals from
deeper objects that other modes might miss.
However, the lower Recovery Speed also has its
drawbacks. It makes the detector more
susceptible to false signals from mineralized soil
or other kinds of interference. It also slows down
the response time, which could make pinpointing
smaller, closer targets more challenging.
Tips for Using Cache Mode:
Use Cache Mode in areas where you expect to
find deeper, older targets, like historical sites.
Due to the slow Recovery Speed, it's essential to
move the coil more slowly over the ground to
ensure accurate detection.
Gold Mode is specifically
engineered for the
challenging conditions of
mineralized goldfields.
Unlike other modes, it
features a continuous
background threshold
tone, aiding in the detection
of both shallow, small gold nuggets and deeper,
larger ones. The audio alerts in this mode are
dynamic; their volume and frequency change in
proportion to the strength of the target signal,
making it easier to gauge the size and depth of
detected objects.
The mode allows for the use of high single
frequencies like 40kHz or 60kHz, as well as Multi
frequency.
By default, Gold Mode operates at a Recovery
Speed of 5 and uses continuous tone. This
configuration aims to pinpoint valuable targets
amidst the mineralized ground noise. Whether
you're searching for small, surface-level nuggets
or deeper, larger pieces, Gold Mode offers a
specialized, effective toolset for navigating the
complexities of goldfield terrains.
Beach Mode is
meticulously designed for
metal detecting in various
beach environments, from
dry sand to underwater
conditions up to 15feet/
5M. The mode is especially useful in tackling the
challenges posed by high salt content and black
sand, which can interfere with accurate target
identification. Unlike single-frequency detectors
that struggle in these environments, Beach Mode
employs HyperQ technology to minimize noise
from salt and achieve maximum performance.
Another unique feature is the black sand
detection. Beaches with black sand, rich in
natural iron, make metal detection extremely
challenging. In such cases, Beach Mode
automatically senses the presence of black sand
and displays high mineral+saltwater presence,
allowing you to adjust your strategy accordingly.
This mode is ideal for saltwater beaches, offering
a high Recovery Speed to minimize saltwater
interference without sacrificing depth. Overall,
Beach Mode provides a comprehensive solution
for efficient and effective treasure hunting in
some of the most challenging terrains.
PART 2
BEACH
GOLD
CACHE
GOLD MODE INTERFACE
15

Operating the V series is quite straightforward. "
There are 2 levels of menus, categorized into 4
sections based on their functions. So you can
access every function quickly without any guessing."
Click ⚙to enter the MENU."
•Use ▲▼ to navigate within the first level menu."
•Click the upper ▪to enter the 2nd level menu."
•Use ▲▼ to navigate within the 2nd level menu."
•Click the lower ▪to return to the 1st level menu."
•Click ⚙again to exit the MENU."
Settings with local mark will only affect the recent
mode. Global mark means the setting is for every
mode
DETECT
PROGRAMING
Discrimination patterns in metal detecting allow
you to focus on specific targets and ignore others.
Targets are identified by a Target ID number and
segment on a scale from 0 to 99. You can turn
segments On (accept) or Off (reject), creating a
custom pattern for detecting treasure and ignoring
trash. These patterns are specific to each Search
Mode Profile, enabling tailored experiences for
different hunting environments. By using
discrimination patterns, you can make your
detecting more efficient and enjoyable.
Click ▲/▼once to move triangle indicator forward
or backward with one ID position.
Hold ▲/▼to move triangle indicator forward or
backward at fast speed.
Click the upper ▪to select or deselect one ID.
Click the lower ▪to return to the 1st level menu.
Click ⚙again to exit the MENU.
LOCAL
SETTING
GLOBAL
SETTING
LOCAL
SETTING
16

Recovery Speed or so-called reactivity
determines how fast the detector can recover
after detecting one target to detect another
nearby target.
Importance: It helps in differentiating between
multiple targets that are close together and
assists in high-trash areas to find smaller
valuable targets amongst larger iron trash.
The default setting is 5, except CACHE mode
and GOLD mode, which are set to 1
Fast Recovery Speed(8,9):
Application: Useful in areas with lots of iron,
mineralized debris, or magnetic black sand,
such as some beaches.
Benefits: Speeds up signal analysis, allowing
the detector to separate non-ferrous targets
next to ferrous targets.
Drawbacks: Reduces detection depth and may
affect Target ID accuracy.
Slow Recovery Speed(1,2):
Application: Suitable for "clean" ground or
beaches where targets are well spaced.
Benefits: Makes the machine more sensitive to
deep targets, increasing the ability to detect
objects buried further down.
Drawbacks: Decreases the ability to detect
targets in close proximity.
TX Power refers to the amount of power
supplied to the transmitter coil, which creates an
electromagnetic field around the coil.
Effect on Detection: Increasing the TX Power
increases the strength of the electromagnetic
field. This enables the detector to penetrate
deeper into the ground and detect objects that
are farther away from the coil.
Differences with Sensitivity setting: TX Power
controls the strength of the electromagnetic field,
affecting the depth of detection and potentially
the level of noise.Sensitivity controls how the
detector responds to received signals, affecting
the ability to detect small or weak signals and
also influencing the level of noise or false signals.
DETECT
Programs can be saved to apply, edit, pin to
top or delete. To save your setting, just press
and hold for 3 seconds activate the window.
LOCAL
SETTING
LOCAL
SETTING
17

The Tone Space setting, which adjusts the end
positions of each tone region, is a powerful tool
for fine-tuning your metal detecting experience.
This setting is especially useful for dictating when
and how different types of materials trigger
specific audio responses. For example, you can
manually adjust the tone spaces to make 'coke,'
a common but undesirable non-ferrous target
with a typical Target ID of 1, fall into the ferrous
range. By doing so, it would then trigger a
ferrous audio response, helping you avoid
digging up this nuisance item.
However, a word of caution: altering the tone
spaces can also mean that some low-
conductive, potentially valuable targets may give
offthe same audio cue as less desirable ferrous
targets. This is something to keep in mind based
on what you're hoping to find.
Another advantage of manipulating tone spaces
is the ability to make more distinct separations
between targets of varying conductivity levels. By
finely tuning these spaces, you're essentially
customizing your detector to be more attuned to
the types of materials you're most interested in,
thereby making your hunting more efficient and
rewarding.
How to adjust Tone Space.
When you spot the Tone Space setting, click the
upper ▪repeatedly to access the specific
region you want to adjust.
Then click ▲or ▼buttons to adjust the
breaking point. Hold for fast movement.
The bars on the standby interface will change
accordingly.
Tone Numbers.The ability to adjust tone
numbers in a metal detector is highly influenced
by personal preference and the specific goals of
your treasure hunt. For example, you can set the
detector to operate in '2-tone,' '5-tone,' or even
in '99-tone' infinity mode, where almost each
metal type is designated its own unique audio
cue.
With the ability to fine-tune the audio responses
based on what you're most interested in finding,
you can essentially make the metal detector an
extension of your own senses. This
personalization makes your searches more
efficient, reduces the amount of unwanted items
you dig up, and overall enhances the joy and
effectiveness of your metal-detecting adventures.
The tone numbers you choose directly change
the tone spaces quantity.
How to adjust Tone Numbers.
When you spot the Tone Numbers setting,
Then click ▲or ▼buttons to adjust the quantity.
SOUND
PROGRAMING
LOCAL
LOCAL
18
This manual suits for next models
1
Table of contents
Other Quest Engineering Metal Detector manuals

Quest Engineering
Quest Engineering X5 User manual

Quest Engineering
Quest Engineering Q30 Series User manual

Quest Engineering
Quest Engineering Q30 Series User manual

Quest Engineering
Quest Engineering X10 User manual

Quest Engineering
Quest Engineering V80 User manual

Quest Engineering
Quest Engineering Scuba Tector Pro User manual
Popular Metal Detector manuals by other brands

Bounty Hunter
Bounty Hunter Ultra Mag Sharp Shooter owner's manual

GOLDEN MASK
GOLDEN MASK DEEP HUNTER Pro AE instruction manual

Velleman
Velleman K7102 Illustrated assembly manual

Tesoro
Tesoro Stingray II Operator's instruction manual

Ceia
Ceia HI-PE/CF Series Additional information

Viking
Viking VK20 user manual