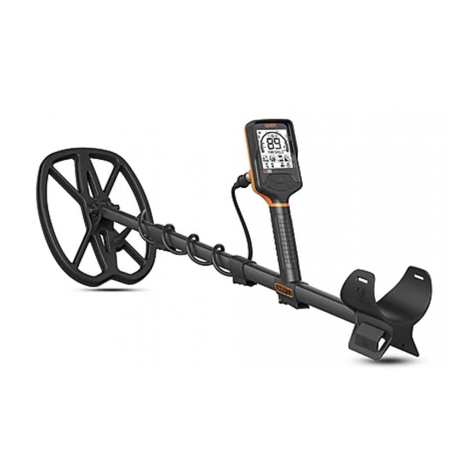
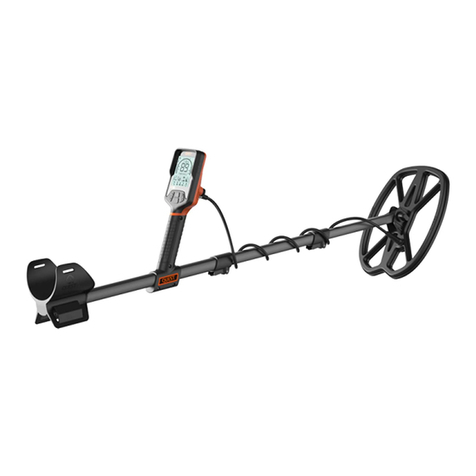
Quest Engineering X5 User manual


Congratulations on Your Purchase!
Welcome to the exciting world of Treasure Hunting and again, congratulations on your purchase of a Quest X5 metal detector. The
entire line of Quest metal detectors has been designed to offer today’s treasure hunter with high quality yet affordable equipment
that provides performance in the field under a wide range of conditions. The Quest X5 has features typically found on detectors
costing and weighing much more yet is easily adjustable to suit your personal preferences. This Quick Start Guide will help you
assemble and understand the controls in short order which will let you get out in the field and start finding lost valuables with
confidence.

TABLE OF CONTENTS
Contents of the Box.............................................................................................................................................................................. 1
Assembling the Quest X5...................................................................................................................................................................... 1
The Quest X5’s Controls and Display ................................................................................................................................................... 3
Target Identification with the Quest X5............................................................................................................................................... 4
Charging the Quest X5’s Battery.......................................................................................................................................................... 5
Quick Start Operation........................................................................................................................................................................... 5
Advanced Programming of the Quest X5 ............................................................................................................................................ 6
Sensitivity................................................................................................................................................................................ 7
Discrimination / Notch Discrimination.................................................................................................................................... 7
Ground Balancing.................................................................................................................................................................... 8
Pinpointing Targets with the Quest X5.............................................................................................................................................. 10
Quest X5’s Technical Specifications................................................................................................................................................... 11
Product Care Tips............................................................................................................................................................................... 12
Troubleshooting................................................................................................................................................................................. 13
Warranty and Service Information..................................................................................................................................................... 14
Accessories for the Quest X5.............................................................................................................................................................. 15
Code of Ethics..................................................................................................................................................................................... 16

1
Contents of the Box
Your new Quest X5 comes complete with everything you need to get started finding treasure in the field. Unpack the box to make
sure you have all of the parts necessary to assemble your detector. The box should contain the items shown below. If any parts are
missing, please contact the dealer you purchased your detector from.
.... Three (3) shaft sections
.... Control housing pod
.... Search coil and coil cover
.... Micro USB charging cable
.... Arm rest assembly
.... Arm rest strap
.... Velcro strip to secure coil cable
.... Hardware to attach search coil to lower shaft
Assembling the Quest X5
The Quest X5 assembles initially in less than 10 minutes. It can be assembled in either an adult or youth configuration with the only
difference being the overall length of the detector itself.
1. Attach the armrest assembly (consists of two pieces – an upper and lower half) to the end of the upper shaft by pressing the two
pieces into place and securing them with the screw included in the package.
2. Remove the four (4) screws visible on one side of the control housing handgrip and take off the section that is now loose. Line up
the pins inside the handgrip assembly with two of the larger holes in the upper shaft piece. Replace the section removed to line
up with the screw holes / pins and reinstall the screws. NOTE: The distance between the arm rest and the hand grip can be
adjusted based on the arm length of the user.

2
3. Select the number of shaft assemblies needed based on the desired configuration; i.e., Adult or Youth. Put them together as
shown below:
4. Attach the search coil to the lower shaft using the bolt, cap and washers included. Wind the cable around the shaft and connect it
to the control housing. NOTE: There is an alignment pin in the housing for the cable connector. Do not force the cable into the
connector. When you wrap the cable around the shaft, you want it look like the picture below but do not make it too tight so that
the cable is pulled from the coil when it is moved.

3
The Quest X5’s Controls and Display
DISPLAY ICONS:
A. Target ID bars that are used to determine what targets are accepted and what
targets are rejected (see Advanced Programming section)
B. Two-digit target ID value used to provide a more accurate assessment of what
you have detected to aid in determining if you want to recover it
C. The first icon shows the current battery strength remaining.
D. This icon shows the current audio level heard through the speaker or
headphones
E. This shows a rough indication of the current Sensitivity level (1, 2, 3 or H). When
adjustments to Sensitivity are being made, the actual value is shown in the
center of the screen (see Area B)
F. This shows a rough indication of target depth (2”, 4”, 6” or 7”+). When the
Pinpoint function is activated, a more accurate indication is shown in the center
of the screen (see Area B)
G. Shows the 3 available search modes and which one has been selected for use
CONTROLS:
1. Turns the power On & Off and scrolls through the menu options
2. Activates the non-motion Pinpoint function
3. Adjusts the Sensitivity level
4. Used to set the Ground Balance for search locations
5. Adjusts the audio volume from the internal speaker or optional headphones
6. Activates the rear-mounted flashlight feature

4
Target Identification with the Quest X5
The X5 provides information on a target’s probable identification to help you determine if it is something you want to recover. When
a target is detected, the X5’s circuitry analyzes the signal and assigns a specific number ranging from 1 to 99 based on the target’s
conductivity. Objects made of iron tend to read at the lower end of that scale while targets made of copper and silver fall at the
upper end of the scale. The figure below shows where different targets fall on the 1-99 scale. As the coil passes over a target you will
receive an audio response which can also help identify targets based on the Audio option you have selected. This will be covered in
the Advanced Programming section of this manual. The Target ID # will appear in the center of the LCD display screen (see Area B on
the previous page) and the corresponding bar at the top of the screen will turn black.
NOTE: In areas containing trash and good targets, it is not always possible to reject all trash and only dig good targets. Target ID
accuracy will depend on the ground conditions, concentration of targets, external interference, target size & orientation as well as the
depth of the target. Testing known targets before you head out will help you understand how specific targets will register in terms of
their audio response and Target ID #. There will be a slight variation in Target ID #’s as you sweep back-&-forth across a target which
is normal; however, if the number fluctuates +/-20 or more, the detected target is typically trash. As you gain experience on actual in-
ground targets you will find that you are able to identify good targets with a high degree of accuracy.

5
Charging the Quest X5’s Battery
The Quest X5 features an internal Li-Po rechargeable battery which eliminates the cost of buying
batteries for your detector.
To initially charge the battery or recharge it when you are heading to the hunt site or coming in from
the field, pry off the moisture / dust cover on the back of the control housing. Connect one end of
the micro USB charging cable to the lower plug in the control housing and the other to a wall or car
charger that accepts the USB connector.
NOTE: Depending on the wall / car charger used, it should take around 4 hours to fully charge the
X5.
Quick Start Operation
Before you head out looking for lost items, spend a few minutes getting familiar with the X5’s controls and the response it produces
to known targets. A little time invested after you unpack the detector will pay off in the field as you will know how to adjust it and
what the type of targets you are looking for sound like.
Place the X5 on a table with the coil away from any metal
Turn it on by pressing the POWER touchpad (see Page 3)

6
Pass an assortment of targets across the coil about 2”-3” away at a normal sweep speed. Use both good targets such as coins,
jewelry and relics as well as trash targets such as nails, tinfoil, bottle caps, pull tabs, etc. Write down the Target ID # that each
produces as this will help you determine if a signal in the field is worth recovering.
Repeat the tests in the different search modes by scrolling through the 3 modes by pressing the POWER touchpad. Press it
momentarily to cycle through the search modes. Holding the touchpad will turn the detector off. You will see that in the
JEWELRY and COINS modes that some of the trash targets are rejected and will not produce a response.
If you are getting chatter or false signals when there is no target passing across the coil, press the DOWN touchpad and
reduce the Sensitivity.
To finish your familiarization of the X5, take it outside and put several of your test targets on the ground. Sweep the coil across them
holding it a few inches above the ground to see what response each produces outside. Once you have spent some time testing known
targets ) and seen what type of response specific targets produce, you are ready to head out and see what you can find.
Advanced Programming of the Quest X5
SENSITIVITY:
The Sensitivity control on any metal detector is often misused resulting in reduced performance and increased frustration.
Simply put, the Sensitivity control adjusts how strong a signal is required for the detector to produce an audio response. If it
is set too high, you will receive false signals from electrical interference, concentrations of trash, changing ground conditions
and even bumping the coil against a rock or stick. On the other hand, if you set it too low, the detector will be extremely
quiet but you will not be able to detect the smaller or deeper targets. The adjustable range on the X5 is from 1 to 99. For
general treasure hunting the optimal setting is as high as you can set it without getting false signals as you sweep the coil
across the ground. The factory preset values are good starting points and keeping it in the range of 60 to 90 will provide the
most stable operation under most ground conditions.
7
To adjust the Sensitivity level, use the UP and DOWN touchpads on the left side of the control
housing face. Adjust the Sensitivity to the desired level. You will see the actual value displayed in
the center of the screen and the 4-segment bar on the left side of the screen reflect the range you
are adjusting in.
OPERATING TIPS
If the ground is highly mineralized, reduce the Sensitivity level and re-Ground Balance the X5 (see Page 10)
If you are searching for shallow targets such as a recently lost piece of jewelry or property marker, drop the Sensitivity to
50 or less.
If you are searching salt water beaches, a lower Sensitivity level will be needed once you get into the wet sand in order for
the unit to remain stable
Don’t assume higher sensitivity settings are always preferable. If the X5 is chattering, it makes it difficult to determine if
you went over a deep target or the sensitivity was simply set to high. You want the detector to be stable for optimal
performance.
DISCRIMINATION / NOTCH DISCRIMINATION:
A metal detector is designed to do one thing and that is to locate buried metal. In some cases you may want to search for all
metal objects in the ground but for most treasure hunters, having the ability to select which targets to accept and which to
reject is a necessity. The X5 allows this to be done through its Discrimination and Notch Discrimination circuits. At the top of
the screen are five (5) segments. These represent groups of Target ID #’s; i.e., 1-20, 21-40, etc. that are either accepted (black)
or rejected (clear). NOTE: The Discrimination function is NOT available in the ALL METAL (AM) mode as it will accept all of the
segments and is intended for applications such as electronic prospecting and archeological surveys where all metal targets can
be desirable. The other two factory preset modes – COINS and JEWELRY - have some of the segments already eliminated and

8
these will serve as the preferred modes for most searches. The figure below shows the segments available and with all being
black, everything will be accepted.
To reject a specific segment that corresponds to a bothersome trash target in your search area, press the POWER touchpad
momentarily and note which segment is now BLACK. If you want to reject that segment, touch the POWER touchpad and the
segment will disappear. If you want to reject a different segment (or accept one that is already rejected), use the UP or
DOWN touchpad to highlight the segment and then tap the POWER touchpad to either accept or reject When you are done,
press the PINPOINT touchpad to return to the search screen.
Any changes made to the segments at the top of the screen will remain even when the power is turned off. To restore
segments that may have been rejected or accepted, use the process described above.
GROUND BALANCING:
Mineralization in the ground can affect how any metal detector performs. The more mineralized the ground is, the more the
signal being sent into the ground is affected which results in reduced detection depth, less accurate target identification and
more chatter as you sweep the coil over the ground. Your Quest X5 has the ability to ignore the effects of ground
mineralization through its Ground Balance circuit. It is recommended that you use the Ground Balance function whenever
you arrive at the hunt site to ensure the X5 is set properly.
To set the Ground Balance, press and hold the Ground Balance touchpad (see #4 on Page 3)

9
while pumping the coil towards the ground and then raising it about 1 foot. Continue the pumping until you hear a short
beep and observe the Ground Balance setting as shown on the screen stabilize.
While areas with no or very low levels of mineralization may not have a noticeable impact on the X5’s performance, it is
recommended that you check the ground conditions whenever you start hunting.
If you notice that the ground conditions have changed from where you started, repeat the process to ensure the X5 is
ignoring the mineralization present in your current search area.

10
Pinpointing Targets with the Quest X5
Locating a target is only half the challenge when it comes to adding it to your collection . . . you still need to recover it. The more
accurately you pinpoint a target, the faster you will be able recover it and move on to the next target. Practicing on targets that you
have buried in your yard will shorten the time needed to become proficient at pinpointing targets and allow you to find more in the
time you have in the field.
Pinpointing with the “Criss-Cross” Method
Pinpointing with the “Detuning” Method
1. Move the coil off to the side
of the detected target
2. Press and hold the
PINPOINT touchpad
3. Move the coil over the area
where the target was
detected in an “X” pattern
(see figure to the left).
4. Watch the screen and see
where the shallowest depth
reading is shown and the
loudest audio signal is
produced.
5. The target should be
directly below the point
where the shaft connects to
the coil at the indicated
1. Move the coil off to the side of the detected target
2. Press and hold the PINPOINT touchpad
3. Move the coil towards the area where the target was
detected
4. As the audio signal starts to increase, release the PINPOINT
touchpad and immediately press and hold it again. The
audio response will disappear as the X5 detunes itself to the
target.
5. Continue slowly moving in towards the target area and
repeat step 4 until you are receiving just a small, well-
defined audio response from the target.
6. When you have detuned the X5 to the point that you only
get a signal over a small area, target will be directly below
the point where the shaft connects to the coil.
NOTE: If you detune it to the point the signal disappears
completely, simply move away and start the process over again.

11
depth.
Quest X5’s Technical Specifications
Detection Platform:......................................................................................................................................................... CVX Compact VLF
Display:............................................................................................................................................................................. 3” LCD 60x45mm
Search Coil:................................................................................................................................................Waterproof Turbo-D Blade 9x5”
Internal Battery:............................................................................................................ 1000mAh Li-Po battery for 8~12Hrs of Operation
Recharge method:............................................................................................................................................................... Micro USB port
Audio output:...................................................................................................................... Built-in speaker or 3.5mm wired headphones
Environmental Protection:.................................................................................................................................Weatherproof / rainproof
On-Screen Information:................................................................................ Battery level, Audio level, Target ID, TID bars (5 segments),
Target Depth, Sensitivity level, Search modes,
Search modes:.................................................................................................................................Three (3) - All Metal, Coin and Jewelry
Shaft Adjustment Range (measured from handle to coil joint):.......................................................... from 55 cm (22”) to 104 cm (41”)
Operating Frequency:...........................................................................................................................................................single 7.99 kHz
Target ID Range:................................................................................................................................................................................ 1 to 99
Armrest:............................................................................................................................ V shape with built-in stand to hold unit upright
Unit Weight:..................................................................................................................................... 850 grams / 1.9 lbs. (w/o middle rod)
947grams / 2.1 lbs. (with middle rod)
Non-Motion Pinpoint Function:............................................................................................................................................................. Yes
Ground Balance:......................................................................................................................................................................................Yes
Flashlight:................................................................................................................................................................................................ Yes

12
Product Care Tips
Do not wrap the coil cable too tightly around the shaft as adjusting the coil can pull on the cable damaging the wire or the
connection
Do not store the device where prolonged exposure to extreme temperatures can occur to avoid damaging the X5. Leaving it in a
car during the summer should be avoided for this reason.
Never use a hard or sharp object to operate the touch pads or damage may result.
Avoid chemical cleaners, solvents, and insect repellents that can damage plastic components and finishes.
Secure the weather cap tightly to prevent damage to the USB port or allow moisture / sand to enter it.
Even small amounts of moisture can cause corrosion of the electrical contacts when connected to a charger – ensure it is dry!
If you are storing the detector for an extended period of time, recharge the internal battery every 4 – 6 months
The search coil is waterproof and can be fully submerged; however, the control housing is not waterproof (it is water resistant)
The X5 can withstand heavy rain; however, submerging the control housing in water can result in damage to the electronics
CLEAN YOUR DETECTOR WHEN YOU GET HOME
Turn off the detector before you start to wipe it down.
Wipe the device using a damp cloth using nothing more than a mild detergent solution.
Wipe it dry with soft, clean, lint-free cloth. Allow the device to dry completely before reassembling it.
Gently wipe the screen with the cloth.

13
Troubleshooting
SYMPTOM
SOLUTION
Detector does not turn on
.... Ensure the battery is fully charged
.... If battery is fully charged, contact your dealer to help resolve the problem
Detector turns on but will
not detect metal
.... Ensure the search coil is properly connected to the control housing
.... Check the Sensitivity level – if set too low, detection depth will be limited
Target detection appears
on the screen but there is
no audio
.... Ensure the Volume is not set too low
.... Check to see if there are headphones connected to the back of the control housing
.... Plug in a set of headphones to see if there is a problem with the internal speaker
Excessive chatter or false
signals received
.... Reduce the Sensitivity level
.... Check the Ground Balance as ground conditions may have changed
.... Try another part of the site you are searching – there may be a large number of targets present
Electrical interference in the area may be the cause. If reducing Sensitivity does not help, you may
need to come back at a different time to see if the cause is no longer present.
High/Low audio signal
.... This is the overload signal. Lift the coil a few inches and recheck the area.
Target ID #”s and audio
tones jumps around
.... Typically this indicates the coil is either passing over multiple targets or trash. Turn 90 degrees
and wiggle the coil across the target. See if you can separate multiple targets or determine if it is a
larger piece of trash. .

14
If the solutions above do not address the issue you are experiencing, reset the X5 to its factory settings. Turn the detector off and
then hold the POWER touchpad for 5 seconds. All of the icons on the screen will illuminate indicating the detector has been reset.
Warranty & Service Information
Quest Metal Detectors provides a two-year warranty on all of our detectors. To register your Quest X5, please go to our website at
www.QuestMetalDetectors.com and click on SUPPORT. Scroll down to REGISTRATION and fill out the form to activate your two year
warranty. If you have difficulty registering your detector online, please contact the dealer you purchased it from to finish the process.
For your records, fill out the form below to help expedite any warranty work that you might require.

15
Accessories for the Quest X5
Quest Metal Detectors provides a complete line of accessories for your X5 that will help you enjoy your time in the field as well as find
more and recover targets faster. Some of the recommended accessories for the Quest line of metal detectors include the following:

16
CODE OF ETHICS
The hobby of treasure hunting has grown exponentially over the past 20 years or so which has turned it into a hobby enjoyed by
people of all ages and walks of life. Unfortunately as more and more people explore sites with their metal detectors, there has been
an increase in the number of people that are willing to trespass, ignore existing restrictions on where detecting is allowed and leave

17
open holes and trash laying around. This has resulted in many areas being closed to metal detecting which hurts all of us. The
Federation of Metal Detector and Archaeological Clubs Inc. or FMDAC for short was organized in 1984 by hobbyists and
manufacturers as a legislative and educational organization dedicated to the preservation, promotion, and protection for the hobby of
recreational metal detecting and prospecting. The following Code of Ethics is one that was developed and endorsed by the FMDAC
and should be part of how you approach the hobby of treasure hunting.
I will always check Federal, State, County and local laws before searching. It is my responsibility to "know the law".
I will respect private property and will not enter private property without the owner’s permission. Where possible, such
permission will be in writing.
I will take care to refill all holes and try not to leave any damage.
I will remove and dispose of any and all trash and litter that I find.
I will appreciate and protect our inheritance of natural resources, wildlife and private property.
I will as an ambassador for the hobby, use thoughtfulness, consideration and courtesy at all times.
I will work to help bring unity to our hobby by working with any organization of any geographic area that may have problems
that will limit their ability to peacefully pursue the hobby.
I will leave gates as found.
I will build fires in designated or safe places only.
I will report to the proper authorities any individuals who enter and or remove artifacts from federal parks, state / local
preserves or designated historical sites.
Table of contents
Other Quest Engineering Metal Detector manuals

Quest Engineering
Quest Engineering Q30 Series User manual

Quest Engineering
Quest Engineering Q30 Series User manual

Quest Engineering
Quest Engineering V80 User manual

Quest Engineering
Quest Engineering X10 User manual

Quest Engineering
Quest Engineering V60 User manual

Quest Engineering
Quest Engineering Scuba Tector Pro User manual