manuals.online logo
Brands
  1. Home
  2. •
  3. Brands
  4. •
  5. Radial Engineering
  6. •
  7. Media Converter
  8. •
  9. Radial Engineering JD7 Injector User manual

Radial Engineering JD7 Injector User manual

Radial Engineering Ltd.
1845 Kingsway Ave., Port Coquitlam, BC V3C 1S9, Canada
Tel: 604-942-1001 • Fax: 604-942-1010
Email: info@radialeng.com
Radial JD-7 owner’s manual v2.1 01/2022 Part #: R870 1015 00
1
2
3
456
7
8
9
10
0
1
2
3
456
7
8
9
10
0
1
2
3
456
7
8
9
10
0
1
2
3
456
7
8
9
10
0
ABCD
Effect:
Note:
1
2
3
456
7
8
9
10
0
1
2
3
456
7
8
9
10
0
1
2
3
456
7
8
9
10
0
1
2
3
456
7
8
9
10
0
ABCD
Effect:
Note:
1
2
3
456
7
8
9
10
0
1
2
3
456
7
8
9
10
0
1
2
3
456
7
8
9
10
0
1
2
3
456
7
8
9
10
0
ABCD
Effect:
Note:
1
2
3
456
7
8
9
10
0
1
2
3
456
7
8
9
10
0
1
2
3
456
7
8
9
10
0
1
2
3
456
7
8
9
10
0
ABCD
Effect:
Note:
1
2
3
456
7
8
9
10
0
1
2
3
456
7
8
9
10
0
1
2
3
456
7
8
9
10
0
1
2
3
456
7
8
9
10
0
ABCD
Effect:
Note:
1
2
3
456
7
8
9
10
0
1
2
3
456
7
8
9
10
0
1
2
3
456
7
8
9
10
0
1
2
3
456
7
8
9
10
0
ABCD
Effect:
Note:
1
2
3
456
7
8
9
10
0
1
2
3
456
7
8
9
10
0
1
2
3
456
7
8
9
10
0
1
2
3
456
7
8
9
10
0
ABCD
Effect:
Note:
1
2
3
456
7
8
9
10
0
1
2
3
456
7
8
9
10
0
1
2
3
456
7
8
9
10
0
1
2
3
456
7
8
9
10
0
ABCD
Effect:
Note:
Effect: Program:
Guitar:
[ ] Input A
[ ] Pad
[ ] Input B
1
2
3
456
7
8
9
10
0
1
2
3
456
7
8
9
10
0
1
2
3
456
7
8
9
10
0
1
2
3
456
7
8
9
10
0
1
2
3
456
7
8
9
10
0
1
2
3
456
7
8
9
10
0
1
2
3
456
7
8
9
10
0
Input Gain Treble mid bass presence master
Channel 1 [ ] - 2 [ ]
Bright [ ]
Treble boost [ ]
Mid boost [ ]
1
2
3
456
7
8
9
10
0
1
2
3
456
7
8
9
10
0
1
2
3
456
7
8
9
10
0
1
2
3
456
7
8
9
10
0
1
2
3
456
7
8
9
10
0
1
2
3
456
7
8
9
10
0
1
2
3
456
7
8
9
10
0
Input Gain Treble mid bass presence master
Channel 1 [ ] - 2 [ ]
Bright [ ]
Treble boost [ ]
Mid boost [ ]
1
2
3
456
7
8
9
10
0
1
2
3
456
7
8
9
10
0
1
2
3
456
7
8
9
10
0
1
2
3
456
7
8
9
10
0
1
2
3
456
7
8
9
10
0
1
2
3
456
7
8
9
10
0
1
2
3
456
7
8
9
10
0
Input Gain Treble mid bass presence master
Channel 1 [ ] - 2 [ ]
Bright [ ]
Treble boost [ ]
Mid boost [ ]
1
2
3
456
7
8
9
10
0
1
2
3
456
7
8
9
10
0
1
2
3
456
7
8
9
10
0
1
2
3
456
7
8
9
10
0
1
2
3
456
7
8
9
10
0
1
2
3
456
7
8
9
10
0
1
2
3
456
7
8
9
10
0
Input Gain Treble mid bass presence master
Channel 1 [ ] - 2 [ ]
Bright [ ]
Treble boost [ ]
Mid boost [ ]
1
2
3
456
7
8
9
10
0
1
2
3
456
7
8
9
10
0
1
2
3
456
7
8
9
10
0
1
2
3
456
7
8
9
10
0
1
2
3
456
7
8
9
10
0
1
2
3
456
7
8
9
10
0
1
2
3
456
7
8
9
10
0
Input Gain Treble mid bass presence master
Channel 1 [ ] - 2 [ ]
Bright [ ]
Treble boost [ ]
Mid boost [ ]
1
2
3
456
7
8
9
10
0
1
2
3
456
7
8
9
10
0
1
2
3
456
7
8
9
10
0
1
2
3
456
7
8
9
10
0
1
2
3
456
7
8
9
10
0
1
2
3
456
7
8
9
10
0
1
2
3
456
7
8
9
10
0
Input Gain Treble mid bass presence master
Channel 1 [ ] - 2 [ ]
Bright [ ]
Treble boost [ ]
Mid boost [ ]
1
2
3
456
7
8
9
10
0
1
2
3
456
7
8
9
10
0
1
2
3
456
7
8
9
10
0
1
2
3
456
7
8
9
10
0
1
2
3
456
7
8
9
10
0
1
2
3
456
7
8
9
10
0
1
2
3
456
7
8
9
10
0
Input Gain Treble mid bass presence master
Channel 1 [ ] - 2 [ ]
Bright [ ]
Treble boost [ ]
Mid boost [ ]
Amplifier:
Amplifier:
Amplifier:
Amplifier:
Amplifier:
Microphone:
Microphone:
Microphone:
Microphone:
Microphone:
Note:
Amplifier:
Microphone:
Note:
Amplifier:
Microphone:
Note:
Note:
Note:
Note:
Note:
Date:
Sound:
Track:
1
2
3
456
7
8
9
10
0
1
2
3
456
7
8
9
10
0
1
2
3
456
7
8
9
10
0
1
2
3
456
7
8
9
10
0
1
2
3
456
7
8
9
10
0
1
2
3
456
7
8
9
10
0
1
2
3
456
7
8
9
10
0
Trim High Freq Mid 1 Freq Mid 2 Bass
Line in [ ] Mic in [ ]
Pad [ ]
Polarity reverse [ ]
EQ In [ ]
On [ ]
On [ ]
Lift [ ]
180º [ ]
On [ ]
Lift [ ]
180º [ ]
On [ ]
Lift [ ]
180º [ ]
On [ ]
Auxiliary
Output
Radial Engineering Ltd. 1845 Kingsway Ave., Port Coquitlam, BC V3C 1S9, Canada
Tel: 604-942-1001 • Fax: 604-942-1010 • Email: info@radialeng.com
JD7 Block Diagram
Guitar A to
Input-A
Guitar B to
Input-B
Ch. 1 Direct out to main guitar amplifier (Ch. A)
Ch. 5 output
to amplifier #3
(Ch. A)
Ch. 6 output
to amplifier #3
(Ch. B)
Ch. 2 output to
amp modeler
To mix/record Ch. 1
To mix/record
Ch. 3
To mix/record
Ch. 4
Balanced Direct Out
To mix/record Ch. 5
Ch. 7 Output to Rockman
To mix/record
Ch. 2
Ch. 4 output
to chorus,
to amp # 2
(Ch. B)
Ch. 4 output
to chorus,
to amp # 1
(Ch. B)
Ch. 6 Loop sent to & from multi effect processor
Ch. 5 Loop sent to & from pedal board
stereo
chorus
Ch. 3 output
to amp # 2
(Ch. A)
Front
Rear
Primary guitar input
‘Drag’ control
Overload LED indicator
8dB pad for Input-2
Second instrument input
Channel-1 on-off switch
Channel-1 output
Direct coupled
Channel-1 on/off indicator
Input selector switch
Replay the dry track, sending the signal to the XLR female input
on the JD7. Select ‘INPUT-2’ by depressing the ‘Select’ switch on
the front panel to turn on the XLR input. Adjust input level to
suit. Now, play back the tr ack through your amplifiers while
trying different settings. This way, you can monitor different
sounds before committing final track to tape.
Recorded Guitar
For Re-Mix - Connect the guitar and amplifiers as usual. Take
direct output from balanced XLR male output to mixer and
recorder. Record the dry track.
Ground Lift - Pin 1
Input level adjust
Balanced out
Ground Lift - Pin 1
Polarity reverse Pin 2 / Pin 3
Balanced out
Ch.-7 out
Effect loop input
from gutar effect.
Effect loop output
to guitar effect.
Channel-1 on-off switch On-off switch
Channel-1 output
Direct coupled
Channel output - Transformer isolated
Ground lift
Polarity reverse - 180º
Channel-1 on/off indicator Channel on/off active indicator
Effect loop bypass switch
Ground Lift - Pin 1
Input level adjust
Balanced out
Ground Lift - Pin 1
Polarity reverse Pin 2 / Pin 3
Balanced out
Ch.-7 out
Effect loop input
from gutar effect.
Effect loop output
to guitar effect.
Channel-1 on-off switch On-off switch
Channel-1 output
Direct coupled
Channel output - Transformer isolated
Ground lift
Polarity reverse - 180º
Channel-1 on/off indicator Channel on/off active indicator
Effect loop bypass switch
Primary guitar input
‘Drag’ control
Overload LED indicator
8dB pad for Input-2
Second instrument input
Channel-1 on-off switch
Channel-1 output
Direct coupled
Channel-1 on/off indicator
Input selector switch
Replay the dry track, sending the signal to the XLR female input
on the JD7. Select ‘INPUT-2’ by depressing the ‘Select’ switch on
the front panel to turn on the XLR input. Adjust input level to
suit. Now, play back the tr ack through your amplifiers while
trying different settings. This way, you can monitor different
sounds before committing final track to tape.
Recorded Guitar
For Re-Mix - Connect the guitar and amplifiers as usual. Take
direct output from balanced XLR male output to mixer and
recorder. Record the dry track.
Guitar A to
Input-A
Guitar B to
Input-B
Ch. 1 Direct out to main guitar amplifier (Ch. A)
Ch. 5 output
to amplifier #3
(Ch. A)
Ch. 6 output
to amplifier #3
(Ch. B)
Ch. 2 output to
amp modeler
To mix/record Ch. 1
To mix/record
Ch. 3
To mix/record
Ch. 4
Balanced Direct Out
To mix/record Ch. 5
Ch. 7 Output to Rockman
To mix/record
Ch. 2
Ch. 4 output
to chorus,
to amp # 2
(Ch. B)
Ch. 4 output
to chorus,
to amp # 1
(Ch. B)
Ch. 6 Loop sent to & from multi effect processor
Ch. 5 Loop sent to & from pedal board
stereo
chorus
Ch. 3 output
to amp # 2
(Ch. A)
Front
Rear
JD7 Block Diagram
1
2
3
456
7
8
9
10
0
1
2
3
456
7
8
9
10
0
1
2
3
456
7
8
9
10
0
1
2
3
456
7
8
9
10
0
ABCD
Effect:
Note:
1
2
3
456
7
8
9
10
0
1
2
3
456
7
8
9
10
0
1
2
3
456
7
8
9
10
0
1
2
3
456
7
8
9
10
0
ABCD
Effect:
Note:
1
2
3
456
7
8
9
10
0
1
2
3
456
7
8
9
10
0
1
2
3
456
7
8
9
10
0
1
2
3
456
7
8
9
10
0
ABCD
Effect:
Note:
1
2
3
456
7
8
9
10
0
1
2
3
456
7
8
9
10
0
1
2
3
456
7
8
9
10
0
1
2
3
456
7
8
9
10
0
ABCD
Effect:
Note:
1
2
3
456
7
8
9
10
0
1
2
3
456
7
8
9
10
0
1
2
3
456
7
8
9
10
0
1
2
3
456
7
8
9
10
0
ABCD
Effect:
Note:
1
2
3
456
7
8
9
10
0
1
2
3
456
7
8
9
10
0
1
2
3
456
7
8
9
10
0
1
2
3
456
7
8
9
10
0
ABCD
Effect:
Note:
1
2
3
456
7
8
9
10
0
1
2
3
456
7
8
9
10
0
1
2
3
456
7
8
9
10
0
1
2
3
456
7
8
9
10
0
ABCD
Effect:
Note:
1
2
3
456
7
8
9
10
0
1
2
3
456
7
8
9
10
0
1
2
3
456
7
8
9
10
0
1
2
3
456
7
8
9
10
0
ABCD
Effect:
Note:
Effect: Program:
Guitar:
[ ] Input A
[ ] Pad
[ ] Input B
1
2
3
456
7
8
9
10
0
1
2
3
456
7
8
9
10
0
1
2
3
456
7
8
9
10
0
1
2
3
456
7
8
9
10
0
1
2
3
456
7
8
9
10
0
1
2
3
456
7
8
9
10
0
1
2
3
456
7
8
9
10
0
Input Gain Treble mid bass presence master
Channel 1 [ ] - 2 [ ]
Bright [ ]
Treble boost [ ]
Mid boost [ ]
1
2
3
456
7
8
9
10
0
1
2
3
456
7
8
9
10
0
1
2
3
456
7
8
9
10
0
1
2
3
456
7
8
9
10
0
1
2
3
456
7
8
9
10
0
1
2
3
456
7
8
9
10
0
1
2
3
456
7
8
9
10
0
Input Gain Treble mid bass presence master
Channel 1 [ ] - 2 [ ]
Bright [ ]
Treble boost [ ]
Mid boost [ ]
1
2
3
456
7
8
9
10
0
1
2
3
456
7
8
9
10
0
1
2
3
456
7
8
9
10
0
1
2
3
456
7
8
9
10
0
1
2
3
456
7
8
9
10
0
1
2
3
456
7
8
9
10
0
1
2
3
456
7
8
9
10
0
Input Gain Treble mid bass presence master
Channel 1 [ ] - 2 [ ]
Bright [ ]
Treble boost [ ]
Mid boost [ ]
1
2
3
456
7
8
9
10
0
1
2
3
456
7
8
9
10
0
1
2
3
456
7
8
9
10
0
1
2
3
456
7
8
9
10
0
1
2
3
456
7
8
9
10
0
1
2
3
456
7
8
9
10
0
1
2
3
456
7
8
9
10
0
Input Gain Treble mid bass presence master
Channel 1 [ ] - 2 [ ]
Bright [ ]
Treble boost [ ]
Mid boost [ ]
1
2
3
456
7
8
9
10
0
1
2
3
456
7
8
9
10
0
1
2
3
456
7
8
9
10
0
1
2
3
456
7
8
9
10
0
1
2
3
456
7
8
9
10
0
1
2
3
456
7
8
9
10
0
1
2
3
456
7
8
9
10
0
Input Gain Treble mid bass presence master
Channel 1 [ ] - 2 [ ]
Bright [ ]
Treble boost [ ]
Mid boost [ ]
1
2
3
456
7
8
9
10
0
1
2
3
456
7
8
9
10
0
1
2
3
456
7
8
9
10
0
1
2
3
456
7
8
9
10
0
1
2
3
456
7
8
9
10
0
1
2
3
456
7
8
9
10
0
1
2
3
456
7
8
9
10
0
Input Gain Treble mid bass presence master
Channel 1 [ ] - 2 [ ]
Bright [ ]
Treble boost [ ]
Mid boost [ ]
1
2
3
456
7
8
9
10
0
1
2
3
456
7
8
9
10
0
1
2
3
456
7
8
9
10
0
1
2
3
456
7
8
9
10
0
1
2
3
456
7
8
9
10
0
1
2
3
456
7
8
9
10
0
1
2
3
456
7
8
9
10
0
Input Gain Treble mid bass presence master
Channel 1 [ ] - 2 [ ]
Bright [ ]
Treble boost [ ]
Mid boost [ ]
Amplifier:
Amplifier:
Amplifier:
Amplifier:
Amplifier:
Microphone:
Microphone:
Microphone:
Microphone:
Microphone:
Note:
Amplifier:
Microphone:
Note:
Amplifier:
Microphone:
Note:
Note:
Note:
Note:
Note:
Date:
Sound:
Track:
1
2
3
456
7
8
9
10
0
1
2
3
456
7
8
9
10
0
1
2
3
456
7
8
9
10
0
1
2
3
456
7
8
9
10
0
1
2
3
456
7
8
9
10
0
1
2
3
456
7
8
9
10
0
1
2
3
456
7
8
9
10
0
Trim High Freq Mid 1 Freq Mid 2 Bass
Line in [ ] Mic in [ ]
Pad [ ]
Polarity reverse [ ]
EQ In [ ]
On [ ]
On [ ]
Lift [ ]
180º [ ]
On [ ]
Lift [ ]
180º [ ]
On [ ]
Lift [ ]
180º [ ]
On [ ]
Auxiliary
Output
Radial Engineering Ltd. 1845 Kingsway Ave., Port Coquitlam, BC V3C 1S9, Canada
Tel: 604-942-1001 • Fax: 604-942-1010 • Email: info@radialeng.com
Radial Engineering Ltd.
1845 Kingsway Ave., Port Coquitlam, BC V3C 1S9, Canada
Tel: 604-942-1001 • Fax: 604-942-1010
Email: info@radialeng.com
Radial JD-7 owner’s manual v2.1 01/2022 Part #: R870 1015 00

Other manuals for JD7 Injector

1

Other Radial Engineering Media Converter manuals

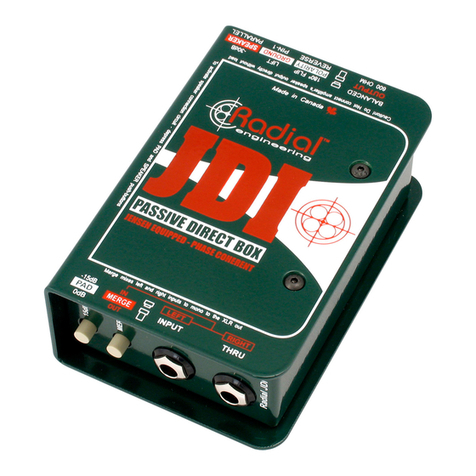
Radial Engineering JDI Mk3 User manual

Radial Engineering

Radial Engineering JDI Mk3 User manual

Radial Engineering OX8 User manual

Radial Engineering

Radial Engineering OX8 User manual

Radial Engineering USB-Pro User manual

Radial Engineering

Radial Engineering USB-Pro User manual

Radial Engineering Decoder User manual

Radial Engineering

Radial Engineering Decoder User manual

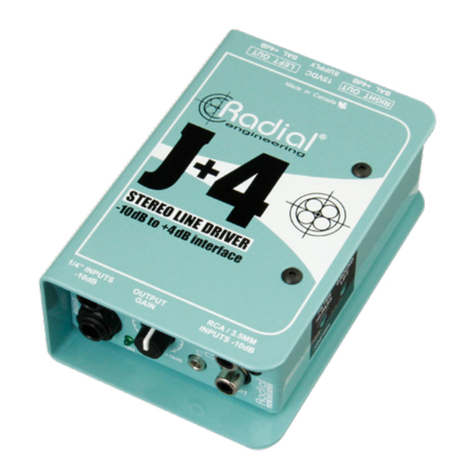
Radial Engineering J+4 User manual

Radial Engineering

Radial Engineering J+4 User manual

Radial Engineering MR5 User manual

Radial Engineering

Radial Engineering MR5 User manual

Radial Engineering 8cx User manual

Radial Engineering

Radial Engineering 8cx User manual

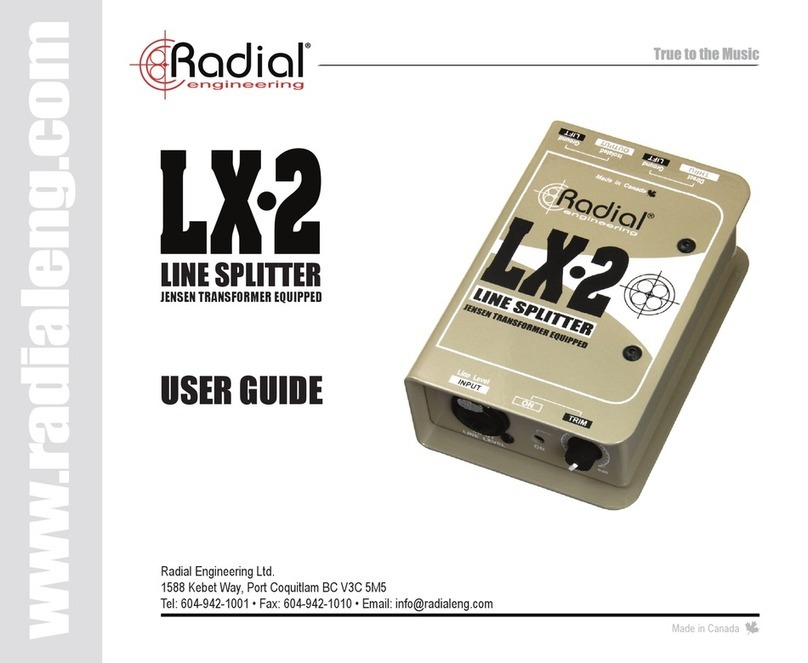
Radial Engineering LX-2 User manual

Radial Engineering

Radial Engineering LX-2 User manual

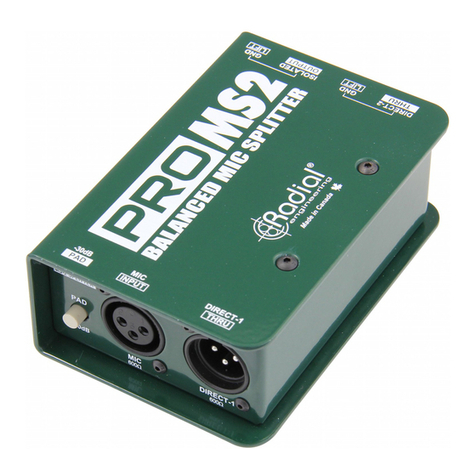
Radial Engineering PROMS2 User manual

Radial Engineering

Radial Engineering PROMS2 User manual

Radial Engineering Exo-Pod RAD-EXO-POD User manual

Radial Engineering

Radial Engineering Exo-Pod RAD-EXO-POD User manual

Popular Media Converter manuals by other brands

Siko SG42 Translation of the original installation instructions

Siko

Siko SG42 Translation of the original installation instructions

Hama 00053325 Operating	 instruction

Hama

Hama 00053325 Operating instruction

TR-Electronic LMRI-46-1050 PB manual

TR-Electronic

TR-Electronic LMRI-46-1050 PB manual

SPAUN BluBox 32v1 Operation manual

SPAUN

SPAUN BluBox 32v1 Operation manual

Motrona PU 210 Operation manual

Motrona

Motrona PU 210 Operation manual

Ophit UVC-S300 user manual

Ophit

Ophit UVC-S300 user manual

YOKOGAWA FLXA402 user manual

YOKOGAWA

YOKOGAWA FLXA402 user manual

Genexis FiberTwist Series installation guide

Genexis

Genexis FiberTwist Series installation guide

ZeeVee ZyPerMX user manual

ZeeVee

ZeeVee ZyPerMX user manual

Pentax EPK-i owner's manual

Pentax

Pentax EPK-i owner's manual

Amazon B07KRWYN4R manual

Amazon

Amazon B07KRWYN4R manual

DeLOCK 64069 user manual

DeLOCK

DeLOCK 64069 user manual

Crystal Vision UP-DOWN-VF Series user manual

Crystal Vision

Crystal Vision UP-DOWN-VF Series user manual

Channel Plus SVD-8 user guide

Channel Plus

Channel Plus SVD-8 user guide

GRASS VALLEY 2020ADC instruction manual

GRASS VALLEY

GRASS VALLEY 2020ADC instruction manual

Promag USB232B Series user manual

Promag

Promag USB232B Series user manual

Greenspan SDI-12 user manual

Greenspan

Greenspan SDI-12 user manual

Wyrestorm NetworkHD 200 series quick start guide

Wyrestorm

Wyrestorm NetworkHD 200 series quick start guide

manuals.online logo
manuals.online logoBrands
  • About & Mission
  • Contact us
  • Privacy Policy
  • Terms and Conditions

Copyright 2025 Manuals.Online. All Rights Reserved.