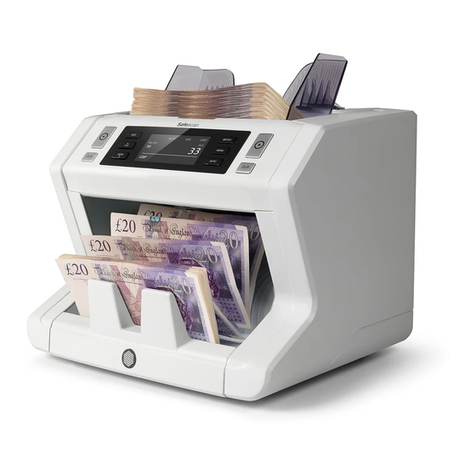
radiotec rapidcount S 575 User manual

User manual rapidcount S
Bedienungsanleitung rapidcount S
rapidcount S

2
Bedienungsanleitung rapidcount S ........................................................
Instruction manual rapidcount S ............................................................
Istruzioni per l’uso di rapidcount S ........................................................
Manual de instrucciones rapidcount S ...................................................
Mode d’emploi rapidcount S .................................................................
Rücksendeinformation.................................................................................
Return information ......................................................................................
[DE]
[EN]
[IT]
[ES]
[FR]
[DE]
[EN]
Inhalt | Content

3
Einleitung
Vorderseite
Rückseite
Sehr geehrter Kunde, sehr geehrte Kundin,
vielen Dank, dass Sie sich für die Banknotenzählmaschine rapidcount S entschieden haben.
Für einen störungsfreien und fehlerlosen Betrieb lesen Sie bitte die Bedienungsanleitung sorgfältig durch. Die
empfohlene Laufleistung der S beträgt , Millionen Banknoten pro Jahr. Für einen einwandfreien Betrieb,
empfehlen wir die Maschine mindestens einmal pro Jahr über den ratiotec Service warten zu lassen.
Hinweis: Bitte vergewissern Sie sich, bei dem zu zählenden Banknotenstapel maximal eine Menge von Stk.
Banknoten zu verwenden. Die Banknoten sollten dabei mittig, möglichst vorsortiert der Größe nach und
leicht aufgefächert in den Banknoteneinzug eingelegt werden.
. Einzugsschiene
. Benutzeroberfläche
. Display
. Banknotenauswurf
. Banknoteneinzug
. Tragegri
. ON | OFF-Schalter
. Netzkabelanschluss
. Druckeranschluss
. Updateanschluss
. Stellschraube
[DE]
.
.
.
. .
.
.
.
.
.
.

4
Bedienfeld
ADD: _______________ Aktivieren und deaktivieren der Additionsfunktion. Beim Entnehmen der gezählten
Banknoten wird das Zählergebnis gespeichert. Die Ergebnisse aus danach folgenden
Zählvorgängen werden aufaddiert. Zum Löschen der Werte drücken Sie die START-
oder die CLR-Taste.
BAT: _______________ Aktivieren und deaktivieren der Bündelfunktion. Stückgenaues Abzählen von Bank-
noten (z. B. Banderolen). Die Bündelgröße kann zwischen bis mit Hilfe des
Ziernblattes neben dem Display eingestellt werden.
CLR: _______________ Deaktivieren der eingestellten Bündelfunktion.
Zurücksetzen der Zählergebnisse
AUTO: ______________ Voreingestellter Modus. Die Maschine beginnt automatisch mit dem Zählen der
Banknoten, wenn diese im Banknoteneinzug platziert werden. Ein Wechsel vom au-
tomatischen in den manuellen Modus (MAL) ist durch das Betätigen der AUTO-Taste
möglich.
MIX: _______________ Voreingestellter Modus. Zählen gemischter Banknotenstapel inkl. Wertzählung und
Prüfung.
SORT: ______________ Aktivieren und deaktivieren der Stückelungsfunktion. Zählen sortenreiner Bankno-
tenstapel inkl. Wertzählung und Prüfung. Die erste Banknote gilt als Referenz – bei
abweichenden Sorten stoppt die Maschine.
CNT: _______________ Aktivieren und deaktivieren der Zählfunktion. Stückzählung inkl. Prüfung sorten-
reiner oder gemischter Banknotenstapel (ohne Wertzählung), z. B. zum Zählen
von Fremdwährungen. Im CNT Modus kann außerdem die MG, MT und UV Prüfung
separat aktiviert oder deaktiviert werden.
START/CLR: _________ Zurücksetzen der Zählergebnisse durch einfaches Drücken derSTART-Taste.
Durch längeres Drücken der START-Taste gelangt man in die Datums- und Uhrzeits-
einstellungen.
PRINT:______________ Ausdruck über optional erhältlichen RTP Thermobelegdrucker. Ist ein Belegdru-
cker an den Druckeranschluss der Banknotenzählmaschine angeschlossen, kann
durch Drücken der PRINT-Taste ein Beleg gedruckt werden.
[DE]
35PCS
475
500 200 100 20 10 5
19664000
50
Stückzahl
Wert
Stückzahl
je Sorte

5
Bedienung
Reinigung der Maschine
Warnhinweise
Verbinden Sie das mitgelieferte Netzkabel mit dem Netzkabelanschluss der Maschine und einer Stromquelle.
Betätigen Sie anschließend den ON/OFF-Schalter. Nach Einschalten der rapidcount S führt die Maschine
einen Selbsttest durch. Nach erfolgreichem Test ist das Gerät einsatzbereit.
Bei erster Inbetriebnahme: Nach Einschalten des Geräts über den ON/OFF-Schalter gelangen Sie durch längeres
Drücken der START-Taste in die Datums- & Uhrzeitseinstellungen. Die START-Taste sollten Sie so lange gedrückt
halten bis ein Signalton ertönt und die Jahresangabe in der linken oberen Ecke des Displays grau unterlegt ist.
Die jeweilige grau unterlegte Angabe lässt sich durch Betätigung der MIX- bzw. der CNT-Taste ändern. Durch er-
neutes Betätigen der START-Taste gelangt man zur nächsten Angabe. Zum Speichern der gesamten Einstellungen
muss die START-Taste erneut für mehrere Sekunden gedrückt werden.
Fächern Sie die Banknoten leicht auf und legen Sie den zu zählenden Banknotenstapel mittig und grob vor-
sortiert der Größe nach in den Banknoteneinzug. Bei aktiviertem Autostart startet die Banknotenzählmaschine
nach ca. Sek. automatisch mit dem Zählvorgang. Bei manuellem Start drücken Sie bitte die START-Taste. Die
Banknoten werden gezählt und über den Banknotenauswurf in das Ablagefach transportiert. Das Zählergebnis
können Sie vom Display ablesen.
[DE]
. Bevor Sie die Maschine einschalten, stellen Sie sicher, dass keine Fremdobjekte den Betrieb der Maschine
beinträchtigen.
. Stellen Sie die Maschine nicht in unmittelbare Nähe von Wasser oder anderen Flüssigkeiten.
. Um das Risiko eines elektrischen Schlags zu reduzieren, nehmen Sie die Maschine nicht eigenhändig
auseinander.
. Benutzen Sie nur das mitgelieferte Netzkabel.
. Benutzen Sie die Maschine nicht in einer Umgebung mit hohen Temperaturen oder hoher Luftfeuchtigkeit.
Bevor Sie die Maschine reinigen, schalten Sie diese aus und entfernen sie von der Stromquelle. Benutzen Sie
keine flüssigen Reiniger zum Säubern der Maschine. Wir empfehlen die Verwendung eines Druckluftsprays.
. Säubern des optischen Sensors: Es ist wichtig, die Sensoren regelmäßig zu säubern, um zu verhindern,
dass Papier- oder Staub-Partikel sich hier festsetzen.
. Säubern des Inneren der Maschine: Das Innere der Maschine sollte einmal im Monat gesäubert werden.
Schalten Sie die Maschine aus und önen Sie einfach den Deckel, um an das Innere zu gelangen.
. Weitere Empfehlung: Benutzen Sie die Maschine nicht in staubigen oder schmutzigen Räumen. Schützen
Sie die Maschine stets vor Schmutz, wenn Sie diese nicht benutzen.
6
[DE]
Fehlermeldungen S
% der Fehler entstehen durch Staub und Schmutz innerhalb der Maschine. Die regelmäßige Reinigung der
Maschine verhindert die meisten dieser Fehlfunktionen.
Wenn die Maschine eine verdächtige Banknote erkennt, wird die Zählung unterbrochen und ein Piepton ertönt.
Nach Entfernen der verdächtigen Banknote – dies ist die letzte Banknote im Banknotenauswurf – drücken Sie die
START-Taste, um mit dem Zählen fortzufahren.
Anzeige Problem Lösung
E, EC Verkettete Banknoten. Einige Banknoten
haften aneinander oder überlappen.
Entnehmen Sie die Banknoten aus dem Bank-
notenauswurf und legen Sie sie erneut in den
Banknoteneinzug. Starten Sie den Zählvorgang
erneut. Tritt die Fehlermeldung wieder auf,
korrigieren Sie den Banknoteneinzug indem Sie
die Stellschraube im Uhrzeigersinn drehen.
E Banknote ist schräg eingelegt worden Banknote entfernen, gerade in den Einzug
einlegen und erneut zählen.
E , E Zu großer Knick in der Banknote Banknote entfernen, Knick entfernen und
erneut zählen.
E, E, E,
E, E, E,
E, E, E
Falsche oder verdächtige Banknote oder
verschmutzte Sensoren
Entfernen Sie die verdächtige Banknote, zählen
Sie die Banknoten erneut. Ggf. eine Reinigung
der Sensoren vornehmen.
Sollten Sie Probleme bei der Maschine feststellen, haben Sie über unsere Webseite die Möglichkeit eine kurze
Kalibrierungsanleitung herunterzuladen und die Maschine selbstständig zu kalibrieren. Sollte die Kalibrierung
der Maschine nicht problemlösend sein, können Sie selbstverständlich den technischen Support hinzuziehen.
Anpassung des Banknoteneinzugs
Stellen Sie einen geeigneten Abstand zwischen Einzugsschiene und den Einzugsrollen ein, indem Sie die Stell-
schraube nutzen. Die Schraube bendet sich hinter der oberen Abdeckung auf der Rückseite des Gerätes. Dre-
hen Sie die Schraube nach links, um den Abstand zu verringern, drehen Sie die Schraube nach rechts, um den
Abstand zu vergrößern.

7
[ EN]
Introduction
Dear customer,
thank you for choosing the rapidcount S banknote counting machine.
Please read the user manual carefully to ensure trouble-free and faultless operation. The recommended oper-
ational performance of the S is . million banknotes per year. For trouble-free operation, we recommend
having the machine serviced by ratiotec Service at least once a year.
Note: Please make sure to insert only a maximum of pieces of banknotes into the banknote feeder. The
banknotes should be inserted in a central position possibly sorted by size and slightly fanned out into the
banknote feeder.
Front side
. Feeder rail
. User interface
. Display
. Banknote stacker
. Banknote feeder
. Carrying handle
Rear view
. ON | OFF switch
. Mains cable connection
. Printer connection
. Connection for updates
. Adjustement screw
.
.
.
. .
.
.
.
.
.
.

8
[EN]
Control panel
ADD: _______________ Activate and deactivate the addition function When removing the banknotes that
have been counted, the counting result is stored. The results from subsequent
counting processes are added. To clear the values, press the START or CLR button.
BAT: _______________ Activate and deactivate the bundle function Exact counting of banknotes (e.g.
banderols). The bundle size can be adjusted between and using the dial next
to the display.
CLR: _______________ Deactivate the set bundle function.
Reset counting results.
AUTO: ______________ Preset mode. The machine will automatically start counting the banknotes when
they are placed in the banknote feeder. A change from automatic to manual mode
(MAL) is possible by pressing the AUTO button.
MIX: _______________ Preset mode. Count mixed banknote stacks including value counting and checking.
SORT: ______________ Activate and deactivate the denomination function. Count sorted banknote stacks
including value counting and checking. The rst banknote is used as a reference -
with diering types the machine stops.
CNT: _______________ Activate and deactivate the counting function. Piece counting including checking of
sorted or mixed banknote stacks (without value counting), e.g. to count foreign cur-
rencies. In CNT mode, the MG, MT and UV check can also be activated or deactivated
separately.
START/CLR: _________ Reset the counting results.
Press and hold the START button to enter the date and time settings.
PRINT:______________ Print counting result via optionally available thermal receipt printer RTP . Is a
receipt printer connected to the printer port of the banknote counter, a receipt can
be printed by pressing the PRINT button.
35PCS
475
500 200 100 20 10 5
19664000
50
Pieces
Value
Quantity
of each
banknote
type

9
[ EN]
Operation
Warnings
Cleaning of the machine
Connect the mains cable supplied to the machine power connector and a power source. Then press the ON | OFF
switch. After switching on the rapidcount S , the machine carries out a self-test. After a successful test, the
device is ready for use.
Initial commissioning: After switching on the device via the ON | OFF switch, pressing and holding the START
button will take you to the date & time settings. The START button should be pressed until a beep sounds and
the year in the top left corner of the display is grayed out. The grayed out indication can be changed by pressing
the MIX or CNT button. Press the START button again to go to the next entry. To save all the settings, press the
START button again for several seconds.
Fan the banknotes slightly and place the banknote stack to be counted centred and roughly sorted according to
size into the banknote feeder. When Autostart is activated, the banknote counting machine automatically starts
the counting procedure after about seconds. When starting manually, please press the START button. The
banknotes are counted and transported via the banknote ejection into the tray compartment. The counting result
can be read o the display.
. Before switching on the machine, make sure that no foreign objects interfere with the operation of the
machine.
. Do not place the machine in the immediate vicinity of water or other liquids.
. To reduce the risk of electric shock, do not disassemble the machine yourself.
. Use the mains cable supplied.
. Do not use the machine in an environment with high temperature or high humidity.
Before cleaning the machine, switch it o and remove it from the power source. Do not use liquid cleaners to
clean the machine. We recommend the use of a compressed air spray.
. Cleaning the optical sensor: It is important to clean the sensors regularly to prevent paper or dust particles
from settling.
. Cleaning the inside of the machine: The inside of the machine should be cleaned once a month. Turn o the
machine and simply open the lid to access the interior.
. Further recommendation: Do not use the machine in dusty or dirty areas. Always protect the machine from
dirt when it is not in use.

10
[EN]
Error messages S
% of the errors are caused by dust and dirt inside the machine. Regular cleaning of the machine prevents most
of these malfunctions.
If the machine detects a suspicious banknote, it interrupts the counting process and starts beeping. After re-
moving the suspect banknote – this is the last banknote on the banknote stacker – press the START button to
continue with the counting.
If you experience problems with the machine, you can download a brief calibration manual on our website and
calibrate the machine yourself. If the calibration of the machine does not solve the problem, you can of course
contact the technical support service.
Adjustment of the banknote feeder
Set a suitable distance between the feed rail and the feed rollers by using the adjustment screw. The screw is
located behind the top cover on the back of the device. Turn the screw to the left to decrease the distance, turn
the screw to the right to increase the distance.
Display Problem Solution
E, EC Chained banknotes. Some banknotes
stick together or overlap
Take out the banknotes of the Banknote stacker
and place it again in the banknote feeder. Start
the counting process again.
If it is often displayed, adjust the adjusting
screw toward the counter-clockwise direction.
E Banknote has been inserted at an angle Remove banknote, insert straight into the
feeder and count again.
E , E Creased banknote Remove banknote, remove crease and count
again.
E, E, E,
E, E, E,
E, E, E
Counterfeit or suspicious banknote or
soiled sensors
Remove the suspect banknote, re-count the
banknotes. Possibly cleaning the sensors.

11
Introduzione
Lato anteriore
Lato posteriore
Gentile cliente,
grazie per aver scelto la macchina contabanconote rapidcount S .
Per un funzionamento privo di inconvenienti ed errori leggere attentamente le istruzioni per l’uso. Le prestazioni
consigliate per S ammontano a , milioni di banconote all’anno. Per un funzionamento impeccabile consi-
gliamo di sottoporre la macchina alla manutenzione da parte dell’assistenza ratiotec almeno una volta all’anno.
Attenzione: non caricate più di banconote alla volta, per un coretto funzionamento, se avete più bancono-
te da contare attivate la funzione somma.
. Guida di inserimento
. Interfaccia utente
. Display
. Espulsione delle banconote
. Ingresso banconote
. Maniglia di trasporto
. Interruttore ON | OFF
. Attacco per cavo di rete
. Attacco per stampante
. Collegamento seriale per il
cavo di aggiornamento
. Vite di regolazione
[IT]
.
.
. .
.
.
.
.
.
.
.

12
[IT]
Pannello di comando
ADD: _______________ Attivazione e disattivazione della funzione di addizione. Alla rimozione delle
banconote conteggiate viene salvato il risultato ottenuto. I risultati dei processi di
conteggio successivi sono sommati di volta in volta. Per cancellare i valori, premere
il tasto START o CLR.
BAT: _______________ Attivazione e disattivazione della funzione di creazione mazzi. Conteggio di un
numero preciso di banconote (ad es. in caso di fascette). La grandezza dei mazzi può
essere impostata da a banconote con l’ausilio del quadrante vicino al display.
CLR: _______________ Disattivazione della funzione di creazione mazzi impostata.
Resetta il valore del conteggio
AUTO: ______________ Modalità predenita. La macchina inizia automaticamente con il conteggio delle
banconote se queste sono state posizionate nel vano di inserimento delle bancono-
te. È possibile passare dalla modalità automatica a quella manuale (MAL) azionando
il tasto AUTO.
MIX: _______________ Modalità predenita. Conteggio di mazzi di banconote miste, compreso conteggio
del valore e verica.
SORT: ______________ Attivazione e disattivazione della funzione di suddivisione per tagli. Conteggio di
mazzi di banconote suddivise per tagli, compreso conteggio del valore e verica. La
prima banconota viene presa come riferimento, in caso di tipi diversi la macchina si
ferma.
CNT: _______________ Attivazione e disattivazione della funzione di conteggio. Conteggio dei pezzi
compresa verica di mazzi suddivisi o misti (senza conteggio del valore), ad es. per
il conteggio di valute estere. Nella modalità CNT possono inoltre essere attivate o
disattivate separatamente la funzione MG, MT e UV.
START/CLR: _________ Ripristino dei risultati del conteggio.
Premere e tenere premuto il pulsante START per inserire le impostazioni di data e ora.
PRINT:______________ Stampa del risultato del conteggio su una stampante termica di vicevuta. Se l’appa-
recchio per il conteggio delle banconote è collegato a una stampante di ricevute, è
possibile stampare una ricevuta, tenendo premuto il tasto.
35PCS
475
500 200 100 20 10 5
19664000
50
Pezzi
Valore
Quantità
Valore
di ciascuna
banconota
genere

13
[IT]
Utilizzo
Collegare il cavo di rete fornito in dotazione con l’attacco per cavo di rete della macchina e una fonte di corrente.
Azionare quindi l’interruttore ON/OFF. Dopo l’accensione, la macchina rapidcount S esegue un auto-test.
Una volta concluso positivamente il test, l’apparecchio è pronto all’uso.
Prima messa in funzione: dopo aver acceso il dispositivo tramite ON | Interruttore OFF, premendo e tenendo
premuto START pulsante ti porterà alle impostazioni di data e ora. Il pulsante START deve essere premuto no
a quando non viene emesso un segnale acustico e l’anno nell’angolo in alto a sinistra del display è disattivato.
L’indicazione in grigio può essere modicata premendo il tasto MIX o CNT. Premere di nuovo il tasto START per
andare alla voce successiva. Per salvare tutte le impostazioni, premere il tasto Pulsante START ancora per diversi
secondi.
Smazzare leggermente le banconote e disporre il mazzo delle banconote da contare, grossolanamente presud-
divise per tagli, al centro nel vano di inserimento delle banconote. Con avvio automatico attivo, la macchina
contabanconote inizia automaticamente il processo di conteggio dopo circa secondi. In caso di avvio manuale,
premere il tasto START. Le banconote vengono contate e spostate tramite l’espulsione delle banconote sull’ap-
posito scomparto di supporto. Il risultato del conteggio è leggibile sul display.
Avvertenze
Pulizia della macchina
. Prima di accendere la macchina, accertarsi che nessun oggetto estraneo comprometta il funzionamento
della macchina.
. Non collocare la macchina nelle immediate vicinanze di acqua o altri liquidi.
. Per ridurre il rischio di una scossa elettrica, non smontare la macchina in autonomia.
. Utilizzare solo il cavo di rete fornito in dotazione.
. Non utilizzare la macchina in un ambiente con temperature elevate o umidità elevata.
Prima di pulire la macchina, spegnerla e scollegarla dalla fonte di corrente. Non utilizzare detergenti liquidi per
la pulizia della macchina. Raccomandiamo l’uso di uno spray ad aria compressa.
. Pulizia del sensore ottico: è importante pulire regolarmente i sensori per evitare che vi si ssino particelle
di carta o di polvere.
. Pulizia dell’interno della macchina: l’interno della macchina deve essere pulito una volta al mese Spegne-
re la macchina e aprire semplicemente il coperchio per avere accesso all’interno.
. Un altro consiglio: non utilizzare la macchina in ambienti polverosi o sporchi. Proteggere sempre la mac-
china dalla sporcizia se non la si utilizza.

14
[IT]
Messaggi di errore S
L’% degli errori deriva da polvere e sporcizia riscontrabili sulla macchina. La pulizia regolare della macchina
evita la maggior parte di questi malfunzionamenti.
Se la macchina rileva una banconota sospetta, interrompe il processo di conteggio e inizia a emettere un segnale
acustico. Dopo aver rimosso la banconota sospetta – questa è l’ultima banconota che trovate nel raccoglitore di
banconote - premere il pulsante START continua con il conteggio.
Messaggio Problema Soluzione
E, EC Banconote incatenate. Alcune bancono-
te si sono incastrate o si sovrapposte.
Estrarre le banconote del raccoglitore di banconote
e posizionarle nuovamente nell’alimentatore di
banconote. Avvia di nuovo il processo di conteggio.
Se viene visualizzato spesso, regolare la vite di
regolazione in senso antiorario.
E La banconota è stata inserita ad angolo
non in modo coretto.
Rimuovere le banconote, inserire in modo corretto
nel alimentatore e contare ancora.
E, E Banconota sgualcita Rimuovere banconote, rimuovere le pieghe e
contare nuovamente.
E, E, E,
E, E, E,
E, E, E
Banconote contraatte o sospette o
sensori sporchi
Rimuovi la banconota sospetta, conta nuovamente
le banconote. Possibilmente pulire i sensori.
Laddove si dovessero riscontrare problemi della macchina, sul nostro sito Web è possibile scaricare delle brevi
istruzioni di calibratura e calibrare autonomamente la macchina. Se la calibratura della macchina non è risoluti-
va ci si può rivolgere ovviamente al supporto tecnico.
Adattamento del vano di inserimento delle banconote
Impostare una distanza idonea tra la guida di inserimento e i rulli di inserimento utilizzando la vite di regolazio-
ne. La vite si trova dietro il coperchio superiore sul retro del dispositivo. Ruotare la vite a sinistra per ridurre la
distanza, ruotare la vite a destra per aumentare la distanza.

15
Introducción
Parte delantera
Parte trasera
Estimada cliente, estimado cliente:
Muchas gracias por decidirse por la máquina contadora de billetes rapidcount S.
Lea atentamente este manual de instrucciones para asegurarse de que la máquina funcione correctamente y
sin fallos. El rendimiento recomendado de la S es de . billetes al año. Para garantizar el correcto
funcionamiento de la máquina recomendamos que sea revisada al menos una vez al año por el servicio técnico
de ratiotec.
Nota: Por favor, asegúrese introducir por cada conteo un máximo de billetes a la vez.
Los billetes se deben colocar alineados - al ser posible ya ordenados por los diferentes tamaños - en el centro
de la entrada de billetes.
. Raíl de alimentación
. Interfaz de usuario
. Pantalla
. Expulsión de billetes
. Entrada de billetes
. Asa de transporte
. Interruptor ON | OFF
. Conexión del cable de
alimentación
. Conexión de la impresora
. Conexión para actual-
izaciones
. Tornillo de ajuste
[ES]
.
.
. .
.
.
.
.
.
.
.

16
[ES]
Panel de control
ADD: _______________ Activación y desactivación de la función de adición. Cuando se retiran los billetes
contados, se guarda el resultado del conteo. A este resultado se sumarán los resul-
tados de las posteriores operaciones de conteo. Para borrar los valores guardados,
pulse la tecla START o la tecla CLR.
BAT: _______________ Activación y desactivación de la función de agrupación. Conteo preciso de billetes
(p.ej., banderolas). Las teclas numéricas situadas al lado de la pantalla permiten
seleccionar el tamaño del fajo de billetes de a .
CLR: _______________ Desactivación de la función de agrupación.
AUTO: ______________ Modo preseleccionado. La máquina empieza a contar automáticamente los billetes
en cuanto se colocan en el alimentador de billetes. Para cambiar entre el modo
automático y el modo manual (MAL), pulse la tecla AUTO.
MIX: _______________ Modo preseleccionado. Conteo de una pila de billetes mixtos, incluido el conteo del
valor y la comprobación de los billetes.
SORT: ______________ Activación y desactivación de la función de clasicación. Conteo de una pila de
billetes clasicados, incluido el conteo del valor y la comprobación de los billetes.
El primer billete se toma como referencia, la máquina se para cuando aparece un
billete que no corresponde al de la referencia.
CNT: _______________ Activación y desactivación de la función contador. Conteo de billetes, incluida la
comprobación de si se trata de una pila de billetes clasicada o mixta (sin conteo
del valor), p.ej., para contar billetes extranjeros. En el modo CNT, también es
posible activar o desactivar las funciones MG, MT y UV.
START/CLR: _________ Restablecimiento de los resultados del conteo.
PRINT:______________ Impreso del resultado de conteo a través de la Impresora de Recibos RTP, que
se vende aparte. Mientras la impresora esté conectada con la contadora de billetes,
se podrá apretar el boton PRINT con el n de imprimir un recibo con el resultado del
conteo.
35PCS
475
500 200 100 20 10 5
19664000
50
Unidades en total
Valor
total
Cantidad
de cada
billete

17
[ES]
Uso
Conecte el cable de alimentación suministrado a la conexión del cable de alimentación de la máquina y a una
toma de corriente. A continuación, pulse el interruptor ON/OFF. Después de encender la rapidcount S, la
máquina realiza una autocomprobación. Si la comprobación ha sido satisfactoria, el aparato estará listo para
su uso.
Al encender la contadora por primera vez, puede apretar la tecla START varios segundos para acceder a los
ajustes de fecha y hora. Apriete dicha tecla hasta que pite, y en el lado izquierdo de la pantalla aparecerá la
fecha en color gris. Cada de la parte en color gris se puede cambiar con la tecla MIX o CNT. Para poder seguir
tiene que apretar cada vez la tecla START. Para guardar los ajustes se tiene que volver a apretar la tecla START
varios segundos.
Abanique ligeramente los billetes, ordénelos por tamaño y deposite la pila de billetes que se van a contar en el
centro del alimentador de billetes. Si el arranque automático está activado, la máquina contadora de billetes
comenzará a contar automáticamente después de aprox. segundos. En caso de arranque manual, pulse la tecla
START. Los billetes se cuentan y se depositan en el compartimento de almacenamiento a través de la expulsión
de billetes. El resultado del conteo se puede leer en la pantalla.
Advertencias
Limpieza de la máquina
Advertencias:
. Antes de encender la máquina, asegúrese de que ningún objeto extraño pueda interferir con su funciona-
miento.
. No coloque la máquina cerca del agua u otros líquidos.
. Para reducir el riesgo de sufrir una descarga eléctrica, no desmonte la máquina por su cuenta.
. Utilice únicamente el cable de alimentación suministrado.
. No utilice la máquina en un entorno con altas temperaturas o humedad.
Antes de limpiar la máquina, apáguela y desconéctela de la fuente de alimentación. No limpie la máquina con
productos de limpieza líquidos.
. Limpieza del sensor óptico: es importante limpiar los sensores regularmente para evitar la acumulación de
partículas de papel o de polvo.
. Limpieza del interior de la máquina: el interior de la máquina debe limpiarse una vez al mes. Apague la
máquina y abra la tapa para acceder al interior.
. Recomendaciones adicionales: no utilice la máquina en lugares polvorientos o sucios. Proteja la máquina
de la suciedad cuando no se esté utilizando.

18
[ES]
Mensajes de error S
El % de los fallos se producen debido al polvo y la suciedad acumulados en el interior de la máquina. La
limpieza regular de la máquina evita la mayoría de estos fallos.
En caso que la contadora detecte un billete sospechoso, entonces el conteo se para y la contadora pita. Después
de retirar dicho billete – es el último que se encuentra en la bandeja de salida – Vd. debe apretar la tecla START
con el n de que siga el conteo.
Si detecta problemas en la máquina, puede descargar un breve manual de calibración en nuestra página web
y calibrarla usted mismo. Si la calibración de la máquina no resuelve el problema, puede ponerse en contacto
con el servicio técnico.
Ajuste del alimentador de billetes
Con el n de ajustar una adecuada distancia entre el raíl de alimentación de billetes y los rodillos de ali-
mentación, use por favor el tornillo de ajuste. Puede encontrar ese tornillo debajo de la tapa superior en el lado
trasero de la máquina. Al girar el tornillo hacia la izquierda se puede reducir la distancia. Al girar el tornillo hacia
la derecha se puede ampliar la distancia.
Indicación Problema Solución
E, EC Billetes pegados. Algunos billetes están
pegados entre si o se solapan
Retire los billetes de la bandeja de salida y
vuelva a colocar los billetes en el raíl de alimen-
tación de billetes. Vuelva a iniciar el conteo.
Si acaso vuelve a aparecer el error, entonces
ajuste el tornillo de alimentación girándolo en
sentido de las agujas del reloj.
E Billete introducido de forma torcida Retire el billete, vuelva a meterla de forma recta
en el alimentador de billetes con el n de volver
a realizar el conteo.
E , E Billete fuertemente doblado Retire el billete, quite la doblez y vuelva a
meterla en el alimentador de billetes con el n
de volver a realizar el conteo
E, E, E,
E, E, E,
E, E, E
Billete falso o sospechoso o ensuciado Retire el billete sospechoso y vuelva a contar los
billetes de nuevo. Tal vez limpie los sensores de
la contadora

19
Introduction
Face avant
Face arrière
Cher client,
Merci d’avoir choisi la compteuse de billets rapidcount S .
Pour un fonctionnement sans incidents et sans erreurs, veuillez lire attentivement le mode d’emploi. Le volume
recommandé pour le S est de , million de billets par an. Pour un fonctionnement parfait, nous vous recom-
mandons de faire entretenir la machine au moins une fois par an par ratiotec Service.
Note: Svp, veuillez vous assurer que la quantité des billets à compter ne soit pas supérieure à . Les billets
doivent être centrés dans la machine et, si possible, triés et un peu ventilés.
. Rail d’alimentation
. Interface utilisateur
. Écran
. Éjection des billets
. Chargeur de billets
. Poignée de transport
. Interrupteur ON | OFF
. Connexion du cordon d’ali-
mentation
. Port imprimante
. Port pour mises à jour
. Vis de réglage pour l’inserti-
on des billets
[FR]
.
.
. .
.
.
.
.
.
.
.

20
Panneau de commande
ADD: _______________ Activer et désactiver la fonction Addition. Lorsque les billets comptés sont retirés,
le résultat du comptage est enregistré. Les résultats des opérations de comptage
suivantes sont additionnés. Pour eacer les valeurs, appuyer sur la touche START
ou CLR.
BAT: _______________ Activer et désactiver la fonction Liasse. Comptage précis des billets de banque (par
ex. banderoles). La taille de la liasse peut être réglée entre et à l’aide du
cadran situé à côté de l’écran.
CLR: _______________ Désactiver la fonction Liasse. Réinitialiser le résultat du comptage.
AUTO: ______________ Mode préréglé. La machine commence automatiquement à compter les billets lors-
qu’ils sont placés dans l’entraînement des billets. Le passage du mode automatique
au mode manuel (MAL) est possible en appuyant sur la touche AUTO.
MIX: _______________ Mode préréglé. Comptage des liasses de billets mixtes, y compris comptage et
contrôle des valeurs.
SORT: ______________ Activer et désactiver la fonction Dénomination. Comptage des piles de billets indivi-
duels, y compris comptage et contrôle des valeurs. Le premier billet sert de référence
– la machine s’arrête s’il y a des coupures diérentes.
CNT: _______________ Activer et désactiver la fonction Comptage. Comptage de pièces avec contrôle des
liasses de billets identiques ou mixtes (sans comptage de valeur), par ex. pour le
comptage de devises étrangères. En mode CNT, les fonctions MG, MT et UV peuvent
également être activées ou désactivées séparément.
START/CLR: _________ Réinitialiser les résultats du comptage.
Appuyez sur le bouton START et maintenez-le enfoncé pour entrer les paramètres de
date et d’heure.
PRINT:______________ Ache les résultats du comptage.
Si une imprimante de reçu est connectée au port imprimante de la compteuse, il est
possible d’imprimer un reçu par une pression sur START touche.
[FR]
35PCS
475
500 200 100 20 10 5
19664000
50
nombre de pièces
Valeur
Quantité
de chaque
type de
billet
Table of contents
Languages: