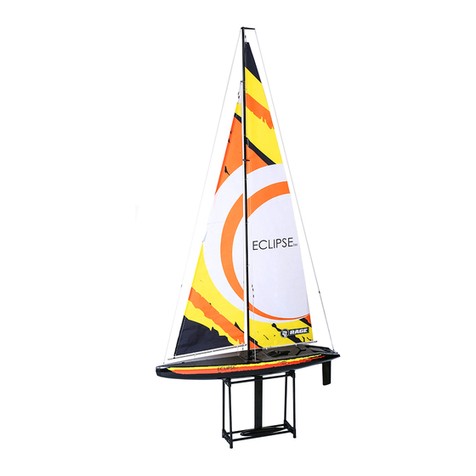
Rage Black Marlin BL User manual

Specificaons
INSTRUCTION MANUAL
INSTRUCTION MANUAL
Hull Length:
Overall Length:
Motor:
ESC:
2212/3500KV Water-Cooled BL Motor
Transmier and Receiver:
Baery:
Charger:
Servo:
Weight:
Hull: ABS
23.5” (60cm)
28” (67cm)
20A Water-Cooled Brushless with Reverse
2-channel, 2.4GHz
11.1V 3S 1800mAh 25C LiPo
0.5A 3S DC Balancing Charger with AC Power Supply
17g Waterproof
26.25 oz. (735g)

2
Introduction
The Rage™Black Marlin BL will have you racing across your local pond or lake with brushless power in no me.
The impressive speed is generated by the installed powerful brushless 3500KV motor in combinaon with a
20A Water-Cooled ESC with reverse and the included 3S 1800mAh LiPo baery pack. The great handling of the
Black Marlin BL comes from the pre-installed stainless steel trim tabs and turn fins that provide great control
and the ability to “turn on a dime”. The BL also has a durable uni-body ABS hull that comes pre-painted with a
unique black mae finish and a pre-applied trim scheme that provides a sleek, aggressive look.
The Black Marlin BL is a RTR (Ready-To-Run) boat that arrives 100% factory-assembled out of the box with a
2-channel, 2.4 GHz radio system that features fully proporonal steering and throle control, a 17gram water-
proof servo, and a convenient DC charger with an AC power supply that plugs into any electrical outlet. The
BL also comes with a display stand that proudly shows it offwhen you’re not out running it. Plus, even the AA
baeries for your transmier are included, so you can be racing your Black Marlin BL with brushless power
across your local pond or lake within minutes of opening the box!
Table of Contents
Introducon..............................................................................................................................................2
Quick Start Guide .....................................................................................................................................3
Safety Precauons....................................................................................................................................4
Age Recommendaons.............................................................................................................................4
Baery Safety Precauons .......................................................................................................................5
LiPo Baery Warning................................................................................................................................6
Charging the Baery.................................................................................................................................7
Transmier Operaon ..............................................................................................................................8
Checking the Radio System and Geng Started ......................................................................................12
Boang Tips..............................................................................................................................................13
Motor Care ...............................................................................................................................................13
When Finished Running ...........................................................................................................................13
Boat Maintenance ....................................................................................................................................14
Replacement Parts List .............................................................................................................................16

3
Quick Start Guide
If you’re an experienced RC driver or pilot, this list will give you all the informaon you need to get started
driving you’re new boat as quickly as possible. If this is your first RC vehicle, it is strongly recommended that
you read the ENTIRE manual before you aempt to operate your new boat.
Before Boang
1. Before turning on your transmier, it is important to make sure that the Throle Rao Switch at the top
of the transmier is located so that you can read 5:5 on the switch. The transmier should arrive from
the factory fixed in this posion, but it is important to confirm before turning on the transmier. If it is
not fixed in this posion, it must be moved there before operaon. We strongly suggest that once in that
posion the switch should be locked so that it cannot be moved. For addional details, please see page
9 of this manual.
2. Turn on your transmier.
3. Install your fully charged baeries in both the boat and transmier. Make sure you use the Velcro on
your baery to securely aach it to the Velcro at the boom of the boat’s hull.
4. Make sure the transmier throle trigger and trim are centered, and the switch on the top of the
transmier is posioned toward the rear in the 5:5 posion.
5. Connect the baery plug to the ESC plug inside the boat.
6. Make sure the boat is bound to the transmier. If not, bind the boat to the transmier using the binding
instrucons in the included transmier manual.
7. Make sure all controls – rudder and throle – move freely and are turning in the correct direcon. If not,
refer to the included transmier manual for direcons.
8. Adjust the steering rate on your transmier, as desired.
9. Find a safe and open boang area.
10. Plan a safe boang route for the water and wind condions.
Aer Boang
1. Always unplug the baery from the ESC before turning offyour transmier to make sure the boat cannot
be controlled by another device.
2. Remove the baery pack from the boat.
3. Make sure the outside of the boat and inside of the hull are completely dried out before storing your
boat. Keep the hatch offthe boat during storage to ensure that mold and mildew are not allowed to
grow and damage the components.
4. Repair and damage or wear to the boat before running it again.
5. Make sure to lubricate the flex shaaer 2 to 3 hours of running me.
6. Make note of lessons learned from each operaon of the boat – including trimming needed, and water
and wind condions.
Have fun boaƟng!

4
Please make sure you read the enre instrucon manual to become familiar with the features of
the Black Marlin before operang. Failure to operate this product correctly can result in damage
to the product or personal property – an even cause serious injury.
Please understand that this is a sophiscated hobby product and is not a toy. It must be operated
with cauon and common sense. Note that it does require some mechanical ability to correctly
operate this product. Failure to operate in a safe and responsible manner could result in injury
or damage to the product or other property. This product is not intended for use by children
without direct adult supervision. Do not aempt to disassemble or operate with incompable
components or make changes to the product without the approval of HRP Distribung.
This manual contains instrucons for safety, operaon, and maintenance. It is essenal to read
and follow all the instrucons and warnings in the manual prior to final assembly, setup, or use.
WARNING
Safety Precautions
As the owner and user of this product, you are solely responsible for operang it in a manner that does not
endanger yourself and others or result in damage to the product or property.
• Never aempt to swim to retrieve a stalled RC boat.
• Never operate your boat while standing in water.
• Never operate your boat in the presence of swimmers.
• The running hardware on RC boats can be very sharp, so use cauon when working on or around these
parts.
• Be cauous with the propeller when the motor is running. Do not come into contact with is or serious
injury could result.
• Due to the sharp hardware, do not operate near or around inflatable objects.
• Keep a safe distance in all direcons around your boat to avoid possible collisions or injury. This boat is
controlled by a radio signal that is subject to interference from many outside sources and could result in a
momentary loss of control.
• Always avoid water exposure to all equipment not specifically designed and protected for this purpose.
Moisture can damage to unprotected electronics.
• Make sure to keep all chemicals, small parts and anything electrical out of the reach of children.
Age Recommendations
This product is not a toy. Not for use by children under 14 years of age.

5
Battery Safety Precautions
Important Note: Lithium Polymer (LiPo) baeries are more volale than the alkaline, NiCad and NiMH
baeries used in other RC applicaons. All instrucons and warnings must be followed exactly to prevent
possible personal injury or damage to property, including by fire. By handling, charging, or using the included
LiPo baery you assume all potenal risks. If you do not agree with these condions, please return your
complete product in new, unused condion to the place of purchase immediately.
Important - Please read the following safety instrucons and warnings before handling, charging, or using the
included baery.
• You must charge you LiPo baery in a safe area away from any flammable materials.
• Never charge the LiPo baery unaended at any me. When charging the baery you should always
remain in constant observaon of the baery to monitor the process and react immediately to potenal
problems you observe.
• Aer discharging the baery during running the boat you must allow it to cool to ambient room
temperature before aempng to recharge. Also, it is NOT recommended that you completely discharge
the baery before charging. It is safe to charge parally discharged baeries when using an appropriate
LiPo charge
• For charging the baery you must use only the included charger or a suitably compable LiPo baery
charger. Failure to do so may result in a fire causing property damage and/or personal injury. DO NOT use a
NiCad or NiMh charger to charge your new LiPo baery.
• If at any me during the charge or discharge process the baery begins to “balloon” or swell, disconnue
charging or discharging immediately! Quickly and safely disconnect the baery before placing it in a safe,
open area away from flammable materials for observaon for at least 15 minutes. Con
nuing to charge
or discharge a baery that has started to “balloon” or swell can result in a fire. Important note: A baery
that has “ballooned” or swollen even a small amount must be removed from service immediately and
completely.
• Never discharge a LiPo baery below 3V per cell.
• Always disconnect a baery from the ESC when the product is not in use.
• Avoid connually operang the baery to LVC (Low Voltage Cutoff) as this could result in damage to the
baery.
• Store the baery parally charged (approximately 50% charged or 3.85V per cell) at room temperature
(approximately 68 to 77o Fahrenheit) in a dry area for best result
• When transporng or temporarily storing the baery, the temperature range should be between 40 to
100F. Do not store the baery or boat in a hot car or in direct sunlight whenever possible or the baery
could be damaged or even catch fire.
• LiPo cells should not be discharged to below 3.0V each. In the case of this 3-cell, 11.1V baery you should
not allow the voltage to fall below 9.0V during operaon.
• Do not over-discharge the LiPo baery, which could result in reduced power, lower run mes or complete
failure of the baery.
NOTE: The included ESC features a “so” LVC (Low Voltage Cutoff) that smoothly reduces power to the motor
(regardless of your throle posion) to let you know that the voltage to the baery is near the 6.0V minimum
and avoid damage to your baery.

6
However, even before the LVC takes place, if you find that more than typical throle is needed to power the
boat you should drive it back to you and disconnect the baery immediately to avoid over-discharge. It is
NOT recommended that you connue to drive the boat aer LVC occurs or permanent damage to the baery
could occur leading to reduced power and run mes with future use. Note that operaon of the baery is NOT
covered under warranty.
It is also not recommended that you connually run the baery to the “so” LVC with each operaon. You
should be aware of the power level of the baery each me you drive the boat and as soon as you find that it
requires more throle than normal to maintain speed you should drive the boat back to you and disconnect
the baery immediately. Connually running the baery to the soLVC can cause permanent damage to the
baery, so it is best to keep track of your run me and disconnue use prior to reaching the soLVC.
Important Note: Do not leave the baery connected to the ESC unless you are ready to run the
boat. If the baery is leconnected when it is not in use, it will become over-discharged and
the baery will become damaged and unusable.
Important Note: Do not store the baery fully charged
For improved safety and longevity of the baery it is recommended that it be stored parally charged for
any length of me. Storing the Li-ion baery at approximately 50% charged (approximately 3.85V per cell) is
typically best. This will take some management of the charge me and the use of a voltmeter. If you do not
have the equipment or experience to maintain the 50% charge, simply be sure not to store the baery fully
charged whenever possible. In fact, as long as the baery will be stored at approximately room temperature
and for no more than a few weeks before the next use, it is beer to store the baery in the discharged state
aer the last use – as long as it was not over-discharged below the LVC.
LiPo Battery Warning
IMPORTANT NOTE: Lithium Polymer (LiPo) baeries
are significantly more volale than alkaline, NiCd
or NiMH baeries also used in RC applicaons. All
instrucons and warnings must be followed exactly
to prevent property damage and/or personal injury
as mishandling of LiPo baeries can result in fire. By
handling, charging or using the included LiPo baery
you assume all risks associated with LiPo baeries. If
you do not agree with these condions please return
the complete product in new, unused condion to the
place of purchase immediately.
• You MUST charge the LiPo baery in a safe area
away from flammable materials.
• NEVER charge the LiPo baery unaended
at any me. When charging the baery you
should ALWAYS remain in constant observaon
to monitor the charging process and react
immediately to any potenal problems that may
occur.
• Aer discharging the baery you must allow it
to cool to ambient/room temperature before
recharging.
• To charge the LiPo baery you MUST use only the
included balance charger or suitable LiPo baery
charger. Failure to do so may result in a fire
causing property damage and/or personal injury.
DO NOT use a NICD or NIMH charger.
• If at any me during the charge or discharge
process the baery begins to balloon or swell,
disconnue charging or discharging immediately.
Quickly and safely disconnect the baery, then
place it in a safe, open area away from flammable
materials to observe for at least 15 minutes.
Connuing to charge or discharge a baery that
has begun to balloon or swell can result in a fire.
A baery that has ballooned or swollen even a
small amount must be removed from service
completely.

7
• Store the baery at room temperature,
approximately 68–77° Fahrenheit (F), and in a dry
area for best results.
• When transporng or temporarily storing the
baery, the temperature range should be from
approximately 40–100°F. Do not store the baery
or model in a hot garage, car or direct sunlight
whenever possible. If stored in a hot garage or car
the baery can be damaged or even catch fire!
• Do not over-discharge the LiPo baery.
Discharging the LiPo baery too low can cause
damage to the baery resulng in reduced power,
flight duraon or failure of the baery enrely.
LiPo cells should not be discharged to below 3.0V
each under load. In the case of the 3-Cell/3S 11.1V
LiPo baery used to power the Black Marlin, you will
not want to allow the baery to fall below 9.0V during
operaon.
The electronic speed control (ESC) has low voltage
cutoff(LVC) protecon. When the baery voltage
drops below a set point the throle is gradually
reduced. At this point the model will need to be
returned to shore and the baery recharged.
Charging the Battery
1. Plug the power supply into charger.
2. Plug the power supply into an AC power outlet.
3. Plug the 4-pin balance connector of the baery
into the charger. Maintain correct polarity
when plugging in 4-pin balance connector.
4. Both red and green LED’s will light during
charge. Only the green LED will remain lit when
charge is complete.

8
Important Charging Notes
PLACE THE CHARGER ON A FLAT, SMOOTH AND
HEATRESISTANT SURFACE.
It’s important that air is able to circulate through the
charger during the charging process in order to keep
it from over-heang. It’s especially important that
the vent openings on the boom and sides of the
charger are not blocked. DO NOT place the charger
on carpeted or other similar surfaces that may block
the vent openings. Also, DO NOT place the charger in
direct sunlight before, during or aer use.
It will take approximately 1 to 11/2hours to fully
charge a mostly discharged baery.
Battery Installation
1. Rotate the hatch lock on the hull cover either
clockwise or counter-clockwise to unlock the
hatch.
2. Remove the hull cover.
3. Place the baery with the hook fastener side
facing down to aach to the loop fastener that
is already adhered to the boom of the boat.
4. Ensure that the wires and plug are facing the
rear of the boat.
Transmitter Operation
Transmier Details
Antenna
Steering Trim
5:5 / 7:3 Switch
dŚƌŽƩůĞZĞǀĞƌƐĞ
^ƚĞĞƌŝŶŐZĞǀĞƌƐĞ
Indicator LED
ŝŶĚƵƩŽŶ
^ƚĞĞƌŝŶŐtŚĞĞů
dŚƌŽƩůĞdƌŝŐŐĞƌ
dŚƌŽƩůĞdƌŝŵ
^ƚĞĞƌŝŶŐZĂƚĞ
Knob
ON/OFF
Switch
On/OffSwitch
Slide the switch UP
for ON and DOWN
for OFF
Baery LED Monitor
Solid Red:
ĂƩĞƌLJŝƐŝŶŐŽŽĚ
ĐŽŶĚŝƟŽŶ;ďŽǀĞϰϯsͿ
Flashing Red:
ĂƩĞƌLJŝƐĂƚůŽǁ
ǀŽůƚĂŐĞ
ZĞƉůĂĐĞďĂƩĞƌŝĞƐ
;ďĞůŽǁϰϯsͿ

9
Servo Reversing Switches
dŚƌŽƩůĞZĞǀĞƌƐĞ^ǁŝƚĐŚ
^ƚĞĞƌŝŶŐZĞǀĞƌƐĞ^ǁŝƚĐŚ
If the direcon of travel on the rudder is backwards,
slide the steering reverse switch to the other posion.
It is same principle for the throle reverse switch.
Steering Rate Knob
Steering Rate
Knob
Rotang the knob clockwise will give you greater
range in rudder movement. Counter-clockwise will
reduce the range of rudder movement. Adjust to suit
your driving style and preferences.
Throle Rao Switch
dŚƌŽƩůĞZĂƟŽ
^ǁŝƚĐŚƐĞƚƚŽϱϱ
To safely operate the Black Marlin BL, the switch
on the top of the transmier has been fixed in the
5:5 posion, so that you should be able to read the
5:5 above the switch locaon. If, for any reason,
the switch is not in this posion, you MUST move it
before operang the boat. It is important to never
move the switch from the posion where you can
read 5:5.
WARNING: The switch on the top of the transmier
should arrive fixed in locaon so that it can never be
moved. It is important to NEVER move this switch
from this locaon or the throle could engage the
propeller when the transmier is turned on and
potenally cause personal harm or injury.
Throle Trim
dŚƌŽƩůĞdƌŝŵ
The throle trim dial is used to adjust the throle
trim when the throle sck is released (neutral
posion). This is typically used to adjust the brakes.
Rotang the dial causes the throle trim (the throle
posion at rest) to be changed.

10
Steering Trim
Steering Trim
The steering trim dial is used to adjust the steering
trim when the wheel is centered.
Rotang the dial changes the steering trim (the
steering at rest posion). Normally, the steering trim
is adjusted unl the vehicle tracks straight.
Receiver Connecon and Binding
Binding is the process of programming the receiver to
recognize the GUID (Globally Unique Idenfier) code
of a single specific transmier. When a receiver is
bound to a transmier, the receiver will only respond
to that specific transmier. If you need to rebind for
any reason, please follow these steps:
1. With the transmier switched OFF Insert the
bind cable to bind channel slot.
&Ăŝů^ĂĨĞƵƩŽŶ
ŝŶĚĂďůĞ
ŶƚĞŶŶĂ
2. Power on the receiver, then turn on the
transmier with pressing on the bind buon
within 5 seconds.
BIND BUTTON
3. Release the bind buon and wait for about 5
seconds.
4. Aer the receiver LED stops flashing binding is
complete.
5. Unplug the bind cable and then you are ready
to run.
CAUTION: DO NOT leave the bind cable in the bind
channel plug aer binding finished, otherwise the
binding program will work automacally each me
when you power on the receiver.
Failsafe Seng
The Black Marlin comes with the receiver failsafe set
to NONE. In the event of loss of signal the motor will
stop and the vehicle will dri. If the signal is regained
normal funcon will return. If you wish to program
the failsafe to a custom seng just follow these
simple steps:
1. With both the transmier and receiver
powered ON, press the bind buon on the
receiver for about 3 seconds.
2. The receiver will enter failsafe seng menu and
the receiver LED will flash.
3. You have about 3 seconds to move the controls
to the posion that you wish to program into
failsafe.
4. Aer the 3 seconds the receiver will save the
sengs and return to normal mode.
5. If you wish to reset to a different seng, simply
repeat above steps.

11
How to Operate Your Vehicle
• Throle
Forward
Reverse
Your boat is equipped with a brushless speed control
with a reverse funcon. Pushing the throle trigger
forward will make the motor run in reverse and back
the vehicle up.
Pull the trigger towards you to make the vehicle go
forward.
The proporonal speed control means the farther you
pull it the faster the vehicle will go.
Release the trigger to stop. Adjust the trim if the
motor does not stop when the trigger is released.
CAUTION: When using reverse only use a low power
seng to prevent swamping the boat.
• Steering
Right>ĞŌ
Rotate the steering wheel clockwise while holding the
trigger to turn right.
Rotate the steering wheel counter-clockwise while
holding the trigger to turn le.
If the steering is not ght enough, increase the travel
volume as described in the following secon.
Changing the Travel Adjust Sengs
The travel funcon supports precise endpoint
adjustments in each direcon for the steering and
throle channels.
1. Hold the trigger in the full brake posion while
powering on the transmier. The LED flashes
rapidly, indicang the programming mode is
acve.
2. Throle End Point: Hold the trigger in the full
throle posion. Turn the TH TRIM to adjust
the full throle end point.
3. Brake End Point: Hold the trigger in the full
brake posion. Turn the TH TRIM to adjust the
full brake end point. Return the trigger to the
center posion.
4. LeSteering End Point: Hold the steering wheel
in the full leposion. Turn the ST TRIM to
adjust the leend point.
5. Right Steering End Point: Hold the steering
wheel in the full right posion. Turn the ST
TRIM to adjust the right end point. Return the
steering wheel to the center posion.
6. Power offthe transmier to save the travel
adjust sengs. The minimum Travel is 75%, and
the Maximum travel is 150%. The default travel
sengs are 125% steering and 100% throle.
Cauon: The user is cauoned that changes or
modificaons not expressly approved by the party
responsible for compliance could void the user’s
authority to operate the equipment.
NOTE: This equipment has been tested and found
to comply with the limits for a Class B digital device,
pursuant to Part 15 of the FCC Rules. These limits are
designed to provide reasonable protecon against
harmful interference in a residenal installaon. This
equipment generates, uses and can radiate radio
frequency energy and, if not installed and used in
accordance with the instrucons, may cause harmful
interference to radio communicaons. However, there
is no guarantee that interference will not occur in
every situaon.
If this equipment does cause harmful interference
to radio or television recepon, which can be
determined by turning the equipment offand on, the
user is encouraged to try to correct the interference
by one or more of the following measures:
• Reorient or relocate the receiving antenna.
• Increase the separaon between the equipment
and receiver.

12
• Connect the equipment into an outlet on a
circuit different from that to which the receiver is
connected.
• Consult the dealer or an experienced radio/TV
technician for help.
Checking the Radio System
and Getting Started
1. Power on the transmier by turning on the
switch on the letop end.
2. Connect a fully charged baery by plugging it
into the ESC inside the hull.
3. Before placing the boat in the water, test the
operaon of the motor using the trigger on the
transmier. Also check the switch on the top
of the transmier to make sure it is set to the
5:5 posion, allowing full forward and reverse
operaon of the motor.
4. Before operang your model, make sure the
rudder moves to center posion once the
baery is plugged into the ESC. If not, you will
need to adjust the steering trim located on the
transmier to the above leof the wheel. See
the transmier instrucons for direcons.
5. Once the rudder is centered, make sure it
moves in the corresponding direcon when you
steering wheel is moved to the right or the le.
6. Once you carefully place the boat in the water,
begin driving slowly as you become familiar
with the operaon. Stay near the shoreline at
first if you are driving your boat in a pond or
lake. Note that steering the boat right or le
is completed by turning the steering wheel on
the transmier in the same direcon you want
the boat to turn. Begin with small movements
of the wheel for wider turns and progress to
sharper turns as your skills increase.
7. Make sure you avoid objects in the water at all
mes while operang the boat.
8. To avoid LVC (Low Voltage Cutoff) drive the boat
back to shore or the edge of the pool when it
begins to lose speed.
9. Power offthe disconnecng the baery pack
and then turn offthe transmier.
10. Allow the motor, ESC, and baery packs to cool
before charging or operang the boat again.
TIP: If it requires a lot of steering trim on the
transmier to have the boat drive straight, return the
steering trim to neutral and mechanically center the
rudder. To do this, loosen the setscrew at the rudder
and center the rudder. Re-ghten the setscrew to
secure the rudder pushrod.
NOTICE: Always power on the transmier before
plugging in the ESC. Make sure the transmier is
NOT turned offfirst or the receiver may pick up stray
signals from other devices and run out of control.
Never transport the boat with the baery connected
to the ESC.
CAUTION: Always keep all body parts, hair, and loose
items away from a spinning propeller as items can
become easily entangled.
Forward
Right
Le

13
Boating Tips
Avoid boang near other watercra, staonary
objects, waves, wakes and other rapidly moving
water. Also make sure to avoid operang the boat
near wildlife, floang debris, or overhanging trees
that come near the surface of the water. You should
also be cauous to avoid boang in areas where
there are people swimming or in park waterways and
fishing areas. Before using on a pond or lake consult
local laws and ordinances before choosing a locaon
to run your boat.
You should only drive at maximum speeds when the
water condions are smooth and there is minimal
wind.
When running your boat for the first me, it is
recommended that you look for calm wind and
water condions so that you can learn how the boat
responds to your control.
When making turns, it is suggested that you decrease
the throle slightly to avoid flipping the boat over.
Never operate your boat in less than 3 inches (8cm) of
water.
Motor Care
• You can prolong motor life by prevenng
condions that overheat the motor. Driving with
frequent starts, stops, turns or pushing items in
the water can overheat the motor. Other driving
condions like connually running at high speed
or through rough water or water vegetaon will
also cause excessive heat and damage the motor.
Make sure you avoid these situaons whenever
possible.
• Though the ESC is equipped with overheat
protecon, it does not protect the motor from
overheang due to extra resistance from the
driving condions menoned above.
When Finished Running
• First, power offthe ESC by disconnecng the
baery.
• Next, turn the transmier off.
• Then, remove the baery from the boat.
TIP: Always store the boat open – with the hatch
removed, so that the inside of the boat is allowed
to completely dry. Excessive moisture allowed to
remain in the hull can all mold or mildew to grow and
damage the components.
NOTICE: When running at full speed in choppy waters, the prop my exit and re-enter the water
quickly and repeatedly. This will subject the propeller to some stress which may eventually cause
damage to the point it will need to be replaced.
CAUTION: Do not operate this product in vinyl covered or inflatable pools. Sharp components may
cause damage to these materials.
CAUTION: Never retrieve your boat from the water in extreme temperatures, turbulence or
without supervision.

14
Boat Maintenance
Always replace the shawhen it is damaged or shows
visible wear. Running the boat with a damaged sha
will not only damage the boat and void the warranty,
but could also cause personal injury or property
damage.
Lubricang the sharegularly is vital to the life of
the drivetrain. The lubricant also acts as a water seal,
keeping water from entering the hull through the
stuffing box. Make sure this is done aer every 2 to
3 hours of operaon. Always replace any parts that
show excessive wear or damage.
Lubricang or Replacing the Drive Sha
1. To remove the sha, first loosen the coupling
between the motor and the sha.
2. Then, loosen the setscrew from the shaand
remove the shafrom the back of the boat.
Tip: Use paper or cloth to hold the shawhen it
is being removed. Set Screw
Coupling
Prop sha
Marine Grease
Prop sha
Noce: Running the boat in salt water could cause some parts to corrode. If you run the boat
in salt water, make sure it is rinsed thoroughly in fresh water aer each use and lubricate the
drive system. Because of the corrosive effects, running the boat in salt water is at the discre-
on of the owner and will void the boat’s warranty.
3. Remove the drive shaby sliding it out of the
stuffing box. Wipe excessive lubricant and other
materials from the sha.
4. Lubricate the full length of the shaassembly
up to the drive dog using marine grease.
5. Apply thread lock to the coupling setscrew.
Thread lock will help prevent the shafrom
loosening during use.
6. Carefully install or reinstall the drive sha,
ensuring that there is a 1 to 2 mm gap between
the prop strut and the drive dog to allow for
shashrinkage under load.

15
Problem Possible Cause Solution
Boat will not respond
to throttle but responds
to other controls
Throttle servo travel is lower than 100% Make sure throttle servo travel is 100% or greater
Throttle channel is reversed Reverse throttle channel on transmitter
Extra noise or extra
vibration
Damaged propeller, shaft or motor Replace damaged parts
Propeller is out of balance Balance or replace propeller
Reduced runtime or
boat underpowered
Boat battery charge is low Completely recharge battery
Boat battery is damaged Replace boat battery and follow
battery instructions
Blocking or friction on shaft or propeller Disassemble, lubricate and correctly align parts
Boat conditions may be too cold Make sure battery is warm before use
Battery capacity may be too low
for conditions
Replace battery or use a larger capacity battery
Drive dog is too close Loosen coupling at flex shaft and move out flex
shaft a small amount
Too little lubrication on flex shaft Fully lubricate flex shaft
Vegetation or other obstacles block
the rudder or propeller
Remove boat from the water and obstacles
Boat will not Bind
(during binding) to
transmitter
Transmitter is too near boat during bind-
ing process
Move powered transmitter a few feet from boat,
disconnect and reconnect battery to boat
Boat or transmitter is too close to large
metal object
Move boat or transmitter away from large metal
object
Bind plug is not installed correctly Install bind plug and bind boat to transmitter
Boat battery/Transmitter battery charge
is too low
Replace/recharge batteries
ESC switch is off Power on ESC switch
Boat will not link (after
binding) to transmitter
Transmitter is too near boat during link-
ing process
Move powered transmitter a few feet from boat,
disconnect and reconnect battery to boat
Boat or transmitter is too close to large
metal object
Move boat or transmitter away from large metal
object
Bind plug is left installed Rebind transmitter to boat and remove bind plug
before cycling power
Boat battery/transmitter battery charge
is too low
Replace/recharge batteries
Transmitter may have been bound to a
different model (using different DSM
Protocol)
Bind boat to transmitter
ESC switch is off Power on ESC switch
Boat tends to dive in
the water or takes on
water
The boat hull is not completely closed Dry out the boat and ensure the hatch is fully
closed on the hull before returning the boat
to the water
Center of gravity is too far forward Move batteries back in the hull
Trim tabs are angled incorrectly on
the back of the boat
Angle each trim tab up a small amount to lift the
bow or down a small amount to lower the bow
Boat tends to turn one
direction
Rudder or rudder trim is not centered Repair rudder or adjust rudder and rudder trim
for straight running when control is at neutral
Vertical fins of trim tabs are angled
incorrectly
Angle the fins a small amount right or left so
that the boat goes straight when the rudder
is at neutral

16
Rudder does not move Rudder, linkage or servo damage Replace or repair damaged parts and adjust con-
trols
Wire is damaged or connections are
loose
Do a check of wires and connections, connect
or replace as needed
Transmitter is not bound correctly or
the incorrect model was selected
Re-bind or select correct model in transmitter
BEC (Battery Elimination Circuit) of the
ESC is damaged
Replace ESC
ESC switch is off Power on ESC switch
Controls reversed Transmitter settings are reversed Do the Control Direction Test and adjust controls
on transmitter appropriately
Motor or ESC overheats Blocked water cooler tubes Clean or replace water tubes
Motor power pulses
then motor loses power
ESC uses default soft Low Voltage Cut-
off (LVC)
Recharge boat battery or replace battery that is
no longer performing
Weather conditions might be too cold Postpone until weather is warmer
Battery is old, worn out or damaged Replace battery
Battery C rating might be too small Use recommended battery
Replacement Parts List
Part Number Part Descripon
RGRB1205 Black Marlin Brushless RTR Boat
RGRB1230 Painted/Decorated hull
RGRB1231 2212/3500KV Brushless Motor
RGRB1232 Water-Cooling Motor Mount
RGRB1233 Brushless Motor Coupler
RGRB1234 20A Brushless ESC (Water-Cooled)
RGRB1235 11.1V 3S 1800mAh LiPo Baery w/ T-Plug
RGRB1236 2.4Ghz 2 Ch. Receiver
RGRB1237 2.4Ghz 2 Ch. Transmier
RGRB1238 DC Balance Charger
RGRB1239 AC Power Supply for RGRB1238
RGRB1212 Canopy Latch
RGRB1213 Rudder Pushrod Set
RGRB1214 Rudder Assembly
RGRB1215 Prop Strut Set
RGRB1216 Equipment Mount Set
RGRB1217 Drive ShaGuide
RGRB1218 Propeller w/Drive Sha
RGRB1219 Propellers (3)
RGRB1224 Rudder Servo

17
Limited Warranty
Warranty Period: Rage R/C warrants that the Black Marlin (“Product”) will be free from original factory defects
in materials and workmanship upon purchase (“Warranty Period”).
What is Not Covered - This warranty is not transferable and does not cover (a) cosmec damage, (b) damage
due to acts of God, accident, misuse, abuse, negligence, commercial use, or due to improper use, installaon,
operaon or maintenance, (c) modificaon to any part of the Product, (d) aempted service by anyone other
than a Rage R/C authorized service center, or (e) Product not purchased from an authorized Rage R/C dealer.
OTHER THAN THE EXPRESS WARRANTY ABOVE, RAGE R/C MAKES NO OTHER WARRANTY OR REPRESENTATION,
AND THEREFORE DISCLAIMS ANY AND ALL IMPLIED WARRANTIES, INCLUDING, WITHOUT LIMITATION, THE
IMPLIED WARRANTIES OF NON-INFRINGEMENT, MERCHANTABILITY AND SUITABILITY FOR A PARTICULAR
PURPOSE. THE PURCHASER ACKNOWLEDGES THAT THEY ALONE HAVE DETERMINED THAT THE PRODUCT WILL
MEET THE REQUIREMENTS OF THEIR INTENDED USE.
Purchaser’s Remedy - Rage R/C’s sole obligaon and purchaser’s sole and exclusive remedy shall be that
Rage R/C will, at its opon, either (a) service, or (b) replace, any Product determined by Rage R/C to be
defecve. Rage R/C reserves the right to inspect any and all Product(s) involved in a warranty claim. Service
or replacement decisions are at the sole discreon of Rage R/C. Proof of purchase is required for all warranty
claims.
SERVICE OR REPLACEMENT AS PROVIDED UNDER THIS WARRANTY IS THE PURCHASER’S SOLE AND EXCLUSIVE
REMEDY.
Limitaon of Liability - RAGE R/C SHALL NOT BE LIABLE FOR SPECIAL, INDIRECT, INCIDENTAL OR
CONSEQUENTIAL DAMAGES, LOSS OF PROFITS OR PRODUCTION OR COMMERCIAL LOSS IN ANY WAY,
REGARDLESS OF WHETHER SUCH CLAIM IS BASED IN CONTRACT, WARRANTY, TORT, NEGLIGENCE, STRICT
LIABILITY OR ANY OTHER THEORY OF LIABILITY, EVEN IF RAGE R/C HAS BEEN ADVISED OF THE POSSIBILITY OF
SUCH DAMAGES.
Further, in no event shall the liability of Rage R/C exceed the individual price of the Product on which liability
is asserted. As Rage R/C has no control over use, setup, final assembly, modificaon or misuse, no liability shall
be assumed nor accepted for any resulng damage or injury. By the act of use, setup or assembly, the user
accepts all resulng liability. If you as the purchaser or user are not prepared to accept the liability associated
with the use of the Product, purchaser is advised to return the Product immediately in new and unused
condion to the place of purchase.
Law - These terms are governed by Utah law (without regard to conflict of law principals). This warranty gives
you specific legal rights, and you may also have other rights which vary from state to state. Rage R/C reserves
the right to change or modify this warranty at any me without noce.
Rage R/C, an exclusive brand of:
HRP Distribung, Inc.
2034 South 3850 West
Salt Lake City, Utah 84104
© HRP Distribung, Inc.
Printed in China

18
Operating and Maintenance Notes:

19
Operating and Maintenance Notes:

HRP Distribung, Inc
v1.0
02/2017
001CHS
Table of contents
Other Rage Boat manuals