Rail King SANTA FE STEEL RAIL FREIGHT HAULER 2-6-0 User manual

RK
AIL ING
By MT H ElectricTrains
®
RAILKING 2-6-0 STEAM ENGINE
OPERATING INSTRUCTIONS
Making the Most of Your Investment
Thank you for purchasing this RailKing Ready-to-Run Steam Engine Set.
We at MTH Electric Trains take pride in manufacturing quality products
like your set, and we hope that you will enjoy it for a long time. To
ensure the maximum durability and pleasure from locomotive, rolling
stock, track and transformer, please read all the way through the Quick
Start Basic Operating Instructions you will find on pages [ ].
Remember that a little attention to routine maintenance yields a
maximum of trouble-free performance.
RAILKING

2
RailKing 2-6-0 Operating Manual
RAILKING
Table Of Contents
QUICK START - BASIC OPERATION(All 3-Rail Models)
3
PROTOSMOKE UNIT OPERATION
4
PROTOSOUNDS®
OPERATING INSTRUCTIONS
5
ProtoSound® DCRU® Reverse Unit Operation (All 3-Rail Models) 5
Whistle Operation 6
Bell Operation 6
ProtoCoupler Operation 7
Enhanced Neutral Steam Sounds 8
Squeaking Brake Sounds 8
Tips On Using The Squeaking Brake Sounds 9
Freight Yard Sounds (FYS) 10
Activating and Triggering Freight Yard Sounds 10
Tips On Using FYS Features 15
Self-Recharging Battery Backup System 16
Replacing The ProtoSound® Battery 16
ProtoSound® Volume Adjustment 17
USING RESET" TO PROGRAM PROTOSOUNDS
18
Entering RESET Options 18
Setting The Engine Volume 19
Programming For A Separate Bell Button Controller 20
Programming For Squeaking Brake Operation 20
Programming For Whistle In Neutral Operation 21
Programming For ProtoCoupler Operation 22
Programming For FYS Operation 23
Activating Remote Lockout Control 23
ResettingAll ProtoSound® Options To Factory Default 24
REVERSE UNIT LOCK-OUT OPERATION
25
Locking The Engine Into Forward or Reverse 25
Unlocking The Engine 25
Locking The Engine Into Neutral 25
OIL & LUBRICATION INSTRUCTIONS
27
TRACTION TIRE REPLACEMENT INSTRUCTIONS
28
LIGHT BULB REMOVAL & REPLACEMENT
29
TROUBLE SHOOTING
PROTOSOUND®
PROBLEMS
30
ProtoSound® RESET Feature Chart 33
Transformer Wiring Chart 34
SERVICE AND WARRANTY INFORMATION
35
HOW TO GET SERVICE
35
LIMITED ONE YEAR WARRANTY
35

3
RailKing 2-6-0 Operating Manual
RAILKING
Compatibility
Our designers have sized the engine and tender to operate on any
traditional 0-27 or larger O Gauge track system, including RiteTrax
using any standard AC transformer including the Z-500 transformer
packaged in your set. (See page [ ] for a complete list of compatible
transformers as well as wiring instructions.) All RailKing products are
compatible with most other 3-rail locomotives, rolling stock, and
accessories.
Equipment Options
Your ready-to-run set features a 2-6-0 locomotive equipped with an
operating headlight, electronic whistle, electronic reverse unit and
ProtoSmoke® smoke system. All are simple and fun to operate. In
addition to the locomotive, your set should also include a circle of
RiteTrax® track (8 curved sections), a RiteTrax® lighted lock-on and
wire harness set (for connecting the track to the transformer) and a 50-
watt Z-500 transformer and controller.
You’ll find complete instructions for choosing and setting up options in
the following pages. If you don’t read through the entire manual before
starting to operate your equipment, be sure to check the Quick Start
Basic Operating Instructions, which will give you the basics of the
operating system.

4
RailKing 2-6-0 Operating Manual
RAILKING
Quick Start Operating Instructions
Track and Power
Although MTH Electric Trains manufactures its own track and
transformers, you can run your locomotive on 0-27 or wider-radius O
gauge track wired to draw power from any of the standard compatible
AC transformers listed in the chart on page [ ]. Be sure your track is in
good condition—clean and securely connected—to keep the locomotive
running and to prevent derailments. If you intend to utilize the
RiteTrax® track sections included in the set, see the directions below.
Setting Up the RiteTrax® Oval
Unlike other O Gauge track systems, each RiteTrax® track section
features a realistic built-in roadbed base, solid nickel-silver track rails and
realistic railroad ties all designed to give the owner an authentic looking
track system. In addition, each RiteTrax® track section employs the use
of quick-connect connectors instead of track pins or railjoiners to
assemble the track sections to one another. The quick connectors and
built-in base allow RiteTrax® track sections to be setup anywhere,
including a carpeted surface without the need for track nails or the
worry of carpet stains.
The lighted lockon included in your set snaps into any RiteTrax® track
section roadbed and functions as the interface between the track and
the transformer. Each RiteTrax® track section includes a “knock-out” in
the roadbed that must be removed to reveal the opening for the lighted
lockon. To remove this knock-out grab the knock-out with a pair of
pliers and gently twist the knock-out until it snaps away from the
-750
DIRECTION
BELL
HORN
WHISTLE
POWER
RK
AIL ING
By MT H ElectricT rains
®
T R A NS FOR M E R CONT ROL L E R
OFF
FU LL
POWER
Also functions as a binding post.

5
RailKing 2-6-0 Operating Manual
RAILKING
roadbed base. Once the knock-out has been removed, snap the lighted
lockon into the roadbed taking care to make sure that the lockon arms
snap into the roadbed electrical receptors. To complete the connection
between the RiteTrax® track section and the transformer, simply plug in
the color-coded wire harness that was included in your set.
Preparing the Locomotive
Before you fun your locomotive, you must• oil the locomotive and
tender chassis and• prime the smoke element.
Oiling the locomotive and Tender
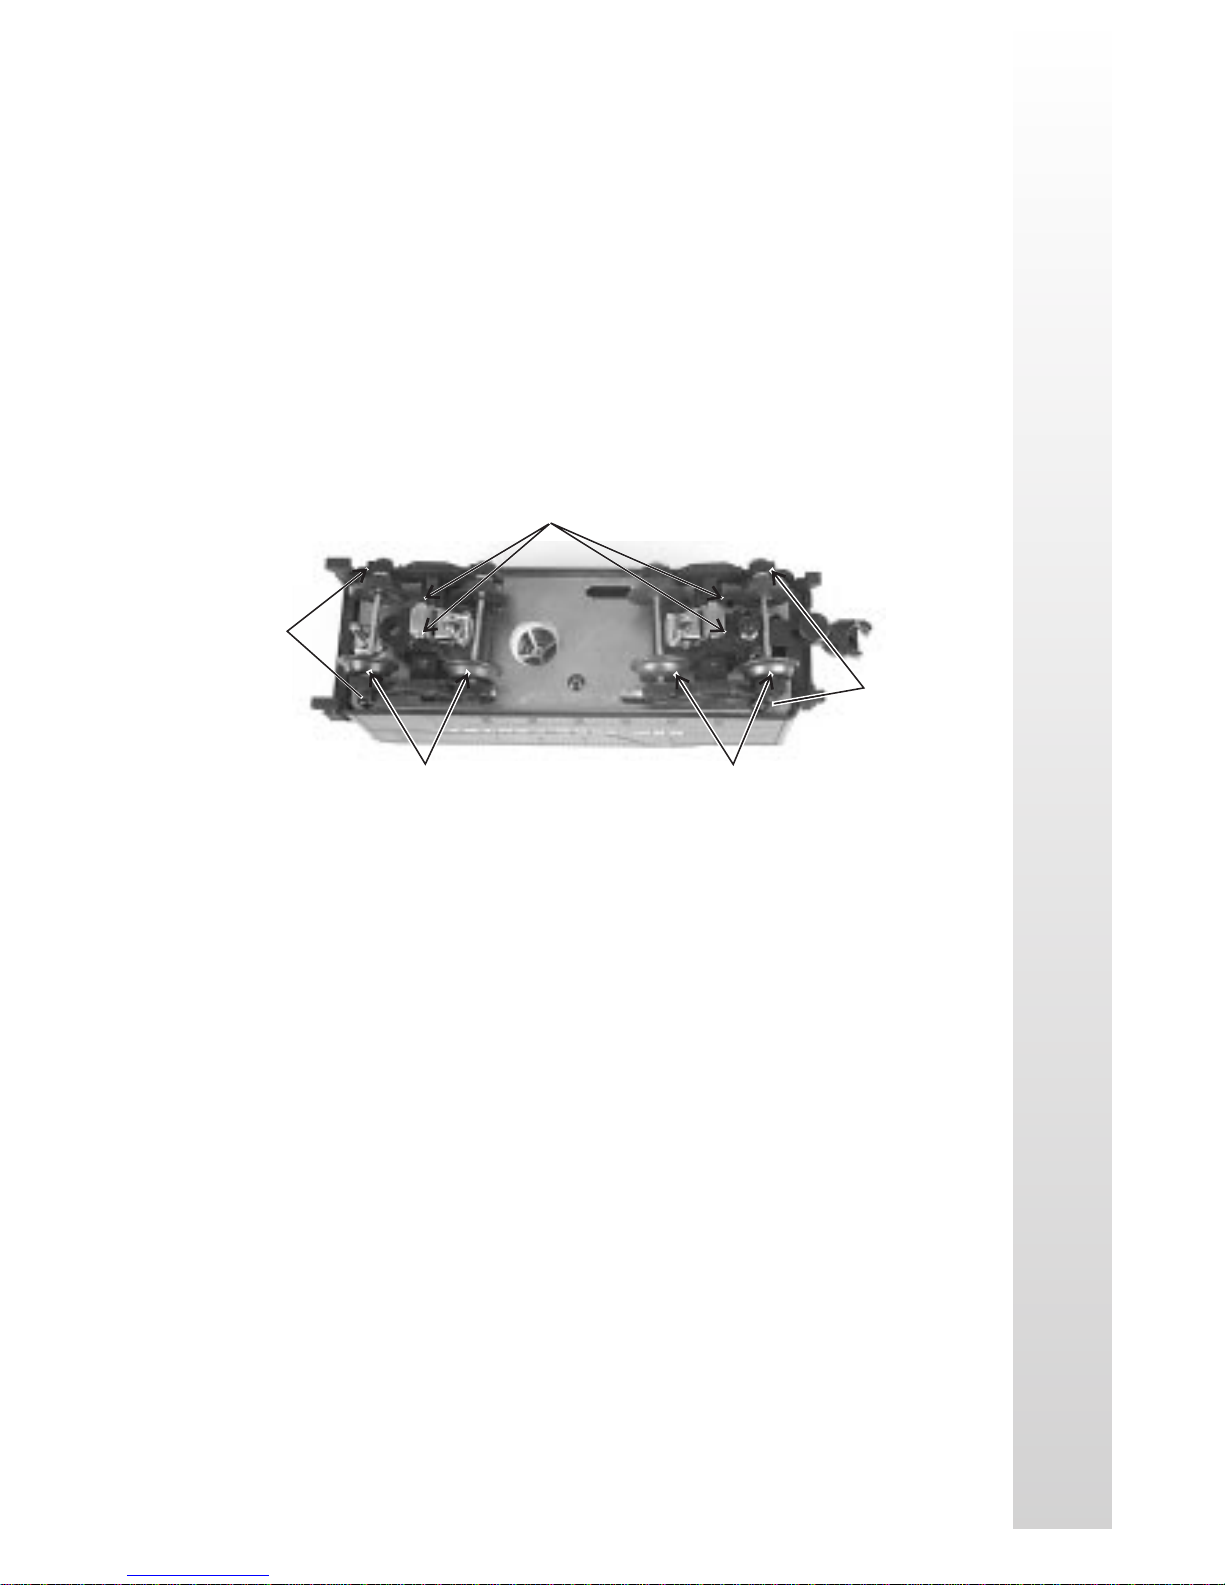
Before you run the locomotive and tender, use a light household or
hobby oil to lubricate side rods, linkage components, and pick up
rollers. Apply a small drop of oil (a pinpoint oiler will help place the
right amount of oil where you need it) to each of the points indicated
by an “L” in the diagrams in figures [ ] and [ ]. You may also what to
use either a locomotive repair cradle or an old towel folded over to
provide a protective bed for the locomotive shell while you’re working
on it.
Because the locomotives’s internal gearing has been greased at the
factory, you shouldn’t need to add more grease until you have run the
locomotive for 50 hours or owned it for a year, whichever comes first.
See the section on lubrication, pages(s) [ ], for detail.
Priming the Smoke Element
All locomotive models are equipped with an operating smoke system
that must be primed with smoke fluid before operating to prevent
damage to the smoke element. Adding 20 to 25 drops of smoke fluid
through the smoke stack should be sufficient.
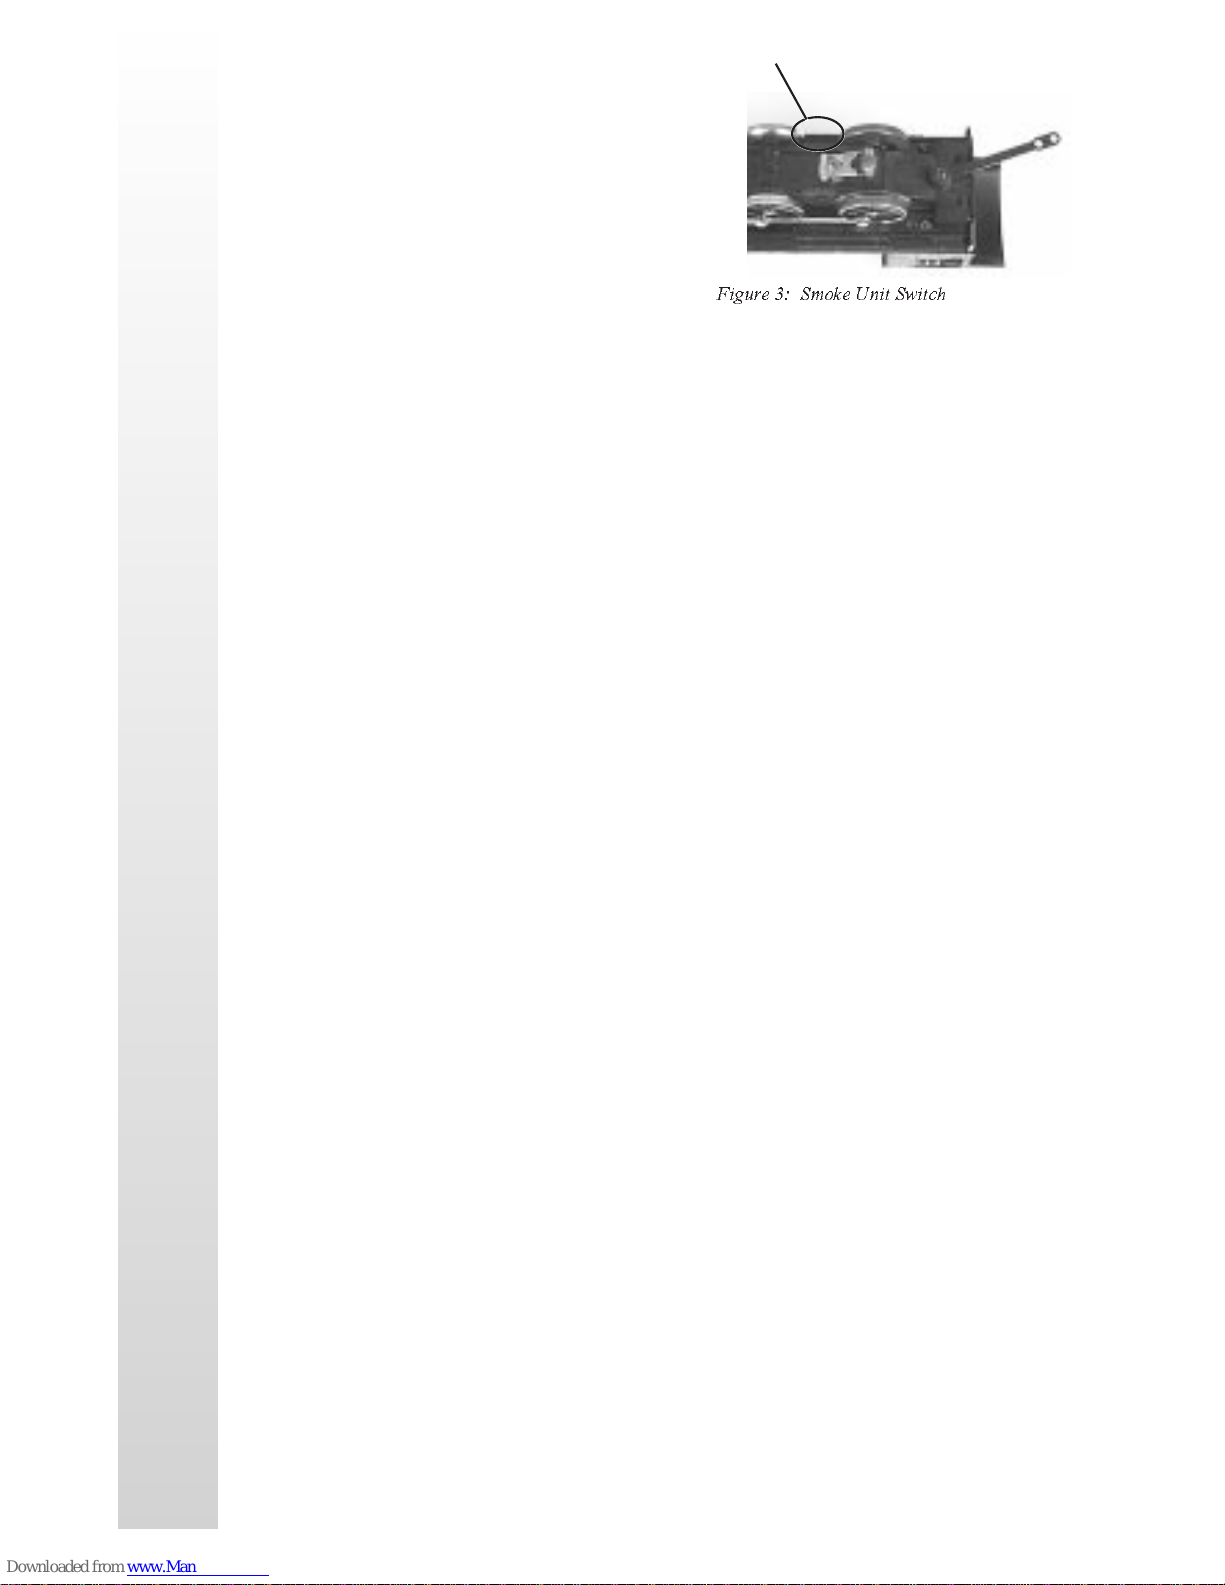
If you don’t want to use the smoke, system, or if you don’t have
smoke fluid on hand, but want to run your locomotive, turn the
smoke unit switch to the OFF position. You will find the smoke unit
switch under the trailing truck. (See figure [3] on page [4].) Turning the
smoke unit switch to OFF will prevent damage to the un-primed smoke
Other manuals for SANTA FE STEEL RAIL FREIGHT HAULER 2-6-0
3
Table of contents
Other Rail King Engine manuals