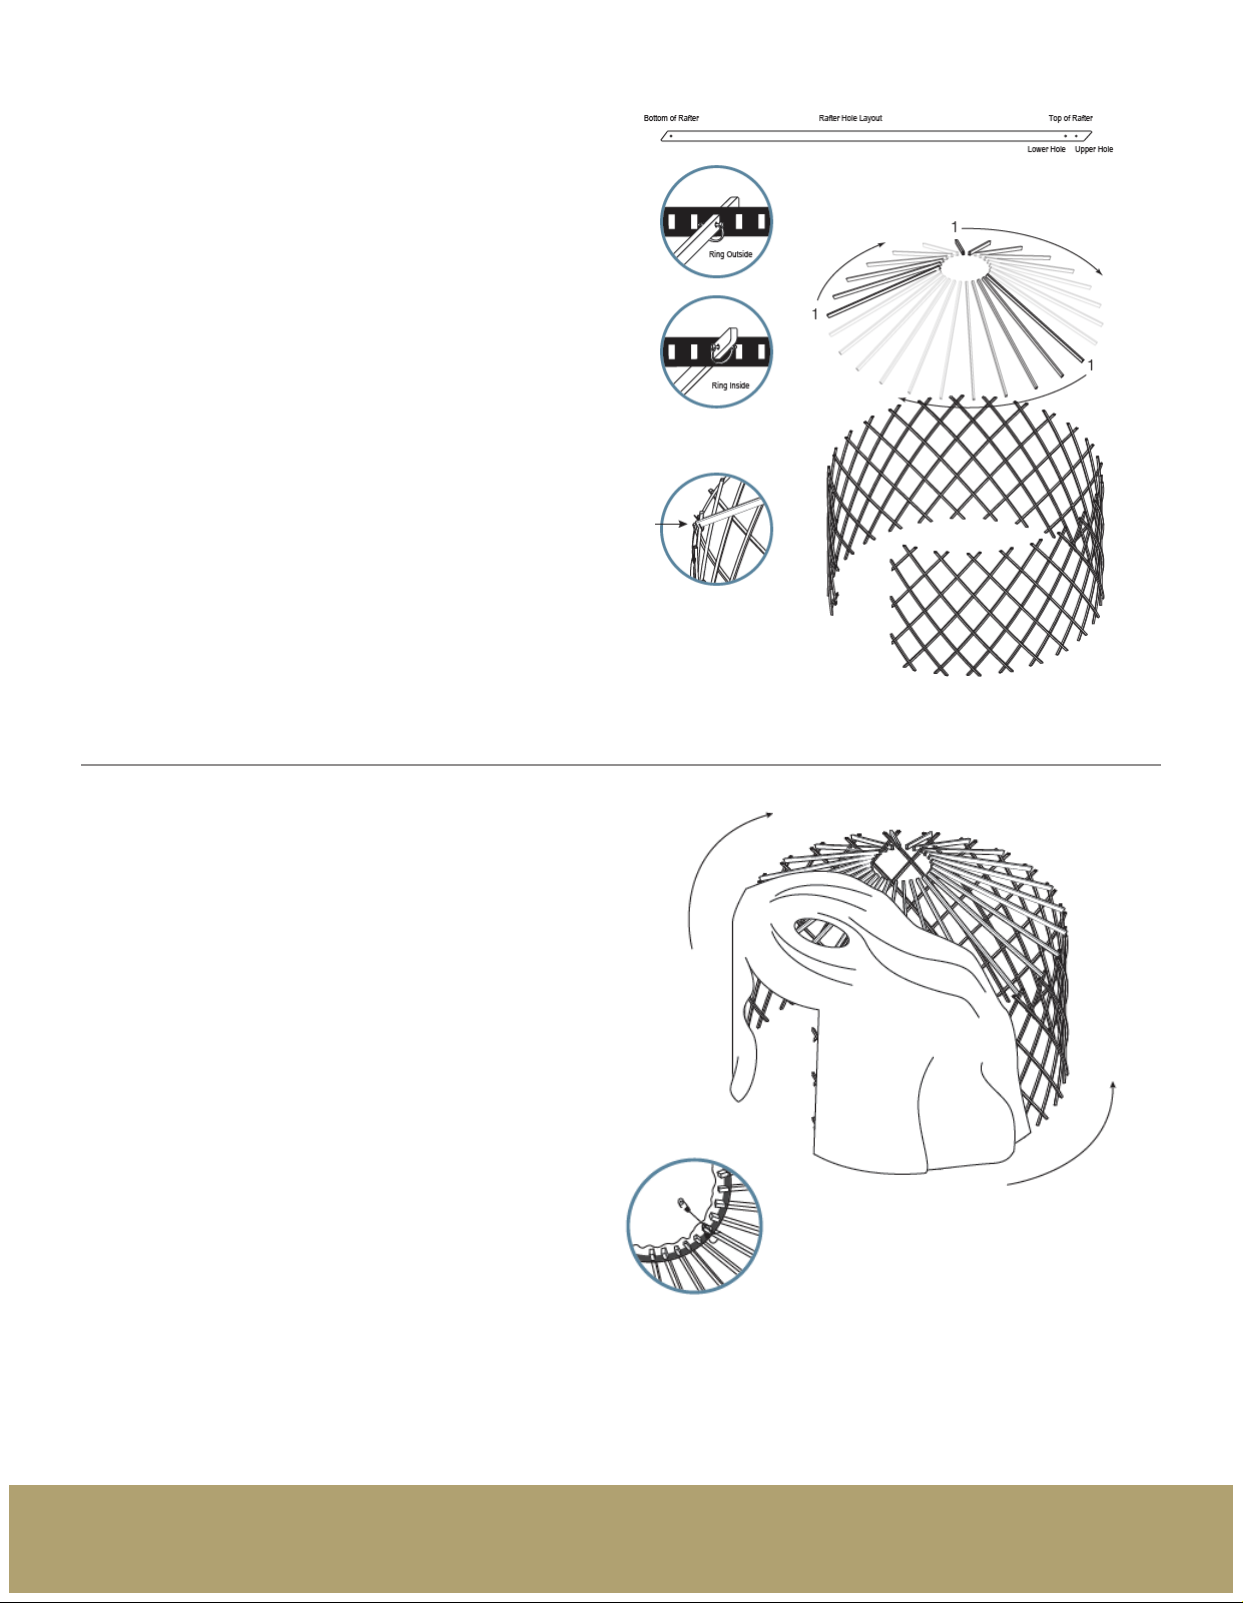
Attaching the Rafters
1. Using the provided cleaves pins, insert one (1) pin
into each rafter in the lower hole.
Select three (3) rafters, and insert each about one-
third of the way around the ring. Secure these rafters
with your remaining pins by inserting the pin into the
upper hole, locking rafters in position.
2. One person will now lift the ring into position, while
a second person will secure the rafters into position
with larger black zip ties. Each zip tie will go through
the bottom hole on the rafter, over the tension band,
and then under the “X” on the lattice.
3. The rst three rafters need to have the same
number of open spaces between at the top as V-joint
spacing at the bottom (i.e. if you have 26 rafters, you
will have 26 V-joints at the top of your lattice).
4. Add remaining rafters to the side of each of the
rst rafters and work your way around the yurt,
adding one rafter at a time per section, slowly lling
each section simultaneously.
Covering the Yurt
1. Drape cover over one half of the yurt. The cover is
currently folded in half, like a taco.
2. Unzip the yurt door, and carefully unfurl the cover
over the top of the yurt. Using a long handle or pole
to push the fabric from underneath can be helpful.
Be careful not to tug too hard on the fabric, it
should slide over the frame easily. Once the fabric
is covering the yurt, align the fabric door and door
frame by rotating the fabric with short, quick tugs.
3. Lift the dome into place from the outside of the
yurt and secure it with the supplied bungee cords.
One hook will secure to the attached anchor on the
dome, the other will loop under the ring. You can
adjust the length of the bungees by pushing the cord
through the hook and tying a new knot.
RainierOutdoor.com | 800.869.7162 Rev. 10/21


