INTRODUCTION/WELCOME
WELCOME FROM CHRYSLER GROUP LLC . 2
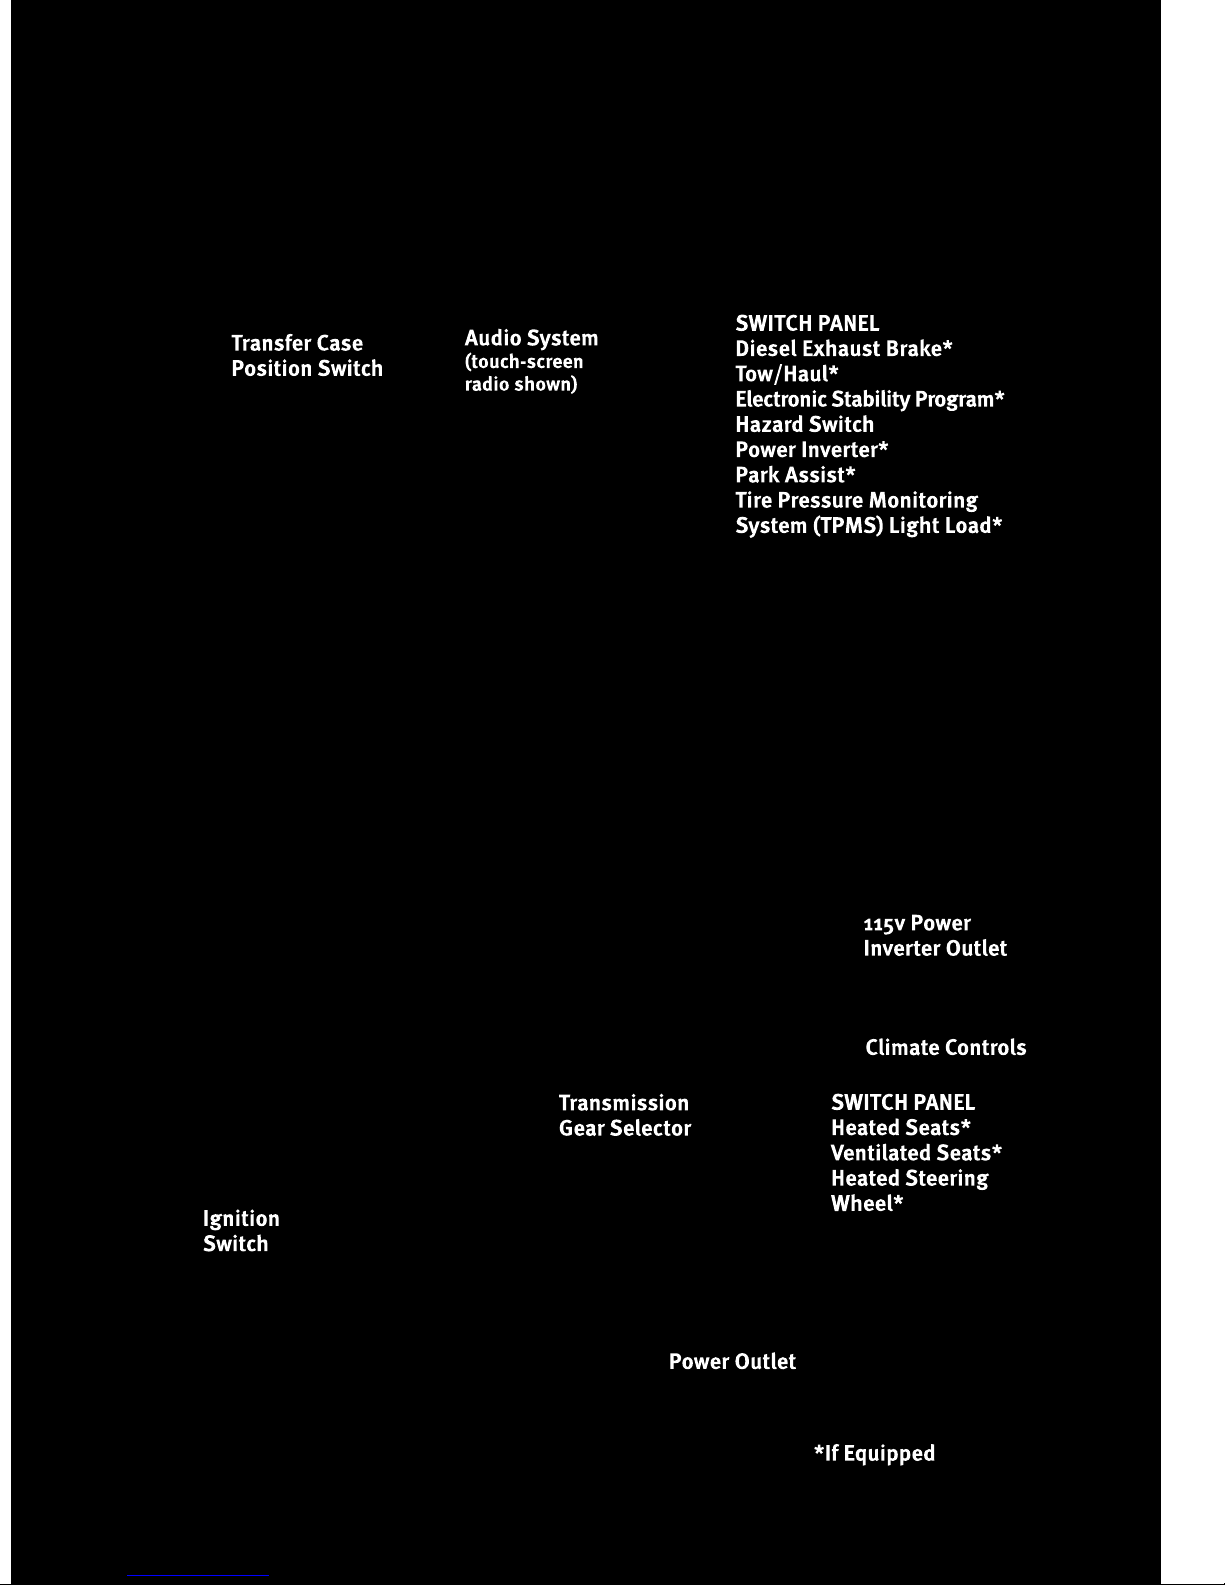
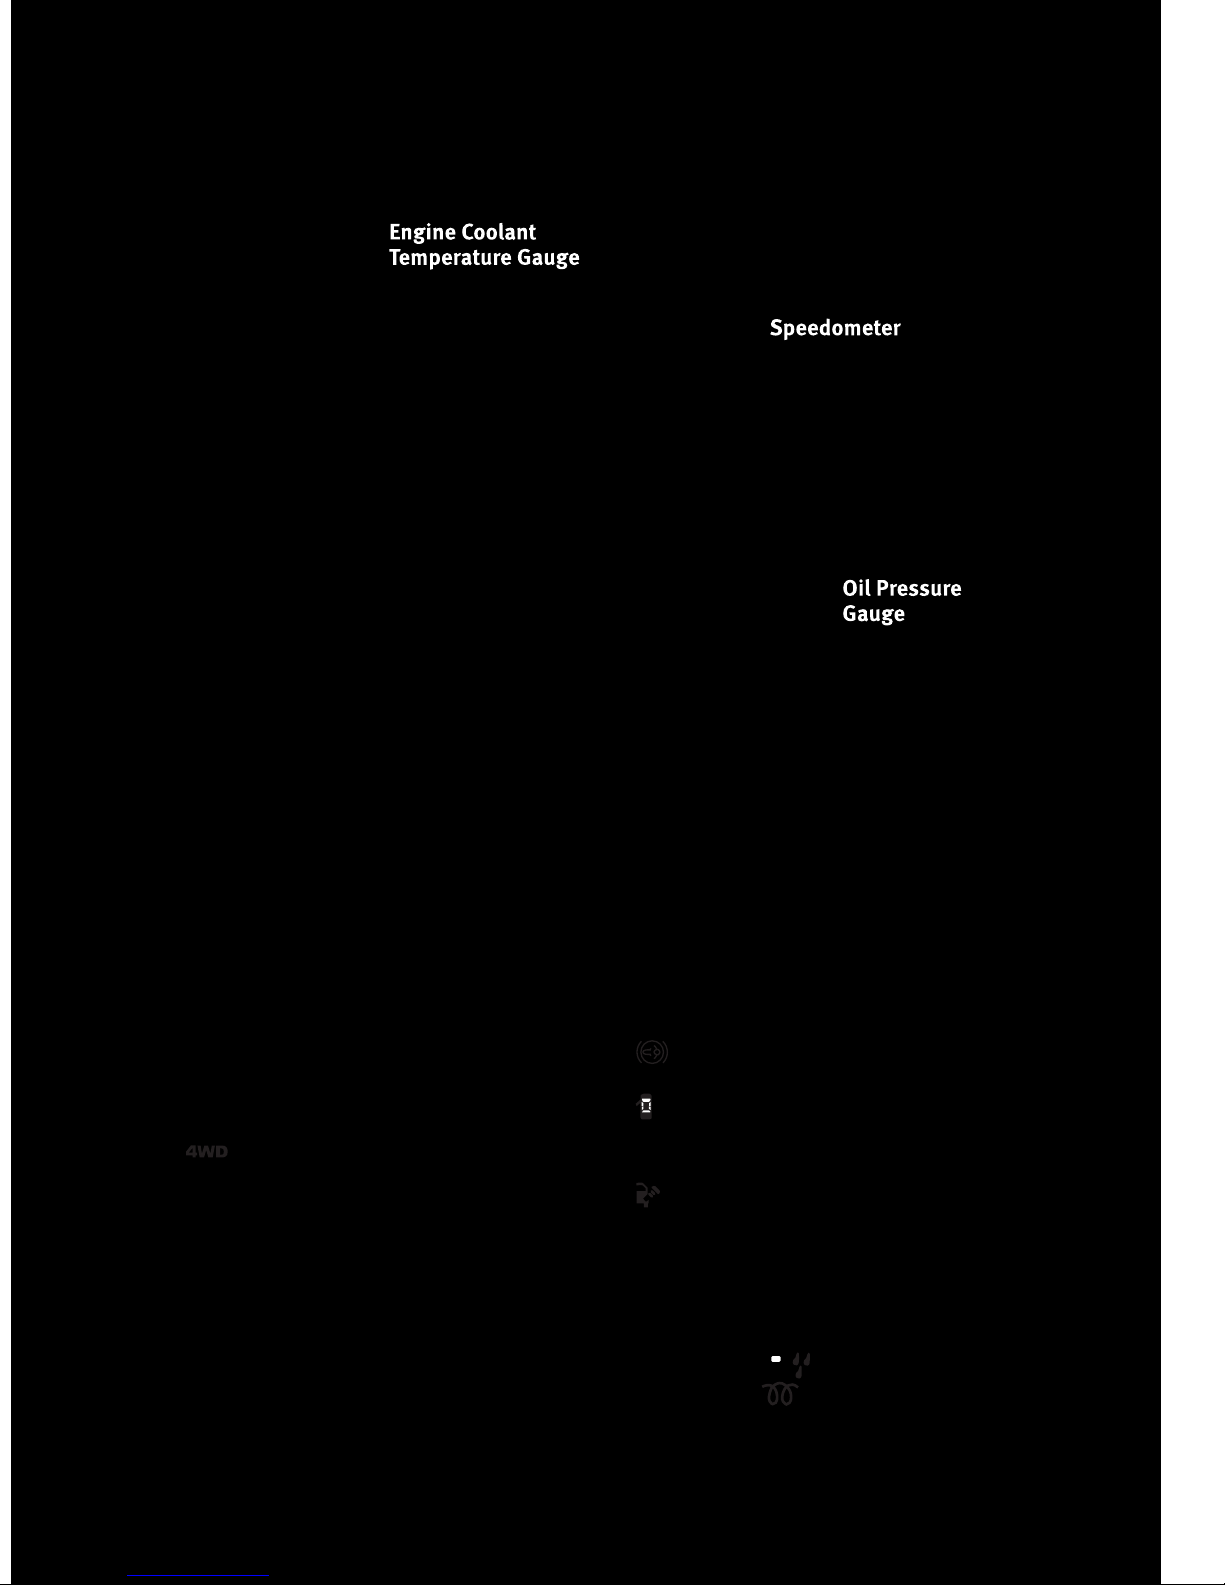
CONTROLS AT A GLANCE
DRIVER COCKPIT ..............4
INSTRUMENT CLUSTER ..........6
GETTING STARTED
KEYFOB...................8
THEFT ALARM ................9
SEATBELT .................9
CHILD RESTRAINTS .............9
FRONTSEATS................12
REARHEATEDSEATS............15
HEATED STEERING WHEEL .........15
TILT STEERING COLUMN / ADJUSTABLE
PEDALS...................16
POWER SLIDING REAR WINDOW .....17
DIESEL ENGINE STARTING
PROCEDURES................17
PROGRAMMABLEFEATURES .......18
OPERATING YOUR VEHICLE
TURN SIGNALS/WIPER/WASHER/HIGH
BEAMSLEVER .............. 20
HEADLIGHT SWITCH ............21
SPEED CONTROL LEVER ......... 22
MANUAL CLIMATE CONTROLS .......23
AUTOMATIC TEMPERATURE
CONTROL(ATC)...............23
PARKSENSE
®
REAR PARK ASSIST .... 24
PARKVIEW
®
REAR BACK-UP CAMERA . . 24
DIESEL EXHAUST BRAKE
(ENGINE BRAKING) ............ 24
IDLE-UP FEATURE (DIESEL/AUTOMATIC
TRANSMISSIONONLY)...........25
TIRE PRESSURE MONITOR SYSTEM
(TPMS) – 2500 MODELS ONLY ......25
POWERSUNROOF ............ 26
WIND BUFFETING ..............27
ELECTRONICS
NON-TOUCH-SCREENRADIOS...... 28
TOUCH-SCREENRADIOS......... 30
REMOTE AUDIO CONTROLS ........34
VIDEO ENTERTAINMENT SYSTEM (VES)™
..34
UNIVERSAL CONSUMER INTERFACE ....35
ELECTRONIC VEHICLE INFORMATION
CENTER (EVIC) .............. 36
UNIVERSAL GARAGE DOOR OPENER . . 36
POWERINVERTER ............ 38
POWER OUTLET ............. 38
UCONNECT™ PHONE .......... 39
VOICECOMMAND .............41
OFF-ROAD CAPABILITIES
FOUR-WHEEL DRIVE OPERATION .... 42
UTILITY
EASY-OFFTAILGATE ............43
RAMBOX
®
.................44
TRAILER TOWING WEIGHTS (MAXIMUM
TRAILER WEIGHT RATINGS) ........47
RECREATIONAL TOWING (BEHIND
MOTORHOME, ETC.) ............47
BRAKE/TRANSMISSION INTERLOCK
MANUAL OVERRIDE ........... 49
WHAT TO DO IN EMERGENCIES
24 HOUR TOWING ASSISTANCE -
U.S. ONLY .................50
INSTRUMENT CLUSTER WARNING
LIGHTS ...................50
IF YOUR ENGINE OVERHEATS .......53
JACKINGANDTIRECHANGING.......54
JUMP-STARTING ............. 60
EMERGENCY TOW HOOKS .........63
TOWINGADISABLEDVEHICLE...... 64
FREEING A STUCK VEHICLE ........65
EVENT DATA RECORDER (EDR) ..... 66
MAINTAINING YOUR VEHICLE
OPENING THE HOOD ............67
ENGINE COMPARTMENT ......... 68
FUEL FILTER/WATER SEPARATOR —
DIESELONLY................72
EXHAUST REGENERATION —
DIESELONLY................73
FLUIDS AND CAPACITIES ..........74
MAINTENANCE CHART ...........78
FUSES................... 82
TIREPRESSURES............. 84
WHEEL AND WHEEL TRIM CARE ......85
EXTERIOR BULBS ..............85
CONSUMER ASSISTANCE
CHRYSLER GROUP LLC CUSTOMER
CENTER.................. 86
CHRYSLER CANADA INC. CUSTOMER
CENTER.................. 86
ASSISTANCE FOR THE HEARING
IMPAIRED................. 86
PUBLICATIONS ORDERING ........ 86
REPORTING SAFETY DEFECTS IN THE
50 UNITED STATES AND
WASHINGTON, D.C. ............87
TIRE WARRANTY ..............87
MOPAR ACCESSORIES
MOPAR
®
ACCESSORIES ......... 90
TABLE OF CONTENTS