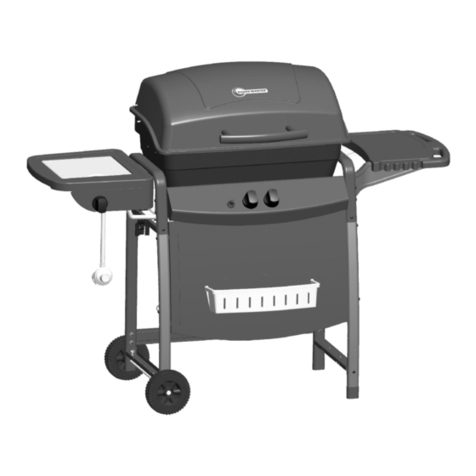
Range Master 70-10-588 User manual

70-10-588 Rev. 12/08/16
4-BURNER GAS GRILL
WITH SIDE BURNER
PARILLA DE GAS CON 4 QUEMADORES
Y QUEMADOR LATERAL
User Manual
Manual
del usuario
English......... 1
Español...... 35
ANS Z21.58- 2015
CSA 1.6- 2015
Outdoor Cooking
Gas Appliances

2
ƐƐĞŵďůĞƌ/ŶƐƚĂůůĞƌdŚŝƐŵĂŶƵĂůĐŽŶƚĂŝŶƐŝŵƉŽƌƚĂŶƚŝŶĨŽƌŵĂƟŽŶŶĞĐĞƐƐĂƌLJĨŽƌƚŚĞƉƌŽƉĞƌ
ĂƐƐĞŵďůLJ ĂŶĚ ƐĂĨĞ ƵƐĞ ŽĨ ƚŚŝƐ ĂƉƉůŝĂŶĐĞ ZĞĂĚ ĂŶĚ ĨŽůůŽǁ Ăůů ǁĂƌŶŝŶŐƐ ĂŶĚ ŝŶƐƚƌƵĐƟŽŶƐ
ďĞĨŽƌĞĂƐƐĞŵďůŝŶŐĂŶĚƵƐŝŶŐƚŚŝƐĂƉƉůŝĂŶĐĞ>ĞĂǀĞƚŚĞƐĞŝŶƐƚƌƵĐƟŽŶƐǁŝƚŚƚŚĞĐŽŶƐƵŵĞƌ
ŽŶƐƵŵĞƌhƐĞƌ &ŽůůŽǁ Ăůů ǁĂƌŶŝŶŐƐ ĂŶĚ ŝŶƐƚƌƵĐƟŽŶƐ ǁŚĞŶ ƵƐŝŶŐ ƚŚŝƐ ĂƉƉůŝĂŶĐĞ
ZĞƚĂŝŶƚŚĞƐĞŝŶƐƚƌƵĐƟŽŶƐĨŽƌĨƵƚƵƌĞƌĞĨĞƌĞŶĐĞ
ŽŶƚĞŶƚƐ
^ĂĨĞƚLJ/ŶĨŽƌŵĂƟŽŶ3
WĂĐŬĂŐĞŽŶƚĞŶƚƐ5
,ĂƌĚǁĂƌĞŽŶƚĞŶƚƐ6
WƌĞƉĂƌĂƟŽŶ6
ƐƐĞŵďůLJ/ŶƐƚƌƵĐƟŽŶƐ7
KƉĞƌĂƟŽŶ/ŶƐƚƌƵĐƟŽŶƐ17
Care and Maintenance22
dƌŽƵďůĞƐŚŽŽƟŶŐ25
tĂƌƌĂŶƚLJ27
ZĞƉůĂĐĞŵĞŶƚWĂƌƚƐ>ŝƐƚ28
/ĨLJŽƵƐŵĞůůŐĂƐ
ϭ^ŚƵƚŽīŐĂƐƚŽƚŚĞĂƉƉůŝĂŶĐĞ
ϮdžƟŶŐƵŝƐŚĂŶLJŽƉĞŶŇĂŵĞ
ϯKƉĞŶůŝĚ
ϰ/ĨŽĚŽƌĐŽŶƟŶƵĞƐŬĞĞƉĂǁĂLJĨƌŽŵ
ƚŚĞĂƉƉůŝĂŶĐĞĂŶĚŝŵŵĞĚŝĂƚĞůLJĐĂůů
LJŽƵƌůŽĐĂůĮƌĞĚĞƉĂƌƚŵĞŶƚ
ϭŽŶŽƚƐƚŽƌĞŽƌƵƐĞŐĂƐŽůŝŶĞŽƌ
ŽƚŚĞƌŇĂŵŵĂďůĞůŝƋƵŝĚƐŽƌǀĂƉŽƌƐ
ŝŶƚŚĞǀŝĐŝŶŝƚLJŽĨƚŚŝƐŽƌĂŶLJŽƚŚĞƌ
ĂƉƉůŝĂŶĐĞ
ϮŶ>W;ůŝƋƵŝĚƉƌŽƉĂŶĞͿĐLJůŝŶĚĞƌ
ŶŽƚĐŽŶŶĞĐƚĞĚĨŽƌƵƐĞƐŚĂůůŶŽƚďĞ
ƐƚŽƌĞĚŝŶƚŚĞǀŝĐŝŶŝƚLJŽĨƚŚŝƐŽƌĂŶLJ
ŽƚŚĞƌĂƉƉůŝĂŶĐĞ
ϯdŚŝƐŐƌŝůůŝƐĨŽƌŽƵƚĚŽŽƌƵƐĞŽŶůLJ
ĂŶĚƐŚĂůůŶŽƚďĞƵƐĞĚŝŶĂďƵŝůĚŝŶŐ
ŐĂƌĂŐĞƵŶĚĞƌŽǀĞƌŚĂŶŐƐŽƌĂŶLJ
ŽƚŚĞƌĞŶĐůŽƐĞĚĂƌĞĂ
ϰŽŶŽƚůĞĂǀĞĂůŝƚŐƌŝůůƵŶĂƩĞŶĚ-
ĞĚ<ĞĞƉĐŚŝůĚƌĞŶĂŶĚƉĞƚƐĂǁĂLJĨƌŽŵ
ƚŚĞŐƌŝůůĂƚĂůůƟŵĞƐ
tZE/E'
E'Z

3
CAUTION
Please read and understand this entire manual before attempting to assemble, operate or install
the product. If you have any questions regarding the product, please call customer service at:
1-877-447-4768, 9:00 am - 6:00 pm EST, Monday – Friday.
1HYHUXVHFKDUFRDORUOLJKWHUÀXLGZLWKWKHJULOO
• Do not use gasoline, kerosene or alcohol for lighting.
7KH/3JDVF\OLQGHUXVHGZLWKWKLVDSSOLDQFHPXVWEH
D&RQVWUXFWHGDQGPDUNHGLQDFFRUGDQFHZLWKWKH6SHFL¿FDWLRQVIRU/3*DV&\OLQGHUV
of the U.S. Department of Transportation (D.O.T.) or the National Standard of Canada,
&$1&6$%&\OLQGHUV6SKHUHVDQG7XEHVIRU7UDQVSRUWDWLRQRI'DQJHURXV*RRGV
DQG&RPPLVLRQDVDSSOLFDEOHDQG
E3URYLGHGZLWKDOLVWHGRYHU¿OOLQJSUHYHQWLRQGHYLFH
F3URYLGHGZLWKDF\OLQGHUFRQQHFWLRQGHYLFHFRPSDWLEOHZLWKWKHFRQQHFWRUIRURXWGRRU
cooking appliances. This grill is not intended to be used in or installed on recreational
vehicles and/or boats.
1HYHUNHHSD¿OOHGFRQWDLQHULQDKRWFDURUFDUWUXQN+HDWZLOOFDXVHWKHJDVSUHVVXUHWR
LQFUHDVHZKLFKPD\RSHQWKHUHOLHIYDOYHDQGDOORZJDVWRHVFDSH
$OZD\VRSHQJULOOOLGVORZO\DQGFDUHIXOO\DVKHDWDQGVWHDPWUDSSHGZLWKLQWKHJULOOFDQEXUQ
you severely.
Safety Information
)XHOVXVHGLQJDVRURLO¿UHGDSSOLDQFHVDQGWKHSURGXFWVRIFRPEXVWLRQRIVXFKIXHOVFRQWDLQ
FKHPLFDOVLQFOXGLQJ%HQ]HQHNQRZQWRWKH6WDWHRI&DOLIRUQLDWRFDXVHFDQFHUELUWKGHIHFWVRU
other reproductive harm. This product contains chemicals, including lead and lead compounds,
NQRZQWRWKH6WDWHRI&DOLIRUQLDWRFDXVHFDQFHUELUWKGHIHFWVRURWKHUUHSURGXFWLYHKDUPWash
hands after handling.
CALIFORNIA PROPOSITION 65
DANGER
• Do not use in an explosive atmosphere. Keep grill area clear and free from combustible
PDWHULDOVJDVROLQHDQGRWKHUÀDPPDEOHYDSRUVDQGOLTXLGV

4
Safety Information
• Do not place the grill under overhead
FRPEXVWLEOHFRQVWUXFWLRQRUDZQLQJV
Minimum clearance from sides and
back of unit to combustible construction,
36 inches (914.4mm) from sides and
back.
127(7KHLQVWDOODWLRQPXVWFRQIRUPZLWK
local codes or, in the absence of local
FRGHVZLWKHLWKHUWKH1DWLRQDO)XHO*DV
Code, ANSI Z223.1/NFPA 54, Natural
*DVDQG3URSDQH,QVWDOODWLRQ&RGH&6$
B149.1, or Propane Storage and
+DQGOLQJ&RGH%
CAUTION
'RQRWVWRUHRUXVHJDVROLQHRURWKHUÀDPPDEOHOLTXLGVRUYDSRUVLQWKHYLFLQLW\RIWKLVRUDQ\
other appliance.
• An LP cylinder not connected for use shall not be stored in the vicinity of this or any other
appliance.
7KLVJULOOLVIRUXVHZLWKSURSDQHJDVRQO\SURSDQHF\OLQGHUQRWLQFOXGHG
• Never attempt to attach this grill to the self-contained propane system of a boat, camper trailer,
motor home or house.
'RQRWDWWHPSWWRPRYHWKHJULOOZKLOHLWLVOLWRUZKHQLWLVKRW7KHFDVWHUVVKRXOGEHORFNHG
ZKHQQRWPRYLQJWKHJULOO
• Do not use the grill unless it is completely assembled and all parts are securely fastened and
tightened.
.HHSDOOFRPEXVWLEOHLWHPVDQGVXUIDFHVDWOHDVWLQFKHVFPDZD\IURPWKHJULOODWDOO
times.
• Do not touch metal parts of grill until it has completely cooled (about 45 minutes) to avoid
EXUQVXQOHVV\RXDUHZHDULQJSURWHFWLYHJHDUSRWKROGHUVJORYHV%%4PLWWHQVHWF«
• Do not alter this grill in any manner.
&OHDQDQGLQVSHFWWKHKRVHEHIRUHHDFKXVH,IWKHUHLVHYLGHQFHRIDEUDVLRQZHDUFXWVRU
leaks, the hose must be replaced prior to operating the appliance. The replacement hose
DVVHPEO\ZLOOEHWKDWZKLFKLVVSHFL¿HGE\WKHPDQXIDFWXUHU
0RYHJDVKRVHVDVIDUDZD\DVSRVVLEOHIURPKRWVXUIDFHVDQGGULSSLQJKRWJUHDVH
• Keep the grill’s valve compartment, burners and circulating air passages clean. Inspect the
JULOOEHIRUHHDFKXVH'RQRWREVWUXFWWKHÀRZRIJDVRUYHQWLODWLRQDLU
• The use of alcohol, prescription or non-prescription drugs may impair the operator’s ability
to properly assemble or safely operate the grill.
• Do not leave a lit grill unattended. Keep children and pets away from the grill at all times.
'RQRWSODFHWKLVJULOORQDQ\W\SHRIWDEOHWRSVXUIDFH7KHJULOOVKRXOGEHSODFHGRQDÀDWDQG
level surface.
'RQRWXVHWKHJULOOLQKLJKZLQGV
WARNING
36in 36in
914.4mm
914.4mm
5
Package Contents
PART DESCRIPTION QUANTITY
$ +RRG+DQGOH
% 7HPS*DXJH
& *ULOO%RG\$VVHPEO\
D Control Knob 5
( *UHDVH3DQ
) *UHDVH&XS
* :DUPLQJ5DFN
+ &RRNLQJ*UDWH
, +HDW7HQW
J Left Side Table Assembly 1
. 6LGH%XUQHU5DFN
L Side Burner 1
0 5LJKW6LGH%XUQHU%RG\
N Control Knob Bezel 1
PART DESCRIPTION QUANTITY
O Left Leg Assembly 1
P Leg End Cap 2
4 &\OLQGHU%ORFN%DU
5 &DUW5HDU6XSSRUW
6 %RWWRP6KHOI¶V5HDU
Bracket Assembly 1
T Cart Front Panel - Upper 1
8 &DUW)URQW3DQHO/RZHU
V
5LJKW/HJ$VVHPEO\
1
: %RWWRP6KHOI
X Axle 1
< :KHHO
Z Bottom Shelf’s Front
Bracket Assembly 1
B
C
D
A
H
G
E
F
I
J
K
L
N
O
M
P
Q
R
V
T
S
U
W
X
Z
D
Y

6
Hardware Contents
ST4.8x10
Screw
Qty. 2
M6
Wingnut
Qty. 2
M6x16
Bolt
Qty. 34
M10
Nut
Qty. 2
M10-M6
Wrench
Qty. 2
Preparation
%HIRUHEHJLQQLQJDVVHPEO\RISURGXFWPDNHVXUHDOOSDUWVDUHSUHVHQW&RPSDUHSDUWVZLWKSDFNDJH
FRQWHQWVOLVWRQSUHYLRXVSDJHDQGKDUGZDUHFRQWHQWVDERYH,IDQ\SDUWLVPLVVLQJRUGDPDJHGGR
not attempt to assemble the product. Contact customer service for replacement parts.
Estimated Assembly Time:PLQXWHVZLWKSHRSOH
Tools Required for Assembly and Leak Testing (not included):3KLOOLSVVFUHZGULYHU6SUD\ERWWOH
3OLHU$GMXVWDEOH:UHQFK
CAUTION
THIS UNIT IS HEAVY. Two people required for safe assembly.
7ZRSHRSOHUHTXLUHGIRUVDIHDVVHPEO\6RPHSDUWVPD\FRQWDLQVKDUSHGJHV:HDUSURWHFWLYH
JORYHVLIQHFHVVDU\5HDGDQGIROORZDOOVDIHW\VWDWHPHQWVZDUQLQJVDVVHPEO\LQVWUXFWLRQVDQG
use and care instructions before attempting to assemble and use.
CC
AA BB DD FF
M6
Spring
Washer
Qty. 2
GG
M6
Washer
Qty. 2
HH
M4x10
Bolt
Qty. 2
II
M5x12
Bolt
Qty. 2
EE

7
Assembly Instructions
3XWWZROHJHQGFDSV3XQGHUOHIWOHJ
DVVHPEO\2DQGIDVWHQWKHPZLWKWZR
67;VFUHZV$$
Hardware Used
ST4.8x10 Screw x 2
2. Slide the axle (X) through the right leg
DVVHPEO\9DQGWKHQSXWWKHZKHHOV<RQ
ERWKVLGHVDQGWLJKWHQWKHZKHHOVZLWK0
QXWV%%ZLWKZUHQFKHV&&3OHDVHQRWHWKLV
VWHSUHTXLUHVWZRSHRSOHWRFRPSOHWHDQGLI
QHFHVVDU\DQ\RWKHUSOLHURUDGMXVWDEOHZUHQFK
can be used for assembly.
Hardware Used
BB M10 Nut x 2
2
AA
1
P
O
CC M10-M6
Wrench x 2
AA
V
X
Y
BB

8
Assembly Instructions
3. Use eight M6x16 bolts (DD) to assemble cart
front panel - upper (T) and cart front panel -
ORZHU8EHWZHHQOHIWOHJDVVHPEO\2DQG
right leg assembly (V). Please note the front
SDQHOORZHU¶V8GLUHFWLRQWKHVLGHZLWKULYHW
QXWLQWKHPLGGOHVKRXOGEHGRZQZDUG
Hardware Used
DD M6x16 Bolt x 8
3
U
TO
V
DD
4. Use four M6X16 bolts (DD) to fasten the
bottom shelf’s front bracket assembly (Z),
bottom shelf’s rear bracket assembly (S) and
ERWWRPVKHOI:
4
S
W
Z
Hardware Used
DD M6x16 Bolt x 4
DD

9
Assembly Instructions
5. Assemble bottom shelf assembly to the left
OHJDVVHPEO\2DQGULJKWOHJDVVHPEO\9ZLWK
four M6X16 bolts (DD).
6. Use four M6x16 bolts (DD) to fasten the cart
UHDUVXSSRUW5WRWKHOHIWDQGULJKWOHJ
assembly. Please note the cart rear support’s
5GLUHFWLRQWKHVLGHZLWKWKHULYHWQXWLQWKH
PLGGOHVKRXOGEHXSZDUG7KHQXVHWZR
M5x12 bolts (EE) to fasten the cylinder block
EDU4EHWZHHQWKHFDUWIURQWSDQHOORZHU8
DQGWKHFDUWUHDUVXSSRUW5
5
6
Hardware Used
DD M6x16 Bolt x 4
R
DD
EE
DD
V
O
Hardware Used
DD M6x16 Bolt x 4
EE M5x12 Bolt x 2 R
U
Q
Bottom Shelf
Assembly

10
Assembly Instructions
8. Assemble the temp gauge (B) onto the hood.
3OHDVHXVHWKHZDVKHUDQGZLQJQXW
SUHDVVHPEOHGZLWKWHPSJDXJHWRLQVWDOOWKH
temp gauge (B) onto the hood.
7. Assemble the hood handle (A) to the
KRRGZLWKWZR0ZLQJQXWV))DQGWZR0
VSULQJZDVKHUV**DQGWZR0ZDVKHUV
++
7
Hardware Used
FF M6 Wingnut x 2
GG M6 Spring Washer x 2
A
HH
FF
GG
HH M6 Washer x 2
8B

11
Assembly Instructions
9. Assemble the grill body assembly (C) onto the
FDUWDVVHPEO\ZLWKIRXU0[EROWV''
9
3UHDVVHPEOHWZR0[EROWV''RQWRWKH
grill body assembly (C) and do not tighten them
DQGPDNHVXUHWROHDYHDPPJDSEHWZHHQ
the bolt and grill body’s end cap. Then hang
the left side table assembly (J) on the bolts
DQGIDVWHQWKHOHIWVLGHWDEOHDVVHPEO\-ZLWK
three M6x16 bolts (DD) and tighten all bolts.
10
Hardware Used
DD M6x16 Bolt x 4
DD
C
J
DD
Hardware Used
DD M6x16 Bolt x 5
C

12
Assembly Instructions
3UHDVVHPEOHWZR0[EROWV''RQWRWKH
grill body assembly (C) and do not tighten
them and make sure to leave a 5mm gap
EHWZHHQWKHEROWDQGJULOOERG\¶VHQGFDS
Then hang the right side burner body (M) on
the bolts and fasten the right side burner body
0ZLWKWKUHH0[EROWV''DQGWLJKWHQ
all bolts.
11
Hardware Used
DD M6x16 Bolt x 5
8VHWZR0[EROWV,,WRDVVHPEOHWKHVLGH
burner valve assembly and control knob bezel
(N) to the right side burner body (M).
12
Hardware Used
II M4x10 Bolt x 2
II
M
N
C
M
DD

13
13
Assembly Instructions
'LVDVVHPEOHWZR0[EROWVWKDWDUHSUH
assembled on the side burner (L) and use them
to assemble the side burner (L) on the right
side burner body (M).
3OHDVHHQVXUHWKHJDVYDOYHRUL¿FHLVFRUUHFWO\
positioned inside side burner inlet (venturi).
M
:$51,1*,7,69(5<,03257$1772&+(&.
$1'(1685(7+$7($&+$1'(9(5<%851(5
,6)8//<(1*$*(':,7+7+($'-$&(179$/9(
25,),&(%()25(&203/(7,1*67(3
)$,/85(72'2620$<5(68/7,1),5(25
(;3/26,213266,%/<&$86,1*6(5,286
,1-85<25'($7+5()(5720$,17(1$1&(
6(&7,21,16758&7,216723523(5/<&+(&.
7+((1*$*(0(17
14
L
&RQQHFWWKHVLGHEXUQHUVSDUNHUZLUHWRWKH
side burner sparker.
:URQJ :URQJ Correct
Correct
Incorrect
Incorrect 2 Bolts previously
disassembled

14
15
Assembly Instructions
15. Put the side burner rack (K) in place.
$VVHPEOHWKH¿YHFRQWURONQREV' 16
K
D

15
Assembly Instructions
17. Put the four heat tents (I) into place over
each burner. 17
3XWWKUHHFRRNLQJJUDWHV+DQGRQHZDUPLQJ
UDFN*LQSODFH 18
G
H
I

16
Assembly Instructions
19. Place grease pan (E) and grease cup (F)
in place. 19
E
F
20. Place gas cylinder (sold separately) into the
QHVWLQJKROHORFDWHGLQWKH%RWWRPVKHOI:
5RWDWHWKHJDVF\OLQGHUXQWLOWKHKRVHUHJXODWRU
FRXSOLQJDOLJQVZLWKWKHWKUHDGHGYDOYHRIWKH
F\OLQGHU+DQGWLJKWHQWKHKRVHUHJXODWRU
coupling to the threaded valve of the LP gas
cylinder.
7LJKWHQWKHWDQNVFUHZFORFNZLVHLQWKH
ERWWRPVKHOI:XQWLOWKHF\OLQGHULVVHFXUHGLQ
place inside the nesting hole of the Bottom
VKHOI:
20
Tank
6FUHZ
LP
Gas
Cylinder
)URQW9LHZ
5HDU9LHZ
W

17
Assembly Instructions
CHECKING FOR LEAKS
$IWHUDOOFRQQHFWLRQVDUHPDGHFKHFNDOOFRQQHFWLRQVDQG¿WWLQJVRQWKH/3JDVWDQNYDOYHJDVKRVH
DQGUHJXODWRUIRUOHDNVZLWKDZDWHUDQGVRDSVROXWLRQ
7RSUHYHQW¿UHRUH[SORVLRQZKLOHWHVWLQJIRUDOHDN
$OZD\VSHUIRUPOHDNWHVWSULRUWROLJKWLQJWKHJULOO
'RQRWVPRNHZKLOHWHVWLQJIRUDOHDN
$OZD\VSHUIRUPOHDNWHVWVRXWGRRUVLQDZHOOYHQWLODWHGDUHD
'RQRWXVHDQ\VRXUFHRIÀDPHZKLOHWHVWLQJIRUOHDNV
• Do not use the grill until any and all leaks are corrected.
• If you are unable to correct a leak, disconnect the propane supply and call a gas appliance service
dealer.
PERFORM LEAK TEST
3UHSDUHOHDNWHVWVROXWLRQE\UDWLRRIOLTXLGGLVKVRDSDQGZDWHU
Total solution required is approximately 2 - 3 ounces (70 - 90 ml).
Put leak test solution in a spray bottle.
• Ensure all control knobs are in the O OFF position.
• Connect the gas hose to the gas supply.
• Open the LP gas tank valve.
6SUD\OHDNWHVWVROXWLRQRQDOOJDVFDUU\LQJFRQQHFWLRQVDQG¿WWLQJV3UHVHQFHRIEXEEOHVDWDUHDV
of applied test solution indicates a gas leak. If leaks are detected or you smell or hear gas, shut off the
gas supply valve immediately and repair or replace the defective part. Do not use the grill until
all leaks are corrected.
WARNING
ALL INSTRUCTIONS AND SAFEGUARDS ON THIS PAGE MUST BE FOLLOWED TO
PREVENT FIRE, DAMAGE AND/OR INJURY.
CAUTION
Only use the regulator and hose assembly provided! If a replacement is necessary, please call
our customer service center. Do not use replacement parts that are not intended for this grill.

18
Operation Instructions
CONNECTING GAS CYLINDER
7KHSURSDQHJDVVXSSO\F\OLQGHUWREHXVHGPXVWEHFRQVWUXFWHGDQGPDUNHGLQDFFRUGDQFHZLWKWKH
6SHFL¿FDWLRQVIRU/3*DV&\OLQGHUVRIWKH86'HSDUWPHQWRI7UDQVSRUWDWLRQ'27RUWKH1DWLRQDO
Standard of Canada, CAN/CSA-B339, Cylinders, Spheres and Tubes for Transportation of Dangerous
*RRGVDQG&RPPLVVLRQDVDSSOLFDEOHDQGSURYLGHGZLWKDOLVWHGRYHU¿OOLQJSUHYHQWLRQGHYLFH
Use only 20-pound cylinders (height: 18.11 inches, tank diameter: 9.84 inches, foot diameter: 8.03 inches)
HTXLSSHGZLWKDF\OLQGHUFRQQHFWLRQGHYLFHFRPSDWLEOHZLWKWKHFRQQHFWLRQIRURXWGRRUFRRNLQJDSSOL-
ances.
The cylinder must include a collar to protect the cylinder valve. The gas cylinder should not be dropped
or handled roughly!
If the appliance is not in use, the gas cylinder must be disconnected. Storage of an appliance indoors
is permissible ONLY if the cylinder is disconnected and removed from the appliance. Cylinders must
be stored outdoors out of the reach of children and must not be stored in a building, garage or any
RWKHUHQFORVHGDUHD<RXUF\OLQGHUPXVWQHYHUEHVWRUHGZKHUHWHPSHUDWXUHVFDQUHDFKRYHU)
3ODFHGXVWFDSRQF\OLQGHUYDOYHRXWOHWZKHQHYHUWKHF\OLQGHULVQRWLQXVH2QO\LQVWDOOWKHW\SHRI
GXVWFDSRQWKHF\OLQGHUYDOYHRXWOHWWKDWLVSURYLGHGZLWKWKHF\OLQGHUYDOYH2WKHUW\SHVRIFDSVRU
plugs may result in leakage of propane.
Before connection, be sure that there is no debris caught in the outlet of the gas cylinder, outlet of the
regulator valve or in the outlet of the burner and burner ports. Connect regulator valve and
KDQGWLJKWHQ¿UPO\.HHSWKHSURSDQHF\OLQGHUYDOYHFORVHGDQGGLVFRQQHFWWKHSURSDQHF\OLQGHUIURP
WKHUHJXODWRUYDOYHZKHQWKHJULOOLVQRWLQXVH
'2127REVWUXFWWKHÀRZRIFRPEXVWLRQDLUDQGYHQWLODWLRQDLUWRWKHJULOO7KHSURSDQHF\OLQGHUPXVW
EHDUUDQJHGIRUYDSRUZLWKGUDZDODQGHTXLSSHGZLWKDOLVWHGRYHU¿OOLQJSUHYHQWLRQGHYLFH3OHDVHXVH
WKHSURSHUF\OLQGHURULHQWDWLRQWRSURYLGHYDSRUZLWKGUDZDO127(7KHF\OLQGHUPXVWEHIXOO\XSULJKW
IRUWKHF\OLQGHUWRKDYHYDSRUZLWKGUDZDORQO\
CAUTION
a. Do not store a spare LP-gas cylinder under or near this appliance.
E1HYHU¿OOWKHF\OLQGHUEH\RQGSHUFHQWIXOO
F,IWKHLQIRUPDWLRQLQDDQGELVQRWIROORZHGH[DFWO\D¿UHFDXVLQJGHDWKRUVHULRXV
injury may occur.

19
Operation Instructions
NOTE: 2WKHUF\OLQGHUVPD\EHDFFHSWDEOHIRUXVHZLWKWKLVDSSOLDQFHSURYLGHGWKH\DUHFRPSDWLEOH
ZLWKWKHDSSOLDQFHQHVWLQJKROHDQGUHWHQWLRQPHDQV5HIHUWR6WHSRIWKH$VVHPEO\,QVWUXFWLRQV
for correct cylinder to cylinder holder connection.
WARNING
ALL INSTRUCTIONS AND SAFEGUARDS ON THIS PAGE MUST BE FOLLOWED TO
PREVENT FIRE, DAMAGE AND/OR INJURY.
WARNING
In the connection process, make sure:
WKHUHJXODWRULQOHWFRQQHFWRUPDWHVZLWKWKHF\OLQGHUYDOYHRXWOHWSURSHUO\VDIHO\DQG¿UPO\DQG
WKH/3JDVKRVHGRHVQRWFRPHLQFRQWDFWRUUHPDLQLQFRQWDFWZLWKWKH¿UHER[
CONNECTING THE LP TANK
7KHNQRERQWKH/3WDQNPXVWEHFORVHG0DNHVXUHWKDWWKHNQRELVWXUQHG FORFNZLVHWRD
IXOOVWRS7KHF\OLQGHUVXSSO\V\VWHPPXVWEHDUUDQJHGIRUYDSRUZLWKGUDZDO
2. Check that the control knob on the control unit is turned off.
5HPRYHWKHSURWHFWLYHFDSIURPWKH/3WDQNYDOYHDQGFRXSOLQJQXW
+ROGWKHUHJXODWRULQRQHKDQGDQGLQVHUWWKHQLSSOHLQWRWKHYDOYH
outlet. Be sure the nipple is centered in the valve outlet. The coupling
nut connects to the large outside threads on the valve outlet. Use
care – do not cross thread the connection.
+DQGWLJKWHQWKHFRXSOLQJQXW FORFNZLVHXQWLOLWFRPHVWRDIXOO
stop. Firmly tighten by hand only. Do not use tools.
To Disconnect)XOO\FORVHWKHWDQNYDOYHE\WXUQLQJ FORFNZLVH
7XUQWKHFRXSOLQJQXW FRXQWHUFORFNZLVHXQWLOWKHUHJXODWRUDVVHPEO\GHWDFKHV
GHWDFKHV

20
Operation Instructions
Lighting The Grill
%HIRUH¿UVWXVH
5HPRYHDOOKDQJLQJVRUSODVWLFVWUDSVLISUHVHQW%HIRUH\RXFRRNRQ\RXUQHZJDVJULOOLWLVLPSRUWDQW
WRFOHDQ\RXUJULOOZLWKKHDW7RGRWKLVRSHUDWHWKHJULOOIRUDSSUR[LPDWHO\PLQXWHVZLWKWKHOLGFORVHG
DQGWKHFRQWURONQRELQWKHKLJKHVWSRVLWLRQ7KLVZLOOFOHDQWKHLQWHUQDOSDUWVE\EXUQLQJRIIDQ\UHVLGXH
and odor from the manufacturing process.
WARNING
Do not lean over grill when lighting. Read instructions before lighting.
CAUTION
,IWKHÀDPHH[WLQJXLVKHVDFFLGHQWDOO\GXULQJLJQLWLRQRURSHUDWLRQLPPHGLDWHO\78512))WKH
cylinder valve and then TURN OFF the control knob.
1. Check that the control knobs are in the OOFF position.
2SHQYDOYHDWWDQNIXOO\E\WXUQLQJFRXQWHUFORFNZLVH
3. Open lid during lighting.
'HSUHVVDQGWXUQFRQWURONQREFRXQWHUFORFNZLVH IURPRIISRVLWLRQSDVWWKH LJQLWHSRVLWLRQWRWKH
high position. You may need to repeat several times to ignite the burner.
If ignition does not occur in 5 seconds, turn the control(s) off, OZDLWPLQXWHVDQGUHSHDWWKHOLJKWLQJ
procedure.
,IWKHEXUQHUVWLOOGRHVQRWOLJKWFKHFNWKDWWKHUHLVJDVLQWKHF\OLQGHUDQGIROORZWKHPDWFKOLJKWLQJ
LQVWUXFWLRQV&KHFNWKH7URXEOHVKRRWLQJ*XLGHRQSDJHIRUPRUHLQIRUPDWLRQ
Table of contents
Other Range Master Grill manuals

Range Master
Range Master Professional+ 110 Manual

Range Master
Range Master 463722512 User manual

Range Master
Range Master Classic C-45G3CB 463441412 User manual

Range Master
Range Master 52916 User manual

Range Master
Range Master 463724313 User manual

Range Master
Range Master CBT1302GW User manual

Range Master
Range Master 47262 User manual

Range Master
Range Master CBT1302GW User manual

Range Master
Range Master 463441913 User manual

Range Master
Range Master 90 Dual Fuel User manual