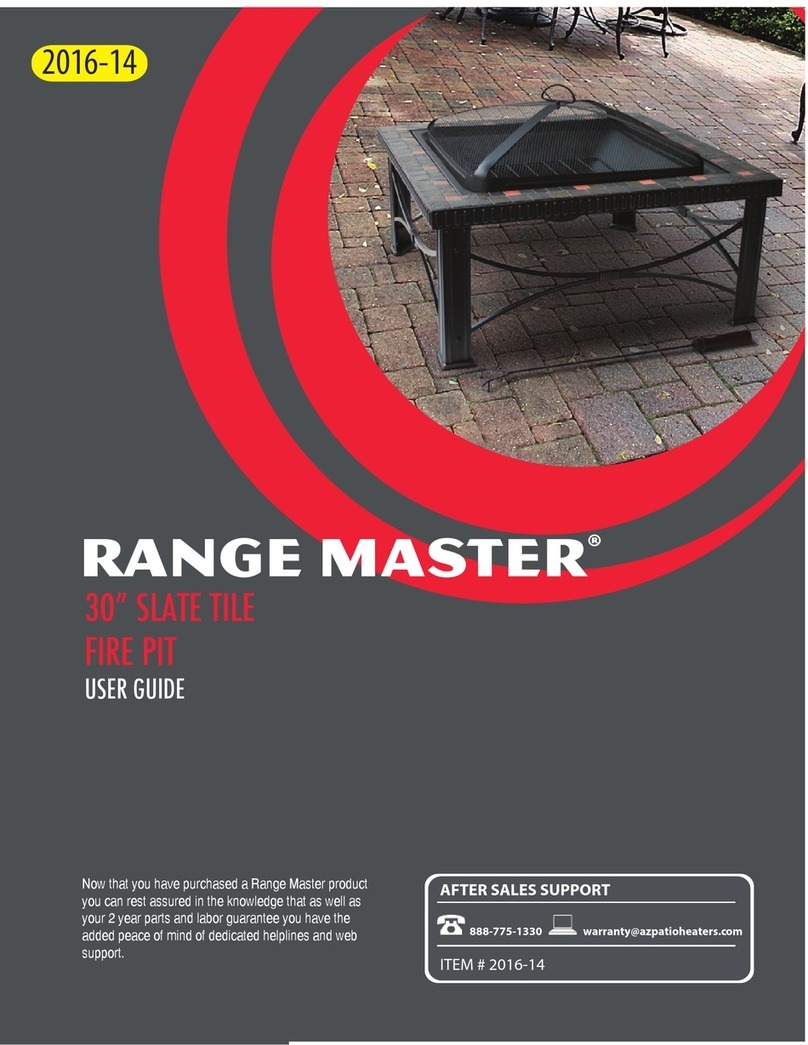
Range Master DHP-30SFP User manual

User Guide
Manual
del usuario
DISTRIBUTED BY DISTRIBUIDO POR:
ALDI INC., BATAVIA, IL 60510
www.aldi.us
USA
MODEL: DHP-30SFP PRODUCT CODE:2016 05/2016
2
YEAR WARRANTY
AÑOS DE GARANTÍA
AFTER SALES SUPPORT SERVICIO POSVENTA
1855 965 5310
cs@discoverhomeproducts.com
30” SLATE TILE FIRE PIT
BRASERO DE 30" CON
BALDOSAS DE PIZARRA
®
English... Page 3
Español... Página 10

Contents
Getting Started.......................................... 3
Parts List....................................................... 4
Assembly Instructions............................ 6
Warranty Information
........................ 18
Identify all the parts packaged in the carton against the parts list.
Remove all protective materials and place parts on a non-abrasive
surface to avoid scratching. If any parts are missing or damaged,
Do NOT attempt to assemble. Please contact our customer service
center (Monday-Friday 10:00AM-5:00PM ET) at 1855 965 5310.
Caution
1. Burn only wood or fire logs in the fire pit.
2. Do not use gasoline or kerosene to start the fire in the fire pit.
3. Do not use this unit on a wood deck, long or dry grass and/or leaves,
or on combustible surfaces.
4. Do not attempt to move the fire pit while it is hot or in use.
5. Place the fire pit no closer than 8 feet from walls or combustibles during use.
6. Adequate fire extinguishing material should be readily available.
7. Always ensure the mesh wire cover is secured over fire bowl while in use.
8. Poker handle may become hot during and after use.
9. Use heat-resistant gloves to handle hot tools.
Warning
1. For outdoor use only ! Never leave fire unattended !
2. Do not use the fire pit to cook food ! The fire pit is not designed for grilling food.
3. Do not allow children or pets near the fire pit without supervision.
4. Do not touch surface of iron fire grate or fire bowl while in use as it may cause burns.
5. Never burn in vehicles, tents or indoors.
6. Never place cover on fire pit when in use. Ensure fire pit and mesh wire cover
have cooled before placing cover over fire pit.
7. Use poker to lift mesh cover when fire pit is in use.
30” Slate Tile Fire Pit Getting Started
USA
USA
1855 965 5310
AFTER SALES SUPPORT
3
cs@discoverhomeproducts.com

30” Slate Tile Fire Pit
USA
Parts List
USA
1855 965 5310
AFTER SALES SUPPORT
5
cs@discoverhomeproducts.com
USA
1855 965 5310
AFTER SALES SUPPORT
Handle
Mesh Wire Cover
Wood Grate
Fire Bowl
Slate Top
Leg Frame
Leg Frame
Poker
Cover
Bolt (M6x8mm)
Nut (M6)
Washer
Bolt (M5x12mm)
Wrench
A 1
1
3
1
1
2
2
1
1
8
5
6
18
1
B
C
D
E
F
G
H
I
AA
BB
CC
DD
EE
Part Picture Description Qty
cs@discoverhomeproducts.com
4
30” Slate Tile Fire Pit Parts List
USA
H
A
B
C
D
E
F
G
I

30” Slate Tile Fire Pit 30” Slate Tile Fire Pit
USAUSA
Assembly InstructionsAssembly Instructions
USA
1855 965 5310
AFTER SALES SUPPORT
7
cs@discoverhomeproducts.com
USA
1855 965 5310
AFTER SALES SUPPORT
cs@discoverhomeproducts.com
6
STEP 3: Attach legs (G) to leg frames (F) using bolts (AA) Washers (DD).
Hand tighten only.
3
STEP 2: Attach wood grate (C) to fire bowl (D) using bolts (CC) and Washers (DD).
Tighten with screwdriver (not included).
STEP 1: Insert handle (A) into hole in mesh wire cover (B). Secure with m6 nut
(BB) from underside of mesh wire cover (B). Then tighten with wrench (EE).
ASSEMBLY TOOLS REQUIRED (NOT INCLUDED)
AA
G
DD
F
BB
B
A
C
D
DD
CC

30” Slate Tile Fire Pit 30” Slate Tile Fire Pit
USA
Assembly Instructions
USA
1855 965 5310
AFTER SALES SUPPORT
9
cs@discoverhomeproducts.com
USA
Assembly Instructions
USA
1855 965 5310
AFTER SALES SUPPORT
cs@discoverhomeproducts.com
8
STEP 4: Attach leg assembly to slate top (E) using nuts (BB) and Washers (DD).
Tighten all hardware with wrench (EE) and screwdriver (not included).
4
STEP 5: Turn assembly upright. Place fire bowl (D) and mesh wire cover (B) into
base assembly.
The fire pit is now ready for use. Keep poker (H) near fire pit for use anytime.
5
6
Care and maintenance:
To extend the life of your fire pit, clean it after each use
and use cover (I) to protect the unit from the elements.
Use a soft cloth to wipe fire pit and poker.
Do not attempt to clean while hot.
Clean ash catcher after each use once ashes have cooled.
Store in a cool, clean, dry place.
B
D
H
BB
DD
E
I

Contenido
Para comenzar....................................................11
Lista de piezas................................................... 12
Instrucciones de ensamblaje....................... 14
Información de la garantía........................... 20
Brasero de 30" con baldosas de pizarra
Para comenzar
USA
USA
1855 965 5310
SERVICIO POSVENTA
11
cs@discoverhomeproducts.com
Compare todas las piezas incluidas en la caja con la lista de piezas. Quite todos
los materiales de protección y coloque las piezas sobre una superficie no abrasiva
para evitar que se rayen. Si alguna pieza falta o está dañada, NO intente realizar el
ensamblaje. Por favor, póngase en contacto con nuestro centro de Servicio al
cliente (lunes a viernes de 10:00 a.m. - 5:00 p.m. ET) en el 1-855-965-5310.
Precaución
1. Queme solo madera o leños en el brasero.
2. No use gasolina ni queroseno para encender el fuego en el brasero.
3. No use esta unidad sobre un muelle de madera, hojas/pasto seco o largo
o sobre superficies combustibles.
4. No intente mover el brasero mientras está caliente o encendido.
5. Coloque el brasero a no menos de 8 pies (2.45 m) de paredes o combustibles
mientras lo usa.
6. Debe haber un extintor de fuego adecuado al material disponible.
7. Siempre verifique que la cubierta de malla de alambre esté fijada sobre el tazón
del fuego mientras lo usa.
8. El asa del atizador podría calentarse durante y después de su uso.
9. Use guantes resistentes al calor para manipular herramientas calientes.
Advertencia
1. ¡Para uso en exteriores exclusivamente! ¡Nunca deje el fuego sin desatendido!
2. ¡No use el brasero para cocinar alimentos! El brasero no está diseñado para
asar alimentos.
3. No permita que los niños o las mascotas se acerquen al brasero sin supervisión.
4. No toque la superficie de la rejilla de hierro o el tazón del fuego mientras está en
uso ya que podría causar quemaduras.
5. Nunca encender en vehículos, carpas o en interiores.
6. Nunca coloque la cubierta sobre el brasero cuando está encendido. Verifique que
el brasero y la cubierta de malla de alambre se hayan enfriado antes de colocar
la cubierta.
7. Use el atizador para levantar la cubierta de malla cuando el brasero está encendido.

Brasero de 30" con baldosas de pizarra
USA
USA
1855 965 5310
SERVICIO POSVENTA
13
cs@discoverhomeproducts.com
Lista de piezas
Brasero de 30" con baldosas de pizarra
Lista de piezas
USA
USA
1855 965 5310
SERVICIO POSVENTA
12
cs@discoverhomeproducts.com
Agarradera
Cubierta de malla
de alambre
Rejilla para madera
Tazón del fuego
Cubierta de pizarra
Marco de la pata
Marco de la pata
Atizador
Cubierta
Perno (M6x8mm)
Perno (M5x12mm)
Arandela
Llave
Tuerca (M6)
A 1
1
3
1
1
2
2
1
1
8
5
6
18
1
B
C
D
E
F
G
H
I
AA
BB
CC
DD
EE
H
A
B
C
D
E
F
G
I
Pieza Imagen Descripción Cantidad

USA
1855 965 5310
SERVICIO POSVENTA
USA
1855 965 5310
SERVICIO POSVENTA
15
cs@discoverhomeproducts.com
14
cs@discoverhomeproducts.com
Brasero de 30" con baldosas de pizarra Brasero de 30" con baldosas de pizarra
USA
Instrucciones de ensamblaje Instrucciones de ensamblaje
USA
PASO 3: Fijar las patas (G) al marco de las patas (F) con pernos (AA) y
arandelas (DD). Ajustar a mano.
3
PASO 2: Fijar la rejilla para madera (C) al tazón del fuego (D) con pernos (CC) y
arandelas (DD). Ajustar con destornillador (no incluido).
PASO 1: Insertar el mango (A) en el orificio en la cubierta de malla de alambre (B).
Fijar con una tuerca M6 (BB) desde el lado inferior de la cubierta de malla de
alambre (B). Luego ajustar con la llave (EE).
SE REQUIEREN HERRAMIENTAS PARA
ENSAMBLAR (NO INCLUIDAS)
AA
G
DD
F
BB
B
A
C
D
DD
CC

USA
1855 965 5310
SERVICIO POSVENTA
USA
1855 965 5310
SERVICIO POSVENTA
17
cs@discoverhomeproducts.com
16
cs@discoverhomeproducts.com
Brasero de 30" con baldosas de pizarra Brasero de 30" con baldosas de pizarra
Instrucciones de ensamblaje Instrucciones de ensamblaje
USA USA
Cuidado y mantenimiento:
Para prolongar la vida útil de su brasero, límpielo después
de cada uso y utilice la cubierta (I) para proteger la unidad
de la intemperie.
Use un paño suave para limpiar el brasero y el atizador.
No intente limpiarlo mientras está caliente.
Limpie el recogedor de cenizas después de cada uso una
vez que se hayan enfriado las cenizas.
Almacenar en un lugar seco, limpio y fresco.
PASO 4: Fijar el ensamblaje de las patas a la cubierta de pizarra (E) con
tuercas (BB) y arandelas (DD). Ajustar todo el equipo con la llave (EE) y
un destornillador (no incluido).
4
PASO 5: Girar el conjunto hacia arriba. Colocar el tazón del fuego (D) y la
cubierta de malla de alambre (B) en el conjunto de la base.
El brasero está ahora listo para usar. Mantener el atizador (H) cerca del
brasero para su uso.
5
B
D
H
BB
DD
E
6
I

Warranty conditions
Dear Customer,
The ALDI warranty offers you extensive benefits compared to the statutory
obligation arising from a warranty:
Warranty period: 2 years from date of purchase
Costs: Free same or equivalent replacment of damaged or missing part.
No shippping cost when covered under warranty,
ADVICE:
To inquire about and process warranty claims please contact
our customer service hotline by phone or email
Monday thru Friday 10AM-5PM ET 1-855-965-5310
In order to make a claim under the warranty, please send us via email:
The original receipt and the warranty card properly completed.
Photos of the damage if applicable.
The warranty does not cover damage caused by:
Any and all acts of nature.
Wind and water damage.
Unreasonable, unanticipated or abusive use.
Improper treatment or modification.
Lack of care or maintenance.
Rust or oxidation caused by exposed metals.
Disregard of the safety instructions.
After the expiration of the warranty period or if your claim is not covered by the limited warranty
you may still have the option of replacing or repairing your product at your own cost provided the
parts needed or an equivalent are available. If the damaged or missing parts are not covered by
the limited warranty you will be informed of the cost to replace these upfront. The distributor is
under no obligation to provide parts after the warranty period is expired or when the damage is
not covered by the limited warranty and may ofter the option to purchase replacements at
their discretion.
Your Details:
Name
Address
Date of purchase:
Location of purchase:
E-mail
Description of malfunction:
Phone
*Please keep your receipt with this warranty card.
For warranty claims please send a
copy of this warranty card and your
receipt to the following:
cs@discoverhomeproducts.com
Customer Service Line
Monday thru Friday
10am-5pm ET
2
YEAR WARRANTY
AFTER SALES SUPPORT
1855 965 5310
cs@discoverhomeproducts.com
MODEL: DHP-30SFP PRODUCT CODE:2016 05/2016
®30” SLATE TILE FIRE PIT
WARRANTY CARD

BRASERO DE 30" CON
BALDOSAS DE PIZARRA
Costos:
AVISO:
Cualquier acto de la naturaleza.
Daños debidos al viento y el agua.
Uso no razonable, no anticipado o abusivo.
Tratamiento o modificación inadecuados.
Falta de cuidado o mantenimiento.
Herrumbre u oxidación causada por los metales expuestos.
Incumplimiento de las instrucciones de seguridad.
Estimado cliente,
La garantía de ALDI le ofrece amplios beneficios en comparación con la
obligación legal que se deriva de una garantía:
Período de garantía: 2 años a partir de la fecha de compra
Reemplazo gratuito de la parte dañada o faltante por una igual o equivalente.
No hay costos de envío cuando está cubierto por la garantía.
Para solicitar información sobre las reclamaciones de la garantía y
para procesarlas, por favor póngase en contacto con nuestra línea
directa de atención al cliente por teléfono o correo electrónico
Lunes a viernes de 10 a.m. - 5 p.m. ET 1-855-965-5310
Después del vencimiento del período de garantía o si su reclamación no está cubierta
por la garantía limitada, es posible que aún tenga la opción de reemplazar o reparar su
producto pagándolo de su bolsillo, siempre y cuando las piezas necesarias o un equivalente
estén disponibles. Si las piezas dañadas o faltantes no están cubiertas por la garantía limitada,
se le informará por adelantado del costo de reemplazarlas. El distribuidor no tiene ninguna
obligación de proporcionar piezas después que haya vencido el período de garantía o cuando
el daño no esté cubierto por la garantía limitada y puede ofrecer a su discreción la opción de
comprar los reemplazos.
La garantía no cubre a los daños ocasionados por:
El recibo original y la tarjeta de garantía completada de manera adecuada.
Fotografías de los daños, si es aplicable.
Para hacer una reclamación bajo la garantía, por favor envíenos por correo electrónico:
Descripción del defecto:
Sus datos:
Nombre
Dirección
Fecha de la compra:
Lugar de la compra:
Correo electrónico
Teléfono
Por favor, mantenga su recibo con esta tarjeta de garantía.
cs@discoverhomeproducts.com
Para reclamaciones de la garantía, por
favor envíe una copia de esta tarjeta de
garantía y su recibo a:
Línea de Servicio al cliente
Lunes a viernes
10 a.m. - 5 p.m. ET
2
AÑOS DE GARANTÍA
SERVICIO POSVENTA
1855 965 5310
cs@discoverhomeproducts.com
MODEL: DHP-30SFP PRODUCT CODE:2016 05/2016
®
TARJETA DE GARANTÍA
Table of contents
Languages:
Other Range Master Outdoor Fireplace manuals
Popular Outdoor Fireplace manuals by other brands

KALOS
KALOS KLFP212-0300 Assembly instructions

Gasmate
Gasmate EDEN Installation, operation and maintenance instructions

Grand Canyon Gas Logs
Grand Canyon Gas Logs OTPB-24 Installation and operation guide

OVE
OVE BELLEVUE G2S424S owner's manual

pleasant hearth
pleasant hearth OFW104SC manual

Fire Island
Fire Island Marcroft owner's manual