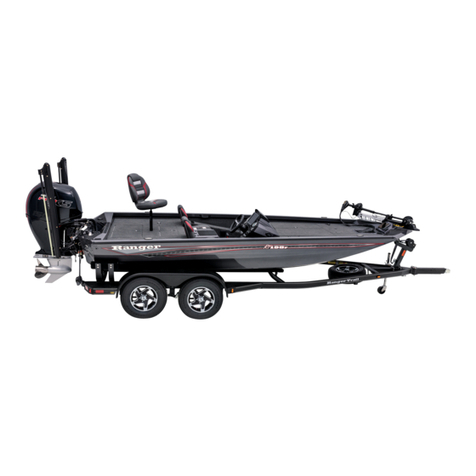
Ranger boats Z-Comanche Owner's manual

Keep this manual with the boat at all times.
All operators must read and fully understand the
operational instructions before the boat is used.
• Z-Comanche®
• Z-500 / Z-100
• Reata®
• Fisherman
• Angler
• Bay Ranger ®
• Bahia™
• Intracoastal
• Ranger Trail® Trailers
Fishing Holdings, LLC
d/b/a Ranger® Boats
P.O. Box 179 • Flippin, Arkansas • 72634
870-453-2222
© Copyright MMXVI Fishing Holdings, LLC d/b/a Ranger Boats Printed in USA, R-6160
Fiberglass Owners Manual.indd 1 6/16/16 9:49 AM

Ranger ® boats include a wide variety of
advantages in quality, construction and
performance. For even more details,
visit us at www.rangerboats.com
®
®
®
®
®
®
®®
®
®
®
RPM Performance
Control Post
Dri-Latch
COOL Hub
®
™
®
®
™
®

1
GETTING TO KNOW AND HANDLE YOUR RANGER BOAT . . .
Your Ranger dealer should see that you have selected the proper horsepower engine for the rating range of
the boat model you have chosen. The proper engine mounting height has been selected for optimum performance
and the correct propeller has been chosen.
Since most boats spend more time on the trailer than in the water, a RangerTrail® trailer can extend the useful
life of your new boat. The load MUST be evenly distributed on the properly fitting “bunks” or “pads” of the trailer.
The boat should not rest on the loading rollers, but should properly cradle on the bunks.
Always park your rig so that the trailer tongue is higher than the stern of the boat, so that any water can drain
from the hull when the drain plug is removed. All livewell valves should be placed in the “empty” position to properly
drain your livewell plumbing.
A properly fitted boat cover will protect your investment from the damaging effects of the ultraviolet rays of
sunlight, as well as from road film, rain and dirt abrasion while trailering. The cover also protects your accessory
equipment and fishing tackle from “prying eyes” and helps to guard against pilferage.
Familiarize yourself with the instruments and indicators used with all installed equipment. Factory equipment
manuals are included to assist you to properly operate your trolling motor; depth finders; engine tachometer;
speedometer; and any additional accessories that you have installed. Naturally this Ranger manual is only complete
when you have completely studied your engine operating manual and are familiar with engine operation.
Now you are ready for a ride in your new boat! This will be an exciting, fun experience if you exercise the proper
caution and observe all safety rules and regulations.
Before launching your boat… stop on the ramp short of the water. Stop your vehicle’s engine and set the
parking brake. At the rear of the boat, install your transom drain plug and remove the trailering tie-downs, trailering
arms, motor supports and/or support brackets. Slowly back the boat and trailer into the water and unhook the winch
strap hook. When in the driver’s seat, put on and secure your life vest and attach the engine emergency stop switch
lanyard to your person. Start engine and back your boat off the trailer. You should experience no problem if the
water is adequately deep for proper launching.
While you are easing along within the “No Wake” zone you should trim your engine all the way down to its
lowest position (in). Turn the steering right and left to insure that there is no undue slack and inspect the steering
system. Look for any loose connections at the engine and beneath the driver’s console (see pp. 23-26). Inspection
of this crucial linkage system can be visually made at home or at the lake, but should be done at regular intervals.
Before applying power and “opening it up”, insure that all passengers are properly seated and are wearing an
approved Personal Flotation Device (PFD or Life vest). Check to see that there are no obstructions in your path.
We recommend that the front pedestal seat be removed from the front deck base and positioned in the special base
provided in the front floor of the boat. If your boat has non-adjustable pedestals, remove the extension pipe from the
seat base and install the seat base directly into the front deck receptacle. If your boat has an optional deck extension
and power pedestals, remove the lid in the deck extension and secure the pedestal in the receptacle provided in
the floor. If the optional deck extension does not have a removable lid, store your seat securely in the floor of the
boat. This will provide for an unobstructed view while driving. The power pedestal should be pushed down into the
lowest position. Should there be no base provided in the floor, the seat should be removed and securely placed in
the floor of the boat.
When you have cleared the “No Wake” zone it is time to accelerate and get your new boat “on plane”. Before
applying power, insure that all passengers are properly and securely seated in appropriate locations. Abruptly move
the throttle lever into the full open position (full forward). The bow of the boat will rise into the air for a moment… this
is normal operation when a boat is “coming out of the hole” and is no cause for alarm. The bow will quickly come
back down into a level running position. When the boat begins to accelerate rapidly, the throttle should be pulled
back to obtain a comfortable running speed. Always increase your speed a little at a time until you are running
at a speed at which you feel safe and are in complete control…NEVER FASTER THAN YOUR EXPERIENCE
Getting to Know and Handle Your Ranger® Boat
Failure to store/park your rig with the bow elevated could allow rain water to
accumulate in the storage boxes.
NOTICE

2
Getting to Know and Handle Your Ranger® Boat
DICTATES! At this moderate speed you should begin to trim your engine into a higher position (out). Please refer
to your engine owner’s manual for more information on power trim use and operations.
Your speed will increase and the bow will lift. The boat will begin to run with the back rear portion of the hull
in contact with the water and steering will become easier. Over-trimming will result in excessively high RPM (note
your tachometer) and the steering can develop “torque” or a “pull” toward the right. Trim back down slightly for best
operation. A different trim setting (see your trim indicator) will be required for different throttle settings. You will soon
develop an instinctive feel for these settings. Your ear will become attuned to the sound of the proper engine RPM.
Again,over trimming is to be avoided as excessive RPM can cause engine damage and can also cause your prop
to “blow out” (lose its grip on the water because it is too near the surface). If the bow of your boat should begin to
bob up and down (called porpoising) you will probably have over trimmed. Bump the trim button down a little until
the motion stops.
If your boat should continue to “porpoise”, a slight increase in throttle and speed will generally correct the
condition. Proper distribution of the load in your boat will make a great difference in its operation. Moving tackle
boxes or ice chests rearward or toward the front can greatly effect boat performance and handling.
When beginning a turn with the engine trimmed in the higher positions, the trim switch should be pressed to
LOWER the engine further into the water just prior to and during the turning of the steering wheel. Practice and
experience will determine just how far down you will need to trim for safely handling a turn at various speeds
and water conditions. Just remember to MAKE SAFETY YOUR GUIDE when attempting any new or unfamiliar
maneuver. PROCEED ONLY AT SPEEDS AT WHICH YOU FEEL SAFE AND IN CONTROL!
Naturally, it is impossible to describe here all the different situations that you may encounter. Just remember
that COMMON SENSE is your best safety precaution. Your new boat is built to safely carry you in NORMAL
OPERATION, but it is up to you to stay alert and to avoid dangerous situations. Safe boating is in the hands of the
operator.
Even the pleasant experience of the “first ride in your new boat” must sometime come to an end. Hopefully you
have purchased a “drive on” trailer with your boat. The key to simple and effortless loading of your boat is having
the trailer in the proper position. This “right” position is determined by the steepness of the ramp. Here, you will
have to experiment with the proper depth to have your trailer in. The most common mistake is having the trailer
too deep, so a little time spent experimenting with different depth positions can ultimately save you much time and
embarrassment. To load at slow speed, position your boat to head directly between the guide bunks or guide rollers
and use the thrust of your outboard engine to drive the boat forward until the bow contacts the roller on the bow
stand block. Shut down your outboard and fasten the winch strap hook to the bow eye. Tighten the winch strap and
lock winch before pulling the boat from the water. Your engine should be trimmed up into a higher position before
the trailer is pulled up the ramp to prevent damage to the lower unit or propeller. Pull the rig up the ramp and park
well out of the way of other boaters. Stop your vehicle engine and set parking brake. Remove the drain plug, open
and drain the livewell systems, and stow all loose equipment. We recommend that you install a transom saver,
or engine support brace, between the trailer frame and the lower unit of your engine to prevent damage to your
transom while the boat is in transit.
For the most possible boating and fishing enjoyment familiarize yourself completely with your boat and with the
instruction manuals for all additional equipment. If you are a novice, there are publications on good seamanship
recommended to make your boating safe and enjoyable. We also recommend that you enroll and attend any of
the excellent safe boating courses offered and conducted by your area Power Squadron or the U.S. Coast Guard
Auxiliary.
Improper use of power trim may lead to excessive bow steer or
steering torque (pull) and could lead to accidental injury or death.
WARNING
The operator (driver) is responsible for the correct and safe operation
of the boat, the equipment aboard and the safety of all occupants
aboard. We strongly recommend that the operator read this manual
and thoroughly understand the operational instructions for the engine and all related accessories before
the boat is used.
WARNING

3
Be Responsible for Safer Boating / Carbon Monoxide Warning
BE RESPONSIBLE FOR SAFER BOATING
•ALCOHOL and DRUGS - The debilitating effects of alcohol and other drugs reduces reaction time and detracts
from judgment. The combined effect of the outdoor environment… sun, heat, rough water, and noise can be more
fatiguing than one would imagine and, combined with drugs or alcohol, can be very dangerous.
•GAME PLAN - Tell a friend, neighbor, or another family member where you will be boating and when you plan
to return. Be certain that this individual has a good description of your boat and any other identifying information
that could be needed to help find you should an emergency arise.
•VISIBILITY - Be sure the operator’s visibility is not obstructed. On models with bases, adjust the seat for best
visibility. (Some saltwater bay models may have limited visibility in the seated position).
•TOOLS and SPARE PARTS - Many people have been stranded by minor breakdowns that they could have
repaired themselves. It is a good idea to carry a few tools and common spare parts and to be familiar with simple
repairs that can be easily accomplished.
•GASOLINE RESERVES - Never push your boating range to the limit of your gas tank capacity… one-third of the
fuel to go, one-third to come back and one-third to reserve.
•GOOD BOAT KEEPING - A clean boat is a safer boat. Take care to see that rods, lures, nets, gaffs and other
potentially harmful gear are properly stowed so that it cannot blow or move around while the boat is underway.
Perform all maintenance and safety checks regularly. Secure all icebox or cooler lids and place any trash or
debris safely under cover until the trip is over.
•BOARDING LADDER - Many models are equipped with a boarding ladder. Rotating propeller may cause serious
injury or death. Do not approach or use the ladder when engine is running. Shut off the engine when near persons
in the water. Make sure to stow the ladder after it is used and before starting the engine. Never use a damaged
ladder.
•SPEED and SKILL - The fast and powerful boat can require the operator to exercise a high level of skill and
attention to driving. Only go as fast as your skill and good judgment dictates is safe. You are in charge of the
wellbeing of your passengers and yourself. Be alert for any hazards in the water and operate your boat in such
a manner as would be appropriate for the water conditions. Be a good boating “neighbor” and do not create a
hazard or annoyance to others. The best safety equipment is your own good judgment.
•SKIERS and SWIMMERS - Do not allow operation of the engine when anyone is in the water near the stern of
the boat. Never back up to a down skier or anyone in the water. Never drive your boat directly behind a skier.
CARBON MONOXIDE
Carbon monoxide is a deadly gas that is odorless, tasteless and colorless. It is present in the exhaust of internal
combustion engines. Inhaling sufficient concentrations of carbon monoxide can be fatal within minutes. Early signs
of carbon monoxide poisoning may include headache, nausea, fatigue, drowsiness, confusion and vomiting. DO
NOT MISTAKE THESE SYMPTOMS FOR SEASICKNESS. If any of these symptoms occur to you or any of your
passengers, ventilate the boat by opening the side curtains or forward hatch to remove the fumes and immediately
seek medical attention.
Carbon monoxide can be drawn into the cockpit area over the stern of the boat. When operating the engine,
ventilate the cockpit area by removing side curtains or opening forward hatches to allow fresh air to flow though. Do
not operate the engine if your boat is moored in a confined area.
Exhaust from a running engine can cause an accumulation of
carbon monoxide gas in the cockpit area when the canvas top and
side curtains are installed. Provide adequate ventilation when these
coverings are installed in their closed positions.
WARNING

4
TABLE OF CONTENTS
Getting to Know and Handle Your Ranger Boat ............................................1-2
Be Responsible for Safer Boating.....................................................................3
Carbon Monoxide Warning................................................................................3
Special Information............................................................................................5
Your Ranger Dealer’s Responsibilities..............................................................5
Owner/Operator’s Responsibilities .................................................................5-6
Warnings ...........................................................................................................6
Hazard Labeling .............................................................................................7-9
Hull Identification Plate....................................................................................10
U.S. Coast Guard Capacity Information Plate ................................................11
Recommended On-Plane Seating Locations ..................................................12
Gasoline Fuel System .....................................................................................13
Your Livewell Aeration System .......................................................................18
Steering at Console.........................................................................................25
Your Boat’s Finish ...........................................................................................28
Maintenance and Repair ........................................................................28-29
Your Power Pedestals.....................................................................................29
Key Locks, Carpet, and Upholstery.................................................................31
Cleaning Upholstery .................................................................................. 31-32
Adding Accessories To Your Boat ..................................................................33
Hook Up of Trolling Motor Leads ....................................................................33
Wiring Diagrams.........................................................................................34-43
Electrical System.............................................................................................44
Fuse Panel Information ..........................................................................44-45
1850, 2050,1880, 2080 ..........................................................................45-46
620FS and 621FS ..................................................................................47-50
Saltwater Series - 220, 240, 2310, 2410.....................................................51
Saltwater Series - 2350, 2510 Bay ........................................................52-54
Z519c, Z520c, Z520ci, Z521c, Z522d ....................................................55-58
Z522 ............................................................................................................59
Safety and Maintenance Tips..........................................................................61
Boating Safety Checklist .................................................................................62
Federal Requirements for Recreational Boats...........................................63-64
YOUR RANGER TRAIL® TRAILER
General Information and Maintenance............................................................64
Contained Oil Orbital Lubrication (COOL) Hubs .............................................64
Reporting Safety Defects ................................................................................64
Trailer Brakes ..................................................................................................65
RangerTrail Wiring ..........................................................................................66
Before Towing Your Ranger Trail Trailer ........................................................67
Towing Your Ranger Trail Trailer....................................................................67
Swing Hitch .....................................................................................................68
Hitch Class Rating...........................................................................................68
Trailer Tire Safety, Care and Maintenance ................................................68-72
Trailer Exploded View .....................................................................................73
Ranger Trail Parts List ....................................................................................73
Limited Warranty ........................................................................................74-75

5
SPECIAL INFORMATION
The following special information is intended to alert you to possible dangers and to information important to
the safe operation of your boat and other equipment. Observe them carefully. However, simply being aware of the
“WARNING”, “CAUTION” AND “NOTICE” notations in this manual will not eliminate the dangers that they signal if
you do not implement the information. These warnings, plus common sense operation will insure you a safe and
fun boating or fishing outing.
Please take special note when you see one of the following signs:
ALL information or instructions in this manual could be necessary for proper operation and/or maintenance.
If you do not understand any portion of this manual, please contact your Ranger dealer or our Customer Service
Department for any additional information.
IMPORTANT:
Your Ranger Dealer’s Responsibilities…
Generally, it is the dealer’s responsibility to the customer to make sure that the boat has been equipped as
ordered with a properly installed and functioning engine that is within the horsepower rating specified for that model
boat. The dealer should see that the engine is outfitted with the proper propeller for that boat model and for the load
that the boat is normally expected to carry.
The dealer should help to familiarize the customer with the onboard equipment and explain operation of this
equipment; the engine operation; and the proper functioning and operation of the boat itself.
Prior to delivery, the dealer should make certain that the product and equipment is completely operational; the
proper propeller is installed; and that all oil, fuel system and lubrication systems are understood. The dealer should
explain the operation of all instrumentation equipment, and the boat electrical and livewell systems.
The dealer should check for correct carburetor adjustment, throttle and steering functioning, and instrumentation
accuracy. Engine cooling water should be properly circulating.
The dealer should test for maximum engine RPM as specified in the engine manufacturer’s specification
sheet(s) and/or engine owner’s manual for proper operation of all equipment and for proper adjustment of steering
effort and direction. All necessary adjustments for maximum efficiency should be made.
Owner/Operator’s Responsibilities…
It is the owner/operator’s responsibility to perform all safety checks and to ensure that all lubrication and
maintenance instructions are complied with for maximum safety and proper operation.
Special Information
Failure to follow the advice of a “WARNING” may result in bodily injury
or death.
WARNING
Draws special attention to installation, operation, or other important
maintenance information.
NOTICE
Non-compliance with “CAUTION” instructions could result in failure of,
or damage to, the product and/or equipment.
CAUTION

6
It is also the owner/operator’s responsibility to return the unit to the Ranger dealer for a periodic checkup.
The owner/operator is responsible for the correct operation of the boat and for the safety of its occupants. Be
sure that all operators read this manual before attempting to operate the boat. Your passengers should be shown
the location and use of all emergency equipment and one passenger should be instructed how to handle the boat
in case of emergency. U.S. Coast Guard requirements for PFDs (Personal Flotation Devices, or Life vests) can
vary, depending on the type of boat. Be sure to comply with the U.S. Coast Guard regulations that apply to your
boat. The owner/operator should, however, make certain that all passengers in the boat are in possession of, and
are securely wearing a PFD whenever the boat is in operation. We strongly recommend that an engine emergency
stop switch be securely connected to the boat operator any time that the engine is in operation!
Learn the waterway rules of the locality in which you intend to operate your boat. Navigable waterways are
controlled by Federal regulations while inland lakes and Canadian waters are controlled by local jurisdictions. Obey
all regulations to protect yourself, your passengers, and fellow boating enthusiasts.
Before boating, obtain the weather forecast for your area. Familiarize yourself with the weather bureau warning
system signal(s) and waterway traffic sign/marking information.
Contact your local U.S. Coast Guard Auxiliary and take advantage of their excellent boating and safety classes
and seasonal boat inspections.
Special Information
Operating a boat with an engine of horsepower in excess of that
specified on the boat’s capacity plate can result in loss of control over
the boat’s operation and could lead to an accident resulting in injury
or death of the boat’s occupants.
WARNING
Imprudent operation of the boat, with or without the use of PFDs and
an approved engine emergency stop switch, can lead to property
damage, injury or death of the boat operator or passenger(s), or
other(s), whether within the boat or outside the boat.
WARNING
The boat operator should insure that the lanyard connection to the
emergency stop switch is of ample length to insure that the inadvertent
activation of the switch is not likely. Accidental triggering of the
emergency stop switch could result in loss of engine power at inopportune times, such as while docking
or in heavy seas, strong currents or high winds and could lead to an accident resulting in injury or death.
WARNING
Do not exceed the maximum weight and persons capacity found on
the U.S. Coast Guard capacity information plate located on your boat.
Overloading severely affects the stability and handling of your boat
and could lead to an accident causing injury or death.
WARNING

7
HAZARD LABELING
The following images are a partial list of warning/information decals that may be found in various locations on
your boat and trailer. (Photos are not to scale) Some labels are not appropriate for every boat/trailer model, so your
rig may not have them all. Check with your Ranger dealer to find out what labels your boat and trailer should have
and ask them to order any necessary replacements.
Hazard Labeling

8
Hazard Labeling

9
Hazard Labeling

10
Hazard Labeling & Hull Identification Plate
HULL IDENTIFICATION PLATE
The hull I.D. Plate is located on the outboard side of the starboard transom, above the water line, and contains
the following information:
• Hull Identification Number (Serial Number) - Should also be included in any inquiries or when ordering parts.
The U.S.C.G. requires the H.I.N. number be permanently affixed and remain on the starboard transom of
the boat. Do not alter this plate in any way.
Year Mfg. Year Model

11
Designated Occupant Positions
DESIGNATED OCCUPANT POSITIONS
The following pages show the designated occupant positions for each model with X for the recommended
on-plane seating and X for additional occupant locations (up to planing speed only).
A decal similar to the one in figure 1 (below) can be found on your boat in the area of the capacity label (figure 2).
The areas marked by X’s are the areas of the boat considered safe and suitable for on-plane seating.
The operator of the boat should familiarize themselves with the seating locations that fit into this category. Be
sure to read any warnings that may be affixed to the seat, base, or pedestal and follow those instructions.
Type A: A seat designed for occupancy while the vessel is underway at any speed.
Type B: A seat designed for occupancy only at boat speeds not exceeding five miles per hour.
Do not sit in type B seats when boat speed exceeds five MPH.
Do not exceed the loading limits of the capacity plate on your boat (Example figure 2).
FIGURE 1 FIGURE 2
Do not operate the boat on plane with persons located outside the
on-plane locations shown on decal. Failure to do so could cause a
person(s) to be thrown overboard resulting in injury or death.
WARNING

12
Designated Occupant Positions
X
X
X
X
RECOMMENDED ON-PLANE SEATING
ADDITIONAL OCCUPANT SEATING/STANDING LOCATIONS (UP TO PLANING SPEED ONLY)
DO NOT OCCUPY CASTING DECK(S) WHILE BOAT IS UNDERWAY.
DESIGNATED OCCUPANT POSITIONS
XX
XX
X
XX
XXX
XX
X
X
X
X
X
X
X
X
X
X
X
X
212LS
FS620-FS621
2510 Bay
X
X
X
X
X
XX
XX
XX
XXX
Z175
1880 & 2080 Angler
168 Phantom
XXXX
X
X X
X
X
X X
Z518-Z518c-Z518cI
220 Bahia
XXXX
X
XXX
XX
X
X
X
XX
X
X X
X
X
X X X
Z521c-Z520c-Z519c
Z519-Z520-Z520cI
Z522d
618T
240 Bahia
X
X
X
X
XX
X
X
X
X
X
X
X
X
X
XX
XX
XX
XX
1850LS-2050LS 620T
2310 Bay
X
XX
X
XX
X
XX
X
XX
X
X
XX
XX
X
XX
XX
190LS
FS619
2410 Bay
0004.00004428 Seating Charts.indd 1 7/9/15 4:22 PM

13
Fuel Systems
GASOLINE FUEL SYSTEMS
Gasoline fuel systems used in Ranger boats are designed to meet or exceed the requirements of the U.S. Coast
Guard, the National Marine Manufacturers Association, the EPA, and the American Boat and Yacht Council at the
time of manufacture.
All gasoline fuel systems have been factory inspected and pressure tested in accordance with regulations in
effect at time of manufacture. Additionally, each fuel tank must pass rigid tests and inspections performed by the
fuel tank manufacturer.
A. FUEL FILLS
Fuel fill deck plates are located on the port side deck, and are marked with the fuel pump symbol.
Most models are designed with the pressure relief system shown above. Under certain conditions the system
will be under pressure.
Always open the cap slowly to allow pressure to escape. The vented deck fill is designed to maintain system
pressure below 1 psi.
While filling the tank, the air displaced by the fuel escapes through the fill/vent. See Figure 1 on the next page.
Periodically inspect the deck fill plate for damage. Be sure to use the exact fuel fill/vent used on your boat if
replacement is required. Excessive pressure or vacuum in the fuel tank may damage the fuel system, if cap is
substituted. (Fuel fill deck plate is not waterproof; water can be drawn into fuel tank during vent operation, if fill is
submerged.)
After fueling, replace the fill cap, and wash the areas around the fuel fill plate, if any fuel is spilled. Residual fuel
DO NOT confuse GAS deck fill plate with WATER or OIL deck fill
plates. Deck fill plates are labeled according to the intended use.
WARNING

14
left on the deck and hull sides can be dangerous, and will yellow the fiberglass.
FIGURE 1: FUEL FILL
B. FUEL GAUGE
The fuel gauge indicates the amount of fuel in the tank. The fuel level is displayed on the console mounted
gauge when the ignition switch is “on”. On models with two tanks, a console mounted switch marked with a fuel
pump symbol or just “fuel”, is used to switch the gauge from one tank to the other. Push the fuel pump symbol switch
to display the level in tank 1 (starboard) or tank 2 (port). Or, on some models, push the switch to the left to display
the port tank fuel level and push to the right to display the starboard tank fuel level. The center position is “off”.
C. FUEL SENDER(S)
Due to the mechanical nature of the fuel sender, variations in readings during various speeds of operation may
occur. This system is merely a relative indication of the available fuel supply and not a calibrated instrument. With
this type of sending unit a more accurate measurement of fuel level is obtained with the boat in a level position.
D. FUEL VALVE(S)
A fuel hose connects the fuel tank to the engine. On models with more than one tank, a switch valve is installed
to switch from tank to tank. This valve, located at the driver seat, on the panel to the right of the driver, is clearly
marked and easily operated.
E. FUEL FILTER
Fuel filters are installed on each engine. (Yamaha has an additional fuel filter/water separator in the stern of
the boat.) Filters should be changed frequently to assure an adequate supply of fuel to the engine. Refer to the
engine manual for additional information. The engine manual is included in the owner’s information packet. Fuel
filters mounted in the vicinity of batteries, have a dielectric shield to protect against accidental short-circuiting. When
servicing, remove any batteries in vicinity of filter, if shield is removed.
F. FUEL STANDARDS
Be cautious when using gasoline that contains alcohol. Refer to the section on gasoline requirements in your
engine manual for additional information. The use of alcohol additives in gasoline has become more widespread.
Regulations on public notification of the existence of additives are currently controlled by the Environmental
Canister-type filters should be changed annually.
NOTICE
Fuel Systems

15
Protection Agency (EPA). Some states do require that gasoline pumps display information on additives (especially
alcohol). If alcohol content is not posted, ask and avoid using fuel containing alcohol if possible.
Although alcohol boosts the octane level in gasoline, it also attacks the rubber fuel distribution lines and even
metal fuel system components. Alcohol will permeate most fuel hoses and other components such as fuel pump,
gaskets and seals, and can also contribute to fuel system contamination.
The hoses we use in our boats are alcohol-resistant as are the materials used by the engine manufacturers. If
only fuel containing alcohol is available, you must perform more frequent inspections for leaks and abnormalities.
Any sign of leakage or deterioration requires your immediate attention. Refer to the engine manufacturer’s
recommendations on fuel type and octane ratings.
G. SAFETY AND MAINTENANCE TIPS
The fuel system in your Ranger requires little or no maintenance. However, the periodic inspection outlined
below is strongly recommended. Contact your Ranger dealer for proper fuel tank access for your model.
1. Check your fuel tank(s) for leakage, especially around the sending unit and fuel hose connections.
2. Inspect fuel hoses. A deteriorated hose containing alcohol blended fuels will normally be soft and swollen. A
deteriorated hose containing no fuel will be hard and brittle. In both cases the hose(s) should be replaced.
3. Inspect the fuel system fittings at the deck fuel fill, fuel tank vent, tank(s), and (if equipped with more than
one tank), the fuel switch valve for signs of leaks or corrosion. Visually inspect for deteriorating metal fittings
at the fuel hose connections.
4. Check fuel tank hold down brackets, making sure they are secure.
Storage compartments are not designed to store flammable materials, as ventilation may not have been
provided.
If areas are found within the fuel system that appear questionable, have your Ranger dealer inspect the system.
A thorough fuel system examination should be made by an experienced marine technician at least once a year.
Naturally a leak-free fuel system is a MUST for proper operation and on-board safety. Always inspect for fuel
leaks prior to connecting wiring to the battery or connecting a battery charger to the batteries or to the AC power.
ALWAYS inspect battery compartments before connecting battery charger to batteries and while battery
compartments are ventilated. Battery compartment lids should always be open to ensure no explosive hydrogen
gas is trapped in the compartment.
Fuel Systems
Avoid serious injury or death from fire or explosion, resulting from
leaking fuel. Inspect system for leaks at least once a year.
WARNING
Fuel vapors are a fire and explosion hazard. To avoid injury or death,
do not store fuel or flammable liquids in boat. Ventilation has not been
provided.
WARNING
Maintenance or repairs should be performed by your Ranger dealer or
other qualified personnel.
CAUTION

16
H. FUELING INSTRUCTIONS
1. Secure boat to dock.
2. Boats on trailers need to be on a level surface to prevent air pockets.
3. Switch off all engine(s), pumps, lights, etc. that could produce a spark.
4. Do not smoke, strike matches, or throw an electrical switch.
5. Make certain all passengers are ashore.
6. Be sure the proper type and grade of fuel as recommended by your engine owner’s manual is used.
7. Determine how much fuel is required to avoid overflow.
8. Ensure that a fire extinguisher is readily available.
9. Insert the fuel supply nozzle, keeping it in contact with the fuel fill deck plate to guard against static produced
sparks.
10. Stand away from the fuel tank vent/fill during fueling. Splash-back may occur which could cause a fire
hazard.
11. Make a habit of inspecting the bilge after pumping 5-10 gallons of fuel for any signs of leakage. If no
problems are detected, resume fueling.
12. DO NOT top off fuel tank. Allow room for thermal expansion, to prevent fuel from sloshing out the vent. Allow
no more than three automatic click-offs when filling.
I. AFTER FUELING
1. Replace all fill caps securely.
2. Wipe up any excess fuel immediately.
3. Determine that there is no odor of gasoline in the bilge, before turning on lights, pumps, or starting engine.
Fuel Systems
Batteries produce hydrogen and oxygen gases when being charged.
These explosive gases escape through the vent/fill caps and may
form an explosive atmosphere around the battery if the ventilation is
poor. This gas may remain around the battery for several hours after charging. Sparks or flame can ignite
the gas and cause an explosion.
WARNING

17
Fuel Systems
A wide variety of components used on this vessel contain or emit
chemicals known to cause cancer and birth defects and other
reproductive harm.
EXAMPLES INCLUDE:
• Engine and generator exhaust
• Engine and generator fuel, and other liquids such as coolants and oil, especially used motor oil.
• Cooking fuels
• Cleaners, paints, and substances used for vessel repair
• Waste materials that result from wear of vessel components
• Lead from battery terminals and from other sources such as ballast or fishing sinkers.
TO AVOID HARM:
• Keep away from engine, generator, and cooking fuel exhaust fumes
• Wash areas thoroughly with soap and water after handling the substances above.
WARNING
Spilled fuel is a fire hazard. DO NOT overfill or overflow the tank,
or allow fuel spills into the hull or bilge. If spillage occurs, clean up
immediately and dispose of soiled rags in a proper container.
WARNING

18
Your Livewell Aeration System
Fig. 2
YOUR LIVEWELL AERATION SYSTEM
The livewell aerator system in a Ranger boat is designed to supply the water and oxygen necessary to the
survival of your catch. This patented system not only allows fresh water to be pumped in through the aerator supply
line(s), but also permits recirculation and aeration at any speed of boat operation.
The recirc position (with aerator running) will only recirculate what water is in the well. It does not bring in any
fresh water. This position provides a more positive seal and is good to use if you are going to transport live fish in
the well.
The auto position also holds the water in the well and in conjunction with the aerator will allow a mix of fresh
water intake and recirculate existing water. This would be the normal position for a day of fishing. The empty position
is just that, to empty the water from the well.
On models without digital switching, the livewell aerator timer located on the driver’s console, controls the off
time of the aerators when the pump switch is in the automatic position. The timer starts and stops the pump at
intervals determined by the setting on the timer. Full counterclockwise is minimum off time and full clockwise is
maximum off time. To have the aerator pumps run continuously, set the pump switch to the manual position.
LIVEWELL PUMP-OUT
Your new Ranger may be equipped with a livewell pump-out system. To use this pump out feature, put the
livewell control valve in the recirc position and pull out on the aerator spray head. Turn on the aerator and the water
in the well will be emptied. To fill the livewell and resume normal operation, push the aerator spray head in and set
the livewell valve to the auto position.
This manual suits for next models
9
Table of contents
Other Ranger boats Boat manuals
Popular Boat manuals by other brands

Chaparral
Chaparral 225 SSi2012 Owner's and operator's manual

Sea Eagle
Sea Eagle Explorer 380x Instructions and owner's manual

Regal
Regal 2700 owner's manual

Gumotex
Gumotex SEAWAVE user manual

Crane Creek Kayaks
Crane Creek Kayaks Styrigger product manual

Boston Whaler
Boston Whaler 420 OUTRAGE owner's manual