Rankam SMOKE CANYON SC2000301-SC-00 User manual

SC2000301-SC-00 - ENG 1 of 19 20151210-V1
Tailgate Grill
Model: SC2000301-SC-00
Instruction Manual
For Outdoor Use Only
Tools needed for assembly and maintenance:
Phillips Screwdriver & Adjustable Wrench (Not Included)
This instruction manual contains important information necessary for
the proper assembly and safe use of the appliance.
Read and follow all warnings and instructions before assembling and
using the appliance.
Keep this manual for future reference.

SC2000301-SC-00 - ENG 2 of 19 20151210-V1
DANGER
If you smell gas:
1. Shut off gas to the appliance.
2. Extinguish any open flame.
3. Open Lid.
4. If odor continues, keep away from the appliance and
immediately call your gas supplier or your fire department.
Failure to follow these instructions could result in fire or explosion
which could cause property damage, personal injury or death.
DANGER
1. Never operate this appliance unattended.
2. Never operate this appliance within 10 ft (3.05 m) of any
structure, combustible material or other gas cylinder.
3. Never operate this appliance within 25 ft (7.5 m) of any
flammable liquid.
4. If a fire should occur, keep away from the appliance and
immediately call your fire department. Do not attempt to
extinguish an oil or grease fire with water.
Failure to follow these instructions could result in fire or
explosion which could cause property damage, personal injury or
death.
WARNING
Combustion by-products when using this product contain chemicals known
to the State of California to cause cancer, birth defects, or other
reproductive harm.

SC2000301-SC-00 - ENG 3 of 19 20151210-V1
Please read Safety and Precaution statements, Grill Maintenance, Leak Testing,
Regulator/ Cylinder connection and Lighting Instructions before using grill the first
time.
Safety Symbols
The symbols and boxes shown below explain what each heading means. Read and
follow all of the messages found throughout the manual.
DANGER
Danger: Indicates an imminently hazardous situation which, if not avoided, will result
in serious injury or death.
WARNING
Warning: Indicates a potentially hazardous situation which, if not avoided, will result
in serious injury or death.
CAUTION
Caution: Indicates a potentially hazardous situation or unsafe practice which, if not
avoided, may result in minor or moderate injury.
WARNING
The appliance shall not be used on or
under any apartment or condominium
balcony or deck.
The appliance shall be used outdoors
only, and shall not be used in a
building, garage or any other
enclosed area.
This appliance is not intended to be
installed or used in or on a
recreational vehicle or boat.
The appliance shall maintain
minimum 36 Inches (91.4cm) from combustible materials to the sides and back

SC2000301-SC-00 - ENG 4 of 19 20151210-V1
of the appliance, and the appliance shall not be located or used under overhead
unprotected combustible materials.
This appliance is for outdoor use only and should only be operated in a
well-ventilated space. Never operate in an enclosed space, garage or building.
This appliance is not intended for commercial use.
This appliance is not for frying turkeys.
When cooking, the appliance must be on a level, stable noncombustible surface
in an area clear of combustible material. An asphalt surface is not acceptable for
this purpose.
Do not leave the appliance unattended. Keep children and pets away from the
appliance at all times.
This appliance is not intended for and should never be used as a heater.
This appliance will be hot during and after use. Use insulated oven mitts or
gloves for protection from hot surface.
Never attempt to attach this appliance to the self-contained LP gas system
of a camper trailer or motor home.
Carefully follow all instructions in this manual for proper assembly and leak
testing. Do not use appliance until leak test has been completed. If leak is
detected at any time, turn OFF gas supply and do not use until leak source has
been corrected.
Cooking area should be kept clear and free from combustible materials, gasoline,
bottled gas in any form, and any other flammable vapors and liquids. Keep free of
obstructions that would prevent ventilation.
Never try to light appliance with lid closed. The buildup of gas is very dangerous
and could cause an explosion.
The use of alcohol, prescription or non-prescription drugs may impair your ability
to properly assemble or safely operate the appliance.
Do not move appliance when in use. Allow the appliance to cool down completely
before moving or storing.
USE OF LP GAS CYLINDER AND INSTALLATION
BEFORE INSTALLING:
LP GAS CYLINDER
The installation must conform with local codes or, in the absence of local codes,with the
National Fuel Gas Code, ANSI Z223.1/NFPA 54, Storage and Handling of Liquefied
Petroleum Gases, ANSI/NFPA 58; or Natural Gas and Propane Installation Code, CSA
B149.1;Propane Storage and Handling, CSA B149.2; or the Standard for Recreational
Vehicles, ANSI A119.2/NFPA 1192; and Recreational Vehicle Code, CSA Z240 RV
Series, as applicable.
The LP-gas supply cylinder to be used must be constructed and marked in accordance
with the specifications for LP-gas cylinders of the US Department of Transportation
(DOT) or the National Standard of Canada, CAN/CSA-B339, Cylinders, Spheres and
Tubes for the Transportation of Dangerous Goods.

SC2000301-SC-00 - ENG 5 of 19 20151210-V1
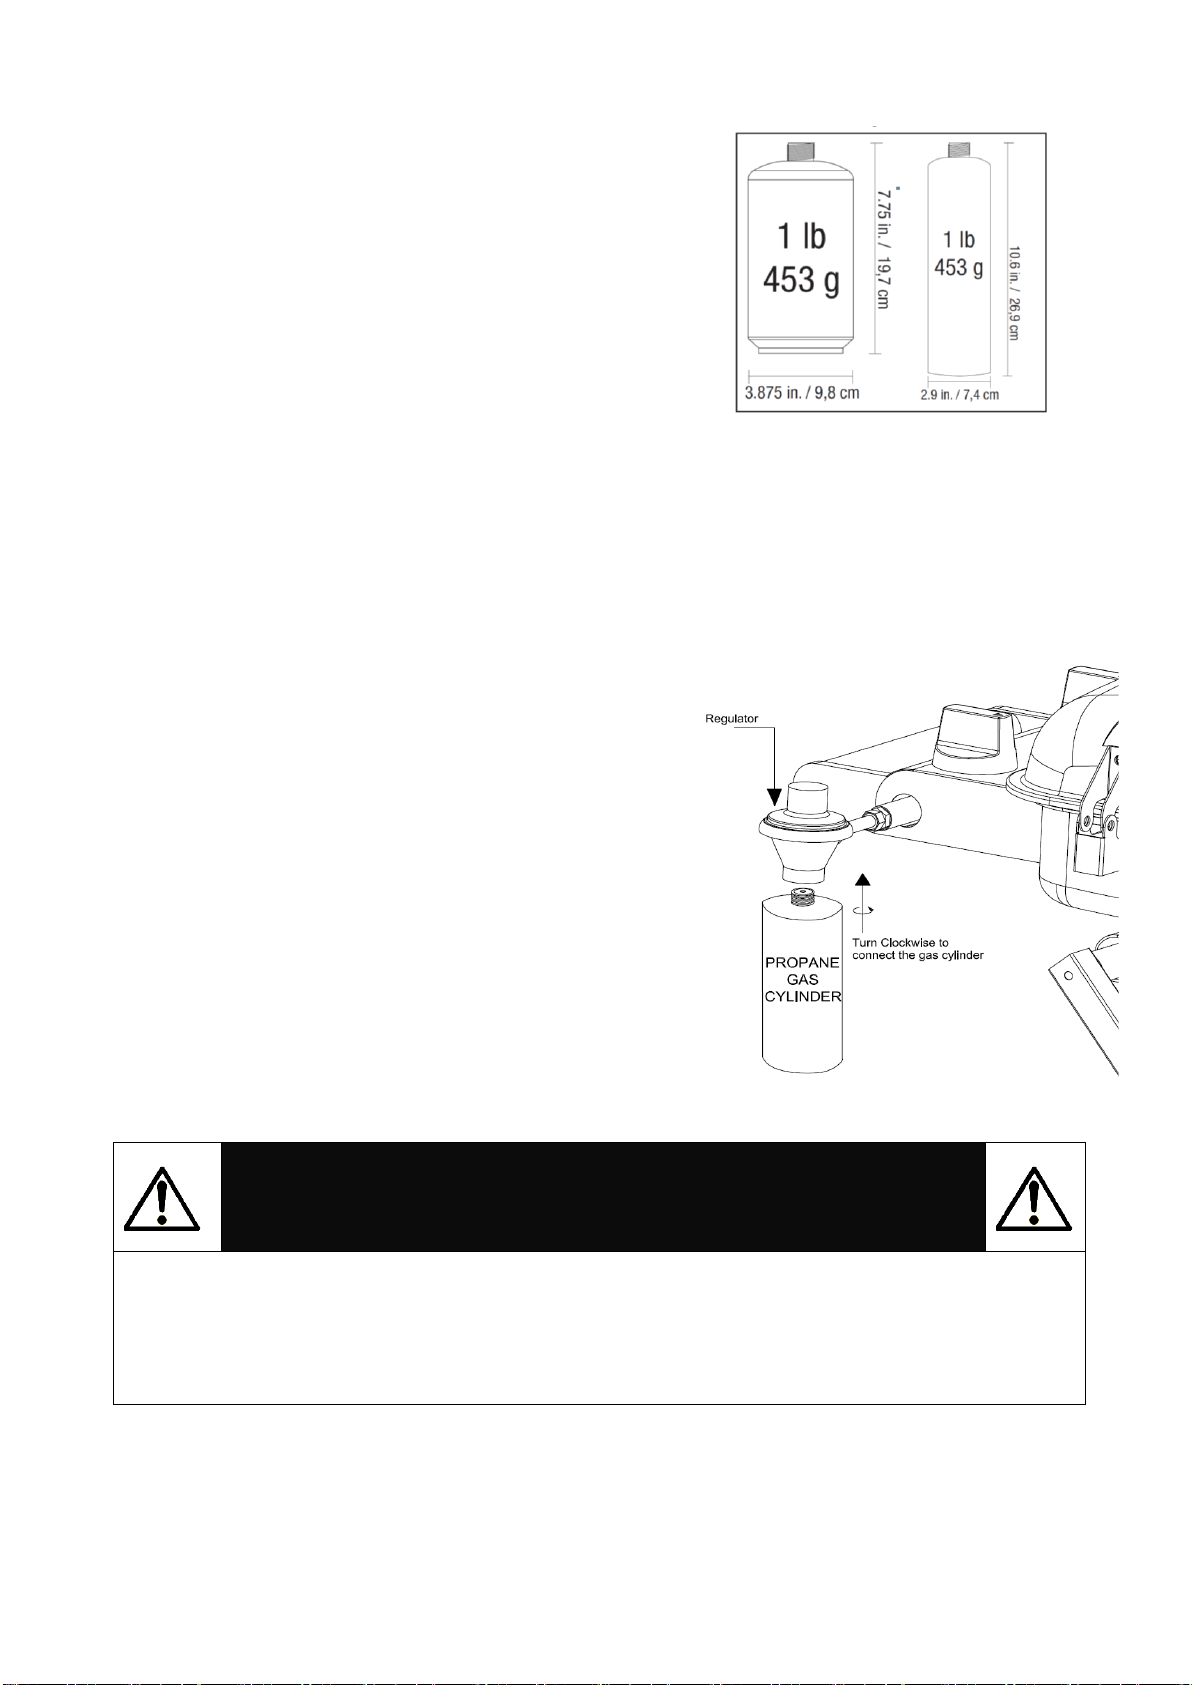
This appliance is designed to operate with a one
pound 7.75”or 10.6”high disposable / 16.4 oz. or
14.1 oz. propane gas cylinder (DOT 39 Cylinder)
Do not attempt to refill any disposable propane gas
cylinders.
The cylinder must be installed, transported and
stored in an upright position and should not be
dropped or handled roughly.
When the appliance is to be stored indoors, the
propane gas cylinder must be disconnected from
the appliance.
When the propane gas cylinder is connected to the
appliance, both must be stored outdoors in a well-ventilated space.
The propane gas cylinder should never be transported or stored where temperatures can reach
51.C (124.F)
Cylinders must be stored outdoors out of the reach of children and must not be stored in
a building, garage, or any other enclosed area.
The propane gas cylinder supply system must be arranged for vapor withdrawal.
Disconnect the gas propane cylinder when not in
use.
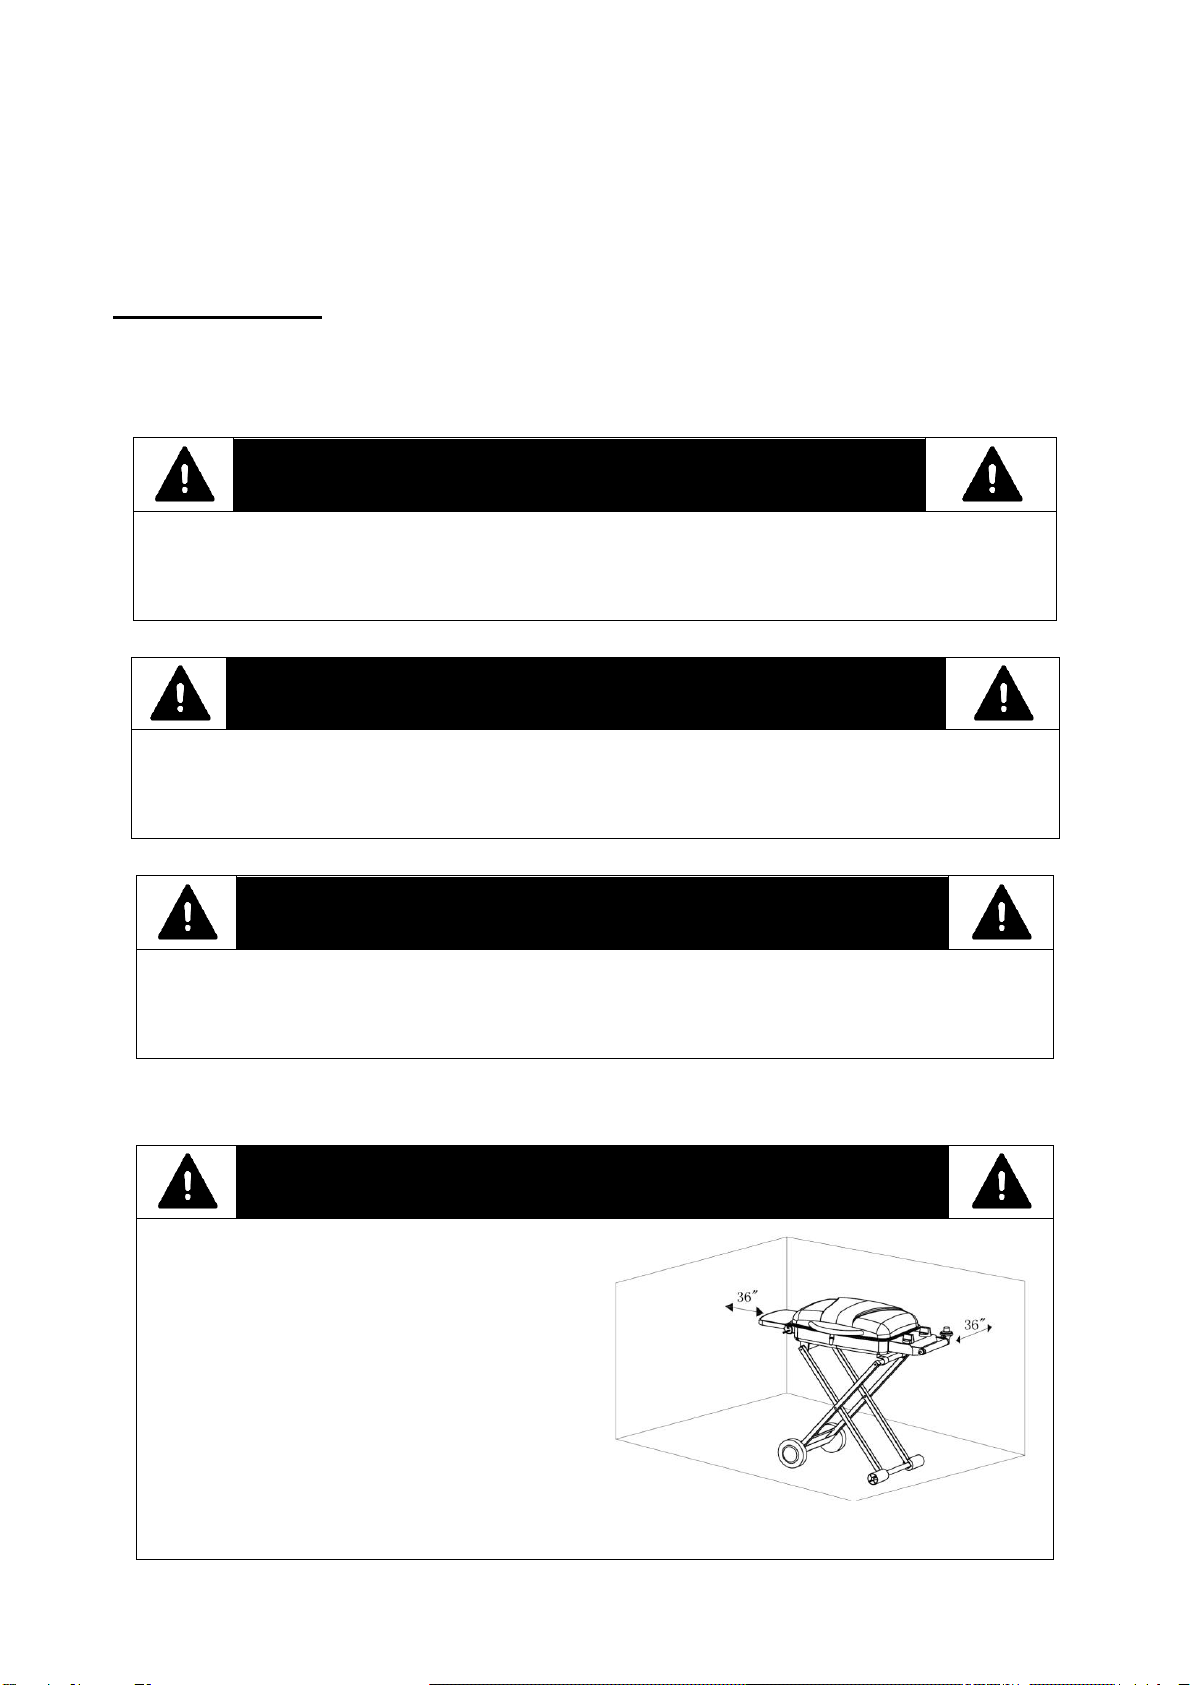
CONNECT THE PROPANE GAS CYLINDER
Only cylinders marked “propane”may be used.
Note: Some 1lb cylinders may form frost when near empty.
1. Make sure the control knob is in OFF position.
2. Lubricate the threads of the regulator with petroleum jelly if
necessary. Line up threads on LP gas cylinder with
regulator.
3. Insert and rotate LP gas cylinder clockwise until
they fit snugly together. HAND TIGHTEN ONLY.
Be careful not to cross threads when screwing in
the cylinder. Test for leaks, see “Leak Test”
Section.
CAUTION
(a) Do not store a spare LP-gas cylinder under or near this appliance;
(b) Never fill the cylinder beyond 80 percent full; and
(c) If the instructions in “(a)” and “(b)” are not followed exactly, a fire causing death or
serious injury may occur.
LEAK TEST
Although all gas connections on the grill are leak tested at the factory prior to shipment, a
complete gas tightness check must be performed at the installation site due to possible
mishandling in shipment, or excessive pressure unknowingly being applied to the unit.

SC2000301-SC-00 - ENG 6 of 19 20151210-V1
Periodically check the whole system for leaks following the procedures listed below. If the
smell of gas is detected at any time you should immediately check the entire system for
leaks.
BEFORE TESTING
Make sure that all packing material is removed from the grill including the burner
tie-down straps.
Prepare a soap water mixture of one part liquid detergent and one part water. You will
need a spray bottle, brush, or rag to apply the solution to the fittings. For the initial leak
test, make sure the LP cylinder is available and never fill the cylinder beyond 80
percent full.
WARNING
DO NOT SMOKE WHILE CONDUCTING LEAK TEST
NEVER PERFORM LEAK TEST WITH AN OPEN FLAME
If it is evident there is excessive abrasion or wear, or the regulator is damaged, it
must be replaced prior to the appliance being operational. The replacement
regulator shall be specified the by manufacturer.
TO TEST
1. Make sure the control knobs are in the “OFF” position, and turn on the gas supply.
2. Check all connections at the Gas cylinder, LP gas regulator and supply valve up to and
including all connections to the pipe that go to the burners (the diagram shows the point
where the soap water mixture is being applied). Soap bubbles will appear where a leak is
present.
3. If a leak is present, immediately turn off the gas supply and tighten the leaky fittings.
4. Turn the gas back on and recheck.
5. If it is evident there is excessive abrasion or wear, or the hose is cut, it must be replaced
prior to the outdoor cooking gas appliance being put into operation. The replacement
hose assembly shall be that specified by the manufacturer. Contact customer service at
(888) 837- 1380
Points of leak test:
1. Connection point at the manifold
and the regulator outlet.
2. Connection point at regulator
and tubing.
3. Connection point at the Gas
cylinder outlet and regulator
inlet.
4. Connection points at control
valves and manifold. ( Under the
Control panel)

SC2000301-SC-00 - ENG 7 of 19 20151210-V1
Product Diagram

SC2000301-SC-00 - ENG 8 of 19 20151210-V1
Component List
1. Lid Handle
2. Lid Handle Bracket
3. Grill Body Assembly
1 pc
2 pcs
3a: Grill body with hose regulator
assembly - 1 pc
3b: Grill lid –1pc
3c: Legs –1set
3d: Control knob –2pcs
3e: Lighting rod –1pc
3f: Lid lock–1pc
3. Grill Lid Assembly
3. Grill Bottom Body Assembly
4. Cooking Grate (Left)
3g: Heat shield –1pc
3h: Hinge (top)–2pcs
3i: Hinge (bottom) –2pcs
3j: Steel bracket (front) –2pcs
3k: Steel bracket (back) –2pcs
3l: Silica washer –12 pcs
1 pc
5. Cooking Grate (Right)
6. Flame Tamer
7. Side Table
1 pc
2 pcs
7a: Side table - 1pc
7b: Lock assembly –1pc
8. Wheel
10. Wheel Cover
10. Oil Drip Tray
2 pcs
2 pcs
1 pc
3a
3b
3c
3d
3e
3f
3k
3g
3j
3h & 3i
7a
7b
3l
3l

SC2000301-SC-00 - ENG 9 of 19 20151210-V1
11. Plastic Leg Base
2 pcs
Hardware List
Item No.
Item Name
Diagram
Qty.
#A
Wheel Bolt
2 pcs
#B
M10 Washer
2 pcs
#C
M6 * 15mm Bolt
4 pcs
#D
M6 Washer
4 pcs
#E
M6 * 55mm Bolts
2 pcs
#F
Cotter Pin
4 pcs

SC2000301-SC-00 - ENG 10 of 19 20151210-V1
Assembly Procedures
Step 1. Take out the Grill Body (3) from the packing box and keep the grill body in folded
position. Loosen the screws on legs as following. Insert these screws through the center hole of
the Plastic Leg Base(11) and tighten them firmly.
Step 2. Insert the Wheel Bolt (#A) through the Wheel (8) and Washer (#B) and then tighten the
bolt to the leg frame of Grill Body (3). Attach the Wheel Cover(9) to the Wheel (8).
9
#A
8
#B
3
9
#A
8
#B
#A –Wheel Bolt x 2 pcs
#B –Washer x 2 pcs
Screws on
legs
3

SC2000301-SC-00 - ENG 11 of 19 20151210-V1
Step 3. Unfold the Grill as per following figure.
Step 4. Attach Side Table (7) to Grill Body by using 4 pcs of M6x15mm Bolt (#C)
and M6 Washer (#D).
7
#C–M6x15mm
Bolt x 4 pcs
#D –M6 Washer x 4 pcs
#C + #D
#C + #D

SC2000301-SC-00 - ENG 12 of 19 20151210-V1
Step 5. Insert M6x55mm Bolts (#E) through the Lid Handle Brackets (2) and Lid
Handle (1). Tighten the the Handle firmly.
Step 6. Place the Flame Tamer (6) over the burners and use 4 pcs of Cotter Pins
(#F) to maintain the Tamers position.
1
2
3
#E
#E - M6x55mm
Bolt x 2 pcs
6
#F
#F –Cotter Pin x 4 pcs

SC2000301-SC-00 - ENG 13 of 19 20151210-V1
Assembly is completed!!!
Before Cooking for the First Time
Operate grill 15 minutes with grill lid closed and gas control on HIGH. This will heat-clean internal components and
eliminate odor of oil in grill.
WARNING
Always unfold the grill completely during cooking and lighting
Step 7. Place the Cooking Grates (4 and 5).
Step 8. Attach the Oil Drip Tray (10) under the Grill Body.
4 and 5
10

SC2000301-SC-00 - ENG 14 of 19 20151210-V1
Unfold Grill
Note: Unlock the latch before unfolding the legs
Fold Grill
WARNING
Propane Gas Cylinder MUST be detached from regulator before folding the grill
DO NOT fold the grill or move the grill immediately after cooking. Wait for the grill to cool
down completely!
Note:
Side table should be completely folded before moving the grill
Lock the latch before moving the grill.

SC2000301-SC-00 - ENG 15 of 19 20151210-V1
Lighting Rod
Match
Fold / Unfold Side table
Lighting Instructions
1. Read all instructions before lighting
2. Open lid during lighting
3. Make sure the propane gas cylinder is
tightly threaded into the regulator
(hand tighten only).
4. Push and turn main burner knob
slowly to “HI”.
5. Press the ignitor button. If ignition does not
occur in 5 seconds, turn the regulator knob off,
wait 5 minutes and repeat the lighting
procedure
Manually Lighting Your Grill By Match
1. Important! OPEN LID.
Attempting to light burner with lid closed may
cause an explosion. Do not expose any part of
your body or clothing directly above cooking area when lighting. .
2. Using the lighting rod with a match, ignite the match and insert through the cooking grates to
the burners.
3. While holding match in place, turn control knob to “Hi”position. Burner will ignite.
4. Observe burner flames through openings at flame
tamer. Make sure burner ignites and stays lit on both
sides.
5. If ignition does not occur in 5 seconds, turn the regulator knob off, wait 5 minutes and repeat
the lighting procedure.
Pull the latch
Pull the latch

SC2000301-SC-00 - ENG 16 of 19 20151210-V1
CAUTION
1. If burner does not light OR if burner flame is accidentally extinguished, turn
control knob on regulator to OFF, wait 5 minutes, try again. If the burner does
not ignite with valve open OR if burner flame is accidentally extinguished after
lighting, gas will continue to flow out of the burner and could accidentally ignite
with risk of injury.
2. Handle temperatures with grill on HIGH will be too HOT to touch with bare
hands. Use hot pads or mitts to handle the grill when hot.
Turning grill off
After cooking, turn the grill off by rotating the control knob to OFF. Control knob should pop up
in the OFF position. If control knob does not pop up, disconnect cylinder to turn grill off and
replace the regulator.
This appliance will be hot during and after use. Use insulating oven mitts or gloves for
protection from hot surface or splatter from cooking liquids.
Allow grill to cool completely before storing.
Storing your grill
Be sure the appliance has cooled. Remove propane cylinder and install protective cap over outlet
threads.
Disconnect the propane gas cylinder when not in use.

SC2000301-SC-00 - ENG 17 of 19 20151210-V1
Flame Characteristics
Check for proper burner flame characteristics. Burner flames
should be blue and stable with no yellow tips, excessive noise
or lifting. The following steps should be followed for correcting
the flame characteristics:
Turn the control knobs and Liquid Propane cylinder valve
“OFF”
Allow the grill and burners to cool.
If the flame is yellow (not enough air), turn the adjustment
screw found at the front of the burner counterclockwise.
If the flame is noisy or lifts away from the burner (too much air), turn the adjustment screw found
at the front of the burner counterclockwise. If these adjustments do not correct the problem,
contact customer service at (888) 837-1380
Grill Maintenance
Clean and inspect pressure regulator and hose assembly prior to use.
Allow grill to cool before cleaning. Frequency of cleaning is determined by how often grill is
used.
DO NOT use self-cleaning oven to clean any grill part. Extreme heat would remove any
chrome plating and cause premature rusting.
Meal drippings will solidify in bottom of grill after a few uses. This residue should be removed
regularly. Failure to do so could cause overflow at bottom vent openings and increase the
chance of a grease fire.
When cleaning grill, cover work area with newspaper. Open grill lid and remove cooking grate.
Loosen residue with scraper or putty knife. Wipe away loosened residue with paper towels.
Inside surface of grill may be cleaned with a strong solution of detergent and water applied
with a scrub brush. Cooking grate may be cleaned with a brass wire brush. Thoroughly rinse
grill with water and allow to completely air-dry before using again.
Place cooking grate and lid onto grill.
Check and clean burner/venturi tubes for insects and insect nests. A clogged tube can lead to
a fire beneath the appliance.
Do not obstruct the flow of combustion and ventilation air.
WARNING
Natural Hazards -Insects and Spiders
A clogged tube can lead to a fire beneath the appliance.
During shipment or storage, it is possible that small Insects and spiders
could find their way into the venturi tubes and make nests or webs. This
could block the flow of gas through the venturi tube causing a smoky,
yellowish flame, or prevent a burner from lighting. It could even cause the
gas to burn outside the venturi tube, which could seriously damage the
appliance. If this occurs, turn off the gas flow and wait for the appliance
to cool. When the appliance has cooled, remove the burner and clean out the venturi tube
with a brush or pipe cleaner. Replace the burner and be sure that the venturi tube is seated
over the orifice located on the gas valves. Cleaning of the venturi tube should be conducted
periodically, especially at the start of the season.
Note: Damage resulting from blocked venturi tube is not covered under warranty.
Appox.
1/2 inches

SC2000301-SC-00 - ENG 18 of 19 20151210-V1
Burner Cleaning
Before cleaning, make sure the gas supply and control knobs are in the “OFF” position and the
burners have cooled.
To remove the main burners for cleaning:
1. Open lid. Remove the cooking grate and
flame tamer.
2. Remove the screws and ignition electrode
wire, lift the burner out of the firebox to clean
the grill burners.
3. Clean the exterior of the burner with a wire
brush. Use a metal scraper for stubbed stains
or debris.
4. Clear clogged ports with straightened paper
clip. Never use a wooden toothpick as it may
break off and clog the port.
5. Check and clean burner / venturi tubes for insects and insect nests. A clogged tube can
lead to a fire beneath and behind the main control panel.
To reinstall the main burners:
1. Insert the burner over the main burner gas valve.
2. Make sure the orifice spud (A) is inside the burner venturi
(B)
3. Align the burner screw hole with the firebox hole, insert
screw and tighten.
Should you encounter any problem, need assistance with assembly, have
questions about this product or have missing or defective parts,
Please contact Customer Service at
Rankam Metal Products Manufactory Limited
1-888-837-1380
Monday thru Friday 8 A.M. to 5 P.M. Western Standard Time
or by email
WE CAN HELP.
Made in China
Burner Venturi (B)
Control Valve
Clean the
burner
Orifice spud (A)
Screw
Burner

SC2000301-SC-00 - ENG 19 of 19 20151210-V1
LIMITED WARRANTY
1. Manufacturer warrants this Product to be free from defects in workmanship and materials for a period of 90 days
from the date of purchase, PROVIDED claims are submitted, in writing, with proof of purchase.
2. If any part of this item fails because of a manufacturing defect within the Limited Warranty Period, Manufacturer
offers to replace such part(s) provide that such parts have not been improperly repaired, altered, or tampered
with or subject to misuse, abuse or exposed to corrosive conditions. This Limited Warranty is, however, subject
to certain limitations, exclusions, time limits and exceptions (Hereinafter “Conditions”) as listed below. Read
these Conditions carefully.
3. This Limited Warranty shall be limited to the replacement or repair of any part(s) which Manufacturer determines,
after reasonable examination, to have been defective at the time of manufacturing and manufacturer’s
obligation(s) shall be limited to replacement, if any, of defective part(s) which shall be shipped at Original
Purchaser’s expense to Original Purchaser’s designated shipping address.
4. This Limited Warranty is given to and covers the ORIGINAL PURCHASER ONLY and such coverage terminates
90 days from the date of purchase.
5. DAMAGE LIMITATION WARNING: IN NO EVENT SHALL MANUFACTURER BE LIABLE FOR ANY
INCIDENTIAL OR CONSEQUENTIAL DAMAGES, INCLUDING (BUT NOT LIMITED TO) LOSS OF USE OF
THE PRODUCT, LOSS OF TIME, INCONVENIENCE, EXPENSES FOR TRAVEL, TRANSPORTATION,
LODGING EXPENSES, LOSS OF FOOD, LOSS BY DAMAGE TO PERSONAL PROPERTY OR LOSS OF
INCOME, PROFITS OR REVENUE.
6. MANUFACTURER’S OBLIGATION: Manufacturer’s liability shall be limited to the delivery of a good,
merchantable Product and, if necessary, the repair or replacement, at manufacturer’s option, of any defective
part or unit.
7. TRANSFER LIMITATIONS: This Limited Warranty is not assignable or transferable. It covers only the
original purchaser.
8. RESERVED RIGHT TO CHANGE: Manufacturer reserves the right to make changes or improvements to
products it produces in the future without imposing on itself any obligations to install the same improvements in
the products it has previously manufactured.
9. This Limited Warranty gives the Original Purchaser specific legal rights but there may be other rights which vary
by jurisdiction.
10. This warranty does not cover the following items:
Chips or scratches on porcelain or painted surfaces
Rust or corrosion is not deemed a manufacturing or materials defect
Discoloration or loss of paint due to handling during assembly, heat or cleaning products. Paint may
require touch up.
Stainless steel discoloration or corrosion
Consumables such as batteries
IF CUSTOMER SERVICE IS NECESSARY:
1. The Original Purchaser is responsible for shipping and handling charges of the returned item(s) and
replacement parts, if any.
2. All parts to be replaced will need to be shipped before replacement items will be sent.
3. Follow the Customer Service Representative’s instructions exactly. If a return is necessary, it must be
packed carefully and shipped prepaid.
Rankam Metal Products Manufactory Limited
1618 W. Rosecrans Ave.,
Gardena, CA90249
USA
Table of contents
Other Rankam Grill manuals

Rankam
Rankam ST1017-012939 User manual

Rankam
Rankam GR3055-014684 Quick reference guide

Rankam
Rankam Smoke Canyon SC2048701-SC User manual

Rankam
Rankam GR2297801-MM-00 Quick reference guide

Rankam
Rankam RedHead SC2042501-RH User manual

Rankam
Rankam GR2234801-MM-00 Quick reference guide

Rankam
Rankam GR2039201-MM-00 User manual

Rankam
Rankam GR2264401-GS-00 Quick reference guide

Rankam
Rankam GR2071013-MM-00 Quick reference guide

Rankam
Rankam GR2297802-MM-00 Quick reference guide