Rans S-21 OUTBOUND User manual

09/11/2018
S-21 OUTBOUND
ROTAX 912ULS INSTALLATION
TEXT MANUAL
Serial Number:
Registration Number:
COPYRIGHT ©
RANS DESIGNS
4600 HWY 183 Alt
HAYS, KANSAS, USA 67601
785-625-6346
www.rans.com

09/11/2018
RANS S-21 OUTBOUND TEXT MANUAL 11-1
BEFORE BEGINNING ASSEMBLY
TAKE INVENTORY:
You must complete an inventory within 60 days
of receiving your kit.
We check and re-check and are 99.9% certain that if we say we shipped it, we did. The
first task in building your kit is to inventory the parts using the packing list provided. It is
your job to keep all parts organized and accounted for. We cannot provide missing parts
cost free after 60 days. Use the supplied pack list to verify that everything that we
packed is in the box. The fast way to inventory is to use the Priority Number that
appears on the Part Number labels, these will match the pack list in numeric order. Go
through the list item by item. If anything is not there that should be, please contact our
parts department immediately.

09/11/2018
RANS S-21 OUTBOUND TEXT MANUAL 11-2
ROTAX 912 ULS INSTALLATION
NOSE GEAR INSTALLATION
NOTE: Nose Gear Mount should be final installed after firewall is in place.
1. Support the fuselage on sawhorses and bolt the Nose Gear Mount to the firewall.
2. Slide the Nose Gear into the Nose Gear Socket. Use a rotary file to remove
excess coating in the Nose Gear Socket.
CAUTION: Do NOT remove excessive material. The Nose Gear must fit
tight in the Socket.
3. Mark a ring 3/8” from the top end of the Nose Gear.
4. Insert the Nose Gear into the Gear Leg Socket until the line is visible in the hole.
NOTE: To verify that the Nose Gear is in the correct position, measure the
distance from the end of the Nose Gear to the upper edge of the Gear
Socket. This should be about 1/4”. See FIGURE 08A-10.
5. Rotate the Nose Gear until it is 90-degrees from the Spar Carry-thru on the
Fuselage.
6. It may be desirable to build a fixture to hold the gear leg in place. See
FIGURE 08A-12.
7. Transfer drill #11 the Nose Gear through the Gear Socket hole just deep enough
to mark the Nose Gear.
8. Remove the Nose Gear. Drill #11 using a “V-block” in a drill press to center the
Nose Gear when drilling.
9. Transfer drill “Letter D” through one side of the Nose Gear Collar. Refer back to
FIGURE 08A-10.
10. Slip Nose Gear Collar onto lower end of Nose Gear. Align holes and transfer drill
“Letter D” through the other side of the Upper Fork Collar.
11. Ream to 0.249” and bolt in place.
NOTE: If using a fixture to lock the leg for drilling leave the Collar off till
drilling is complete.
12. Re-install the Nose Gear in the Gear Socket and fixture. Transfer drill through
#11.
13. Chase drill 6.2mm, then ream to 0.249”. Bolt in place.
14. Seat the Spring Washers by sanding on a sheet of 400-grit sandpaper. Refer to
FIGURE 08A-20. This will help prevent premature wearing of the Spring
Washers.
IMPORTANT: Before installing the Nose Gear Fork to the Nose Gear
Strut inspect the Fork for stress risers.

09/11/2018
RANS S-21 OUTBOUND TEXT MANUAL 11-3
15. This is a high stress part and it is critical to remove any scratches on the surfaces
of the Fork. The most critical is the bottom surface where any stress riser could
result in eventual failure of the part. Be aware of this during annual inspections
also, since the Fork is subjected to possible abuse. If you encounter gouges or
scratches you cannot use standard sanding and polishing techniques to remove,
the Fork will need to be replaced. Sand and Polish the bottom of the Fork in
parallel to the Fork blades.
CAUTION: DO NOT CROSS SAND the Fork blades. Install the Nose
Gear Fork according to the PARTS MANUAL DRAWINGS and FIGURE
08A-21.
16. Using a fish scale, adjust the nut until the required pull is attained at the Axle
Attachment on the Fork to move it. See FIGURE 08A-22.
17. Drill the Nose Gear #30 from each side for the cotter pin and install.
18. Temporarily assemble Nose Wheel Hub without Tire. Slide Axle through hub
bearings. If the Axle will not slide into the wheel bearings, spin sand the Axle on
a belt or disc sander.
IMPORTANT: Do NOT remove any more material than necessary.
19. Cut the Bushings to length so as to center the Wheel Hub in the Fork. Refer to
FIGURE 08A-25.
NOTE: The Bushing material is provided long to allow trimming as
needed.
HINT: Add the measurements on each side of the Wheel Hub together.
Divide by 2 to obtain equal lengths of the finished Bushings to
center the Hub.
IMPORTANT: The Bushings must be tight to allow no side to side play of
the wheel.
20. Remove Axle and Wheel Hub. Disassemble Hub and install Tire and Tube. Re-
assemble with Tire & Tube.
21. Install U-Bolt and Clamp Block around lower end of Nose Gear Socket.

09/11/2018
RANS S-21 OUTBOUND TEXT MANUAL 11-4
ROTAX 912 ULS - ENGINE MOUNT INSTALLATION
(AFTER FIT-UP OF FIREWALL & BOOT COWL)
ASSEMBLY
1. Become familiar with the ROTAX 912uls PARTS MANUAL DRAWINGs and
collect the parts shown in the drawing.
2. Install parts referring to PARTS MANUAL DRAWINGS.
(AFTER INSTALLING ALL ACCESSORIES ON FIREWALL)
ENGINE MOUNT INSTALLATION
1. Become familiar with the ROTAX 912uls PARTS MANUAL DRAWINGSand
collect the parts shown in the drawing.
2. Install Engine Mount after making sure all accessories are located on firewall.

09/11/2018
RANS S-21 OUTBOUND TEXT MANUAL 11-5
ROTAX 912 ULS - BATTERY BOX ASSEMBLY & INSTALLATION
(FINAL INSTALL OF ENGINE)
ASSEMBLY
1. Refer to the parts catalog and select the required components for assembly.
2. Firewall should have been drilled to match Battery Box Mount Plate.
3. Cleco Support Angles to inside of Front Plate. Refer to the PARTS MANUAL
DRAWING. Transfer drill #30 and rivet. Base of Battery will set on Support
Angles.
4. Align one edge of Battery Box Front Plate with edge of Battery Box Mount Plate.
Clamp together and transfer drill #11 though upper and lower mount holes in
Mount Plate and cleco.
5. Slip Battery into assembly. Align free edge of Plates; pull Front Plate against
battery. Check to see if Battery can be slid in and out. If battery cannot be slid in
and out, then loosen fit slightly to allow easier removal. Clamp and transfer drill
#11 through upper and lower mount holes and cleco.
6. Transfer drill #30 the center holes in Mount Plate, and rivet from the AFT side.
7. Slide the Battery Bar through the holes in the Battery Box assembly. Modify the
Battery Bar per FIGURE 11A-07/912. Remove Battery from Battery Box
assembly
INSTALLATION
8. Bolt Battery Box assembly to firewall.
9. Install Battery and Battery Bar. Install Small Cotter Pins to retain Battery Bar.
10. Refer to the ENGINE ELECTRICAL section for Battery Cable and routing.

09/11/2018
RANS S-21 OUTBOUND TEXT MANUAL 11-6
ROTAX 912 ULS - FUEL SYSTEM - FIREWALL FORWARD
(AFTER INSTALLATION OF ENGINE)
1. Refer to the parts pages and select the required components for assembly.
INSTALLATION WITHOUT OPTIONAL GASCOLATOR
NOTE: Contact ROTAX for recommended Fuel Filter.
2. Connect Fuel Filter with listed hardware and supplied Fuel Line to Fuel Line from
engine fuel pump.
3. Install 90-degree fitting into 3/8" fuel line. Attach to Firewall Fitting.
4. Route line to Fuel Filter Assembly and cut to length. Install Straight Fitting.
5. Install Hose Clamps. Tighten all connections.
INSTALLATION WITH OPTIONAL GASCOLATOR
6. The Gascolator Mount should have been riveted to the firewall during ENGINE
ACCESSORY INSTALLATION.
7. Install fittings in Optional Gascolator. Orientate fittings per parts page drawing.
Remove wire bail from Gascolator and remove bowl. Slip bail into fore and aft
holes in Mount. Install top portion over mount and retain with wire bail. Re-install
bowl.
IMPORTANT: Gascolator has an INLET and OUTLET side. Orientate
INLET side outboard.
8. Connect Fuel Line Assembly from firewall fitting to INLET fitting of Gascolator.
Ends of Fuel Line Assembly may be turned as required.
9. Connect fuel line from engine fuel pump to OUTLET side of Gascolator. Tighten
all connections.
RETURN LINE INSTALLATION
10. Route line from Restricted Banjo Fitting, atop the Clamp Block attached to
Compensating Tube of the engine, to firewall fitting. Cut to length and attach 90-
degree fitting. Install Hose Clamps. Tighten all connections.

09/11/2018
RANS S-21 OUTBOUND TEXT MANUAL 11-7
ROTAX 912 ULS - FUEL SYSTEM - FUSELAGE
1. Locate Header Tank Mount per FIGURE 11B-01/912. Transfer drill #30 through
each tab. Glue Rubber Edging to top edge of Mount flanges. Rivet Header Tank
Mount to top of tabs.
HEADER TANK ASSEMBLY
2. Locate and drill fitting holes in Header Tank per FIGURE 11B-02/912. Do NOT
drill the sump drain holes until fitting of the tank to the fuselage. For drilling the
holes a 1/2" Unit-Bit®and 3/4" Unit-Bit® work best. Locate center of each hole
with a #30 drill bit, then drill full size. Deburr all holes. Thoroughly clean tank
several times by rinsing with water. After confirming that all foreign material has
been removed, let dry prior to installing fittings.
NOTE: If it is anticipated that the plane will be converted between Trike
and Taildragger, then it is recommended to install sump drains in both
locations.
DOUBLE & TRIPLE CHECK HOLE LOCATIONS BEFORE DRILLING.
3. To install the fuel fittings into the tank, obtain a piece of wire. Safety wire works
well. Insert wire through one of the fitting holes in the tank and up through the
filler neck. Refer to FIGURE 11B-03/912. Install an O-Ring onto the tank
withdrawal fitting and slide this assembly over the wire extending from the filler
neck. Bend a loop in the end of the wire to keep the fitting and O-Ring from
falling off. Pull the fitting through the hole. Slide a flat rubber washer, thick steel
washer, and a retaining nut over the wire and onto the fitting. Apply Loctite to
threads and thread the nut on before removing the wire.
CAUTION: Do NOT get Loctite on the rubber washer.
4. Use an Allen wrench inserted into the tank fitting to hold the fitting while
tightening the retaining nut.
IMPORTANT: Do not allow the fitting or thick washer to rotate while
tightening or leaks may occur.
HINT: Prevent the thick washer from turning by holding with needle-nose
Vise-Grips.
5. Apply thread sealant to fittings and install into the tank fittings. Again, allow no
rotation of the tank fitting. Refer to the parts manual for the correct parts.
6. Perform a leak test by capping off all fittings and pressurizing the tank to 1 PSI
and let set for a period of time.

09/11/2018
RANS S-21 OUTBOUND TEXT MANUAL 11-8
CAUTION: Damage may result from over-pressurization. While the tank is
pressurized, check for any leaks by spraying a soap/water mixture onto
the tank and around the fittings. To cap off the fittings use a 1" segment of
fuel line with a bolt inserted, and fuel line clamps or similar. An alternate
test is to fill the tank with water and let it sit for approximately 48 hours.
7. Modify Header Tank Mount Channel per FIGURE 11B-08/912. Position Header
Tank flush with front of Mount. Use large hose clamps to secure tank to mount.
NOTE: Modified Mount Channel will position under hose clamps, on top of
tank, and be positioned so that Channel ends are flush with sides of
header tank.
LOCATING HEADER TANK SUMP VALVE HOLE THROUGH BELLY
SKIN
1. Mark on the outside of the tank on each side next to the sump valve as per
FIGURE 11B-02/912. This allows location of the hole through belly skin with the
tank installed.
2. Set the header tank in place. Transfer the marks on the tank to the belly skin.
Remove the tank and project the marked lines at 90° to the sides of the tank until
they intersect.
3. Drill a #40 in the skin at the intersection. Set the header tank securely in place.
Drill #30 through the hole in the skin and the header tank. Use a step drill or
several sizes of drill bits to work up to the required size hole for the sump drain
fitting.
FUEL VALVE INSTALLATION
1. Install two fittings to the fuel valve using thread sealant. Refer to FIGURE 11B-
09/912 and the parts manual.
2. Remove the handle from the fuel valve and install the valve to the two tabs of the
fuselage steel frame. Use the mount brackets as shown in FIGURE 11B-09/912.
Re-install the handle to the fuel valve.
NOTE: Valve should be "ON" when valve handle is AFT and "OFF" when
valve handle is UP.
3. Install the bulkhead fittings in the pre-cut holes on the lower left side of the
firewall. Use the hardware shown in the parts manual.
4. If installing the OPTIONAL ELECTRIC FUEL PUMP do so at this time.
5. Fabricate and install a fuel hose assembly from the bulkhead fitting in the firewall
to the fuel valve and from the fuel valve to the header tank fitting. Secure as
desired using plastic ties. Add a clear plastic tape or split fuel hose as anti-chafe
wherever the lines contact the fuselage frame or other parts.

09/11/2018
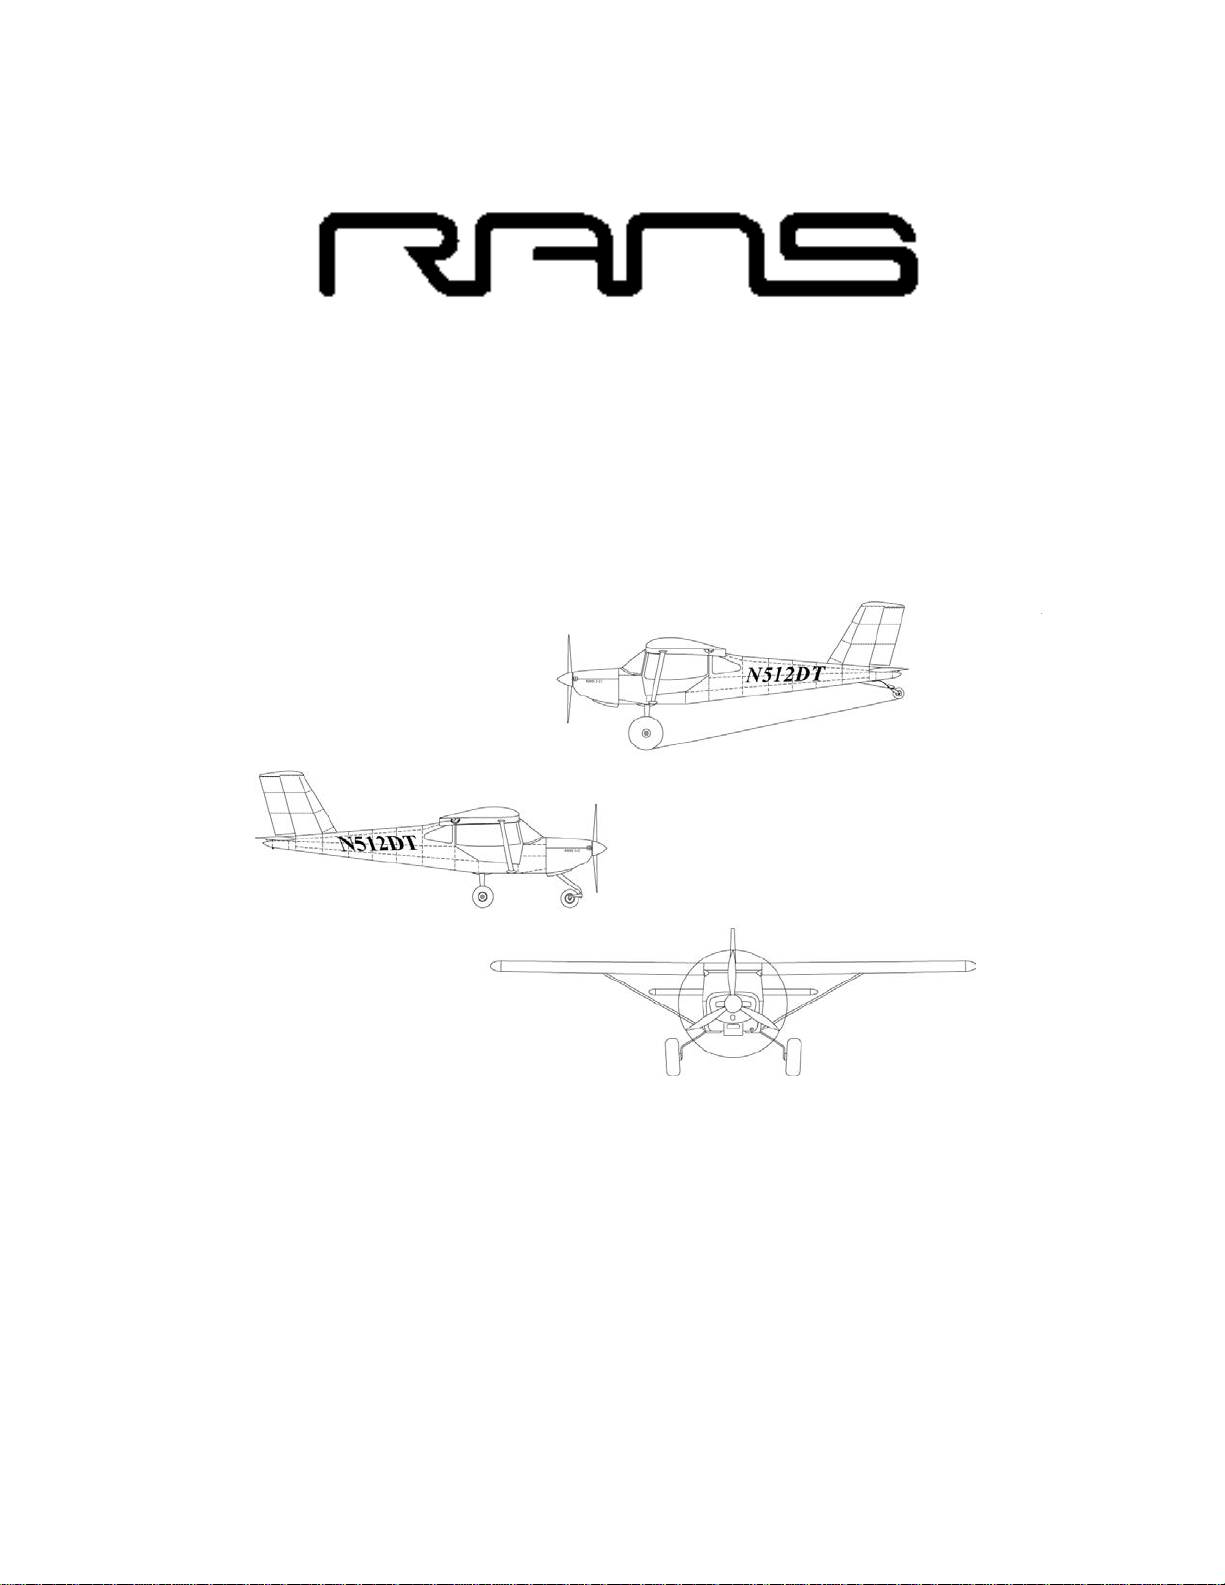
RANS S-21 OUTBOUND TEXT MANUAL 11-9
NOTE: The smaller return line routes directly from the bulkhead fitting to
the header tank and will not connect through the Fuel Valve.
IMPORTANT: Be sure to include the Check Valve in the Return Line.
6. Drill a #40 hole in edge of Fuel Cap. Screw on the cap and tighten. Using the
hole in the cap, safety wire the cap against rotation to the fuselage frame.
(AFTER WINGS MOUNTED TO FUSELAGE)
7. After wings are mounted to fuselage in final assembly, route fuel line from each
wing, down behind Station 3 and to Header tank. Secure as desired using plastic
ties. Add a clear plastic tape or split fuel hose as anti-chafe wherever the lines
contact the fuselage frame or other parts.
OPTIONAL LOW FUEL WARNING KIT
1. Become familiar with the Optional Low Fuel Warning Kit on the Header Tank
PARTS MANUAL DRAWINGS and collect the parts shown in the drawings.
2. A 5/8" hole should have been located in the side of the Header Tank. If not, refer
back to FIGURE 11B-02/912. Replace Silicon Washer provided with Low Fuel
Warning Switch with 5/8" Rubber Washer. Install Low Fuel Warning Switch into
Header Tank. Be sure to orientate the switch to allow electrical continuity (closed
circuit) when installed. Use a continuity tester (Ohmmeter) to be sure. Refer to
FIGURE 11B-10/912. As the header tank fills with fuel, the switch will open,
turning off the LED Indicator Light.
3. Install 5/8" Rubber Washer, 5/8" Steel Washer and plastic nut on outside of tank
and tighten. Double check to be sure the switch is orientated correctly.
4. Locate LED Indicator Light in instrument panel. Connect to Low Fuel Warning
Switch per FIGURE 11B-10/912. Do not forget to include a proper sized breaker
or fuse.
OPTIONAL ELECTRIC FUEL PUMP
1. Become familiar with the Optional Electric Fuel Pump PARTS MANUAL
DRAWINGs and collect the parts shown in the drawings.
2. Install fittings into Fuel Pump with Thread Sealant.
3. Rivet Nut Plates to bottom of tabs under Left Seat.
4. Bolt Fuel Pump to tabs.
5. Connect Fuel Line from Header Tank to Fuel Pump. Connect Fuel Line from Fuel
Pump to Fuel Valve.
6. Connect electrical wires of fuel pump to 12-volt switch on Instrument Panel. Do
not forget to include a proper sized breaker.

09/11/2018
RANS S-21 OUTBOUND TEXT MANUAL 11-10
ROTAX 912 ULS - COOLING SYSTEM INSTALLATION
(AFTER INSTALLATION OF ENGINE MOUNT)
ASSEMBLY
1. Refer to the parts catalog and select the required components for assembly.
2. The items below should have been done before installing the engine to the
Engine Mount. If not, then do so before proceeding.
•Rotate the water pump inlet on engine to the lower right position.
Retighten screws to 90 in. lbs.
•Completely remove Rotax installed coolant hose attached to AFT cylinder
head coolant fitting. Move the Aft end of the remaining coolant hose to the
upper water pump fitting. Install the “S” shaped radiator hoses from aft
cylinder head coolant fittings to lower water pump fittings. The "S" end will
attach to the lower water pump fitting. The “S” hose prevents coolant hose
conflict with the engine mount. Install on both right and left aft fittings. Trim
hose as required to prevent binding.
3. Attach Radiator Mounts to top of Radiator with Cushion Clamps and hardware
shown and attach to Engine Mount tubes as shown. Leave the nuts and bolts
slightly loose to allow adjustment. Tighten after final positioning. Refer to
FIGURE 11C-03/912 for Clamp locations.
NOTE: Notice the orientation of the Cushion Clamps.
4. Oil Cooler Mount Bracket will attach to lower end of Radiator after attaching to Oil
Cooler.
(AFTER INSTALLATION OF OIL COOLER TO RADIATOR)
5. Rotate bottom of Radiator aft and temporarily bolt through Mount Bracket -
Radiator to cushion clamps on lower AFT Engine Mount tubes. Refer back to
FIGURE 11C-03/912.
6. Cut Pre-formed Radiator "U" Hose into 2 pieces to form 2 90-degree hoses.
Install to left side radiator inlet.
7. Route 1" Radiator Hose from right side Radiator Outlet and Coolant Pump Inlet.
Insert Hose Spring into Radiator Hose until located at bend area to help prevent
possible hose collapse.
NOTE: Unbolt lower end of radiator and rotate out of way as needed to
attach.
8. Route 1" Radiator Hose between left side Radiator Inlet and Expansion Bottle on
top of engine with a Cooling Tube Union. Insert Hose Spring into Radiator Hose
until located at bend area to help prevent possible hose collapse.

09/11/2018
RANS S-21 OUTBOUND TEXT MANUAL 11-11
9. Fabricate Anti-chafe for Radiator Hoses by splitting a leftover piece and securing
around the Hoses with Plastic Ties.
10. Secure all hoses with Hose Clamps.
11. Rivet Coolant Recovery Bottle Mount Bracket with Spacer Shims to firewall.
Secure Overflow Bottle with supplied Clamp to the Mount Bracket.
12. Route Overflow Hose from Coolant Bottle to Expansion Bottle on engine. Secure
Overflow Hose at each end with Safety Wire.
OPTIONAL HEATER INSTALLATION - RADIANT STYLE
NOTE: Heater Installation will require the 1" Radiator Hoses to be cut to
install Tees. Refer to Parts Pages.
13. Drill two 1 1/8" holes in the left hand side of the firewall. Locate holes to avoid
Firewall Components and Exhaust System. Cut Serrated Grommet Strip to length
and install to inside of holes as anti-chafe.
14. Assemble the Fan to the Heater Core. The fan will have arrows showing the
direction of airflow and the rotation. Make sure the airflow arrow is pointing
toward the Heater Core. Locate #11 holes in the Fan Mounting Plate to match
Fan mounting holes. Attach the Fan Mounting Plates using Truss Head Screws.
The screws will self-tap into the plastic housing of the fan. Orientate the fan so
the wires come out on the same side as the Heater Core Nipples. Drill two #30
holes into the Mounting Plate and Heater Core sides. Rivet with 1/8" Aluminum
Rivets. Refer to FIGURE 11C-14/912.
CAUTION: Be careful not to drill into the heater core. Use a drill-stop!
15. Attach the Nipples to the Heater Core.
CAUTION: When working with the Heater Core, be careful not to over-
tighten, or cracking may result. When tightening the fittings, it is necessary
to use a wrench to support the fitting.
16. Locate the Tees for the heater system. One Tee is located between the Coolant
Pump Inlet and the Radiator Outlet. The second Tee is located in the Radiator
Hose that comes directly out of the Expansion Bottle on top of the engine.
17. The Heater Core Assembly may be attached to two brace tubes aft of Station 1.
Place the Heater Core so the fan is blowing air down and back into the cabin.
Check for possible interference with panel instruments and Rudder Pedals. Use
Cushion Clamps to secure to the tubes.
18. Route Heater Hose from Heater Core fittings to Tees forward of the firewall.
19. Locate the Control Valve in the Heater Hose attached to the Tee in the line
coming from the Expansion Bottle. Locate the Valve in a location that allows
connecting of the Control Cable.
IMPORTANT: Make sure you are installing the Control Valve in the "HOT"
side connected to the Expansion Bottle on top of the engine.

09/11/2018
RANS S-21 OUTBOUND TEXT MANUAL 11-12
20. Locate the Control Cable and Fan switch in the instrument panel. Keep this in
mind when planning your instrument panel layout.
21. Locate a hole in the Firewall and route the Control Cable to the Control Valve.
Trim the control wire after connecting, leaving 2" for adjustments. Check the
control wire and housing for a secure installation. Any movement of the housing
will reduce the travel stroke. If the valve cannot fully open and close,
performance of the heater will be diminished.
22. Drill #40 the center of the Valve control arm post. After retaining the Control
Cable housing in the clamp on the Valve, bend the wire to retain it to the valve
post. It must be bent in a tight loop around the post. The easiest way is to start to
wrap it around, bend it into a hook shape. Slip it off the post and use a pair of
pliers to hold it while completing the loop with needle-nose pliers. Twist it tight so
it fits snug over the post. Secure with #6 Pan Head Screw, stainless steel washer
and small brass washer.
23. With the heater mounted, slip the heater hoses onto the nipples of the core and
tighten all the hose clamps. Check all hose and fittings for security and chafing.
24. Connect wires to fan. Route them to the switch and power source.
25. To keep the hoses out of the rudder pedals, use a 1" cushioned clamp bolted to
the firewall. Test operate the pedals to assure tangle free movement. After the
hoses are clamped to the firewall, install the Hose Covers. The cover of the hose
that is clamped to the firewall will need to be cut with a hot knife to fit around the
clamp, or remove the cushion off the clamp to allow clearance. Tie the hoses
together with Plastic Ties.
IMPORTANT: Double check to be sure there is no interference with
Rudder Pedals.
26. After final engine install, check for coolant leaks and proper operation during
engine test run.
27. The heater should produce noticeable heat within a few minutes of starting the
engine. Depending on how well your cabin is sealed, and the outside air
temperature, the heater should be able to keep the cabin warm enough for
extended flying on winter days, or at altitude. Do not expect the heater to keep up
if you have many air leaks in your cabin, or if it is extremely cold (below 20
degrees F.).

09/11/2018
RANS S-21 OUTBOUND TEXT MANUAL 11-13
ROTAX 912 ULS - LUBRICATION SYSTEM INSTALLATION
(FINAL INSTALL OF ENGINE)
ASSEMBLY
•Oil Tank should be installed to center of firewall.
•Oil Breather Tube is installed on Firewall
•The engine needs to be installed to the airframe.
1. Refer to the parts catalog and select the required components for assembly.
2. The Rotax 912ULS installation features an oil cooler mounted under the engine
mount.
CAUTION: When working with the oil cooler take care not to induce stress
or over tighten fittings or bolts. Damage to the cooler may result. When
tightening the lines of the oil cooler it is necessary to use a wrench to
support the fitting.
3. With a band saw or hacksaw, remove the mount tabs from the oil cooler leaving
a 1/16" lip past the Oil Cooler body.
4. Inspect Oil Cooler threaded boss for nicks or burrs in O-ring contact area that
might cause O-ring failure. Inspect the Cooler port threads for any buildup of
coating. If needed, gently clean threads. Apply light petroleum oil to port threads.
Lubricate O-ring of fittings by coating with light petroleum oil and install the O-ring
onto the fitting. Install adaptor and fitting into the threaded boss on Oil Cooler.
Using two wrenches tighten fitting until hexagon face contacts the face of the
hexagon boss on Oil Cooler.
IMPORTANT: Always use two wrenches to tighten fitting onto cooler.
Using only one wrench and cooler as leverage will cause cooler to fail. Do
NOT Over Tighten. Tighten to just snug. The O-ring is the sealing
component. This is not a pipe thread.
5. Cut the provided Silicone Sheets to length to fit in the Oil Cooler Mounts. Trim
just short of the outer bolt holes to allow clearance with the threaded bushings.
Install to the upper and lower oil cooler mounts as shown in the PARTS MANUAL
DRAWING. The sheets provide vibration isolation and should extend past the
forward and aft edges of the oil cooler.
NOTE: Use the upper cooler mount as a template. Mark and cut. The
piece for the top of the oil cooler needs two holes to allow for the fittings.
6. Locate Oil Cooler Mount Bracket onto Upper Oil Cooler Mount per FIGURE 11D-
06/912. Drill, countersink holes on Upper Oil Cooler Mount, and rivet together.
7. Apply Loctite to bolts and assemble the upper and lower mounts to the Cooler
using the Threaded Bushings.

09/11/2018
RANS S-21 OUTBOUND TEXT MANUAL 11-14
NOTE: To achieve the proper compression on the Silicon Sheets, it might
be necessary to add washers between the threaded bushings and the
upper and lower oil cooler mounts.
8. Bolt the Oil Cooler Assembly to the AFT side of the radiator through the Oil
Cooler Mount Bracket, as shown in the PARTS MANUAL DRAWING. Use Loctite
to secure the bolt.
9. Refer to the parts manual for oil line routing.
IMPORTANT: The pickup fitting is the straight fitting (OUT) on the oil
bottle and MUST route to the left hand fitting on the oil cooler. The return
fitting is the angled fitting (IN) on the oil bottle and MUST route to the
fitting on the bottom of the engine. Failure to route the oil lines properly will
result in engine failure.
10. Fill the Oil Cooler and pickup side with oil using a syringe or funnel before engine
start-up. Install the Oil Lines onto the Oil Tank. Use a back-up wrench on the
Cooler and Oil Tank when tightening fittings.
11. Apply anti-chafe and secure all lines as necessary.
12. Cut to length and install the Overflow Line from the Oil Tank filler neck to the
Breather Tube located on the firewall. For tube fabrication, refer back to ENGINE
ACCESSORY INSTALLATION. Secure ends with safety wire.
PRE-ENGINE START UP
Refer to ROTAX for a more thorough Pre-start up procedure.
13. Prior to starting the engine for the first time, install a new oil filter and fill the Oil
Tank to the full line on the dipstick. Refer to the Rotax manuals for oil
specifications.
14. Remove the spark plugs on all four cylinders.
15. Verify the ignition switch is OFF.
16. Turn the prop through several revolutions by hand.
17. With the spark plugs out and from the pilot’s seat, turn the key switch to the start
position and crank the engine for several seconds. Check for an oil pressure
indication on the gauge.
18. If after several seconds, there is no sign of oil pressure, stop cranking the engine.
Remove the Tank to Oil Cooler line at the tank. Using a funnel, prime the oil line.
Check to be sure Oil Cooler to Pump line is full. Re-attach the line to the tank.
Crank the engine. When an oil pressure indication is achieved, stop cranking.
19. Install the spark plugs and start the engine. Watch the oil pressure gauge as the
engine starts. After the engine starts, allow 10 seconds for oil pressure to come
up. If there is no pressure indication within 10 seconds, shut the engine off and
repeat the previous priming procedures. The engine will change sound (quieter)
as the oil starts pumping.

09/11/2018
RANS S-21 OUTBOUND TEXT MANUAL 11-15
20. After running the engine for a few minutes, check the oil level and check for any
leaks in the system.
ROTAX 912 ULS - MUFFLER ASSEMBLY
(FINAL INSTALL OF ENGINE)
ASSEMBLY
•The engine needs to be installed to the airframe.
NOTE: If installing the optional Muffler Style Heater, you may wish to install the Heater
Wrap prior to installing the Muffler.
1. Refer to the parts catalog and select the required components for assembly.
2. Cut three segments, each 1 3/8" long from the 1 1/4" O.D. Rubber Hose provided
in the 912 Muffler - Raw Stock Kit. Locate the center of each segment lengthwise
and drill or punch a 1/4" hole through the top and bottom wall. Install the 6mm
bolts and Formed Washers from the inside of each segment. Refer to the PARTS
MANUAL DRAWING and FIGURE 11E-02/912.
3. Cut three segments, each 1 3/8" long from the 3/4" O.D. Rubber Hose. Insert
between the bolt heads, in the isolator assembly, until flush on each end. Safety
wire inner hose in place as shown in FIGURE 11E-03/912.
NOTE: In order to tighten the bolts, it may be necessary to wait with
installing the inner segments and safety wire until after the isolators have
been installed on both the Muffler and Muffler Attach Channels.
4. Apply Loctite to the threads of the top bolt and attach the isolator assembly,
aluminum washer and thick washers to the Muffler as shown in the PARTS
MANUAL DRAWING.
IMPORTANT: Isolators should be final installed laterally (open end to
sides).
5. Install the isolator assembly to the Muffler Attach Channels.
NOTE: The left Attach Channel will be installed flanges up, while the right
is flanges down.
6. Bolt the Muffler Assembly with Channels to the tab and bushing on the lower
tubes of the engine mount.
7. Bolt the FWD Muffler Manifold #1 to the forward cylinder exhaust ports of the
engine. Bolt the AFT Exhaust Manifolds to the aft cylinder exhaust ports. Do not
fully tighten the nuts, at this time, to allow for adjustment of the manifolds. Slip
the FWD Muffler Manifold #2 and Muffler Canister Couplers into place and install
Muffler Springs.
HINT: Muffler Springs may be more easily installed using a length of cord
wrapped around a dowel.

09/11/2018
RANS S-21 OUTBOUND TEXT MANUAL 11-16
8. Leave the manifold nuts loose until the cowling has been installed and proper
positioning has been verified.
9. Slide the Tail Pipe Extension over the exhaust pipe on the Muffler until bottomed.
Attach to the Tail Pipe Support Angle at the firewall.
10. Locate a #11 hole through the top flange of the Tail Pipe Extension and through
the flange on the Muffler.
11. Locate and drill a #30 hole in the Hose Clamp and install a 1/8" Stainless Steel
Rivet. Install the Hose Clamp on the muffler extension with the rivet extending
into the #11 hole in the Extension and Muffler. Tighten Clamp.
NOTE: The 1/8" Stainless Steel Rivet acts as a safety pin to retain the
extension.
ROTAX 912 ULS - OPTIONAL MUFFLER HEATER INSTALLATION
•The RANS Muffler Style Heater works well for most cases. If additional
heat is required from the Heater, wrap a long spring around the Muffler
before installing the Heater Wraps. Stretching the spring to provide air
gaps between coils will also aid in efficiency. RANS uses spring #9664K48
from McMaster-Carr.
1. Rivet a Heater Flange to each Heater Wrap.
NOTE: Apply high-temp silicone to the Flange before riveting as a sealant.
2. Install Heater Wraps to the Muffler using the hardware shown in the parts
manual.
NOTE: The Heater Wrap should fit tight around the Muffler. Shim as
required using the supplied Heater Wrap Shims. Heater Wraps will need
to be formed around the Muffler for a tight fit.
3. Install the Muffler Assembly to the engine as shown in the parts manual. The
Heater Wrap may be safety wired to an Exhaust Spring mount loop to avoid
rotation of the Heater Wrap in service.
4. Secure Heater Duct Hose to inlet Heater Flange on Heater Wrap with a Hose
Clamp. Route Duct Hose to Cushion Clamp at right FWD cylinder. Cut duct to
length.
5. Slip Inlet Tube about half way inside Duct Hose and secure with Cushion Clamp,
Spacer, Duct Hose and Inlet Tube to right FWD cylinder threaded boss.
6. Locate hole in Firewall for Air Diverter Assembly.
7. Install Reverse Cable Stop in end cap of Slide of Air Diverter. Orientate to allow
installation and access to the small Set Screws.
8. Install Adjustable Cable Ferrule to bent end of Air Diverter. Allow room to adjust
the Cable Ferrule in and out.

09/11/2018
RANS S-21 OUTBOUND TEXT MANUAL 11-17
9. Cleco Air Diverter to Firewall. Opening should be orientated downward.
10. Locate and secure Control Cable in Instrument Panel. Keep this in mind when
planning your instrument panel layout. Slip Control Friction Block over Control
Cable and slide to end of housing. The Socket Head Cap Screw can be tightened
to provide friction on the control wire to prevent movement from vibration.
11. Route Cable to Adjustable Cable Ferrule in Air Diverter and trim housing to
length.
CAUTION: Pull control knob out at least 5" before cutting to prevent
cutting control wire too short.
12. Push control knob in, inserting control wire through Adjustable Ferrule and
Reverse Cable Stop. Safety wire Control Cable housing to Adjustable Ferrule.
13. Install small Set Screws with Loctite into Reverse Cable Stop. Make sure control
knob and slide of Air Diverter are all the way forward. Trim control wire to length.
Tighten small Set Screws to retain wire.
HINT: Removing Air Diverter Assembly with Control Cable attached from
Firewall may aid in installing the small Set Screws.
14. Rivet Air Diverter to Firewall.
15. Route Duct Hose from outlet Heater Flange on Muffler Wrap to Air Diverter.
Secure with Hose Clamps.

09/11/2018
RANS S-21 OUTBOUND TEXT MANUAL 11-18
ROTAX 912 ULS - THROTTLE CONTROL ASSEMBLY
(FINAL INSTALL OF ENGINE)
ASSEMBLY
•The engine needs to be installed to the airframe.
•Instrument Sub-panel must be installed
NOTE: Adjustable Ferrule in Throttle Support Arm on Carburetor must be remove
and replaced with the Slip Fit Conduit Terminals supplied with the
Throttle Cable Assembly. Refer to Manufacturer's instructions.
1. Refer to the parts catalog and select the required components for assembly.
2. Remove lock washer and retaining nut from Throttle Cable Assembly.
3. Route Cables through center hole in Instrument Sub-panel. Secure with lock
washer and retaining nut.
4. Install Rubber Grommets to lower set of 5/16" holes below Regulator Rectifier on
Firewall and route cables through.
5. Route cables to each Carburetor leaving slack to allow for engine movement and
maintenance of carburetor.
NOTE: Throttle Control can be pulled out slightly to allow trimming of
Control Cable housings.
6. After Choke Control is installed, cut provided Blue Line into segments and secure
with Plastic Ties to secure the Throttle and Choke Cable housings together.
7. Adjust to allow full throttle when control is pushed all the way in. Synchronization
of the carburetors is very important. There are videos on the internet that show
this procedure in detail.
NOTE: http://www.rotax-owner.com/ has many E-Learning videos
available.

09/11/2018
RANS S-21 OUTBOUND TEXT MANUAL 11-19
ROTAX 912 ULS - CHOKE CONTROL ASSEMBLY
(FINAL INSTALL OF ENGINE)
ASSEMBLY
•The engine needs to be installed to the airframe.
•Instrument Sub-panel must be installed
1. Refer to the parts catalog and select the required components for assembly.
Refer to Manufacturer's instructions.
2. Remove lock washer and retaining nut from Throttle Cable Assembly.
3. Route Cables through right side hole in Instrument Sub-panel. Secure with lock
washer and retaining nut.
4. Install Rubber Grommets to upper set of 5/16" holes below Regulator Rectifier on
Firewall and route cables through.
5. Route cables to each Carburetor leaving slack to allow for engine movement and
maintenance of carburetor.
NOTE: Choke Control can be pulled out slightly to allow trimming of
Control Cable housings.
6. Cut provided Blue Line into segments and secure with Plastic Ties to secure the
Throttle and Choke Cable housings together.
7. Insert Barrel Stop into choke control arm and thread Control Cable through.
Refer to FIGURE 11G-07/912. Adjust to allow full off (down) position when
control is pushed all the way in and tighten Set Screw in Barrel Stop.
HINT: Turn Adjustable Ferrule out slightly to allow easier adjustment. Lock
Adjustable Ferrule with lock nut.
8. Safety wire Cable housing to Adjustable Ferrule and check for operation.
Other manuals for S-21 OUTBOUND
3
Table of contents
Other Rans Aircraft manuals

Rans
Rans S-21 OUTBOUND User manual

Rans
Rans S-12 Owner's manual

Rans
Rans S-7S COURIER User manual

Rans
Rans N512DT User manual

Rans
Rans S-20 RAVEN User manual

Rans
Rans S-19 VENTERRA User manual

Rans
Rans S-20 RAVEN User manual

Rans
Rans S-12S User manual

Rans
Rans S-12 User manual

Rans
Rans S-21 OUTBOUND User manual