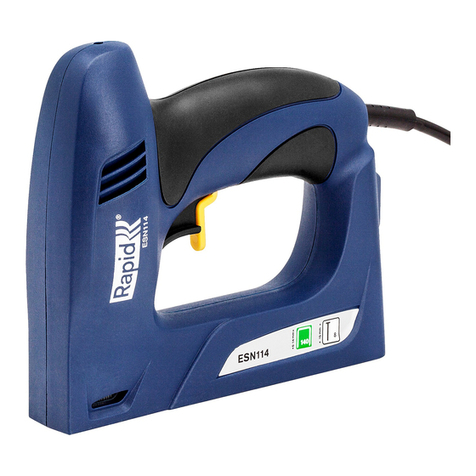
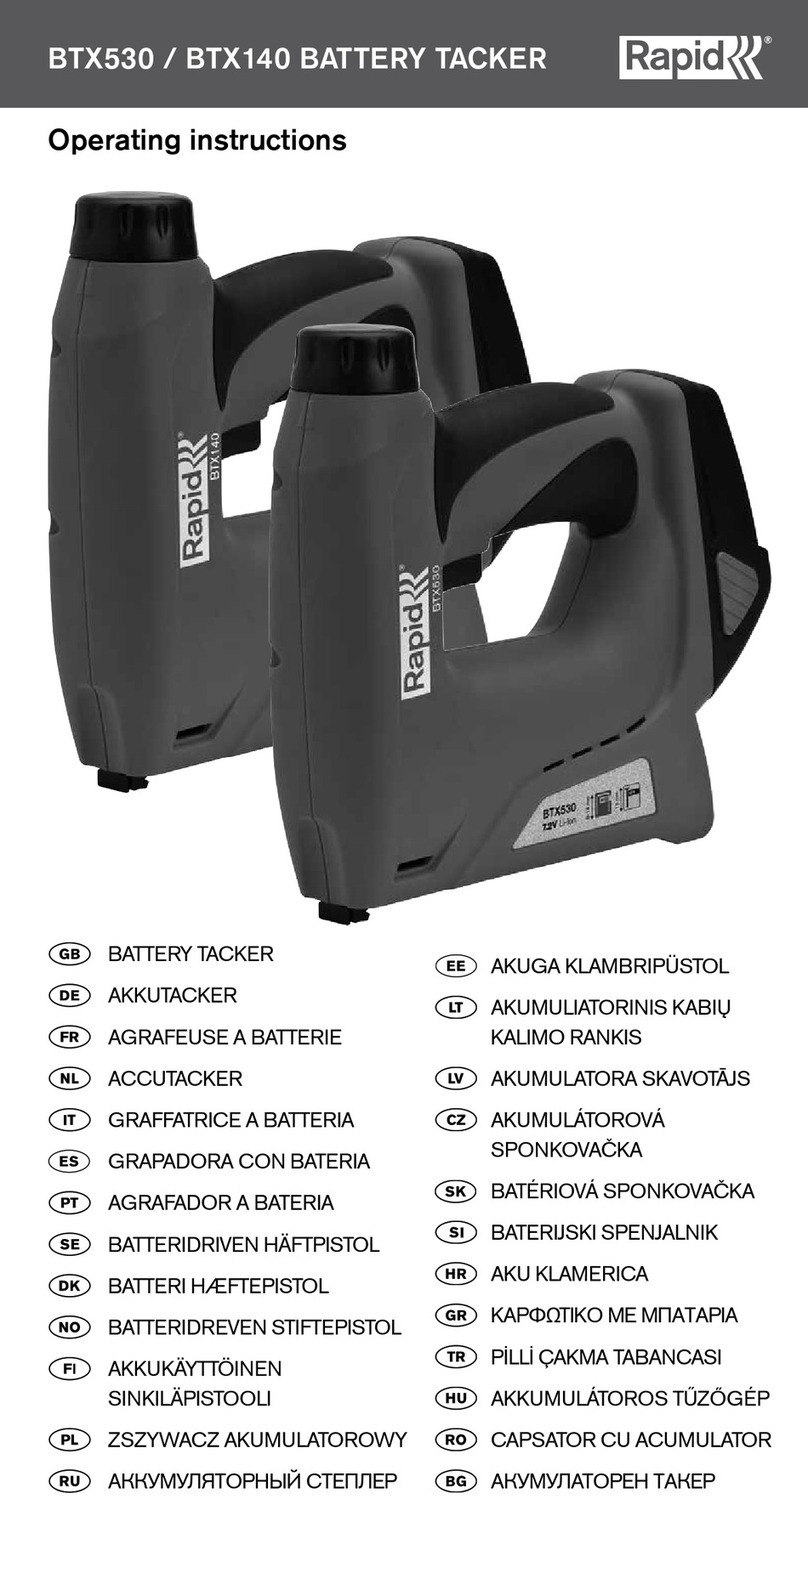
Rapid BTX10 User manual

BTX10
BATTERY TACKER
Operator’s manual
BATTERY TACKER
AKKUTACKER
ZSZYWACZ AKUMULATOROWY
АККУМУЛЯТОРНЫЙ СТЕПЛЕР
AKUMULÁTOROVÁ SPONKOVAČKA
BATÉRIOVÁ SPONKOVAČKA
BATERIJSKI SPENJALNIK
AKU KLAMERICA
PİLLİ ÇAKMA TABANCASI
AKKUMULÁTOROS TŰZŐGÉP
CAPSATOR CU ACUMULATOR
АКУМУЛАТОРЕН ТАКЕР

2
G
H
F
D
C
B
E
A
I
ཱ ི ཱི

3
F
E
ུ
1
2
ཱུ

4
A
H
ྲྀ
D
ཷ

5
A
B
I
ླྀ
1
2
3
F
E
ཹ

6
Operator’s manual - Original instructions 7
Betriebsanleitung - Übersetzung der ursprünglichen 19
Tłumaczenie oryginalnej instrukcji obsługi 35
Перевод оригинальных инструкций 50
Překlad originálního návodu 66
Preklad pôvodných pokynov 80
Prevod originalnih navodil 94
Prijevod izvornih uputa 107
Orijinal talimatların çevirisi 121
Az eredeti utasítások fordítása 134
Traducerea instrucţiunilor originale 148
Превод на оригиналните инструкции 162

7
INTRODUCTION
This tool is intended for tacking of fabric, leather, cardboard, paper and
similar materials on surfaces of softwood or materials similar to wood.
The tacker should be used only for the intended purposes. This tool is
for private use only.
TECHNICAL SPECIFICATIONS
Battery Tacker, model number BTX10
Staple type Rapid 53
Staple length 4-10 mm
Magazine capacity staple, max 100 pcs
Tool Dimensions H x W x L 156 x 58 x 170 mm
Weight 0.774 kg
Battery type, Voltage Li-Ion, 3.6 V
Battery capacity 1300 mAh
Battery charger External USB charger 5VDC
max 3.0 A
Charging time 100 minutes
Shots per charge, max ≈ 900 shots
Stapling speed, max continuous 20 shots/minute
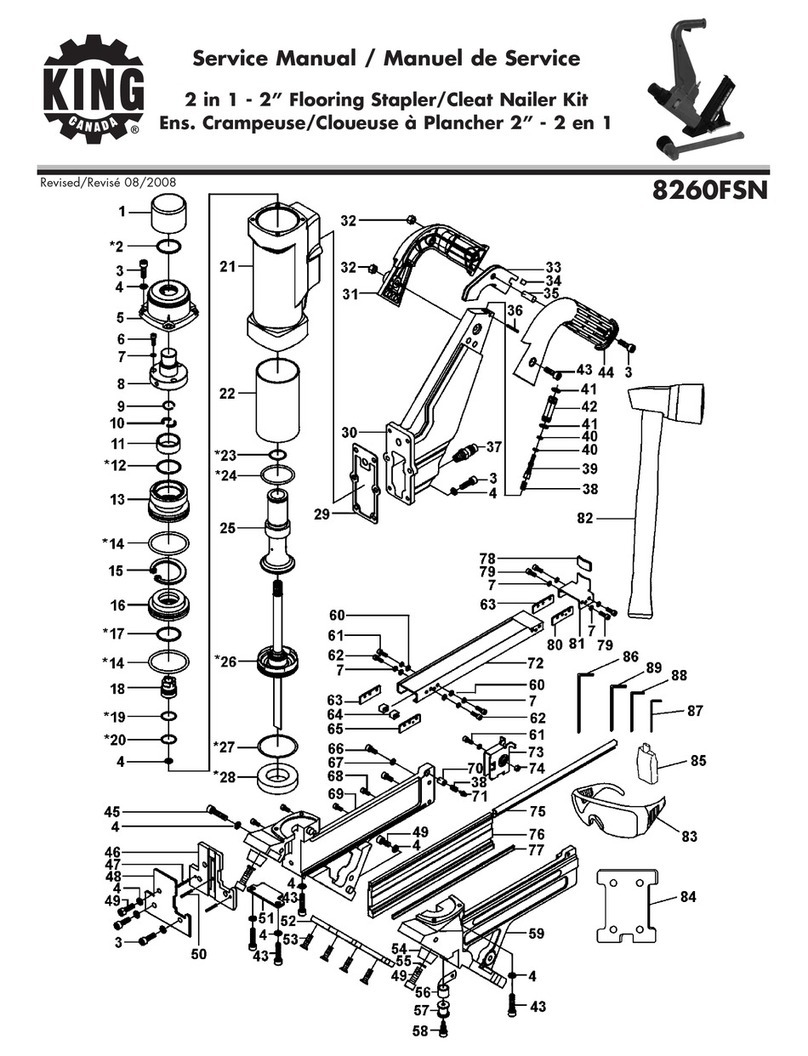
TOOL ELEMENTS
🅐LED 🅑Micro-USB port
🅒Integrated battery pack 🅓Trigger
🅔Magazine latch 🅕Magazine
🅖Staple indicator 🅗Safety yoke
🅘 Micro-USB cable
GENERAL POWER TOOL
SAFETY WARNINGS
BTX10 Battery tacker
Original instructions

8
WARNING Read all safety warnings,
instructions, illustrations and specifi-
cations provided with this power tool.
Failure to follow all instructions listed be-
low may result in electric shock, fire and/or
serious personal injury.
Save all warnings and instructions for future
reference.
The term ”power tool” in the warnings refers
to your mains-operated (corded) power tool or
battery-operated (cordless) power tool.
1)WORK AREA SAFETY
a) Keep your work area clean and well lit.
Cluttered benches and dark areas invite acci-
dents.
b)Do not operate power tools in explosive
atmospheres, such as in the presence of
flammable liquids, gases, or dust. Power
tools create sparks which may ignite the dust
or fumes.
c) Keep children and bystanders away while
operating a power tool. Distractions can
cause you to lose control.
2)ELECTRICAL SAFETY
a) Power tool plugs must match the outlet.

9
Never modify the plug in any way. Do
not use any adapter plugs with earthed
(grounded) power tools. Unmodified plugs
and matching outlets will reduce risk of
electric shock.
b)Avoid body contact with earthed or
grounded surfaces such as pipes,
radiators, ranges and refrigerators. There
is an increased risk of electric shock if your
body is grounded.
c) Do not expose power tools to rain or wet
conditions. Water entering a power tool will
increase the risk of electric shock.
d)Do not abuse the cord. Never use the
cord for carrying, pulling or unplugging
the power tool. Keep cord away from
heat, oil, sharp edges or moving parts.
Damaged or entangled cords increase the
risk of electric shock.
e) When operating a power tool outdoors,
use an extension cord suitable for out-
door use. Use of a cord suitable for outdoor
use reduces the risk of electric shock.
f) If operating a power tool in a damp loca-
tion is unavoidable, use a residual current

10
device (RCD) protected supply. Use of a
RCD reduces the risk of electric shock.
3)PERSONAL SAFETY
a) Stay alert, watch what you are doing and
use common sense when operating a
power tool. Do not use a power tool while
you are tired or under the influence of
drugs, alcohol or medication. A moment of
inattention while operating power tools may
result in serious personal injury.
b)Use personal protective equipment.
Always wear eye protection. Protective
equipment such as dust mask, non-skid
safety shoes, hard hat, or hearing protection
used for appropriate conditions will reduce
personal injuries.
c) Prevent unintentional starting. Ensure the
switch is in the off-position before con-
necting to power source and/or battery
pack, picking up or carrying the tool.
Carrying power tools with your finger on the
switch or energizing power tools that have
the switch on invites accidents.
d)Remove any adjusting key or wrench be-
fore turning the power tool on. A wrench
11
or a key left attached to a rotating part of the
power tool may result in personal injury.
e) Do not overreach. Keep proper footing
and balance at all times. This enables bet-
ter control of the power tool in unexpected
situations.
f) Dress properly. Do not wear loose
clothing or jewellery. Keep your hair and
clothing away from moving parts. Loose
clothes, jewellery or long hair can be caught
in moving parts.
g)If devices are provided for the connection
of dust extraction and collection facilities,
ensure these are connected and proper-
ly used. Use of dust collection can reduce
dust-related hazards.
h) Do not let familiarity gained from frequent
use of tools allow you to become compla-
cent and ignore tool safety principles. A
careless action can cause severe injury within
a fraction of a second.
4)POWER TOOL USE AND CARE
a) Do not force the power tool. Use the cor-
rect power tool for your application. The
correct power tool will do the job better and

12
safer at the rate for which it was designed.
b)Do not use the power tool if the switch
does not turn it on and off. Any power tool
that cannot be controlled with the switch is
dangerous and must be repaired.
c) Disconnect the plug from the power
source and/or remove the battery pack,
if detachable, from the power tool before
making any adjustments, changing
accessories, or storing power tools. Such
preventive safety measures reduce the risk of
starting the power tool accidentally.
d)Store idle power tools out of the reach
of children and do not allow persons
unfamiliar with the power tool or these
instructions to operate the power tool.
Power tools are dangerous in the hands of
untrained users.
e) Maintain power tools. Check for misalign-
ment or binding of moving parts, break-
age of parts and any other condition that
may affect the power tool’s operation. If
damaged, have the power tool repaired
before use. Many accidents are caused by
poorly maintained power tools.
f) Keep cutting tools sharp and clean.

13
Properly maintained cutting tools with sharp
cutting edges are less likely to bind and are
easier to control.
g)Use the power tool, accessories and tool
bits etc. in accordance with these instruc-
tions, taking into account the working
conditions and the work to be performed.
Use of the power tool for operations different
from those intended could result in a hazard-
ous situation.
h) Keep handles and grasping surfaces dry,
clean and free from oil and grease. Slip-
pery handles and grasping surfaces do not
allow for safe handling and control of the tool
in unexpected situations.
5)BATTERY TOOL USE AND CARE
a) Recharge only with the charger specified
by the manufacturer. A charger that is suit-
able for one type of battery pack may create
a risk of fire when used with another battery
pack.
b)Use power tools only with specifically
designated battery packs. Use of any other
battery packs may create a risk of injury and
fire.

14
c) When battery pack is not in use, keep it
away from other metal objects, like paper
clips, coins, keys, nails, screws or other
small metal objects, that can make a
connection from one terminal to another.
Shorting the battery terminals together may
cause burns or a fire.
d)Under abusive conditions, liquid may be
ejected from the battery; avoid contact.
If contact accidentally occurs, flush with
water. If liquid contacts eyes, additionally
seek medical help. Liquid ejected from the
battery may cause irritation or burns.
e) Do not use a battery pack or tool that is
damaged or modified. Damaged or mod-
ified batteries may exhibit unpredictable
behaviour resulting in fire, explosion or risk of
injury.
f) Do not expose a battery pack or tool to
fire or excessive temperature. Exposure
to fire or temperature above 130 °C/265 °F
may cause explosion.
g)Follow all charging instructions and do
not charge the battery pack or tool out-
side the temperature range specified in

15
the instructions. Charging improperly or at
temperatures outside the specified range
may damage the battery and increase the risk
of fire.
6)SERVICE
a) Have your power tool serviced by a qual-
ified repair person using only identical
replacement parts. This will ensure that the
safety of the power tool is maintained.
TACKER SAFETY WARNINGS
• Always assume that the tool contains
fasteners. Careless handling of the tacker
can result in unexpected firing of fasteners
and personal injury.
• Do not point the tool towards yourself or
anyone nearby. Unexpected triggering will
discharge the fastener causing an injury.
• Do not actuate the tool unless the tool is
placed firmly against the workpiece. If the
tool is not in contact with the work piece, the
fastener may be deflected away from your
target.
• Use caution while removing a jammed
fastener. The mechanism may be under

16
compression and the fastener may be force-
fully discharged while attempting to free a
jammed condition.
• Do not use this tacker for fastening elec-
trical cables. It is not designed for electric
cable installation and may damage the
insulation of electric cables thereby causing
electric shock or fire hazards.
NOISE EMISSION/VIBRATION
• A-weighted sound pressure level LpA= 71.8 dB(A), uncertainty K=3
dB(A). A-weighted sound power level LwA= 82.8 dB(A), uncerta-
inty K=3 dB(A). Recommendation for the operator to wear hearing
protection.
• Vibration total value =2.447 m/s², uncertainty K=1.5 m/s². The
declared vibration total value has been measured in accordance with
a standard test method and may be used for comparing one tool
with another. The declared vibration total value may also be used in a
preliminary assessment of exposure.
WARNING
The vibration emission during actual use of the power tool can
differ from the declared total value depending on the ways in
which the tool is used. It’s needed to identify safety measures to protect
the operator that are based on an estimation of exposure in the actual
conditions of use (taking account of all parts of the operating cycle
such as the times when the tool is switched off and when it is running
idle in addition to the trigger time).
ASSEMBLY
LOAD STAPLES INTO THE MAGAZINE
1 Turn the tool upside down.
2 Press the magazine latch 🅔to unlock it from the tacker body.
3 Slide the magazine 🅕backwards. ུ
4 Insert a staples strip ཱུ. Make sure to use only Type 53 staples.

17
5 Close the magazine. Make sure it is safely locked.
REMOVE STAPLES FROM THE MAGAZINE
1 Press the magazine latch 🅔to unlock it from the tacker body.
2 Slide the magazine 🅕backwards.
3 Remove the staples from the magazine.
4 Close the magazine. Make sure it is safely locked.
OPERATION
ACTIVATING THE TOOL
1 Make sure the tool is in good working condition.
2 Firmly press the safety yoke 🅗against the workpiece until it is
pushed in a few millimeters ྲྀ. The LED 🅐lights green. The tool is
active now and ready for stapling.
STAPLING
1 Firmly press the safety yoke 🅗against the workpiece until it is
pushed in a few millimeters.
2 Briefly press the trigger 🅓. ཷ
3 Release the trigger and remove the tool from the workpiece.
4 To fire again, do steps 1 thru 3 again.
ACTIVE MODE/SLEEP MODE
• When the tool is in active mode it stays in this mode for 15 seconds
when there is no activity.
• After 15 seconds of inactivity, the tool goes into sleep mode. The
spring decompresses and you hear a sound. This is normal.
• Press the safety yoke 🅗to activate the tool again.
CHARGING OPERATING INSTRUCTIONS ླྀ
! Do not use the tool whilst charging.
1 Connect the Micro-USB cable 🅘to the Micro-USB port 🅑.
2 Connect the Micro-USB cable to a USB-charger (not included).
3 Connect the USB-charger to a wall socket. The LED 🅐flashes red
during the charging process.
4 When the battery is fully charged, the LED turns green.
5 Disconnect the Micro-USB cable and remove the USB-charger from
the wall socket.

18
! Charge only at ambient temperature between 10°C and 50°C.
! During the process of charging, the charger can become warm: this
is normal.
! Do not store the tool in locations where the temperature may exceed
50°C.
EXPLANATION OF LED LIGHT
Operation/Usage
LED red LED green
LED is continuously green
Tool is active and ready for next staple
LED flashes red and green alternately
Battery is low/empty
Charging with USB-charger
LED red LED green
LED flashes red
Battery is charging
LED is continuously green
Battery is fully charged
! For better performance, press the tool firmly against the
workpiece.
! Look through the staple indicator 🅖to see if the tool still has
sufficient staples.
! In case of a jammed staple, read the maintenance section. DO
NOT re-fire the tool in order to clear the jam as this may damage the
tool.
! During operation, the tool may feel warm. This is normal but if the
tool starts to feel hot stop using the tool until it has cooled down.
MAINTENANCE
STANDARD MAINTENANCE
1 Inspect all screws and tighten if necessary.
2 Keep all vents free from dust and dirt.
3 Clean the tool with a dry or damp cloth. NEVER use any solvent.

19
4 Keep the magazine channel clean.
5 DO NOT oil or grease any parts.
6 Make sure the tool is not damaged. In case of damage, replace or
repair the tool prior to use.
CLEARING A JAMMED STAPLE ཹ
1 Press the magazine latch 🅔to unlock it from the tacker body.
2 Slide the magazine 🅕backwards.
3 Take out the loose staples from the magazine.
4 Use a pin with a sharp end to remove the jammed staple.
WARNING
Changes to the tool and technical modifications are not permit-
ted. This can lead to personal injury.
If the tool fails despite the care taken in manufacturing and
testing procedures, repair shall be carried out by an after-sales service
centre for Rapid tools.
DISPOSAL
EN Waste Electrical and Electronic Equipment (WEEE)
This symbol indicates that this device must not be treated as
unsorted municipal waste, but must be collected separately!
Dispose of the device via a collection point for the recycling of
waste electrical and electronic equipment within the EU and in other
European countries that operate separate collection systems for waste
electrical and electronic equipment. By disposing of the device in the
proper manner, you help to avoid possible hazards for the environment
and public health that could otherwise be caused by improper treat-
ment of waste equipment. The recycling of materials contributes to the
conservation of natural resources.
BTX10 Akkutacker
Übersetzung Der Original-
Bedienungsanleitung
EINLEITUNG
Dieses Werkzeug ist für das Tackern von Stoffen, Leder, Pappe, Papier

20
und ähnlichen Materialien auf Weichholz oder holzähnlichen Materialien
vorgesehen und nur für den privaten Gebrauch bestimmt.
TECHNISCHE DATEN
Akkutacker, Modellnummer BTX10
Klammertyp Rapid 53
Klammerlänge 4-10 mm
Magazinkapazität Klammern, max. 100 St.
Werkzeugabmessungen H x B x L 156 x 58 x 170 mm
Gewicht 0,774 kg
Akkutyp, Spannung Li-Ion, 3,6 V
Akkukapazität 1300 mAh
Akkuladegerät Externes USB-Ladegerät
5VDC max. 3,0 A.
Ladezeit 100 Minuten
Auslösungen pro Akkuladung ≈ 900 Auslösungen
Tackergeschwindigkeit, maximal dauerhaft 20 Schüsse/Min.
WERKZEUGTEILE
🅐LED 🅑Micro-USB-Ladebuchse
🅒Integrierter Akku 🅓Auslöser
🅔Magazinverriegelung 🅕Magazin
🅖Klammerfüllstandsanzeige 🅗Auslösesicherung
🅘Micro-USB Kabel
ALLGEMEINESICHERHEITSWARNUNGEN
FÜR ELEKTROWERKZEUGE
WARNUNG!! Lesen Sie alle Sicher-
heitshinweise, Anweisungen, Abbildun-
gen und Spezifikationen, die mit die-
sem Elektrowerkzeug geliefert werden.
Die Nichtbeachtung der unten aufgeführ-
Other manuals for BTX10
1
Table of contents
Languages:
Other Rapid Staple Gun manuals