4
Secon 2
Spraying with Scout Groups
Make sure you have the correct tractor selected.
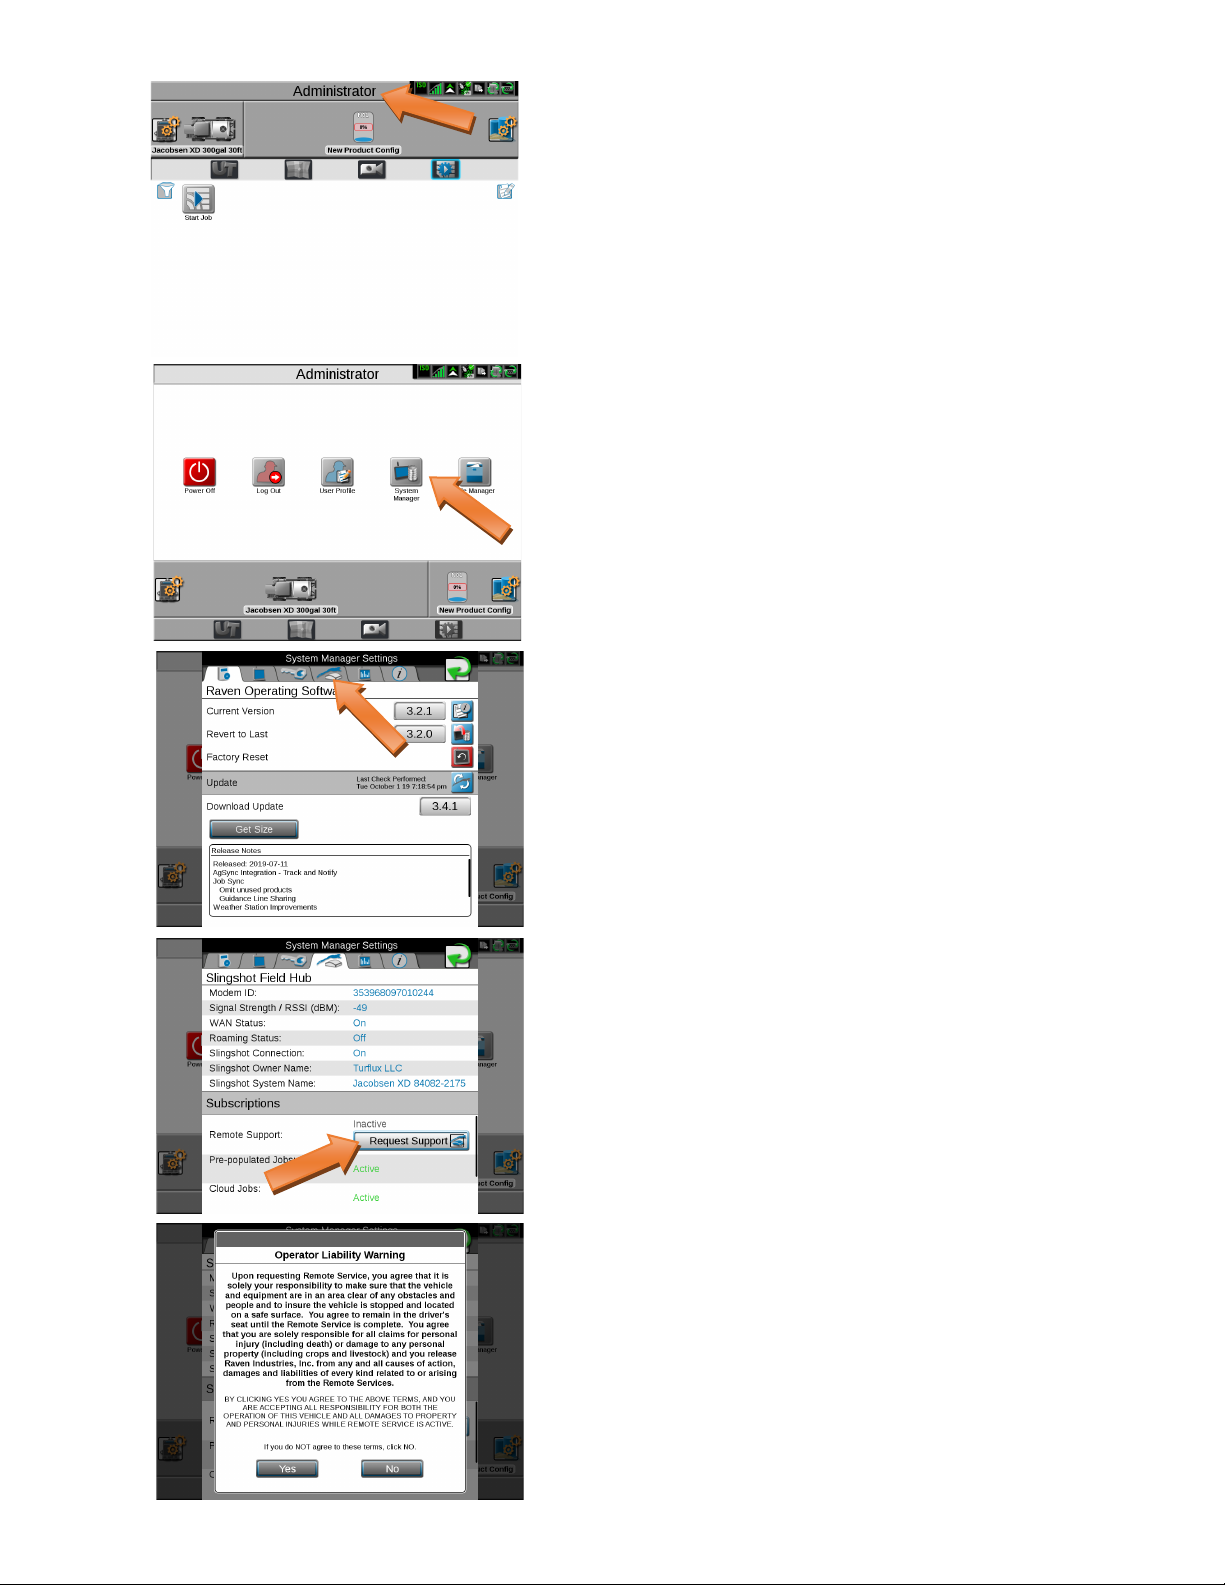
Click Start Job icon
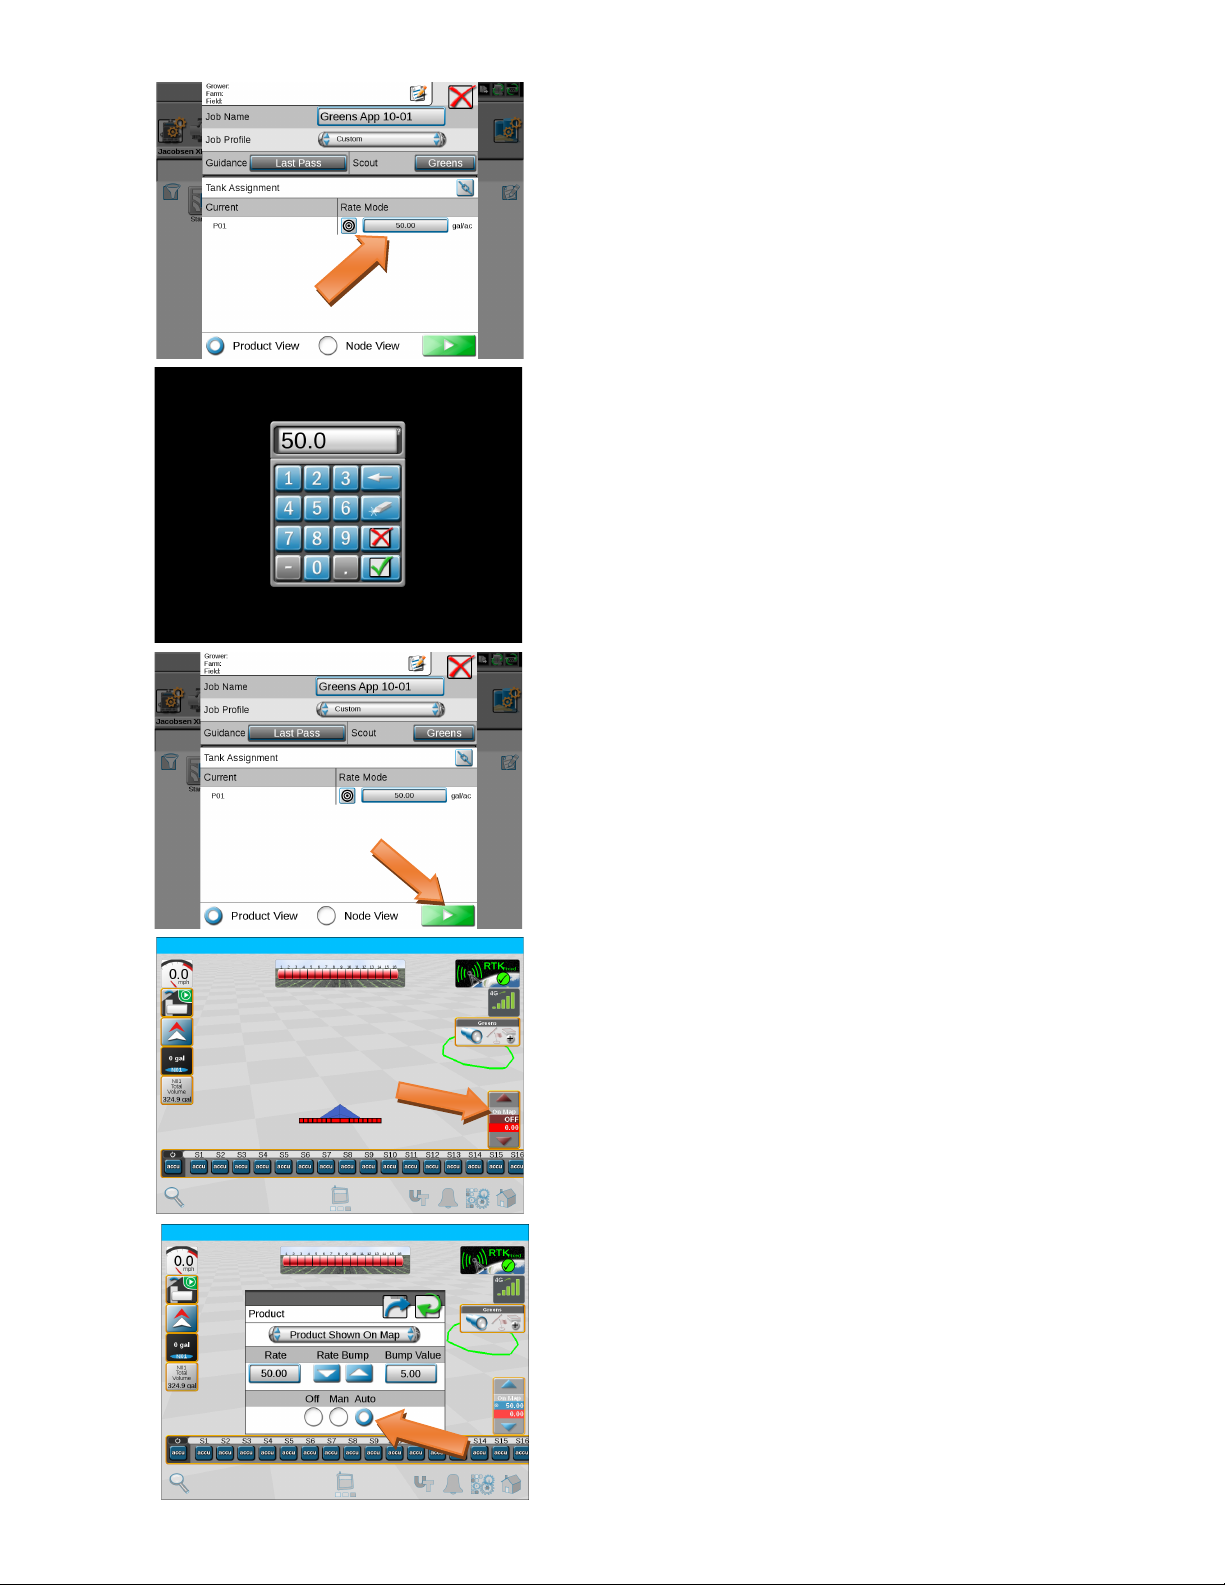
Touch the generic Job Name to rename your spray job.
Turux recommends naming spray jobs for beer
reference later. Click on the label with the generic
name to the right of ‘Job Name’ to open the keypad for
entering the name you want to use.
You should name you job something you will recognize
if you have to go back to the job for any reason. Also
use the date in the name so when you go to clean up
les you can idenfy older jobs to be deleted.
Hit the Green check to connue.
At this point you will want to select your Scout Group.
This will be the group of eld boundaries that you plan
to spray. (Note: If you are planning to spray without
maps in the ‘As Applied’ mode you will not select a
scout group.)
Click on ‘None’ next to Scout to select the group
Touch the dropdown box and change it to the Scout
Group you want to use.
Click on OK once the group is selected.