Contents
What can this GPS Locator and Safer Walking App do? ...................1
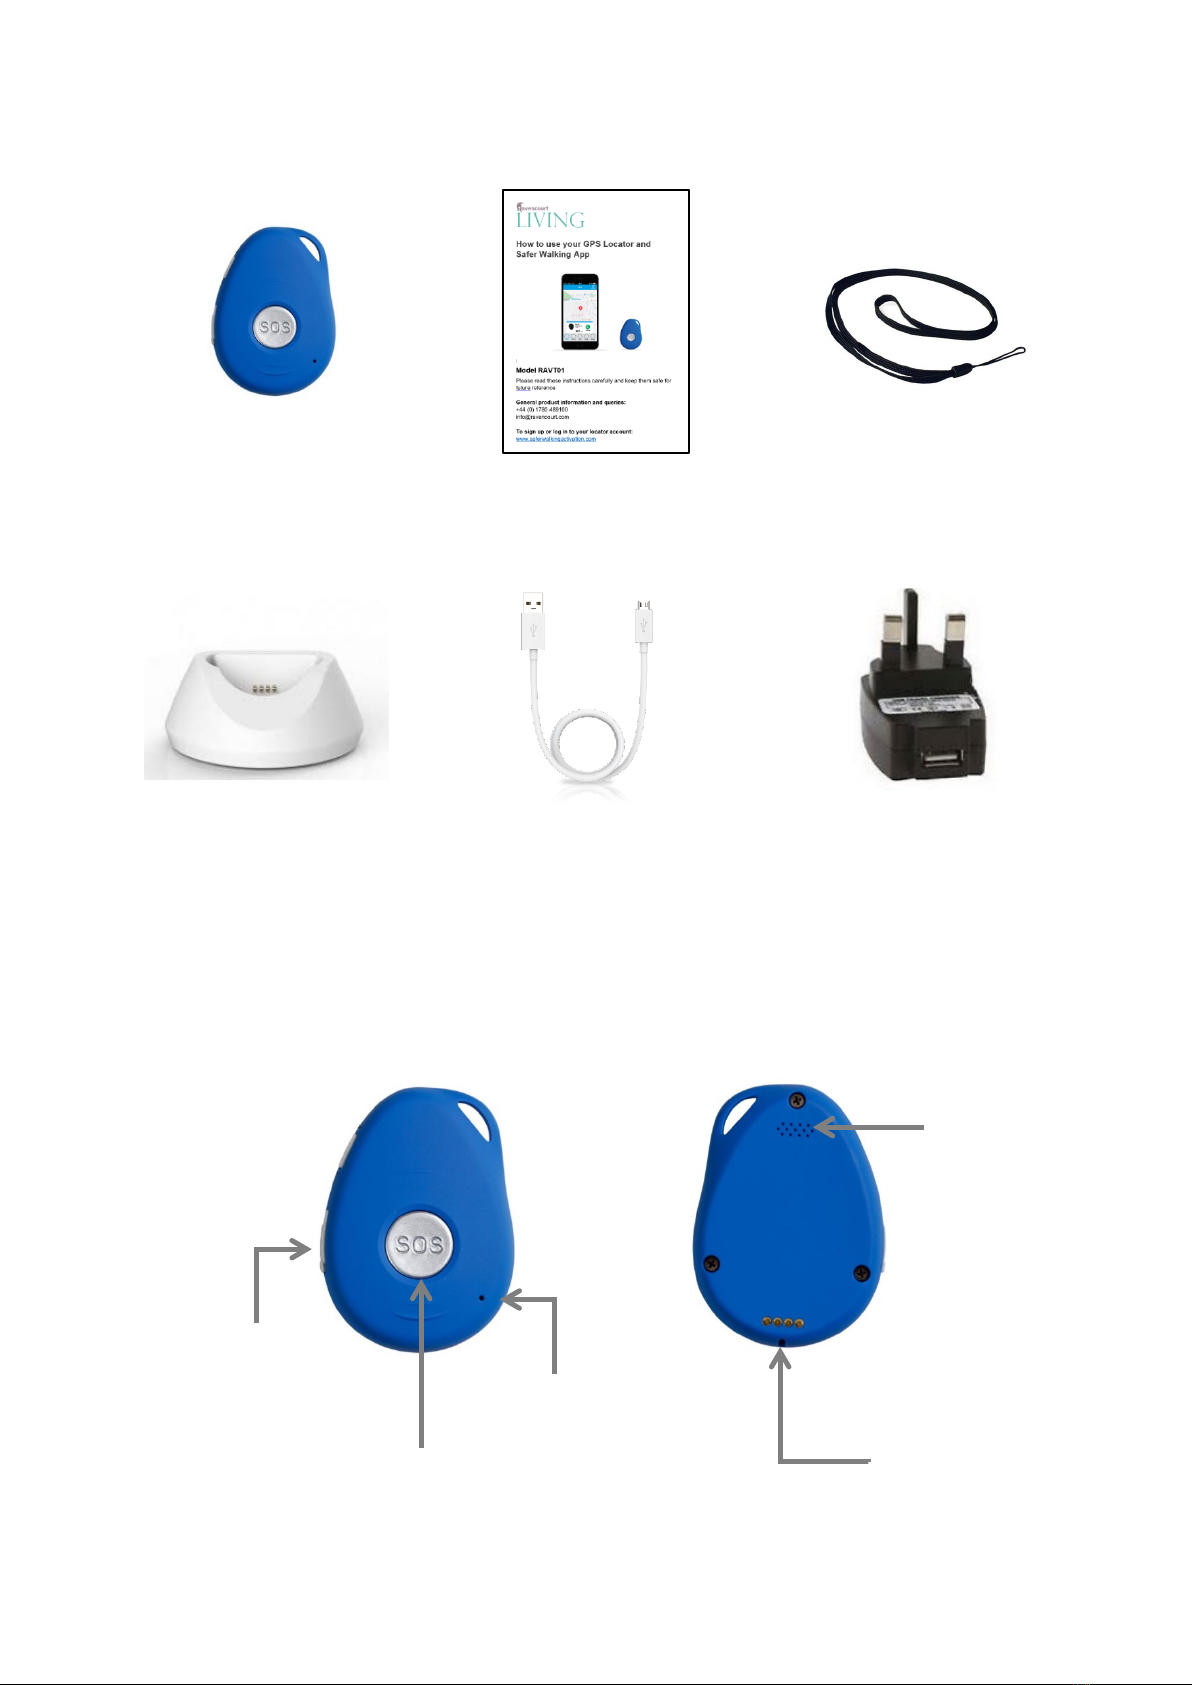
What’s in the box?................................................................................2
Product features ...................................................................................2
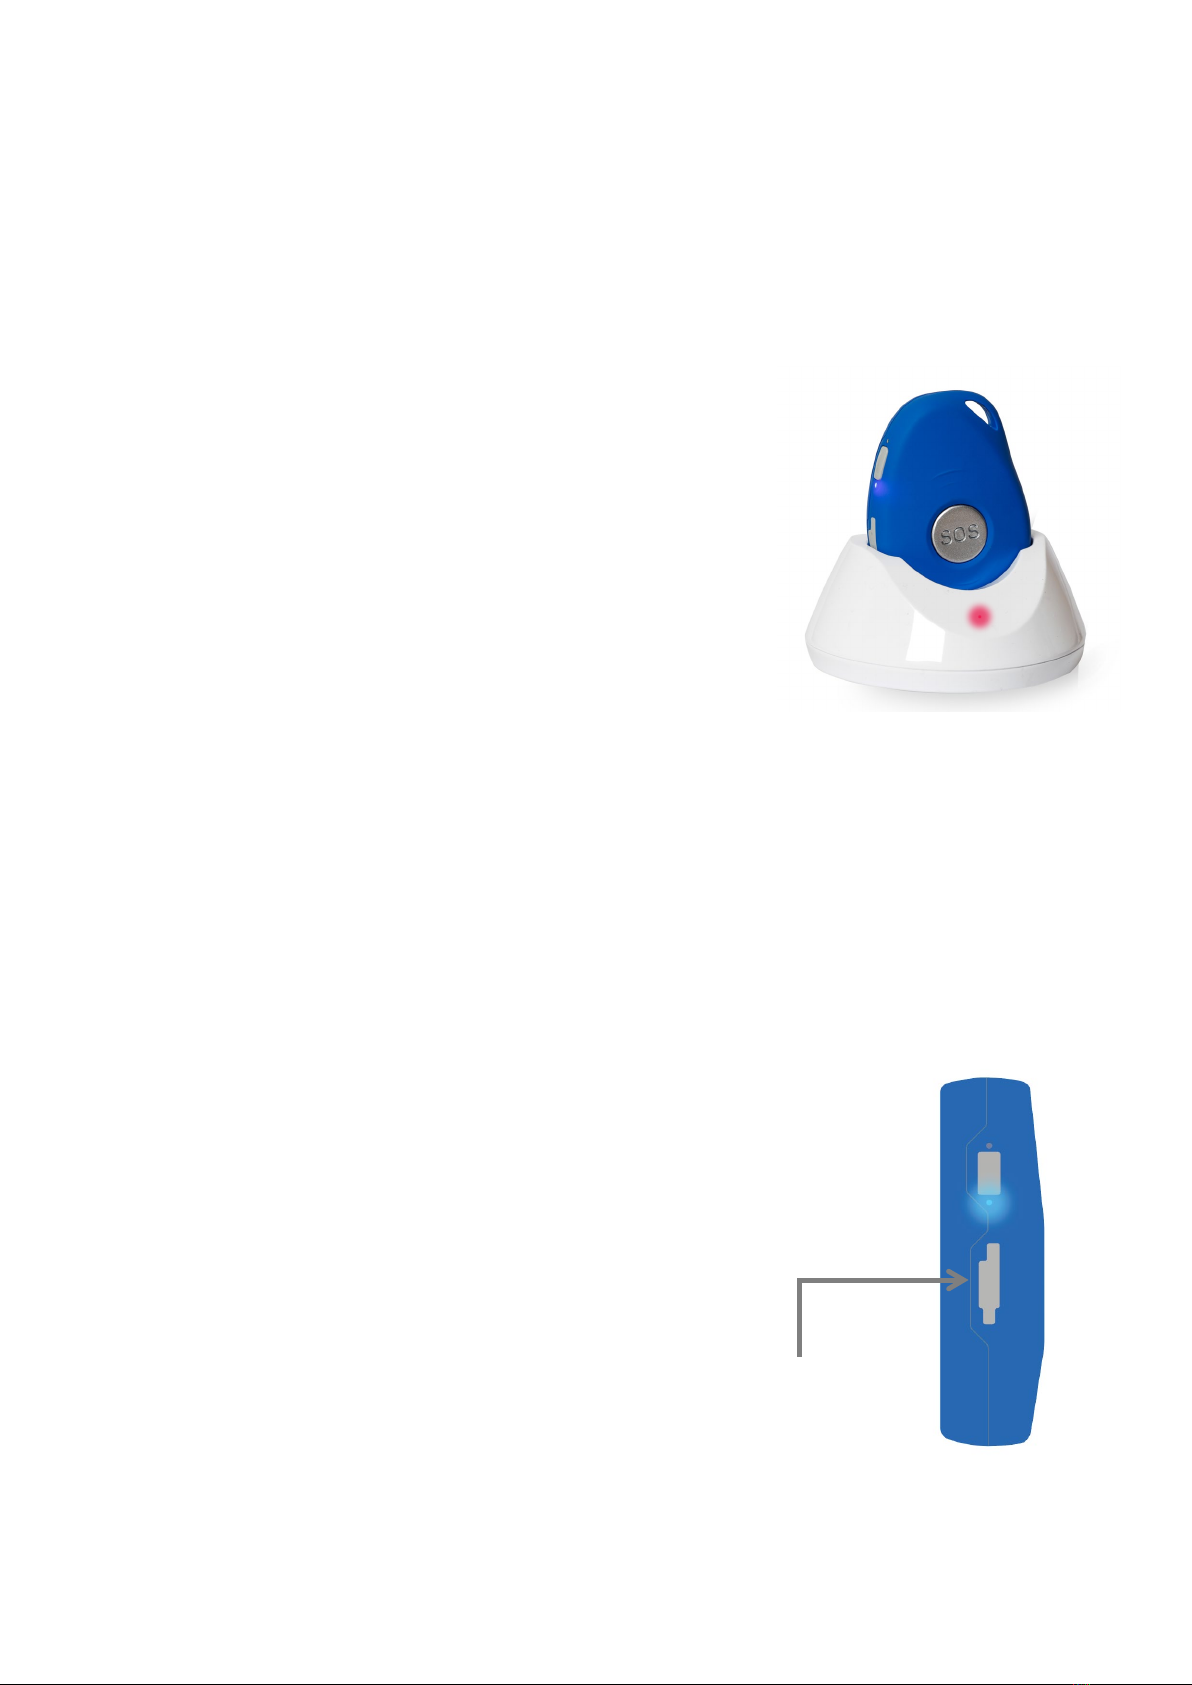
What do the coloured lights mean? ....................................................3
Getting started ......................................................................................4
Step One: Charge your GPS locator for 3-4 hours ..............................4
Step Two: Register your account online ..............................................5
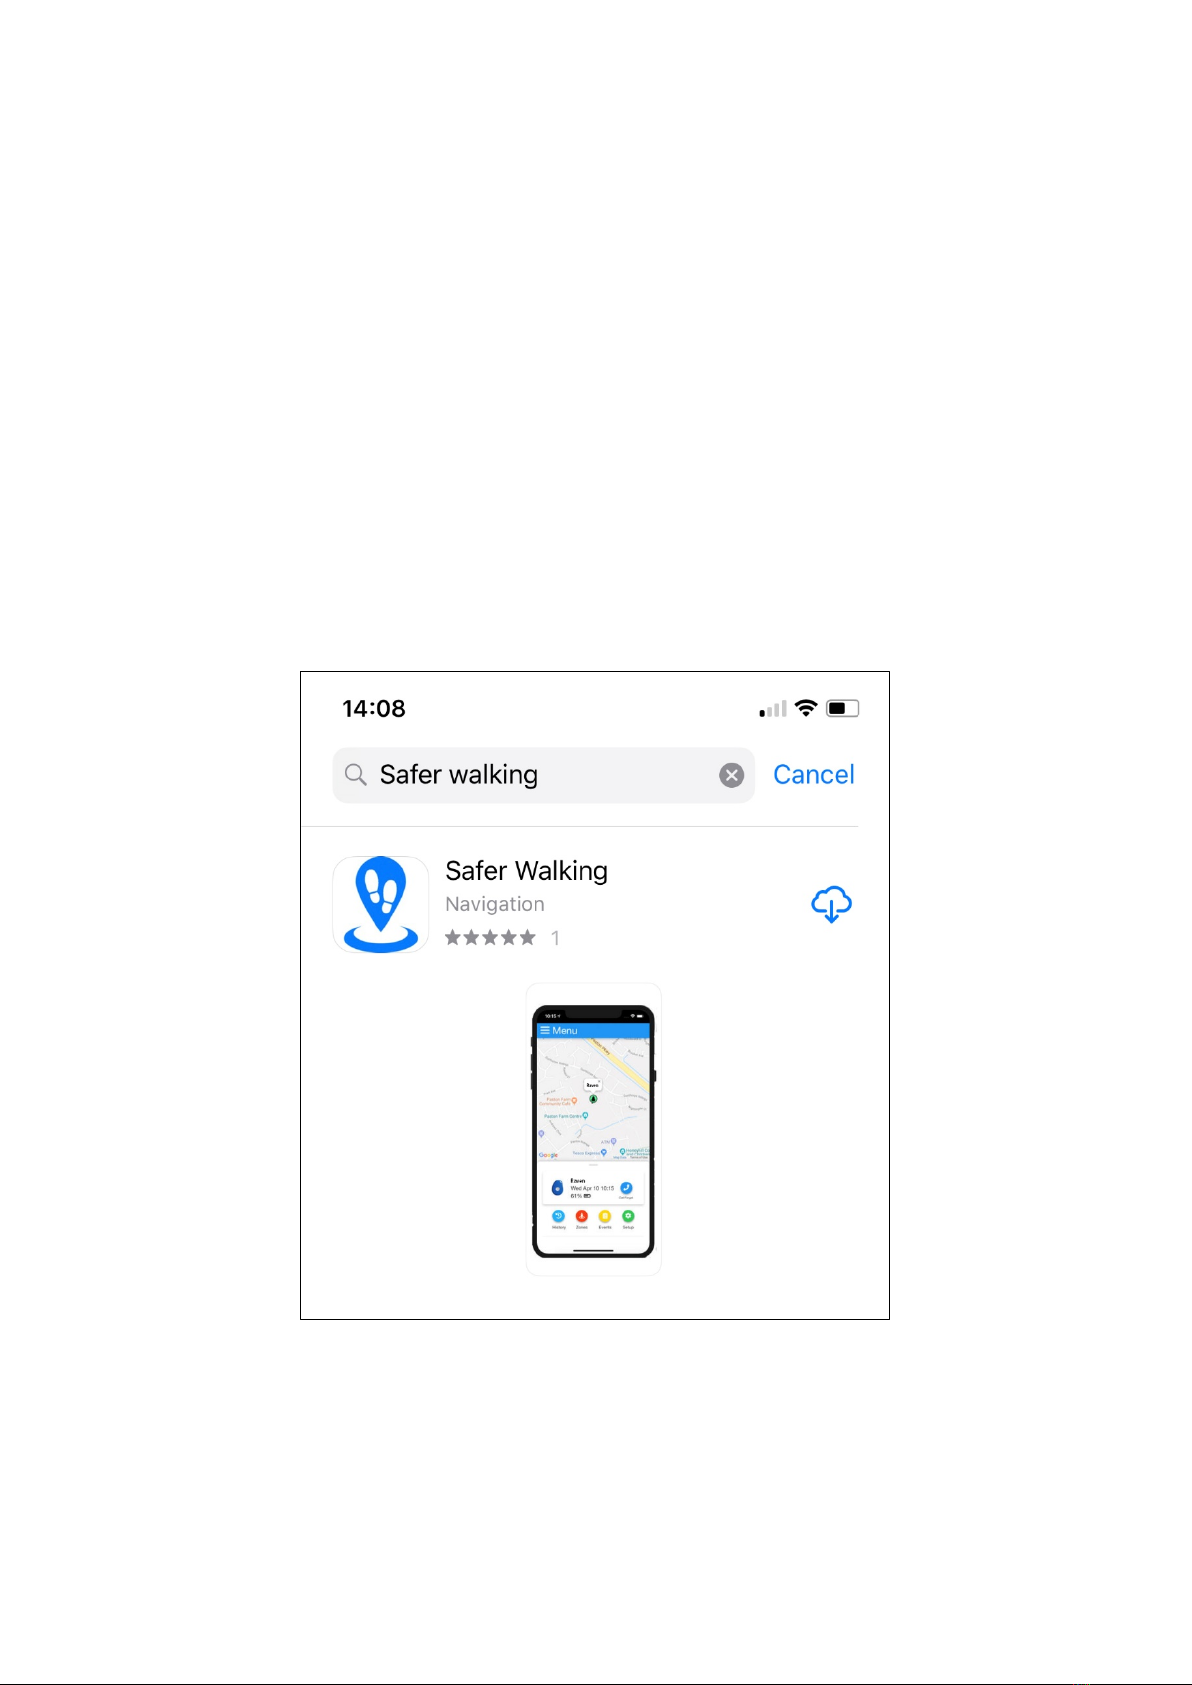
Step Three: Download the Safer Walking App to your smartphone .....6
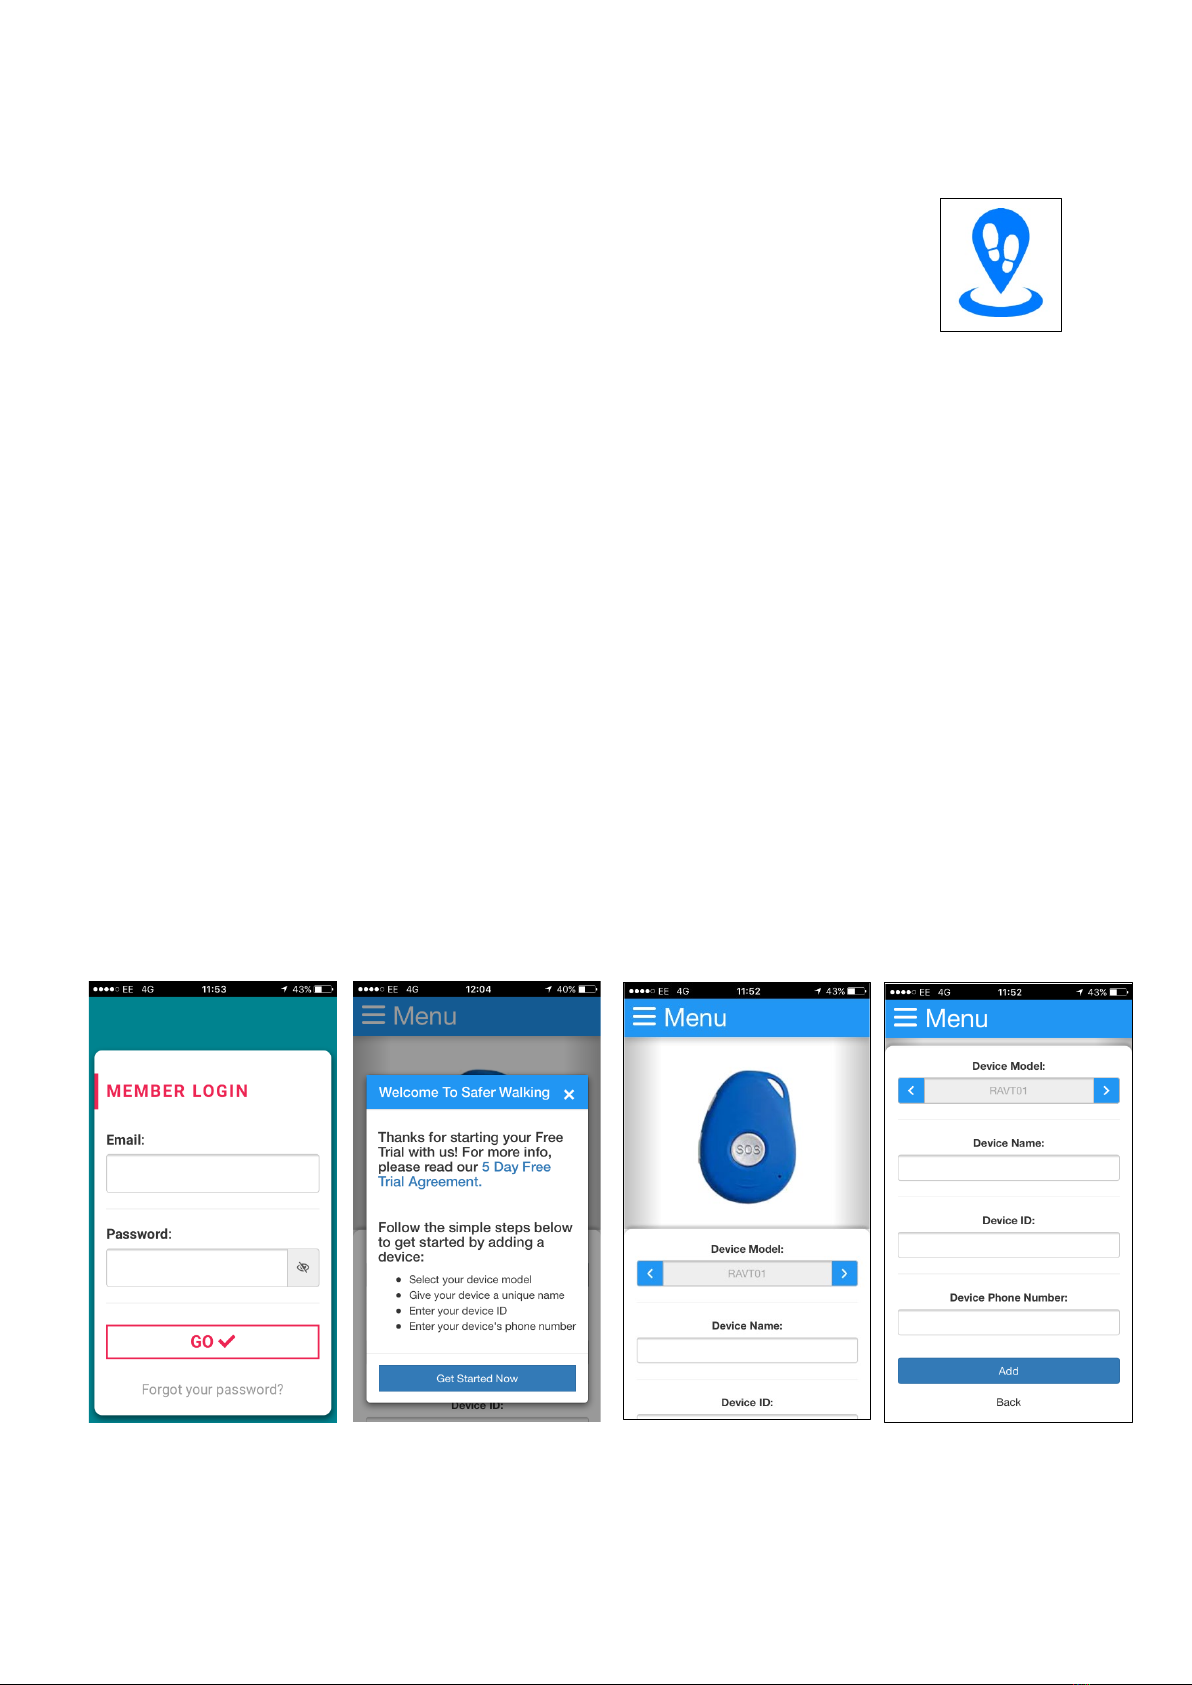
Step Four: Open the Safer Walking App and set-up your GPS locator
device..................................................................................................7
Using the GPS Locator and Safer Walking App ................................9
View the locator’s current location.......................................................9
View information about the locator ......................................................9
How to return to the Home screen.......................................................9
Make a phone call to the locator........................................................10
Use the SOS button to request help..................................................11
History – Where has the GPS locator been? .....................................12
Zones – Get alerts when the wearer enters or leaves an area ..........13
Events – See past events relating to the locator................................15
Setup – View locator device settings .................................................16
Menu options.....................................................................................17
Home .........................................................................................17
Add Device ................................................................................17
Settings......................................................................................17
Logout........................................................................................17
Battery life and charging....................................................................18
Frequently asked questions...............................................................19
Technical and safety information ......................................................20
Help using your GPS Locator and Safer Walking App.....................21