Rawlplug R-WW90II User manual

www.rawlplug.com 1
WW90 II
Gas Nailer
R-WW90II
AG34/90-C1
Operation
manual Warranty
card Cleaning
Guide
EN Operation manual | PL Oryginalna instrukcja obsługi | FR Mode d’emploi original
RU Оригинальная инструкция по эксплуатации | DE Betriebsanleitung
EN Warranty card | PL Karta gwarancyjna | FR Carte de garantie
RU Гарантийный талон | DE Garantieschein
EN Cleaning Guide | PL Instrukcja czyszczenia | FR L’instruction de nettoyage
RU Инструкции по чистке | DE Reinigungsanleitung

www.rawlplug.com 3
www.rawlplug.com
2
WW90 II WW90 II
Operation manual – gas powered nailer
R-WW90II
Improper and unsafe use of the nailer may cause death or serious
injury. The person designated to operate this tool should read
and understand this manual before starting to work with the tool.
Keep this operation manual safe for future reference of other
users of the nailer.
Date of issue 1.04.2020 Disposeofpowertools,accessories
and packaging in accordance with
the applicable environmental
regulations. Do not dispose of power tools and
batteries in household waste, as they may contain
hazardous substances/mixtures that pose a threat
to human health and the environment. Power tools
and batteries unfit for use should be collected
separately and recycled in accordance with the
relevant environmental regulations.
Separate collection of waste products and packaging
enables some materials to be recovered and reused.
It is one of the ways to protect natural environment
and reduce the demand for raw materials. Observe
local regulations in any cases where they require
you to hand over used up electrical appliances of
common use to special collection points, or the
resellers to accept them when a new product is
purchased. All information concerning the disposal can
be obtained from the service centre of Rawlplug S.A.
CONTENTS
Introduction 4
Tool description 5
Specication 6
Tool handling 8
Maintenance 12
Nailer troubleshooting 13
General precautions 14
Warranty and its terms and conditions 21
Original CE declaration of conformity 23
Warranty card 122
Cleaning guide 124
EXPLANATION OF THE SYMBOLS USED
ENVIRONMENTAL PROTECTION
Li-Ion
Read the operating manual! Wear hearing protection
Environmental protection and
hazardous materials Li-Ion
Wear a safety helmet
Recycling Wear protective gloves
Notes Ability to operate in contact release
mode
Conforming with the applicable
European directives Risk of injury
Wear safety glasses Using CO2or O2is prohibited
AG34/90-C1
EN Operation manual | Warranty card ............................................................................................... 2
PL Oryginalna instrukcja obsługi | Karta gwarancyjna .................................................................. 25
FR Mode d’emploi original | Carte de garantie ............................................................................... 49
RU Оригинальная инструкция по эксплуатации | Гарантийный талон .............................. 73
DE Betriebsanleitung | Garantieschein ............................................................................................. 97
EN Cleaning Guide | PL Instrukcja czyszczenia | FR L’instruction de nettoyage
RU Инструкции по чистке | DE Reinigungsanleitung .................................................................. 124
EN

www.rawlplug.com 5
www.rawlplug.com
4
WW90 II WW90 II
Read through all the guidelines and instructions provided. Failure to follow these instructions may
result in electric shock, re and/or severe injury.
TOOL DESCRIPTION
13
6
8
7
4
5
3
1 2
10
9
12
11
Tool power increased to 104 J to
enable driving the longest 90mm
ring shank nails into the hardest
substrates
Lithium-Ion battery providing twice
theperformance-8000xingsper
charge and charging time of 30
minutes
NEW ergonomically designed grip
position for improved balance and
working comfort
NEW design with Improved durability
andincreasestheeciencyofair
throughtheairlterzone
Convenient,reliableandaccuratexing
thanks to keyless nailing depth adjustment
for improved precision and ease of use
Nose protection cap, that protects wood
surfaces from getting damaged and
minimises potential material waste
Convenient rafter hook, allowing you to
hang up the nailer for a work break
FEATURE AND BENEFITS
Design
1. Safeguard A
2. Nailing depth adjustment knob
3. Nail feeder
4. Gas flow activator
5. Battery indicator
6. Magazine
7. Handle
8. Trigger
9. Air filter shield
10. Gas container socket
11. Hanger
12. Battery pack socket
13. Muzzle
Equipment
1. Nailer
2. Battery (2 pcs.)
3. Charger
4. Charger power cord with an EU plug
5. Charger power cord with a UK plug
6. Transport case
7. Original operation manual and warranty card
8. Allen keys
9. Cleaning and maintenance instructions
10. Safety goggles and hearing protectors
EN EN

www.rawlplug.com 7
www.rawlplug.com
6
WW90 II WW90 II
NAILER
Model R-WW90II (AG3490)
Weight 3,8kg
Dimensions (D/S/W) 394x121,4x407mm
Nailing energy 104J
Nail lenght 50-90 mm
Joining angle 34o
Nail diameter 2,87-3,3mm
Fastening speed per second 2-3
Fastening speed per hour 1200
Operating temperature range 7oC- 49oC
CHARGER
Model SP-WW90II/SC40II-CH-00
Input voltage range 100-240 VAC
Supply frequency 50/60Hz
Charging voltage 8,4 V
Charging current 2 A
Charging time 75 min. (max.)
Protection class II
Tightness class IPXO
Electrical safety class II
BATTERY
Battery type PBP2A66D1
Battery capacity 2,5Ah
Voltage 7,2V
Fixings per charge 8000
FUEL CELL
Index R-RAWL-GP6
Mixture type liquid propane butane
Recommended working -5-25 degrees Celsius
Full charge <0,15A
CHARGER INPUT PARAMETERS
Index SP-WW90/SC40II-CH
Input Voltage Range 100-240 VAC
Input Frequency 50/60lub50-60Hz
Inrush Current 40A maks. (Cold Start)
TECHNICAL DATA
GENERAL PARAMETERS
Efficiency 75%
Leakage Current 0,35mA max
Pre-Charge Current 0,15A - 0,25A
Pre-Charge Voltage 4V<Vbattery<6V
Complete Charge 2A
Constant Voltage 8,2V - 8,4V
Complete Charge <0,15A
Total Charge Time 2 Hours max
Overvoltage Protection 8,5V
Work Temperature 0°C - 50°C
Battery Pack Temperature Protection T < 0°C or T > 55°C
Continuous Output Power 17W max
ENVIRONMENTAL SPECIFICATIONS
Operating Temperature Range 0°C to 50°C
Temperature Coefficient ±0.02%/°C
Storage Temperature Range –20°C to +85°C
Humidity, Non-Condensin 0 to 95% RH
Cooling Free-Air Convection
EMI Meets CISPR22 Class B Standard
Safety Specifications UL1310&IEC60335-2-29
INFORMATION ON THE NOISE AND VIBRATION LEVEL
NoisemeasurementvaluesweredeterminedinaccordancewithEN62841.Typicalforagivendevice,
The noise level emitted by this device, determined according to scale A, is standard:
Sound pressure level LpA 102,4 dB
Sound power level LWA 102.8 dB
Measurement error KpA and KWA 2,5dB
Wear hearing protection!
Total vibration values ah (vector sum of three directions) and measurement uncertainty K marked
accordingtoEN60745are:
ah 2,48 m/s2
K 1,24 m/s2
The vibration level specified in this manual has been measured in accordance with the EN standard
60745 measuring procedure. The vibration level is representative for basic applications dedicated for
power tool. If the power tool is used for other applications or with other tools
and if it is not sufficiently maintained, the vibration level may deviate from specified. The above remarks
also apply to accessories. To provide adequate protection the user against additional effects of vibration to
ensure the safety warm hands while working.
USING THE TOOL AS INTENDED:
The RAWLPLUG R-RAWL-WW90II gas powered nailer is a professional tool, powered by the energy created by burning a
gas and air mixture, and it is only intended for xing wooden elements with nails. Thanks to the gas containers and the
battery pack the device features, it is fully portable. The power tool and its accessories may only be used as intended
and designed for, in accordance with this operation manual. Using them otherwise is impermissible. The manufacturer
shall not be held liable for any damage or injury resulting from unintended use of the tool, failure to observe the
relevant safety regulations as well as the recommendations provided in this operation manual.
EN EN

www.rawlplug.com 9
www.rawlplug.com
8
WW90 II WW90 II
1
4
5
2
3
CN1
INPUT CN 1: 2-pin use Solteam
ST-02H-BP (IEC60230 C8) or equivalent
Pin Input voltage
L&N 90-264 V AC
OUTPUT
Pin Output
1 Bat +
2NTC
3 Bat –
4 LED red
5 LED green
We recommend using original gas supplies and
nails from RAWLPLUG which guarantees reliable
tool operation.
Relling gas containers is impermissible.
PREPARING A NEW GAS CONTAINER
OPERATION MANUAL
INSTALLING AND REMOVING A GAS
CONTAINER
Open the gas container compartment by pulling
its lid in the direction indicated by arrow 1 and
then tilting it in the direction indicated by arrow 2.
Place a gas container inside the compartment as
indicated by arrow 3. Move the gas container val-
ve to the device’s gas nozzle as shown in Figure 4.
Close the gas container compartment lid.
Hold the nailer and the battery pack securely
when replacing the battery. Failure to do so
may result in the tool slipping out of your hands,
potentially causing damage to the tool.
Do not expose the battery pack to low
temperatures, as this may drastically shorten
its service life.
Visually check the battery pack condition
each time to make sure that it bears no signs
of mechanical damage. Electrolyte may leak out
of a damaged battery pack, which is harmful to
health. If electrolyte comes into contact with the
skin, rinse it thoroughly with water. In the event of
eye contact, rinse thoroughly with clean water and
seek medical attention immediately! Electrolyte is a
ammablesubstancewhichmaycausethebattery
to ignite or explode.
The battery pack heats up considerably while
being charged, so do not start working with
the tool immediately after the charging process is
complete. In order to avoid damaging the battery,
wait until it cools down to room temperature.
INSTALLING AND REMOVING THE BATTERY
Slide the battery into the socket at the bottom
section of the handle so as to hear the characte-
ristic click sound.
Once the battery has been installed in the device
handle, read the battery charge status. The bat-
tery charge status is indicated by LEDs. If all LEDs
are lit green, the battery is fully charged. Only
one red LED lit indicates a discharged or dama-
ged battery.
To remove the battery, press the button on the
battery pack while simultaneously sliding the bat-
tery out of the socket.
BATTERY CHARGE STATUS INDICATIONS OF THE
NAILER’S LEDS.
Status Meaning
All LEDs are lit green Battery charge level
above 80%
Two LEDs lit green Battery charge level
between 60% and 80%
One LED lit green Battery charge level
between 40% and 60%
One LED flashing
green
Battery charge level
between 20% and 40%
One LED lit red Battery power below
20%
1
3
2
4
EN EN

www.rawlplug.com 11
www.rawlplug.com
10
WW90 II WW90 II
Before connecting the chargerto the electrical
outlet, make sure that the mains voltage
corresponds to the voltage specied on the
device’s nameplate and the specications
provided in the operation manual.
Use the original charger only, and charge only the
batteriesspeciedbythemanufacturer.
The original charger features double
insulation conforming with the EN 60745
standard, which is why no earth wire is required.
CHARGING THE BATTERY AND INFORMATION
ON THE CHARGER’S LEDS
The nailer features two Li-Ion batteries. A full
battery charge cycle takes up to 75 minutes.
If a charger without a battery in is connected
to the power supply, its red LED lights up for a
while and then changes to green.
Once the battery has been connected to the
charger, its red LED lights up.
When the battery is fully charged, the LED light
up green.
If the battery temperature is incorrect, the red
LED starts flashing at regular intervals. --In the
event of any battery problem, the red LED
lights up, and the battery must be replaced
immediately.
When a fully charged battery is connected to the
charger, the green LED lights up.
If any abnormal symptoms should occur during
battery charging, including overheating, smoke,
buzzing, etc., interrupt the battery charging
immediately and contact the service centre.
The batteries, the charger and the power
adapter should all be in good technical
condition, free of any mechanical damage,
to ensure safe and efficient charging.
CHARGING AND DISCHARGING THE NAILER
Before charging the nailer with nails, connect the
battery and the gas container.
Loading a nail before connecting the battery may
cause incidental nail ejection.
When charging the nailer, point its muzzle away
from yourself and others, and never place your
finger on the trigger.
To the nailer with nails, slide tape 1 into the
magazine hole, and then push them upwards as
much as possible.
Move nail feeder 2 as indicated by the arrow
as much as possible until it is home, and then
release it. The feeder should stop at the end of
the nail tape, pressing them against the muzzle.
To empty the nailer of nails, press button 3 on the
nail feeder and move it upwards.
Press and hold nail lock 4, then slide the nails
towards the charging inlet, and release the lock
when the tape starts to slide over it.
Remove nails from the magazine.
3
NAILING DEPTH ADJUSTMENT
The tool features a nail driving depth adjustment
function. Always perform a test fixing before
you start working. The test fixing should be
performed with the adjustment slider set in
position (1).
Change the nailing depth adjustment slider’s
setting to achieve the desired outcome.
If the nailing outcome (2) is not satisfactory, use
a nail of a different length and repeat the above
steps.
REMOVING TOOL MUZZLE JAMS
In the event that a nail gets jammed inside the
tool, disconnect the power supply (gas container
and battery) from the device before performing
any action.
Remove the magazine by pressing the right lever
on the nailer body.
DRIVING DEPTH ADJUSTMENT
This nailer features a driving depth adjustment
function. Test the driving depth on a scrap piece
of material before you start your work.
Driving depth can be adjusted with a knob. Keep
rotating the knob until you find your desired
driving depth setting.
NOTE! We do not recommend using the tool
with its nailing adjustment knob in extreme
settings (minimum and maximum), as this may
lead to malfunction of the device.
Once the nailer has been armed (i.e.
after connecting the battery and the gas
container, and inserting the nail tape), do not point
the nailer muzzle at yourself, any other person or
animal.
Donothitnailsorthematerialbeingxing
and other elements with any part of the
nailer, as it is a precision tool and any impact can
adverselyaectitsoperation.
When working with a cordless battery-powered
nailer, hold it securely and maintain a stable
working position.
CONTACT ACTUATION AND ACTIONS
REQUIRED TO DRIVE A NAIL
The WW90II nailer operates in a contact (sequen-
tial) actuation mode, which means that before a nail
isejected,thenailermustrstbeunlocked,which
is performed by pressing safeguard A on the muz-
zleagainstthematerialinwhichyouarexing.This
causes safeguard A to slightly retract towards the
tool, activates the ventilation fan and unlocks the
trigger via the lever, and a nail is not ejected until
the trigger is pulled. The contact actuation solution
applied in the tool prevents nails from being driven
in by pressing the nailer with safeguard A against
the material with the trigger pulled. This makes the
nailer a very safe tool to use. To drive another nail,
release the lock (move the tool away from the sur-
face of the working material) and the trigger before
repeating the above action. Before pulling the trig-
ger, make sure that the nail is to be driven directly
intothexture.Thetoolmustbepositionedata
right angle to the surface in every plane.
4
2
1
EN EN

www.rawlplug.com 13
www.rawlplug.com
12
WW90 II WW90 II
WORKING AT LOW TEMPERATURES
We do not recommend using this gas powered tool at
temperatures below -7°C (19°F). Low temperatures
reduce the gas combustion eciency and battery
performance.
MEASURES IN THE EVENT OF RAM JAMMING
IN THE MUZZLE
It may sometimes happen that a piece of a nail
tape causes the ram to jam inside the muzzle, in
which case:
Disconnect the battery and the gas container
from the nailer, and remove the remaining nail
tape from the magazine.
Place the nailer on a stable surface with the
muzzle facing upwards.
Position a type PH2 screwdriver of appropriate
length above the muzzle hole and gently hit it with
a hammer to unlock the jammed ram (as shown in
the photograph). The unjammed ram should move
smoothly into the nailer away from the muzzle.
Remove the blocking piece of tape from the
muzzle.
We recommend blowing the nailer muzzle
through with compressed air.
Finally, make sure that the ram has fully retracted and
reached its extreme position, since otherwise, the
first time you try to drive a nail, the tool may cause
what is referred to as a misfire, meaning that the
nailer does not pick up a nail and the ram directly hits
the material into which the nail was to be driven. Each
subsequent nail ejection should proceed correctly.
Before performing any inspection or
maintenance, switch the device o by
disconnecting it from the power supply (battery),
and disconnect the gas container.
General maintenance
The persons responsible for making sure that the
tool is maintained in a fully operational condition
enabling safe use are the employer and the tool
operator.
NEVER use the tool if there is any doubt with
regard to its technical condition.
Regularly check that all mounting screws are
properly tightened. If any of the screws are loose,
tighten them immediately to avoid danger. Any
damage not resulting from improper operation
should only be repaired by the manufacturer’s
authorised service centre in order to avoid risks
and losing warranty due to tampering with the
device’s internal components.
Do not use solvents or other aggressive
chemical compounds to clean the device,
as this may cause damage to its rubber and plastic
components.
Lubrication and cleaning
Keep the tool properly cleaned according to the
enclosed cleaning and maintenance instructions.
A fully operational device does not require
additional lubrication of external moving parts,
such as safeguard A. The gas which contains oil
provides for lubrication of the tool’s internal
components.
Use only the compounds recommended by the
manufacturer for cleaning.
Pay special attention to the handle cleanliness. A
dirty handle may compromise the grip. This may
lead to losing control of the device.
Storage
Store the battery-powered nailer and its accessories
in a dry and safe place, out of children’s reach.
Store the device with the battery pack removed.
Also remember not to store discharged batteries
for a prolonged time, since it may damage them.
Batteries should be charged on an ongoing basis,
as soon as they are discharged, which extends their
service life.
MAINTENANCE
Symptoms Remedies
The nailer LED is lit red and the
tool is not working.
Low battery.
Replace the battery with a fully charged one.
The tool operates normally but
does not drive fasteners flush with
the working surface.
Set a larger driving depth using the tool’s knob.
Clean the cylinder with proper cleaner.
Check the battery status and replace it if needed.
Wood in which fixing is attempted is too hard or wet. Using different na-
ils is recommended.
The fan does not work and the
LED indicator is lit red.
The battery is dead. Replace the battery with a fully charged one.
If none of the above measures solve the problem, return the tool to the ne-
arest service centre.
The battery cannot charge, or
the battery charger is heating up
when charging.
Replace the battery. If this has solved the problem, the battery is dama-
ged or used up.
If the battery is functioning normally when installed on the tool but can-
not be charged using the charger, replace the charger.
Battery charger is heating up, pro-
duces abnormal noise or smoke.
The battery charger is damaged and unfit for further use. Unplug the
battery charger immediately and replace it with a new one.
Safeguard A is locked and cannot
be fully pressed down, which
makes it impossible to operate
the tool.
The contact element is bent or some dirt is stuck in the track of the safe-
guard mechanism. Clean the safeguard mechanism track. Repair or re-
place the contact element by returning the device the service centre.
Locking mechanism is active. Charge the nailer by inserting a new nail
tape into the magazine.
Check if the ram has not got jammed inside the muzzle, and if so, follow
the relevant instructions provided in this operation manual.
The tool does not operate, but the
green LED is on and the fan works.
The gas container is empty or damaged. Replace it with a new and non-
-defective one.
The spark wire is loose. Check the spark wire by removing the cap.
The spark plug is dirty. Clean the spark plug.
If none of the above measures solve the problem, return the tool to the
nearest service centre.
The tool seems to work normally,
but fixing is impossible.
Wrong type of fasteners is used. Change fasteners with correct ones.
The cylinder needs cleaning.
A fastener is jammed. Clean the jammed fastener before attempting to
use the tool.
The gas combustion compartment
does not return to its initial
position.
Safeguard A (clamp) is bent or dirty. Check safeguard A, and repair or re-
place it, if necessary. Clean the safeguard mechanism track.
The ejection mechanism does not
return to its initial position, and
misfire frequency has increased
above the average.
Check and replace the complete battery pack.
Clean the tool using an adequate cleaning agent.
The tool may be overheated. Clean or replace the air filter.
Tool seems to be loosing power.
Check the fuel cell.
Clean or replace the air filter.
Check the spark plug wire.
Clean the tool using an adequate cleaning agent.
In the event of a failure other than those described above, immediately stop using the tool and contact your
local dealer or directly the service centre.
Nailer troubleshooting
TROUBLESHOOTING
EN EN

www.rawlplug.com 15
www.rawlplug.com
14
WW90 II WW90 II
GENERAL PRECAUTIONS FOR SAFE TOOL HANDLING
Read through all the following warnings and
safety instructions.
Failure to observe the following warnings and
safety instructions may result in electric shock, fire
and/or serious injury.
Keep all warnings and safety instructions in a safe
place for future reference.
Keep this operation manual.
The term power tool as used in this operation manu-
al refers to all mains-operated (using a power cord)
tools as well as battery-powered tools, where the
battery is a component thereof (cordless operation).
a. Persons under the influence of alcohol, narcotics
or drugs affecting their psychophysical condition
are forbidden to use power tools.
b. Use the power tool for its intended purpose only.
Using it for any other purposes may lead to serious
accidents.
c. The power tool is designed to be powered by
electric current with the parameters specified on
the nameplate attached to the tool.
d. Check whether the local power supply
parameters correspond to those specified on the
power tool’s nameplate before connecting it.
1.WORKPLACE SAFETY:
a.Keep your workplace tidy and well lit. Untidiness
and poor illumination at the workplace may cause
accidents.
b.Do not use power tools in explosive atmospheres,
i.e. in the presence of flammable liquids, gases or
dust. Power tools produce sparks which may ignite
the dust or vapour of flammable substances.
c.Do not allow children and unauthorised persons
to places where power tools are used. Distraction
may cause you to lose control of the power tool.
2.ELECTRICAL SAFETY:
a. Power tool plugs must fit into electrical outlets.
Never modify the plug in any way. Do not use any
extension cords with power tools featuring a pro-
tective earth wire. By refraining from introducing
any modifications to plugs and electrical outlets
you reduce the risk of electric shock.
b. Avoid touching surfaces which have been
grounded or shorted with the frame, such as pipes,
heaters, central heating radiators and refrigerators.
Touching parts that are grounded or shorted with
the frame increases the risk of electric shock.
c. Do not expose power tools to rain or use them
in high humidity conditions. Water getting inside a
power tool increases the risk of electric shock.
d. Do not strain power cords. Never use the power
cord to carry, pull or unplug the power tool. Keep
the power cord away from heat sources, oil, sharp
edges or moving parts. When damaged or tangled,
power cords increase the risk of electric shock.
e. When using the power tool outdoors, you
should only extend its power cord with dedicated
extension cords designed for outdoor applications.
Using an outdoor extension cord reduces the risk
of electric shock.
f. Where using the power tool in a humid
environment is unavoidable, protect it against
supply voltage by means of a residual current
device (RCD). Using an RCD reduces the risk of
electric shock.
3. PERSONAL SAFETY:
a. Act with foresight, keep track of what is
happening around you and be reasonable when
using the power tool. Do not use the power tool
when tired or under the influence of drugs, alcohol
or medication. A moment of inattention while
using the power tool can cause serious injuries.
b. Use personal protective equipment. Always
wear protective glasses. Under specific conditions,
using personal protective equipment such as a dust
mask, anti-slip safety shoes, a hard hat, or hearing
protectors reduces the risk of personal injuries.
c. Avoid unintended start-up. Make sure that the
power tool’s switch is in the off position before
connecting it to a power source and/or connecting
a battery pack, and before picking up the tool.
Moving the power tool with your finger on the
switch or connecting the power tool to the mains
with the switch on may cause an accident.
d. Before starting the power tool, remove all
spanners. Leaving a spanner in the power tool’s
rotating part can cause injuries.
e. Do not lean too far. Stay secure and balanced
GENERAL PRECAUTIONS at all times. This will allow you to maintain better
control of the power tool in unpredictable
situations.
f. Dress properly. Do not wear loose clothing or
jewellery. Keep your hair, clothing and gloves away
from moving parts. Loose clothing, jewellery or
long hair may be caught by moving parts.
g. If the equipment is suitable for connecting an
external dust extractor and dust catcher, make
sure that they have been connected and are used
properly. Using dust catchers can reduce dust
related hazards.
4.POWER TOOL OPERATION AND
MAINTENANCE:
a. Do not overload the power tool. Use a power
tool of capacity suitable for the job. A suitable
power tool facilitates your work and makes it safer
provided that it is used under loads for which it has
been designed.
b. Do not use a power tool with a defective switch.
A device that cannot be turned on or off normally is
dangerous and must be repaired.
c. Disconnect the power tool’s plug from the power
source and/or disconnect the battery pack before
any repair, adjustment, replacement or storage.
Such preventive safety measures reduce the risk of
the power tool being incidentally activated.
d. When not in use, keep the power tool out of
children’s reach, and do not allow persons who are
unfamiliar with the device or who have not read
the operation manual to use the power tool. Tools
are dangerous in the hands of inexperienced or
untrained persons.
e. Power tools require maintenance. Inspect the
moving parts for alignment and jamming, and other
components for cracks. Check all other aspects
which may affect the power tool operation. Having
found any defects, repair the power tool before
using it. Unprofessional maintenance of power
tools is a cause of numerous accidents.
f. Keep cutting tools sharp and clean. Adequate
maintenance of the sharp edges of cutting tools
reduces the risk of jamming and makes tool
handling easier.
g. The power tool as well as its accessories and
instrumentation etc. must be used in accordance
with this operation manual by taking the working
conditions and the job type into consideration.
Using the power tool in an inappropriate manner
may lead to hazardous situations.
h. Clean the power tool with a cloth. Do not use
petrol, solvents, turpentine or any other similar
substances. No part of the power tool may be
immersed in water or any other liquid. Prevent
water or other liquids and their vapour from
penetrating the power tool body as it may lead to a
hazardous situation or damage the equipment.
5. Repair:
a. Have the power tool repaired by a qualified
person using original spare parts only. This allows
you to keep using the power tool in a safe manner.
b. Do not replace the power cord by yourself. It
must be replaced by an authorised service centre.
GENERAL SAFETY PRECAUTIONS
User must wear eye protection which
conforms to ANSI Z87.1/EN 166 with front
and side protection against flying object; when
handling, operating, and servicing the tool. It is
the employer’s responsibility to have the user and
all other nearby personnel at worksite wear eye
protection when operating the tool.
WARNING! Eye protection must be worn by
the operator and other people in the work
area.
WARNING! It is the employer’s responsibility
to provide means of eye protection for the
tool operator and other persons in the work area,
and to enforce using them.
Wear hearing protectors at the workplace
and in its vicinity to reduce the hearing
damage risk. The head protection should comply
with the ANSI Z89.1 standard.
Dress properly. Do not wear loose clothing or
jewellery as they can be caught in the power
tool’s moving parts. When working outdoors, it is
advisable to wear gloves and non-skid safety shoes.
Cover long hair.
Always ensure that the tool is properly
maintained and clean. For details on proper
maintenance and cleaning of the equipment, refer
to the maintenance instructions supplied with the
power tool.
The tool is not designed to be used in
explosive atmosphere. On account of the
EN EN

www.rawlplug.com 17
www.rawlplug.com
16
WW90 II WW90 II
tool design, sparks may appear during its operation.
Exhaust fumes released by the tool also pose a
potential risk of ignition of flammable fuels or
gases. Do not use the tool in any places where this
may be the case. Smoking is prohibited while using
or carrying the tool and its gas container.
1. Before switching the tool on, check:
- if the tool is fully operational,
- that no moving parts have changed their original
position or jammed, and eliminate any other
conditions which may affect the tool operation.
2. The gas container is a high-pressure liquid gas
cylinder. Keep it away from sparks, fire or heat
and potentially explosive atmospheres.
3. Do not pierce the cylinder or attempt to open the
gas cartridge. Do not incinerate the cylinder when
it is used up. Follow the recycling instructions
provided on the cylinder.
4. The gas container is not refillable.
5. Do not store the tool, its batteries or gas
containers at temperatures above 50°C (120°F).
High temperature may lead to an explosion or fire
and release of combustible gas. When not in use,
keep the tool away from heat and direct sunlight.
6. The tool should be used in properly ventilated
rooms. Do not inhale exhaust fumes, vapours or
gas, as they pose a potential threat to the human
body.
7. Keep your body well balanced and stable, and
avoid leaning too far when using the tool.
8. Keep the tool, its gas container, charger and
battery pack away from children. Using the tool
by an untrained person poses a hazard. Persons
under the influence of alcohol, narcotics or drugs
affecting their psychophysical condition are
forbidden to operate the tool.
SAFETY INSTRUCTIONS FOR NAILERS
PRECAUTIONS FOR SAFE NAILER HANDLING
- Always assume that the tool contains nails, and
that it is ready for operation. Careless handling of
the nailer may result in incidental ejection of nails
leading to personal injury.
- Do not aim the tool at yourself or anyone else.
Unexpectedly pulling the trigger will cause nail
ejection, and may cause injury.
- Before pulling the trigger, make sure that the tool’s
tip is firmly pressed against the fixture. If the tool is not
properly pressed against the surface of the fixture, the
nail may be fixed incorrectly or not fixed at all.
- If the nail becomes jammed inside the tool,
disconnect it from the battery and remove the gas
container. When connected to a power source, the
nailer may accidentally start up while a jammed nail
is being removed.
- Do not use the nailer to directly fix electrical
installations. This device is not intended for
mounting electrical cables and may damage their
insulation, thus posing a risk of fire, electric shock or
damage to the electrical system.
- Periodic maintenance and servicing will ensure
long and trouble-free operation of the tool. No
modifications of the power tool are allowed. All
modifications performed outside the service centre
reduce the level of safety and may adversely affect
the operation of the device, additionally invalidating
its warranty.
Regardless of material specifications, always
perform fixing tests to select the right nails
and to set the tool parameters correctly. Do not
operate the device with your wrists or elbow joints
locked. The device may recoil causing an injury.
- Do not fix in substrates that are not thick enough,
or too close to edges. This may cause the substrate
to chip off and cause an injury.
- Use only the lubricants recommended by the
manufacturer. The tool does not require daily
external lubrication. The tool should be lubricated
only when it is being cleaned or maintained.
- Keep the tool clean and wipe off grease or oil after
use. Do not use solvent-based cleaning agents to
clean the tool. Solvents may reduce the strength of
the tool’s rubber and plastic parts. A greasy grip or
body of the tool may cause accidental dropping and
injury to the operator or bystanders.
Recommended nails and accessories:
- Use only the nails recommended by the
manufacturer,oroneswhoseparameterscorrespond
to the nails recommended by the manufacturer.
- Use only the accessories recommended by the
manufacturer.
Notes: Accessories included: 2 batteries, charger and
charger power cord.
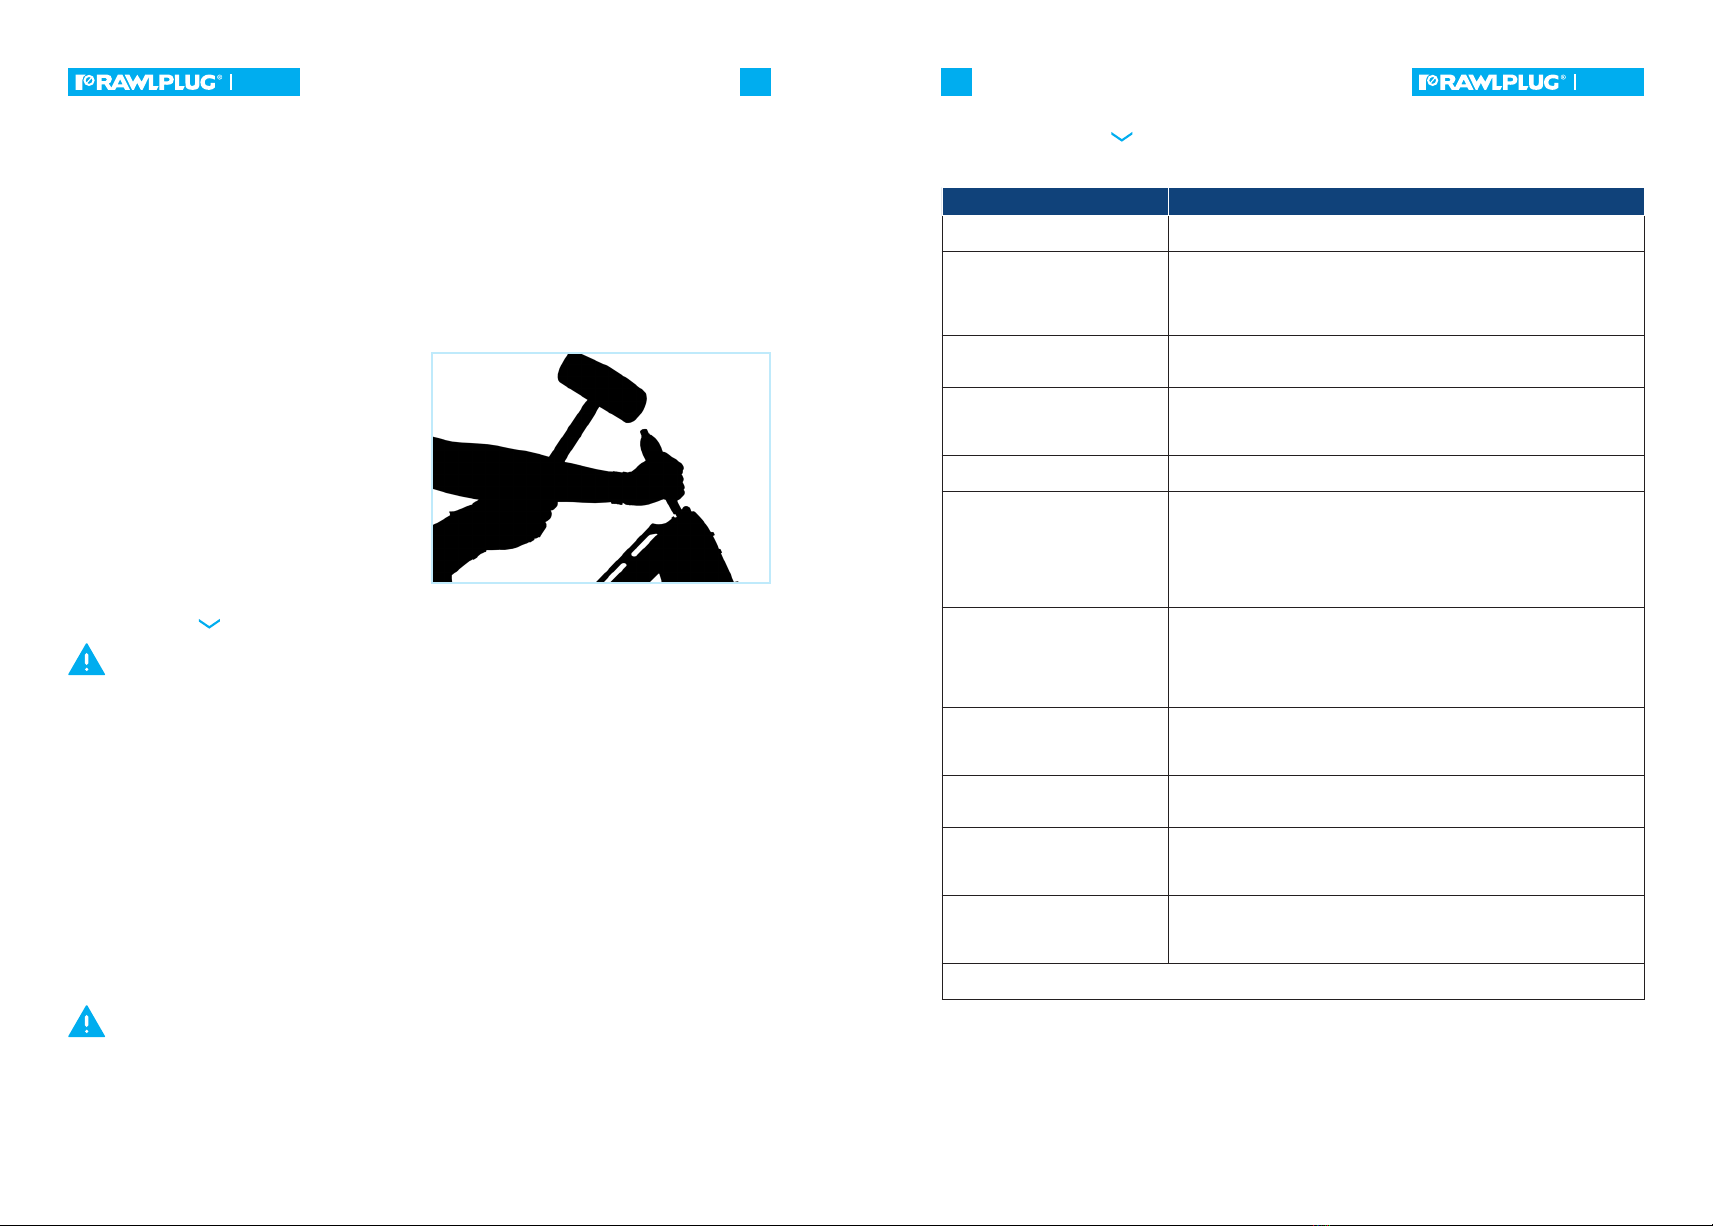
- Use the tool for its intended purpose only. In
particular, do not use the tool as a hammer, as the
impact force increases the risk of damage to the tool
body and accidental nail ejection.
- Charge the tool with nails last in order to prevent
accidental ejection while installing the gas cartridge
and the battery pack.
Controls:
- Do not use the tool if the warning labels are missing
or damaged.
- Do not use a tool that is not in good technical
condition.
- Do not remove or modify the controls or make
them inoperable in any way.
- Do not use the tool if any of its controls are
inoperable, disconnected, modified, or do function
improperly.
Tool handling:
- The tool should only be used by persons who have
read and understood the contents of the operation
manual/safety instructions.
- Always assume that the tool contains nails, and that
it is ready for operation.
Do not aim the tool at yourself or anyone else,
regardless of whether or not it contains nails!
Work in well-ventilated places. When
operated, the device produces carbon
monoxide which dangerous to human health.
Do not touch the exhaust outlet. The device
heats up during operation. Hold the device by
the grip only.
- Do not use the tool in the presence of children or
bystanders.
- Before pulling the trigger, make sure that the tool’s
tip is firmly pressed against the base material.
- The tool should be treated as an aid to work.
- Stay vigilant, focus on the job at hand and maintain
common sense when using the tool.
- Users who are tired or affected by drugs, alcohol or
medication must not use the tool.
- Avoid working in an excessively tilted position. Keep
your balance at all times.
- Do not hold or carry the tool while holding your
finger on the trigger.
- Nails should only be driven into a suitable working
surface.
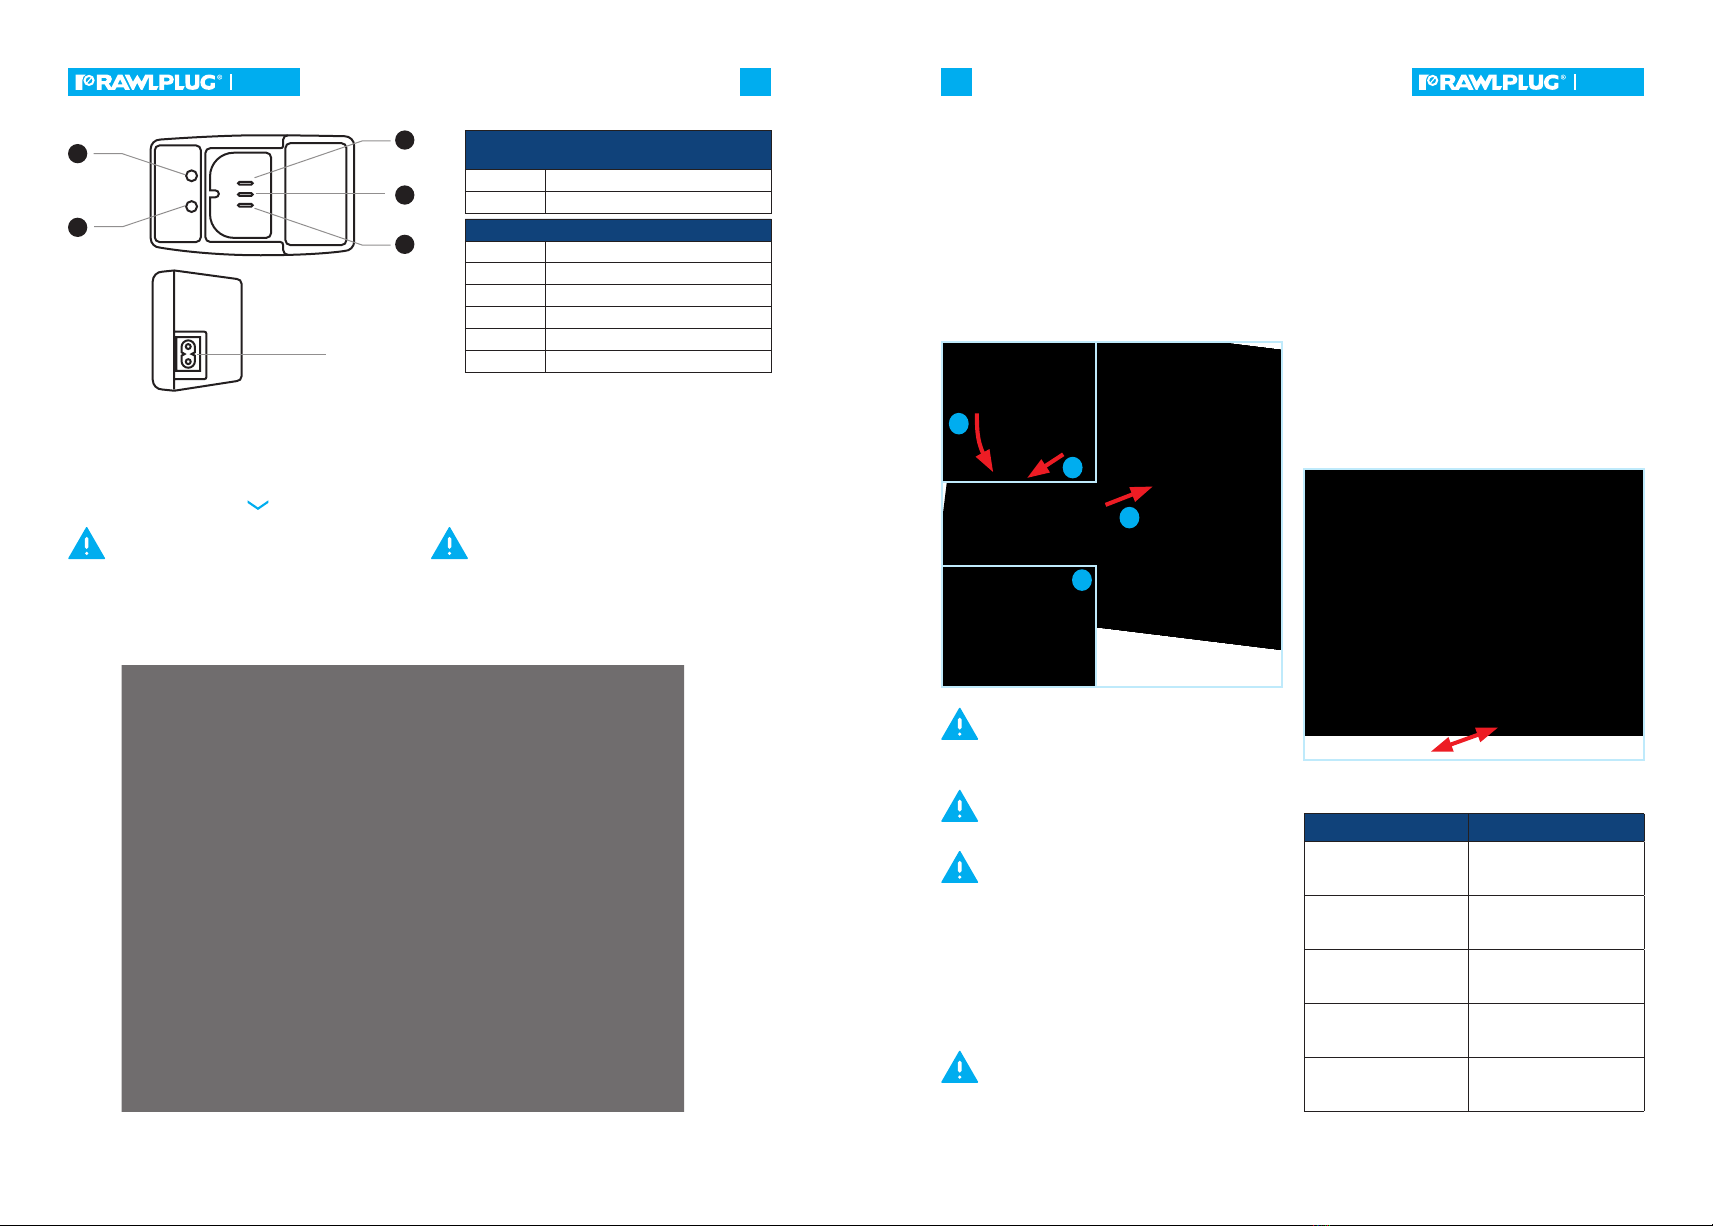
- After a nail has been driven in, the tool can recoil,
consequently moving abruptly in the direction
opposite to the working surface.
In order to reduce the risk of injury, contain the
recoil by:
- maintaining ongoing control of the tool,
- allowing the recoiling tool to move away from the
working surface,
- not resisting the recoil force by pushing the tool
back against the working surface,
- keeping face and body parts away from tool.
- When working close to the fixture edge or driving
at a sharp angle, take special precautions to minimise
chipping, splitting, ricocheting or unintended
ejection of nails, which can lead to injury.
- Keep your hands and other body parts away from
the tool’s muzzle.
- Do not operate the tool with a power source that
does not comply with the specifications provided in
the tool’s operation manual/safety instructions.
- Take special precautions when driving nails into
existing walls or other substrates that restrict
visibility in order to avoid injuring people on the other
side or damaging hidden objects (e.g. pipes, cables).
Remove the gas cartridge and the battery pack
from the tool when it is not in use as well as in
the following cases:
The tool is being maintained or repaired;
- A jammed item is being removed from the tool;
- The tool is being lifted, lowered or otherwise
moved to a new position;
- The tool is not supervised or operated by a
competent operator;
- Nails are being removed from the magazine.
WARNINGS FOR GAS CONTAINER HANDLING
Use only gas containers recommended by the
manufacturer.
Recycle used-up containers in accordance with
the applicable local regulations.
Do not attempt to recharge or incinerate an
empty gas container.
Do not expose the gas container or a tool with
the gas container installed to direct sunlight.
Avoid storing the aforementioned items at
temperatures above 50°C (120°F).
Overheating of the gas container can lead to an
explosion or fire.
Do not pierce or attempt to open the gas
container. It contains flammable gas, even when
it seems empty.
The contents of the gas container are highly flammab-
le. Keep it away from any heat or ignition sources.
Notes: Recommended gas container: R-RAWL-GP6.
EN EN

www.rawlplug.com 19
www.rawlplug.com
18
WW90 II WW90 II
POTENTIAL HAZARDS IN GENERAL
APPLICATIONS OF THE GAS POWERED NAILER
DO NOT allow for the safe tool operation ru-
les to be ignored on account of the daily rou-
tine or the comfort of work. This can be potentially
dangerous to the user as well as to bystanders and
nearby property!
The tool user should make sure that using the
tool does not cause any specific hazards.
1. WARNINGS for tools with contact
actuation capability
Do not rest your finger on the trigger when picking
up the tool, moving between operating areas,
changing positions or walking, since this can lead
to inadvertent tool activation. For tools with the
selective actuation mode feature, always check
the tool before use to make sure that the right
operating mode has been selected
Be careful when moving between work stations.
2. Projectile hazards
The fastener driving tool should be disconnected
from power supply when removing fasteners,
making adjustments, clearing jams or changing
accessories.
During operation, make sure that the fasteners are
driven into the material correctly, and that they
do not deflect and/or accidentally shoot at the
operator or bystanders.
During operation, shards of material may escape
from the fixture, the substrate and the fastening
tool.
Always wear safety goggles with side shields when
using the device.
The person using the tool is obliged to assess
the risks to bystanders resulting from the tool’s
operation.
Take special precautions when the tool is not
in contact with the fixture, as inadvertent nail
ejection may, causing injury to the operator and/
or bystanders.
Make sure that the tool is firmly pressed against
the surface of the fixture, and that it cannot slip
down from it.
3. Tool handling hazards
Hold the device in a correct position, being
ready to control its normal as well as sudden
movements, such as recoil.
Keep your body well balanced and stable.
Use appropriate hearing protection.
Use a power source that meets the recommenda-
tions provided in the operation manual.
The purpose of the operation manual is to provide
the user with information on the intended appli-
cations of the tool. This includes information on
both permissible and impermissible applications,
as well as risks associated with the tool handling,
e.g. when working on lifts, mobile platforms, etc.
4. Hazards due to repetitive movements
When using the tool for a prolonged time, the ope-
rator may experience discomfort in the hands,
arms, neck or other body parts.
The tool user should work in a good and ergono-
mic posture, maintain a stable position and avoid
uncomfortable or unbalanced postures.
If the operator experiences symptoms such as per-
sistent or recurring discomfort, pain, pulsation,
blunt pain, tingling, numbness, burning or stiff-
ness, these should not be ignored. The operator
should seek advice concerning general working
practices from an adequately qualified health care
professional.
Other risks attributable to repetitive movements
performed at work may be due to such factors as
staying in the same position for a prolonged time
or exposure to physical stress.
Each time risk assessment is performed, one shou-
ld pay special attention to musculoskeletal disor-
ders and assume that reducing fatigue is an effec-
tive way to reduce illnesses at work.
5.Hazards associated with the use of
accessories and consumables
The operation manual specifies the right accesso-
ries and consumables.
Disconnect power sources, such as a gas cartridge
or the battery pack, before adjusting or changing
and/or replacing accessories, e.g. recharging nails.
Use only accessories of the size and type specified
by the manufacturer.
Use only the lubricants recommended by the ma-
nufacturer.
The suitable fasteners are specified in terms of
their minimum and maximum diameter, length and
fixing characteristics, such as spacing and angle.
6. Workplace related hazards
Slips, trips and falls are the main causes of
workplace injuries.
Take special precautions when working in un-
familiar places. There is a risk of concealed ha-
zards, such as the presence of electric wires or
other utility installations.
This tool is not intended for use in potentially ex-
plosive atmospheres, and it is not insulated from
contact with electricity.
Make sure that there are no electric cables, gas
pipes, etc. in the vicinity, that could cause a ha-
zard due to being damaged by the tool.
7. Dust and exhaust hazards
If the tool is used in places where static dust is
present, the tool’s operation may raise and move
the dust, potentially causing a hazard.
The risk assessment should account for the dust
produced by the use of the tool as well as the po-
ssibility to raise and move the existing dust.
In cases of dust or exhaust hazard, the priority is
to contain them at the point of emission.
8. Noise
Exposure to high levels of noise without adequate
hearing protection can lead to permanent hearing
damage resulting in disability as well as other ail-
ments such as tinnitus (ringing, droning, wheez-
ing or buzzing in the ears).
It is essential to assess the risks involved and to im-
plement appropriate measures to control them.
The control measures considered appropriate in
reducing the risk may include the use of damping
materials to prevent the ringing of fixed parts.
Use suitable hearing protectors.
In order to avoid excessive noise, maintain and
operate the tool in accordance with the guideli-
nes provided in this operation manual.
If the tool features a muffler, when using the tool,
it is paramount that you make sure it has been in-
stalled in the right place and its technical condi-
tion is appropriate.
9. Vibration
It is essential that an appropriate risk assessment
be conducted for such hazards, and that appro-
priate control measures be implemented.
Exposure to vibration can cause damage to nerves
and blood vessels in hands and arms, which may
lead to disability.
Use the tool with dry and clean hands, and wear
sufficiently warm clothing when working at low
temperatures.
Should you experience numbness, tingling, pain
or skin discoloration in fingers or hands, seek ad-
vice concerning the type of work you generally
perform from a qualified occupational physician.
In order to avoid excessive vibration, maintain and
handle the tool in accordance with the instru-
ctions provided in this operation manual. Keep a
gentle but safe grip on the tool as the risk of vi-
bration increases with the grip force.
Additional safety instructions for handling of gas
powered tools
Gas powered tools should only be used with the
gas containers specified in the operation manual
of the given tool, or those which have been te-
sted by the gas container supplier for compliance
with the ISO 11148-13 standard.
Take special precautions when using gas powered
tools as they may heat up, which affects the grip
and control of the tool.
Use gas powered nailing tools in ventilated com-
partments only.
Contact of flammable liquid gas with human skin
poses a risk of injury.
Gas containers must be marked according to the
relevant transport regulations.
Take special precautions when handling gas con-
tainers, and check that they are not damaged. Da-
maged gas containers can cause an explosion and
damage to human health.
Read and follow the instructions supplied with
the gas container.
Make sure that flammable materials are not expo-
sed to hot exhaust gases.
Do not use gas powered tools in explosive at-
mospheres, as the sparks produced by the tools
may cause fire or explosion.
Small amounts of gas may be released in standard
operation of gas powered tools.
WARNINGS FOR SAFE BATTERY HANDLING
Use the original battery pack and charger only.
Otherwise, the equipment may get damaged.
Using a different type of battery than the
EN EN

www.rawlplug.com 21
www.rawlplug.com
20
WW90 II WW90 II
recommended one may cause the battery to
explode, potentially leading to personal injury or
material damage.
Recycle the battery pack in accordance with
the applicable local regulations. Do not set the
battery pack on fire. Do not attempt to puncture
or crush the battery pack.
Do not immerse the battery pack in water or any
other liquid. Do not expose the battery pack to
rain or snow.
Keep the battery pack away from heat sources
at all times. Do not expose the battery pack to
a prolonged effect of high temperature, e.g. in
placeswherethetemperaturemayexceed50˚C
(e.g. in a car, metal building on sunny days), as this
may cause its explosion.
Prevent the battery contacts from touching
metals or conductive materials.
Avoid charging the battery at temperatures below
0˚Candin conditions of increased humidity.Do
not expose the charger to a direct effect of water.
The above factors are harmful to the device and
may damage it as well as cause electrical shock.
Do not disassemble battery packs.
In the event of eye contact with electrolyte,
rinse the eyes thoroughly with clean water
and immediately seek medical attention. Such
exposure may cause loss of sight.
Using damaged batteries is impermissible, which
is why one should always check them for visible
signs of damage before use. Using damaged
batteries may lead to their explosion or leakage
of electrolytes.
Do not charge batteries near flammable materials.
Do not cover the charger during charging. This
may lead to overheating, damage, and in extreme
cases, to ignition of both the elements in contact.
Do not short-circuit the battery’s positive and
negative contacts by allowing them to come in
a direct contact with conductive materials. This
may cause damage to the above elements, and in
extreme cases, lead to burns or fire.
Do not store fully discharged batteries. Storing
fully discharged batteries for a prolonged time
may damage them and reduce their service life.
Always recharge the batteries immediately after
they have been discharged.
Do not leave batteries unattended during
charging.
Note: Protect the product from the effect
of water, fire or prolonged exposure to high
temperatures.
Do not crush, pierce, disassemble or short-circuit
the battery pack terminals. Charge the battery
before the first use. The battery conforms with UN
38.3andIEC62133.
WARNINGS FOR SAFE CHARGER HANDLING
Before connecting the charger to the power
supply source, make sure that the grid parameters
conform with the specifications provided in this
operation manual. Connecting the charger to an
unsuitable power supply source may damage the
charger and the battery pack. In extreme cases, this
may endanger the user’s health and life.
Do not use the charger in potentially explosive
atmospheres. As an electrical device, it is not
intended for use in such an environment.
Thebatterypackshouldbechargedincompartments
with a temperature ranging between 0°C and 50°C.
A hot battery should be left to cool down before
charging.
Do not charge the battery pack in the open air, under
conditions of high humidity, or at temperatures
below 0°C.
Do not immerse the charger in water or any other
liquid. Do not expose the charger to rain or snow.
Do not use the charger if its power cord is damaged
or if the charger is defective.
Disconnect the charger by gripping the plug instead
of pulling the cord.
Do not cover the charger with any other objects.
Do not power the charger using step-up
transformers or engine generators.
The device is only suitable for use with the
RAWLPLUG lithium-ion battery packs.
When charging, place the battery pack in a well-
ventilated location.
Use only the original power cord to power the
charger.
Do not touch the power cord connected with a
power supply source with a wet hand or glove. This
could result in an electric shock.
Do not short-circuit the charger’s positive and
negative contacts by allowing them to come in
a direct contact with conductive materials. This
may cause damage to the above elements, and in
extreme cases, lead to burns or fire.
Always handle the power cord with care. Do not
carry the charger by holding the cord only. In order
to disconnect the charger from the power supply
source, hold the plug and do not pull the power
cord, since the latter may damage the cable leads,
consequently causing a short circuit. Furthermore,
make sure that the cable does not come into
contact with hot materials or sharp edges. A
defective cable must be replaced immediately by
an authorised service centre.
Do not attempt to recharge disposable batteries
or batteries that are not suitable for this charger
model.
The warranty covering the power tools from
RAWLPLUG is effective for a period of time
specified in the warranty card provided along with
this operation manual. Defects resulting from
normal wear and tear, due to mechanical damage
caused by improper operation, lack of cleaning
and maintenance or failure to comply with the
provisions of the operating instructions, improper
use, use of inappropriate accessories and faults
caused by overloading the device are not subject
to warranty.
Products with defects resulting from material
flaws as well as manufacturing flaws shall be
repaired free of charge or replaced with products
of full value.
Complaints pertaining to defective power tools
from RAWLPLUG shall be accepted on the
condition that the device is sent to the dealer
or delivered to an authorised centre providing
warranty service of such equipment as a complete
device which has not been disassembled, without
any modifications, with a warranty card filled in
by the point of sale, specifying the device’s serial
number, along with a description of the defects
in question, the buyer’s data and a proof of the
purchase, such as a receipt or a copy of the relevant
invoice (with the date of sale corresponding to
that stated in the warranty card).
In order to ensure safety and reliability of
the equipment, repairs should be performed
by qualified personnel, only at authorised service
centres, and using original spare parts. Any case
of unauthorised interference with the equipment
shall void the warranty, and may additionally cause
the device to malfunction, posing a threat to the
user.
WARRANTY AND ITS TERMS AND CONDITIONS
EN EN

www.rawlplug.com
22
WW90 II
1. RAWLPLUG S.A. hereby warrants that the device
is fully operational.
2. The warranty period begins upon delivering the
device to the user and lapses after 24 months.*
3. All defects caused by having used defective
materials in the manufacture, incorrect assembly
or manufacturing technology shall be removed
free of charge.
4. The warranty remains valid if the tool is delivered
to the service centre without any modifications,
and with the warranty card filled in by the point
of sale, stating the date of sale and the device’s
serial number. Along with the aforementioned
documents, the device must be accompanied with
a complaint record stating the reason for the
complaint being filed and a legible copy of the
purchase document, such as a receipt or invoice
with the date of sale corresponding to that stated
in the warranty card).
5. RAWLPLUG S.A. shall be obliged to repair the
device within 14 days from the date of its delivery
to the service centre.
6. In the absence of spare parts, the warranty repair
period specified in item 5 may be extended by the
time required to obtain the missing parts. In any
such cases, the warranty period shall be extended
by the time required to perform the repair.
7. All costs related to secure packaging, insurance
and other risks shall be incurred by the Customer.
8. The service centre may decide to replace the
device with a new one (in whole or in part) in the
event that it is impossible to remove the defect
or due to high repair costs. If an identical product
is not available, another new product may be
furnished instead, provided that its technical
parameters are not inferior in any manner.
9. The warranty service centre’s decision concerning
the legitimacy of the defects complained about
shall be final.
10. The warranty does not cover the following:
malfunction or damage caused by using the
product improperly or against its intended use,
as per the operation manual or the applicable
safety regulations;
malfunction or damage caused by overloading
of the tool, leading to damage to the motor,
gear or other components, as well as by using
accessories other than those recommended;
mechanical damage to the product caused by
improper handling and consequential defects;
mechanical damage caused by the user (e.g.
broken spindle lock, damaged body, cut or torn
power cord, etc.).
damage being a consequence of an earlier defect,
previously not reported and not removed due to
the user’s negligence;
malfunction or damage caused by inappropriate
supply voltage, corrosion, fire, lightning, flood
and other natural disasters or external factors;
using equipment without the required filters,
using inappropriate service fluids and, in the case
of washers, feeding them with contaminated
water;
products with broken warranty seals, or products
repaired outside warranty service centres or
modified in any way whatsoever;
the consumables and accessories supplied with
the device, such as drills, discs, screw driving
bits, tips, planing tools, blades, abrasive paper,
abrasive sticks, auxiliaries (i.e. open-ended Allen
keys for unscrewing grinding discs) as well as
all other pieces of equipment subject to normal
wear and tear in operation;
defects due to normal wear and tear of such
product components as: gaskets, drive belts,
friction linings, fuses, service fluids and
lubricants, batteries, beaters, drill chucks along
with accessories, filters, carbon brushes of
electric motors, hoses, lance holders, lances and
nozzles, quick couplings;
repairs which consist in adjusting, cleaning,
lubricating or replacing the aforementioned
parts;
devices whose serial numbers are illegible or
have been mechanically removed;
battery damage caused by improper battery
handling, natural battery wear and tear, storage
in unsuitable conditions and mechanical damage
caused by the user. The buyer shall be obliged to
use the battery in accordance with the service
instructions provided in this manual.
Products complained about should be
cleaned by the user before being returned
under the complaint procedure. The service centre
may refuse to proceed with a repair of a product
which has not been cleaned, or clean it at the
expense of the party submitting the complaint.
TERMS AND CONDITIONS OF WARRANTY
EU DECLARATION OF CONFORMITY
DEKLARACJA ZGODNOŚCI WE
No/Nr: 14/V/2020/RSA
Company Name / Nazwa Firmy: RAWLPLUG S.A., ul. Kwidzyńska 6, 51-416 Wrocław, Poland
Product name / Nazwa produktu: Gas Nailer / Gwoździarka gazowa
Model number, index: AG34/90-C1 / R-WW90II
We hereby declare, that all major safety requirements, concerning to:
Niniejszym deklarujemy, że wszystkie główne wymagania dotyczące bezpieczeństwa produktu zawarte w:
CE Machinery Directives [ 2006/42/WE ]
LVD Directives [ 2014/35/UE ]
EMC Directives [ 2014/30/UE ]
RoHS Directives [ 2011/65/UE ]
RoHS3-2015/863
2012/19/UE ( WEEE )
As well as with harmonized standard and the technical standard
Are fulfilled, as laid out in the guideline set down by the member states of the EEC Commission.
Jak również z normą zharmonizowaną oraz normą techniczną
Zostały spełnione zgodnie z wytycznymi krajów członkowskich Komisji EEC.
Dyrektywie maszynowej [ 2006/42/WE ]
Dyrektywie niskonapięciowej [ 2014/35/UE ]
Dyrektywie o kompatybilności elektromagnetycznej [ 2014/30/UE ]
Dyrektywie RoHS [ 2011/65/UE ]
RoHS3-2015/863
2012/19/UE ( WEEE )
The standards relevant for the evaluation of safety and EMC requirements are as follows:
Oceny spełnienia wymagań bezpieczeństwa i kompatybilności dokonano na podstawie następujących norm:
PN-EN ISO 12100:2012
PN-EN ISO 11148-13
PN-EN 55014-1+A2
PN-EN 50581
For Charger / Dla ładowarki:
PN-EN 60335-1:2012+A13:2017-11
PN-EN 60335-2-29:2005+A2:2010+A11
For Battery / Dla baterii:
PN-EN 62133-2:2017-08
Test report issued by:
Test raport sporządzony przez:
Basso Industry Corporation
No. 24,36 Rd., TaichnungIndustrial Zone
Taichnung, Taiwan, R.O.
date of issue / wydany: 05.11.2019r
Certificate of verification of the manufacturer’s declaration of conformity:
Certyfikat weryfikacji deklaracji zgodności wytwórcy:
No/Nr DC 61000461.001 z dnia 21.01.2020r.
issued by / wydany przez: Tuv Rheinland Polska Sp. z o.o.
ul. 17 Stycznia 56
…………….02-146 Warszawa, Polska
Technical documentation in accordance with Directive2006/42 / EC is stored at the premises of Rawlplug SA.
ul. Kwidzyńska 6, 51-416 Wrocław.
Contact: tools.certification@rawlplug.com
A person authorized to prepare and store technical documentation
and making a declaration on behalf of Rawlplug S.A., is:
Dokumentacja techniczna zgodnie z Dyrektywą 2006/42/WE przechowywana jest w siedzibie firmy Rawlplug S.A.
ul. Kwidzyńska 6, 51-416 Wrocław.
Osobą upoważnioną do przygotowania i przechowywania dokumentacji technicznej
oraz sporządzenia deklaracji w imieniu Rawlplug S.A., jest:
Authorized person:
Radosław Koelner
Chief Executive Officer
Rawlplug S.A
ul. Kwidzyńska 6
51-416 Wrocław
Wrocław, dnia 10.05.2020 r.
EN

www.rawlplug.com 25
www.rawlplug.com
24
WW90 II WW90 II
ITEM NO.
PART NO. DESCRIPTION
101 11371-1270901-1 DEFLECTOR
102 1121N-1270003-1 FILTER UNIT
103 2040102-03010-0 HALF ROUND HD.HEX. BOLT
104 2040201-03050-0 FLAT WASHER
105 1136P-1154701-1 COLLOR
106 11369-1270901-1 CAP
107 11216-0870002-1 HIGH VOLTAGE CABLE SET
108 1120D-1154701-1 SPARKLER
109 2040102-02043-5 HALF ROUND HD.HEX. BOLT
110 1131J-1154701-1 POSITIONING SHEET
111 1136H-1154704-1 GROUND WIRE BRACKET
112 1120N-1150003-1 MOTOR UNIT
113 2040301-17010-0 C - RING
114 113CK-1150001-1 POSITIONING SHAFT
115 1134W-1154706-1 FEED BUMPER
116 1133X-1150001-1 SPACER
117 2040301-25010-0 C - RING
118 11398-1150002-1 SLEEVE MOTOR
119 11380-1150001-1 WASHER-MOTOR SHAFT
120 113A6-1151101-3 FUEL STEM ADAPTER
121 1139U-1270001-1 END CAP-COMBUSTION
CHAMBER
122 2041108-06132-0 O - RING
126 2040104-02010-5 HEX.SOC.HD.SCREW
127 1120C-1150001-2 COOLING FAN ASSEMBLY
128 11398-1270002-1 COLLOR
129 1133D-1270001-1 SPRING RETAINER
130 2040102-03020-0 HALF ROUND HD.HEX. BOLT
131 1133X-1270001-1 SPACER
132 2040101-02080-4 HEX.SOC.HD.BOLT
133 2040101-02090-0 HEX.SOC.HD.BOLT
134 1135B-1150002-2 GUIDE
135 113AE-1150002-2 UPPER COMBUSTION CHAMBER
136 1132M-1150901-1 PACKING
137 1139V-1150002-3 COMBUSTION CHAMBER
138 1131K-1150001-1 PIN
139 1139B-1150001-2 WASHER
140 2040102-02060-2 HALF ROUND HD.HEX. BOLT
141 2041104-07064-0 O-RING
142 2040300-14010-2 C - RING
143 11350-1274701-1 PISTON RING
144 11204-1270010-1 DRIVER UNIT
145 11327-1154701-1 BUMPER
146 11320-1270004-1 CYLINDER
147 1134W-1154705-1 BUMPER-COMBUSTION
CHAMBER
148 11337-1154701-1 SAFETY SPRING
149 1139W-1150001-2 EXHAUST MESH PLATE
150 113A0-1150001-1 EXHAUST BAFFLE
151 2040101-02030-0 HEX.SOC.HD.BOLT
152 1139X-1150001-2 REED VALVE
153 1139L-1150001-1 CLEANER
154 113A3-1150001-2 DEFLECTOR
155 2040101-02040-0 HEX.SOC.HD.BOLT
156 11382-1274713-1 NOSE PIECE
157 11315-1270001-1 SPRING A
158 113CL-1274702-1 Stopper
159 2040102-03020-2 HALF ROUND HD.HEX.BOLT
ITEM NO.
PART NO. DESCRIPTION
160 11331-1274716-1 SAFETY A
161 11332-1274703-1 SAFETY B
162 2040800-01010-0 STEEL BALL
163 1137T-1270001-1 SPRING
164 11352-1270001-1 DRIVER GUIDE COVER A
165 11353-1270001-1 DRIVER GUIDE COVER B
166 2040102-03131-2 HALF ROUND HD.HEX.BOLT
167 2041002-03010-0 SELF-TAPPING SLEEVE
201 11319-1154701-1 SPRING
202 11316-1274702-1 TRIGGER
203 11335-1270001-1 SAFETY
301 11384-1270901-1 GUN BODY
302 11380-1154702-1 WASHER CAP
303 11398-1150001-1 CAP NUT
304 11323-1274713-1 CYLINDER BRACKET
305 2040101-03060-2 HEX.SOC.HD.BOLT
306 11383-1274701-1 MUZZLE PROTECTOR
307 1138B-1270901-1 GLOVE
308 11398-1274705-1 LATCH SPRING BUSHING
309 2040101-03070-2 HEX.SOC.HD.BOLT
310 113A7-1150902-1 FUEL ACTUATOR
311 11325-1154702-1 PIN-FUEL ACTUATOR
312 11398-1154701-1 BUSH-FUEL ACTUATOR
313 113EJ-1150001-1 INSULATING SLEEVE
314 11233-1270901-1 HANDLE A UNIT
315 2040107-02040-0 TAP BOLT
316 11325-1274702-1 HANDLE BOLT
317 1138W-1270003-1 SPACER
318 1122B-1150007-1 MOTOR CABLE
319 11323-1274715-1 WIRE GUIDE B
320 2040108-01040-6 SELF TAPPING BOLT
321 1120R-1270001-1 MOTOR FAN SWITCH LEVER UNIT
322 2040201-01040-0 FLAT WASHER
323 2040108-01020-5 SELF TAPPING BOLT
324 11323-1274714-1 WIRE GUIDE B
325 1120G-1150015-1 PCB ASSEMPLY
326 1122Y-1270001-1 CONNECTOR UNIT
327 11315-1270002-1 SPRING A
328 113AK-1270001-1 STOPPER
329 113AP-1150003-1 LED COVER
330 11233-1270902-1 HANDLE B UNIT
331 1137X-1274701-1 WRENCH
332 2040101-01010-0 HEX.SOC.HD.BOLT
333 2040201-03040-0 FLAT WASHER
401 11303-1274704-1 DRIVER GUIDE
402 11389-1274723-1 MAGAZINE
403 11389-1274724-1 MAGAZINE
404 2040107-01151-0 TAP BOLT
405 1134W-1274703-1 FEED BUMPER
406 11261-1274703-1 GUIDE BULB UNIT
407 2040107-02030-0 TAP BOLT
408 11363-1274708-1 PUSHER
409 1136E-1274704-1 PROTECTING HOOD COVER
410 11372-1270001-1 SPRING
412 1133X-1274703-1 SPACER
413 11367-1270001-1 PUSHER SPRING
414 113DX-1270901-1 Pusher Button
415 2040107-01101-0 TAP BOLT
LIST OF SPARE PARTS Instrukcja obsługi gwoździarki gazowej
R-WW90II
Data wydania instrukcji 1.04.2020
AG34/90-C1
EN PL

www.rawlplug.com 27
www.rawlplug.com
26
WW90 II WW90 II
Zwiększonado104Jmoc
pozwalającanawetnaaplikację
najdłuższychgwoździw
najtwardszychpodłożach.
Litowojonowabateriapozwalająca
nawykonanie8000zamocowań
zjednegoładowania-dwukrotnie
większawydajność.
Zmienionapozycjarękojeści
zapewnialepszewyważenie
i komfort pracy.
Wydłużonażywotnośćmaszynydzięki
zmienionej konstrukcji i podniesionej
efektywnościstrefyltrówpowietrza.
Precyzjaiłatwośćużytkowaniadzięki
beznarzędziowejregulacjigłębokości
osadzenia.
Zredukowanie strat w materiale do
minimumdziękiochronnejnakładcena
lufęzabezpieczającejpowierzchnię.
Wygodnyhakpozwalającynaodwieszenie
gwoździarkinaczasprzerwywpracy.
Elektronarzędzia, osprzęt i opa-
kowanie należy poddać utyliza-
cji zgodnie z obowiązującymi za-
sadami ochrony środowiska. Nie należy wyrzucać
elektronarzędzi oraz akumulatorów do odpadów
domowych, gdyż mogą one zawierać substancje/
mieszaniny niebezpieczne stanowiące zagrożenie
dlazdrowialudziorazdlaśrodowiska.Niezdatnedo
użyciaelektronarzędziaiakumulatorynależyzbierać
osobnoidoprowadzićdoponownegoużyciazgodne-
gozzasadamiochronyśrodowiska.
Dziękiselektywnejzbiórcezużytychwyrobówiopa-
kowańniektóremateriałymogąbyćodzyskaneipo-
nowniewykorzystane.Wtensposóbchronisięśro-
dowisko naturalne i zmniejsza popyt na surowce.
Stosuj się do lokalnych przepisów, jeżeli wymagają
oneoddawaniazużytychelektrycznychurządzeńpo-
wszechnego użytku do specjalnych punktów zbior-
czychlubzobowiązująsprzedawcówdo
przyjmowania ich przy zakupie nowego wyrobu.
Wszelkieinformacjena temat utylizacjimożnauzy-
skaćwserwisiefirmyRawlplugS.A.
Wstęp 27
Opisnarzędzia 28
Dane techniczne 29
Obsługanarzędzia 31
Konserwacja 35
Rozwiązaniaproblemówwystępującychpodczasużytkowaniagwoździarki 36
Ostrzeżeniaogólne 37
Gwarancjaijejwarunki 46
OryginalnadeklaracjazgodnościWE 47
Karta gwarancyjna 122
Instrukcja czyszczenia 124
Li-Ion
Zapoznajsięzinstrukcjąobsługi Stosujśrodkiochronysłuchu
Ochronaśrodowiskaimateriały
niebezpieczne Li-Ion
Stosuj kask ochronny
Recykling Stosujrękawiceochronne
Uwagi Zdolnośćdodziałaniawtrybie
wyzwalania stykowego
Zgodny z odpowiednimi
dyrektywami europejskimi Ryzyko urazu
Stosuj okulary ochronne Korzystanie z CO2lub O2
wzbronione
PL PL

www.rawlplug.com 29
www.rawlplug.com
28
WW90 II WW90 II
Model R-WW90II (AG3490)
Waga 3,8kg
Wymiary (D/S/W) 394x121,4x407mm
Siławbijania 104J
Długośćgwoździ 50-90 mm
Kątłączenia 34o
Średnicagwoździa 2,87-3,3mm
Prędkośćmocowanianasekundę 2-3
Prędkośćmocowanianagodzinę 1200
Zakres temperatury roboczej 7oC- 49oC
Model SP-WW90II/SC40II-CH-00
Zakresnapięciawejściowego 100-240 VAC
Częstotliwośćzasilania 50/60Hz
Napięcieładowania 8,4 V
Prądładowania 2 A
Czasładowania 75 minut (maksymalny)
Klasaochronności II
Klasaszczelności IPXO
Klasabezpieczeństwaelektrycznego II
AKUMULATOR
Typ baterii PBP2A66D1
Pojemnośćakumulatora 2,5Ah
Napięcieznamionowe 7,2V
Ilośćstrzałównajednymakumulatorze 8000
POJEMNIK Z GAZEM
Indeks R-RAWL-GP6
Rodzaj mieszanki płynnypropanbutan
Zalecana temperatura pracy -5-25 stopni Celsjusza
Pełneładowanie <0,15A
Indeks SP-WW90/SC40II-CH
Zakresnapięciawejściowego 100-240 VAC
Częstotliwośćwejścia 50/60lub50-60Hz
Prądrozruchowy 40A maks. (zimny rozruch)
DANE TECHNICZNE
Gwoździarka gazowa RAWLPLUG R-WW90II jest narzędziem profesjonalnym, zasilanym energią powstała w wyniku
spalania mieszanki gazowo powietrznej i służy do łączenia elementów drewnianych za pomocą gwoździ. Dzięki za-
stosowaniu pojemników z gazem oraz akumulatora urządzenie to jest w pełni mobilne. Elektronarzędzie oraz osprzęt
można wykorzystywać wyłącznie zgodnie z przeznaczeniem i niniejszą instrukcją obsługi. Wszystkie inne zastosowania
są zabronione. Producent nie ponosi odpowiedzialności za wszelkie szkody i obrażenia powstałe w wyniku używania
narzędzia niezgodnie z przeznaczeniem, nie przestrzegania przepisów bezpieczeństwa i zaleceń niniejszej instrukcji.
Należy przeczytać wszystkie wskazówki i przepisy. Błędy w przestrzeganiu poniższych wskazówek
mogą spowodować porażenie prądem, pożar, lub/i ciężkie obrażenia ciała.
13
6
8
7
4
5
3
1 2
10
9
12
11
Budowa
1. Zabezpieczenie A
2. Pokrętło regulacji głębokości wbijania
3. Podajnik gwoździ
4. Aktywator gazu
5. Wskaźnik baterii
6. Magazynek
7. Rękojeść
8. Spust
9. Osłona filtra powietrza
10. Gniazdo pojemnika z gazem
11. Wieszak
12. Gniazdo akumulatora
13. Lufa
1. Gwoździarka
2. Akumulator x2 szt
3. Ładowarka
4. Przewód zasilający do ładowarki z wtyczką EU
5. Przewód zasilający do ładowarki z wtyczką UK
6. Kufer transportowy
7. Oryginalna instrukcja obsługi wraz z kartą
gwarancyjną
8. Klucze imbusowe
9. Instrukcja czyszczenia i konserwacji
10. Okulary ochronne i ochraniacze słuchu
PL PL

www.rawlplug.com 31
www.rawlplug.com
30
WW90 II WW90 II
1
4
5
2
3
CN1
ST-02H-BP (IEC60230 C8) lub odpowiednika
Styk Napięcie wejściowe
L&N 90-264 V AC
Styk Wyjście
1 Bat +
2NTC
3 Bat –
4 LED czerwona
5 LED zielona
Zaleca się stosowanie oryginalnych gazów jak
i gwoździ marki RAWLPLUG, dzięki temu otrzy-
mujemy gwarancję niezawodnej pracy narzędzia.
Zabrania się ponownego napełniania pojemni-
ków z gazem
PRZYGOTOWANIE POJEMNIKA Z GAZEM
PARAMETRY OGÓLNE
Wydajność 75%
Prądupływowy 0,35mA maks.
Prądładowaniawstępnego 0,15A - 0,25A
Napięcieładowaniawstępnego 4V<Vakumulatora<6V
Pełneładowanie 2A
Napięciestałe 8,2V - 8,4V
Pełneładowanie <0,15A
Całkowityczasładowania maks. 2 godziny
Ochronaprzeciwprzepięciowa 8,5V
Temperatura robocza 0°C - 50°C
Ochronaakumulatoraprzeddziałaniemtemperatury T < 0°C lub T > 55°C
Mocwyjściowaciągła 17W maks.
Zakres temperatur roboczych 0°C do 50°C
Temperaturowywspółczynnikrezystancji ±0.02%/°C
Zakres temperatur przechowywania –20°C do +85°C
Wilgotność,bezkondensacji 0 do 95% RH
Chłodzenie Swobodny obieg powietrza
Zakłócenieelektromagnetyczne(EMI) ZgodneznormąCISPR22klasyB
Danedotyczącebezpieczeństwa UL1310orazIEC60335-2-29
WartościpomiarowehałasuokreślonozgodnieznormąEN62841.Typowydladanegourządzenia,
określonywgskaliApoziomhałasuemitowanegoprzeztourządzeniewynosistandardowo:
PoziomciśnieniaakustycznegoLpA 102,4 dB
Poziom mocy akustycznej LWA 102.8 dB
BłądpomiaruKpA i KWA 2,5dB
Należystosowaćśrodkiochronnesłuchu!
Wartościłącznedrgańah(sumawektorowatrzechkierunków)iniepewnośćpomiaruKoznaczone
zgodnieznormąEN60745wynoszą:
ah 2,48 m/s2
K 1,24 m/s2
PodanywniniejszejinstrukcjiobsługipoziomdrgańzmierzonyzostałzgodniezokreślonąprzeznormęEN
60745procedurąpomiarową.Podanypoziomdrgańjestreprezentatywnydlapodstawowychzastosowań
elektronarzędzia.Jeżelielektronarzędziezostanieużytedoinnychzastosowań lub z innyminarzędziami
roboczymi, a także jeżeli nie będzie wystarczająco konserwowane, poziom drgań może odbiegać od
podanego. Powyższe uwagi dotyczą również akcesoriów. W celu zapewnienia odpowiedniej ochrony
użytkownika przed skutkami wibracji należy stosować dodatkowe środki bezpieczeństwa zapewniając
ciepłodłoniompodczaspracy.
PL PL

www.rawlplug.com 33
www.rawlplug.com
32
WW90 II WW90 II
Przed podłączeniem ładowarki do gniazda
elektrycznegonależyupewnićsię,czynapięcie
wsiecielektrycznejjestzgodnezwartościąnapięcia
znajdującąsięnatabliczceznamionowejoraz
w danych technicznych zapisanych w instrukcji
obsługi.
Należy używać wyłącznie oryginalnej
ładowarki oraz ładować nią jedynie
akumulatory przewidziane przez producenta.
Oryginalna ładowarka jest podwójnie zaizolowana
zgodnieznormąEN60745idlategożyłauziemiająca
nie jest wymagana.
Gwoździarkawyposażonajestwdwaakumulatory
Li-Ion. Pełny cykl ładowania akumulatora trwa
maksymalnie 75 minut.
Jeśliładowarkajestpodłączonadozasilania,anie
znajdujesię wniejakumulator,nachwilę zapala
sięczerwonadiodaLED,poczymzmieniasięna
zieloną.
Powłożeniuakumulatora,naładowarcezapalasię
czerwona dioda LED.
Gdy akumulator jest w pełni naładowany, dioda
LEDzaświecisięnazielono.
W przypadku nieprawidłowej temperatury
akumulatora, czerwona dioda LED zacznie
migać w miarowych odstępach. W przypadku
problemówzakumulatorem,zapalasięczerwona
dioda LED i akumulator należy niezwłocznie
wymienićnanowy.
Gdy do ładowarki zpstanie podłaczony
naładowany akumulator, zaświeci się na niej
zielona dioda LED.
Jeśli w trakcie ładowania akumulatora
wystąpią jakiekolwiek niepokojące objawy, tj.
przegrzewanie, dymienie, buczenie, itp., należy
niezwłocznie przerwać ładowanie akumulatora i
skontaktowaćsięzserwisem.
Akumulatory, ładowarka oraz zasilacz powinny
znajdowaćsięwdobrymstanietechnicznyminie
posiadaćuszkodzeńmechanicznych,abyzapewnić
bezpieczeństwo i skuteczność ładowania.
Przedzaładowaniemgwoździdonarzędzianależy
podłączyćakumulatororazpojemnikzgazem.
Jeżeli gwóźdź zostanie załadowany przed
podłączeniem akumulatora, może nastąpić
przypadkowywystrzał.
Podczasładowaniagwoździnależykierowaćwylot
lufy z dalaod siebiei innych osóbi nie trzymać
palcanaspuściewyzwalacza.
Aby załadować gwoździe, należy wsunąć taśmę
1 w otwór magazynka, a natępnie przesunąć je
maksymalniekugórze.
Nastepnieprzesunąćpodajnikgwoździ2zgodnie
z kierunkiem strzałki do końca, a następnie
go zwolnić. Podajnik powinien zatrzymać się
na końcu taśmy z gwoździami dociskajac je w
kierunku lufy.
Aby wyładować gwoździe z narzędzia, należy
wcisnąć przycisk 3 na podajniku gwoździ i
przesunąćgokugórze.
Następniewcisnąćiprzytrzymajblokadęgwoździ
4, a nastepnie przesunąć gwoździe w stronę
otworu załadunkowego zwalniając blokadę w
momenciekiedytaśmazaczniesięnaniąnasuwać.
Wyciągnąćgwoździezmagazynka.
3
2
1
POJEMNIKA Z GAZEM
Aby otworzyć klapkę komory pojemnika z ga-
zem,należyjąpociągnąćwkierunkuoznaczonym
strząłką 1, a nastepnie przechylić zgodnie z kie-
runkiemstrzałki2. Umieścić pojemnik z gazem
wkomorzezgodniezestrzałką3.Dosunąćzawór
pojemnikazgazemdodyszygazowejurządzenia
jak na rysunku 4.
Zamknąćklapkękomorypojemnikazgazem.
Podczas wymiany akumulatora należy
pewnie trzymać gwoździarkę i akumulator.
Niezastosowaniesiędotejuwagimożeskutkować
wyśliźnięciemsięnarzędziazrąkidoprowadzićdo
jego uszkodzenia.
Nie należy wystawiać akumulatorów na
działanie niskich temperatur, gdyż może to
drastycznieskrócićichżywotność.
Każdorazowo sprawdzaj wizualnie stan
akumulatora,czynienosiśladówuszkodzeń
mechanicznych. Z wnętrza uszkodzonego
akumulatora może wydostać się elektrolit, który
jest szkodliwy dla zdrowia. W przypadku kontaktu
elektrolituzeskórąnależymiejscekontaktuobcie
spłukać wodą. W przypadku kontaktu z oczami
należy również obcie przepłukać je czystą wodą
i niezwłocznie udać się do lekarza! Elektrolit jest
substancją łatwopalną, która może spowodować,
żeakumulatorzapalisięlubwybuchnie.
Podczas ładowania akumulator mocno się
nagrzewa, dlatego też nie wolno podejmować
pracy bezpośrednio po zakończonym procesie
ładowania. Aby uniknąć uszkodzenia akumulatora
należyodczekaćdomomentu aż wychłodzisięon
do temperatury pokojowej.
Wsunąćakumulator dogniazdaznajdującegosię
wdolnejczęścirękojeściażdousłyszeniacharak-
terystycznego„kliknięcia”.
Pozamontowaniuakumulatoranarękojeściurzą-
dzenianależyodczytaćstannaładowaniaakumu-
latora.Stannaładowaniaakumulatorasygnalizu-
jądiodyLED.Jeśliwszystkiediodyświecąsięna
zielono oznacza to, że akumulator jest w pełni
naładowany. Jeśli świeci się tylko jedna czerwo-
nadiodaoznaczatorozładowanylubuszkodzony
akumulator.
Aby zdemontować akumulator należy wcisnąć
znajdujący się naakumulatorze przyciski jedno-
cześniewysunąćzgniazda.
WSKAZANIA STANU AKUMULATORA NA
DIODACH INFORMACYJNYCH ZNAJDUJĄCYCH SIĘ
NA GWOŹDZIARCE.
Stan Znaczenie
Wszystkie diody LED
świecą na zielono Poziom naładowania
akumulatora
Dwie diody LED
świecą na zielono Poziom naładowania akumu-
latora
Jedna dioda LED
świeci na zielono Poziom naładowania akumu-
latora
Jedna dioda LED
miga na zielono Poziom naładowania akumu-
latora
Jedna dioda LED
świeci na czerwono Poziom naładowania
akumulatora
1
3
2
4
PL PL

www.rawlplug.com 35
www.rawlplug.com
34
WW90 II WW90 II
NISKIE TEMPERATURY
Nie jest zalecane stosowanie tego narzędzia gazo-
wego w temperaturach poniżej –7°C (19°F). Niskie
temperatury spowodują zmniejszenieefektywności
spalaniaiwydajnościakumulatora.
ZAKLESZCZENIA BIJAKA W LUFIE
Zdarza się czasami, że fragment taśmy łączącej
gwoździe zablokuje bijak w lufie w takim
przypadkunależy:
Odłączyć od gwoździarki akumulator, pojemnik
zgazemorazwyciągnąć zmagazynka pozostałą
taśmęzgwoździami.
Ustawić gwoździarkę na stabilnym podłożu lufą
skierowanąkugórze.
UstawićwkrętakPH2odpowiedniejdługościnad
otwór lufy i delikatnie uderzając go młotkiem
odblokowaćzakleszczonybijak(takjaknazdjęciu
obok). Odblokowany bijak powinien wsunąć się
bezwiększegooporuwgłąblufy.
Usunąćblokującyfragmenttaśmyzotworuwlufie.
Zaleca się wydmuchanie wnętrza lufy przy
pomocy kompresora.
Na koniec należy upewnić się że bijak cofnięty
jest maksymalnie w przeciwnym wypadku przy
pierwszejpróbiewbiciagwoździamożewystąpić
takzwany„pustystrzał”toznaczygwoździarkanie
pobierzegwoździaibijakuderzybezpośredniow
materiałwktórymiałbyćwbijanygwóźdź.Każde
kolejne osadzenie gwoździa powinno już być
prawidłowe.
Przedprzystąpieniemdokażdejkontrolilub
konserwacji, należy urządzenie odłączyć od
zasilania (akumulatora) oraz odłączyć pojemnik z
gazem.
Podstawowe czynności konserwacyjne
Pracodawca i użytkownik narzędzia są
odpowiedzialni za zagwarantowanie, że stan
technicznynarzędziapozwalanajegobezpieczne
użytkowanie.
NIGDYnienależyużywaćnarzędzia,jeżeliistnieją
jakiekolwiekwątpliwościcodojegosprawności.
Regularnie sprawdzać czy wszystkie śruby
mocujące są odpowiednio dokręcone. W
przypadku poluzowania którejkolwiek ze śrub
należy natychmiast je dokręcić aby uniknąć
zagrożenia. Wszelkie uszkodzenia niewynikające
z nieprawidłowej eksploatacji, należy usuwać
wyłączniewautoryzowanymserwisieproducenta
abyuniknąćzagrożeńjakrównieżutratygwarancji
zpowoduingerencjidowewnątrzurządzenia.
Do czyszczenia urządzenia zabrania się
stosowania rozpuszczalników ani innych
agresywnych, gdyż może to doprowadzić do
uszkodzenia elementów gumowych oraz tych
wykonanych z tworzywa.
Smarowanie i czyszczenie
Narzędzienależyutrzymywaćwnależytejczystości
zgodnie z dołączoną instrukcja czyszczenia
i konserwacji. W pełni sprawne urządzenie
nie wymaga dodatkowego smarowania
zewnętrznych elementów ruchomych jak na
przykład zabezpieczenie A. Za smarowanie
elementówwewnątrzurządzeniaodpowiedzialny
jestgazktórywswoimskładziezawieraolej.
Doczyszczenienależyużywaćwyłączniepreparaty
zalecane przez producenta.
Należy zwrócić szczególną uwagę na czystość
uchwytu. Zabrudzona rękojeść może skutkować
ograniczeniem pewności chwytu. Może to
przyczynićsiędoutratykontrolinadurządzeniem.
Przechowywanie
Gwoździarkęgazowąwrazzwyposażeniemnależy
przechowywać w miejscu suchym, bezpiecznym
i niedostępnym dla dzieci. Urządzenie należy
przechowywać z wyciągniętym akumulatorem.
Należy pamiętać również aby nie przechowywać
przez dłuższy czas rozładowanych akumulatorów,
gdyż może to doprowadzić do ich uszkodzenia.
Akumulatory powinny być ładowane na bieżąco
zaraz po ich rozładowaniu. Dzięki temu przedłuży
sięichżywotność.
KONSERWACJA
Narzędzie wyposażone jest w funkcję regulacji
głębokościwbijania.Przedrozpoczęciempracyza-
wszenależywykonaćpróbnemocowanie.Próbne
mocowanienależywykonaćz suwakiemregulacji
ustawionymwpołożeniu(1).
Przesunąć suwak regulacji głębokości osadzania
abyuzyskaćpożądanyefektmocowania.
Jeśliuzyskanyefekt(2)niespełniaoczekiwań,nale-
żydobraćinnądługośćgwoździaipowtórzyćpo-
wyższeczynności.
USUWANIE ZAKLINOWANYCH ELEMENTÓW
Wprzypadkuzacięciasięgwoździawewnątrzna-
rzędzia,należyodłączyć źródło zasilania (pojem-
nik z gazem oraz akumulator) przed wykonaniem
jakichkolwiekczynności.
Zdemontować magazynek poprzez naciśnięcie
odpowiedniejdźwigniznajdującejsięnakorpusie
osadzaka.
Opisywanegwoździarkaoferujemożliwośćregulacji
głębokości osadzania. Przed przystąpieniem do
pracy należy sprawdzić głębokość osadzania na
próbnymkawałkumateriału.
Głębokość osadzania reguluje się pokrętłem.
Należy obracać je aż do momentu osiągnięcia
pożądanejgłębokościosadzania.
UWAGA nie zaleca się używania narzędzia z
pokrętłem regulacji wbijania ustawionym w
skrajnych punktach (minimalnym i maksymalnym),
gdyż może to doprowadzić do nieprawidłowego
działaniaurządzenia.
Po „uzbrojeniu” gwoździarki (to znaczy
podłączeniu akumulatora , pojemnika z
gazemorazwłożeniutaśmyzgwoździami)zabrania
siękierowaćlufygwoździarkiwswojąstronąjakiw
stronęinnychludziczyteżzwierząt.
Zabronione jest uderzanie którąkolwiek częścią
gwoździarki w gwoździe czy też łączony
materiał oraz inne elementy gdyż jest to narzędzie
precyzyjne i każde uderzenie może wpłynąć
niekorzystnienapracęurządzenia.
Podczas pracy akumulatorową gwoździarką należy
trzymać ją pewnie oraz zachować stabilną pozycję
pracy.
METODA WYZWALANIA I KROKI WYMAGANE
W gwoździarce WW90II zastosowano system wy-
zwalania stykowego (sekwencyjnego), co oznacza,
że przed tzw. strzałem należy odblokować gwoź-
dziarkę, co czynimy, dociskając zabezpieczenie
A znajdujące się na lue do łączonego materiału.
Powoduje to nieznaczne cofnięcie zabezpieczenia
Awkierunkunarzędzia,uruchomieniewentylatorai
dźwignioweodblokowaniespustu,pojegowciśnię-
ciunastępujedopierowbiciegwoździa.Zastosowa-
ne rozwiązanie wyzwalania stykowego uniemożli-
wiawbijaniegwoździprzezdociskaniegwoździarki
zabezpieczeniem A do materiału przy wciśniętym
spuście.Dziękitemugwoździarkajestwięcbardzo
bezpiecznymnarzędziemwpracy.Abyosadzićkolej-
nygwóźdź,należywpełnizwolnićblokadę(oderwać
narzędzieodpodłoża)ispustprzedpowtórzeniem
powyższej czynności. Przed naciśnięciem spustu
wyzwalaczanależyupewnićsię,żegwóźdźjestwbi-
janywprostwpoddawanyobróbceprzedmiot.Na-
rzędziemusibyćustawionepodkątemprostymdo
podłożawkażdejpłaszczyźnie.
4
PL PL

www.rawlplug.com 37
www.rawlplug.com
36
WW90 II WW90 II
OGÓLNE OSTRZEŻENIA DOTYCZĄCE BEZPIECZEŃSTWA
UŻYTKOWANIA NARZĘDZIA
Należyprzeczytaćwszystkieostrzeżeniai
wskazówkidotyczącebezpieczeństwa.
Nieprzestrzeganiepodanychniżejostrzeżeńdotyczą-
cychbezpieczeństwaiwskazówekdotyczącychbez-
pieczeństwamożebyćprzyczynąporażeniaprądem
elektrycznym,pożarui/lubpoważnychobrażeń.
Zachowaj wszystkie ostrzeżenia i wskazówki doty-
czącebezpieczeństwa,abymócskorzystaćznichw
przyszłości.
Należyzachowaćinstrukcjęobsługi.
Nazwa „elektronarzędzie” używana w poniższej in-
strukcjidotyczy wszystkich narzędzizasilanychprą-
dem z sieci elektrycznej (przewodem zasilającym)
oraznarzędzizasilanychzakumulatorastanowiące-
goczęśćnarzędzia(bezprzewodowo).
a.Zakazanejestużywanieelektronarzędziprzezoso-
byznajdującesiępodwpływem alkoholu,środków
odurzających oraz leków mających wpływ na stan
psychofizyczny.
b. Elektronarzędzia należy używać tylko zgodnie z
jego przeznaczeniem. Użycie niezgodnie z przezna-
czeniemmożedoprowadzićdogroźnychwypadków.
c.Elektronarzędziejestprzystosowanedozasilania
prądem elektrycznym o parametrach podanych na
tabliczceznamionowejznajdującejsięnaelektrona-
rzędziu.
d. Przed podłączeniem elektronarzędzia należy
sprawdzićczylokalneparametrysiecizasilającejod-
powiadają parametrom podanym na tabliczce zna-
mionowejelektronarzędzia.
1.BEZPIECZEŃSTWO W MIEJSCU PRACY:
a.W miejscu pracynależy utrzymywaćporządek i
dobre oświetlenie. Nieporządek i niedostateczne
oświetleniemogąprzyczynićsiędowypadków.
b. Nie należy używać elektronarzędzi w środowi-
skachwybuchowych,tworzonychprzezłatwopal-
neciecze,gazylubpyły.Elektronarzędziewytwarza
iskry,któremogązapalićpyłluboparysubstancji.
c.Nienależydopuszczaćdzieciiobserwatorówdo
miejsc,wktórychużywasięelektronarzędzi.
Rozproszenie uwagi może spowodować utratę
kontrolinadelektronarzędziem.
2.BEZPIECZEŃSTWO ELEKTRYCZNE:
a. Wtyczki elektronarzędzi muszą pasować do
gniazdek.Nigdywżadensposóbnienależyprze-
rabiać wtyczki. Nie należy używać żadnych prze-
dłużaczy w przypadku elektronarzędzi mających
przewódzżyłąuziemieniaochronnego.Brakprze-
róbek we wtyczkach i gniazdkach wtyczkowych
zmniejszaryzykoporażeniaprądemelektrycznym.
b. Należy unikać dotykania powierzchni uziemio-
nychlubzwartychzmasą,takichjakrury,ogrzewa-
cze,grzejnikicentralnegoogrzewaniaichłodziar-
ki. W przypadku dotknięcia części uziemionych
lub zwartych z masą, wzrasta ryzyko porażenia
prądemelektrycznym.
c.Nienależynarażaćelektronarzędzinadziałanie
deszczulubwarunkówwilgotnych.Wprzypadku
przedostanie się wody do wnętrza elektronarzę-
dzia,wzrastaryzykoporażeniaprądemelektrycz-
nym.
d. Nie należy nadwerężać przewodów przyłącze-
niowych.Nigdynienależyużywaćprzewoduprzy-
łączeniowegodoprzenoszenia,ciągnięciaelektro-
narzędzialubwyciąganiawtyczkizgniazdka.Należy
trzymaćprzewódprzyłączeniowyzdalekaodźró-
dełciepła,olejów,ostrychkrawędzilubruchomych
części. Uszkodzone lub zaplątane przewody przy-
łączeniowe zwiększają ryzyko porażenia prądem
elektrycznym.
e.Wprzypadku,gdyelektronarzędzieużywasięna
wolnympowietrzu,przewodyprzyłączeniowenale-
ży przedłużać przedłużaczami przeznaczonymi do
pracy na wolnym powietrzu. Używanie przedłuża-
cza przeznaczonego do pracy na wolnym powietrzu
zmniejszaryzykoporażeniaprądemelektrycznym.
f. W przypadku, gdy używanie elektronarzędzia
w środowisku wilgotnym jest nieuniknione, jako
ochronę przed napięciem zasilania należy stoso-
waćurządzenieróżnicowoprądowe(RCD).Zasto-
sowanieRCDzmniejszaryzykoporażeniaprądem
elektryczny
Objawy
Nagwoździarcepalisięczerwona
diodaLED,anarzędzieniedziała.
Zbytniskipoziomnaładowaniaakumulatora.
Wymienićakumulatornawpełninaładowany.
Narzędziedziałaprawidłowo,
aleniepozwalanacałkowite
zlicowanieelementówzłącznych
zpowierzchniąroboczą.
Ustawićnapokrętlewiększągłębokośćosadzania.
Oczyścićcylinderzapomocąodpowiedniegośrodkaczyszczącego.
Sprawdzićstanakumulatoraiwymieńgowraziepotrzeby.
Zastosowano zbyt twarde lub mokre drewno, zalecane jest zastosowanie
innychgwoździ.
Wentylatorniedziałaipalisię
czerwona dioda LED.
Akumulatorjestwyczerpany.Wymienićakumulatornawpełninaładowany.
Jeżelipostępowaniezgodniezpowyższymiinstrukcjaminiepozwoliłona
rozwiązanieproblemu,oddaćnarzędziedonajbliższegopunktuserwi-
sowego.
Niemożnanaładować
akumulatora lub akumulator
nagrzewasięnadmierniewtrakcie
ładowania.
Wymienićakumulator.Jeślitorozwiązałoproblemu,akumulatorjest
uszkodzonylubzużyty.
Jeżeliakumulatordziałanormalniewnarzędziu,aleniemożnagonałado-
waćnależywymienićładowarkę.
Ładowarkanagrzewasięnadmier-
nie,wydajeniepokojącedźwięki
lub powoduje powstawanie dymu.
Ładowarkajestuszkodzonainienadajesiędoponownegoużycia.Na-
tychmiastodłączyćładowarkęizastąpićjąnową.
Zabezpieczenie A jest zabloko-
waneiniemożnagodocisnąćdo
końcaprzezconiemożnaużywać
narzędzia.
Elementkontaktowyuległwygięciulubzanieczyszczeniazebrałysięw
bieżnimechanizmuzabezpieczającego.Oczyścićbieżnięmechanizmuza-
bezpieczającego.Naprawićlubwymienićelementkontaktowy,oddając
narzędziedocentrumserwisowego.
Uaktywnionyzostałmechanizmblokady.Wprowadzićdomagazynka
nowątaśmęgwoździ.
Sprawdzićczyniezakleszczyłsiębijakwlufiejeżelitakpostępujzgodniez
opisanąwniniejszejinstrukcjizasadapostępowaniawtakimprzypadku.
Narzędzieniedziała,leczpalisię
zielonadiodaLEDidziaławen-
tylator.
Pojemnikzgazemjestpustybądźteżuszkodzony.Wymienićgonanowy
sprawny.
Przewódiskrowyjestpoluzowany.Zdjąćosłonęisprawdzićprzewód
iskrowy.
Świecazapłonowajestzabrudzona.Oczyścićświecęzapłonową.
Jeżelipostępowaniezgodniezpowyższymiinstrukcjaminiepozwoliłona
rozwiązanieproblemu,oddaćnarzędziedonajbliższegopunktuserwi-
sowego.
Narzędziawydajesiędziałaćnor-
malnie, ale osadzenie elementu
złącznegowmaterialejestnie-
możliwe.
Wużyciusąelementyzłączneniewłaściwegotypu.Wymienićelementy
złącznenawłaściwe.
Cylinder wymaga czyszczenia.
Doszłodozakleszczeniałącznika.Przedponownymużyciemnarzędzia
należyusunąćzakleszczonyelementzłączny.
Komora spalania nie powraca do
pozycjiwyjściowej.
ZabezpieczenieA(docisk)jestwygiętylubzabrudzony.Sprawdzićzabez-
pieczenieAinaprawićgolubwymienić.Oczyścićbieżnięmechanizmu
zabezpieczającego.
Mechanizm wyrzutu nie po-
wraca do pierwotnej pozycji
izwiększyłasięczęstotliwość
niewypałów(pustychstrzałów).
Skontrolowaćiwymienićkompletnyzespółakumulatora.
Oczyścićnarzędzieprzyużyciuodpowiedniegośrodkaczyszczącego.
Narzędziemożebyćprzegrzane.Oczyścićlubwymienićfiltrpowietrza.
Narzędziewydajesiętracićmoc.
Sprawdzićogniwopaliwowe.
Oczyścićlubwymienićfiltrpowietrza.
Sprawdzićprzewódświecyzapłonowej.
Oczyścićnarzędzieprzyużyciuodpowiedniegośrodkaczyszczącego.
Wprzypadkachstwierdzeniausterekinnychniżopisanepowyżejnależyzaprzestaćużytkowanianarzędziai
skontaktowaćzlokalnymprzedstawicielemproducentabądźteżbezpośredniozserwisemgwarancyjnym.
PL PL

www.rawlplug.com 39
www.rawlplug.com
38
WW90 II WW90 II
Wymagasię,by użytkownikstosowałokula-
ryochronnezgodneznormąANSIZ87.1/EN
166zprzedniąibocznąosłonąprzedprzedmiotami
poruszającymisięwpowietrzuwtrakcieużytkowa-
nia,obsługi i serwisowania narzędzia. Pracodawca
jestzobowiązanydopilnować,byzarównoużytkow-
nik, jak i wszyscy inni pracownicy obecni w miejscu
pracyspełnialiwymógstosowaniaśrodkówochrony
oczupodczasobsługinarzędzia.
OSTRZEŻENIE Wymóg stosowania środków
ochronyoczudotyczyzarównoużytkownika
narzędzia,jakiosóbobecnychwmiejscupracy.
OSTRZEŻENIEObowiązkiempracodawcyjest
zapewnić i egzekwować ochronę oczu dla
operatoranarzędziaiinnychosóbprzebywających
w obszarze roboczym.
Aby zapobiec uszkodzeniom słuchu, zaleca
sięstosowaćśrodkiochronysłuchuwmiejscu
pracyorazjegopobliżu.
Ochronagłowypowinnabyćzgodnazestan-
dardem ANSI Z89.1.
Należynosićwłaściwąodzież.Nienależyno-
sićluźnychubrańlubbiżuterii,gdyżmogązo-
stać pochwycone przez ruchome części narzędzia.
Podczaspracynazewnątrzwskazanejestnoszenie
rękawic i obuwia antypoślizgowego. Należy okryć
długiewłosy.
Należyzawszedbaćoprawidłowąkonserwa-
cję i czystość narzędzia. Szczegółowe infor-
macje na temat właściwej konserwacji oraz w jaki
sposóbnależyczyścićurządzenieznajdująsięwin-
strukcji konserwacji narzędzia dołączonej do urzą-
dzenie.
Narzędzie to nie jest przeznaczone do
stosowania w przestrzeniach zagrożonych
wybuchem.Narzędziezostałozaprojektowanetak,
żewtrakciejegodziałaniamogąpojawić sięiskry.
Spalinyzurządzeniarównieżstanowiąpotencjalne
zagrożeniezapłonułatwopalnychpaliwlubgazów.
Nie należy stosować narzędzia w tego rodzaju
przestrzeniach. Palenie papierosów w trakcie
używanialubprzenoszenianarzędziaipojemnikaz
gazem jest zabronione.
1. Przeduruchomieniemnależysprawdzić:
-czynarzędziejestwpełnisprawne.
-czyniewystąpiłyprzesunięcialubblokada
ruchomychczęściorazwszelkieinne
uwarunkowania,któremogąwpłynąćna
działanienarzędzia.
2. Pojemnikzgazem stanowi butla płynnegogazu
podwysokimciśnieniem.Należytrzymaćjezdala
od iskier, ognia lub wysokiej temperatury oraz
przestrzenigrożącychwybuchem.
3. Nie przekłuwać butli lub podejmować prób
otwarcia naboju gazowego. Nie podpalać butli
po zużyciu. Postępować zgodnie z instrukcjami
recyklinguznajdującymisięnabutelce.
4. Pojemnikzgazemnienadajesiędoponownego
napełniania.
5. Nieprzechowywać narzędzia,akumulatorówani
pojemników z gazem w temperaturze powyżej
50°C (120°F). Wysoka temperatura prowadzi do
wybuchu lub pożaruiuwolnienia gazu palnego.
Nieużywane narzędzie należy przechowywać
z dala od źródła wysokiej temperatury i
bezpośredniegodziałaniaświatłasłonecznego.
6. Narzędzia należy używać w odpowiednio
wentylowanych pomieszczeniach. Nie wdychać
spalin,oparówlubgazu,ponieważstanowiąone
potencjalnezagrożeniedlaludzkiegoorganizmu.
7. Podczas używania narzędzia należy zachować
odpowiedniąrównowagęciała,beznadmiernego
wychylaniasię.
8. Narzędzie, pojemnik z gazem, ładowarkę i
akumulator należy trzymać z dala od dzieci.
Użytkowanie narzędzia przez nieodpowiednio
przeszkolonąosobęstanowiniebezpieczeństwo.
Zabrania się pracy urządzeniem przez osoby
będące pod wpływem alkoholu, środków
odurzających lub leków mających wpływ na
sprawnośćpsychofizyczną.
-Należyzawszezakładać, żewurządzeniuznajdu-
jąsięgwoździe,aurządzeniejestgotowedopracy.
Nieostrożne obchodzenie się z gwoździarką może
spowodowaćprzypadkowewystrzelenie gwoździi
uszkodzeniaciała.
-Nienależycelowaćnarzędziemwsiebielubosoby
3. BEZPIECZEŃSTWO OSOBISTE:
a. Należy być przewidującym, obserwować co się
robiizachowywaćrozsądekpodczasużywaniaelek-
tronarzędzia. Nie należy używać elektronarzędzia,
gdyjestsięzmęczonymlubpodwpływemnarkoty-
ków,alkoholulublekarstw.Chwilanieuwagiwcza-
siepracyelektronarzędziemmożestaćsięprzyczy-
nąpoważnychurazówciała.
b.Należystosowaćwyposażenieochronne.Należy
zawszezakładaćokularyochronne.Używaniewod-
powiednich warunkach wyposażenia ochronnego,
takiegojakmaskaprzeciwpyłowa,obuwieantypo-
ślizgowe,kasklubochronnikisłuchu,zmniejszyoso-
bisteobrażenia.
c. Należy unikać niezamierzonego rozruchu. Przed
przyłączeniemdoźródłazasilaniai/lubprzedpodłącze-
niemakumulatoraorazzanimpodniesiesięnarzędzie
należyupewnićsię,żewyłącznikelektronarzędziajest
wpozycjiwyłączony.Przenoszenieelektronarzędzia
zpalcemnawyłącznikulubprzyłączenieelektrona-
rzędziadosiecizasilającejprzyzałączonymwłączni-
kumożebyćprzyczynąwypadku.
d. Przed uruchomieniem elektronarzędzia należy
usunąć wszelkie klucze. Pozostawienie klucza
w obracającej się części elektronarzędzia może
spowodowaćosobisteobrażenia.
e. Nie należy wychylać się za daleko. Należy cały
czas stać pewnie i zachowywać równowagę.
Umożliwitolepsząkontrolęnadelektronarzędziem
w sytuacjach nieprzewidywalnych.
f. Należy odpowiednio się ubierać. Nie należy nosić
luźnego ubrania ani biżuterii. Należy utrzymywać
swojewłosy,ubranieirękawiczkizdalaodczęścirucho-
mych.Luźneubrania,biżuterialubdługiewłosymogązo-
staćzaczepioneprzezczęściruchome.
g.Jeżeliurządzeniasąprzystosowanedoprzyłącze-
niazewnętrznegoodciągupyłuipochłaniaczapyłu,
należyupewnićsię,żesąoneprzyłączoneiprawid-
łowoużyte.Użyciepochłaniaczypyłumożezreduko-
waćzagrożeniazależneodzapylenia.
4.UŻYTKOWANIE I TROSKA O
ELEKTRONARZĘDZIE:
a. Nie należy elektronarzędzia przeciążać. Należy
stosować elektronarzędzie o mocy odpowiedniej
dowykonywanejpracy.Właściweelektronarzędzie
umożliwipracęlepsząibezpieczniejsząprzyobcią-
żeniu,najakiezostałozaprojektowane.
b.Nienależyużywaćelektronarzędziazuszkodzo-
nym włącznikiem. Urządzenie, które nie daje się
normalniewłączyćlubwyłączyćjestniebezpieczne
imusizostaćnaprawione.
c.Należyodłączaćwtyczkęzeźródłazasilaniaelek-
tronarzędziai/lubodłączyćakumulatorprzedwyko-
naniem każdej naprawy, regulacji, wymiany części
lub magazynowaniem. Takie zapobiegawcze środ-
kibezpieczeństwaredukująryzykoprzypadkowego
rozruchuelektronarzędzia.
d. Nieużywane elektronarzędzie należy przechowy-
waćpozazasięgiemdzieciiniedopuszczaćdoużyt-
kowania elektronarzędzia osób nie obeznanych ze
sprzętemlubtych,któreniezapoznałysięniniejsząin-
strukcjaobsługi.Narzędziawrękachniedoświadczo-
nychlubnieprzeszkolonychosóbsąniebezpieczne.
e. Elektronarzędzia należy konserwować. Nale-
żysprawdzać współosiowość lubzakleszczenie się
częściruchomych,pęknięciaczęściiwszystkieinne
czynniki,któremogąmiećwpływnapracęelektro-
narzędzia. Jeżeli stwierdzi się uszkodzenia, należy
elektronarzędzieprzedużyciemnaprawić.Przyczy-
nąwieluwypadkówjestniefachowysposóbkonser-
wacjielektronarzędzia.
f.Narzędziatnącepowinnybyćostreiczyste.Odpo-
wiednieutrzymanieostrychkrawędzinarzędzitną-
cychzmniejszaprawdopodobieństwozakleszczenia
iułatwiaobsługę.
g. Elektronarzędzie, wyposażenie, narzędzia robo-
czeitp.należystosowaćzgodniezniniejsząinstruk-
cją,biorącpoduwagęwarunkipracyirodzajpracy
do wykonania. Używanie elektronarzędzia w spo-
sóbdojakiegoniejestprzewidzianemożespowo-
dowaćniebezpiecznesytuacje.
h.Elektronarzędzienależyczyścićszmatką.Niewolno
używać benzyny, rozpuszczalników, terpentyny i in-
nychtympodobnychsubstancji.Żadnejczęścielektro-
narzędzianiemożnazanurzaćwwodzieiinnychcie-
czach.Niewolnodopuścićdoprzedostaniasięwody,
innychcieczy i ichoparówdo wnętrza elektronarzę-
dzia,gdyżmożetodoprowadzićdoniebezpiecznejsy-
tuacjijakiuszkodzeniasprzętu.
5. Naprawa:
a. Naprawę elektronarzędzia należy zlecić osobie
wykwalifikowanej,wykorzystującejwyłącznieoryginal-
neczęścizamienne.Zapewniato,żeużytkowanieelek-
tronarzędziabędzienadalbezpieczne.
b. Zabroniona jest samodzielna wymiana przewodu
przyłączeniowego, wymianę należy wykonać w
autoryzowanym Serwisie.
PL PL
Table of contents
Languages:
Other Rawlplug Nail Gun manuals