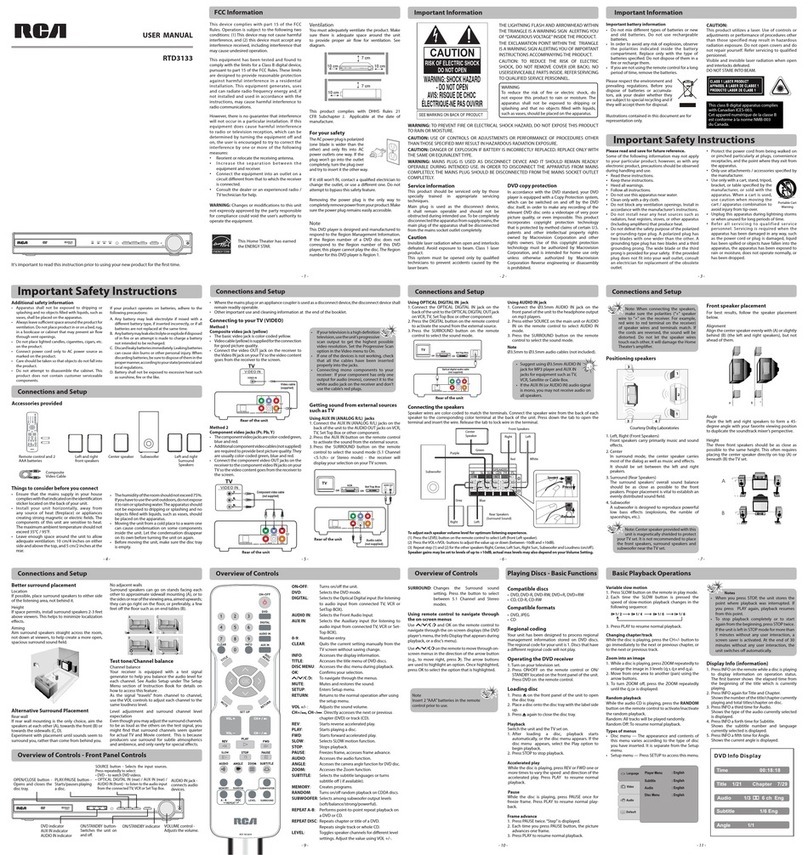
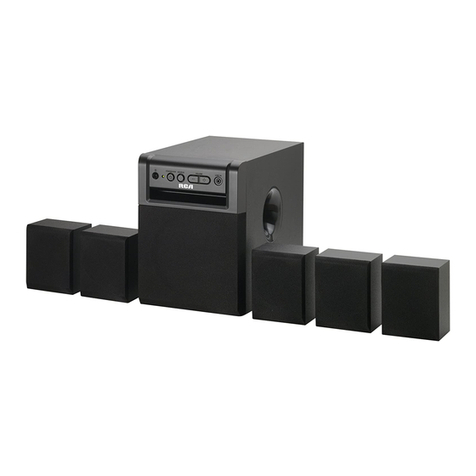
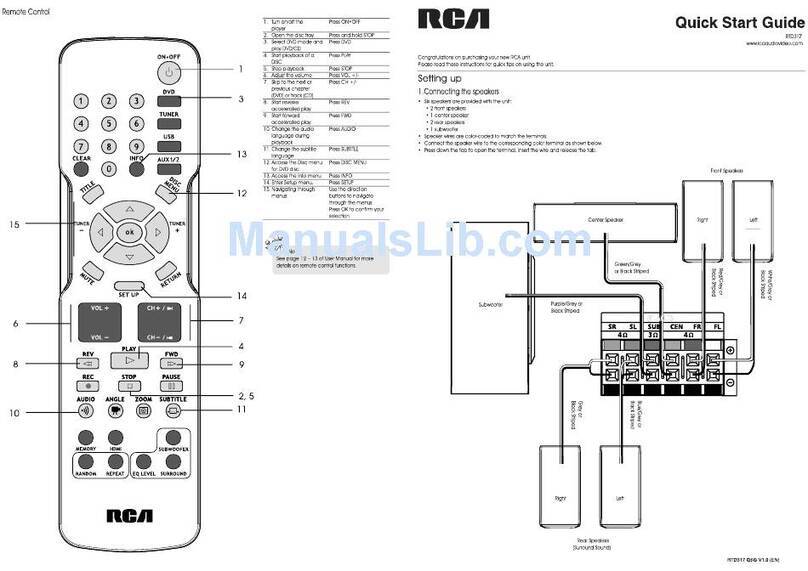
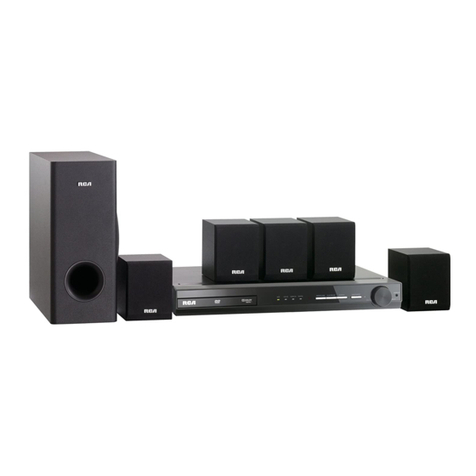
RCA RTD300 User manual

IMPORTADOR
Comercializadora Thomson de México, S.A. de C.V.
Miguel de Cervantes Saavedra 57
Col. Ampliación Granada
C.P. 11529 Mexico D.F.
Telefono: (55)25 81 53 20
R.F.C.: CTM-980723-KS5
0151
EXPORTER
Thomson Inc.
P.O. Box 1976
Indianapolis, IN 46206 - 1976
©2003 Thomson Inc.
Trademark(s) ® Registered
Marca(s) Registrada(s)
Marque(s) Deposée
55814590 (EN/F/E)
www.rca.com
www.rca.com/LatinAmerica
Printed in China / Impreso en China
RTD300 EN 7/25/03 2:36 PM Page 2

usermanual
RTD300
It is important to read this instruction book prior to using your new product for the first time.
Es importante leer este manual antes de usar por vez primera su euipo.
RTD300 EN 7/25/03 2:36 PM Page 3

This device complies with Part 15 of the FCC Rules.
Operation is subject to the following two conditions:
(1) This device may not cause harmful interference,
and (2) this device must accept any interference
received, including interference that may cause
undesired operation.
In accordance with FCC requirements, changes or
modifications not expressly approved by Thomson Inc.
could void the user’s authority to operate this
product.
This device generates and uses radio frequency (RF)
energy, and if not installed and used properly, this
equipment may cause interference to radio and
television reception.
If this equipment does cause interference to radio or
television reception (which you can determine by
unplugging the unit), try to correct the interference
by one or more of the following measures:
• Re-orient the receiving antenna (that is, the
antenna for the radio or television that is
"receiving" the interference).
• Move the unit away from the equipment that is
receiving interference.
• Plug the unit into a different wall outlet so that
the unit and the equipment receiving interference are
on different branch circuits.
If these measures do not eliminate the interference,
please consult your dealer or an experienced
radio/television technician for additional
suggestions. Also, the Federal Communications
Commission has prepared a helpful booklet, "How To
Identify and Resolve Radio TV Interference Problems."
This booklet is available from the U.S. Government
Printing Office, Washington, DC 20402. Please specify
stock number 004-000-00345-4 when ordering copies.
This product complies with DHHS Rules 21 CFR
Subchapter J. Applicable at the date of
manufacture.
Technical Specification
Product: DVD + VCR Home Theatre System
Brand: RCA
Model: RTD300
Electrical current consumption
Power Supply: 120V ~ 60Hz
Power consumption: 95 Watts
IMPORTER
Comercializadora Thomson de México, S.A. de C.V.
Miguel de Cervantes Saavedra No. 57
Col. Ampliación Granada
C.P. 11529 Mexico D.F.
Telefono: (55)25 81 53 20
RFC: CTM-980723-KS5
FCC Information
For Your Safety
The AC power plug is
polarized (one blade is wider
than the other) and only fits
into AC power outlets one
way. If the plug won’t go into
the outlet completely, turn
the plug over and try to insert
it the other way. If it still
won’t fit, contact a qualified electrician to change
the outlet, or use a different one. Do not attempt to
bypass this safety feature.
CAUTION: TO PREVENT ELECTRIC SHOCK, MATCH
WIDE BLADE OF PLUG TO WIDE SLOT, FULLY INSERT.
For Your Records
In the event that service should be required, you may
need both the model number and the serial number.
In the space below, record the date and place of
purchase, and the serial number:
Model No.
Remote Control No.
Date of Purchase
Place of Purchase
Serial No.
Service Information
This product should be serviced only by those
specially trained in appropriate servicing techniques.
For instructions on how to obtain service, refer to the
warranty included in this Guide.
RECORD
WARNING:
TO PREVENT FIRE OR ELECTRICAL
SHOCK HAZARD, DO NOT EXPOSETHIS PRODUCT
TO RAIN OR MOISTURE.
SEE MARKING ON BOTTOM / BACK OF PRODUCT
CAUTION
RISKOFELECTRICSHOCK
DONOTOPEN
THE EXCLAMATION
POINT WITHIN THE
TRIANGLE IS A
WARNING SIGN
ALERTING YOU OF
IMPORTANT
INSTRUCTIONS
ACCOMPANYING
THE PRODUCT.
THE LIGHTNING
FLASH AND ARROW-
HEAD WITHIN THE
TRIANGLE IS A
WARNING SIGN
ALERTING YOU OF
"DANGEROUS
VOLTAGE" INSIDE
THE PRODUCT.
CAUTION: TO REDUCE THE
RISK OF ELECTRIC SHOCK,
DO NOT REMOVE COVER
(OR BACK). NO USER-
SERVICEABLE PARTS IN-
SIDE. REFER SERVICING
TO QUALIFIED SERVICE
PERSONNEL.
GEFAHR EINES
ELEKTRISCHEN SCHLAGS
RTD300 EN 7/25/03 2:36 PM Page 4

EN
1
Contents
FCC Information
Contents .................................................. 1
Identification of Controls .............................. 2
Remote Control ........................................ 5
Connecting with TV .................................... 7
FM/AM Antenna connection ..........................8
Speaker system connection .......................... 9
Connecting with Other Video Equipment ........ 10
Output Select .......................................... 11
Clock Set .............................................. 12
Memorizing TV Channels ............................ 13
VCR Playback .......................................... 15
Using advanced features ............................ 16
Hi-Fi Stereo Playback (Hi-Fi Model only) .......... 20
DVD initial setting
LANGUAGE Setup .................................... 21
DISPLAY Setup ........................................ 22
AUDIO Setup.......................................... 24
RATINGS Setup ...................................... 26
DVD Playback .......................................... 28
Playing a desired scene .............................. 30
Confirming the current PLAY mode on screen .. 34
AUDIO language, SUBTITLE language
and 3D AUDIO .......................................... 36
ZOOM, Multi Angle and Digest play ................ 37
About mp3 discs . ...................................... 38
Displaying menus in a disc. .......................... 39
Recording .............................................. 40
Timer Recordings .................................... 42
Watching and Recording Cable TV ................ 45
Presetting the radio stations ........................ 46
Listening to the radio ................................47
Speaker Setup for enjoying the surround sound
effect .................................................... 48
Delay Time Setting .................................... 50
Setting the sound level .............................. 52
About DVD .............................................. 53
Basic information about VCR and Videotape .... 55
Troubleshooting Tips (DVD) .......................... 56
Troubleshooting Tips (VCR) .......................... 57
Specifications .......................................... 59
Care & maintenance .................................. 60
LImited Warranty (U.S.) .............................. 61
LImited Warranty (Canada) ..........................62
Product Information
Installation
VCR Operation
DVD Setup
DVD Operation
Recording
Radio Operation
Speaker Setup
More Information
Warranty
RTD300 EN 7/25/03 2:36 PM Page 5

2
Identification of Controls
1Power (STANDBY/ON) button
Powers the device on/off when AC
power supply is connected.
2Videotape deck
Insert the desired video tape here.
3Eject button
Ejects the tape.
4Disc tray
5Open/Close Tray button
Opens and closes disc tray. Place a disc
on the disc tray with the label side up.
6Video / Audio input 3 jack
Connect a cable to the video/audio out
jacks on a camcorder, another VCR, or
another audio visual source.
7Playback/PAUSE button
Plays videotape or disc. Press this button
during playback to pause playback or
recording modes.
8Stop/MEMORY button
Stops the current DVD or VCR functions.
Stores radio stations.
9Tuning & Search –/+
Search- (1): Rewinds the currently
videotape in VCR mode. Search
backwards at different speeds (x2, x4,
x8, etc.) in DVD mode. Searches
backwards when activated during video
tape playback.
Search+( ¡): Fast forwards the
current video tape in VCR mode. Search
forward at different speeds (x2, x4, x8,
etc.) in DVD mode. Searches forward
when activated during video tape and
DVD playback.
Tuning –/+ : Scans all available radio
stations.
;Record button
In VCR mode, starts recording of a TV
program or program from another
sources (except DVD).
AOperation Display Window
Displays device operations. For more
information, see “Operation Display
Window” on the next page.
BDVD/P-SCAN indicator
The indicator lights in green in DVD
mode.
The indicator lights in red in P-Scan
mode.
CVHS/REC indicator
Illuminate in VCR mode.
DVCR/OUTPUT button
Selects among VCR mode and other
output modes.
EChannel & Preset –/+
Selects the preset TV broadcasting
channel or preset radio stations.
FDVD button
Selects DVD mode.
GSOUND FIELD button
Adjusts the Sound Fields and Graphic
Equalizer.
HAM/FM button
Selects RADIO mode.
IVolume control
Adjusts the sound level from the
speakers connected to the unit.
JHeadphone jack
Front panel
12345
67890 A BCD
EF
GH
JI
RTD300 EN 7/25/03 2:36 PM Page 6

EN
3
Operation Display Window
Identification of Controls
11Speaker setup indicator
22Memorised TV broadcasting channel
or radio stations
33
Chapter indicator
44Track indicator
55Sleep time indicator
66Playback disc indicator
77Dolby Digital indicator
88
Prologic II indicator
99Playback indicator
00Pause indicator
AA
DTS indicator
BBDSP indicator
CCPBC (Playback Control) indicator
DDFM Stereo indicator
EEMute indicator
FFRandom playback indicator
GGRepeat playback indicator
1
8 9 10 11 12 13 14
15 16 17
7
2 3 4 5
6
RTD300 EN 7/25/03 2:36 PM Page 7

Rear Panel
11Power Cord
Jack for supplying power to the unit.
Connect to a wall outlet.
22Analog 5.1 Speaker Out Jack
Connect each of the speaker wires to
the satellite speakers.
Speaker cords, 1 for each speaker, are
needed for connection.
When connecting the speakers, make
sure the polarities ("+" side of the
speaker wire to "+" on the receiver) of
speaker wires and terminals are
matched.
33Connection to Antenna Cable
Connect a coaxial cable from your
cable wall outlet or antenna to the
ANT IN jack on the back of your
DVD/VCR unit.
44AM Antenna Jack
55S-Video Output Jack (DVD only)
66COMPONENT (Progressive) Out Jack
(DVD only)
To obtain better screen quality,
connect the unit to a TV or monitor
with a COMPONENT(480i or 480p)
input.
Note: VCR signal is only available
from Composite Video Out jack and
RF Out. You must always connect
these to the TV in order to set up and
use your unit.
77Subwoofer Pre-Output Jack
Connect an active subwoofer to
improve bass performance especially
in a large room.
88A/V Output Jack
99A/V Input 2 Jack
;;A/V Input 1 Jack
AAConnection to TV
Required connection for VCR
operation. Connect on end of the RF
cable to the RF Out Jack on the back
of the unit and the other end to the
ANT IN jack on the back of your TV.
BBFM Antenna Jack
Identification of Controls
FRONT-R FRONT-L
REAR-L
WOOFER
REAR-R
CENTER
SPEAKER
COMPONENT OUT
IN 1
IN 2OUT
S-VIDEO OUT
WOOFER OUT
AUDIO
ANT.IN
AM
FM
RF.OUT
R
L
VIDEO
Pr Pb Y
IMPEDANCE USE 6Ω(WOOFER USE 6Ω)
4
1234
5678 9 0 A B
RTD300 EN 7/25/03 2:36 PM Page 8

EN
5
1[DVD] Open/Close button, [VCR] Eject button
2DVD SELECT button
3VCR SELECT button
4[DVD, VCR] Number button , [VCR] Tracking –/+
button
5CLEAR button
6SETUP button
7[DVD] Title /PBC button
8[DVD, VCR] Use to highlight a selection on the menu
and adjust certain settings, [RADIO] Adjust the
volume
9[DVD] Menu button
0ENTER (Confirm selections on a menu screen) button
A[DVD] ZOOM button
B[VCR] TIMER RECORDING button, [DVD] program
button
C[DVD, VCR] Forward / Reverse Search button,
[RADIO] Scan all available radio stations
DPlay/Pause button
E[VCR] Record button
FSTEP FORWARD/REVERSE button
G[DVD] Chapter/Title/Time Search button
H[DVD] Subtitle Select button, [RADIO] Switch
between AM or FM button
I[DVD] Repeat Playback button
J[DVD] REPEAT a defined period from A to B button
KSOUND MUTE button
L[DVD, VCR] Clock/Counter button
MPower button
NTV SELECT button
O100/P-SCAN button
[VCR] Used to enter three digit numbers.
[DVD] Switches to P-Scan mode.
P[DVD, VCR] OSD Display button
Q[RADIO] FM/AM Select button
R[VCR] Channel Up/Down button, [RADIO] Tune to the
presetted stations
S[DVD] Angle, [VCR] Record Speed button
TStop/MEMORY (Enter the number of a selected
chapter, track, station or channel) button
U[DVD] PREVIOUS (move to the previous chapter or
track) / Next (Move to the next chapter or track)
button, [VCR] Frame Advance button in pause mode
V[DVD] SOUND FIELD button
W[DVD] AUDIO Language Select, [VCR] AUDIO Select
button, [RADIO] Set FM Mode to Stereo or Mono
sound
X[DVD] Sound LEVEL button
Y[DVD] DELAY button
Zsleep button
[TV/VCR Select, TV INPUT button
Child Lock!!! (VCR mode)
Press the power [ ] button on the remote
control for about 8 seconds. No buttons on
the front panel and the remote control can
be operated now and the Lock indicator
(“ ”) will be displayed on the window
display. To release child lock, press the
power [ ] button on the remote control
for about 8 seconds.
Remote Control
OPEN/CLOSE
–TRACKING
CLEAR
SETUP
ENTER
OK
ZOOM
REC
PROGRAM
MEMORY
SEARCH SUBTITLE AUDIO SOUND FIELD
REPEAT A–B DELAY LEVEL
MUTE CLK/CNT TV/VCR
TV INPUT
SLEEP
STEP
SPEED/ANGLE
CH/PRESET
DISPLAY
FM/AM
MENU
TITLE/PBC
100/P-SCAN
+
/INPUT
12 3
45 6
78
0
9
VCR
POWER
DVD TV
VOL+VOL–
–TUNING & SEARCH
+
–
+
123
24
25
26
27
28
2930
31
33
35
37
32
34
36
2
10
12
14
16
18
20
22
3
4
5
6
7
8
9
11
13
15
17
19
21
RTD300 EN 7/25/03 2:36 PM Page 9

Instructions in using remote control
Remote Control
Accessories
•Operate the remote control within 7m from the unit.
•Do not press 2(two) buttons at the same time.
•Keep the unit away from humid and dusty areas.
To purchase accessories not supplied with the unit, contact your nearest dealer or service center. Owner’s
manual and warranty are not sold additionally.
Remote Control 2 Batteries RF cable
Audio/Video
(Composite) Cable
Owner’s Manual/
Warranty/
Safety Leaflet/
Quick Connection
Guide
AM antenna FM antenna
OPEN/CLOSE
–
TRACKING
CLEAR
SETUP
ENTER
OK
ZOOM
REC
PROGRAM
MEMORY
SEARCH SUBTITLE AUDIO SOUNDFIELD
REPEAT A–B DELAY LEVEL
MUTE CLK/CNT TV/VCR
TVINPUT
SLEEP
STEP
SPEED/ANGLE
CH/PRESET
DISPLAY
FM/AM
MENU
TITLE/PBC
100/P-SCAN
+
/INPUT
123
456
78
0
9
VCR
POWER
DVD TV
VOL+VOL–
–
TUNING& SEARCH
+
–
+
OPEN/CLOSE
–
TRACKING
CLEAR
SETUP
ENTER
OK
ZOOM
REC
PROGRAM
MEMORY
SEARCH SUBTITLE AUDIO SOUNDFIELD
REPEAT A–B DELAY LEVEL
MUTE CLK/CNT TV/VCR
TVINPUT
SLEEP
STEP
SPEED/ANGLE
CH/PRESET
DISPLAY
FM/AM
MENU
TITLE/PBC
100/P-SCAN
+
/INPUT
123
456
78
0
9
VCR
POWER
DVD TV
VOL+
VOL–
–
TUNING& SEARCH
+
–
+
6
• 1 X green/black wire for center
speaker
• 1 X red/black wire for front right
speaker
• 1 X white/black wire for front left
speaker
• 1 X purple/black wire for subwoofer
• 1 X blue/black wire for rear left
speaker
• 1 X gray/black wire for rear right
speaker
+
-
Front Speakers Center Speakers
Rear Speakers
(Surround Sound)
Subwoofer
Unpacking The Speakers
• one set of speakers including 1 set of left and right front
speakers, 1 centre speaker, 1 subwoofer and 1 set of left and
right rear speakers.
6 Speaker Cables:
RTD300 EN 7/25/03 2:36 PM Page 10

EN
7
Various methods in connecting with TV
Connecting with TV
■During initial setup, the RF output channel for video is set to CH 3. This setting can be changed from the
“Channel SET” screen in VCR operation (refer to page 13).
■To see the picture from this unit, set your TV to CH3 once the RF cable is connected.
Audio connection
Connect the Audio cables (red and white)from the Audio/Video (composite) cable to the Audio Jack
on the back of the DVD-Video player and the TV. Match the colour between the cable and the jacks
when making the connections. Connect the left (white) and right (red) audio cables to the AUDIO
OUT L(white) and R (red) jack on the DVD-Video player and the AUDIO IN jacks on the TV.
AUDIO
VIDEO
S-VIDEO
ANT INPUT
S-VIDEO INPUT
A/V INPUTCOMPONENT INPUT
CAUTION
CAUTION:TO REDUCE THE RISK OF ELECTRIC SHOCK.
DONOT REMOVE COVER (OR BACK).
NOUSER SERVICEABLE PARTS INSIDE.
REFERSERVICING TO QUALIFIED SERVICE PRESONNEL.
RISKOFELECTRIC SHOCK
DONOTOPEN
2018 16 14 12 10 8 6 4 3
2119 17 15 13 11 9 7 5 3 1
FRONT-R FRONT-L
REAR-L
WOOFER
REAR-R
CENTER
SPEAKER
COMPONENT OUT
IN 1
IN 2OUT
S-VIDEO OUT
WOOFER OUT
AUDIO
ANT.IN
AM
FM
RF.OUT
R
L
VIDEO
Pr Pb Y
IMPEDANCE USE 6Ω(WOOFER USE 6Ω)
<Outside Antenna or
Wall Antenna Outlet>
RF Cable
Connection
Basic Audio/Video
Connection
<Rear Panel of TV>
<Rear Panel of unit>
Optional (DVD only)
Optional (DVD only)
RTD300 EN 7/25/03 2:36 PM Page 11

Connecting with TV
8
FRONT-R FRONT-L
REAR-L
WOOFER
REAR-R
CENTER
SPEAKER
COMPONENT OUT
IN 1
IN 2OUT
S-VIDEO OUT
WOOFER OUT
AUDIO
ANT.IN
AM
FM
RF.OUT
R
L
VIDEO
Pr Pb Y
IMPEDANCE USE 6Ω(WOOFER USE 6Ω)
To listen to radio broadcast, connect the FM and AM antenna supplied with your unit.
• Connect the AM loop antenna to the AM antenna connector.
• Connect the supplied FM wire antenna to the FM antenna connector on the back of the DVD-Video player or
connect a coaxial 75 cable (not supplied) to the wall socket and to the FM antenna connector.
•To prevent interference, keep the AM loop antenna away from DVD Receivers and other components that causes
interference.
•If the FM wire antenna is connected, be sure to fully extend and keep it as horizontal as possible.
FM/AM Antenna connection
AM loop antenna
(supplied)
FM wire antenna
(supplied)
Video Connection
With the yellow cable (Video Cable) from the Audio/Video Composite Cable, connect the Video Out
(yellow) jack on the DVD-Video player to the Video IN jack on the TV.
Connect the TV to the DVD-Video player with the RF cable provided with the unit. Plug one end of
the RF cable into the “RF OUT” jack on the rear panel of the DVD-Video and the other end to the
“ANT. IN” jack on the TV.
Optional (DVD only): If your TV has component video jacks, connect the component video cables
(not supplied) to the Component Out (DVD only) jacks (Pb, Pr and Y) on the back of the DVD/Video
player and the TV by matching the colours between the cables and the jacks. This connection
provides better quality picture than composite video type.
Optional(DVD only): If your TV has a S-Video jack,
use a S-Video cable (not supplied) to enjoy higher
quality pictures.
Connect a S-Video cable to the S-Video Out jack on the back of the DVD-Video and
the S-Video jack on the back of the TV.
Note: Be sure to change the TV input on your TV when switching between DVD and Video mode.
RTD300 EN 7/25/03 2:36 PM Page 12

EN
9
FRONT-R FRONT-L
REAR-L
WOOFER
REAR-R
CENTER
SPEAKER
COMPONENT OUT
IN 1
IN 2OUT
S-VIDEO OUT
WOOFER OUT
AUDIO
ANT.IN
AM
FM
RF.OUT
R
L
VIDEO
Pr Pb Y
IMPEDANCE USE 6Ω(WOOFER USE 6Ω)
Speaker system connection
Connect the speakers using the supplied speaker cords by matching the colors of the terminals and those of the
cords. To obtain the best possible surround sound, adjust the speaker parameters (distance, level, etc.)
•Be sure to match the speaker cord to the appropriate terminal on the component: + to + and – to –. If the cords are
reversed, the sound will be distorted and will lack bass.
•If you use front speakers with low maximum input rating, adjust the volume carefully to avoid excessive output on
the speakers.
•Do not disassemble the front cover of supplied speaker.
Front speaker
(right)
Front speaker
(left)
Rear speaker
(left surround)
Rear speaker
(right surround)
Center speaker
Subwoofer
Subwoofer
Optional:
You can connect an active subwoofer
to the WOOFER OUT connector using a
monaural audio cord (not supplied) to
improve bass performance, especially
in a large room. When you connect an
active subwoofer, disconnect the
woofer from the WOOFER speaker
connector.
RTD300 EN 7/25/03 2:36 PM Page 13

10
Connection with other audio/video equipment
Connecting with Other Equipment
How to Copy (Edit) Tape from Other Video Equipment
■You can connect a wide variety of audio/video equipment to your DVD-Video system including : an
additional VCR, Laser Disc Player, DVD Player, Camcorder, Satellite Receiver or Video Game. Since all
of these devices use essentially the same connections, they will be described together.
AUDIO/VIDEO Cable
1
1Use the Audio/Video (Composite) cable to connect the Audio/Video
Out jack on another video equipment to the Audio/Video In jack on the
rear panel (or front panel) of DVD-Video system.
2
2Use the RF cable to connect the “ANT. IN” jack on your TV to the
“RF.OUT” jack on the DVD-Video system.
3
3To record contents from another video equipment with the DVD-Video
system, insert a recording tape, with the recording tab attached, into
the unit.
1
1Turn on the unit.
2
2Press the [VCR INPUT] button on the remote control to select among “VIDEO 1”, “VIDEO 2” or “VIDEO 3”
on the TV screen. Select the one that pertains to the video equipment that you want to record.
3
3Press [PLAY] on the additional video equipment that you want to record.
4
4Press the [REC] button on the unit to begin recording contents from the selected video equipment.
5
5Press the [Pause] button on the unit to stop recording temporarily. Press again to resume.
(Caution) If the unit remains in pause mode for more than 5 minutes, it will stop automatically to
protect the tape from being damaged.
AUDIO
VIDEO
ANT INPUT
A/V OUTPUT
CAUTION
CAUTION:TOREDUCETHE RISK OF ELECTRIC SHOCK.
DONOTREMOVECOVER (OR BACK).
NOUSERSERVICEABLEPARTS INSIDE.
REFERSERVICINGTOQUALIFIED SERVICE PRESONNEL.
RISKOFELECTRICSHOCK
DONOTOPEN
2018 16 14 12 10 8 6 4 3
2119 17 15 1311 9 7 5 3 1
FRONT-R FRONT-L
REAR-L
WOOFER
REAR-R
CENTER
SPEAKER
COMPONENT OUT
IN 1
IN 2OUT
S-VIDEO OUT
WOOFER OUT
AUDIO
ANT.IN
AM
FM
RF.OUT
R
L
VIDEO
Pr Pb Y
IMPEDANCE USE 6Ω(WOOFER USE 6Ω)
RTD300 EN 7/25/03 2:36 PM Page 14

EN
11
To Select DVD
Press the [VCR INPUT] button.
To toggle and select VCR PLAYBACK, BROADCASTING RECEPTION or EXTERNAL INPUT, press the [VCR INPUT]
button repeatedly.
Output Select
To Select VCR
Press the [DVD] button.
Press [DVD] to select DVD mode, the DVD indicator lights on the front panel. The remote control can then be
used to access DVD functions.
Press the [VCR] button.
Press the [VCR] button to select VCR mode. The VHS indicator lights on the front panel. The remote control
will operate VCR functions.
To Select Watch Modes or External Input
RTD300 EN 7/25/03 2:36 PM Page 15

12
CLOCK SET
CLOCK SET
SETUP
■Set TV to your selected channel (CH3 or CH4) or the AV input you have
chosen.
■Press [VCR] on the remote control to select VCR mode and follow the
procedures below.
Clock Set
1
1
2
2
3
3
Press the [SETUP] button to view
SETUP menu.
With the cursor at CLOCK SET, press
[ENTER] to view CLOCK SET menu.
From the CLOCK SET menu, select Time
and Date Set by pressing the [ENTER]
button.
When CLOCK SET is complete,
press the [SETUP] button.
Set the current date and time
with the [55, ∞∞, 22, 33] buttons or
the [NUMBER] button.
For DATE SET, follow the order of Month /
Day / Year ; for TIME SET, follow the
order of Hour / Minute.
CLOCK SET
TIMER RECORDINGS
CHANNEL SET
FUNCTIONS
LANGUAGE SELECT
Move: 55∞∞Select: ENTER
End: SETUP
Time and Date Set
Auto DST : ON
Move: 55∞∞Select: ENTER
End: SETUP
CLOCK SET
Time - - : - -
(hh:mm)
Date - - / - - / 20 - -
Move: 2233Input: 55∞∞
End: SETUP
Time 11 : 01 AM
Date 05 / 24 / 2003 (Sat)
(mm/dd/yy)
Move: 2233Input: 55∞∞
End: SETUP
OPEN/CLOSE
–
TRACKING
CLEAR
SETUP
ENTER
OK
ZOOM
REC
PROGRAM
MEMORY
SEARCH SUBTITLE AUDIO SOUND FIELD
REPEAT A–B DELAY LEVEL
MUTE CLK/CNT TV/VCR
TV INPUT
SLEEP
STEP
SPEED/ANGLE
CH/PRESET
DISPLAY
FM/AM
MENU
TITLE/PBC
100/P-SCAN
+
/INPUT
12 3
45 6
78
0
9
VCR
POWER
DVD TV
VOL+VOL–
–
TUNING & SEARCH
+
–
+
RTD300 EN 7/25/03 2:36 PM Page 16

EN
13
Channel 02
is now ADDED.
What type of signal are
you using?
Cable TV
Antenna
Detect Automatically
CHANNEL SET
CLOCK SET
TIMER RECORDINGS
CHANNEL SET
FUNCTIONS
LANGUAGE SELECT
To Memorize Channels Automatically
Memorizing TV Channels
To Memorize Channels Manually
1
1Press the [SETUP] button.
Press the [ ∞] button to move the cursor
down to CHANNEL SET. Press [ENTER] to view
CHANNEL SET menu.
Select “AUTO CHANNEL SEARCH”.
With the cursor at AUTO CHANNEL SEARCH,
press [ENTER] to select the type of signal you
have.
Select “Detect Automatically” with
the [ ∞ ] button.
Press [ENTER] and the auto channel search
starts.
Channel number changes successively from 01
to 125, while only broadcasting channels are
memorized automatically. When the Automatic
Channel Set process is completed, the first
memorized channel is displayed.
2
2
3
3
1
1
2
2
3
3
Check the memorized channels.
To check the memorized channels, press [CH up or down] on the remote
control.
■To add additional channels without affecting your existing stored channels, follow the steps below:
Press the [SETUP] button and select
“CHANNEL SET”.
Select “Add/Remove Channels”.
Select and store a channel.
Press the [NUMBER] buttons on the remote
control to select the desired channel to store.
Press [3] to change “REMOVED” into “ADDED”.
Check the memorized channel.
To check the stored channels, press [CH up or down] on the remote control.
SETUP
Auto Channel Search
Add/Remove Channels
Signal Type: CABLE
Channel Change: CH3
AUTO CHANNEL SEARCH
AUTO CHANNEL SEARCH
Now scanning channel 11
CHANNEL SET
Auto Channel Search
Add/Remove Channels
Signal Type: CABLE
Channel Change: CH3
ADD/REMOVE CHANNELS
RTD300 EN 7/25/03 2:36 PM Page 17

14
1
1Press the [SETUP] button and select
“CHANNEL SET”. Select “Add/Remove
Channels”.
2
2Select the channel to delete.
Use the [NUMBER] buttons on the remote control to enter
the channel to delete.
Press the [3] button to select “ADDED” or press the [2] button to select
“REMOVED” under the channel number.
3
3To make sure the selected channel has been deleted, press [CH up or down] on the
remote control.
Channel 02
is now ADDED.
To Delete Channels Manually
Memorizing TV Channels
Selecting cable or antenna viewing
To Set Output Channel
ADD/REMOVE CHANNELS
CHANNEL SET
Auto Channel Search
Add/Remove Channels
Signal Type: CABLE
Channel Change: CH3
■Follow the procedures below to delete stored channels.
■You can set the viewing mode on your VCR, choose either CABLE (cable system connection) or ANTENNA
(antenna connection).
Press the [SETUP] button and select
“CHANNEL SET”. Select “Channel Change”.
Press [ENTER] to set the exclusive video channel (CH3 or
CH4).
To set the viewing mode:
From the CHANNEL SET menu, press [ ∞∞] to move the
cursor down to SIGNAL TYPE. Press [ENTER] to toggle
between CABLE and ANTENNA.
When the desired viewing mode is displayed, press
[SETUP] twice to exit.
CHANNEL SET
Auto Channel Search
Add/Remove Channels
Signal Type: CABLE
Channel Change: CH3
RTD300 EN 7/25/03 2:36 PM Page 18

EN
15
VCR Playback
Press the [ ] button to power on the unit.
Press the [VCR] button on the remote control to select VCR mode.
Insert the desired tape.
To start playback, press the [PLAY] button.
If the picture jumps or is in poor quality, adjust the tracking manually with the
[TRACKING + or –] button.
To stop playback, press the [ ■] button.
To pause playback, press the [PLAY/PAUSE] button in playback mode.
Press again to resume.
Press the [EJECT] button on the front panel or the [OPEN/CLOSE]
button on the remote control to eject the tape.
1
1
2
2
3
3
4
4
5
5
Various Playback Methods
■For fast forward or fast reverse playback, press [¡] or [1] during Playback.
■For a still picture, press [PLAY] during playback to watch the desired screen in
pause mode.
■For slow-motion playback, press the [ ] button in play mode to watch the desired
screen in the slow forward playback.
* NOTE: VCR does not support Slow Reverse Playback.
■If you want to watch a series of screens one by one, (FRAME ADVANCE) press the
[]button repeatedly in Pause mode . Each time you press this button, the next
frame is displayed.
To Adjust Display
This product includes an Automatic Tracking function that adjusts the display
automatically for clearer pictures. (During automatic display adjustment, “Adjusting
Display” is displayed on the TV screen.)
Manual adjustments can also be used to improve the following:
- poor picture in Playback mode,
- streaks on the upper or lower part of the screen during slow motion playback,
- the picture jitters in pause mode.
Use the [TRACKING + or –] buttons on the remote control to manually adjust the display.
This DVD/Video
system is equipped
with an auto-
detector that can
detect
contamination on
tape heads.
If the tape head is
contaminated, a
notice shows on the
display.
If this occurs, rub
the heads with a
head-cleaner. (Refer
to “How to use a
head-cleaner” for
details.)
OPEN/CLOSE
–
TRACKING
CLEAR
SETUP
ENTER
OK
ZOOM
REC
PROGRAM
MEMORY
SEARCH SUBTITLE AUDIO SOUND FIELD
REPEAT A–B DELAY LEVEL
MUTE CLK/CNT TV/VCR
TV INPUT
SLEEP
STEP
SPEED/ANGLE
CH/PRESET
DISPLAY
FM/AM
MENU
TITLE/PBC
100/P-SCAN
+
/INPUT
12 3
45 6
78
0
9
VCR
POWER
DVD TV
VOL+VOL–
–
TUNING & SEARCH
+
–
+
RTD300 EN 7/25/03 2:36 PM Page 19

16
Press the [SETUP] button to display the
SETUP menu.
Move the cursor down to select “FUNCTIONS”
with the [∞] button. The FUNCTION menu is
displayed.
Move the cursor to “AutoPlay” and
press [ENTER] to select between ON
and OFF.
-Select ON if you want a tape with its safety
tab removed to start playing automatically
when the tape is inserted.
-Select OFF if you do not want a tape with its
safety tab removed to start playing
automatically.
Play the tape automatically
Press the [SETUP] button to display the SETUP menu.
Move the cursor down to “FUNCTIONS” using the [∞] button and press [ENTER]
to display the “FUNCTIONS” menu.
Using advanced features
Switch the VCR to TV or VCR mode automatically
1
1SETUP
CLOCK SET
TIMER RECORDINGS
CHANNEL SET
FUNCTIONS
LANGUAGE SELECT
Move: 55∞∞Select: ENTER
End: SETUP
■This feature allows the VCR to automatically start playback when a tape (with it’s safety tab removed) is
inserted.
2
2
Move the cursor down to select “Auto
TV/VCR” and press [ENTER] to select
between ON and OFF.
- Select ON if you want the VCR to switch to
VCR mode when the VCR is turned on or
when a cassette is inserted. This cuts off
other incoming signals that may cause
interference.
Note: This is only applicable if you have
connected the RF cable to the ANT.IN jack on
your TV and RF OUT jacks on your VCR. Your
VCR must also be set to channel 3 on your
TV.
1
1
■This feature controls whether the TV/VCR changes to VCR mode automatically when the VCR is turned on.
The purpose of this switch is to avoid interference between an incoming antennal signal and the output of
your VCR.
2
2
FUNCTIONS
Auto Play: ON
Auto TV/VCR: ON
Index Search
Go-To Search
Move: 55∞∞Select: ENTER
End: SETUP
FUNCTIONS
Auto Play: ON
Auto TV/VCR: ON
Index Search
Go-To Search
Move: 55∞∞Select: ENTER
End: SETUP
- Select OFF if you want the VCR to remain in TV mode. This is useful if you
watch your VCR on the TV’s video input and you don’t want your
antenna/cable signal interrupted by the VCR.
RTD300 EN 7/25/03 2:36 PM Page 20

17
EN
Searching a cassette tape for programs (indexing)
Press the [SETUP] button to display the
SETUP menu.
Select “FUNCTIONS” from the SETUP menu and
press [ENTER] to display the “FUNCTIONS”
menu.
Select “Index Search” from the
“FUNCTIONS” menu and press
[ENTER] to show the INDEX SEARCH
menu.
To search through a certain number of index
marks, enter the number of marks you want to
search with the number buttons (the entry
must be a two digit number).
Press [CLEAR] on the remote control to correct
an entry.
or
Press REW to search backward or FF to search
forward. The VCR will locate your index mark
and begin playback. If you did not enter a
specific index number, the VCR will locate the
next index mark and begin playback. Press
STOP to stop index searching.
Using advanced features
1
1
2
2
FUNCTIONS
Auto Play: ON
Auto TV/VCR: ON
Index Search
Go-To Search
INDEX SEARCH
Press REW or FF
to begin searching
or
Enter a specific
index number
- -
End: SETUP
■When you record a programs, the VCR places an index mark at the start of each recording. To search for an
index mark:
• If two
recordings
overlap, the index
mark for the
second program
will be erased.
Therefore, when
you use the index
feature to find the
second program,
the VCR will skip
over it.
•If you record
multiple programs
in one recording
session, the VCR
will only find the
index mark that
was placed on the
video cassette tape
when the recording
session began.
RTD300 EN 7/25/03 2:36 PM Page 21
Table of contents
Other RCA Home Theater System manuals