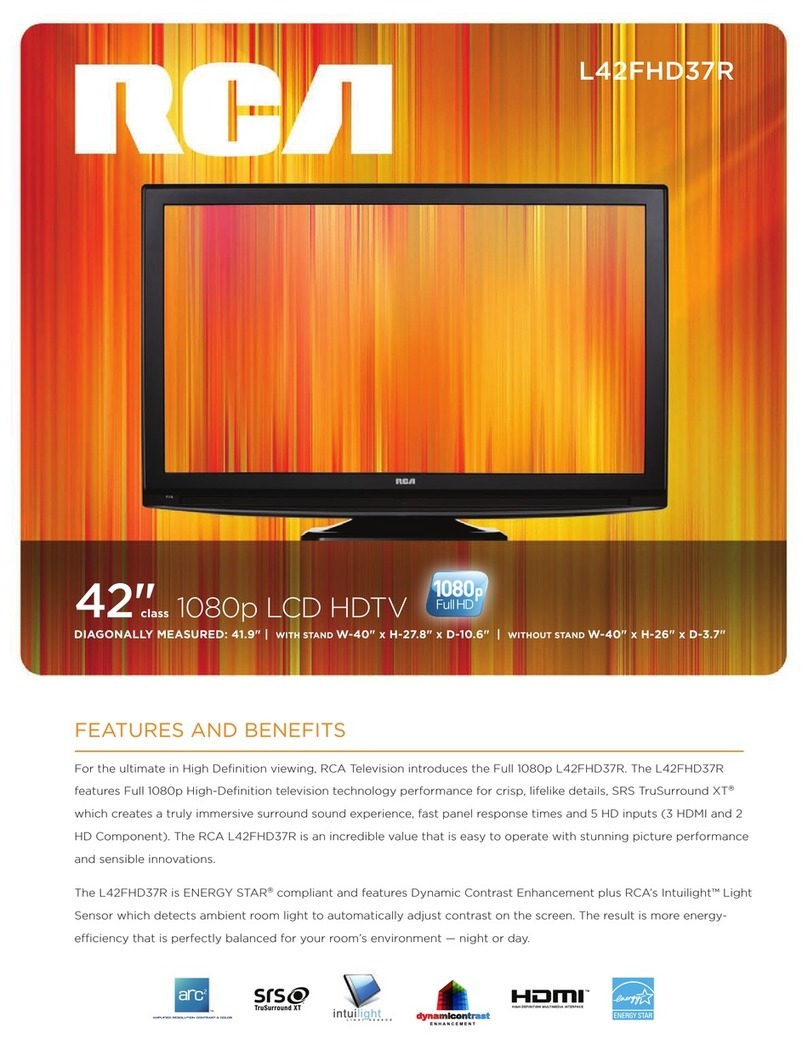
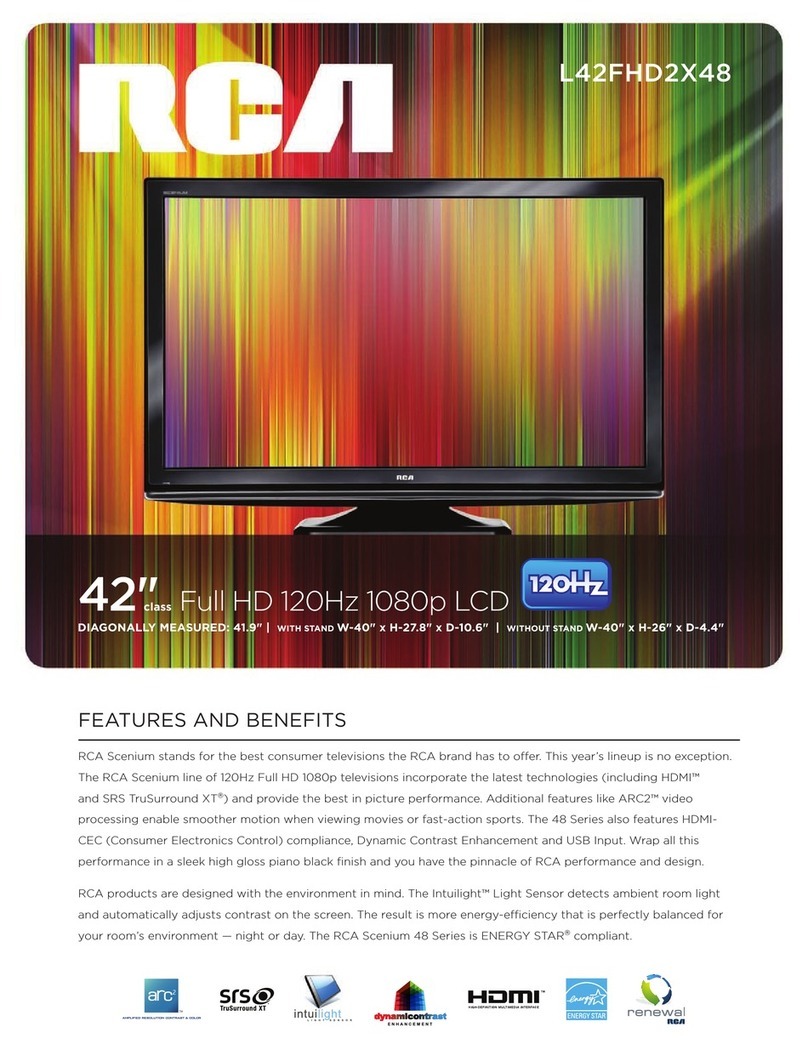
RCA L26WD23 User manual

26’’ LCD TV RCA L26WD23
1
Service
Service
Service
Horizontal Frequency
31~60 kHz
TABLE OF CONTENTS
Description Page Description Page
SAFETY NOTICE
ANY PERSON ATTEMPTING TO SERVICE THIS CHASSIS MUST FAMILIARIZE HIMSELF WITH THE
CHASSIS AND BE AWARE OF THE NECESSARY SAFETY PRECAUTIONS TO BE USED WHEN SERVICING
ELECTRONIC EQUIPMENT CONTAINING HIGH VOLTAGES.
CAUTION: USE A SEPARATE ISOLATION TRANSFOMER FOR THIS UNIT WHEN SERVICING
R FOR TH
UNIT WHEN S
CI
7.2.Power Board……………..………….……….......27
7.3.IR Board………………………………………….......30
7.4.Connector Board……………………..……….......30
7.5.Key Board……………………………….……….......30
8. White-Balance, Luminance Adjustment...................31
9 Block Diagram.……...........................................33
10. Schematic……………...…….……..………………..34
10.1 Main Board…….………..….…………….….......34
10.2. Power Board…………….……….………….......50
10.3. IR Board…………….……….………….…….......51
10.4. Key Board…………….……….………….......52
10.5. Side Board…………….……….……….…….......53
11. Exploded View..……………..........................…..54
12. BOM List……………….…………………………….56
Table Of Contents.......……..............................…........1
Important Safety Notice.......................................……......2
Revision List.…........................................……......3
1. General Specification..............................………........4
2. Operating Instructions…………………….……….......5
2.1. The Use Of Remote Control…….………….…….......5
2.2. To Use The Menus...…………………….……….......6
2.3. How To Connect…….…………………….……….....11
2.4. Front Panel Control Knobs……………….……….....15
4. Input/Output Specification…………....................…....16
5. Mechanical Instructions…………………….................18
6. Repair Flow Chart ……………………….…….…….....21
7. PCB Layout ………………..………………....….......25
7.1.Main Board…………..………………….……….......25

26’’ LCD TV RCA L26WD23
2
Important Safety Notice
Proper service and repair is important to the safe, reliable operation of all AOC Company Equipment. The service
procedures recommended by AOC and described in this service manual are effective methods of performing service
operations. Some of these service operations require the use of tools specially designed for the purpose. The
special tools should be used when and as recommended.
It is important to note that this manual contains various CAUTIONS and NOTICES which should be carefully read in
order to minimize the risk of personal injury to service personnel. The possibility exists that improper service
methods may damage the equipment. It is also important to understand that these CAUTIONS and NOTICES ARE
NOT EXHAUSTIVE. AOC could not possibly know, evaluate and advise the service trade of all conceivable ways in
which service might be done or of the possible hazardous consequences of each way. Consequently, AOC has not
undertaken any such broad evaluation. Accordingly, a servicer who uses a service procedure or tool which is not
recommended by AOC must first satisfy himself thoroughly that neither his safety nor the safe operation of the
equipment will be jeopardized by the service method selected.
Hereafter throughout this manual, AOC Company will be referred to as AOC.
WARNING
Use of substitute replacement parts, which do not have the same, specified safety characteristics might create
shock, fire, or other hazards.
Under no circumstances should the original design be modified or altered without written permission from AOC.
AOC assumes no liability, express or implied, arising out of any unauthorized modification of design.
Servicer assumes all liability.
FOR PRODUCTS CONTAINING LASER:
DANGER-Invisible laser radiations when open AVOID DIRECT EXPOSURE TO BEAM.
CAUTION-Use of controls or adjustments or performance of procedures other than those specified herein may
result in hazardous radiation exposure.
CAUTION -The use of optical instruments with this product will increase eye hazard.
TO ENSURE THE CONTINUED RELIABILITY OF THIS PRODUCT, USE ONLY ORIGINAL MANUFACTURER'S
REPLACEMENT PARTS, WHICH ARE LISTED WITH THEIR PART NUMBERS IN THE PARTS LIST SECTION OF
THIS SERVICE MANUAL.
Take care during handling the LCD module with backlight unit
-Must mount the module using mounting holes arranged in four corners.
-Do not press on the panel, edge of the frame strongly or electric shock as this will result in damage to the screen.
-Do not scratch or press on the panel with any sharp objects, such as pencil or pen as this may result in damage to
the panel.
-Protect the module from the ESD as it may damage the electronic circuit (C-MOS).
-Make certain that treatment person’s body is grounded through wristband.
-Do not leave the module in high temperature and in areas of high humidity for a long time.
-Avoid contact with water as it may a short circuit within the module.
-If the surface of panel becomes dirty, please wipe it off with a soft material. (Cleaning with a dirty or rough cloth may
damage the panel.)

26’’ LCD TV RCA L26WD23
3
Revision List
Version
Release Date
Revision Instructions
TPV Model
A00
Mar.-26-2007
Initial Release
E266MZNKW4RCN
E266MZNKW4RCNZ

26’’ LCD TV RCA L26WD23
4
1. General Specification
Items
Specification
LCD Panel
Panel Type
V260B1-L01
Driving system
TFT-LCD CMO Panel
Aspect Ratio
16: 9
Resolutions
1366 x768
Active Area
575.769 (H) x 323.712(V)
Pixel Pitch
0.1405 mm (H) X 0.4215 mm(V)
Display colors
16.2 million
Panel Typical Brightness:
500 cd/㎡
Panel Typical Contrast:
800:1
Color Temperature
Cool / Warm/normal
TV Function
TV Standard
NTSC/M
Color systems
NTSC
Video Inputs
AV
RCA x 1
Audio L/R x 1
S-Video
S-Video x 1
Audio L/R x 1
COMPONENT
Y,Cb,Cr x 1
Audio channel L / Rx 1
Audio Output
Audio Output: L / R
Speaker (built-in): Two 10W speakers
Headphone Mini-jack for stereo (3.5ø)
OSD language
English. French. Spanish
Wall Mount
VESA 100 x 100 mm
Power
Power Supply
AC100V~240V, 50/60Hz
Power Consumption
≤180W
Environment
Operating Temperature
+ 0 °C ~ + 40 °C
Storage Temperature
-10 °C ~ + 50 °C
Operating
10% ~ 85%

26’’ LCD TV RCA L26WD23
5
2. Operating Instructions
2.1. The Use of Remote Control
Arrows Used to highlight different items in the TV menu and to
adjust the menu controls.
Number Buttons Enter channel numbers. To enter a digital channel
with a sub-channel, enter the main channel, then press the SUB CH
button to enter the sub-channel and press OK.
CC Toggles through the CC settings: CC Off, CC On, and CC On
When Mute.
CH + or CH - Scans up or down through the current channel list.
Press once to change the channel up or down; press and hold to
continue changing channels.
CLEAR Removes any menu or display from the screen and returns
you to normal viewing.
DVD•VCR Places the remote in DVD or VCR mode. This button
lights when you press a valid button in DVD•VCR mode (see Modes of
Operation on page 24 for more information).
FAVORITE Press to browse the channels set in your Favorite
Channel list. Go to page 35 for more information.
FORMAT Press to change the size of the picture on-screen.
GO BACK Returns you to the previous channel.
GUIDE Displays an electronic program guide (when available).
INFO If no menus are on-screen, displays the channel banner; press
again to clear the screen.
INPUT Displays the available video input channels- Watch TV,
Composite, S-Video, Composite (Side), S-Video (Side), Component 1,
Component 2, VGA, HDMI 1 and HDMI 2.
MENU Displays the Main menu. If the main menu is displayed,
exits the menu; if a sub-channel is displayed, takes you back to the
previous menu.
MUTE Reduces the TV’s volume to its minimum level. Press again
to restore the volume. To program this button to work with an audio
system, follow the instructions for Volume Punch through Feature on
page 24.
OK When in the menu system, selects highlighted items.
ON•OFF When in TV mode, turns the TV on or off. If in another
mode (SAT•CBL or DVD•VCR) and programmed, will turn the device
on or off.
PRESETS Toggles through the picture mode settings: Natural,
Vibrant, Gaming, and Personal.
REVERSE, PLAY, FORWARD, RECORD, STOP, PAUSE (buttons at
bottom of the remote) If programmed, provides transport control
for some remote-controllable VCRs or DVD players.
SAT•CBL Places the remote in SAT•CABLE mode. This button
lights when you press a valid button in SAT•CBL mode (see Modes of
Operation on page 24 for more details).
SLEEP Sets the TV to turn off after 30 min, 60 min, or 90 min.
SOUND For an Analog channel, switches the sound mode options. For
a Digital channel,
switches the audio language. In VGA mode, switches to the audio input
you selected from the
VGA Sound Source option.
SUB CH When entering a digital channel that has a sub channel , press
this button to enter a
Sub channel . Once the channel is entered, press the OK button to tune
to the channel.
TV Turns on the TV and puts the remote in TV mode.
VOL –or VOL + Decreases or increases the TV’s volume. To program
this button to work

26’’ LCD TV RCA L26WD23
6
MAIN MENU
2.2 To Use the Menus
1. Press the MENU button.
2. Use the up and down arrow buttons to highlight an icon on the left and press the right arrow button to enter the
menu. The name of the menu is displayed at the top of the menu screen.
3. Press the up and down arrow buttons to move to a different option within the menu. If necessary, press the OK
button or right arrow to display the choices of the option you’ve highlighted or toggle through available options. If
available, use the information at the bottom of the screen for help.
4. To adjust controls, such as picture setting options, highlight the option and press OK. The option appears on the
bottom of the screen so you can see the option change as you adjust it.
5. To return to the previous menu, press the MENU button.
Signal Source If you connected cable to the ANTENNA/CABLE INPUT, select Cable TV. If you connected an
antenna to the ANTENNA/ CABLE INPUT, select Air (Antenna).
DTV Signal Strength Displays the signal strength of the digital channel that the TV is currently tuned to.
Auto Channel Search Searches for channels the signal is receiving.
Manual Channel Setup Displays the channel list, allowing you to add or delete channels. If a channel is Hidden and
you want it viewable as you change channels, select Viewable. If a channel is Viewable and you don't want it to
appear as you change channels, select Hidden.
Channel Labels Allows you to add or change a seven character label to a channel, which is displayed on-screen
when you tune to the channel. Press the up and down arrow button to scroll through the available characters.

26’’ LCD TV RCA L26WD23
7
Continue to press the right arrow button to highlight the next space to add another character.
Menu Language Allows you to change the language of the menu system.
Screen Format Allows you to change the format of the screen. If there are bars on-screen try a different format, if
available, that may eliminate the bars. Choose between Normal, Zoom, and Center.
Favorite Channel The channel you're tuned to is saved as a favorite channel when you turn the setting On. You can
have up to 10 favorite channels. Then use your FAV button on the remote to scroll through your favorite channels.
Picture Menu
Picture Preset Mode Displays a choice list that lets you select one of the preset picture settings: Vibrant, Cinematic,
Natural, Sports, Videogame, Video camera or Personal. Choose the setting that is best for your viewing
environment.
Contrast Adjusts the difference between the light and dark areas of the picture.
Brightness Adjusts the brightness of the picture.
Sharpness (not available in VGA mode) Adjusts the crispness of the edges in the picture.
Color (not available in VGA mode) Adjusts the richness of the color.
Tint (not available in VGA mode) Adjusts the balance between red and green levels.
Backlight Adjusts the level of light, depending on your room setting.
Note: When you change any of these picture settings, the Picture Preset Mode changes to Personal.
Advanced Picture Menu
Video Noise Filter Reduces picture “static” or any type of interference. This feature is especially useful for providing
a clearer picture in weak analog signal conditions. Choose between Off for no noise reduction; Low for a softer,
smoother picture that retains picture sharpness and detail; Medium for a slightly softer picture than the Low setting;
High for an even softer, smoother picture than the other settings (the picture detail is somewhat decreased).

26’’ LCD TV RCA L26WD23
8
Color Temperature Adjusts to make the picture appear more red or blue. Choose Warm for more red, Normal for
standard picture, and Cool for more blue.
3D Comb Filter If you have a device connected to the VIDEO INPUT helps to correct detail and color loss. Turn the
option On for improved video.
VGA Settings (only available in VGA mode)
Horizontal Position Adjusts the picture's position left or right.
Vertical Position Adjusts the picture's position upward or downward.
Clock Adjusts the clock sync of the picture.
Phase Adjusts the picture if there is flicker of screen letters, color misalignment, or blurring.
Auto Adjustment Adjusts the position of the picture automatically. Try it if the picture on the VGA input doesn't look
right.
Reset All Restores VGA Settings menu to the default settings.
Audio Menu
Bass Increases or decreases the bass of the sound.
Treble Increases or decreases the treble of the sound.
Balance Adjusts how much audio is sent to the left and right speakers.
Advanced Audio Menu

26’’ LCD TV RCA L26WD23
9
Audio Language (only available on digital channels) Press the right arrow to choose from the audio languages
available for the program you're watching. The language you choose becomes your preferred audio language for all
channels on the digital tuner until you turn the TV off. If the language you choose here is not being broadcast with a
program, then the TV plays the default audio for the program (usually English in the U.S.).
Digital Audio Output Lets you choose a setting for the DIGITAL AUDIO OUTPUT jack. Choose Digital to receive
Dolby Digital sound if transmitted and you've connected a six-channel receiver to the TV's output jack. Choose for
PCM if your audio receiver only handles PCM.
TV Speakers Turn on or off the internal speakers. If you have an audio amplifier device connected to the DIGITAL
AUDIO OUTPUT jack on the back of the TV and you want to control the sound by the audio amplifier device instead,
turn the option Off.
VGA Sound Source Allows you to listen to the audio from the VGA, COMPOSITE, or COMPONENT inputs while
tuned to the VGA input. Make sure the device connected to the input is turned on and the audio you want to hear is
playing.
Reset All Restores the Advanced Audio Menu to the default settings.
Options Menu
Set Time Lets you set the time zone and time.
Time Press the left or right arrow to set the time. The AM and PM setting changes when you get to 12 o'clock.
Note: If your TV loses power, you need to reset the time.
Sleep Timer Lets you set the TV to turn off after a given amount of time. Choose between Off, 30 min, 60 min, or 90
min.
Set Password Set the password used to lock parental controls.
Parental Controls The Parental Controls menu was explained in
Analog Captions Many programs are encoded with closed captioning information, which lets you display the audio
portion of a program as text on the TV screen. If you are unsure of the differences among the modes, you may

26’’ LCD TV RCA L26WD23
10
prefer to leave the closed captioned mode set to CC1, which displays complete text of the program in the primary
language in your area. Note that Closed captioning is not available on all channels at all times. Only specific
programs encoded with closed-captioning information.
Digital Captions If available, lets you select a closed caption mode for digital channels. Use Service1 if you are
unsure what to use.
Digital Captions Setup Customize the digital captions. A sample of how the digital captions might look appears at
the bottom of the screen. The options are:
Text Style If you want to customize the digital closed caption options, choose Custom. Choose As Broadcast to
have the options set for you. The following options are only available if you chose Custom as your Text Style:
Text Size Lets you set the size of the digital closed-caption text. You can choose Small, Normal, or Large.
Font Lets you select a character design for the digital closed caption text. A font is a complete assortment of letters,
numbers, punctuation marks, etc. of a given design. You can choose from a variety of fonts.
Text Color Lets you choose the color of the digital closed caption text: Red, Green, Blue, Yellow, Magenta, Cyan,
Black, or White.
Text Opacity Lets you set the appearance of the digital closed caption text: Transparent, Translucent, Solid, or
Flashing.
Background Color Lets you choose the color of the area behind the digital closed-caption text: Red, Green, Blue,
Yellow, Magenta, Cyan, Black, or White.
Background Opacity Lets you choose the opacity of the area behind the digital closed-caption text: Transparent,
Translucent, Solid, or Flashing.
Edge Effect Lets you set the effect of the font's edge: None, Raised, Depressed, Uniform, Left Shadow, or Right
Shadow.
Edge Color Lets you set the edge effect's color: Red, Green, Blue, Yellow, Magenta, Cyan, Black, or White.

26’’ LCD TV RCA L26WD23
11
2.3 How to Connect
There are several ways to connect your TV. Please use the following chart to determine which connection is best
for you.

26’’ LCD TV RCA L26WD23
12
Video (Basic) Connection
1. If necessary, connect your cable and/or off-air antenna as described
2. Connect your yellow video cable. Connect a video cable to the VIDEO Input jack on the back of the TV and to
the Video Output jack on the DVD player.
3. Connect your red and white audio cables. Connect the audio (red and white) cables to the AUDIO R and L
jacks on the back of the TV and to the Audio Output jacks on the DVD player.
Component Video (Advanced) Connection
1. If necessary, connect your cable and/or off-air antenna as described.

26’’ LCD TV RCA L26WD23
13
2. Connect your Y Pb Pr component video cables. Connect three video cables or special Y Pb Pr cables to the
COMPONENT VIDEO INPUT Y Pb Pr jacks on the back of the TV and to the Y Pb Pr outputs on the DVD player.
3. Connect your red and white audio cables. Connect the audio (red and white) cables to the COMPONENT
VIDEO INPUT AUDIO R and L jacks on the back of the TV and to the Audio Output jacks on the
DVD player.
HDMI Connection
VGA Connection

26’’ LCD TV RCA L26WD23
14
1. If necessary, connect your cable and/or off-air antenna as described.
2. Connect your monitor cable. Connect one end of a 15-pin monitor cable to the VGA INPUT jack on the TV and
the other end to the PC's video output jack. Note, if your PC's video output isn't 15-pin, you'll need an adapter that
can connect to a 15-pin monitor cable.
3. Connect your audio cable. Connect a 3.5 mm stereo mini pin cable (sometimes referred to as 1/8" stereo mini
pin) to the VGA AUDIO INPUT jack on the back of the TV and the other end to the Audio Output jack on the PC.

26’’ LCD TV RCA L26WD23
15
2.4 Front Panel Control Knobs
If you cannot locate your remote, you can use the buttons on the top of your TV to operate many of the TV’s features.
Mode L26WD23 buttons are located on the top panel.
MENU Displays the TV Main menu. If the main menu is displayed, exits the menu; if a sub menu is displayed, takes
you back to the previous menu.
CH∨Scans down through the channel list. In the TV menu system, acts like the down arrow button on the remote
control and adjusts menu controls.
CH∧Scans up through the channel list. In the TV menu system, acts like the up arrow button on the remote control
and adjusts menu controls.
POWER Turns the TV on and off.
VOL < Decreases the volume. In the TV menu system, acts like the left arrow button on the remote control and
adjusts menu controls.
VOL > Increases the volume. In the TV menu system, acts like the right arrow button on the remote control and
adjusts menu controls.
INPUT/OK Displays the available video input channels- Watch TV, Composite, S-Video, Composite (Side), S-Video
(Side), Component 1, Component 2, VGA, HDMI1 and HDMI2. When in the menu system displays sub-menus and
selects the highlighted item.

26’’ LCD TV RCA L26WD23
16
4. Input/Output Specification
4.1 RGB Signal input
15 - Pin Color Display Signal Cable
Pin No.
Description
Pin No.
Description
1
Red Video
9
Mandatory +5V Supply for PC Bypass
2
Green Video
10
Sync Ground
3
Blue Video
11
SDA(Remote Control)
4
SCL(Remote Control)
12
Bi-directional Data (SDA) for PC Bypass
5
Ground
13
H-Sync.
6
Red Video Ground
14
V-Sync.
7
Green Video Ground
15
Data Clock (SCL) for PC Bypass
8
Blue Video Ground
4.2 AV/S-Video/Component signal input
AV (Composite Video input)
Video1 / Video2
System
NTSC
Amplitude
1.0 V(p-p), negative sync.
Impedance
75 ohm terminated
S-Video (Y / C input)
S-Video1 / S-Video2
System
NTSC
Y signal amplitude
1.0Vpp (including sync)
C signal amplitude
0.286Vpp
Impedance
75 ohm terminated
Component (Y, Pb/Cb, Pr/Cr input)
Component1/Component2
System
1080i, 480p, 720p, 480i
Y signal amplitude
1.0Vpp (including sync)
Cr, (R-Y) / Cb, (B-Y)
Signal amplitude
±0.35Vpp, 75 ohm
Impedance
75 ohm terminated
Y = 0.299R + 0.587G + 0.114B
(R-
(B-
1
6
11
15
5
10

26’’ LCD TV RCA L26WD23
17
4.3 Compatible Mode Table
VESA MODES
Horizontal
Vertical
Mode
Resolution
Total
Nominal
Frequency
(KHz)
Sync
Polarity
Nominal
Freq.
(Hz)
Sync
Polarit
y
Nominal
Pixel
Clock
(MHz)
VGA
640x480@60Hz
800 x 525
31.469
N
59.940
N
25.175
640x480@72Hz
832 x 520
37.861
N
72.809
N
31.500
640x480@75Hz
840 x 500
37.5
N
75
N
31.500
SVGA
800x600@56Hz
1024 x 625
35.156
P
56.25
P
36.000
800x600@60Hz
1056 x 628
37.879
P
60.317
P
40.000
800x600@72Hz
1040 x 666
48.097
P
72.188
P
40.000
800x600@75Hz
1056 x 625
46.0875
P
75
P
49.5
XGA
1024x768@60Hz
1344x806
48.363
N
60.004
N
65.000
1024x768@70Hz
1328x806
56.476
N
70.069
N
75.000
1024x768@75Hz
1312x800
60.023
P
75.029
P
78.750
WXGA
1360x768@60Hz
1792x795
47.712
P
60.015
P
85.5

26’’ LCD TV RCA L26WD23
18
5. Mechanical Instructions
1. Remove the 4 screws to remove the base.
2. Remove the 5 screws to remove the rear cover.
3. Remove the side board.

26’’ LCD TV RCA L26WD23
19
4. Remove the 3 screws to remove the frame.
5. Remove the shielding.

26’’ LCD TV RCA L26WD23
20
6. Remove the screws and connectors in red to remove the main board, audio board and power board.
7. Remove the screws on the main frame to remove the bezel.
Table of contents
Other RCA LCD TV manuals

RCA
RCA LED29B30RQ User manual

RCA
RCA LED24G45RQ User manual

RCA
RCA RLC2609 User manual

RCA
RCA 26LA33RQ User manual

RCA
RCA LED32G45RQ User manual

RCA
RCA RLC3257B User manual

RCA
RCA L22HD41 - 22" LCD TV Quick start guide

RCA
RCA L19WD20 - 19" LCD TV Quick start guide

RCA
RCA L15D20 User manual

RCA
RCA L32HD35D - 32" 720P LCD/DVD Combo Service manual

RCA
RCA LED46C45RQ User manual

RCA
RCA LED60B55R120Q User manual

RCA
RCA L19WD20 - 19" LCD TV User manual

RCA
RCA SCENIUM L26WD14 User manual

RCA
RCA RLC4283A User manual

RCA
RCA 32LA30RQ User manual

RCA
RCA SCENIUM L37WD14 User manual

RCA
RCA RB32H1-EU User manual

RCA
RCA LED60B55R120Q User manual

RCA
RCA 46LA55R120Q User manual