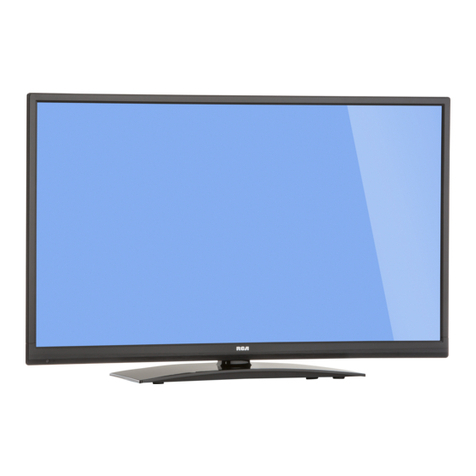
RCA DECK15DR User manual

For Sales Information Please Contact
RoadTrucker Inc (www.RoadTrucker.com)
8312 Sidbury Rd.
Wilmington, NC 28411
(800) 507-0482 / (910) 686-4281


Safety Precautions
Safety Strap
Caution: Pushing, pulling or climbing on the TV may cause the TV falling. Do not let chlidren climb or hang on the TV.
Always place the TV on a sturdy, level, sable surface that can hold the weight of TV. And if possible, secure the
TV according to the instruction below (Note: The fastening components such as screws are not supplied with TV).
Step one: Insert the M4 mounting screws into the upper two wall mounting screw holes and fasten them (Figure A).
Step two: Insert anchors to wall and connect the bolts and anchors with ropes or chains (Figure B).
Figure A Figure B
M4 Screws
Wall

Caution and Warning
WARNING: TO REDUCE THE RISK OF FIRE OR ELECTRIC SHOCK, DO NOT EXPOSE THIS APPLIANCE TO RAIN
OR MOISTURE.
CAUTION: CHANGES OR MODIFICATIONS NOT EXPRESSLY APPROVED BY THE PARTY RESPONSIBLE FOR
COMPLIANCE WITH THE FCC RULES COULD AVOID THE USERS AUTHORITY TO OPERATE THIS
EQUIPMENT.
This equipment has been tested and found to comply with the limits for a Class B digital device, pursuant to Part 15 of
the FCC rules. These limits are designed to provide reasonable protection against harmful interference in a residential
installation. This equipment generates, uses and can radiate radio frequency energy and, if not installed and used in
accordance with the instructions, may cause harmful interference to radio Communications. However, there is no
Guarantee that interference will not occur in a particular installation. If this equipment does cause harmful interference
to radio or television reception, which can be determined by turning the equipment off and on, the user is encouraged
to try to correct the interference by one or more of the following measures:
- Reorient or relocate the receiving antenna.
- Increase the separation between the equipment and the receiver.
- Connect the equipment into an outlet on a circuit different from that to which the receiver is connected.
- Consult the dealer or an experienced radio/TV technician for help.
CAUTION
RISK
OF
ELECTRI C
SHOCK
DO NOT OPEN
symbol, within an equilateral triangle
is intended to alert the user to the
presence of uninsulated dangerous
voltage within the product enclosure
consitute a risk of electric shock.
The exclamation point within an
equilateral triangle is intended to
alert the user to the presence of
important operating and maintenance
(servicing) instructions in the literature
accompanying the TV.
FCC Notice
FCC Information
High voltages are used in the operation of this television
receiver. Do not remove the cabinet back from your set.
Refer servicing to qualified service personnel.
To prevent fire or electrical shock hazard, do not expose
the television receiver to rain or moisture.
Do not drop or push objects into the television cabinet
slots or openings. Never spill any kind of liquid on the
television receiver.
Do not block the ventilation holes in the back cover.
Adequate ventilation is essential to prevent failure of
electrical components.
Do not trap the power supply cord under the television
receiver.
Never stand on, lean on, or suddenly push the television or
its stand. You should pay special attention to children.
Serious injury may result if it falls.
Do not place your television on an unstable cart, stand,
shelf or table. Serious injury to an individual , and damage
to the television, may result if it falls.
When
the
televisio n
receiver
is
not
used
for
an
extended
period
of
time,
it
is
advisable
to
disconnect
the
AC
power
cord
fro m
the
AC
outlet .
Avoid exposing the television receiver to direct sunlight
and other sources of heat. Do not stand the television
receiver directly on other products which give off heat,
e.g. video cassette players and audio amplifiers. Do not
place naked flame sources, such as lighted candles on
the television.
Dim:515*320mm(
If the television is to be built into a compartment or similar
enclosure, the minimum distances must be maintained. Heat
build-up can reduce the service life of your television, and
can also be dangerous.
1
Table of Contents
2
W arnings
Features
Introduction
Input terminals used for external equipment connection
l TV adopts TFT LED display screen
l HDTV Compatible( 480p,720p, 1080i, 1080p)
l Support American TV Standard 8VSB/Free 64/256QAM,NTSC System, ATSC System
l Connect to computer directly to realize TV/monitor combo.
l Zero X radiation complies to green environment protection requirement
l Advanced Chroma Processing
l Closed captioning/PARENTAL LOCK
l SAP/STEREO/MONO; ATSC.
l HDMI input
l USB input
Troubleshooting 25
Introduction
Features
Specifications
2
3
Accessories
General Description
Overview of front and side panel
Overview of back panel
Overview of remote control
4
4-7
4
5
6
External Connection
Connecting VCR
9
10
8
PICTURE
SOUND
18
Basic operation
Turning the TV On and Off
15
15
16
OSD Menu Operations
BASIC OPERATION 16
17
Picture defects and the reason 26
8
SETUP
CHANNEL
19
20
Connecting DVD Player/Set-Top Box via HDMI
Connecting DVD Player/Set-Top Box
Connecting Digital Audio System
Connecting Amplifier/DVD Home Theater
Connecting PC
Connecting a Headphone
11
12
13
14
DVD OPERATION
DVD Setup Menu
23
24
USB
USB Operation
21
22
One ANTENNA input
One computer VGA/PC inpu One PC Audio input t
One HDMI input One AV input
One USB input
One EARPHONE out put
One YPbPr input
One Coaxial output
One S-Video input
R/L output Audio
27
28

34
Fine digital control
NTSC3.58
75W (Unbalance)
2 x 5 W
24 W
Color active matrix LED display
NTSC System, ATSC System
Antenna: 2~69; Cable: 1~135 (Analog: 1-125,
Digital: 1-135)
Note:
Introduction
W arnings
Specifications
DC 3V (Two AAA size batteries)
o
0C-40C
o
Design and specification modification maybe made at any time without
prior notice; all data and dimensions are approximations.
Power supply
1366X768
DECK15DR
Model
Please make sure the following items are included with your LED TV. If any items are
missing, contact your dealer.
Accessories
Remote Control &
Batteries (AAAx 2)
General Description
Overview of front and side panel
DC 12V 3A
Adapter
Power Cord
SPEAKER
REMOTE CONTROL SENSOR
Aim the remote control towards this
spot on the TV.
POWER INDICATOR
Green: In power on mode.
Red: In standby mode.
Toggles between all the available input
sources ( TV, AV, S-VIDEO, Component,
CH+/-
Press to change channels.
In the on-screen menu, use the CH +/-
buttons as up/down arrow buttons.
VOL+/-
Press to increase or decrease the volume.
In the on-screen menu, use the VOL +/-
buttons as left/right arrow buttons.
POWER
Press POWER button to toggle between
and standby mode.normal
MENU
Press to see an on-screen menu of your
TV's features.
SOURCE
45
6
78
9
10
After placed a disc in the disc tray,
press button to play the disc,and
press button twice to pause.
9
10
DVD, HDMI, VGA, USB)
Press the button when the power is
on the disc will eject, Press button
again the disc is pulled in automatically.
15.8 x 4.7 x 11.9 inch
Owner’s
Instructions
Car charger cable

HDMI
IN
VGA
IN
R
L
VIDEO
IN
PC
AUDIO
IN
DC 12V
IN
Pr
Pb
Y
IN
56
General Description
Overview of back panel
RF
IN
EARPHONE
OUT USB
R
L
COAXIAL
OUT
S-VIDEO
IN
1 2 3 4 5 6 7
8
9
10
11
12
13
1. POWER( ) input
2. HDMI
3.
4. PC AUDIO
5.
6.
DC 12V
Audio input for external devices
7.
Connect to the HDMI jack of a device
with an HDMI output.
VGA/PC IN
Connect to the video output jack on
your PC.
COMPONENT
Connect Component video.
COMPOSITE VIDEO
Video input for external devices, such
as a camcorder or VCR.
COMPOSITE COMPONENT AUDIO
Audio inputs for external devices.
8. S-VIDEO
Connect an S-VIDEO signal from a
camcorder or VCR...
9. COAXIAL
10.
11.RF
12.EARPHONE
13.USB
USB input
Connect to a Digital Audio devices.
AUDIO OUT
Connect to the audio output jacks
on your amplifier/home theater.
Connect to an antenna or cable
NTSC & ATSC.
Connect a set of phone for private
listening
Overview of remote control
General Description
POWER: Turn the TV on or off.
MUTE: Press to mute the sound, Press again to regain
the sound.
0-9: Press 0-9 to selet a TV channel directly The channel
will change after 2 seconds. Applicable for entering page
number in teletext mode and so on.
-/--: Press this button firstly when the channel to be
selected is two or three figures (only DVD mode).
RETURN: Return to the previously viewed program.
P.MODE: Select the picture mode.
S.MODE: Select the sound mode.
SOURCE: Press to select signal source for TV.
VOL+/-: Press these two buttons to increase/decrease the
sound volume.
CH+/-: Press these two buttons to change channels
sequently.
▲▼◀▶/enter: Allows you to navigate the on-screen
menus and adjust the system settings to your
preference.
EXIT: Exit from the menu or sub menu.
MENU: Allow you to navigate the on-screen menus.
EPG: Press to display EPG (Electronic Program Guide) in
formation.
INFO: Displays the channel in formation.
ZOOM: Press to change the screen scale.
MTS: Press to select the audio channels.
LOCK: Press to display the parental menu.
: Open/close in DVD mode.
TIME: Press to display Time menu.
SETUP: DVD system setup.
FREEZE: Press to freeze the screen.
DISPLAY: Press to display the program’s in formation.
CC: Press to display the closed caption.
AUDIO: Press to display the language of the audio in DTV
or DVD mode.
LIST: Press to display the TV program list.
GOTO: Press this button to go to desired position The
player provides 3 search mode.
FAV: Press to display the favorite programs.
SUBTITLE: Press to select the subtitle language.
ADD: Add this program to the favorite language.
ERASE: Delete this program from the favorite channels
list.
FAV+/-: Press this button +/- the favorite program list.
A-B: Repeat play the segment between A and B.
SLEEP: Set up the time how long the TV will turn off.
TIME: Press to display tine menu.
MENU: TV system setup.
PBC: Press this button can return to the menu of the disc,
then play the disc from the first track.
: Play / Pause.
: Stop playing.
:Play fast backward / forward.
: Play previous / next media file.
REPEAT: Press to change the playing mode.

78
SLEEP
P.MODE
S.MODE
LIST
1 2 3
SOURCE
+-./ ABC DEF
DTV
Installing Batteries in the Remote Control
Installing BatteriesInstalling Batteries
1Open the battery compartment
cover on the back side.
2Insert two 1.5V AAA size batteries in
correct polarity. Don´t mix old or used
batteries with new ones.
3Closed the cover.
Point the remote towards the remote
control sensor of the wireless TV and
use it within 7 meters.
Put the used batteries into the recyc-
ling bin since it can negatively affect
the environment.
General Description
Battery
Cover
2xsize AAA 1.5V
Battery
Cover
Antenna connection
Antenna input impedance of this unit is 75ohm. VHF/UHF 75ohm coaxial cable can be
connected to the antenna jack directly, if the antenna cable is 300ohm parallel flat feeder
cable, you need to use the 300ohm/75ohm converter to connect the antenna cable to the
antenna jack. For details Please refer to the following drawing.
Use a 75ohm - 300ohm converter
300ohm coaxial cable
Antenna feeder
ANT IN
75ohm coaxial cable
Antenna cable
Antennas with 300ohm flat twins Leads Antennas with 75ohm Round Leads
External Connection
The batteries shall not be eposed to ecessive heat such as sunshine
fire of the like.
External Connection
Connecting VCR
These instructions assume that you have already connected your TV to an antenna or a
cable TV system. Skip step 1 if you have not yet connected to an antenna or a cable
system.
Follow the instructions in Viewing a VCR or Camcorder Tape to view your VCR tape.
Each VCR has a different back panel configuration.
When connecting a VCR, match the color of the connection terminal to the cable.
We recommend the use of cables with a Ferrite Core.
1. Unplug the cable or antenna from the back of the TV.
2. Connect the cable or antenna to the ANT IN terminal on the back of the VCR.
3. Connect an RF Cable between the ANT OUT terminal on the VCR and the ANT IN
terminal on the TV.
4. Connect a Video Cable between the VIDEO OUT jack on the VCR and the VIDEO IN
jack on the TV.
5. Connect Audio Cables between the AUDIO OUT jacks on the VCR and the AUDIO L and
AUDIO R jacks on the TV.
If you have a mono (non-stereo) VCR, use a Y-connector (not supplied) to hook up to
the right and left audio input jacks of the TV. If your VCR is stereo, you must connect
two cables.
VCR Rear Panel
Audio Cable (Not supplied)
Video Cable (Not supplied)
RF Cable (Not supplied)
HDMI
IN
VGA
IN
R
L
VIDEO
IN
PC
AUDIO
IN
DC 12V
IN
Pr
Pb
Y
IN
RF
IN
EARPHONE
OUT USB
R
L
COAXIAL
OUT
S-VIDEO
IN

External Connection External Connection
and the AUDIO OUT jacks on the DVD player.
the TV and the COMPONENT [Y, PB, PR] jacks on the DVD player.
Connecting DVD Player/Set-Top Box
The rear panel jacks on your TV make it easy to connect a DVD to your TV.
Component video separates the video into Y (Luminance (brightness)), Pb (Blue) and Pr
(Red) for enhanced video quality.
Be sure to match the component video and audio connections.
For example, if connecting the video cable to COMPONENT IN, connect the audio
cable to COMPONENT IN also.
Each DVD player/STB has a different back panel configuration.
When connecting a DVD player/STB, match the color of the connection terminal to the
cable.
We recommend the use of cables with a Ferrite Core.
1. Connect a Component Cable between the COMPONENT IN [Y, PB, PR] jacks on
2. Connect Audio Cables between the COMPONENT IN [R-AUDIO-L] jacks on the TV
Connecting Digital Audio System
The rear panel jacks on your TV make it easy to connect a Digital Audio System to your TV.
5.1 CH audio is possible when the TV is connected to an external device supporting 5.1
CH.
We recommend the use of cables with a Ferrite Core.
1. Connect an COAXIAL Cable between the SPDIF jacks on the TV and the Digital Audio
jacks on the Digital Audio System. When a Digital Audio System is connected to the Input
SPDIF terminal: Decrease the gain (volume) of the TV, and adjust the volume level with
the system's volume control.
COAXIAL Cable (Not supplied)
Digital Audio System
HDMI
IN
VGA
IN
R
L
VIDEO
IN
PC
AUDIO
IN
DC 12V
IN
Pr
Pb
Y
IN
RF
IN
EARPHONE
OUT USB
R
L
COAXIAL
OUT
S-VIDEO
IN
910
HDMI
IN
VGA
IN
R
L
VIDEO
IN
PC
AUDIO
IN
DC 12V
IN
Pr
Pb
Y
IN
RF
IN
EARPHONE
OUT USB
R
L
COAXIAL
OUT
S-VIDEO
IN
Audio Cable (Not supplied)
Component Cable (Not supplied)
DVD Player/Set-Top Box

Audio Cable (Not supplied)
Amplifier/DVD Home Theater
HDMI
IN
VGA
IN
R
L
VIDEO
IN
PC
AUDIO
IN
DC 12V
IN
Pr
Pb
Y
IN
RF
IN
EARPHONE
OUT USB
R
L
COAXIAL
OUT
S-VIDEO
IN
Each external input source device has a different back panel configuration.
When connecting an external device, match the color of the connection terminal to the
cable.
We recommend the use of cables with a Ferrite Core.
1. Connect Audio Cables between the AUDIO L and R OUT on the TV and AUDIO IN [R-
AUDIO-L]on the Amplifier/DVD Home Theater.
When an audio amplifier is connected to the AV OUT [R-AUDIO-L] terminals: Decrease
the gain (volume) of the TV, and adjust the volume level with the Amplifier's volume control.
External Connection External Connection
Connecting Amplifier/DVD Home Theater Connecting DVD Player/Set-Top Box via HDMI
This connection can only be made if there is a HDMI Output connector on the external
device.
What is HDMI.
HDMI, or high-definition multimedia interface, is a next-generation interface that enables
the transmission of digital audio and video signals using a single cable without
compression.
Multimedia interface is a more accurate name for it especially because it allows multiple
channels of digital audio (5.1 channels).
The difference between HDMI and DVI is that the HDMI device is smaller in size, has the
HDCP(High Bandwidth Digital Copy Protection) coding feature installed, and supports
multi-channel digital audio.
Each DVD player/STB has a different back panel configuration.
We recommend the use of cables with a Ferrite Core.
1. Connect an HDMI Cable between the HDMI connector on the TV and the
HDMI connector on the DVD player/Set-Top Box.
HDMI Cable (Not supplied)
DVD Player/Set-Top Box
HDMI
IN
VGA
IN
R
L
VIDEO
IN
PC
AUDIO
IN
DC 12V
IN
Pr
Pb
Y
IN
RF
IN
EARPHONE
OUT USB
R
L
COAXIAL
OUT
S-VIDEO
IN
11 12

14
External Connection
Connecting PC
Each PC has a different back panel configuration.
The HDMI jacks do not support PC connection.
We recommend the use of cables with a Ferrite Core.
1. Connect a D-Sub Cable between RGB/PC IN connector on the TV and the PC output
connector on your computer.
External Connection
2.Plug PHONE out connector into PHONE out jack on the TV the TV speaker will
be muted.
D-Sub Cable (Not supplied)
PC
Phone In
HDMI
IN
VGA
IN
R
L
VIDEO
IN
PC
AUDIO
IN
DC 12V
IN
Pr
Pb
Y
IN
RF
IN
EARPHONE
OUT USB
R
L
COAXIAL
OUT
S-VIDEO
IN
3. Connect the PC audio input jackc on the TV
Input Mode
Air
Cable
8VSB
Free 64/256QAM
CVBS NTSC 3.58
Supporting signals
Component
VGA/PC
480p/60Hz
720p/60Hz
1080i/60Hz
HDMI
640x480/60Hz
800x600/60Hz
1024x768/60Hz
480p/60Hz
720p/60Hz
1080i/60Hz
1360x768/60Hz 1080p/60Hz 1080p/60Hz
USB
Dat eTr ave r
HDMI
IN
VGA
IN
R
L
VIDEO
IN
PC
AUDIO
IN
DC 12V
IN
Pr
Pb
Y
IN
RF
IN
EARPHONE
OUT USB
R
L
COAXIAL
OUT
S-VIDEO
IN
13
Headphone Cable

15 16
Turning the TV On and Off
1. Insert the power cord plug into a polarized AC
outlet.
2. Press POWER button on the remote control or
button on the LED TV.
3. Normal picture will be displayed on the screen after
6 seconds. If no signal input, "No Signal" will be
displayed on the screen.
4. If temporary POWER off is required, press POWER button on the remote control or
button on the LED TV.
5. If you want to completely switch off the power for this unit, unplug the power cord plug
for this unit.
6. After switching off the unit, you should turn on the TV again at least 5 seconds later.
Status indication lamp
Green: In power on mode.
Red: In standby mode.
Auto power off
If there is no signal input in any Mode, the TV will automatically accesses the standby
state in about 15 minutes.
Memory before turning TV off
The settings of picture and the preset channels will be memorized at turning off the unit.
When being started up again, the unit will work according to the mode set before being
turned off.
1How to turn the TV on or off
Basic Operation
Press SOURCE button to display the
input source
list;
Press ▼/▲ button to select the input
source you
want to watch;
Press ENTER button to enter
the input
source;
Adjust the OSD Screen
OSD Menu Operations
Press MENU button to display the MAIN OSD MENU.
Press button to select the MENU you want.
Press button to enter the sub menu.
You can use MENU or EXIT button to save and return back to the previous menu.
Press button to select the option and then press to adjust the value in
the value in the sub menu.
◀/▶
▼/▲
▼/▲ ◀/▶
BASIC OPERATION
INPUT SOURCE
TV
AV
S-VIDEO
Component
HDMI
VGA
USB
DVD
Picture Mode < Standard >
Contrast
Brightness
Color
Tint
Sharpness
Advanced Video >
Select Move Exil
MENU
50
50
50
0
50

17 18
Adjust the OSD Screen
OSD Menu Operations
PICTURE
The PICTURE menu offers options to enhance and refine the picture displayed
on your TV based on ambient room light and personal prefer-ences.
Adjustment options include PICTURE MODE,CONTRAST,BRIGHTNESS,
COLOR, TINT,SHARPNESS,
How to Navigate:
Press the MENU button on the remote control. then press◀/▶ buttons to
select PICTURE. Press the down ▼ button to highlight PICTURE MODE,
then press the ◀/▶ button to select your viewing preference from 4 factory
options: Custom > Soft > Vivid > Standard.
The Standard setting is recommended for most viewing environments. Depending
on the ambient light level in the room, you may select one of the other options
more pleasing. To make more critical adjustments based on your own preferences
in Custom :
Press ▼ button to highlight Constrast/brigthness/Color/Tint/Sharpness. then
press◀/▶ buttons to increase or decrease the option.
button to highlight Constrast/ Brigthness/ Color/ Tint/ Sharpness. then press
Press ▼ button to highlight Advanced Video. then press the ◀/▶ button to select
Color Temp, Aspect Ratio, Noise Reduction, Adaptive Contrast, Auto Zoom,
Color Range.
Press ▼ / ▲ button to select the option and then press◀/▶to adjust the value
in the sub menu;
NOTE:
Contrast: This item can adjust the highlight intensity of the picture, but the shadow
of the picture is invariable.
Brightness: This item can adjust the optical fiber output of the entire picture, it
will effect the dark region of the picture.
Color: This item can adjust the saturation of the color based on your own like.
Tint: This item may use in compensating color changed with the transmission in the
NTSC code.
Sharpness: This item can adjust the peaking in the detail of the picture.
OSD Menu Operations
Adjust the OSD Screen
The Sound menu offers options to make sound enhancements while listening
through the built-in speakers
How to Navigate:
Press the MENU button on the
remote control. then press ◀/▶
buttons to select Sound. Press
the▼ button to highlight
Sound Mode, then press the
◀/▶ button to select your sound
preference from 6 factory
options: Standard> News >
Music > Movie > Sport >
Custom.
SOUND
Souund Mode < Custom >
Bass
Treble
Balance
Surround
AVC
Digital output
Audio Language
< Off >
< PCM >
< Off >
< English >
Select Move Exil
MENU
75
70
50
Picture Mode < Standard >
Contrast
Brightness
Color
Tint
Sharpness
Advanced Video >
Select Move Exil
MENU
50
50
50
0
50
< Normal >Color Temp
Aspect Ratio
Noise Reduction
Adaptive Contrast
Auto Zoom
Color Range
Select Move
< 16:9 >
< Weak >
< On >
< Off >
< Full >
Exil
MENU

19 20
OSD Menu Operations
Adjust the OSD Screen
To make more critical sound adjustments based on your own preferences in Custom :
Press▼ button to highlight Bsaa/ Treble/ Balance. then press the
increase or decrease the option.
Press▼ button to highlight Surrond, the press the ◄ / ► buttons to select it ON or OFF.
Press▼ button to highlight AVC. then press the◄ /► buttons to select it ON or OFF.
Press▼ button to highlight Audio Language. then press the◄ /► buttons to select the
language you want. This is only available in digital TV.
NOTE:
Balance: This item can adjust the speaker’s output, it enables you to listen to
best at your position.
Surround: The choice of this item can suit the big space or the encirclement sound
effect pattern,
according toreceiveing the broadcast signal or the external input source.
AVC: This item uses for reducing the difference between channel and program’s
volume automatically.
it made the overall water to be even. This function will also reduce the fluctuation
of the sound.
◄ / ► buttons to
SETUP
In the Setup menu you may change some preferences that include Sleep Time,
Time Zone and so on.
How to Navigate:
Press the MENU button on the remote control. Navigate using ◄ /► buttons to
select Setup. Gain access to display op tionsb y press ing down▼arrow butt on to
highlight Parental Controls or other options, then press ◄ /► buttons on your
remote to select.
Adjust the OSD Screen
OSD Menu Operations
Press▼ button to highlight Parental Controls. then press the buttons to
select Enter Password.
Press▼ button to highlight Time. then press the◄ /► buttons to select Sleep Time,
Time Zone, DST, Time style, clock.
Press▼ button to highlight Closed Caption. then press ◄ / ► buttons to enter sub-menu.
Press▼ button to highlight Menu Settings. then press ◄ / ► to adjust the value in
the sub menu;
Press▼ button to highlight VGA Settings. This is only available in PC source.
Press▼ button to highlight Restore Default. then press the ► buttons to reset .
NOTE:
Enter Password: factory default code is “9999”
Sleep Time : This item can close done the TV automatically.
Time Zone : This item can select the area.
Clock : This item will change with the area which you have selected in Time Zone.
This is only vailable in PC source.
Restore Default: lt will replace the picture establishment for default value.
◄ / ►
CHANNEL
How to Navigate:
Press the MENU button on the remote control. Navigate using buttons to select
Channel.
◄ / ►
< Air >Air/Cable
Auto Scan
Favorite
Show/Hide
Channel No.
Channel Label
Select Move
>
>
>
< 11.1 >
>
DTV Signal Weak
Exil
MENU
>Parental Controls
Time
Closed Caption
Menu Settings
VGA Settings
Restore Default
Select Move
>
>
>
>
>
Exil
MENU
Press ▼ / ▲ button to select Air/Cable, then press button to select Air or Cable.
Press ▼ / ▲ button to select Auto Scan, then press ENTER or▶button to enter sub menu.
Press ▼ / ▲ button to select Favorite, then press ENTER or▶button to enter sub menu.
Press ▼ / ▲ button to select Show/Hide, then press ENTER or▶button to enter sub menu.
Press ▼ / ▲ button to select Channel No., then press◀/▶button to select what you
want watch.
Press ▼ / ▲ button to select Channel Label, then press ENTER or▶button to enter sub menu.
You can input alphabet or the digital number to change the name of the channel.
◀/▶

USB
USB Operation
Note: Before operating Media menu, Plug in USB device, then press SOURCE
button to set the Input Source to USB.
Press button to select Photo/Music , and then press ENTER button to enter.◄ / ►
Playing Photo
It is available to playback the JPEG photo files from the USB device.
Press ▼ / ▲ button to select the photo you want to watch, and then press ENTER
button to play.
Press ▼ / ▲ button to play previous or next photo.
Press button to rotate the photo.◄ / ►
USB
USB Operation
Playing Music
It is available to playback the music files in the formats MP3 from the
USB device.
Press ▼ / ▲ button to select the music you want to listen, and then press ENTER
button to play.
Press button to select menu in the botton you want to run, and then press
ENTER bitton to operate.
Press exit button to back to the previons menu.
◄ / ►
21 22
USB
USB
Photo
USB
C
C:\
001/001
:0
0 Bytes000 x 000Total Size 3.7 CB
Unused Size 3.7 CB
USB
C . jpg
Photo
dsjf. jpg
006822. jpg
dsf682. jpg
llhr. jpg
aiwwa992. jpg
C
C:\USB\
001/001
:0
891.9 KB1880 x 1180Total Size 3.7 CB
Unused Size 3.7 CB
Music
USB
Photo
56767129. mp3
006822.
dsf682.
llhr.
aiwwa992.
mp3
mp3
mp3
mp3
C
C:\USB\
001/001
:0
Total Size 3.7 CB
Unused Size 3.7 CB
Music
56767129.mp3
Title:
Artist:
Album:
Year:
Bit Rate: 96kbps
Play
00:23 04:23
RandomRandom

23 24
DVD OPERATION
DVD Support List:
1.TV DISPLAY: Set the ratio of output
to the television signal options are:
Normal/PS(4:3 Pan
Scan),Nomal/PS(4:3 Letter Box),Wide
the current default settings is wide.
2.OSD Lang: Set the OSD language
options.
3.CAPTION: Play the enclosed
captions on some DVD titles, Optional
settings: ON/OFF.
4.LAST MEMORY: Save the last to
open with the related options are:
ON/OFF.
INITIAL SETTING(DVD)
Multi
MULTI
Default Password is 8888.
5.
6.
7.Default: This option will resume the
original settings of this player.

25 26
Picture defects and the reason
8
MUTE
Troubleshooting
plugged in.
been
Snowy Picture

27 28
For Sales Information Please Contact
RoadTrucker Inc (www.RoadTrucker.com)
8312 Sidbury Rd.
Wilmington, NC 28411
(800) 507-0482 / (910) 686-4281
Table of contents
Other RCA LED TV manuals

RCA
RCA Scenium SRC5565-UHD User manual

RCA
RCA RLEDV2488A User manual

RCA
RCA RLDED5078A-F User manual

RCA
RCA RNSM2403 User manual

RCA
RCA RLDED3932A-RK User manual

RCA
RCA RLED2265A User manual

RCA
RCA LED46C45RQ User manual

RCA
RCA J24HE842 User manual

RCA
RCA RLDED4016A-D User manual

RCA
RCA RTU6549-B User manual