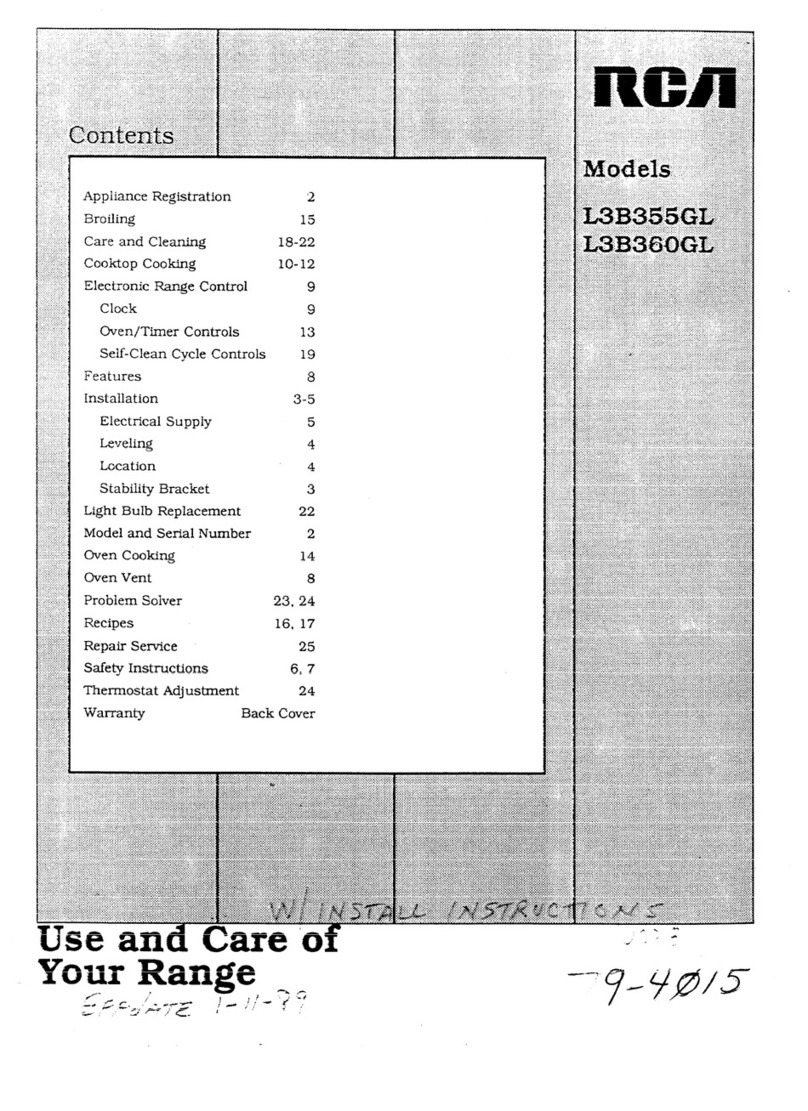
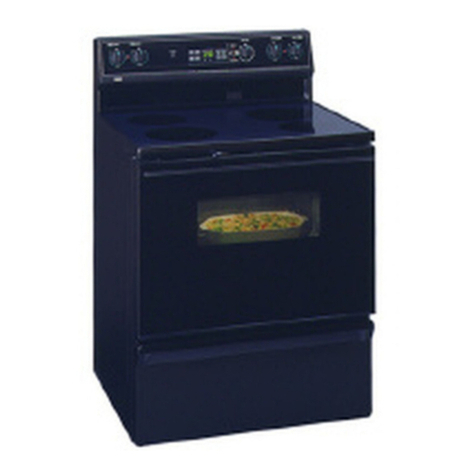
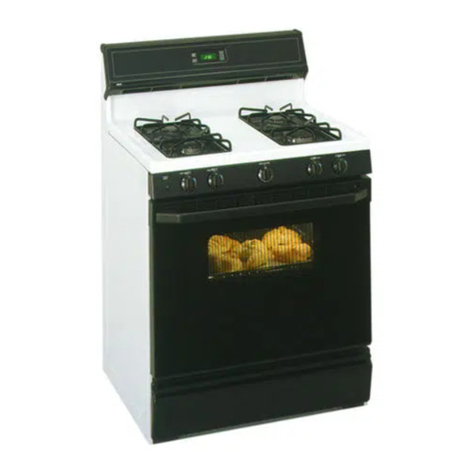
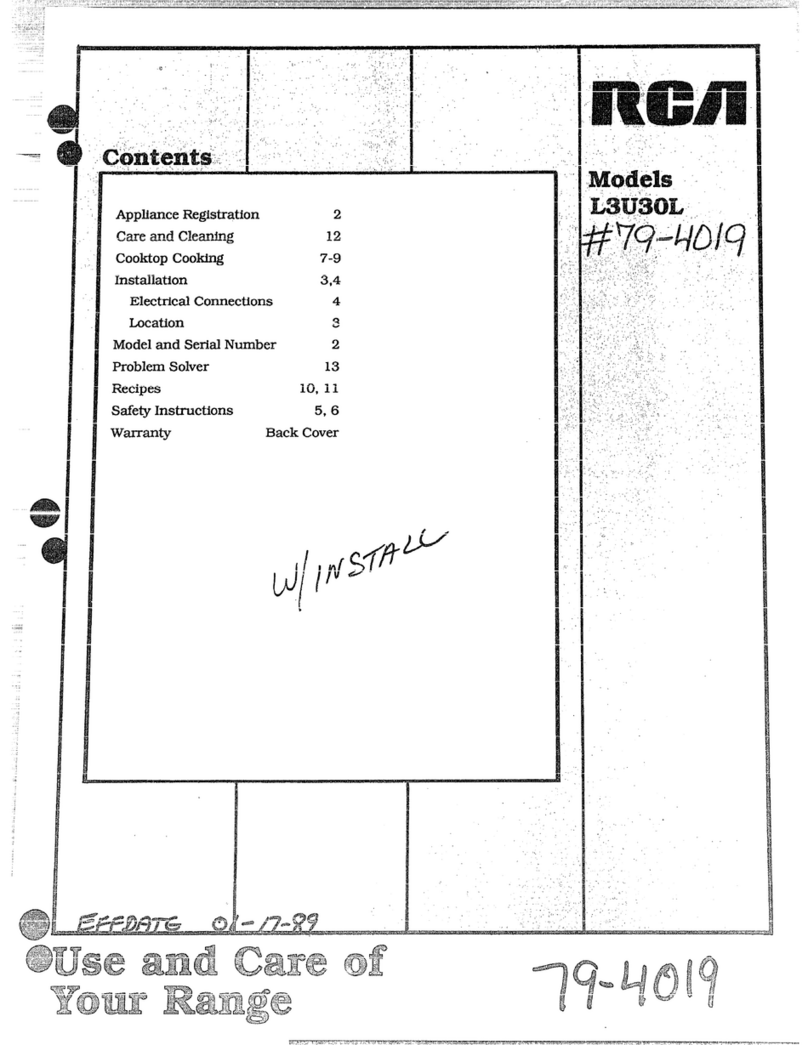
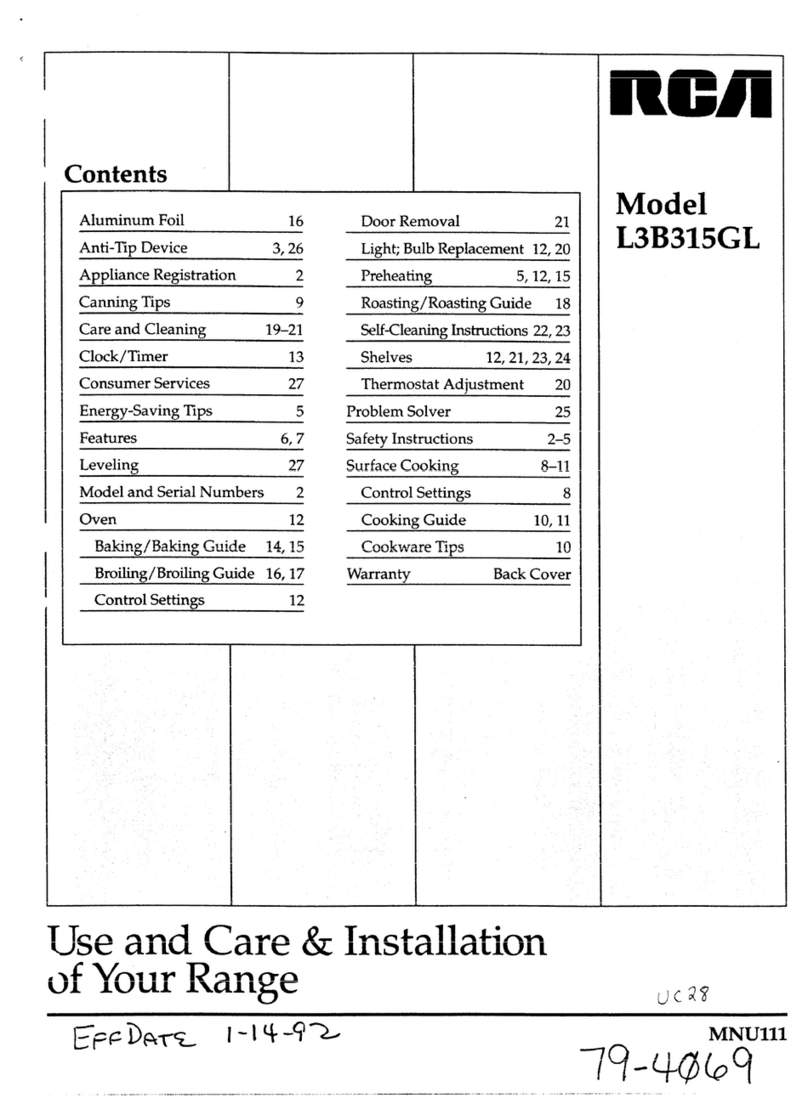
RCA L2B335GEL User manual

.
...—-
... ..
;
/!
AhnnFo
T17
Pro
So
2
SaInst
2-
AntiDev
3,
SuCoo
7
ApplRegis
2
Caa Clea
16
BuGr
1
Clock
9Bu
1
CoSet
7
ConsServ
3
ConPa
:1
Feat
6
FloountRa2
Grou
3
InstalInstr
26
CooT7
DP1
FlS7
War
B C
Leve
3
LifCoo
—
MoaSerNum2,
Ov
8
AAdjus
23,
BakingGu1 1
BroilingGu1 1
ConSett
9 1
DoRem
1
Prehe
1
RoastingGu1
She
8U1
ThermAdju2
VeDu
8
---lliseandCare&
iYRange
-...,
.—.:
.(J’4!-, (
j\\,;
-.
o’. (

Readthisibookearefdhy.
Ikintetheyopea
maifitainyournewrangeproperly.
Keepithandyforanswerstoyour
questions.
IfyoLldon’tunderstandsomething
or needmore help,write (include
yourphonenumber):
ConsumerRelations
AppliancePark
Louisville.KY40
Wri
dothemaid
aserialmmdws.
You’llfindthemon alabellocated
behindthe storagedrawerpanelon
theleftsideoftherangefront
frame. Seepage6.
Thesenumbersare also on the
ConsumerProductOwnership
RegistrationCard that camewith
yourrange. Beforesendingin this
card, please write these numbers
here:
ModelNumber
Serial Number
Usethese numbersin any
correspondenceor service calls
concerningyour range.
2
Ifyoureceived
adamagedrange..●
hnmediateiycontactthedealer(or
builder)thatsoldyoutherange.
Saw timeandmoney.
Befm-’eyourequest
service...
Checkthe ProblemSolveron
pages24 and 25.It listscausesof
minoroperatingproblemsthatyou
cancorrect yourself.
If youl-ledservice.••
Toobtainservice, seethe
Consumer Servicespi t
backofthis book.
Toobtainreplacementparts,
contactRCA/GEServiceCenters.
We’reproud ofour serviceand
wantyouto bepleased. If forsome
reasonyou are nothappywiththe
service you receive,here are three
stepsto followforfurtherhelp.
FIRST,contactthepeoplewho
serviced your appliance.Explain
whyyouare notpleased. In most
cases, this will solvethe problem.
NEXT, if youare stillnot pleased,
write allthe details—including
yourphone number—to:
Consumer Relations
Appliance Park
Louisville, Kentucky40225
FINALLY, ifyourproblem isstill
notresolved, write:
Major Appliance
Consumer ActionPanel
20 North WackerDrive
Chicago,Ill60
g
Is
2.
3. any
Clperlfhnea
4. call
*Don’tturnelectricswitches
cmoroffbecause sparksmay
ignitethegas.
Donot orfLwe
and
of orany
or
Carl CM
this
For or
I

TCalifSa
Drin
WataToEnfor
ArequtGoveo
Califtpubalio
substknt t st
t
cau
canbidefo
othreprodhaa
requbusintwa
custoo poteexp
tsusubst
(applicca
minexpotfoo th
substanambenz
carmonoforma
ansocauprimbt
incomcombuo nat
gaoLfueProp
adjuburnindiba
bluratthayeifla
wiminiincom
—combExptth
-~=::cbmini
~Uihb venwiaop
..+ousaventf
mho
when YImGMYourRange
@~~v~the hlfiitalk!rshow y
the location of’the range gas
cut-off’valve ahow tosh
ioff if nece
~l-he your ra
and propgmnby 8
insti acco
wit InstaInstr
Aadjusasersho
bperfoonb qual
garaninstaoser
techni
@pitig your Hinge intoa120-VOU
odd only. Do n
remtrogroupr
frtplIidoab
tgrouo thoelec
“4
‘=:Vi i yoper
,.--
.....-
-L~”~sL~U]is~lUilit~”aoblit
~-f ungrourep
\L:!,
J;
wapropeth
prouiaccw
t
Nat
EleCD
nuaextcw
tapp
ranges
cm tip a
incould
reT
pr
acc
tiot
raati
t t wo
fb
inst
Antde
sup
(
InstInstT
chi t deiin
aenproca
t t rafou i
entde
Iy p traoft
wfarems
tdeentr
wy p trb
@BstMpamat
aremoved fromtra
beopei t prf
osmdasht
pamaig
@Locate raoutofkitchen
traffic path aoutofdrafty
locations to prevent pow a
~Be sure yrange& Inc
adjustedbya. service
or forthe
typeof~as or U?) on
whi i tbus
Y
rac bconfu
oeit o g S
InstInst
sApdoIBgd uoa
raryy+ hfloor
may rm m f
co
will nw
tkMNi t
ro v tol
tcwsto
uNi i da
ink
ca
IJshgYourRange
e~()~~~~$1~~~&~~&g3~a]~~~Or
unwanih
oiopTcb
seb
@Da a tI
sohotd
stdort
Tcdtra
et i ocs
pei
a~A~ ~
INT
SI
NBSI
CM
A AR
O O T
CAR.A
CLOTR
TRIC B
SERIOUSLYmLnJRED.
@Letbfa o
sucb
to! t w
chc r t
@N w lo
u
tapBcw
refisi
caotr I
mac bi i
bricwf
o h o sar
csb
@FysnW
your for 01”
hetI
{coilriw?d narpagc)
3
——-——— —— —

~Y (continued)
.
eDnotI.m? water(m grease
fires.
Never piuafla
paTuo burth
smoflap b cov
pcompwiwell
licoosho fltr
Flagroutap
cb p o b cov
wi
baksoo iavaia
multi-dche
ofoamfiextin
eDo ~~~ s~o~efi~
mate
iaovo ne
th
cookDnsto u
gaso
ootfla
vapaliqi t vic
otho aotappl
@Do notlcooking gr
ootflam
mate
accumionetra
@Whcoopofo
tdireexaa al
cotmetaint
tempeoale17
Thassthi t rem
possithtrimb
prei t meiwib
kilamewibsate
SWfacefcooking
@~fyfy lea~~r~~
ahifl
sett130ica
smoagrspii
thmcaofi
@tbuflsi
sidon exbeyt
edo tcookExc
fli haza
em(dpothdders-
moo dapotho h
surfmreibufr
steDnJpoth
coneopflawh
liftcookDn u a
towootbucli
plaoapotho
coohatots
o b o trwi
extoadbu
@Alt subu
obereco
@Carwfb
frahfse
@Neblt v(
opeotraT
prtaiaou
whinecftr
topprwco
com
eDn u awo~
cosui t wha
rourwh
pl
otbug tsu
twTra a ah-
twhmdat
bu
grabuh Ai
mcatbutw
impTmc a
camolat
albcusta
resiaheha
~~offrshbe a
daposFofr
foo moo f f
ccahftbuu a
osio p
~ule
posamd
f f effshmd
ffrFit ptf
ofccaspiw
fiad
@~f~ of~i~~~~
fwb u ifrs
togbeheoaf
msl
sAhV~yS htw ht s1a
waa ihe
~Use~~~pfat ,
tpr
overf bet
Srnpo
Qu~Rpskx
pataunsoea
tipSecool
entprocof
ta
bo
as
awble
tcbgTw
bsc a p
haacof
shspo s
lorciUp
whtc e b
gawrc
4Vu g c
msi i dft
ofc
~Kapaf
tI
$Tatpoo
babct
t
co
faba
aOpa a g
a c bat
rtg
*~f f a
utht t f
oTfiom
stf
~I r i!na
wd n u lc
wcb o t t
ba c afh
~IYsgt t
gt t ra c aq
steNua
oft l al
Bating, and
~DnIWS43ofas
a
@Saftr
wotd o ah
oThaosw
e c c bt
face eyes.
eKof f g
‘p~$~&
w O ic

outshelfto theshelf
c$Mlv#M?rMx?mlifting
wuis’also $3
magabufr
fiuchothrof’
do(iwal
*DoheunopfO
contaitmPre
cou
Ihu atcmt
:coubucauainj
@Domalumfo
anywitovexca
descrithbo
Mi
coresiafihao
damt t ra
@Whuscooo
roas
baiovfollow
tmanufacdirec
@
Us
onglcoo
thirecom
fu
i
ga
ove
@Alwrembrop
frova soa y fin
—h~oiGrelei t p
cafii ovius
=r:+remtgr
w-tbropa
@Whbroii meit
ciot t flat f m
igniTrexcftpre
excesflare
@Masu
brop i i
plcmrtret
possiogrfi
~Hyoshohaagr
fii t brop tuo
ovakeovdocl
tconfiunibuou
*IIOt cltdg
berespcl
instopMT
dgaiesfag
seBcantrda
omi
~Do not use oven cleN
comoclo o
liprocoo a
kshb u ioar
ap o to
~Retbrpa
otcoobe
se
cletov
cleaningYourRange
@Clean only paIii t
UaCBo
@Keep raclaf
o
accum
ogro
spiwhmig
mim.1Needse
*Re‘gPrSo
opa2 a 2 o tb
sDoattre
orea p o y
rang
i i spe
recoi t bA
otsershb re
taqua
tech
c

FeaIn
I5Cooktop Burner
1OvLiSwi
2OvVe
3ElectOvCon
4LifCoo
I6SurUnCont
I7OvDoLa(Udu
Self-cyonl
I8Ovh~teri
I9OvShe
‘
Eqdahed
on page
8
8
910
16
718
7
8 1
Explained
FeIop
1Oven SSu8
1BrPaR(n1
ci t Selo
1O D G 1
1ReO D 1
1ReStD3
1MaSN~
1AnDe3
1ReOB1
6

Imtrwtkms
fb
Uactimerson theserana
htedbyelectric ignition,ending
eneedfor standingpilotswith
constantlyburningflames.
hcaseofapoweroutage,youcan
lightthepilotlessignitionsurface
burnersonyourrangewithamatch.
Holdalightedmatchtothe burner,
thenturnthe knobtothe LITE
position.Useextremecautionwhen
lightingburnersinthis man
Surfaceburnersin use whenan
electricalpoweroutageoccurswill
continueto operatenormally.
SW’faceEh.m’$erControls
Theknobsthatturn the surface
burnerson andoffare locatedon
thelowercontrolpanel in frontof
theburners.
Thetwoknobsonthe leftcontrol
theleftfront and1eftrear burners.
Thetwoknobson the rightcontrol
herightfrontandrightrear burners.
ToLightaSurfaceBurner
Pushthecontrolknobinandturn it
toLITE. Onelectricignitionmodels,
youwillhear alittleclickingnoise—
thesoundof theelectricspark
ignitingtheburner.
Afierthe burnerignites,turnthe
knobto adjusttheflamesize.
Note:
~Do notoperateaburnerfor
extendedperiodsoftimewithout
havingcookwareon thegrate.The
finishon the gratemaychipwithout
cookwareto absorbthe heat.
~Checkto besurethe burneryou
turnedon istheoneyouwanttouse.
@Be surethe burners and grates are
coolbefore you place your hand, a
potholder, cleaning cloths or other
materials on them.
HowtoSelectFlameSize
Theflame sizeonagasburner
shouldmatchthecookwareyou
are using.
~-
FOR SAFE HANDLING OF
COOKWARE,NEVER LET THE
FLAMEEXTEND UPTHE SIDH
OF THE COOKWARE.Anyflame
largerthanthe bottomofthe
cookwareis wastedandonly
servesto heat thehandles.
When ua o
ahsts
papadjusttheflameso
the circleit makesisabout 1/2inch
smallerthan thebottomofthe
cookware.
Wbousethis same
flame size-–l/2 inchsmaller than
thebottomof thecookware:no
matter what thecookwareismade
of. Foodscookjust as quicklyat a
gentleboil as theydo at afurious,
rollingboil. Ahighboilcreates
steamand cooksawaymoisture,
flavorand nutrition. Avoiditexcept
for the fewcookingprocesses
which need avigorousboil,
W’henfrying or warming foods
in stainlessstee19cast iron or
enamelware, keepthe flame down
lower—toabout 1td
otp
When frying inglassor ceramic
cookware9 lowerthe flame even
more.
7

oven
I“nitiorl
The own burner andbroilburner
arelightedbyelectricignition.
TOlighteitherburner,pushthe
buttonforthedesiredfunctionand
turn the SET knobuntilthedesired
temperatureisdisplayed.The
burnershouldignitewithin60
seconds.
Poweroutage?
The ovenand broilerburnerswill
notlightin theeventofanelectrical
poweroutage.Do not attemptto
lightthemrnanuaUywithamatch.
ChenSMves
The shelvesare designedwith stop-
Iocksso when placedcorrectly on
theshelf suppo~~s,theywill stop
beforecoming completelyoutof
(heoven and will not tilt when you
me removing foodfrom themor
placingfoodoth
Whenplacing cookwareon ashelf,
pullthe shelf outto the “stop”
position. Place the cookwareon
[hcshelf, then slidethe shelfback
intothe oven. This will eliminate
reachinginto thehot oven.
1
Toremovethe shelvesfrom the
oven,pullthemtowardyou, tih
frontendupwardandpullthemout.
Toreplace,placeshelfon shelf
supportwith stop-locks(curved
extensionof shelf)facingup and
towardrear ofoven.Tiltup front
and pushshelftowardback ofoven
untilitgoespast “stop”on oven
wall. Thenlowerfrontof shelfand
pushitallthe wayback.
shelf Positions
The ovenhas fourshelfsupports—
A(bottom),B, Cand D(top).
Shelfpositionsforcookingare
suggestedon Bakingand Roasting
pages.
oLight
Usethe switchonthecontrolpanel
toturnthe lighton and off.
ov
Yourovenisventedthroughducts
attherear oftherange(seepage6).
Do notblocktheseductswhen
cookingin theoven—itisi
t t fo h afto
afat t o b b
uniAt t
vopo n s
d o o b o
tmb h
@
Ventopeningsand nearby
surfacesmay becomehot. Do not
touchthem.
@Handks of potsand panson the
cooktopmay becomehotif M
toocloseto thevent.
~Do not leaveplasticitemson
the eooktop—theymaymelt if’
lefttoo dose to the vent.
oMoisture
As yourovenheatsup, the
temperature changeofthe air
in the ovenmaycause water
dropletsto formon the door
glass. Topreventthis, open the
ovendoor fo~the first minute
of ovenheat-up to letthe moist
air out.

mlBake
LPushBAKEbutton.
2. TurnSET knobuntildesired
temperatureisdisplayed.
Aone-secondbeepwillsound
whentheovenhaspreheatedtoand
stabilizedat selectedtemperature.
ov“on” hldi
Theword “ON” isdisplayedwhen
theBAKEor BROILbuttonis
energized,andgoesout whenthe
CANCELbuttonispushedor
whentheovenburner shutsoff
automatically.
Theovenoperationiscontrolled
electronically.Thefollowing
mlsthe
Minute/SecondTher
LPushTIMER button.
2. TurnSET knobtodesired
amountoftime (upto 9hoursand
59 minutes).The Minute/Second
Timerwillbegintocountdown
withinafewseconds.
instructionstellyouhowtooperate 3. Whentimeisup,theEnd-of-Cycle
theelectroniccontrols. Tone(3 longbeeps)will soundand
thedisplaywillagainshowthetime
ToSetthe clock ofday.
PushCLOCK button..Note: The Minute/SecondTimeris
—— TurnSET knobto correct time areminderonlyandwillnotoperate
day.Clock isnowset. The clock the oven.
stbe set to thecorrect timeof Youcan usethe Minute/Second
dayforaccurateautomaticoven Timerwhether or notthe ovenis
timingoperations. beingused. The Minute/Second
Timerdoes notinterferewithoven
operations.
Tocancel ‘theTimer
Push and hold TIMER buttonfor
three seconds. This willclear the
Minute/SecondTimer function.
3. Whenfinishedbaking,push
CANCELbutton.
Note: Torecall whattemperature
youhaveselectedwhilethe rising
temperatureisbeingshown,push
andholdthe BAKEbutton.The
selectedtemperaturewillbe shown
whileyouholdtheBAKEbutton.
Theactualoventemperaturewill
beshownafter afewseconds.
YoucanpushtheCLOCK button
todisplaytime ofdaywithout
canceling theovenoperation.
Youcan changethe selected
temperatureat anytimeby
pushingthe BAKEbuttonand
turningthe SET knob. I
mBroil .
LPushBROILbutton.
2. TurnSET knob untilyour
choiceofHI BROILor LO BROIL
is visiblein the display.
When finishedbroiling,pushthe
CANCEL button.
(continuednextpage)
(l)
J
.—

Awmatk OTimer
Theoventimerwillautomatically
startandstopyourovencookingor
self-cleaningoperationforyou.
~01’a.ItOIni3tiC OVfXlcooking:
LPushCOOKTIME button.
2. TurnSET knobtosetlengthof
bakingtime.
3. PushBAKEbutton.
4. TurnSET knobtosetdesired
temperature.
Whencook timeisreached,the
End-of-CycleTonewillsoundand
theovenwillturn off.
Duringautomaticcooking:
oYoucanpush theSTOPTIME
buttonto find out when theEnd-of-
CycleTonewillsoundandtheoven
willturn off.
~Youcanpush the CLOCK button
todisplaytime ofday without
canceling theovenoperation.
lb why stam
o
Ha delayedcookingoperation
isdesired:
LPushCOOKTIME button.
2. Setlengthofbakingtimewith
SETknob.
3. PushSTOPTIME button.
4. TurnSET knobtotimeofday
whenbakingshouldbecompleted.
Stoptimemustbeequalto or
greaterthanthecooktimeplusthe
currenttimeofday.
5. PushBAKEbutton.
6. TurnSET knobto desired
temperature.
When stoptimeisreached, the
End-of-CycleTonewillsoundand
theovenwill turn off.
Caution:Neverletfoodsit inthe
ovenformorethan4hoursbefore
cookingstarts. Rtem
iidftgroha
bacBsolii o
bechftbw
spbacgr
Note:Youcan push the STOP
TIME buttonto findoutwhenthe
ovenwillturn off. Push and hold
the COOK TIME buttonto findout
when theovenwillturn on.
H’adelayedself-cleaningoven
operationis desired, see page2
Howtofchange
a
When afunctionhas been
entered,you can recallwhathas
beenprogrammedbypushingthe
corresponding functionbutton.
Themessagesinthedisplayshow
you which functionis currently
being displayed. While the
function isdisplayed, you can
changeit with the SET knob.
Youcanchangeanyprogrammed
function at any time.
—
Tones
End-of-CycleTone(3 longbeeps—
onesecondon, onesecondoff):
showsthat atimedovenoperation
hasreachedSTOPTIME orthat
theMinute/SecondTimerhas
counteddown.
AttentionTone(seriesofshort
beeps, l/4-secondon, U4-second
off, untilproper responseisgiven):
willsoundifovenhas onlybeen
partiallyprogrammed.Forexample,
ifyouhaveselectedacooktimebut
notemperature,youwillhearthe
AttentionToneuntilyouselecta
temperatureor pushCANCEL.
NotificationTone(single,one-
secondbeep): indicatesovenhas
stabilizedat selectedtemperature.
KeyTone (single,I/lO-second
beep): soundswhenanybuttonis
pushed.
FunctionErrorTone(seriesof
very rapid beeps, l/8-secondon,
l/4-secondoff): displaywillshowa
failurecode. CancelFunctionError ._. ..:
TonebypushingtheCANCEL ......
button. If the FunctionError Tone
startsagain(afterabout 15
seconds), call forservice.
Disconnectthe rangeelectrical
supplyto stopthetone.
If the functionerror occurred
whileyouwere programmingthe
Electronic Control, pushthe
CANCEL buttonand try again.
To Cancelthe Tone...Iy d
wa a twy p
abuy c e tK
Tb p aht
Cb u y h a
sb(apt
seTat t a
pahtCb
omu y h as
bCaoat
tso b d wt
in o op
pr
PutCbw
c a fuetC
aMiT

toset YourRange
aking
Positiontheshelfor shelvesin
eoven.If cookingontwoshelves
atthesametime, staggerthe
cookwareforbestheatcirculation.
2. Closeovendoor.
3. PushtheBAKEbuttonand
—turntheSET knobuntildesired
temperatureisdisplayed.If
preheatingisdesired, do notput
foodin the ovenuntilaone-second
beepsoundsto tellyoutheovenis
preheated.
4. Opendoor andplace foodin
ovenon center of shelf. Allowat
least2inchesbetweenedgeof
bakewareand ovenwallor adjacent
cookware.
5. Closeovendoor.
6. Checkfoodfordonenessat
minimumtime on recipe. Cook
longerif necessary.Push CANCEL
buttonand removefood.
ostbaking isdoneon the second
shelfposition (B)from the bottom.
Whenbakingthree or four items,
ustwshepositot
seca fouseosup
(BDfrbotoov
Ba
angel foodcakeson firstshelf
position(A) from bottomofoven.
Tips
~Folatesreca
meastingrecare
Iyoausapacmi
fcd1adirec
eimoiisnoticeableonthe
frontoftheovenorontheglassdoor
whenfirstturningontheoven,leave
theovendoorajarforaminute.
~DOnotOtheovendoorduring
abakingoperation—heatwillbelost
aridthebakingtimemightneedto
beextended.Thiscouldcausepoor
bakingresuhs.Ifyoumustopenthe
door,openitpartially—only3or4
inches—andcloseitasquicklyas
possible.
@Donotdisturbtheheatcirculation
intheovenwiththeuseofaluminum
foil.Iffoilisused,placeasmall
sheetofit, about 10by 12inchesat
themost,onalowershelfseveral
inchesbelowthefood.Donotplace
foilontheovenbottom.
common Baking Problem
and Possible SOllltiom
PIES
Burningaroundedges
~Eofcrusttooth
@Incbatemp
Bottomcrustsoggyandunbaked
@Al]owcrustand/orfih’ig to COO1
sufficientlybeforefillingpieshell.
@Fillingmaybetoothinorjuicy.
~Fillingallowedtostandinpieshell
beforebaking. (Fillpieshellsand
bakeimmediately.)
@Ingredientsandproper measuring
affectthequalityofthecrust. Usea
testedrecipeandgoodtechnique.
Makesurethere arenotinyholesor
tearsinabottomcrust. “Patching”
apiecrust couldcausesoaking.
Pie fil!ingrunsover
@
Tabocrnw
setog
@Edo p crnbuu
hieno
@T
mu
fil
@Chso p pl
R&-y istough;crustnot flaky
*TOO
mu
han
@Ftsoci t fi
Rodoliahaa
liapos
GNKEs
Cakeriseshigherononeside
@Batterspreadunevenlyinp
@o
sh
n]
@
Usingwarpedpans.
Cakescrackingontop
eoventemperaturetoohigh.
@Battertoo thick,f r
oepdi
@Cfpsp
aCpsize calledforinr
~Imm oc
Cakefalls
@Toomuchshortening,sugaror
liquid.
@Checkleaveningab
p o b sta
frMahtn
exd o p
ing
*Cbain
teo n b l
en
eIaotac m m
cetoi t t a
asp
Gust ishard
@Checktemperature.
sCheckshelfposition.
Cakehassoggylayerorstreaksat
bottom .
@JUnderminingingredients.
~Shorteningtoosoftforproper
creaming.
eToomuch liquid.
CO
&I
Doughycenter;heavycruston
surface
@
Cte
eCspo
oFbin
caa gir r
o o cofp
~Fcswgm
ebreDo
foabs
~Cofu b
texd
IhNvning more noticeableon
one side
~odoor notclosedp
cgs
=Csp

.
—
1. Preheatingisveryimportant
whenusingtemperaturesbelow
225”F.andwhenbakingfoods
suchas biscuits,cookies,cakes
Preheatingisnotnecessarywhen
roastingor forlong-timecookjng
ofwholemeals.
3. Darkor non-shinyfinishesand
glasscookwaregenerallyabsorb
heat, whichmayresultin dry,crisp
crusts.Reduceovenheat25°F.if
lightercrustsare desired.Rapid
browningofsomefoodscanbe
2. Ah.tminumpansconductheat
quickly.For mostconventional
baking,light,shinyfinishesgive
bestresultsbecausetheyhelp
preventoverbrowning.Forbest
browningresults, werecommend
andotherpastries.Afterpushing
theBAKEbuttonand turningthe
SET knobto thedesired achieved-bypreheatingcastiron
cookware.temperature,besureto waitforthe
one-secondbeepbeforeputting
. .
foodintothoven. dullbott~msurfacesforcakepans
andpiepl
Time,
Minutes
Shelf
POsition Oven
Temperature:
400°-4750
350°-4000
400°-4500
350°
400°-4250
375°
350°-375”
375°-4250
375°-4250
350°-3750
Cookware Comment..
Foo
Bread
Biscui(M-ithic
Coffcak
Corbreomuffi
Gingerbr
Muffll
Popove
Quicloabre
Yeasbre(loave
Plainrolls ,
Sweerol
15
20
20
45
20
45
45
45
10
20
30
10
45
Carefbit 2t4
mil t
ShiCookShe
ShiMetPawi
satin-fibot
CaIroGlaPa
ShiMetPawi
satin-fibot
ShiMetMufPa
DeGlaoCaIrCu
MetoGlaLoPa
MetoGlaLoPa
ShiObloo MufPa
ShiObloo MufPa
B C
BA
B
B
AB
B
B
AB
AB
BA
Prcipfc c
Dea 5mifm m
Oba45f2mit a
35f1t1mi
Dmo g g d
bro
FtroSBmu
FtroSBmu
Cakes
(withoshorteni
Angefoo
Jellrol
Spon
Cakes
Bundcak
Cupcak
Fruitca
Laye
Layechocol
Loa
AlumiTuPa
VletJelRoPa
MetoCeraPa
A
B
A
325°
375°
325°
Tp p ico
Lpw w p
VletoCeraPa
;hiMetMufPa
vletoGlaLoo
~uPa
ihiMetPawi
atin-fibot
lhiMetPawi
atin-fibot
4etoGlaLoPa
AB
B
AB
B
B
B
325°
350°
275°
350°
350°
35
45
~(
2 h
20
25
40
Pa1iprm m c
U30aSBfso
indca
Ibaflau
shBaD
Cookies
Browni
Dro
Refrigera
Rolloslic
Fruits,
other Desserts
Bakeappl
Custa
Puddingric
ancusta
fetoGlaPa
‘ookShe
B C
B C
B C
B C
325°
350°-4000
400°-4250
375°-4000
25
10-20
6-12
7-12
Bcofmust
U
Sh
Cainte
2t5fmbr
‘ookShe
ookShe
laoMetPa
laCustCuo
asser(sipaohowa
laCustCuo
Isser
AB C
B
B
350°-4000
300°-3500
325”
30
30
50-90
Retemt3fl
cu
Cb o rpuwc
b 8 t9mi
Pies
Froz
Mering
Oncrus
Twcrus
Pastshe
Miscellaneous
Bakepotato
Scallopdish
souffles
400°
325°
400°
400°
45
325°
325°
300°
45-70
15-25
45-60
40-60
12-16
60-90
30-60
30-75
Lap u 40aint
Tqub meu 4 f
9t!1mi
Cufirelte
lot
)iPaoCooShe
wetcruedg
A
B C
AB
B
B
asoSatin-fMetPa
GlaoSatin-fMetPa
GlaoSatin-fMetPa
Intflaos
leoOvShe
GlaoMetPa
GlaPa
AB C
AB C
B

Roastingiscookingbydryheat.
Ttmdermeator pouitrycanbe
roasteduncoveredinyouroven,
oastingtemperatures,which
shouldbelowandsteady,keep
spatteringto aminimum,When
roasting,itis notnecessarytosear,
baste,coveror addwatertoyour
meat.Roastingiseasy,just follow
thesesteps:
Step 1:Positionovenshelfat
secondfrombottomposition(B)
forsmallsizeroast(3 to5lbs.)and
abottomposition(A) forlarger
roasts.
Roastingwi
Afeat
Tender
cutribhigquali
sirlotiprumotoroun
Lmnleobone-should
\ktishouldeleoloi
Purlloinrioshouklc
H:imprwm
}imlra
*FobonelemIlcmasov6-inc
[hic:d5 t1minutpclbttinws
~il,~n~bove,
RAtry
L-hicoDuc
Chicpicc
Turk
.. ..-—-
Step2: Checkweightofroast.
Placemeatfat-side-uporpoultry
breast-side-upcmroastingrackin a
shallowpan. Themeltingfatwill
bastethemeat. Selectapanas
closetothesizeofmeataspossible,
(Broilerpanwith rack is agood
panforthis.)
Step 3: PushBAKEbuttonand
turn SET knobuntildesired
temperatureisdisplayed.Checkthe
RoastingGuidefortemperaturesand
approximatecookingtimes.
—
—
Oven
Temperature
32
32
32
32
32
32
3~
37
32
Doneness
Ra
Med
WeDo
Ra
Med
WeDo
WeDo
WeDo
TV&
WeDo
WeDo
WeDo
WeDo
Step 4: Mostmeatscontinueto
cookslightlywhilestandingafter
beingremovedfromtheoven.
Standingtime recommendedfor
roastsis 10to20 minutes.This
allowsroaststo firmupand makes
themeasierto carve.Internal
temperaturewillriseabout5°to
10”F.;tocompensatefortemperature
rise, ifdesired, removeroastfrom
ovenat5“to IO°F.lessthan
temperatureonguide.
FrozenRoasts
Frozenroastsofbeef, pork,
lamb,etc., can be startedwithout
thawing,but allow 15to 25 minutes
per poundadditionaltime (15
minutesper pound forroastsunder
5pounds,more timefor larger
roasts).
Thawmost frozenpoultrybefore
roastingto ensureevendoneness.
Somecommercialfrozenpoultry
can be cooked successfullywithout
thawing.Followdirectionsgiven
on packer’slabel.
ApproximateRoastingTime
inMinutesper Pound
3to5-lbs. 6to8-lbs.
2418
3522
40
30
2120
2524
3028
3530
3530
17minp l(we
Under10lbs. 10to Is-lbs.
27-35 24-27
3to5-lbs. Over5Ibs.
35-40 30-35
30-35
10to 15-lbs. (lver 15lbs.
18-25 15-20
Internal
Temperature“F
!30°-1400
150°-1600
1700-185°
130°-1400
150°-1600
170°-1850
170°-1800
170°-1800
115°-1250
170°
1”
18
Ithigh:
185°-1900
1

Broilingiscookingfoodbydirect
heatfromabovethefood.Your
ovenisdesignedfor waist-high
broiling.Aspeciallydesigned
broilerpan andrack allows
drippingfattodrain awayfrom
thefoodsandbekeptawayfrom
thehighheatofthegasflame.
HowtoBroil
LIfmeathasfatorgristlenearthe
edge,cutverticalslashesthroughit
about2inchesapart, butdon’tcut
intomeat. Werecommendthatyou
trimfattopreventexcessive
smoking,leavingalayerabout
l/8-inchthick,
2Arfoodon rack and
positionthe broilerpanonthe
appropriateshelfintheoven.
Placingfoodcloserto flame
increasesexteriorbrowningof
food,butalso increasesspattering
andthepossibilityoffatsandmeat
juices igniting.
3. Closetheovendoor.
4. Pressthe BROILbuttonandturn
theSET knobuntilyourchoice
of “I-IIBROIL”or “LO BROIL”is
displayed.Note:Chickenandham
are broiledat LO BROILinorder
tocook foodthroughwithout
over-browningit.
5. Turnmost foodsonceduring
cooking(theexceptionis thinfillets
of fish;oil one side,placethatside
downonbroilerrackandcookwithout
turninguntildone). Timefoodsfor
aboutone-halfthetotalcooking
time, turn food, thencontinueto
cook topreferred doneness.
6. Push CANCEL button. Remove
broilerpan fromovenand servefood
immediately.Leavepan outsidethe
oventocool.
Qumstions&Ansvw3rs -
Q.When
broiling,is itnecessary
toalwaysusearackinthepan?
A. Yes.Usingtherack suspends
themeatoverthepan. Ast_hemeat
cooks,thejuicesfallintothepan,
thuskeepingmeatdrier. Juices
areprotectedbytherackand stay
cooler,thuspreventingexcessive
spatterand smoking.
Q. Should Isaltthe meatbefore
broiling?
A. No. Saltdrawsoutthejuices
andallowsthemtoevaporate,
Alwayssaltaftercooking.Turn
meatwith tongs;piercingmeat
withafork alsoallowsjuicesto
escape.Whenbroilingpoultry
or fish, brush each sideoften
withbutter.
Q. Whym-emymeatsnotturning
outasbrownasthey should?
A. Checkto seeifyouare usingthe
recommendedshelfposition. Broil
forlongestperiod oftime indicated
inthe BroilingGuide.Turn food
onlyonceduringbroiling.
Q. Do Ineed togrease mybroiler
racktopreventmeatfromstietig?
A. No. The broilerrack isdesigned
to reflectbroiler heat, thuskeeping
the surfacecoolenoughtoprevent
meatstickingtothesurface.However,
sprayingthebroilerracklightlywith
avegetablecookingspraybefore
cookingwill makecleanup easier.
—

—
Broilingshouldbedonewithoven
setongstoturnmeatover—
piercednleatlosesjuices.
~Steaksandchopsshouldbeatleast
1inchthickforbestbroilingresults.
Panbroilthinnerones.
@Alwaysusebroilerpanandrack
thatcomeswithyouroven.Itis
designedtominimizesmokingand
spatteringbytrappingjuicesinthe
shieldedlowerpartofthepan,
oAfierpirtgfoodonthe
broilerpan, putthepanonanoven
shelfintheproperposition.The
recommendedshelfpositionand
cookingtimecanbefoundinthe
guidebelow.
Thecloserthefoodistotheflame
thefasterthemeatbrownsonthe
outside,yetstaysredtopinkinthe
center.Movingthemeatfarther
awayfromtheflameletsthemeat
cooktothecenterwhilebrowning
outside.
@Ifdesired,marinatemeatsor
chickenbeforebroiling.Orbrush
withbarbecuesaucelast5to 10
~Whenarrangingfoodonp
donotletfattyedgeshangover
sides,whichcouldsoilovenwithfat
dripping.
@Broilerdoesnotneedtobe
preheated.However,forverythin
foods,ortoincreasebrowning,
preheatifdesired.
~~s~~a~ can b
conventicmallybroiledbypositioning
theovertshelfatnextlowestshelf
positionandincreasingcookingtime
giveninthisguidelfi timesperside,
minutesonly.
QuantityandlHIorLO Shelf FirstSide SecondSide
Rmd Thickness Broil Position Time,Minutes Time,Minutes Comments
BacOn ‘A-lb.
(aboSHc32%Arisil
thislic
GroundBeef l-l(4pattiHc8-10 5-7 SpevUt9
pa
t
RktDon%t37-ithi
abst
BeefSteaks H
Rarl-ithi
B75Stl t l ct
Me(ii(t1%-ib)B10
5bebrPfi
B18rec
1‘h-ithi
B10 5Slf
([(2fi-!b
B12
7
B20 12-14
1whoie LA25-30 15-20 Reta5t1m
(t2fi-ibs
psfcuchB
spilength
eswm
bu
B
ws s dfab
wdci
BakeryProducts H
Brea(Toaso 2 4siic
c2y 1 SpevPEnm
Toos[Pastrii pkg(2
cutabwbi
En:li
Mutll2-spi
c3de
I,ohsterThils ~_4 Hc13
Dntov
Cthb o s s
((ts-m-eac
opBwmb b
a a ht
t;isil i-ill.
fiilc
HB55Haa tvcaB
‘hto‘/2-inthi
wlbub ad
coidePrbt
inbr
—
II:m
Slices(450
l-ithi
Lc88Int5mips
l%c~xwkc
fiV2to h c
Pot-
chops 2(Y2
in)HB8-
4Slf
\\i’Don2 (i-nthicB10-i8
abo
t i ib.
Iam
Chops HI
Nltkii
2(i,B84-7 Sf
\\2iD(m
iih)llt 10 to 12 -o
Bio 10
hlL’Lii
2 ( v in)B10 4
\\tiDaboilb
B112
-..\! ’icnm, i-lb.pkg.(lo) Hc6l-~ Idirssaih
~ji!!!:!T
pi”tX\)(ikc?d lenci5t6 p
~;;i.;u:ebrawur
.,>...
:—--
-<.-.
..<--,
e:
-L
..--.,E
..._.1

Care
(SeeCleaning,Guide on page22,)
Propercare andcleaningare
imp-ortantsoyourrange-willgive
youefficientand satisfactory
service.Followthesedirections
carefullyincaring for ittohelp
tissures~feandpropermaintenance.
YOIJRRANGEHAS
ELECIGPWIB
SUREELECTRICPOWERIS
OFFBEFORECLEANING
ANY PARTOFH’.
OuPaihi
Whenthe rangeiscool, washthe
top, frontand, if exposed,thesides
wi[~mildSoand water.Neveruse
tinyharshabrasivesor cleaning
powdersthatmayscratchor mar the
pai{ltedsurhce. Rinsethe surface
witclean waterand dry withasoft
cloth. Ifyou wish, occasionally
applyathincoatofmild cleaning
waxto help pi-otectthe finish.
P’oCoddop
There are anumber ofprecautions
youcan taketo avoidmarring the
porcelainenamel surfaceofthe
cooktopand preventit from
becomingdull. Don’tslideheavy
pansacross it. If youspillfoods
with alotof acid (tomatoes,
sauerkraut, fruitjuices, etc.)or
foodswith high sugar content,
clean them up as soon as possible.
Ifallowed to set, these foodscould
cause adull spot. Also, nomatter
howstubborn the foodstain, never
useharsh abrasive”cleansers.They
COpermanently damagethe
enamel surface. Werecommend a
cleanser such as “Soft Scrub@”
brand.
controlRind
It’sagood ideato wipethecontrol
panelcleanaftereachuseofthe
oven.Foramorethoroughcleaning,
theknobscan be removedby
pullingthemofftheknobstems.
Cleanwithmildsoapand water,
rinsewithcleanwaterand polish
dry withasoftcloth.
Do notuse abrasivecleansers,
strongliquidcleanersor oven
cleanerson the controlpanel—
theywilldamagethefinish.
LiCooktop
Cleanthearea underthecooktop
often.Built-upsoil, especially
grease, maycatchfire.
Tomakecleaningeasier,the
cooktopmaybe liftedup.
Before raisingthecooktop:
LBesure burnersare turnedoff.
2. Removethe gratesand thedrip
pans.
This rangeis equippedwith dual
supportrods thatwillsnap into
placewhen the frontofthecooktop
isliftedall the wayup. Tolowerthe
cooktopagain, supportthe raised
cooktopwith onehand, then
carefullypush the bottomofeach
rod awayfrom youuntilrod slides
backdown intothe sideof the
range.
s
Bwmer’G
Gratesshouldbewashedregular]y
and, ofcourse, afterspi]lovers.
Washtheminhot, soapywaterand
rinsewithcleanwater.Dry the
grateswithacloth--don’tputthem
backonthe rangewet. When
replacingthe grates,be surethey’re
lockedintopositionovertheburners.
Togetrid of burned-onfood,soak
thegratesin aslightlydiluted
liquidcleaner.
Althoughthey’redurable,the
grateswillgraduallylosetheir
shine,regardlessofthebestcare
youcan givethem. This isdueto
their continualexposuretohigh
temperatures.
Do notoperateaburner foran
extendedperiodoftime without
cookwareon the grate. The finish
on thegrate maychipwithout
cookwareto absorbthe heat.
Drip Pans
Removethe gratesand liftoutthe
chromedrip pans.Washthemin
hot, soapywater.Rinsethemwith
clean, hotwaterandpolishthem
dry with acloth. Neveruse
abrasivecleaner or steelwool—
theywill scratchthe surface.
Instead, soak thedrip pansfor
about20 minutesin slightlydiluted
liquidcleanser or mildsolutionof
ammonia and water(1/2cup of
ammoniato one gallonofwater).
After soaking, washthem in hot,
soapywater. Rinsewith clean water
and polish with aclean, softcloth.
1

koBottom
ttcan be removed
makecleaningeasierafterheavy
dloversand toenableyoutoreach
theovenburner.
L“====-—-.--.======————\
/—.
fl~
c. \\
-’
—-“—.———
L-----G+, I
UnlocLo
Tremove:
LSlidethetabatthe centerfront
oftheovenbottomto the lefl.
2. Lifttheovenbottomup andout.
TorepIace:
LSliptheovenbottomintothe
ovensothetabsin therear ofthe
ovenbottomfit intothe slotsin the
ovenback.
2. Lowerthe frontoftheoven
bottomintoplaceand slidethe
fronttab to therightto lockthe
ovenbottomintoplace.
The ovenbottom has aporcelain
namelfinish. Tomake cleaning
protecttheovenbottom
omexcessivespillovers.Thisis
reticularlyimportantwhen baking
afruitpie or other foodswithhigh
acidcontent. Hot fruit fillingsor
foodsthatare highin acid content,
suchas milk, tomatoor sauerkraut,
andsauwivino le
juimcapitadam
tthporcenasur
Toprotectthe ovenbottomsurface,
placeapiece ofaluminum foil
slightlylarger thanthe bakingdish
or asmallcookie sheeton alower
sheountbakdit
cat
an
spillIshon
complcotshath
woucaunehei t
oveAlumfoshon b
plaotovbot
Iaspil~doocot
ovbottalt ovtco
first. Youcan clean the bottom with
soapand water, amild abrasive
cleanser, soap-filledabrasive pads
+r llsethe self-clean cycle.
.--i
-.,:./..
--.
Lift=cmoDoor
Theovendoor isremovableto
maketheinteriormoreaccessible
duringreplacementofthelampbulb.
Hinge
I
Toremove the door, openitafew
inchestothe specialstopposition
thatwillhold thedooropen. Grasp
firmlyoneach sideandliftthedoor
straightup and offthehinges.
Note: Becareful notto placehands
betweenthe springhingeandthe
ovendoor frame asthe hingecould
snapback and pinchyourfingers.
TorepIacethe door,makesurethe
hingesare in the “out” position.
Positionthe slotsin the bottomof
the door squareIyoverthehinges.
Then lowerthe door slowlyand
evenlyoverboth hingesatthe same
time. If hingessnapback against
the ovenframe, pullthem back out.
oshelves
Ovenshelvesmaybecleanedwith
amildabrasivecleanserfollowing
manufacturer’sdirect~ons.After
cleaning,rinsetheshelveswith
cleanwateranddrywithach$an
cloth.
Toremoveheavy,burned-onsoil,
soapymetalpadsmaybeused
followingmanufacturer’sdirections.
Afterscrubbing,washwithsoapy
water,rinseanddry.
h-oilerPan&Rack
Afterbroiling,removethebroiler
rackandcarefullypouroffthe
grease.Washand rinse thepan and
rackin hot, soapywater.
If foodhasburned on, sprinkle
the rackwhile hotwith detergent
andcoverwithwetpaper towelsor
adishcloth.That way,burned-on
foodswill soakloosewhilethe
mealisbeing served.
Do notstoreasoiledbroiler pan
and rackin the oven.Do notclean
in self-cleaningoven.
(continuednextpage)

—
--
~~~~ (cdntinued)
oLiBum
Thelightbulbislocatedinthe
upperrightcorneroftheoven.
Beforereplacingthebulb,
disconnectelectricalpowertothe
rangeatthemainfuseor circuit
breakerpanelor unplugtherange
fromtheelectricoutlet. Letthe
bulbcoolcompletelybefore
removingit. Donottouchahot
bulbwithadampcloth. Ifyou
do,thebulbwillbreak.
RangeTopIh’mfws’
The holesin theburnersofyour
rangemustbe keptcleanat all
timesforproperignitionandan
even,unhamperedflame,
Youshouldcleantheburners
routinely,especiallyafterbad
spilloverswhichcouldclogthese
holes.Burnersliftrightoutfor
cleaning,
Ti-f?IT10V6!:
@Removethe 3screwsin thelamp
cover. ‘
@Detachlampcoverand remove
bulb.
Toreplace:
@Putin anew40-wattappliance
bulb.(Note: A40-wattappliance
bulbis smaller than astandard
40-watthouseholdbulb.)
~Installlamp cover.Replace3
screwsand tighten,making sure
coverfitsflushwith ovenwall.
~Reconnectelectricalpowerto
therange.
Note: Ascrewholdseach of
the burners in placeto keepthem
from wobblingaroundduring
shipment. Removeand discardthe
shippingscrews.Tilttheburner to
the rightto release itstwo tabsfrom
“slotsin the burner support and
movetheburner towardtheback of
the range.This disengagesitfrom
the gasvalveat the front ofthe
range, and it liftsout easily.
Toremoveburned-on food, soak
theburner in asolutionofwater
and aproduct used for cleaningthe
insideofcoffeemakers. Soakthe
burner for20 to 30 minutes. If the
fooddoesn’trinse offcompletely,
scrub it with soap and wateror a
mild abrasive cleanser and adamp
cloth.
Beforeputting the burner back, dry
it thoroughly bysetting it in awarm
ovenfor 30 minutes. Then place it
back in the range, making sure it is
properly seated and level.
controlKnobs
Thecontrolknobsmayberemoved
forcleaning.
Toremoveknob,pullitstraight
offthestem. If knobisdifficultto
remove,placeathincloth(likea
handkerchief)or apieceofstring
underandaroundtheknobedge
andpullup.
Washknobsin soapand water,but
do notsoak.
Toreplaceknob, locatethegroove
ineach side oftheknobstem. One
ofthe groovescontainsaspring
clipandthe other grooveisclear.
Locatethemolded rib insidethe
knob.Fitthe moldedrib ofthe
knobintothe clear grooveon the
knobstem. —------
——-

care the
o~ramnmdCleaningTime:
—
iiolu”s
PreparetheOvenBefore
sethecon
Theovenmustbecompletelycool
inorderto settheself-cleancycle.
step 1:
Removethebroilerpan, broiler
rack, allcookwareand any
aluminumfoilfromtheoven.
(Ovenshelvesmaybe leftinthe
oven.Note: shelveswilldiscolor
aftertheself-cleancycle.)
st2
Remtovbotpa(s
pa17i i is excessivelysoiled.
Cleanitand put itback in theoven.
Ifyouusesoap, rinsethoroughly
beforeself-cleaning;thiswill
pre}fentstaining.Toomuchsoilon
ovenbottommaycausesmoking
duringthecleaningcycle.The
otton~must be inplaceduringthe
f-cleancycle.
p3:
anspattersor soilon theoven
Font fr~me(A), underthe front
edgeofthecooktop,the door liner
outsidethe door gasketand the
frontedgeoftheovencavity(about
1“intotheoven). No matter how
stubbornthe foodstain, neveruse
harshabrasivecleaners.Theycould
permanentlydamagethe enamel
surface.Werecommend acleanser
suchas “Soft Scrub””brand or a
similarcleaning productto keep
whi[esurfaces lookingclean and
nm. After cleaning, rinse wellwith
avincgarand watermixture. This
willhelp preventabrown residue
fromforming when the ovenis
heated. Buffthese areas with adry
cloth.
Clean top,sides and outside front
ofo~endoor with soap and water.
DOnotuse abrasives or oven
cleaners.Do not let water run down
--thl.<}~!ghopenings in the top ofthe
Cleanthedoorgasket(C) usinga
cleanspongetosoakthe soiledarea
withhydrogenperoxide.Repeated
soakingmaybeneededdepending
ontheamountofsoil. Frequent
cleaningwillpreventexcessivesoil
buildup. Do notrub thedoor
gasket—thefiberglassmaterialof
thegaskethasanextremelylow
resistancetoabrasion.An intact
andwell-fittingovendoorgasketis
essentialfor energy-efficientoven
operationandgoodbakingresults.
Ifyounoticethegasketbec(n
worn, frayedor damagedinany
wayor if it hasbecomedisplaced
onthedoor,youshouldreplaceit.
Makesuretheovenlightbulbcover
(D)is in place. (ii)
A<
B.
c.
D.
o
B
OvenFrontFrame
OpeningsinDoor
OvenDoor Gasket
oven LightBulb cover
Step4:
Closethe ovendoor and make
surethe ovenlightisoff.
Chrome drip pansfrom the top
of’vmwrange should neverbe
cleaned in the self-cleaningoven.
Oven shelvesmaybe cleaned inthe
self-cleaningoven. However,they
willdarken, losetheir lusterand
become hard to slide. Wipethe
shelfsupports with cooking oil
after self-cleaningto make shelves
slidemore easily.
...,
~;$;ScruiaregistetrademothCloComp
–.-:
~::><
Do notusecommercialoven .
cleanersorovenprotectorsin
or neartheself-cleaningoven.
Acombinationofanyofthese
productsplusthehighclean-cycle
temperaturemaydamagethe
porcelainfinishofthe oven.
h-rqmrtant
Theovendoor mustbeclosed
andallcontrolsmustbe set
correctlyfortheclean cycleto
workproperly.Tohelp you
understandhowthecleancycle
works,the stagesofthecycle
are notedbelow.
1. Slidethe door latchhandle
tothe right.
2. Setthe controls.
3. Thewords“CLEAN TIME”
aredisplayed.The ovenbeginsto
heat,thedoorlocksautomatically
when lockingtemperatureis
reachedand the word “LOCK”
isdisplayed.
If theovendoor isnotlatched,
the word“DOOR” is displayed
andtheovenbeepscontinuously.
Closethedoor,touchCANCEL
and beginagain.
4. When the 31Ahour clean
cycleisover,the word
“CLEAN” goesout and the
ovenbeginsto cool.
5. When the oventemperature
has fallenbelowthe locking
temperature (about20-30
minutesafter the word
“CLEAN” goesout at the end
ofthe clean cycle), the word
“LOCK” goesout, tdoor
latchhandle can be movedto
the leftand the door can be
opened.

-— tht? (continued)
3. SlidethedoorLA~Fl HANDLE
st‘ofCk
Therangemustbe completelycool
inorder-toset the self-cjean~ycle.
1. Slidethe LATCHHANDLE to
therightas far as itwill go.You
mayneedto slightlypress onthe
doortoget itto lock properly.
Neverforce the door latch handle<
Forcingthe handle may damage
the door Ilockmechanism.
2. Push the CLEAN button.
Thedisplaywill show “3:30~’
The words “CLEAN TIME” will
bedisplayedon the left. Within20
seconds,the words “CLEAN
LOCK” will be displayedon the
right.
NotYoucan fiowht
clecywibfinib
pushtSTTIbut
The word “DOOR” is displayed
whenyoutry to set aclean cycle
withthe door unlatched or when
theoventemperature is too high.
TSaDelayedStart
LSlidethe LATCHHANDLE to
the rightas far as itwillgo.
2. Push STOPTIME button.
3. TurnSET knobto timeofday
whenyouwishcleaningtobe
completed(mustbemorethan
3~hourslaterthan currenttime
ofday).
4. Push theCLEAN button.
The words “DELAYCLEAN”
willbe on inthedisplayuntilthe
cleancyclestarts.Aftertheclean
cyclestarts, theword “CLEAN”
willbe on in thedisplay.
Note: During adelayedself-clean
operationyoucan findoutwhen
the oventurnson bypushingand
holdingthe CLEAN button.
To stop aclean cycle
1. Press the CANCEL button.
2. Waituntilthe ovenhascooled
belowlockingtemperature(about
20-30 minutes)and theword
“LOCK” isoffin the display.
Btheleftasfar asitwillgo.
Youwillnotbeableto openthe
doorrightawayunlesstheoven
temperatureis at asafelevel.If
youcannotopentheovendoor
immediatelyaftertheword“LOCK’
goesoff, waitoneminuteandtry
again.
Aftersd
LWhenaclean cycleisfinished,
theword “CLEAN” willbeoff in
thedisplay.
2. Vv’aituntilthe ovenhascooled
belowlockingtemperature(about
20-30minutes)andthe word
“LOCK” isoff inthedisplay.
3StdLH
t t l afaiwg
Youwill notbe ableto openthe
door unlesstheoventemperature
isat asafe level.If you cannotopen
the ovendoor immediatelyafter the
word “LOCK” goesoff, waitabout
one minuteand try again.
Youmaynotice somewhiteash
inthe oven.Justwipe itup with
adamp cloth.
Iwsr r t
wasoswp
Bsureto rinse thoroughlywith a
vinegarand watermixture. These
depositsare usuallyasalt residue
thatcan not be removedbythe
clean cycle.
If the ovenis notclean after one
clean cycle, repeatthe cycle.
i-
r.
2
This manual suits for next models
1
Table of contents
Other RCA Range manuals

RCA
RCA LGB336 Training manual

RCA
RCA L3U30L Installation instructions

RCA
RCA L3B315GL Installation guide

RCA
RCA L3B325GL Installation guide

RCA
RCA L3BI15GL Installation guide

RCA
RCA LGB600 Installation guide

RCA
RCA LEB356GY Manual

RCA
RCA LEB356 Installation instructions

RCA
RCA LGB116 Installation guide

RCA
RCA LGB126 Installation guide

RCA
RCA LEB316GR Installation guide

RCA
RCA LGB336GET Installation guide

RCA
RCA LEB131 Installation instructions

RCA
RCA L2W20BEL Installation instructions

RCA
RCA L3B355GL User manual

RCA
RCA L2B115GEL User manual

RCA
RCA LGB116GPR Installation guide

RCA
RCA LEB356WY Manual

RCA
RCA LGB146 Installation guide

RCA
RCA L2W20EL Installation instructions