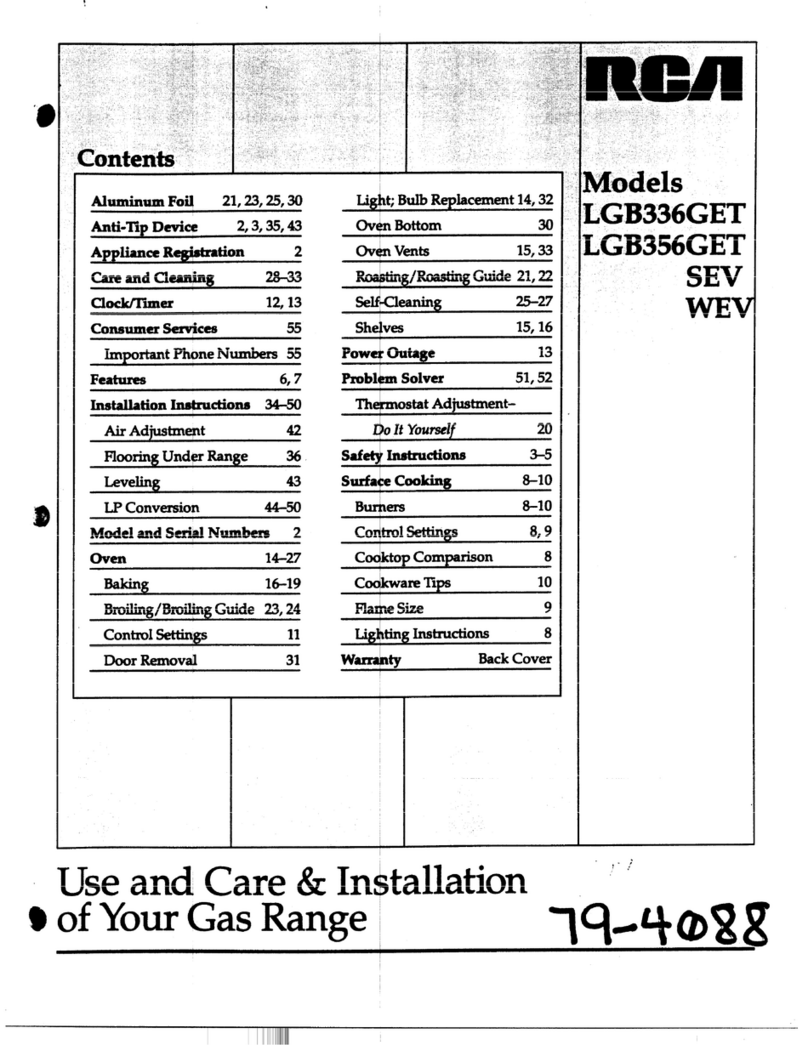
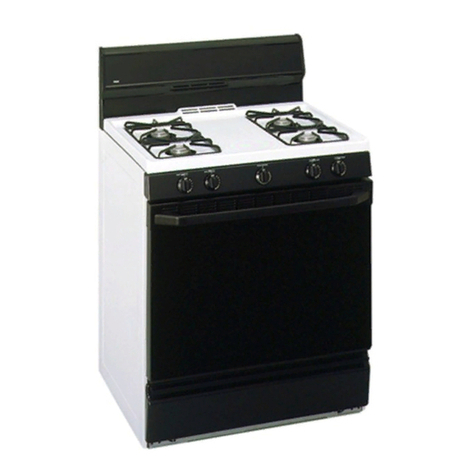
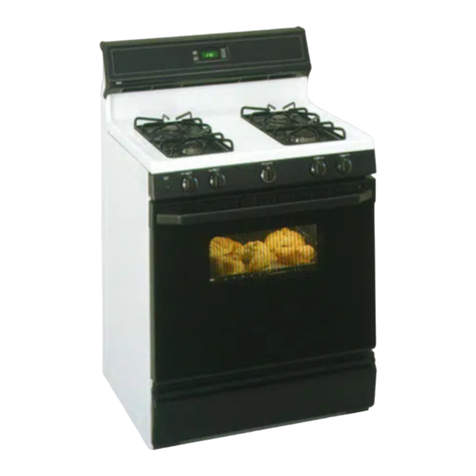
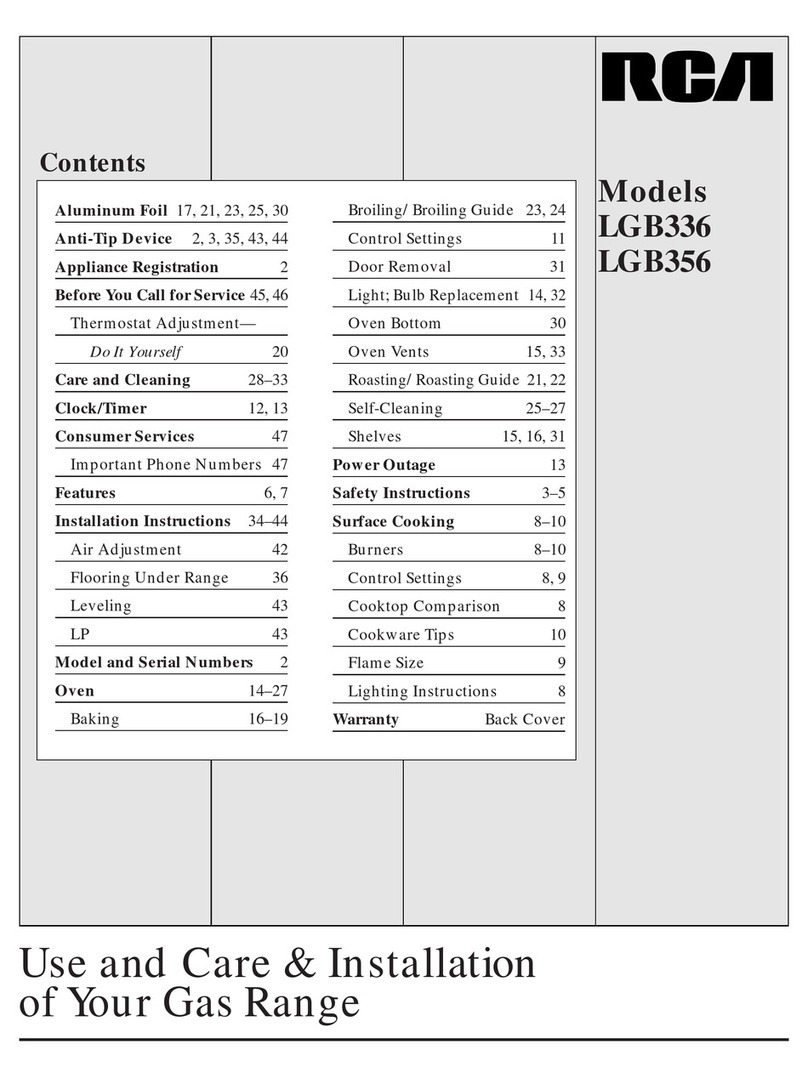
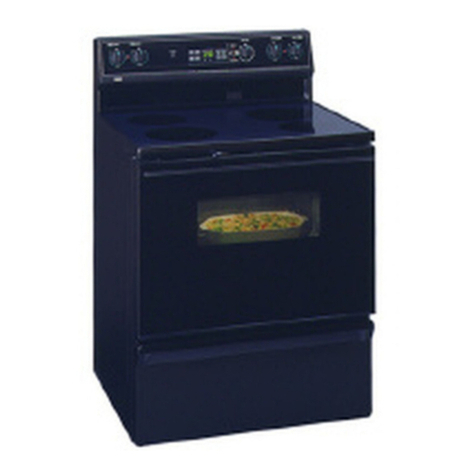
RCA LGB600 Installation guide

I
Immn
ContentS Model
LGB600
Ahuninum FOti 5,16,20,22,24 Oven Bottom 30
Anti-’HpD&ice 2,3,34,41 Oven Vents 4,5,14,32
Careand Clknimz 28-32 Roasting/Roasting Guide 20,21
ClocldTiie* 11,12 Self-cleaninfz 24-27
Features ~6.7 Shelves 5,14,15,20,23,24,31
Installation Ihstnactions 33-44 Thermostat Adiustxnent-
Air Adiusbent 40 Do It Yourself 19
FlooringI35 TunedBaking 17,18
41 Power Outage 9
LP Conv&ion 42-44 Problem Solver 45,46
Oven 11-27 Safeti Instructions 2-5
15-17 Surface Cooking 8-1o
M@@iIing Guide 22-23 Burners 8,9
Control S&timzs 11,12,15, Control Settings 9
17-20,22,25,26 Cooktop Comparison 8
Door RemOval 31
Fluoresce tNight Light 13
Light; Bulk)Replacement 13,32
Cookware TIDS 10
Flame Size 9
Lijzhtins Instructions 9
II
Use and Care &Installation
of You~Gas Range
1.Ou

Read this guiipCarefiluy.
$
It is intendedto hlp you operate and maintain your
new range proper .
Keep it handy for lanswersto your questions.
If you receiv+ adamaged range...
tiediately ~m+cxtie dealer(or builder) that sold
you the range. 4
Save time an money.
Before you Uestservice. ● ●
Check the Proble Solver in the back of this guide.
?
It lists causes of “noroperatingproblem that you
can correct yourse f.
AWARNING
●ALLRANGES
CANTIP
●INJURYTO PERSONS
COULD RESUET
.INSTALLANTI-TIP
DEVICES PACKED
_RANGE
●SEE INSTALLATION
INS’IIWC~ONS
,10
WARNING: ~the iIlfOI’IMtiOn inthis
guide is not followed exactiy, afire or
explosion may result causing property
.-e, pe~ti Wury or death. h
—Donot*mor Ngasoihe or other
flammable vapors and liquids in the
vicinity of this or any other appliance.
—WHAT TO DO IF YOU SMELL GAS
●Do not @to light any appliance.
●h) IIOt tOUCh my ektdd switch; do
not use any phone in your building.
●Immediately call your gas suppiier from
aneighbor’s phone. Follow the gas
supplier’s instructions.
●If you cannot reach your gas supplier,
call the fire department.
—Installation and service must be
performed by aqualifkd installer, service
wev or the gas supplier.
2

IMPORTANT SAFETY INSTRUCTIONS
Read allinstructions IX1ORuAg thisappiiance.
m
“IMPORTAN’J’SAFETY NOTICE
●The~o %●Safe Drinking Water and Toxic
EnforcementArequiresthe GovernorofCalifornia
to publish alist of substances known to the state
to cause cancerdbirth defects or other reproductive
hmd requ@ businesses to warn customers
of potential ex~sure to such substances.
Gas appiianc ean cause minor exposure to
1
four of these bstanees, namely benzene, carbon
monoxide,formaldehydeand soot,caused primarily
by the incomplete combustion of natural gas or
LP fuels. Rope@yadjusted burners, indicated by a
bluish rather th~ ayellow flame, will minimize
incomplete coTustion. Exposure to these
substances can minimized by venting with an
open window o~using aventilation fan or hood.
When You QYour-e
5
●~ve tie &er show you the location of the
range gas cut ff valve and how to shut it off
if neeessary.
●Have your
eTinstalled and properiy
grounded by aqualified installer, in accordance
with the InstW$ion Instructions. Any adjustment
and service sho@dbe performed only by qualifkd
gas range ins~ers or service technicians.
●Do not at@mpt’to repair or rephwe any part of
your range +~ it is NKommended
inthisguik othersemicing shouldbe referred
to aqualifiedttx$mician.
“Plug your ranqeinto a120-volt grounded
outlet only. Dopot remove the round grounding
*
prongfrom the$ug. Ifin doubtabout& grountig
of the home ekx@cal sys~ it is your personal
responsibility@obligation to have anungrounded
outlet replaced ~th aproperly grounded; three-
prong outlet in +cordance with the National
Electrical Code;
•~~~ “
paekmg materials are removed fkom
the range before operating it to prevent fmeor
smoke damage should the packing material ignite.
cBe sure your range is correctly adjusted by a
qualified serviee technician or installer for the
type of gas (natural or LP) that is to be used.
Yourrange can be converted for use with either
type of gas. See the Installation Instructions.
W~G: Theseadjustmentsmust be made by a
qualiikd servicetechnician in accordancewith the
manufacturer’sinstructionsand all codes and
requirementsofthe authorityhavingjurisdiction.
Failureto followtheseinstructionscould result in
seriousinjury or propertydamage. The qualified
agencyperformingthiswork assumesnxponsibility
for the conversion.
●After prolonged use of arange, high floor
temperatures may remit and many floor
coverings will not withstand this kind of use.
Never install the range over vinyl tile or linoleum
that cannot withstand such type of use. Never
install it directly over interior kitchen carpeting.
Using YourRange
AWARNING-MI~. ~
cantipandi@ryeo uldresuit.To
prevent aeeidentai tipping of the @
range, attach it to the wall by installing
the Anti-’Ilpdevice supplied.
To check if the device is installed and m
engaged properly, carefully tip the
range forward. The Anti-’Ilp device should engage
and prevent the range from tipping over.
If you pull the range out fkomthe wall for any
reason, make sure the device is properly engaged
when you push the range back against the wall.
If it is not, there is apossible risk of the range
tipping over and causing injury if you or achild
stand, sit or lean on an open door.
Please refer to the Anti-Tip device information
in this guide. Failure to take this precaution could
result in tipping of the range and injury.
●Do not l~ve ~@n done or ~a~nd~
where arange is hot or in operation.
They could be seriously burned.
●For your safety, never use your appliance for
warming or heating the room.
(continued next page)
3
I
———, ._

.—. .+-
1IMPORTM SAFETY INSTRUCTIONS
(continued)
[
ocAmON: IMS OF INTEREST TO
CHILDREN H(XJLD NOT BE STORED IN
CABINETS OVE AIUWGE OR ON THE
BACKSPLA OF ARANGE-CHILDREN
4
CLIMBING NTHE RANGE TO REACH
ITEMS CO DBE SERIOUSLY INJUREI).
●Do not allow myone to climb, stand or hang on
the door or c@ktop. Theycould damage the range
and even tip it (wer,causing severe personal injury.
d
*Let the burne grates and other surfam cool
before tout “gthem or leaving them where
children can @achthem.
r
●Never wear 10 efitting or hanging garments
while using th appliance. Be careful when
reaching for ite~ stored in cabinets over the
Cooktop.Fl%able material could be ignited if
brought in con ct with flame or hot oven surfaces
and may cause ~everebums.
cDo not use wa~r on grease fires. Never pick up
aflaming pan.;Tum the controls off. Smother a
flaming pan on asurface unit by covering the
pan completely with awell-fitting lid, cookie sheet
or flat tray. Uselamulti-purpose dry chemical or
foam-type fwe~xtinguisher.
Flaming grease ,outsideapan can be put out by
covering it wiLbaking soda or, if available, by
using amulti-p se dry chemical or foam-type
fue extinguisher.
Fiame in the ovpncan be smothered completely by
closing the eve+ door and turning the oven off or
by using amul~-purpose dry chemical or foam-
type f~e exting~isher.
.Donotstore lematerialsintheovenor
●DO NOT STO$E OR USE COMBUSTIBLE
MATERIALS,GASOLINE OR OTHER
A
I?LAMMABL VAPORSAND LIQ~S IN
THE VICINI OF T~ OR ANY OTHER
APPLIANCE.
$
●DO not let coo gg- or other flammable
Xl@erialsace ulate in or near the range.
●When cooking ~rk, follow the directions exactly
and always COOKthe meat to an internal
temperature of tleast 170°F.This assures that, in
lb
the remote poss” ility that trichina maybe present
in the meat, it will be killed md fie meat will be
safe to eat.
4
Surface Cooking
●Alwaysheat fat slowly, and watch as it heats.
●Alwaysuse the LITE position when igniting the
topburnersand make sure the burners have ignited.
●Never leave the surface burners unattended at
highflame settings. Boilovers cause smoking
and greasy spillovers that may catch on fire.
.Adjust the top burner flame size so it does not
extend beyond the edge of the cookware.
Excessive flame is hazardous.
●Useonly dry pot holdem+noist ordamppot holdem
onhot surfacesmay resultin burnsfinm steam.
●Do not let potholders come near open flames
when lifting cookware. Do not use atowel or other
bulkyclothin place of apot holder.
●Tominimim the possibility of burns,ignition
of flammable materials and spillage, turn cookware
handles toward the side or back of the range
without extending over adjacent burners.
●Always turn the surface burnem to off before
removing cookware.
cCarefully watch foods being fried at ahigh
flame setting. @
●Never block the vents (air openings) of the
range.Theyprovide the air inlet and outlet that
arenecessary for the range to operate properly
with correct combustion. Air openings are located
at the rear of the cooktop, at the top and bottom of
the oven door, and at the bottom of the range under
the storage drawer.
●Donot useawokif the wok has around metal
ringthat is placed over the burner grate to
SUppOrtthe wok. Thisring acts as aheat trap,
which may damage the burner grate and burner
head. Also, it may cause the burner to work
improperly. T& may cause acarbon monoxide
level above that allowed by current standards,
resulting in ahealth hazard.
●F* for&yingshouldbeasdry aspossible Frost
on fi-omnf~s or mois~ on fresh foods can cause
hotfat to bubble uP ~d over the sides of the pan.
●UW the kast possible amount offat for effective
ShdJOWor d~p.fat fr~g. Filling the pan too fill
of fat can cau5e Spillovem when food is added.
●Usea deepfat thermometerwhenever possible to
Prevent overheating fat beyond the smoking po~t.
●Never try to move a pan of ~ot fat5especially a
deep fat @cr. Wtit until tie fat is COOL
——
/- ●When using Tscookware, make sure it is
Ldesigned for to -of-range cooking.
1
●If acombinati nof oils or fats will be used
in frying, stir tgether before heating or as fats
melt slowly. 1
●We proper pa size-Avoid pans that are
unstable or eas”ly tipped. Select cookware having
flat bottoms lar eenough to properly contain food
and avoid boil vers and spillovers and large
enough to covet burner grate. This will both save
cleaning time ~d prevent hazardous accumulations
of food, since ~avy spattering or spillovers left
on range can i$ite. Use pans with handles that
can be easily g$isped and remain cool.
●Keep all plasti+saway from the top burners.
too-dose”totheIvent. IVentappearanceand locationvary I
●Do not leave 3yitems on the cooktop.
Thehot air fro the vent may ignite flammable
items and will @crease pressure in closed
4P”I containers, whi+h may cause them to burst.
W●TOavoid the ~ibility of abum, always be
J
certain that th controls for all burners are at
the off positio and all grates are cool before
attempting to ~move them.
1
●When flaming oods are under the ho@ turn
the fan off. Th fan, if operating, may spread
the flames.
●Ifrangeisl Tnear awindow,do not hang
long curtains th tcould blow over the top burners
and create afm hazard.
+
●Ifyousmellg ,tumoffthe gastotherangeand
call aqualified “cetechnician. Never use an open
flame to locate leak
Baking, Broi+g and Roasting
●Do not use the ~ven for astorage area.
Items stored id the oven can ignite.
●Place the oven Shelvesin the desired position
while the oven bcool.
\
●Standaway fr mthe range when opening the
door of ahot oen. Thehot air and steam that
91
escapes can cau ebums to hands, face and eyes.
●Keep the oven ree from grease buildup.
●Pulling outtheshelfto theshelf-stopisa
conveniencein lifting heavy foods. It is also a
precaution against burnsfrom touching hot
surfaces of the door or oven walls. The lowest
~ition “R” is not designed to slide.
●Do notheatunopenedfood containers.Pressure
couidbuildup andthecontainercouldburst,
causing an injury.
●Do not use aluminum foil anywhere in the oven
except as described in this guide. Misuse could
result in af~e hazard or damage to the range.
●When using cooking or roasting bags in the
oven, follow the manufacturer’s directions.
cUse only glass cookware that is recommended
for use in gas ovens.
●Always remove the broiler pan from range as
soon as you finish broiling. Grease left in the pan
can catch f~e if oven is used without removing
the grease from the broiler pan.
cWhen broiling, if meat is too close to the flame,
the fat may ignite. Trim excess fat to prevent
excessive flare-ups.
cMake sure the broiler pan is in place correctly
to reduce the possibility of grease f~es.
●If you should have agrease fire in the broiler p-
turn offoven control,andkeep the oven door closed
to containfire untilit burnsout
Self-Cleaning Oven
●cl= ()~ypm listedinthisUseandCareGuid&
●Do not clean door gaskek The door gasket is
essential for agood seal. Care should be taken not
to rub, damage or move the gasket.
cDo not use oven cleaners. No commercial oven
cleaner or oven liner protective coating of any kind
should be used in or around any part of the oven.
Residue from oven cleaners will damage the inside
of the oven when the self-clean cycle is used.
.Beforeself-cieaningtheoven, remove the shelves,
the broiler pan and grid and other cookware.
cBe sure to wipe up excess spillage before
starting the self-cleaning operation.
●If the self-cleaning mode malfunctions, turn
the oven off and disconnect the power supply.
Have it serviced by aqualified technician.
SAVE THESE
INSTRUCTIONS 5

0-
FEA-S OF YOUR RANGE
—
Features and appearance vary.
??7
1--+
.
Sealed Burners
f+.L. __--_J_~
6.

FeatureIndex (Appearance of features varies.)
1Air Wake (under storage drawer)
2Modql and Serial Numbers
(on front frame of range, behind the storage drawer)
3Anti-rip Device
(Lower right rear comer on range back. See the Installation Instructions.)
4Oven Bottom
5Oven Interior Light
See page
4,32
2,3,34,41
30
13,32
6Oven LightOn/OffSwitch 13
7Grat~ Drip Pans (on some models) and Surface Burners 4,5, 8–10,
28,29
8Elect~nic Oven Control Clock and Timer 11, 12
9Oven Vent 4,5, 14,32
10 Fluo@scent Surface Light 13,29
11 Cookfop 4, 8–10, 30
12 Surf~e Burner Control Knobs 4,9, 10,32
13 Oven Door Latch 15,20,23
(use for Self-Cleaning only) 24-26
14 Oven Shelves 5,14, 15,20,
(easilyremovedor repositionedon shelfsupports) 23,24,31
15 Oven Shelf Supports I5,14,15,20,
22,23
16 Oven Door Gasket 5,24,31
17 Air V+ntin Oven Door (top of ovendoor) 4, 13,32
18 Lift-QH Oven Door 31
19 Storage Drawer 4,29
20 Broi16r Pan and Grid 5,20,
(Do n@ clean in the self-cleaning oven.) 22-24,31
7

*
“i
HOVVDOES THIS COOKTOP COM,I?M
TO YOUR OLD ONE?
Your new cooktop has gas burners. If you are used The best types of cookware to use, plus heat-up and 8J
to cooking with @duction or other electric surface cool-down times, depend upon the type of burner or
units, you will notice some differences when you use swface unit you have.
gas burners.
‘&p of Cooktop !Description
Gas Burners IRegukror seakd
Igmburners use
eitherLP gas
or naturalg~.
Radiant El-c coils
(Glass (hlIIliC) underaglass-
Cookt.op ceramiccooktop.
o
Indupon Highfrequency
#
@Qg
.0 inductioncoils
+\-
//,,,,,,,\s\ underaglass
surface.
Electriccoil
eFlattenedmetal
tubingcontaining
electricresistance
wiresuspended
overadrippn.
Solid Disk
oSolidcastiron
disk sealedto the
~1 cooktOpsurface.
The following chart will help you to understand the
differences between gas burner cooktops and any
othertypeof cooktopyou may haveusedin thepast.
RowIt Works
Flamesheat the pansdirectly.Panflatnessis not titical to cookingresults,but
flat-bottomti panswillprovidemorestabilityontop of the grates.Gasburners
kat the panright awayandchangeheat settingsright away.Whenyouturnthe
controloff,cookingstopsrightaway.
Heattravelsto the glasssurfaceandthen to the cookware,sopansmustbeflat on
thebottomforgoodcookingresults.Theglasscooktopstayshot enoughto
continuecookingafterit is turnedoff.Removethepan tim the surfaceunit if
youwantcookingto stop.
Pansmustbe madeofferrousmetals(metalthatattractsamagnet).Heatis
producedby amagneticcircuitbetweenthecoil andthe pan.Heatsupright away
andchangesheatsettingsrightaway,likeagascooktop.Afterturningthe control
off,theglasscooktopis hotfromtheheatofthepan,but cookingstopsrightaway.”
Heatsby directcontactwiththepan andby heatingthe airunderthepan.Forbest
cookingresults,usegoodqualitypans.Electriccoils aremoreforgivingof
warped pansthanradiantor soliddisks.Heatsup quicklybut does not change
heatsettingsas quicklyas gasor induction.Electriccoilsstayhot enoughto
continuecookingforashorttimeafterthey areturnedoff.
Heatsby directcontactwiththepan, sopansmustbe flaton the bottomforgood
cookingresults.Heatsup andcoolsdownmoreslowlythanelectriccoils.The
diskstayshot enoughto continuecookingafterit is turnedoff.Removethepan
fromthe soliddisk if youwantthecookingto stop.
8

SURFACE COOKING
eSurface Burner Controls
The knobs that turn the surface burners on and off are
locatedon the controlpanel in front of the burners.
The twoknobson the left controlthe left frontand
left rear burners.The two knobson the rightcontrol
the right frontandright rearburners.
Before Lighting aBurner
●If drip pans are supplied with your range, they
should be Usedat all times.
●Makesureall grates on the range are in place
before using any burner.
cThe smaller burner (right rear position) will give
the best simmer results. It offers precise cooking
performance for delicate foods, such as sauces or
foods which need to cook over low heat for a
long time. It can be turned down to avery low
simmer setting.
●The right front burner is higher powered than the
others and will bring liquids to aboil quicker.
To Light aSurface Burner
Push the control knob in
and turn it to LITE. You
will hear alittle “clicking”
noise—the sound of the electric
spark igniting the burner.
Turn the knob to adjust the
oflame size. If the b-ob stays at
LITE, it will continue to click.
*A When one burner is turned to LITE, all the burners
spark. Do not attempt to disassemble or clean around
any burner while another burner is on. An electric
~\ sh&k may result, which could cause you to knock
over hot cookware.
lP%----
L
In ease of power fdure, you can light the
surface burners on your range with amatch. Hold
alighted match to the burner, then turn the knob
to the LITE position. Use extreme caution when
lighting burners this way.
Surface burners in use when an electrical power
failure occurs will continue to operate normally.
After Lighting aBurner
●Donot operate aburner for an extended period of .Be sure the burners and grates are cool before you
time without codkware on the grate. The finish on the place your hand, apot holder, cleaning cloths or
grate may chip without cookware to absorb the heat. other materials on them.
How to Select Flame Size
Watch the flame, not the knob, as you reduce heat.
The flame size on agas burner should match the ~.i,.
.pv~>:>
cookware you are using. -— ~+;,::~,,’,,,,..
FOR SAFE HANDLING OF COOKWARE NEVER
LET THE FLAME EXTEND UP THE SIDES OF
THE COOKWAIW.
@
Any flame larger than the bottom of the cookware is
wasted and only serwx to heat the handle. (continued next page)

SURI?ACE COOKING
(continued)
Top-of-Range Cookware
Aluminum: Medium-weight cookware is
recommended &c@useit heats quickly and evenly.
Most foods brown evenly in an aluminum skillet.
Use saucepans with tight-fitting lids when cooking
with minimum amounts of water.
Cast-Iron: If heated slowly, most skillets will give
satisfactory results,
Enamelware: Undersomeconditions,the enamelof
somecookwaremaymelt.Followcookware
manufacturer’srecommendationsforcookingmethods.
Glass: There are two types of glass cookware+ose
for oven use only and those for top-of-range cooking
(saucepans, coffee and teapots). Glass conducts heat
very slowly.
Heatproof Glass Ceramic: Can be used for either
surfaceor oven cooking. It conducts heat very slowly
and cools very slowly. Check cookware manufacturer’s
directions to be sure it can be used on gas ranges.
Stainless Steel: This metal alone has poor heating
properties and is usually combined with copper,
aluminum or other metals for improved heat
distribution. Combination metal skillets usually work
satisfactorily if they are used with medium heat as the
manufacturer recommends. *
Stove TopGrills
Do not use stove top grills
on your sealed gas burners.
If you use the stove top
grill on the sealed gas
burner it will cause
incomplete combustion and
can result in exposure to
carbon monoxide levels
above allowable current
standards. T’hiSCan be
hazardous to yOUrhealth.
Wok Cooking
We recommend that you
use only aflat-bottomed wok.
They are available at your local
retail store.
Do not use woks that have
4
k= A&
support rings. Use of these
types of woks, with or
without the ring in place,
can be dangerous. Placing &
the ring over the burner grate may cause the burner
to work improperly resulting in carbon monoxide
levels above allowable current standards. This could
be dangerous to your health. Do not try to use such
woks without the ring. You could be seriously burned
if the wok tipped over.
10
_——
.

[
ON
OVEN
IJGHT
OFF
FICA-S OF YOUR OVEN CONTROL
(appearance may vary)
(b(b (b&
1. OVENLIGHT(on some models). Press this pad
to turn the oven light on or off.
2. CLEAR/OFF. Press this pad to cancel all oven
operations except clock and timer.
3. PROGRAM STATUS. Words light up in the
9
display to indicate what is in the time display.
Programmed information can be displayed at any
time by touching the pad of the operation you
want to see. For example, you can display the
current time of day while the timer is counting
down by pressing the CLOCK pad.
4. TIME DISPLAY. Shows the time of day, the
times set for the timer or automatic oven operation.
5. OVEN TEMPERATURE AND BROIL
DISPLAY. Shows the oven temperature or the
broil setting selected.
6. FUNCTION INDICATORS. Lights up to show
whether oven is in bake, broil or self-clean mode.
7. INCREASE. Short taps to this pad increase the
time or temperature by small amounts.
Press and hold the pad to increase the time or
temperature by larger amounts.
8. P-L LIGHT. Press this pad to turn the
cooktop surface light on and off.
9. DECREASE. Short taps to this pad decrease the
time or temperature by small amounts.
Press and hold the pad to decrease the time or
temperature by brger amounts.
10. BAKE. Press this pad to select the bake function.
o11. BROIL. Press this pad to select the broil fimction.
I-
:
ON
PANEL
LIGHT
OFF
12. CLEAN. Press this pad to select self-cleaning
function. See the Operating the Self-Cleaning
Oven section.
13. COOK TIME. Press this pad for Timed Baking
operations.
14. STOP TIME. Use this pad along with the COOK
TIME or CLEAN pad to set the oven to start
automatically at atime you select.
15. CLOCK. To set the clock frostpress the CLOCK
pad. Then press the INCREASE or DECREASE
pad to change the time of day. Press the CLOCK
pad to start.
16. TIMER. Press this Dadto select timer function.
The timer does not ;ontrol oven operations. The
timer can time up to 9hours and 55 minutes.
To set the timer, first press the TIMER ON/OFF
pad. Then press the INCREASE or DECREASE
pad to change the time.
To cancel the timer, press and hold the TIMER
ON/OFF pad until the word “TIMER’ disappears
tim the display.
If ‘T— and anumbed’ flash in the display and
the oven control signals, this indicates fhnction
error code. If the function error code appears
during the self-cleaning cycle, check the oven door
latch. The latch handle may have been moved, even
if only slightly, horn the latched position. Make
sure the latch is moved to the right as far as it will
go. Press the CLEAR/OFF pad. Allow the oven to
cool for one hour. Put oven back into operation.
If the function error code repeats, disconnect power
to the range and call for service.
11
I
—

OVEN CONTROL, CLOCK ANDTIMER
Clock
The clock must be set for the automatic oven timing
functions to work properly.The time of day cannot be
changed during aT- Baking or Self-Cleaning cycle.
ToSet the Clock
o
1. Press the CLOCK pad.
CLOCK
2. Press the INCREASE or DECREASE pad to set the
time of day.
3. Press the CLOCK pad to start.
I%ner ToSet the Timer
The timer is aminute time~
o
1. Press the
it does not control oven operations. TIMER pad.
The maximum setting on the timer TIMER
is 9hours and 55 minutes.
c1
2. Press the
ANCREASE or
DECREASE pad to
set the amount of
time on the timer.
ov
The timer will start automatically
within afew seconds of releasing
the pad. The timer, as you are
setting it, will display seconds until
1minute is reached. Then it will
display minutes and seconds until
60 minutes is reached.
After 60 minutes, it will display
hours (“HR” now appears in
display) and minutes until the
maximum time of 9hours and
55 minutes is reached.
ToReset the Timer To Cancel the Timer
If “TIMER” is displayed, press the INCREASE or Press and hold the TIMER pad until the word
DECREASE pad until desired time is reached. ‘TIMER’ disappears born the display.
If “TIMER’ is not displayed, press the TIMER pad
first, then follow the instructions above to set the timer. . .
End of Cycle Tone Display Messages
The end of cycle tone is aseries of M~~d~ti~ap~ in the *play,
three beeps followed by one beep the dmr is open. Close the door. If
every six seconds. If you would “LOCK’ appws in the display,
liketo removethe signalthat beeps the oven dooris in the locked
everysix seconds,press andhold position.BAKE,BROILand
theCLEAR/OFFpadfor 10seconds. COOKTIMEcannotbe setif the
Toreturnthe signalthat beeps dooris in the lockedposition.
everysix seconds,pressandhold
theCLEAR/OJWpadfor 10seconds.
Power Outwe
u
After apower outage, when power
is restored, the display will flash
and time shown will no longer be
correct-for example, after a5-
minute power intemuption the
clock will be 5minutes slow.
All other functions that were in
operation when the power went out
will have to be programmed again.
*
12

USING YOUR OVEN
C
●:4 Before Using Your Oven
Be sure you understand how to set the controls properly. Practice removing
and replacing the shelves while the oven is cool. Read the information and
tips on the following pages. Keep this guide handy where you can refer to
it, especially during the first weeks of using your new range.
Electric Ignition
Power Outage
CAUTION: Do not make any attempt to operate the electric ignition
oven during an electrical power failure.
The oven or broiler cannot be lit during apower failure. Gas will not flow
unless the glow bar is hot.
If the oven is in use when apower failure occurs, the oven burner shuts
off and cannot be re-lit until power is restored. This is because the flow
of gas is automatically stopped and will not resume when power is
restored until the glow bar has reached operating temperature.
Oven Moisture
*Asyour oven heats up, the temperaturechange of the air in the oven may
cause water dropletsto form on the door glass.Thesedropletsare harmless
and will evaporateas the oven continuesto heat up.
Fluorescent Night Light (on some models) Oven Light
Usethe switch on the upper control panel to turn The oven light comes on automatically when the door
the light on and off. is opened. Use the pad on the control panel to turn
the light on and off when the door is closed.
Automatic Oven Shut Off
ASasafety feature, this oven will automatically shut itself off if it has been
left on for more than 12 hours.
(continued next page)
13
I
——.—....

.
USING YOUR OVEN $
(continued) $
Oven Vents
The oven is vented through duct openings at the rear
of the cooktop. See the Features section. Do not block
these openings when cooking in the oven—it is
important that the flow of hot air from the oven and
fksh air to the oven burners be uninterrupted.
●The vent openings and
nearby surfaces may
become ho~ Do not
touch them.
●Do not leave plastic Vent appearance and location vary
items on the cookto~
they may melt if leR too
close to the venk
●Handles of pots and pans on the cooktop may
become hot if left too close to the ven~
●Metal items will beeome very hot if they are left
on the cooktop and could cause burns.
●Do not leave any items on the cooktop. The hot air
from the vent may ignite flammable items and will
increase pressure in closed containers, which may
cause them to burst.
Oven Shelves
The shelves are designed with stop-locks so when
placed correctly on the shelf supper@ they will
stop before coming completely out of the oven and
will not tiIt when you are removing f- from them
or placing food on them.
When placing cookware on ashelf, pull the shelf out
to the bump on the shelf support. Place the cookware
on the shelf, then slide the shelf back into the oven.
This will eliminate reaching into the hot oven.
To remove ashelf fkom the oven, pull it toward you,
tilt the front end upward and pull the shelf out.
To replacq place the shelf on the shelf support with
the stop-locks (curved extension of the shelf) facing
up and toward the rear of the oven. Tilt up the front
and push the shelf toward the back of the oven until it
goes past the bump on the shelf support. Then lower
the front of the shelf and push it all the way back.
Bump ,
Shelf Positions
The oven has five shelf supports for baking,
roasting and broiling identified in this illustration –T -\\
as A(6&tom), B, C; Dand E(top). It also has a
J1i
b.*
special low shelf position (R) for roasting extra
large items, such as alarge turkey-the shelf is not
designed to slide out at this position. Shelf positions ~
for cooking are suggested in the Baking, Roasting
and Broiling sections. *’
q:
14 _.———..-—

BAKING
Do not leek the oven door with the latch during If you think an adjustment is necessary, see the Adjust
baking. The latch is used for self-cl-g only. the Oven Thermostat section. It gives easy Do It
Youroven temperatureis controlledusingthe latest Yowxe~instructionson howto adjustthe thermostat.
technologyinovencontrolsystems.Itis recommended
that you operateyour newovenforanumberof
weeksto becomefamiliarwithits performance.
How to Set Your Range for B-g
Toavoid possible burns, place shelves in the correct 3. Press the CLWUUOFF pad when baking is finished
position before you turn the oven on. and then remove the food from the oven.
1. Press the BAKE pad.
2. Press the INCREASE or DECREASE pad until the To change the oven temperati during BAKE
desired temperature is displayed. cycle, press the BAKE pad and then the INCREASE
The oven will start automatically.The word “ON” and or DECREASE pad to get the new tempem~re.
“100°” will be displayed. As the oven heats up, the
display will show the changing temperature. When the
oven reaches the temperatm you set atone will sound.
Oven Shelves
9Arrange the oven
shelf or shelves in
the desired
locations while
the oven is cool.
The correct shelf
position depends
on the kind of
fti and the
browning desired
As ageneral rule,
place most fti in the middle of the oven, on
either shelf position Bor C. See the chart for
suggested shelf positions.
Q
o
0
Q
.
Q
.
I‘lJpe of Food IShelf Position I
Angel food cake A
1
Biscuits or muffhs Bor C1
Cookies or cupcakes Bor C
Brownies Bor C
Layer cakes Bor C
Bundt or pound cakes Aor B
Pies or pie shells Bor C
—
Frozen pies A(on cookie sheet)
Casseroles Bor C
Roasting Bor R
Preheating
Preheat the oven if the recipe calls for it. Preheat
means bringing the oven up to the specified
temperature before putting the food in the oven.
TOpreheat, set the oven at the correct tempera~—
eselecting ahigher temperature does not shorten
preheat time.
Reheating is necessary for good results when baking
cakes, cookies, pastry and breads. For most casseroles
and roasts, preheating is not necessary. For ovens
without apreheat indicator light or tone, preheat 10
minutes. After the oven is preheated place the food
in the oven as quickly as possible to prevent heat ,
—
from escaping.
(continued next page)
15
---

1
‘w!
.
‘.
BAKING ~.
.“’
;
(continued) ‘+?
,.
$,,
Pan Placement 61
For even cooking and proper browning, there must be Pans should not touch each other or the walls of the -
enough room for air circulation in the oven. Baking oven. Allow 1-to 1%-inch space between pans as I
results will be better if baking pans are centered as well as from the back of the oven, the door and the
much as possible rather than being placed to the front sides. If you need to use two shelves, stagger the pans
or to the back of the oven. so one is not directly above the other.
Baking Guides
When using prepared baking mixes, follow package recipe or instructions
for best baking results.
cookies
When baking cookies,
flat cookie sheets (without
sides) produce better-
looking cookies. Cookies
baked in ajelly roll pan
(short sides all around)
may have darker edges
and pale or light browning
may occur.
Aluminum Foil
Never entirely cover a
shelf with aluminum foil.
This will disturb the heat
circulation and result in
poor baking. Asmaller
sheet of foil may be used to
catch aspillover by placing
it on alower shelf several
inches below the food.
Cookies can be baked on several shelves at the same Do not put aluminum foil on the oven bottom.
time but browning may be uneven because of reduced
air circulation.
Do notuseacookie sheet so large that it touches
the walls or the door of the oven.
Pies
For best results, bake pies
in dark, rough or dull pans
to produce abrowner,
crisper crust. Stagger the
pies for most even
browning. Frozen pies in
foil pansshould b- placed I~~1
on &aluminum cookie ~/y
sheet for baking since the shiny foil pan reflects
heat away from the pie crust; the cookie sheet helps
retain it.
Cakes
For best browning when f1I\
baking several 8“-or 9“
cakes, stagger them so one
pan is not directly above
another. Warped or bent
pans will cause uneven
baking results and poorly
shap~ products. A-cake y)
baked in apan larger than the recipe recommends will
usually be crisper, thinner and drier than it should be.
If baked in apan smaller than recommended, it may
be undercooked and batter may ovefflow.
Baking Pans
Use the proper baking pan. The type of ftish on the ●Shiny, bright and smooth pans reflect heat, resulting
pan determines the amount of browning that will occur. in alighter, more delicate browning. Cakes and
sDark, rough or dull pans absorb heat resulting in acookies require this type of pan.
browner, crisper crust. Use this type for pies. ●Glass baking dishes also absorb heat. When baking
in glass baking dishes, the temperature may need to
be reduced by 25”F.
16

.
49 Don’t Peek
Set the timer for the estimated cooking time and do DO NOT open the door to check until the minimum
not open the door to look at your food. Most recipes time. Opening the oven door frequently during
provide minimum and maximum baking times such cooking allows heat to escape and makes baking
as “bake 30-40 rninu~s.” times longer. Your baking results may also be tiected.
How to Tme Bake
TIMED BAKING
Do not lock the oven door with the latch NOTE: Before beginning make sure the clock shows
during Tiied Baking. The latch is used for the correct time of day.
Self-ckxmillg only. To set the clock, fmt press the CLOCK pad. Press the
The oven control allows you to turn the oven on or INCREASE or DECREASE pad until the correct time
off automatically at specific times that you set. of day is displayed.
How to Set Immediate Start and Automatic Stop
To avoid possible burns, place the shelves in the The oven will start automatically. The word “ON’
correct position before you turn the oven on. and”1 00°” will be displayed. The Cook Time will
The oven will turn on immediately and cook for abegin to count down. As the oven heats up, the
*selected length of time. At the end of Cook Time, display will show the-changing temperature.
the oven will turn off automatically. When the oven reaches the temperature you set,
R1. Press the COOK TIME pad. atone will sound. The oven will continue to cook
for the programmed amount of time, then shut off
..-
[‘MEIautomatically.
~5. Press the CLEAIUOFF mid to clear
w #
2. Press the INCREASE Dad until the desired lenti ICLEAR
of baking time appea&”in the display. “LOFF
3. Press the BAKE pad.
4. Press the INCREASE or DECREASE mtd until the
the display if necessary~Remove the
food from the oven. Remember, even
though the oven shuts off automatically,
foods continue cooking after the
desired temperature is displayed. An a&ntion tone controls are off.
NOTE: Foods that spoil easily, such as milk, eggs, f@
will occur if step 3is not done. stuffings, poultry and po~ should not be allowed to sit
for more than one hour before or after cooking. Room
temperature promotes the growth of harmful bacteria.
Be sure that the oven light is off because heat fi=omthe
bulb will speed harmful bacteria growth.
(continued next page)
17
-——.. ——

“’--7 :
TIMED BAKING
(continued)
How to Set Delay Start and Automatic Stop
Quick Reminder:
1. Press the COOK TIME pad.
2. Press the INCREASE or DECREASE pad to
set the Cooking Time.
30Press the STOP TIME pad.
4. Press the INCREASE or DECREASE pad to
set the length uf Cooking Time.
5. Press the BAKE pad.
6. Press the INCREASE or DECREASE pad
until the desired temperature appears
in the display.
To avoid possible bums, place the shelves in the
correct position befbre you turn the oven on.
You can set the oven control to delay-start the oven,
cook for aspecitlc length of time ar-dthen turn off
automatically.
For example: Let’ssayit’s2:00 and dinner time is
shortly after 7:00. The recipe suggests 3hours baking
time at 325”F. Here’s how:
c1
1. Press the COOK TIME pad.
COOK
TIME
2. For 3hours of cooking time, press the INCREASE
pad until “3:00” appears in the display.
c1
3. Press the STOP TIME pad.
STOP
TIME
“5:00” appears in the display and “STOP TIME”
flashes. The control automatically sets the Stop
Time by adding the Cook Time to the time of day.
In this example, the time of day is 2:00 and the
Cook Time is 3hours. Adding 3 hours to the time
of day equals 5:00.
4. Change the Stop Time from 5:00 to 7:00 by
pressing the INCREASE pad until “7:00” appears
in the display.
5. Press the BAKE pad.
I‘AKEI
6. Press the INCREASE or DECREASE pad until
“325°” is displayed.
At 4:00, the oven will turn on automatically. The
word “ON” and “100°” will be displayed. The Cook
Time will begin to count down. As the oven heats
up, the display will show the changing temperature.
The oven will continue to cook for the programmed
3hours and shutoff automatically at 7:00.
7. Press the CLEAR/OFF pad to clear the display
if necessary. Remove the food fkom the oven.
Remember, even though the oven shuts off
automatically, foods continue cooking after the
controls are off.
NOTE:
●The low temperature zone of this range (between
150”F.and 200”F.) is available to keep hot cooked
foods warm. Food kept in the oven longer than two
hours at these low temperatures may spoil.
sFoods that spoil easily, such as milk, eggs, fish,
stuffhgs, poultry and pork, should not be allowed to
sit for more than one hour before or after cooking.
Room temperature promotes the growth of harmful
bacteria. Be sure the oven light is off because heat
from the bulb will speed harmfhl bacteria growth.
*./
18
.— —.———
—

ADJUST THE OVEN THERMOSTAT—
DO IT YOURSELF! u
“r You may find tliat your new oven cooks differently
than the one it teplaced. We recommend that you
use your new oven for afew weeks to become more
familiar with it, following the times given in your
recipes as aguide.
If you think your new oven is too hot or too cold,
you can adjust the thermostat yourself. If you think
it is too hot, adjust the thermostat to make it cooler. If
YOU think it is too cool, adjust the thermostat to make
it hotter.
We do not recommend the use of inexpensive
thermometer, such as those found in grocery stores,
to check the tempeti setting of your new oven.
These thermometers may vary 20-40 degrees.
To Adjust the Thermos&t:
n
1. Press the BAKE pad.
BAKE
2. Select an oven tempera~re between 500”F.
and 550”F.
3. Immediately, before the BAKE indicator stops
flashing, press and hold the BAKE pad for about
4seconds. The display will change to the oven
adjustment display.
4. The oven temperature can be adjusted up to
(+) 35*F. hotter or (-) 35”F. cooler. Use the
INCREASE or DECREASE pads to select the
desired change in the display.
o5. After you have made the adjustment,
CLEAR press the CLEAR/OFF pad to go back
OFF to the time of day display. Use your
oven as you would normally.
NOTE: This adjustment will not tiect the broiling
or self-cleaning temperatures. It will be retained in
memory after apower failure.
.
I
.

. .
..
Do not lock the oven door with the door latch
during roasthg. This is used for self-cleaning only. q
Roasting is cooking by dry heat. Tender meat or
poultry can be roasted uncovered in your oven.
Roasting temperatures, which should be low and
steady, keep spattering to aminimum.
The oven has as~ial
low shelf (R.)position 7#db”= ~1
just abovethe oven -~G
bottom Use it when ‘!
extracookingspace is r
needed,for example,
whenroastingalarge =
turkey.The shelfis not
designed to slide out at this position.
Roasting is really abaking procedure used for meats.
Therefore, oven controls are set for Baking or Timed
Baking. (You may hear aslight clicking sound,
indicating the oven is working properly.) Timed
Baking will turn the oven on and off automatically.
Most meats continue to cook slightly while standing,
after being removed from the oven. The standing time
recommended for roasts is 10 to 20 minutes. This
allows roasts to firm up and makes them easier to
carve. The internal temperature will rise about 5° to
10°F.;to compensate for the temperature rise, if
desired, remove the roast from oven sooner (at 5° to
10”F.less than the temperature in the Roasting Guide).
Remember that food will continue to cook in the hot
oven and therefore should be removed when the
desired internal temperature has been reached.
1. Position the oven
at shelf(B) position II~w
for small size roast -’—
(3 to 5lbs.) and at ..z::’.f~~~
(R) position for $-’”.~$jj
Q
larger roasts. _
2. Checkthe weight of the meat. Placethe meat fat-s~de-
up, or poul~ breast-side-up,on roastinggrid in a
shallowpan. The melting f~ will baste themeat.
Selectapan as close to the sizeof the meat as possible.
(Thebroilerpan with grid is agood pan for this.)
n
3. Press the BAKE pad.
BAKE
4. Press the INCREASE or DECREASE pad until the
desired temperature is displayed.
The oven will start automatically. The word “ON”
and”1 00°” will be displayed. As the oven heats up,
the display will show the changing temperature.
When the oven reaches the temperature you se~ a
tone will sound.
n5. Press the CLEAR/OFF pad when
CLEAR roasting is finished and then remove
OFF the food from the oven.
To change the oven temperature during the
roasting cycle, press the BAKE pad and then
the INCREASE or DECREASE pad to get the new
temperature.
Use of Aluminum Foti
You can use aluminum foil to line the broiler pan.
This makes clean-up easier when using the pan for
marinating, cooking with fkuits, cooking heavily
cured meats or basting food during cooking. Press
the foil tightly around the inside of the pan.
Dual Shelf Cooking
This allows more than one food to be cooked at the same time. For example: while roasting a
20 lb. turkey on shelf (R) asecond shelf maybe added on position Dso that scalloped potatoes
can be cooked at the same time. Calculate the total cooking time to enable both dishes to
complete cooking at the same time. Allow 15–20 minutes of additional cooking time.
20
..-___ _- ——..
Other RCA Range manuals

RCA
RCA L2B115GEL User manual

RCA
RCA L3U30L Installation instructions

RCA
RCA L3B315GL Installation guide

RCA
RCA LEB316GR Installation guide

RCA
RCA L3B325GL Installation guide

RCA
RCA LGB116 Installation guide

RCA
RCA L2W20BEL Installation instructions

RCA
RCA L2B335GEL User manual

RCA
RCA LGB336 Training manual

RCA
RCA LEB131 Installation instructions

RCA
RCA LEB356WY Manual

RCA
RCA LEB356GY Manual

RCA
RCA L3B355GL User manual

RCA
RCA LGB336GET Installation guide

RCA
RCA L3BI15GL Installation guide

RCA
RCA LGB146 Installation guide

RCA
RCA LGB126 Installation guide

RCA
RCA L2W20EL Installation instructions

RCA
RCA LEB356 Installation instructions

RCA
RCA LGB116GPR Installation guide