RCA SmarTVirtuoso RNSM3203-D User manual


Manufactured under license from Dolby Laboratories
.
Dolby,Dolby Audio,Pro logic, and the double-D symbol are
trademarks of Dolby Laboratories
.
RNSM3203-D
INSTRUCTION MANUAL
Before using the TV, please read this manual thoroughly, and
retain it for future reference.
This product has been manufactured and sold under the responsibility of Curtis International Ltd.
RCA, the RCA logo, the two dogs (Nipper and Chipper) logo, are registered trademarks or trademarks of Technicolor (S.A.)
or itsaffiliates and are used under license by Curtis International Ltd.
Any other product, service, company, trade or product name and logo referenced herein are neither endorsed nor sponsored
byTechnicolor (S.A.) or its Affiliates.


&$87,21
5,6.2)(/(&75,&6+2&.
'212723(1
7KLVV\PEROLQGLFDWHVWKDWWKLVSURGXFWLQFRUSRUDWHV
GRXEOHLQVXODWLRQEHWZHHQKD]DUGRXVPDLQVYROWDJH
DQGXVHUDFFHVVLEOHSDUWV:KHQVHUYLFLQJXVHRQO\
LGHQWLFDOUHSODFHPHQWSDUWV
&DXWLRQ7RUHGXFHWKHULVNRIHOHFWULFVKRFNGRQRWUHPRYHFRYHURUEDFN1RXVHUVHUYLFH
DEOHSDUWVLQVLGH5HIHUVHUYLFLQJWRTXDOLILHGVHUYLFHSHUVRQQHO
7KLVV\PEROLQGLFDWHVLPSRUWDQW
LQVWUXFWLRQVDFFRPSDQ\LQJWKH
SURGXFW
7KLVV\PEROLQGLFDWHVGDQJHURXVYROWDJH
LQVLGHWKHSURGXFWWKDWSUHVHQWVDULVNRI
HOHFWULFVKRFNRUSHUVRQDOLQMXU\
:$51,1*
7RUHGXFHWKHULVNRIILUHRUHOHFWULFVKRFNGRQRWH[SRVHWKLVSURGXFWWRUDLQRUPRLVWXUH
7KHDSSDUDWXVPXVWQRWEHH[SRVHGWRGULSSLQJRUVSODVKLQJ2EMHFWVILOOHGZLWKOLTXLGVVXFK
YDVHVRUGULQNLQJJODVVHVPXVWQHYHUEHSODFHGRQWKHDSSDUDWXV
7KLVHTXLSPHQWFRPSOLHVZLWK5)UDGLDWLRQH[SRVXUHOLPLWVVHWIRUWKIRUDQXQFRQWUROOHG
HQYLURQPHQW7KLVHTXLSPHQWVKRXOGEHLQVWDOOHGDQGRSHUDWHGZLWKDPLQLPXPGLVWDQFHRI
FHQWLPHWHUVEHWZHHQWKHUDGLDWRUDQG\RXUERG\
6DIHW\,QIRUPDWLRQ
1RWH7KLVHTXLSPHQWKDVEHHQWHVWHGDQGIRXQGWRFRPSO\ZLWKWKHOLPLWVIRUD&ODVV%GLJLWDO
GHYLFHSXUVXDQWWRSDUWRIWKH)&&5XOHV7KHVHOLPLWVDUHGHVLJQHGWRSURYLGHUHDVRQDEOH
SURWHFWLRQDJDLQVWKDUPIXOLQWHUIHUHQFHLQDUHVLGHQWLDOLQVWDOODWLRQ7KLVHTXLSPHQWJHQHUDWHV
XVHVDQGFDQUDGLDWHUDGLRIUHTXHQF\HQHUJ\DQGLIQRWLQVWDOOHGDQGXVHGLQDFFRUGDQFHZLWK
WKHLQVWUXFWLRQVPD\FDXVHKDUPIXOLQWHUIHUHQFHWRUDGLRFRPPXQLFDWLRQV+RZHYHUWKHUHLV
QRJXDUDQWHHWKDWLQWHUIHUHQFHZLOOQRWRFFXULQDSDUWLFXODULQVWDOODWLRQ,IWKLVHTXLSPHQWGRHV
FDXVHKDUPIXOLQWHUIHUHQFHWRUDGLRRUWHOHYLVLRQUHFHSWLRQZKLFKFDQEHGHWHUPLQHGE\WXUQLQJ
WKHHTXLSPHQWRIIDQGRQWKHXVHULVHQFRXUDJHGWRWU\WRFRUUHFWWKHLQWHUIHUHQFHE\RQHRU
PRUHRIWKHIROORZLQJPHDVXUHV
Ь5HRULHQWRUUHORFDWHWKHUHFHLYLQJDQWHQQD
Ь,QFUHDVHWKHVHSDUDWLRQEHWZHHQWKHHTXLSPHQWDQGUHFHLYHU
Ь&RQQHFWWKHHTXLSPHQWLQWRDQRXWOHWRQDFLUFXLWGLIIHUHQWIURP
WKDWWRZKLFKWKHUHFHLYHULVFRQQHFWHG
Ь&RQVXOWWKHGHDOHURUDQH[SHULHQFHGUDGLR79WHFKQLFLDQIRUKHOS
$Q\&KDQJHVRUPRGLILFDWLRQVQRWH[SUHVVO\DSSURYHGE\WKHSDUW\UHVSRQVLEOHIRUFRPSOLDQFH
FRXOGYRLGWKHXVHUVDXWKRULW\WRRSHUDWHWKHHTXLSPHQW
)&&:$51,1*

1. Read these instructions.
2. Keep these instructions.
3. Heed all warnings.
4. Follow all instructions.
5. Do not use this apparatus near water.
6. Clean only with dry cloth.
7. Do not block any ventilation openings. Install in accordance with the manufacturer's
instructions.
8. Do not install near any heat sources such as radiators, heat registers, stoves, or other
apparatus (including amplifiers) that produce heat.
9. Do not defeat the safety purpose of the polarized or grounding-type plug. A polarized plug
has two blades with one wider than the other. A grounding type plug has two blades and a
third grounding prong. The wide blade or the third prong is provided for your safety. If the
provided plug does not fit into your outlet, consult an electrician for replacement of the
obsolete outlet.
10. Protect the power cord from being walked on or pinched particularly at plugs, convenience
receptacles, and the point where they exit from the apparatus.
11. Only use attachments/accessories specified by the manufacturer.
12. Use only with the cart, stand, tripod, bracket, or table specified by the
manufacturer, or sold with the apparatus. When a cart is used, use caution
when moving the cart/apparatus combination to avoid injury from tip-over.
13. Unplug this apparatus during lightning storms or when unused for long
periods of time.
14. Refer all servicing to qualified service personnel.
Safety Information
2
INDUSTRY CANADA NOTICE
This device complies with Industry Canada Iicense-exempt RSS standard(s).
Operation is subject to the following two conditions:
1. This device may not cause interference, and
2. This device must accept any interference, including interference that
may cause undesired operation of the device.
Le présentappareilestconforme aux CNR d'Industrie Canada applicables
aux appareils radio exempts de licence. L'exploitationestautorisée aux
deux conditions suivantes:
(1) l'appareil ne doit pas produire de brouillage, et
(2) l'utilisateur de l'appareildoit accepter tout
brouillageradioélectriquesubi, mêmesi le brouillageest susceptible
d'encompromettre le fonctionnement.

Servicing is required when the apparatus has been damaged in any way, such as power-
supply cord or plug is damaged, liquid has been spilled or objects have fallen into the
apparatus, the apparatus has been exposed to rain or moisture, does not operate normally,
or has been dropped.
15. If an outside antenna or cable system is connected to the product, be sure the antenna or
cable system is grounded so as to provide some protection against voltage surges and built-
up static charges. Section 810 of the National Electrical Code, ANSI/NFPA No. 70-1984
(Section 54 of Canadian Electrical Code, Part 1) provides information with respect to proper
grounding of the mast and supporting structure, grounding of the lead-in wire to an antenna-
discharge unit, size of grounding conductors, location of antenna-discharge unit, connection
to grounding electrode. See following example.
16. Mains plug is used as the disconnect device. It shall remain readily operable and should not
be obstructed during intended use.
17. To prevent injury, this apparatus must be securely attached to the floor/wall in accordance
with the installation instructions.
18. Excessive sound pressure from earphones and headphones can cause hearing loss.
(NEC SECTION 810-21)
1
2
3
4
5
6
7
Electric service equipment
Power service grounding electrode system (NEC ART 250 PART H)
Ground clamps
Grounding conductors
Antenna discharge unit
Grounding clamp
Antenna lead in wire
NEC-NATIONAL ELECTRICALCODE
2
6
4
3
1
7
5
Safety Information
3

High Voltage
Do not open
Risk of electronic shock, do not open.Do not
attempt to service this product yourself as
opening or removing covers may expose you
to dangerous voltage or other hazards. Refer
all servicing to qualified service personnel.
CAUTION
Important Safety Instructions and Maintenance
Important Safety Instructions
If the following problems occur:
Turn off the TV set and unplug the AC power
cord immediately if any of the following
problems occur. Ask your dealer or service
centre to have it checked by qualified service
personnel.
When:
- AC power cord is damaged.
- Poor fitting of AC power outlet.
- TV set is damaged by being dropped, hit or
having something thrown at it.
- Any liquid or solid object falls through
openings in the cabinet.
The screen and cabinet get warm when the
TV is in use. This is not a malfunction.In case
of smoke, strange noise or strange smell
from the unit:
Turn off the power switch immediately;
Disconnect the power plug from the power
outlet;
Contact your dealer or service
centre. Never attempt to make
repairs yourself
because this could
be dangerous.
·
·
·
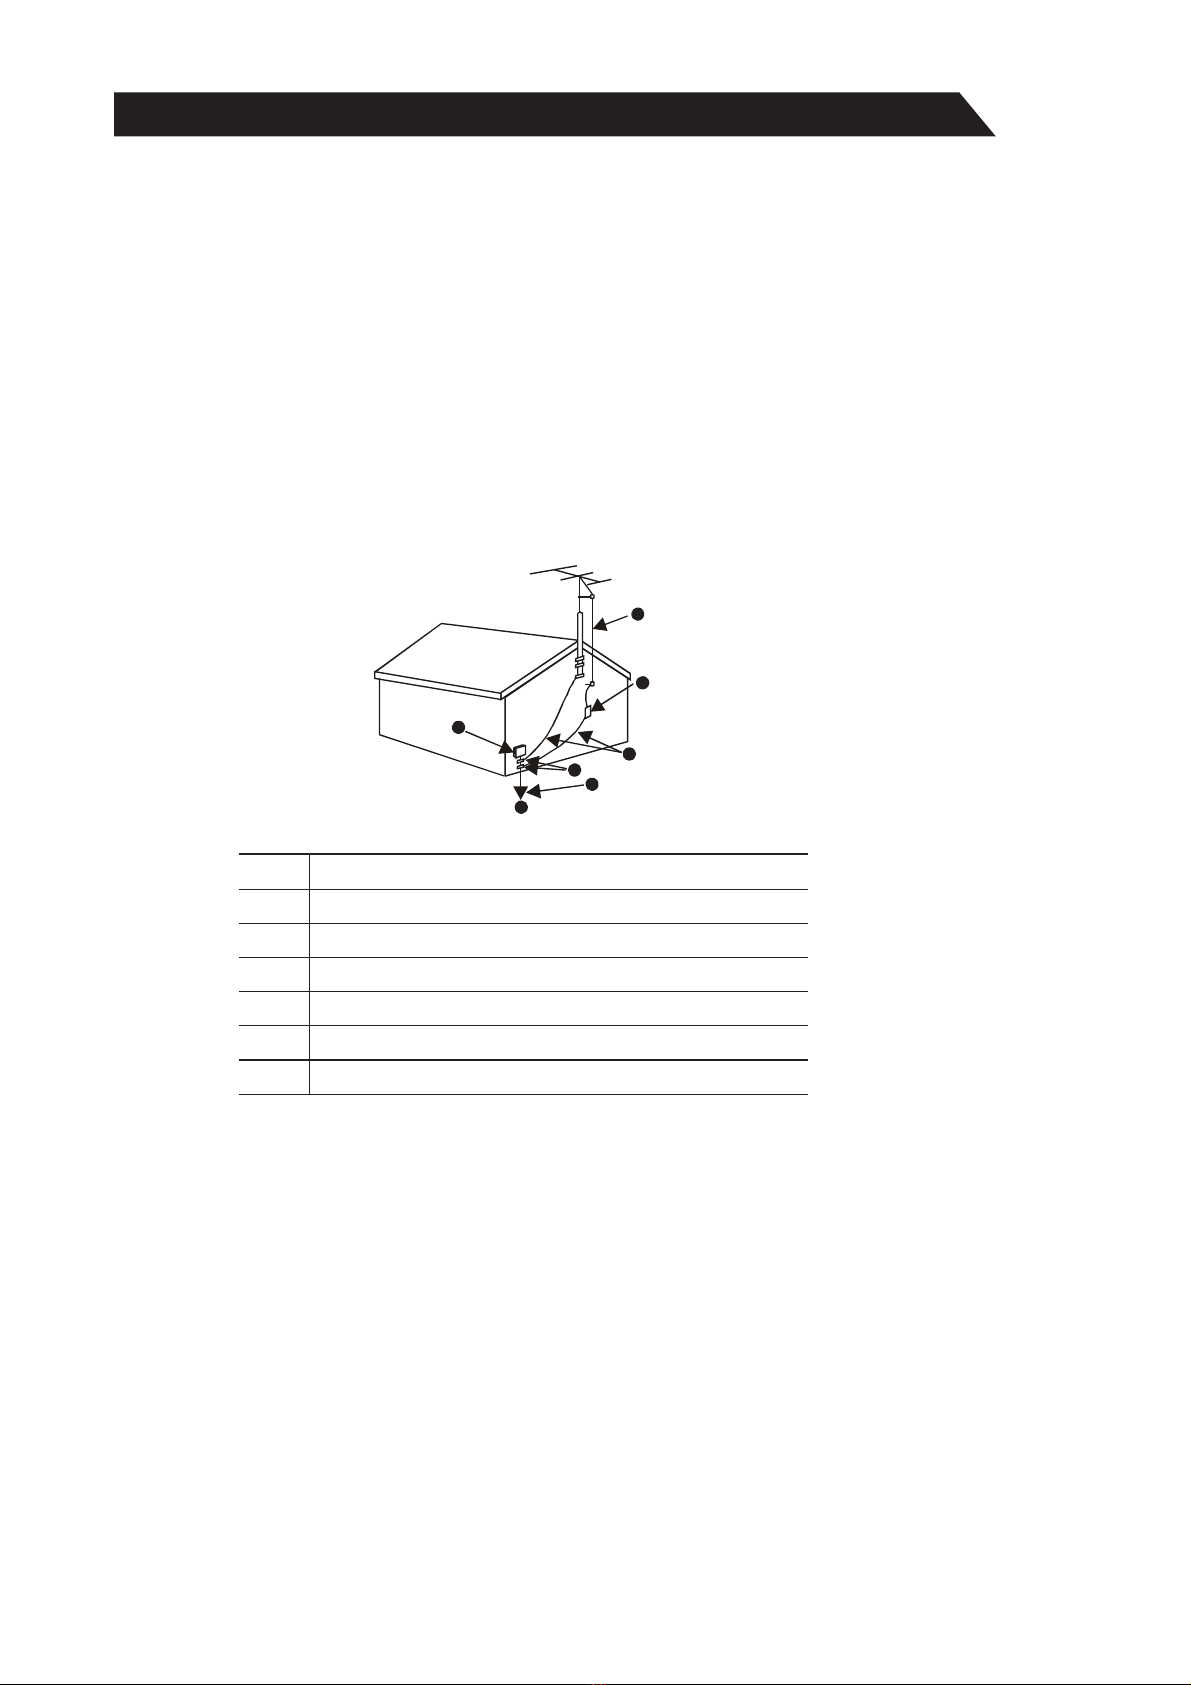
Do not overload wall outlets, extension cords or adaptors beyond their capacity,
this can result in fire or electrical shock.Power-supply cords should be
routed so that they are not likely to be walked on or pinched by items
placed upon or against them, paying particular attention to cords at plug
end, adaptors and the point where they exit from the appliance. The mains
plug is used as the disconnect device. It shall remain readily accessible and
should not be obstructed during intended use. Make sure to plug the power
cord in until it is firmly inserted. When removing the power cord, make sure to hold the power
plug when pulling the plug from the outlet, do not pull the plug out by the wire. NEVER touch the
plug or power cord with wet hands. To disconnect the apparatus from the mains power, the plug
must be pulled out from the mains socket, therefore make sure the mains plug is always easily
accessible.
To reduce the risk of fire or
electric shock, do not expose
this product to rain or moisture.
The apparatus shall not be
exposed to dripping or splashing and
no objects filled with liquids, such as vases,
shall be placed on the apparatus.
Never push objects of any kind into the set
through the cabinet slots as they may touch
dangerous voltage points or short-circuit
parts that could result in a fire or electric
shock. Never spill liquid of any kind on the
set. Use special caution in households where
children are present. The apparatus is not
suitable for children under 3-year to operate.
4
To avoid the fire, no naked flame source, such as lighted candles, should be placed
on the apparatus.
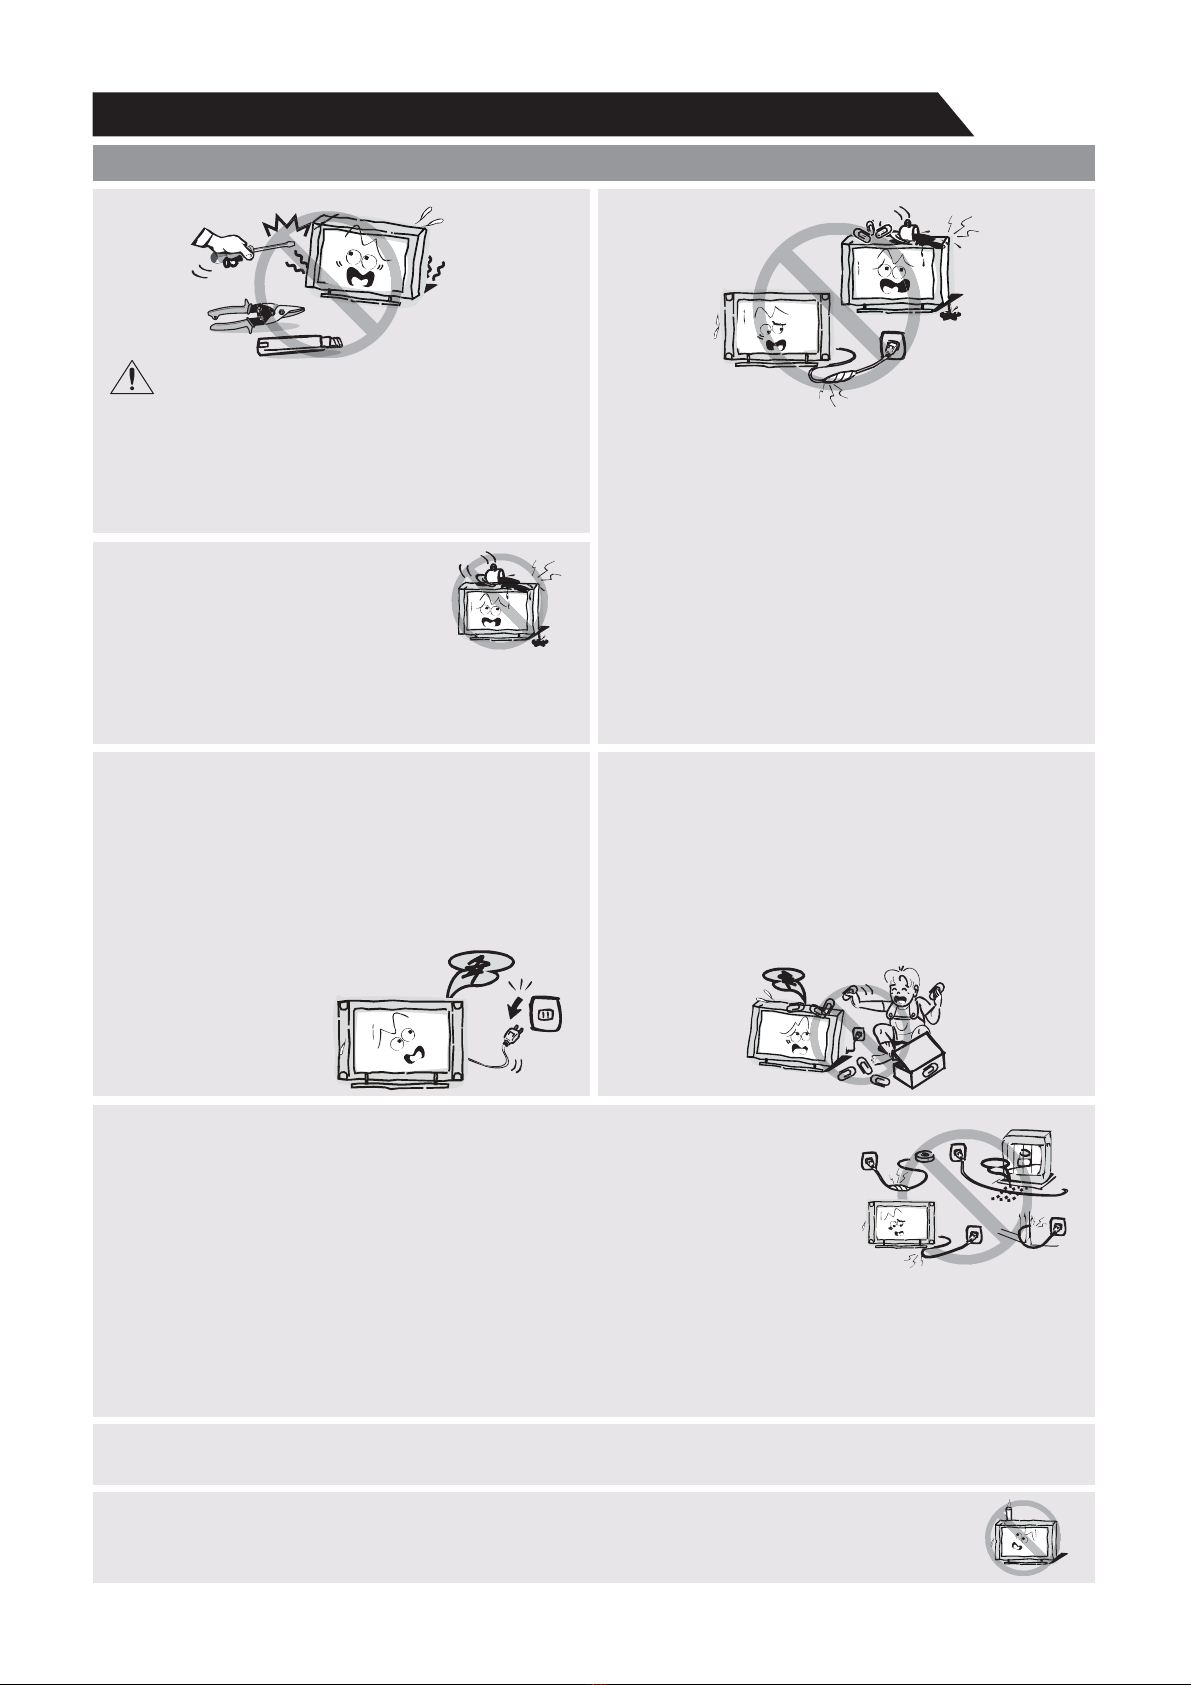
Do not push or scratch the front filter, or place any objects on top of the TV set. The image may
be uneven or the screen may be damaged.

Important Safety Instructions and Maintenance
Important Safety Instructions
5
An outside antenna
system should not
be located in the
vicinity of overhead
power lines or other
electric light or power
circuits, or where it can
fall into such power
lines or circuits. When installing an outside
antenna system, extreme care should be
taken to keep from touching such power
lines or circuits as contact with them might
be fatal Ensuring the television is not
overhanging the edge of the supporting
furniture.
.
When not in use
If you will not be using the TV set for several
days, the TV set should be disconnected from
the AC mains for environmental and safety
reasons. As the TV set is not disconnected from
the AC power when the TV is turned off at the
standby switch, pull the plug from the AC power
outlet to disconnect the TV completely. However,
some TV sets may have features that require the
TV set to be left in standby to function correctly.
In the case of lightning, unplug the TV set from
the outlet immediately. Never touch the antenna
wire during lightning.
Do not pull the plug out by the wire; Never
touch the plug with wet hands.
Excessive from earphones and
headphones can cause hearing loss.
volume
Installation
The ventilation should not be impeded by covering the ventilation
opening with items, such as newspapers, tablecloths, curtains, etc.
At least 10 cm space should be left around the apparatus for sufficient
ventilation.
The product should be situated away from heat sources such as
radiators, heat registers, stoves, or other products
(including amplifiers) that produce heat. Place the apparatus in
such a position that the screen
is not exposed to direct sunlight. It is best to have soft indirect
lighting while watching and avoid
and reflection from the screen as these may cause eye fatigue.
Keep the TV set away from any equipment emitting
electromagnetic radiation.
completely dark environments
Do not place the set on an unstable cart, stand, table or shelf. The
set may fall, causing serious personal injury as well as damage to
the product. Use only with the cart, stand, tripod, bracket, or table
specified by the manufacturer, or sold with the apparatus. An
appliance and cart combination should be moved with care. Quick
stops, excessive force, and uneven surfaces may cause the
appliance and cart combination to overturn.
Do not place this apparatus near water, for example, near a bath
tub, wash bowl, kitchen sink, or laundry tub; in a wet basement; or
a swimming pool; and the like;

solvent thinner
Important Safety Instructions and Maintenance
6
Installation
Move
When the TV being moved in from cold place, it needs some right time for dew
inside unit evaporating fully before turn on the unit;
To prevent injury, this apparatus must be securely attached to the floor/wall in
accordance with the installation instructions.
LED Screen
Although the LED screen is made with high precision technology and 99.99% or more of the
pixels are effective, black dots may appear or bright points of light (red, blue or green) may
appear constantly on the LED screen. This is a structural property of the LED screen and is not
a malfunction.If the surface of the LED panel cracks, do not touch it until you have unplugged
the AC power cord. Otherwise electric shock may result. Do not throw anything at the TV set.
The LED panel may break from the impact and cause serious injury.
Precautions When Displaying a Still Image
A still image may cause permanent damage to the TV screen.
Do not display still images and partially still images on the LED panel for more than 2 hours as it
can cause screen image retention. This image retention is also known as "screen burn". To
avoid such image retention, reduce the degree of brightness and contrast of the screen when
displaying a still image.
Watching the LED TV in 4:3 format for a long period of time may leave traces of borders
displayed on the left, right and centre of the screen caused by the difference of light emission on
the screen. Playing a DVD or a game console may cause a similar effect to the screen.
Damages caused by the above effect are not covered by the Warranty.
Displaying still images from Video games and PC for longer than a certain period of time may
produce partial after-images. To prevent this effect, reduce the 'brightness' and 'contrast' when
displaying still images.
Cleaning
Cleaning and handling the screen surface
and cabinet. Disconnect the unit from the AC
outlet before cleaning. To remove dust, wipe
gently with a soft, lint free cloth. If required
use a slightly damp cloth.
MAINS PLUG
Wipe the mains plug with a dry cloth at
regular intervals. Moisture and dust may lead
to fire or electrical shock.
Use care not to subject the TV's surfaces to detergent. (A liquid inside
the TV could lead to product failure, fire or electrical shock.)
Use care not to subject surfaces to bug repellent, solvent, thinner, or
other volatile substances as this may deteriorate the surface and finish
of the cabinet.
Attention should be drawn to the environmental aspects of battery disposal;
This equipment is a Class II or double insulated electrical appliance. It has been designed
in such a way that it does not require a safety connection to electrical earth.

Important Information
7
Table of Contents
If a television is not positioned in a sufficiently stable location, it can be potentially hazardous
due to falling. Many injuries, particularly to children, can be avoided by taking simple precautions
such as:
• Using cabinets or stands recommended by the manufacturer os the television.
• Only using furniture that can safely support the television.
• Ensuring the television is not overhanging the edge os the supporting furniture.
• Not placing the television on tall furniture (for example, cupboards or bookcases) without
anchoring both the furniture and the television to a suitable support.
• Not standing the televisions on cloth or other materials placed between the television and
supporting furniture.
• Educating children about the dangers of climbing on furniture to reach the television or its
controls.
• Keep small accessories out of reach of children so they are not mistakenly swallowed.
8
9
9
10
11
13
13
14
15
18
19
19
24
24
26
26
27
29
34
32
34
35
37
40
42
43
44
Accessories
Introduction
-------------------------------------------------------------------------------------------------------------
-------------------------------------------------------------------------------------------------------------
Features-------------------------------------------------------------------------------------------------------------------
Specifications-------------------------------------------------------------------------------------------------------------
-----------------------------------------------------------
---------------------------------------------------------------------------------------------------
Overview of front panel-------------------------------------------------------------------------------------------------
Overview of back panel-------------------------------------------------------------------------------------------------
Overview of remote control--------------------------------------------------------------------------------------------
Installing Batteries in the Remote Control-------------------------------------------------------------------------
--------------------------------------------------------------------------------------------------
Antenna connection-----------------------------------------------------------------------------------------------------
---------------------------------------------------------------------------------------------------------
Stand and Wall-mounting Instructions (optional)
General Description
External Connection
Basic Operation
Menu Operation---------------------------------------------------------------------------------------------------------
--------------------------------------------------------------------------------------------
--------------------------------------------------------------------------------------------------------------------
---------------------------------------------------------------------------------------------------------------------
--------------------------------------------------------------------------------------------------------------------
Lock ------------------------------------------------------------------------------------------------------------------------
Menu System Instruction
Picture
Sound
Setting
Program -------------------------------------------------------------------------------------------------------------------
Network---------------------------------------------------------------------------------------------------------------------
About------------------------------------------------------------------------------------------------------------------------
-------------------------------------------------------------------------------------------------------
--------------------------------------------------------------------------------------------------------------------
---------------------------------------------------------------------------------------------------
--------------------------------------------------------------------------------------------------------
------------------------------------------------------------------------------------------------------
Home Operation
Internet
Digital Media Player
Troubleshooting
Limilted Warranty

8
Accessories
Please make sure the following items are included with your LED TV. If any items are missing,
contact your dealer.
Remote Control
Owner’s
Instructions
Stand x 2 Screws x 4
Top 5 Tips
AAA Batteries for
Remote x 2

9
Introduction
z TV adopts 32" TFT LED display screen
Zero X radiation complies to green environment protection requirement
Connect to computer directly to realize TV/monitor combo.
USB 2.0
16:9 wide screen
Auto tuning and fine tuning
HDMI input
Programmable sleep timer
Wide range voltage input
z
z
z
z
z
z
z
z
Features
Basic Functions
Input terminals used for external equipment connection
1 x RF input
2 x USB inputs
3 x HDMI inputs
1 x AV input
1 x SPDIF output
1 x Headphone output
1 x RJ-45 NET

10
Introduction
Specifications
NOTES:
• Design and specifications are subject to change without notice.
• Weight and Dimension shown are approximate.
5
İ1W
RNSM3203-D
32” Diagonal(max.)
0C-40C
oo
1366X768
Digital: ATSC
Analog: PAL-M/ PAL-N/
NTSC-M
Digital: 7-69
Analog: Antenna: 2-69
Cable: 1-135
55W
731.8x91.3x435mm
731.8x185.3x491mm
4.3 kg
4.23 kg

11
Stand and Wall-mounting Instructions (optional)
How to assemble the stand
- Before attaching/detaching the stand, make sure to turn off the TV.
- Before performing work, spread cushioning over the base area to lay the LED TV on.
This will prevent it from being damaged.
Assembling instruction:
If you need to remove or assemble the stand please read the following instructions.
Step1: Take out two stands from package,
and insert them into bottom of TV;
Step2: Take out four screws provided with
TV set and tighten them into screw
holes;
- To disconnect the stand from the TV, perform the above steps in reverse order.
Note: The illustrations and on-screen displays in this manual are for explanation purposes
and may vary slightly from actual product.
Screws
32" (4 x B-ST4*20)

12
Stand and Wall-mounting Instructions (optional)
Wall-mounting instruction:
1. The wall-mounting bracket is suit for 23 to 32-inch flat TV that the wall-mouting hole
distance is 100 or 200mm.(The wall-mounting hole of back panel should be smooth.)
2. Punch three holes on the wall according to the wall-mounting bracket (3)
3. Insert the nylon anchors(2) into the corresponding holes on the wall.
4. Fix the wall-mounting bracket (3) with self-tapping screws(4) in nylon anchors of the wall.
5. Screw the wall-mounting screws(5) into the upper two screw holes in the back panel.
6. Left the TV and hang it on the wall by two people.
Note: 1. Please mount your TV on the strength of the wall for withstanding the TV’s weight.
2. Be careful not to scratch panel and TV cabinet when your fasten the screws on the TV.
Your LED TV is able to accommodate wall mounting with the use of a wall mount bracket
(not supplied with LED TV, please contact your local hardware store) and the mounting
holes on the back of the unit. We recommend removing the TV stand prior to wall mounting
the TV. Please see previous page for instructions on removing the stand.
:DOO
1\ORQDQFKRUWKUHH
:DOOPRXQWLQJEUDFNHWRQH
6HOIWDSSLQJVFUHZWKUHH
:DOOPRXQWLQJVFUHZ00
WZRIRUHDFK2QO\QHHGWRVHOHFWWZR
5HDUFDELQHW
Wall mounting instructions:

13
General Description
Overview of Front Panel (32")
The buttons on the lower-right panel control your TV’s basic features, including the on-screen menu.
To use the more advanced features, you must use the remote control.
Red light indicates the TV is in standby mode.
Green light indicates the TV is on. POWER(power on / key function)
The key instructions are subject to below.
When there is no button icon popping up, press and hold the key, the key icon
will pop up like the picture shows above, the key icon will automatically turn off after 5 seconds
of inactivity.
Short press the button, move the loop to the right, select the icon.
Long press the key to achieve the function of the selected icon.
Corresponding to the “POWER” button of remote.
Corresponding to the “CH+” button of remote.
Corresponding to the “CH-” button of remote.
Corresponding to the “Input” button of remote.
Corresponding to the “VOL+” button of remote.
Corresponding to the “VOL-” button of remote.

14
Note: The product and illustrations in this user's manual is only for explanation purposes and may
vary depending on model.
You can connect the TV with video devices such as DVD/VCD player, VCR and video camera to enjoy the
high quality picture.
General Description
Overview of back panel
General Description
Overview of back panel
General Description
Overview of Back Panel
Camcorder
PC (HDMI-output)
Blu-ray disc player
DVD player
USB

15
General Description
Overview of Remote Control
Loading batteries:
1) Remove the lid of the battery compartment.
2) Insert 2 size AAA batteries with polarities as indicated inside the compartment.
3) Replace the lid.
Note:
1) A loading of batteries should be last one year under normal use.
2) If you don't intend to use the remote control for a long period of time, remove batteries
to avoid damage due to leakage.
3) Do not mix old and new batteries or different types.
4) Do not throw batteries into fire or water.
5) The batteries (battery pack or batteries installed) should not be exposed to excessive
heat such as sunshine, fire or the like.

16
General Description
Overview of Remote Control
o
p
q
rs
tu
vw
n
1. : Turn the TV on and off.
2. : This button is used to switch among
POWER
INPUT
different sources, Select a source and press
ENTER button to confirm.
3. : Directly select channel
with digital buttons.
4. Switch to the previous program.
5. : If network connects, press this key
to view YouTube directly.
6. If network connects, press this
key to open and view amazon prime video directly.
Digital Buttons(0-9, •)
CH RTN:
YouTube
prime video :
7. Press it to go to App home page.
8. : If network connects, press this key
to view NETFLIX directly.
HOME:
NETFLIX
9. : Press this key to go to quick menu. Q.MENU
MENU: Display the main menu or exit the
current menu.
11. : Validation key.
12. : Use to select
on-screen menu items and change menu
values.
13. Return.
14. : Exit the menu.
15. : Press it to show channel list and favorite
list on screen.
ENTER
Arrow button
BACK:
EXIT
LIST
16. -: Press these buttons to adjust the
volume.
17. :
VOL
CH
10.
s STWX
+/
ST/Press these buttons to change channel
upward or downward.

17
General Description
Overview of Remote Control
18. : Press this button to cut off the sound of
the TV set temporarily, press again to resume.
MUTE
19. It's used in Apps.
20.
Include play/pause, stop, previous, next,
backward, forward is used in USB mode.
No record function.
Please refer to relevnat instructions in the section
of multimed player.
COLOR BUTTONS :
D M P :IGITAL EDIA LAYER CONTROL BUTTON
21. : Display the program information.
22. : In USB mode, press this
INFO
MTS AUDIO
button to switch audio track when movie
is playing. In TV mode, press this button
to switch MTS or Audio Language.
23. PICTURE: Press this button to select among
Dynamic, Standard, Movie, User.
24. SOUND: Press this button to select among
Standard, Music, Movie, Sport, User
25. : In USB mode, press this button to switch
subtitles when movie is playing.
CC
o
p
q
rs
tu
vw
n
Table of contents
Other RCA Smart TV manuals

RCA
RCA RTRU6527-US User manual

RCA
RCA RTRU7027-US User manual

RCA
RCA RTRU5528-B User manual

RCA
RCA Roku TV RTRU7027-B-US User manual

RCA
RCA RTRU6528-B-CA User manual

RCA
RCA RNSM4504 User manual

RCA
RCA RTRU5527-US User manual

RCA
RCA Roku TV RTRU4327-B-US User manual

RCA
RCA RTRU6528-C-CA User manual

RCA
RCA Roku TV RTR3260-B-US User manual

RCA
RCA TR3201A User manual

RCA
RCA RNSM4003 User manual

RCA
RCA RTR2461-B-CA User manual

RCA
RCA RTR4060-US User manual

RCA
RCA RTRQ5522-US User manual

RCA
RCA Roku TV RTR4261-CA User manual

RCA
RCA RTR4061-B-CA User manual

RCA
RCA Roku TV RTRU6027-US User manual

RCA
RCA Roku TV RTRQ5023-CA User manual

RCA
RCA RTAU5504 User manual