Startup
4. TWn on the VCR.
The first time you turn on the VCR, the CABLE BOX SETUP
menu will appear. Follow the steps on the screen to
automatically set-up the cable box, auto channel search, and
automatically set the time. If the menu does not appear or you
prefer, you can perform each of these procedures manually.
5. Auto cable box setup.
CABLE BOX SETUP allows the VCR to record programs from the
cable box. If your cable box can be controlled by a remote, the
VCR may be able to tune it to the channel you want to record
during VCR Plus+ and timer recordings and automatically set
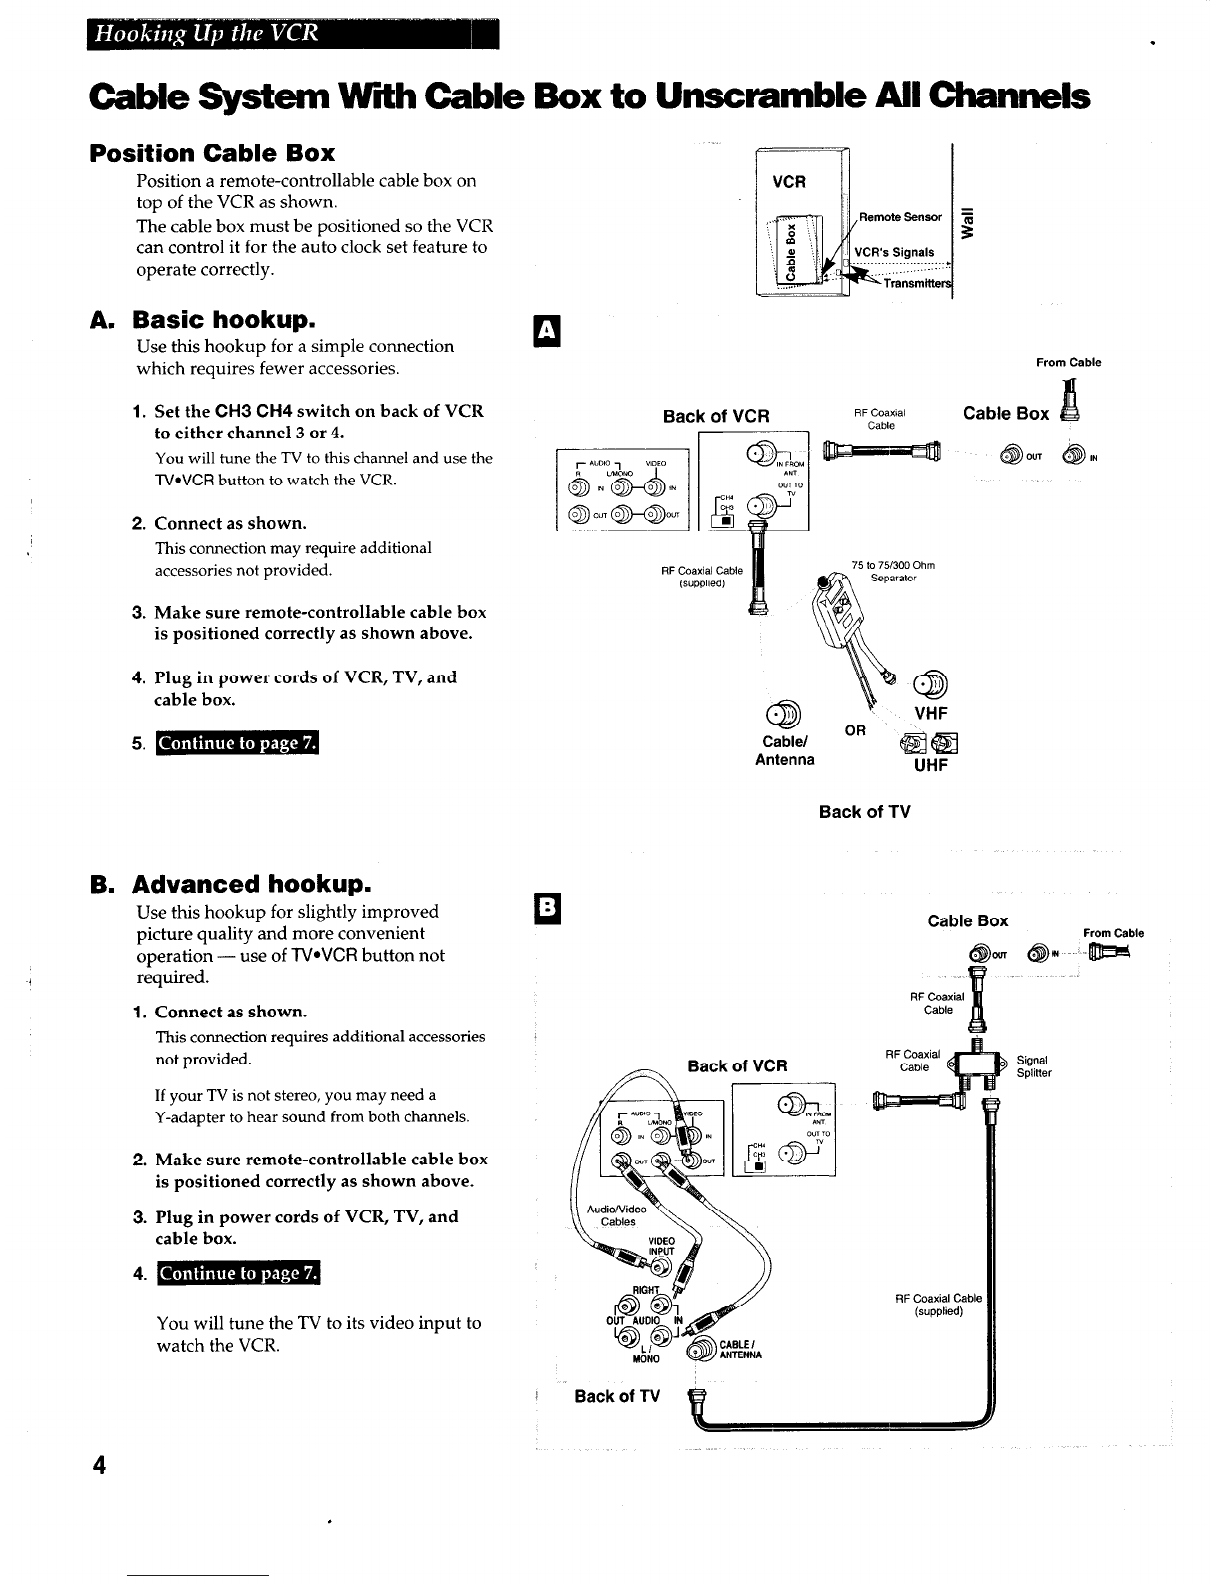
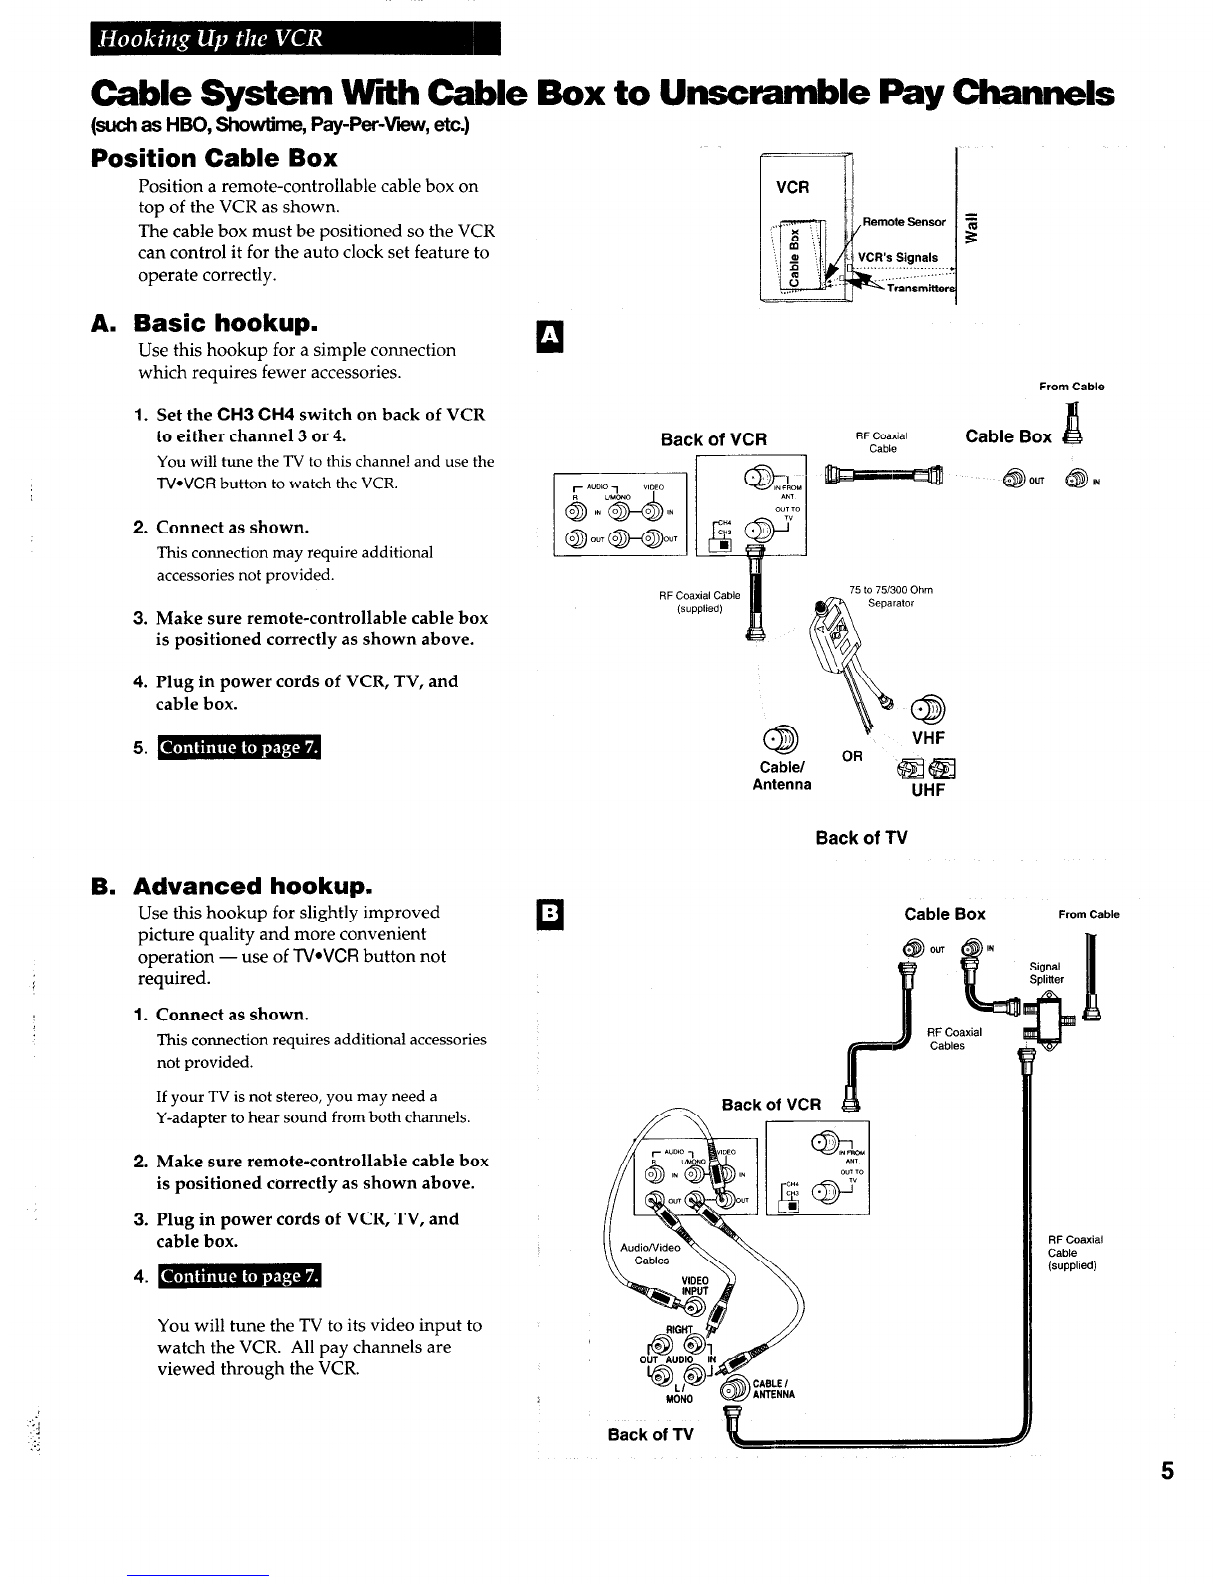
the clock after power failures. Position the remote-controllable
cable box on top of the VCR at an angle to receive the infrared
remote signal. See pages 4-5.
A. Press VCR1 on the remote.
The CABLE BOX SETUP menu appears the first time the VCR
is turned on after connecting it.
B. Cable box not used for all channels: Press 2. You are
finished with CABLE BOX SETUP. Skip to Step 6.
Cable box used for all channels: Press 1 to continue.
C. Turn on your cable box and tune it to channel 2. Press two
numbers on the remote to enter the output channel of your
cable box. Press 0 before a single-digit number. (Valid
numbers are 01 - 13.)
If you connected your cable box to the back of the VCR using
the cable box’s AUDIONIDEO OUT jacks, press INPUT on the
remote to select the VIDEO1 option.
Press CLEAR on the remote to correct an entry.
D. Press MENU*PROG to proceed.
The VCR now automatically enters the output channel of your
cable box as the channel to be recorded in the VCR PLUS+ and
TIMER RECORDINGS menus.
E. Manual Controlled Cable Box: You are finished with CABLE
BOX SETUP. Press MENU*PROG to exit. Skip to Step 6.
Remote Controlled Cable Box: Enter your cable box code
from the chart 011page 16 and follow the on-screen directions.
The VCR changes the cable box from channel 02 to channel 09
when you enter the correct code for your cable box. If the
cable box changes channels, press 1. The VCR will now set
the clock. Proceed to Step 6.
If none of the codes work, try repositioning the cable box and
entering the codes again. If the codes still do not work, this
VCR cannot control your cable box during VCR plus+ or timer
recordings or automatically set the clock. Press MENUePROG
to exit the CABLE BOX SETUP. Proceed to Step 6.
r- -
CABLE BOX SETUP
Is a cable
box being
used with the VCR
for all
channels?
CABLE BOX SETUP
Turn on the cable box
and tune it to Ch 2.
Enter the output channel
of the cable box.
--
Press 01 - 13 or INPUT
Press MENU to exit
L
r
CABLE BOX SETUP
The VCR will now receive
all channels from the
cable box on VCR Ch 03.
Press MENU to proceed
7--
I
CABLE BOX SETUP
Enter the code for your
cable box from the
list
in your User's manual.
Did the cable box
tune to channel 9?
1 Yes, setup is complete
2 No, try another code
8
continued on next page