Connecting Two VCRs for Copying Tapes
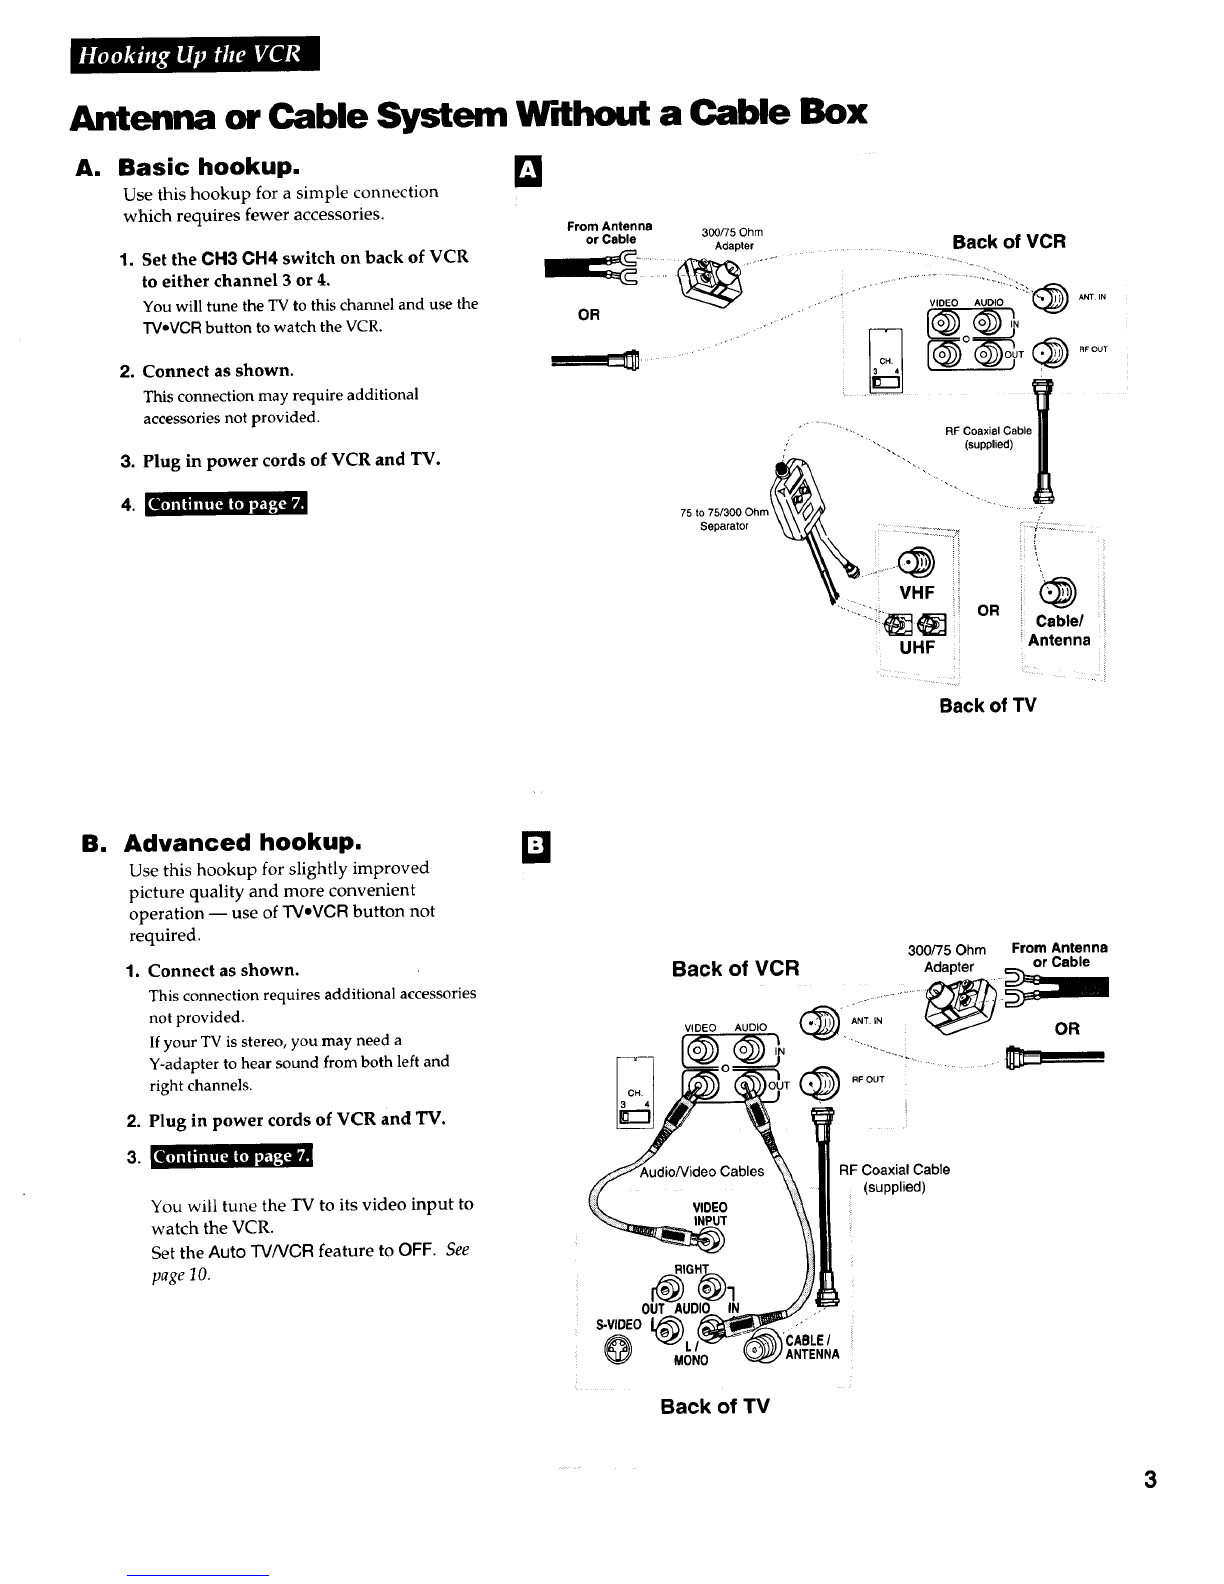
Option A hookup.
Use this hookup for a simple connection which
requires fewer accessories.
1. Select a hookup from pages 2 through 5
and then modify with this connection.
2. Set the CH3 CH4 switch on the playback
VCR to either channel 3 or 4.
You will tune the recording VCR to this channel
to receive the signal from the playback VCR.
3. Connect as shown.
D
Playback VCR
From Antenna, Cable ....................................
or Cable Box
..................... VIDEO AUDIO "_) ....
RF Coaxial Cable
(supplied)
Recording VCR
This connection may require additional
accessories not provided.
4. Plug in power cords of VCRs and TV.
lO] iIIIil ! [ii (Ol o_-,[iiP
Use the hookup to the TV
as previously selected on
pages 3, 4, or 5.
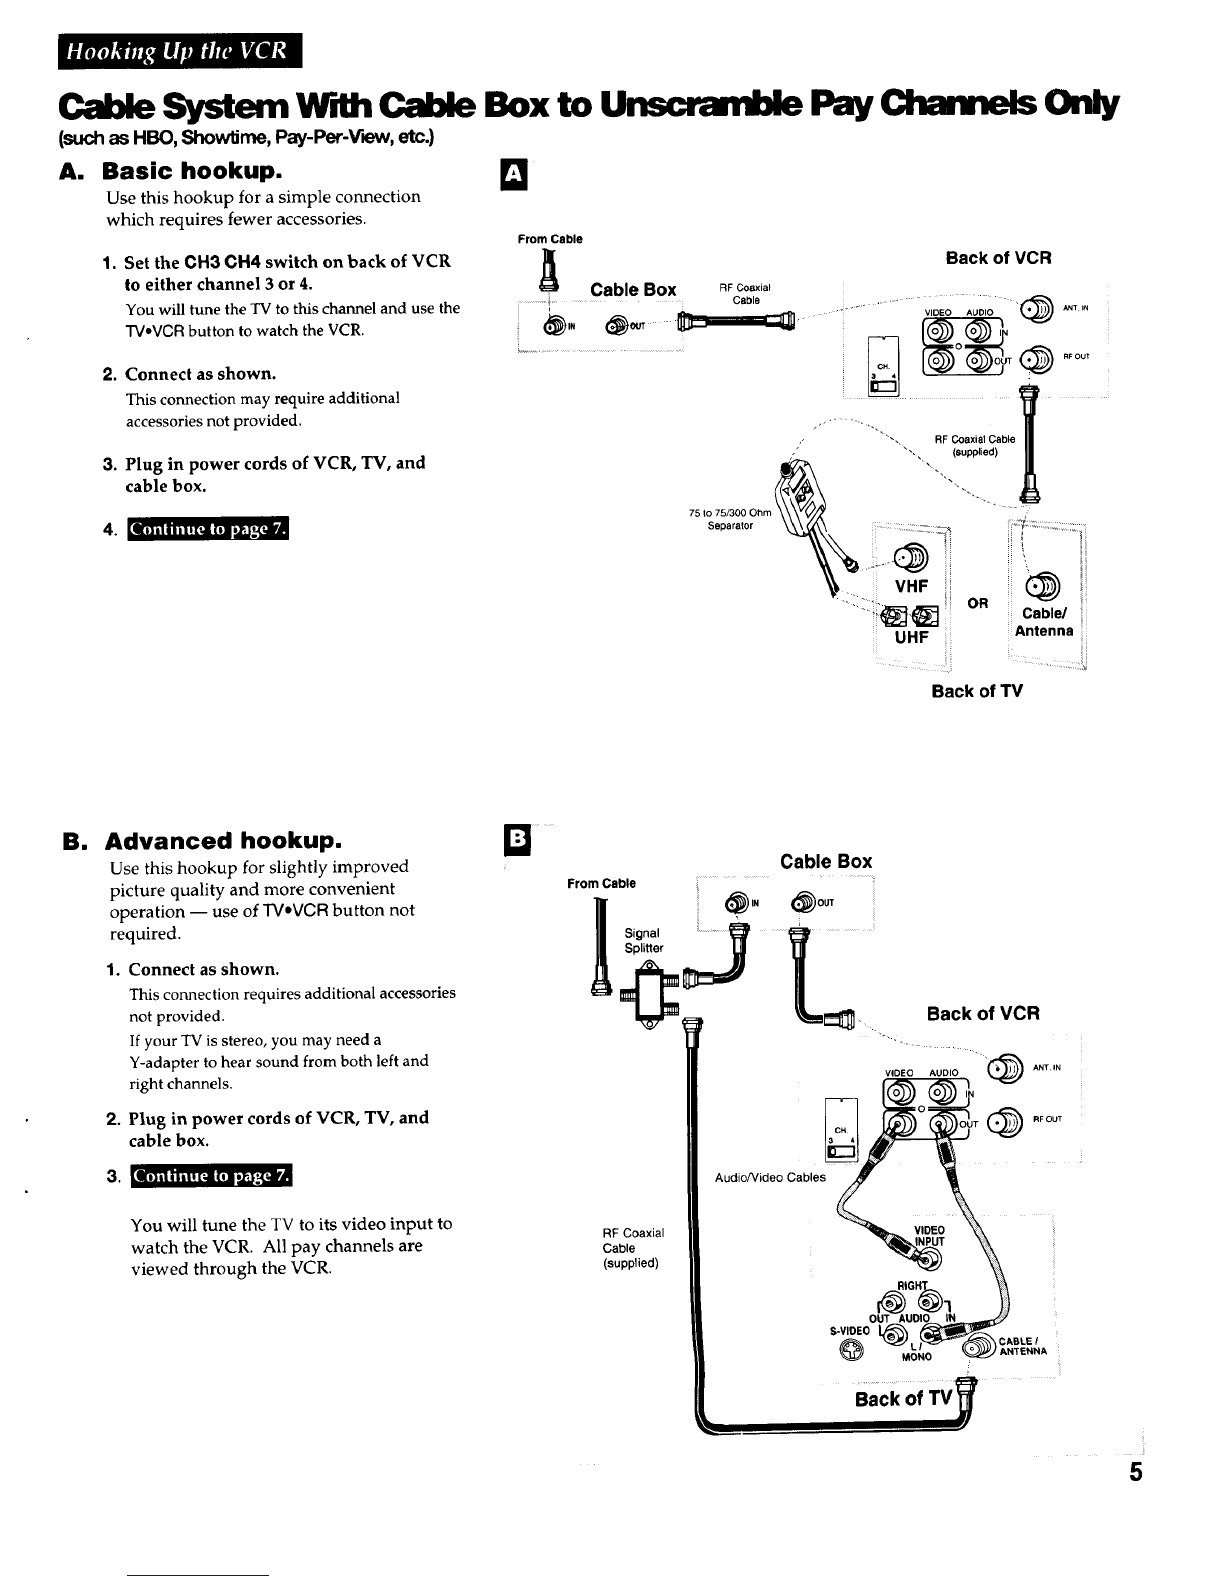
Option B hookup.
Use this hookup for slightly improved copy
quality and more convenient operation -- use of
TVeVCR button not required.
1. Select a hookup from pages 2 through 5
and then modify with this connection.
2, Connect as shown.
This connection requires additional accessories
not provided.
If your other VCR is stereo, you may need a
Y-adapter to hear sound from both left and
right channels.
3. Plug in power cords of VCRs and TV.
4. [_--*--[_a-]=,ip, a:_[_J
You will select the line (audio/video)
input on the recording VCR to receive the
signal from the playback VCR.
Caution: The unauthorized recording
of satellite broadcasts, television
programs, or other materials may
infringe the rights of others.
Q
Playback VCR (only)
VIDEO AUDIO _ANT IN
RFOUT
Recording VCR
AudioNideo -- or -RF Coaxial Cable
Cables II (supplied)
Use the hookup to the TV
as previously selected on
pages 3, 4, or 5.
From Antenna, Cable
or Cable Box
6