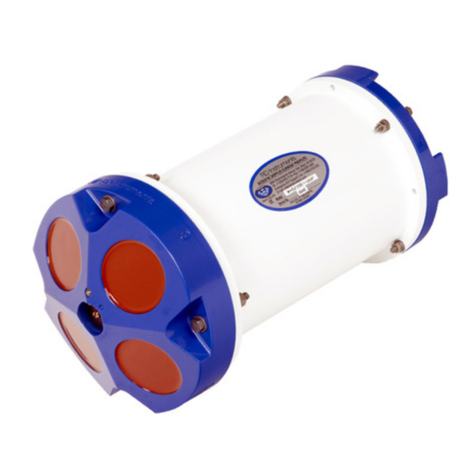
RD Instruments WorkHorse User manual

WorkHorse
Mariner ADCP
User’s Guide
P/N 957-6169-00 (April 2005)
RD Instruments
Acoustic Doppler Solutions


Table of Contents
1Introduction....................................................................................................................................... 1
2WorkHorse Mariner ADCP Applications......................................................................................... 2
3System Overview .............................................................................................................................. 4
3.1 Mariner ADCP Overview.....................................................................................................................4
3.2 Deck Box Overview.............................................................................................................................5
3.3 Mounting Plate Overview ....................................................................................................................8
3.4 I/O Cable Overview.............................................................................................................................9
3.5 Optional Flash Memory Card ............................................................................................................10
3.6 Spare Parts .......................................................................................................................................10
4WorkHorse Care.............................................................................................................................. 11
4.1 General Handling Guidelines ............................................................................................................11
4.2 Assembly Guidelines ........................................................................................................................11
4.3 Deployment Guidelines.....................................................................................................................12
5Setup the WorkHorse Mariner ADCP............................................................................................ 13
5.1 Serial Communication.......................................................................................................................13
5.2 What if the WorkHorse Does Not Respond.......................................................................................13
6Software........................................................................................................................................... 14
6.1 System Requirements.......................................................................................................................14
6.2 Software Installation..........................................................................................................................14
7Power ............................................................................................................................................... 15
7.1 Bench-Top Battery Power Requirements..........................................................................................16
7.2 Operation Modes ..............................................................................................................................16
8Testing Your WorkHorse................................................................................................................ 17
9Compass Calibration...................................................................................................................... 18
9.1 Preparing for Calibration ...................................................................................................................18
9.2 Compass Calibration Verification ......................................................................................................19
9.3 Compass Calibration Procedure .......................................................................................................20
10 Internal Pressure Sensor ............................................................................................................... 22
10.1 Pressure Sensor Maintenance..........................................................................................................22
11 Deployment Guide .......................................................................................................................... 23
11.1 Deployment Checklist .......................................................................................................................23
11.2 Prepare the ADCP for Deployment ...................................................................................................24
11.3 Deployment Software........................................................................................................................25
11.4 Deploy the ADCP..............................................................................................................................25
11.5 Send the Deployment Commands ....................................................................................................26
12 Reviewing the Data......................................................................................................................... 26
12.1 'Where' was the Data? ......................................................................................................................26
12.2 'When' was the Data? .......................................................................................................................26
12.3 'What' is the Data? ............................................................................................................................26
13 A Few Principles of Operation ...................................................................................................... 27
14 Technical Support .......................................................................................................................... 28

List of Figures
Figure 1. Typical River Deployment................................................................................................ 2
Figure 2. Mariner ADCP Overview ................................................................................................. 5
Figure 3. Deck Box (Front View) .................................................................................................... 6
Figure 4. Deck Box (Rear View) ..................................................................................................... 7
Figure 5. Deck Box (Top View) ....................................................................................................... 8
Figure 6. Connecting and Disconnecting the I/O Cable.................................................................. 9
Figure 7. I/O Cable Overview ......................................................................................................... 9
Figure 8. Memory Card Overview................................................................................................. 10
Figure 9. WorkHorse Mariner Connections .................................................................................. 13
Figure 10. BBTalk Command History Box ...................................................................................... 19
Figure 11. Compass Alignment ...................................................................................................... 21
Figure 12. Visual Inspection before Deployment ............................................................................ 23
Figure 13. Prepare the ADCP......................................................................................................... 24
Figure 14. Real-Time Deployment.................................................................................................. 25
List of Tables
Table 1: WorkHorse Mariner River Application Guide ................................................................... 2
Table 2: WorkHorse Mariner Real-Time Application Guide ........................................................... 3
Table 3: Spare Parts ................................................................................................................... 10
Table 4: WorkHorse Software Main Modules .............................................................................. 14
Table 5: WorkHorse ADCP Tests ................................................................................................ 17

WorkHorse Mariner ADCP User's Guide
P/N 957-6169-00 (April 2005) page 1
Acoustic Doppler Solutions
WorkHorse Mariner ADCP User's Guide
1 Introduction
Thank you for purchasing the RD Instruments (RDI) Mariner WorkHorse.
This guide is designed to help first time WorkHorse users to set up, test, and
deploy their ADCP.
This guide is designed for use with the other WorkHorse Technical Manual
guides. Where needed, there are references to detailed information and fig-
ures contained in the WorkHorse Technical Manual.
WorkHorse Mariner deployments are most often Real-Time. Real-Time use
refers to the fact you are viewing the data as the ADCP collects it via a per-
sonal computer. This data is also stored on the computer to allow for data
playback and processing at a later time.
NOTE. When you receive your WorkHorse, look for a set up card that
shows all of the pieces you should have in your box. If anything is missing
or damaged, contact RDI immediately.
NOTE. When an addition or correction to the manual is needed, an Interim
Change Notice (ICN) will be posted to our web site on the Customer
Service page (www.rdinstrument.com). Please check our web site often.

WorkHorse Mariner ADCP User's Guide
page 2 RD Instruments
2 WorkHorse Mariner ADCP Applications
The WorkHorse Mariner is designed to measure real-time current profiles of
coastal, inshore, and open ocean water current structures from temporary or
permanent mounting in a vessel. It gives fine along-track resolution thanks
to RDI’s superior low-noise data, including bottom tracking. The Mariner
ADCP’s small size and light weight makes hull mounting an easier process
and a more reasonable expense. The Deck Box is designed to team up with
the vessel’s DGPS input to integrate ADCP readings with precise position
information. WinRiver is the most often used software package for ADCP
setup, river discharge data collection, and data review. For detailed infor-
mation on how to use WinRiver, see the WinRiver User’s Guide.
Table 1: WorkHorse Mariner River Application Guide
Mariner using WinRiver
• River, stream and channel discharge
• Suspended sediment load estimation
• Plume tracking
• Bridge scouring
• Simultaneous bathymetry discharge, flow structure
Figure 1. Typical River Deployment

WorkHorse Mariner ADCP User's Guide
P/N 957-6169-00 (April 2005) page 3
The WorkHorse Mariner ADCP can also be used in other moving vessel real
time applications that take advantage of the Mariner’s bottom tracking abili-
ties. WinRiver is the most often used software package for Mariner ADCP
setup, river discharge data collection, and data review. RDI also offers the
VmDas program for ADCP setup, real-time data collection, and data review.
For detailed information on how to use VmDas, see the VmDas User’s
Guide.
Table 2: WorkHorse Mariner Real-Time Application Guide
Application Blue Water Costal and Continental Shelf
Mariner using VmDas Mariner using VmDas
• Oil production platforms • Port and harbor monitoring
Real-Time deployment
• Current mapping • Water quality studies
Mariner using VmDas Mariner using VmDas
• Oceanography • Costal engineering
• Boundary layer studies • Cable and pipe laying
• Fisheries • Circulation/model studies
• Plankton biomass
Vessel Mount (permanent)
• Seismic streamer positioning
Mariner using VmDas Mariner using VmDas
• Oceanography • Plume tracking
• Boundary layer studies • Environmental surveys
• Fisheries • Planning new ports
Boat Mount (portable)
• Plankton biomass • Current mapping
Mariner using VmDas
• Seismic prospecting
• Exploration drilling
• Field development
Offshore oil and gas
• Production

WorkHorse Mariner ADCP User's Guide
page 4 RD Instruments
3 System Overview
The Mariner ADCP system consists of a WorkHorse Monitor ADCP with
Bottom Track mode, cables, Deck Box, Mounting Plate, and software. The
Mariner system requires the addition of a Windows® compatible computer
to collect data.
3.1 Mariner ADCP Overview
The transducer assembly contains the transducer ceramics and electronics.
Standard acoustic frequencies are 300, 600, and 1200kHz. See the outline
drawings in the Installation Guide for dimensions and weights.
I/O Cable Connector – Input/Output (I/O) cable connects the WorkHorse
ADCP to the computer.
Beam-3 Mark – The Beam-3 mark shows the location of Beam-3 (Forward).
Urethane Face – The urethane face covers the transducer ceramics. Never
set the transducer on a hard surface. The urethane face may be damaged.
Housing – The standard WorkHorse housing allows deployment depths to
200 meters.
Thermistor – The Thermistor measures the water temperature.
Pressure Sensor – The Optional pressure sensor measures water pressure
(depth).
Transducer Head – The WorkHorse electronics and transducer ceramics are
mounted to the transducer head. The numbers embossed on the edge of the
transducer indicates the beam number. When assembling the unit, match
the transducer beam number with the Beam 3 mark on the end-cap.
End-Cap – The end-cap holds the I/O cable connector. When assembling
the unit, match the Beam 3 mark on the end-cap with beam 3 number on the
transducer.

WorkHorse Mariner ADCP User's Guide
P/N 957-6169-00 (April 2005) page 5
URETHANE FACE
BEAM 3 MARK
THERMISTOR
PRESSURE SENSOR
(OPTIONAL)
TRANSDUCER
HEAD
HOUSING
END-CAP
I/O CABLE
CONNECTOR
Figure 2. Mariner ADCP Overview
3.2 Deck Box Overview
The deck Box contains all interfaces to/from the ADCP, computer/terminal,
optional vessel gyrocompass, and power.
Power Switch – The power switch is a combination switch/circuit breaker.
The Power Status LED next to the circuit breaker lights when power is ap-
plied to the Deck Box.
Reset Button – Pushing the Reset button sends a break to the ADCP.

WorkHorse Mariner ADCP User's Guide
page 6 RD Instruments
Data In/Out LEDs – Channel 1 In indicates data transmission from the com-
puter to the ADCP. Channel 1 Out indicates data transmission from the
ADCP to the computer.
Gyro Display – The LCD Display shows the vessel’s gyro heading.
NOTE. The Gyro Interface is optional. If you do not have a Gyro Interface
board installed, the LCD display will be blank.
Gyro Offset Controls – Use the Up/Down/Set buttons to set the Gyro Offset
for systems with the optional Gyro Interface board installed. The Offset
Control buttons are Up, Set, and Down, as depicted by the upward arrow,
the square box, and the downward arrow respective.
For example, to set a heading offset for a multi-rate gyro, push the up or
down button and set button simultaneously, using two small aids such as a
pencil. When the desired offset is obtained, release the buttons. To prevent
accidental re-adjustment, the buttons are recessed.
GYRO DISPLAY
G
YR
O
O
FF
S
ET
CO
NTR
O
L
S
DATA IN/OUT LEDs RESET BUTTON
P
O
WER
S
WIT
C
H
Figure 3. Deck Box (Front View)
ADCP (J17) – Connects the ADCP to the deck box.
Channel 1 RS 422 (J19) – Connects the computer’s RS-422 port to the deck
box. Use this only if your computer has a RS422 serial port. If you com-
puter has a RS-232 serial port (standard), use J20.
Channel 1 RS 232 (J20) – Connects the computer RS-232 port to the deck
box.
Gyro Synchro/Stepper (J22) – Optional Gyrocompass (gyro) interface con-
nects the ship’s gyro to the Deck Box. The Installation Guide lists gyro re-
quirements.
Gyro Serial RS 232 (J28) – Supplies serial, ASCII navigation data to the
computer via our VmDas program. See the VmDas help file for require-
ments. This is an option for some ADCP applications. When working in
areas where bottom-track detection is not possible, you need this equipment

WorkHorse Mariner ADCP User's Guide
P/N 957-6169-00 (April 2005) page 7
to remove ADCP (Ship) motion from the data. The output from the J28
deck box connector is a serial data string of gyro heading, pitch, and roll.
The format of this string is: $PRDID,±ppp.pp,±rrr.rr,hhh.hh (where pis
pitch, ris roll, and his heading; all scaled in decimal degrees).
AC Power Input – The deck box accepts input voltages of 98-264 VAC, 50-
60Hz (J27). This input voltage will be converted to 48 VDC. This is the
voltage supplied to the ADCP.
DC 12-Volt Input – Use a 12 VDC car battery (J26) when AC power is not
available. The deck box converts the voltage to 48 VDC. This is the volt-
age supplied to the ADCP. Use the largest rated amp-hour battery as possi-
ble. A car battery should last one to two days powering a 1200-kHz ADCP.
DC 20 to 50 Volt Input – If you are using an external DC power supply con-
nected to the deck box on J25 (20 to 50 VDC, 3.0 A), the voltage from the
external power supply is sent directly to the ADCP. This is useful if you
want to increase (higher voltage level) or decrease (lower voltage level) the
range of the ADCP. The current requirement for the power supply is listed
as a reference. Using a lesser-rated power supply can cause the voltage
level to drop. The ADCP will draw only the current it needs.
Figure 4. Deck Box (Rear View)

WorkHorse Mariner ADCP User's Guide
page 8 RD Instruments
RS-232/RS-422 COMMUNICATION PCB POWER SUPPLY
FUSE
GYRO INTERFACE PCB
FILTER INTERFACE (J18)
Figure 5. Deck Box (Top View)
3.3 Mounting Plate Overview
The Mounting Plate is a bronze plate that helps mount the transducer head
to a vessel. For installation instructions, see the Maintenance Guide.
The overall dimension of the mounting plate is ∅311.1 (12.25 inches) and
the bolt hole pattern is 16 equally spaced ∅8.20 through holes on a
∅285.75 bolt circle.
NOTE. See the Installation Guide outline installation drawings for the
exact dimensions and weights.

WorkHorse Mariner ADCP User's Guide
P/N 957-6169-00 (April 2005) page 9
3.4 I/O Cable Overview
Always remove the retaining strap on the end-cap underwater-connect cable
and dummy plug when disconnecting them. Failure to do so will break
the retainer strap.
Do not apply any upward force on the end-cap connector as the I/O cable is
being disconnected. Stressing the end-cap connector may cause the
ADCP to flood. Read the Maintenance guide for details on disconnecting
the I/O cable.
Figure 6. Connecting and Disconnecting the I/O Cable

WorkHorse Mariner ADCP User's Guide
page 10 RD Instruments
A
A
P1 P2
View A - A
J1 Wire Side
Sca
l
e
: N
o
n
e
P1 P2
6
5
2
1
4
3
7
BRN
BLU
WHT
BLK
GRN
RED
YEL
L
W
M
X
N
E
G
ADCP_TXDB1 (RS-232 OUT/CH A RS-485B/RS-422 OUT B (-))
ADCP_TXDA1 (RS-232 IN/CH A RS-485A/RS-422 OUT A (+))
ADCP_RXDA1 (CH B RS-485 A/RS-422 IN A (+))
ADCP_RXDB1 (CH B RS-485 B/RS-422 IN B (-))
ADCP_DATACOM (COMMUNICATION RETURN)
ADCP +VDC (POWER +)
ADCP -VDC (POWER -)
Figure 7. I/O Cable Overview
3.5 Optional Flash Memory Card
Memory cards are not included with the Mariner ADCP. Two PCMCIA
memory card slots (see Figure 5, page 8) are available, with the total mem-
ory capacity not to exceed 2GB. The PC Card recorder is located on the
Digital Signal Processor (DSP) board inside the Workhorse’s electronics.
To recover data, the card can be removed and used in a personal computer
(PC), or left in the Workhorse, and accessed by using WinSC (see the
WinSC and PlanADCP User's Guide).
NOTE. The WorkHorse Mariner does not come with flash memory, but
has the same capacity as a WorkHorse Sentinel.
NOTE. WinSC is not provided with WorkHorse Mariner systems, but is
available for free download at www.rdinstruments.com.

WorkHorse Mariner ADCP User's Guide
P/N 957-6169-00 (April 2005) page 11
Figure 8. Memory Card Overview
3.6 Spare Parts
The following parts are included in the spare parts kit.
Table 3: Spare Parts
Description Part number
O-ring, face 2-260
Desiccant, sealed bag DES3
Lubricant, silicone, 5.3 oz, Dow-Corning DC-111
Fuse, 3.0 Amp, 250V GMA-3A
4 WorkHorse Care
This section contains a list of items you should be aware of every time you
handle, use, or deploy your WorkHorse. Please refer to this list often.
4.1 General Handling Guidelines
• Never set the transducer on a hard or rough surface. The
urethane faces may be damaged.
• Always remove the retaining strap on the end-cap underwa-
ter-connect cable and dummy plug when disconnecting them.
Failure to do so will break the retainer strap.
• Do not apply any upward force on the end-cap connector as
the I/O cable is being disconnected. Stressing the end-cap
connector may cause the ADCP to flood. Read the Main-
tenance guide for details on disconnecting the I/O cable.
• Do not expose the transducer faces to prolonged sunlight.
The urethane faces may develop cracks. Cover the trans-

WorkHorse Mariner ADCP User's Guide
page 12 RD Instruments
ducer faces on the Workhorse if it will be exposed to sun-
light.
• Do not expose the I/O connector to prolonged sunlight. The
plastic may become brittle. Cover the connector on the
Workhorse if it will be exposed to sunlight.
• Do not store the ADCP in temperatures over 75 degrees C.
The urethane faces may be damaged. Check the tempera-
ture indicator inside the shipping case. It changes color if the
temperature limit is exceeded.
• Do not scratch or damage the O-ring surfaces or grooves. If
scratches or damage exists, they may provide a leakage
path and cause the ADCP to flood. Do not risk a deploy-
ment with damaged O-ring surfaces.
• Do not lift or support a WorkHorse by the external I/O cable.
The connector or cable will break.
4.2 Assembly Guidelines
• Read the Maintenance guide for details on WorkHorse re-
assembly. Make sure the housing assembly O-rings stay in
their groove when you re-assemble the WorkHorse. Tighten
the hardware as specified. Loose, missing, stripped hard-
ware, or damaged O-rings can cause the WorkHorse
transducer to flood.
• Place a light amount of DC-111 lubricant on the end-cap
connector pins (rubber portion only). This will make it eas-
ier to connect or remove the I/O cable and dummy plug.
• Do not connect or disconnect the I/O cable with power ap-
plied. An exception to this is the external battery case. The
external battery case connector is always “hot” when batter-
ies are installed. When you connect the cable with power
applied, you may see a small spark. The connector pins
may become pitted and worn.
• The WorkHorse I/O cable is wet mate-able, not under water
mate-able.
4.3 Deployment Guidelines
• Align the compass whenever the battery pack or recorder
module is replaced, or when any ferrous metals are relocated
inside or around the WorkHorse housing. Ferro-magnetic
materials affect the compass.

WorkHorse Mariner ADCP User's Guide
P/N 957-6169-00 (April 2005) page 13
• The deck box is not designed to withstand water. Use cau-
tion when using on decks in wet conditions.
• Avoid using ferro-magnetic materials in the mounting
fixtures or near the Workhorse. Ferro-magnetic materials
affect the compass.
5 Setup the WorkHorse Mariner ADCP
Figure 9 illustrates how to connect the WorkHorse Mariner cables on your
workbench. You will need a container of water large enough to submerge
the WorkHorse’s transducer head into during testing (two to three inches of
water is sufficient). Testing the WorkHorse out of water may cause some
tests to fail but causes no harm to the WorkHorse.
TO J17
INPUT POWER
NAVAGATION
DEVICE
FROM
TO
ENSEMBLE-OUT
DEVICE
FROM (J22)
TO GYRO
FROM CHANNEL 1
(J20 RS-232 or J19 RS-422)
TO COMPUTER
COMPUTER
DECK BOX (REAR VIEW)
EXTERNAL RS-232 (J28)
GYROCOMPASS DATA
DC 20-60 VOLT
AC 98-264 VOLT
DC 12 VOLT
(CHOOSE ONE INPUT VOLTAGE)
(OPTIONAL)
(OPTIONAL) (OPTIONAL)
(OPTIONAL)
(REQUIRED FOR COMMUNICATION AND TESTING)
TO COMPUTER
TO ADCP
I/O CABLE
Figure 9. WorkHorse Mariner Connections
5.1 Serial Communication
The standard communications settings for WorkHorse Mariners is RS-422,
9600-baud, no parity, 8 data bits and 1 stop bit. The Deck Box converts

WorkHorse Mariner ADCP User's Guide
page 14 RD Instruments
your computer’s RS-232 port to RS-422. There is no need to change the
ADCP’s communication setting.
5.2 What if the WorkHorse Does Not Respond
If your WorkHorse does not respond, check the serial port, cables, power,
and Deck Box. If necessary, refer to the Troubleshooting Guide in the
WorkHorse technical manual.
6 Software
RDI has utility programs to help you set up, use, test, and trouble-shoot
your WorkHorse ADCP. Each program has a help file that you can print, or
you can view help while running the program.
Table 4: WorkHorse Software Main Modules
Program Name Description
BBTalk Windows ADCP communication program. Use this program to "talk"
to the ADCP and to run test script files. BBTalk is included on the
RDI Tools CD. For detailed information on how to use BBTalk, see
the RDI Tools User's Guide.
WinADCP Gives users a visual display of the entire set of data. You can zoom
in on a portion of the data for closer analysis and export data to text
or MatLab files. For detailed information on how to use WinADCP,
see the WinADCP User's Guide.
Documentation CD The Documentation CD has an Adobe Acrobat® (*.pdf) electronic
version of the WorkHorse Technical Manual. Use the Documenta-
tion CD to search for information. For detailed information on how
to use Adobe Acrobat® and the Documentation CD, see the Read
This First guide.
6.1 System Requirements
The WorkHorse software requires the following:
• Windows 95®, Windows 98®, Windows NT 4.0® with Ser-
vice Pack 4 installed, Windows 2000®, or Windows XP®
• Pentium class PC 233 MHz (350 MHz or higher recom-
mended)
• 32 megabytes of RAM (64 MB RAM recommended)
• 6 MB Free Disk Space (20 MB recommended)
• One Serial Port (two High Speed UART Serial Ports recom-
mended)
• Minimum display resolution of 800 x 600, 256 color (1024 x
768 recommended)

WorkHorse Mariner ADCP User's Guide
P/N 957-6169-00 (April 2005) page 15
6.2 Software Installation
To install the WorkHorse software, do the following.
a. Insert the compact disc into your CD-ROM drive and then follow the
browser instructions on your screen. If the browser does not appear,
complete Steps “b” through “d.”
b. Click the Start button, and then click Run.
c. Type <drive>:launch. For example, if your CD-ROM drive is drive D,
type d:launch.
d. Follow the browser instructions on your screen
7 Power
The Mariner deck box automatically scales the input voltage to the proper
level. No special jumpers or switch settings are required to select the input
voltage. If more than one power source is connected to the deck box, the
highest voltage source will be used. Although this is not recommended, it
will not damage the deck box.
AC Power. The deck box accepts input voltages of 98-264 VAC, 50-60Hz
(J27). This input voltage will be converted to 48 VDC. This is the voltage
supplied to the ADCP.
12 VDC Car Battery. Use a 12 VDC car battery (J26) when AC power is not
available. The deck box converts the voltage to 48 VDC. This is the volt-
age supplied to the ADCP. Use the largest rated amp-hour battery as possi-
ble. A car battery should last one to two days powering a 1200-kHz ADCP.
DC Power Supply. If you are using an external DC power supply connected
to the deck box on J25 (20 to 50 VDC, 3.0 A), the voltage from the external
power supply is sent directly to the ADCP. This is useful if you want to in-
crease (higher voltage level) or decrease (lower voltage level) the range of
the ADCP. The current requirement for the power supply is listed as a ref-
erence. Using a lesser-rated power supply can cause the voltage level to
drop. The ADCP will draw only the current it needs.
NOTE. Transmitted power increases or decreases depending on the input
voltage. Higher voltage to the ADCP (within the voltage range of 20 to 50
VDC) will increase the transmitted power. The transmitted power is
increased 6 DB if you double the input voltage from 24 VDC to 48 VDC.
For a 300kHz WorkHorse ADCP, each additional DB will result in an
increase in range of one default depth cell.
ADCP Internal Batteries. If you want the ADCP to use internal battery
power (Sentinel Workhorse ADCP or external battery pack) rather then the
deck box power, do the following.

WorkHorse Mariner ADCP User's Guide
page 16 RD Instruments
a. Turn OFF or disconnect all power to all ADCP system equipment.
b. Remove the screws on the top cover of the deck box. Lift the cover off.
c. Locate the Filter Interface board (see Figure 5, page 8). Locate connec-
tor J18 and disconnect the twisted black and white cable plugged into
this connector. The power from the deck box to the ADCP has now
been disabled. Only the batteries are powering the ADCP.
7.1 Bench-Top Battery Power Requirements
While the WorkHorse is awake and responding to commands, it consumes
approximately 2.2 watts. A single internal battery pack supplies this power
level for about five days. When the WorkHorse is asleep, it consumes less
than one mw. A standard battery pack supplies sleep power for years. At
every opportunity, the WorkHorse will “sleep” to conserve power while de-
ployed.
7.2 Operation Modes
The WorkHorse has two modes of operation: command mode, and ping
mode (also referred to as “Deployment Saver” Mode). Depending on what
mode the ADCP is in; it will go either to sleep or to resume pinging.
In the Command Mode
Whenever you wake up your WorkHorse, power dissipation increases from
less than one mw to around 2.2 w. If you leave the WorkHorse in command
mode without sending a command for more than five minutes, the Work-
Horse automatically goes to sleep. This protects you from inadvertently
depleting batteries.
In the Ping Mode
After you send commands to the WorkHorse that tells it to start collecting
data, the WorkHorse goes into deployment saver mode. If power is some-
how removed and later restored, the WorkHorse simply picks up where it
left off and continues to collect data using the same setup.
Other manuals for WorkHorse
1
Table of contents
Other RD Instruments Measuring Instrument manuals
Popular Measuring Instrument manuals by other brands

Gardner Bender
Gardner Bender PM3000 operating instructions

Agilent Technologies
Agilent Technologies ESA Series User's/Programmer's Reference

ETS
ETS SM3-WM instructions

Galaxy Audio
Galaxy Audio CHECK MATE CM-170 quick start guide

Dakota Digital
Dakota Digital VHX systems Installation and operation manual

GN
GN CX-WLTFM user manual