x2
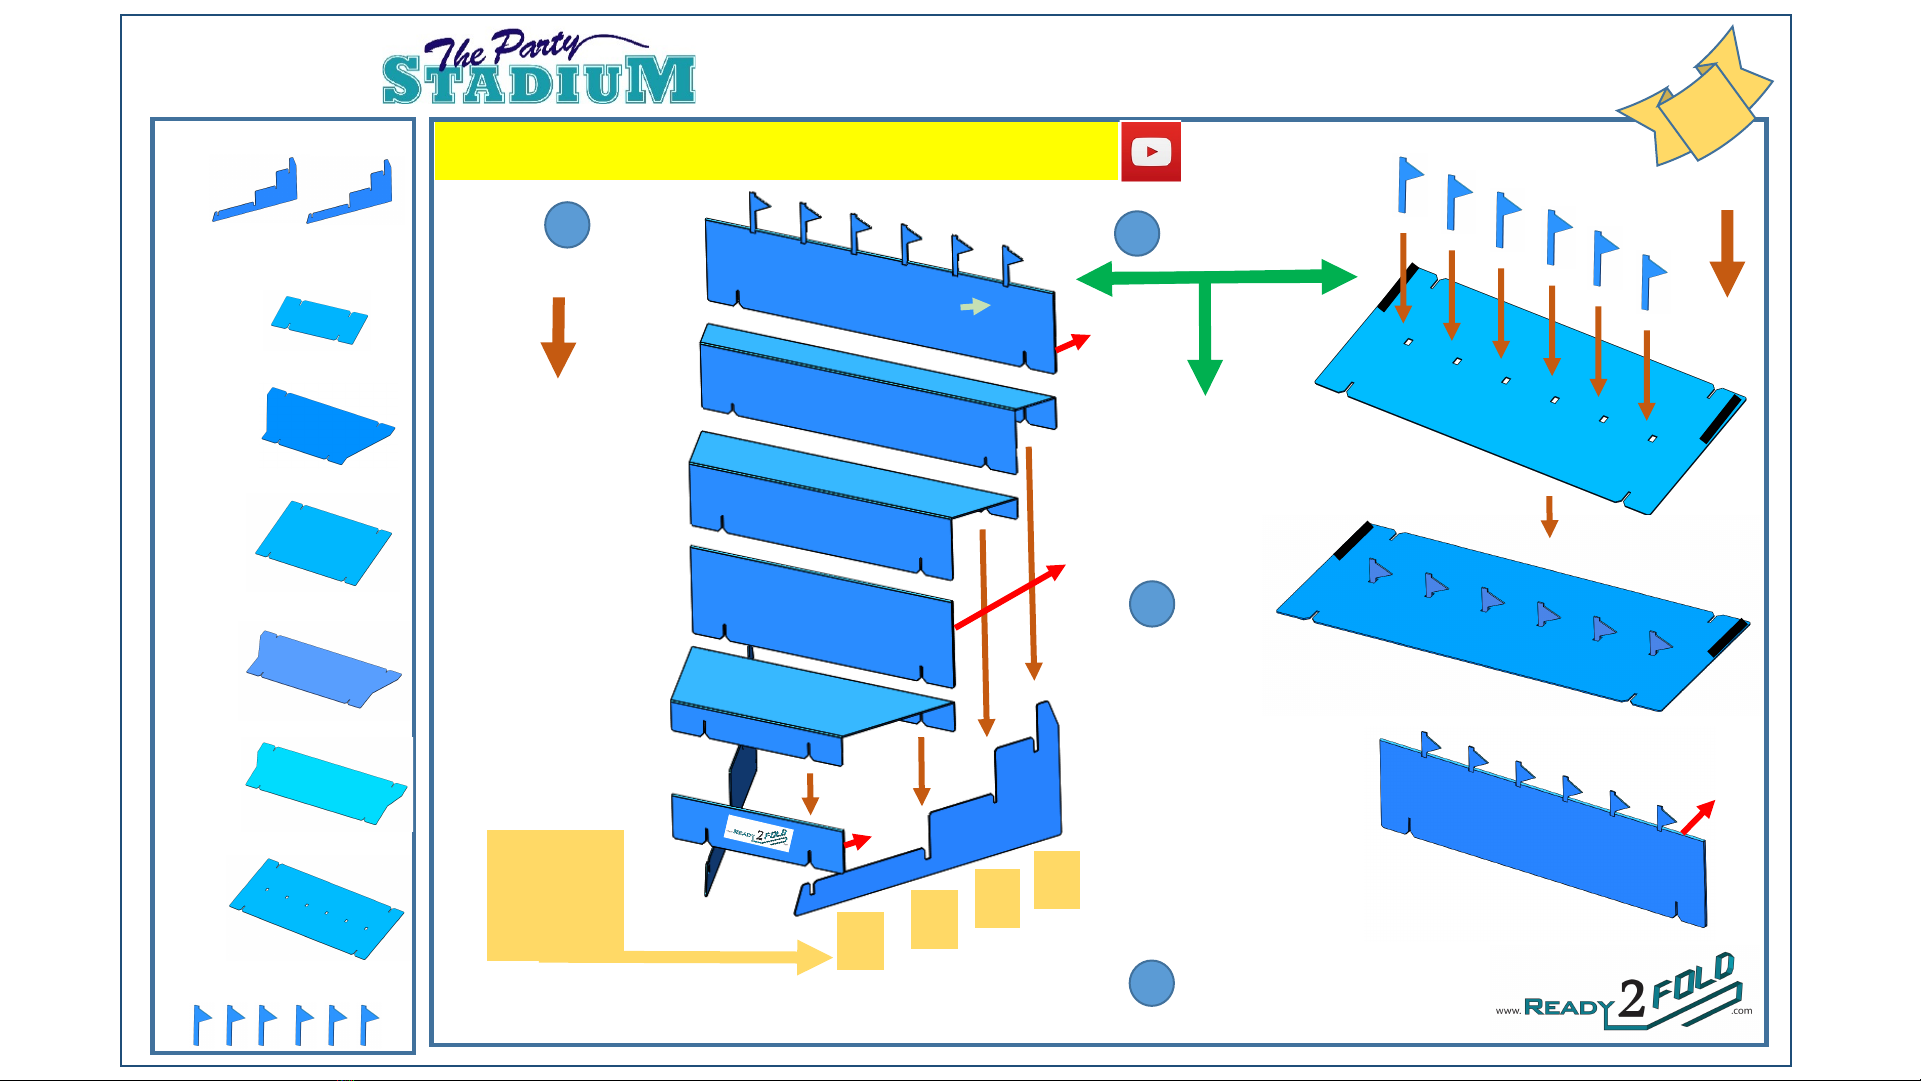
Tailgating and Game-Day Tabletop Food Stadium
x1
x4
x1
x1
Side section -List of items
Front folded vertical
(w/ Ready2fold sticker)
Detail K
Horizontal lower
Detail L
Middle folded vertical
Detail M
Flags
Detail H
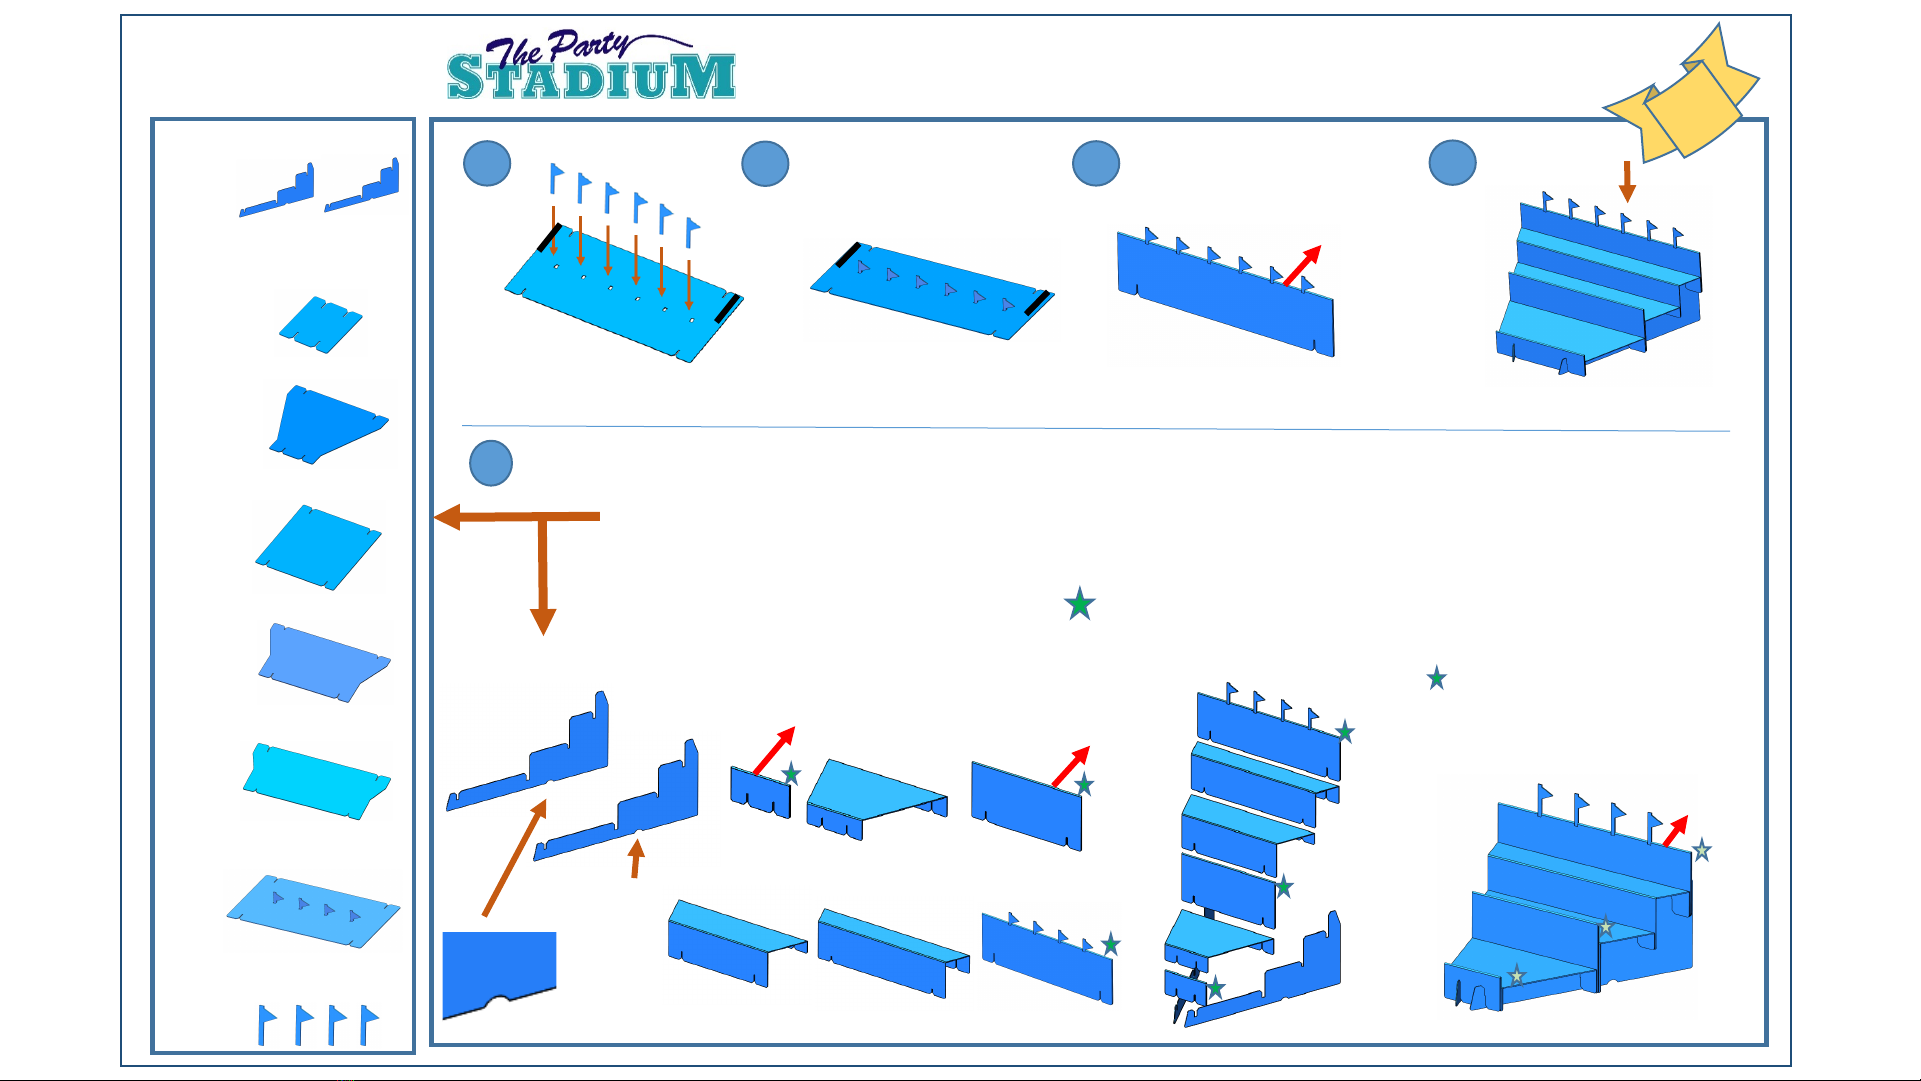
Detailed Assembly Instructions (Repeat steps for 2 side sections)
Sheet 3 of 5
Vertical Stanchions
Detail J
x1
2nd Tier Horizontal
Detail N
x1
3rd Tier Horizontal
Detail O
x1
Back wall
Detail P
PATENT
PENDING
Folded Det. G
Detail G w/ flags dropped in Folded Det. G
Detail G
Detail H -Flags
12 15
13 14
Repeat Steps 1 thru 15 two more times, using the details shown here to the left
of this page and below. To build the 2 side sections. Note: That the Left-side
section should have the Velcro on the Right-hand/Rear-side of all vertical pieces,
and the Right-side section should have the Velcro on the Left-hand/Rear-side of
the vertical pieces. See stars below
Detail J Detail KDetail LDetail M
Detail N Detail ODetail P & H
16
x2
x2
x2
x2
x2
x2
x2
x2 =
Left-side Section shown here.
(Right-side is opposite).
This symbol shows the areas
where the Velcro is located on the
BACK side of the vertical pieces.
=
Center Sections (1-required)
*
Detail J:
Has half
moon cut-
outs on the
bottom
edge.
=
Velcro
facing the
back
Velcro
facing the
back
Velcro
facing the
back
Velcro
facing the
back