3 4
WARNING
Before undertaking any type of work on your rearm – including disassembly, cleaning,
modication, and reassembly – you must know how to unload, remove the magazine,
and conduct a safety check of the rearm both visibly and physically. You must
know how to safely operate the action of the rearm and how to combine and
separate the upper receiver from the lower receiver.
After performing work on your rearm, you must properly perform all appropriate
safety procedures such as checking headspace and conrming proper function of the
re control group. Failure to do so can result in damage or destruction of your rearm
and/or injury or death to you and/or any bystanders in the vicinity when the rearm
is loaded and/or red. In all cases, you assume all liability for damages from any
modications made to your rearm.
If you have any doubt about your skills, ability, or understanding of the rearm
and/or the Armorer’s Master Vise, you must seek the assistance of an experienced
armorer or gunsmith.
The Master Gun Vise is a medium duty vise made from durable materials but
is not indestructible. If damage occurs to the vise, do not attempt to continue
using it. Using a damaged vise increases the potential for damaging gun
components and personal injury.
All components that you select for your gun should come with information from
the manufacturer. You must carefully read and understand this information before
proceeding with any installation. Torque specs vary from one manufacturer to another.
We recommend conrming all torque specs with the component’s manufacturer.
Before using the Master Gun Vise, you must MAKE SURE THAT THE FIREARM
IS UNLOADED AND SAFE to work on. It is your responsibility to exercise caution
during the use of this vise, especially when applying torque. Make sure to follow the
manufacturer’s recommended torque setting when applying torque.
CAUTION: Maximum distance between stainless steel jaws is 3.5 inches. Opening jaws
wider than 3.5 inches reduces thread engagement and stability. The front jaws can be
completely removed for care and maintenance when desired and therefore, the threaded
drive shaft and guide rods do not have retaining pins and will detach at the end of the
drive shaft. Use caution during this process to avoid the front jaws falling out and hitting
the ground or landing on operator’s foot.
MOUNTING
THE VISE
Before installing, be sure the table or
workbench has a square edge and is a
solid mounting surface that can handle
200ft-lbs of force. Position vise in the
reverse 45° position to prevent tipping
forward and falling during installation.
Next, place the vise in desired location
on square edge of a table or workbench.
Mark the center point of the three
mounting holes. Remove vise from
location and use a 1/4" bit to drill the
three holes. Place the vise back into
position and install the three 1/4"-20 x
2-1/4" carriage bolts, washers and nuts.
Recommended torque of 40in-lbs using
a 7/16" socket.
INSTRUCTIONS
GUN SAFETY IS A PRIORITY. Before working on any rearm, make sure the gun is
unloaded, the chamber is empty, and the gun is pointed in a safe direction.
This vise was designed for a solid bench-top with no obstructive bracing. If
attempting to install on a bench-top with obstructive bracing, 1/4" x 1-1/2 lag
screws can be substituted in place of the carriage bolts provided. In case your
bench-top is thinner than 1-1/2", a wooden spacer on the underside of the bench-
top is recommended. (Lag screws not included)
The Torq-Lok pin intersects and locks the ball and
socket joint for high torque applications.
Speed-Cam allows you to quickly position and
reposition your gun in the vise and tighten it down
again for faster and more efcient workow.
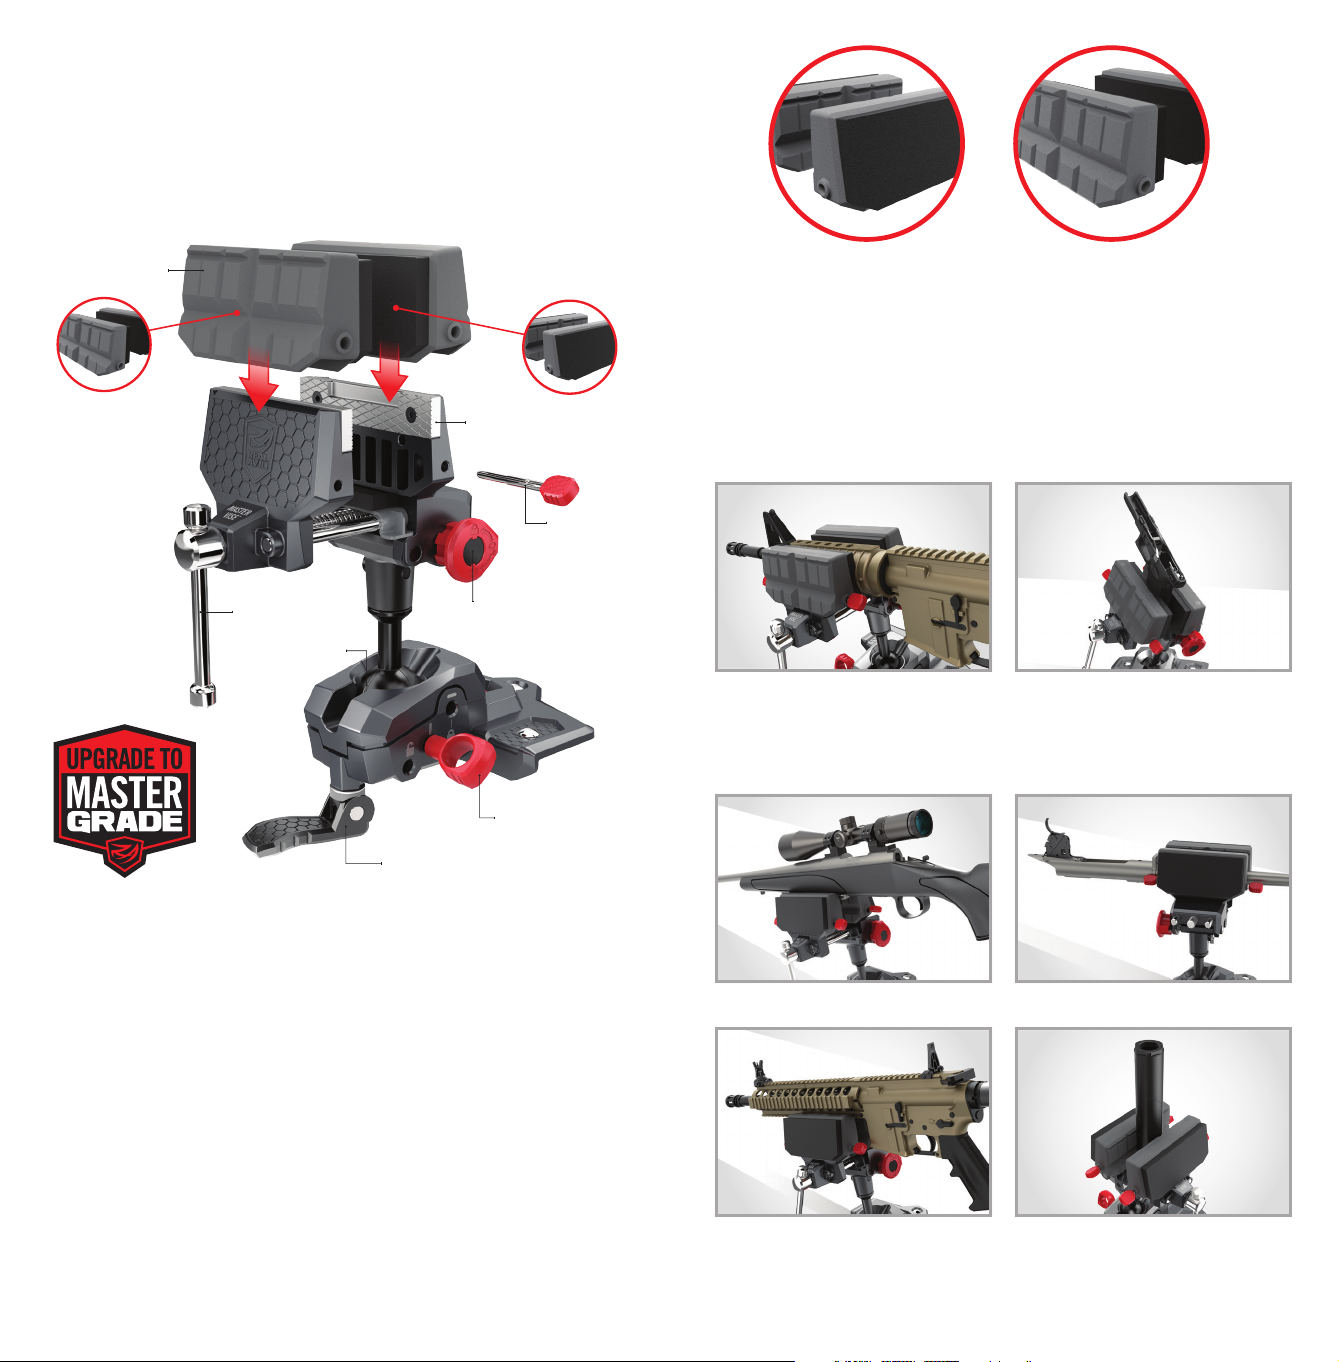
ARTICULATING BALL & SOCKET JOINT
The base of the vise consists of an Articulating Ball & Socket Joint, Speed Cam™Ball
& Socket Locking Lever and Torq-Lok™Pin. The Speed Cam™adjusts the clamping
force of the socket to hold the articulating ball and shaft in place. Once the desired
position is attained, the user can simply pivot the Speed Cam down to hold the ball
joint in place, and up to allow movement. The Speed Cam force can also be adjusted
by turning the Speed Cam under the base. For high torque applications during
assembly/disassembly of a rearm, the Torq-Lok Pin should be used with the Speed
Cam engaged for maximum hold. Reference the guide lines on the ball to indicate
which positions will allow the Torq-Lok Pin to intersect the ball and socket and lock it
in place. There are four vertical locking positions and four horizontal locking positions.
There are three holes in the base for the
Torq-Lok pin. The rst hole, indicated
by an unlock symbol, is where you can
store the pin when not in use. The
other two holes are for locking the ball
within the socket and are indicated by a
horizontal or vertical line for the position
intended. If the Torq-Lok pin doesn’t go
in smoothly, do not use a hammer or try
to force pin as damage to the pin or vise
could occur. Reposition ball and socket
and retry inserting Torq-Lok pin. Guide lines for Torq-Lok Pin locking positions.
Position vise in the reverse 45°
position during installation
DO NOT APPLY EXCESSIVE OR UNEVEN FORCE TO VISE JAWS.
The uniquely large jaw shape allows for enhanced capabilities with gun stocks and vise
blocks. However, this enlarged jaw does come with limitations. Damage can result if
uneven clamping force is applied (when clamped objects are off-center), or excessive
clamping force is applied beyond the vise jaw’s limitations. In either scenario you will
begin to notice exing. Excessive exing can lead to permanent damage. Keep these
limitations in mind when working.
DO NOT APPLY MORE THAN 100ft-lbs OF TORQUE AT ANY TIME.
To avoid injury or damage to your rearm check for correct t of all implements carefully
before use. To avoid damaging your rearm, make sure that you are using the proper
devices to securely hold it in place (barrel blocks, upper vise blocks, lower vise blocks etc.).
OFF-CENTER
CENTER