RecPro RP-PAFRM User manual

RP-PAFRM
Powered Awning
Installation Manual
CONTENTS

DESCRIPTION

Ø6.35x31.75 Hex head lag screw
DESCRIPTION

6"
36"
72
28
65⅝"
1"
13/16"
19/32"
223/64"
223/64"
125/32"
13/16"
13/16"
3/64"
7/16"
1/64"13/16"
13/16"
7/16"
2
21/32"
1
(A)
Preparation
Open the package and check to make sure that all the parts and accessories are included.
Gather needed tools, including a hand drill, tape measure, screwdriver, pencil, and ladders.
According to your purchased awning size, mark the 6 fixation points for installation. The six
fixation points should be calculated according to the calculation formula below.
Note: The 6 mounting points must be in a position on the RV which has strong
bearing force.
Installation points 1 & 2, 3 & 4, 5 & 6 must be in the same horizontal position.
Installation points 1 & 5, 2 & 6 must be in the same vertical position.

1/64"
8' 9' 10' 11' 12' 13' 14' 15' 16' 17' 18' 19' 20' 21'
3"
5⅛"
9
23/64"
2
7/16"
72
8'
Note: A= awning width (left arm center to right arm center)
Please check the above measurement sheet carefully and calculate the correct
installation position accordingly.
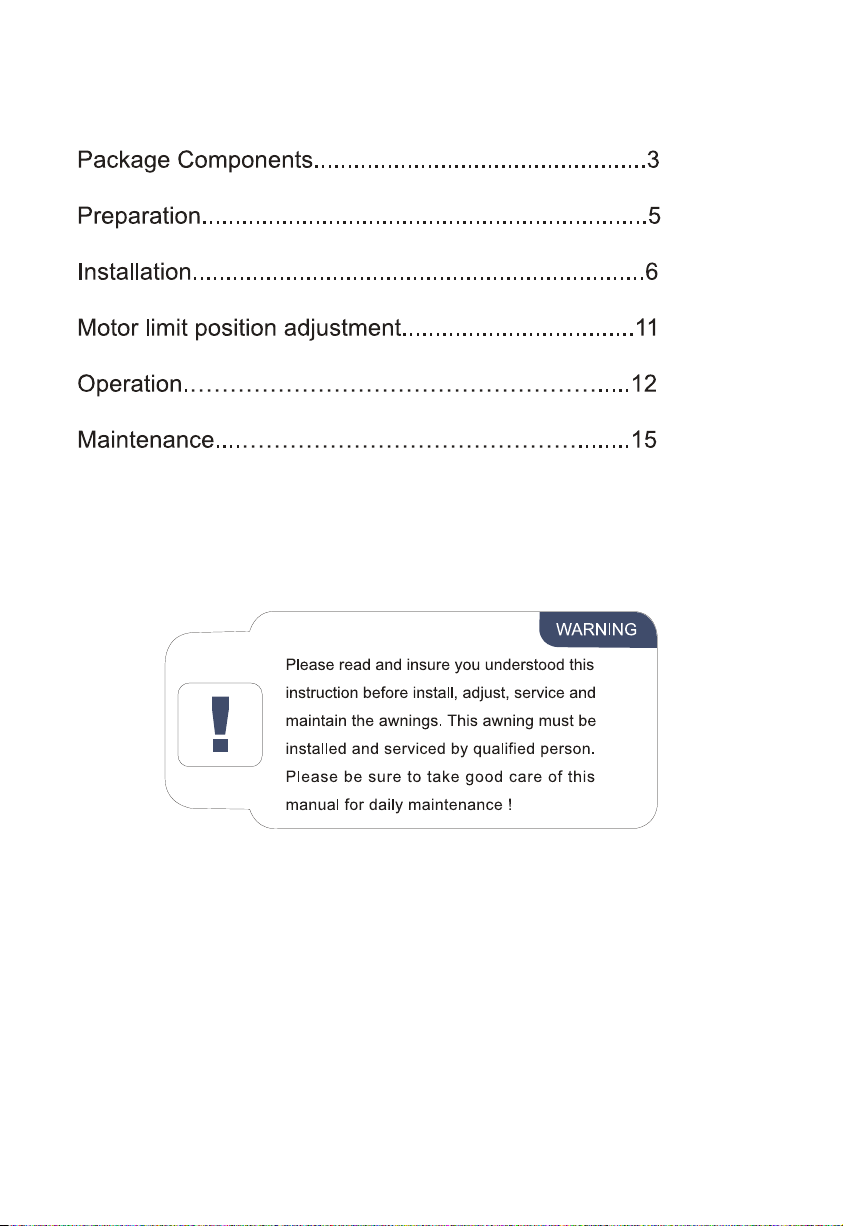
Find the correct installation position
and attach the upper holes of the Z
type brackets on the RV on points
1 & 2.
Insert the back
channel of the
arms into the Z
type brackets.
Attach the bottom
holes of the arms
(back channel)
onto the RV.
Step 1
Step 2
Step 3

7
Step 4
Step 5
Note: After completing step 1-3, please be sure the
left and right arms are tied back with the Velcro so
that the arms are in a secured position.
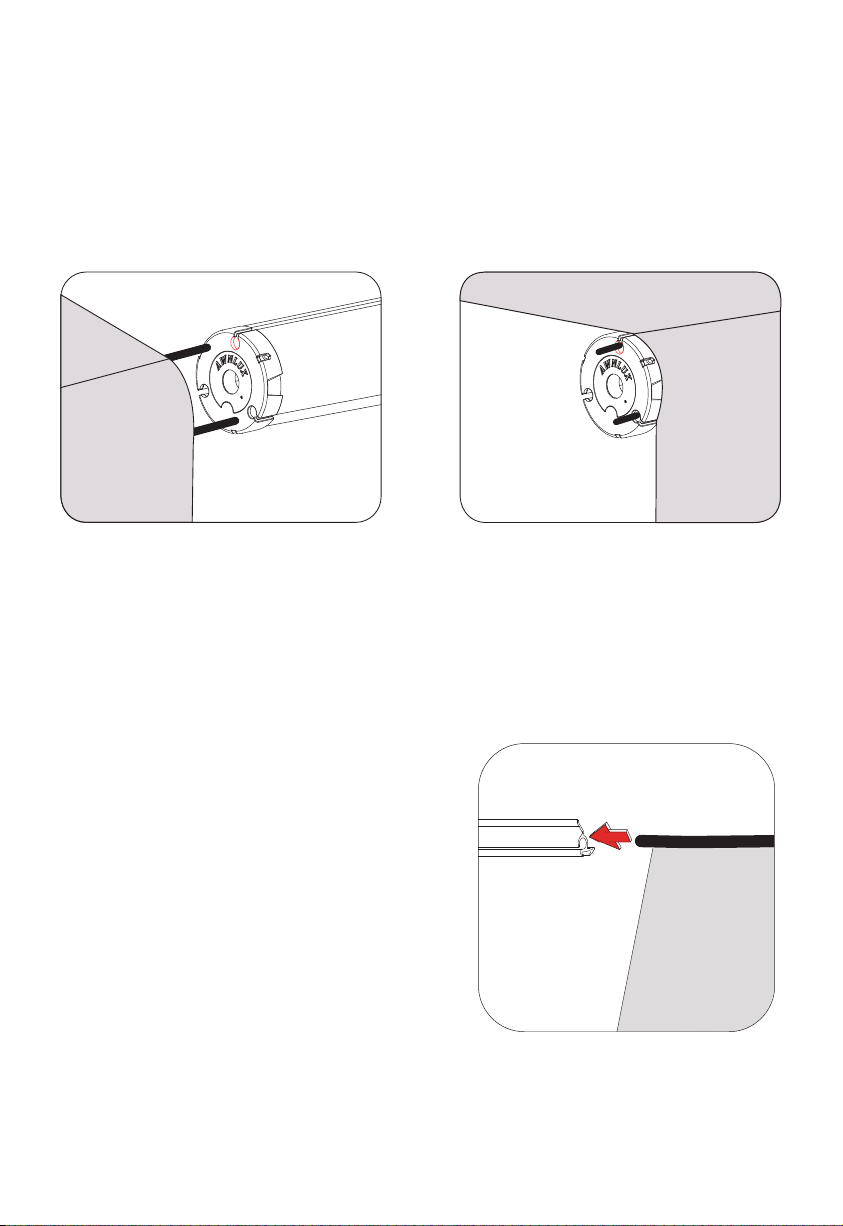
Attach the fabric lock rail to the wall of the RV. Optional: after
installing, use sealant around the fabric lock rail to protect against
water leakage.
Fabric tube connection. Find the
fabric roller tube (right side cover
with a motor and wire, left side only
with a cover, the rest is the center
piece). Take out the tube connector
from the roller tube, then connect
all tubes with M6 x 16 screws piece
by pieces. See illustrations to the
right and below. (please be sure all
three sides are fixed tightly, or the
tube will be curved easily during
operation)
Step 4
Step 5
Insert fabric into fabric tube.
Slide the poly cords on the front of the awning fabric into two of the three grooves on the
fabric tube.
Insert fabric into fabric lock rail.
Slide the poly cord into the fabric lock rail on
the RV wall.

Step 8
Install the roller tube on the left and right arms. Make sure the connecting motor
part is on the right arm.
Step 9
After installing the roller tubes, loosen the Velcro on both
arms (arms will open slightly but will not open fully). At
this time, wire the motor to the switch and power supply
temporarily. (Wiring connection instructions on pg 10)
After connecting the power supply, open the awning and
complete the following steps:
Attach the Z type bracket to the upper arm through the
lower hole of the Z type bracket. Attach the middle hole
of the arm back channel with the RV.
After attaching the arm, adjust the motor limit position to
let the awning work as normal (please refer to step 14)
Step 10
Open and close the awning normally and make sure that
the fabric is smooth and stable. If not, pull the fabric to
adjust it. After you confirm that your fabric is stable and
smooth, use the self-tapping screws to fix the fabric on
both ends of the fabric lock rail to ensure a solid fit.

Step 11
Open the awning completely and disconnect the temporary wiring. Connect the power
cord of the motor from the hole on the right-side arm then connect it with the cable inside
of the arm. Then, hide the connection in the protection shell.
Step 12
Connect the motor to the RV power cord and hide the connector
in the protection shell to prevent element damage.
Step 13
Create a hole in the RV
wall according to the
switch cutout size.
Wiring instructions:
Black wire (-) and red wires (+) are for the 12
volt power, connect with the RV power supply
Blue wire and white wire are for the motor.
Connect with the motor cable (motor cable no
(+) or (-) differences)
Table of contents
Other RecPro Accessories manuals


