RED DEVIL RED23307 User manual

Page | 1 7/25/2017 www.reddevilsnowblowers.com | Red Devil Snow Blowers Red Devil Snow Blowers is a registered trademark of Lankota Group.
270 West Park Avenue
Huron, SD 57350
866-526-5682
Serial Number: _____________________ Date of Purchase: ______________
RED23307
Owner’s Manual
7 foot, 3-Point Mounted Snow Blower
Page | 2 7/25/2017 www.reddevilsnowblowers.com | Red Devil Snow Blowers Red Devil Snow Blowers is a registered trademark of Lankota Group.
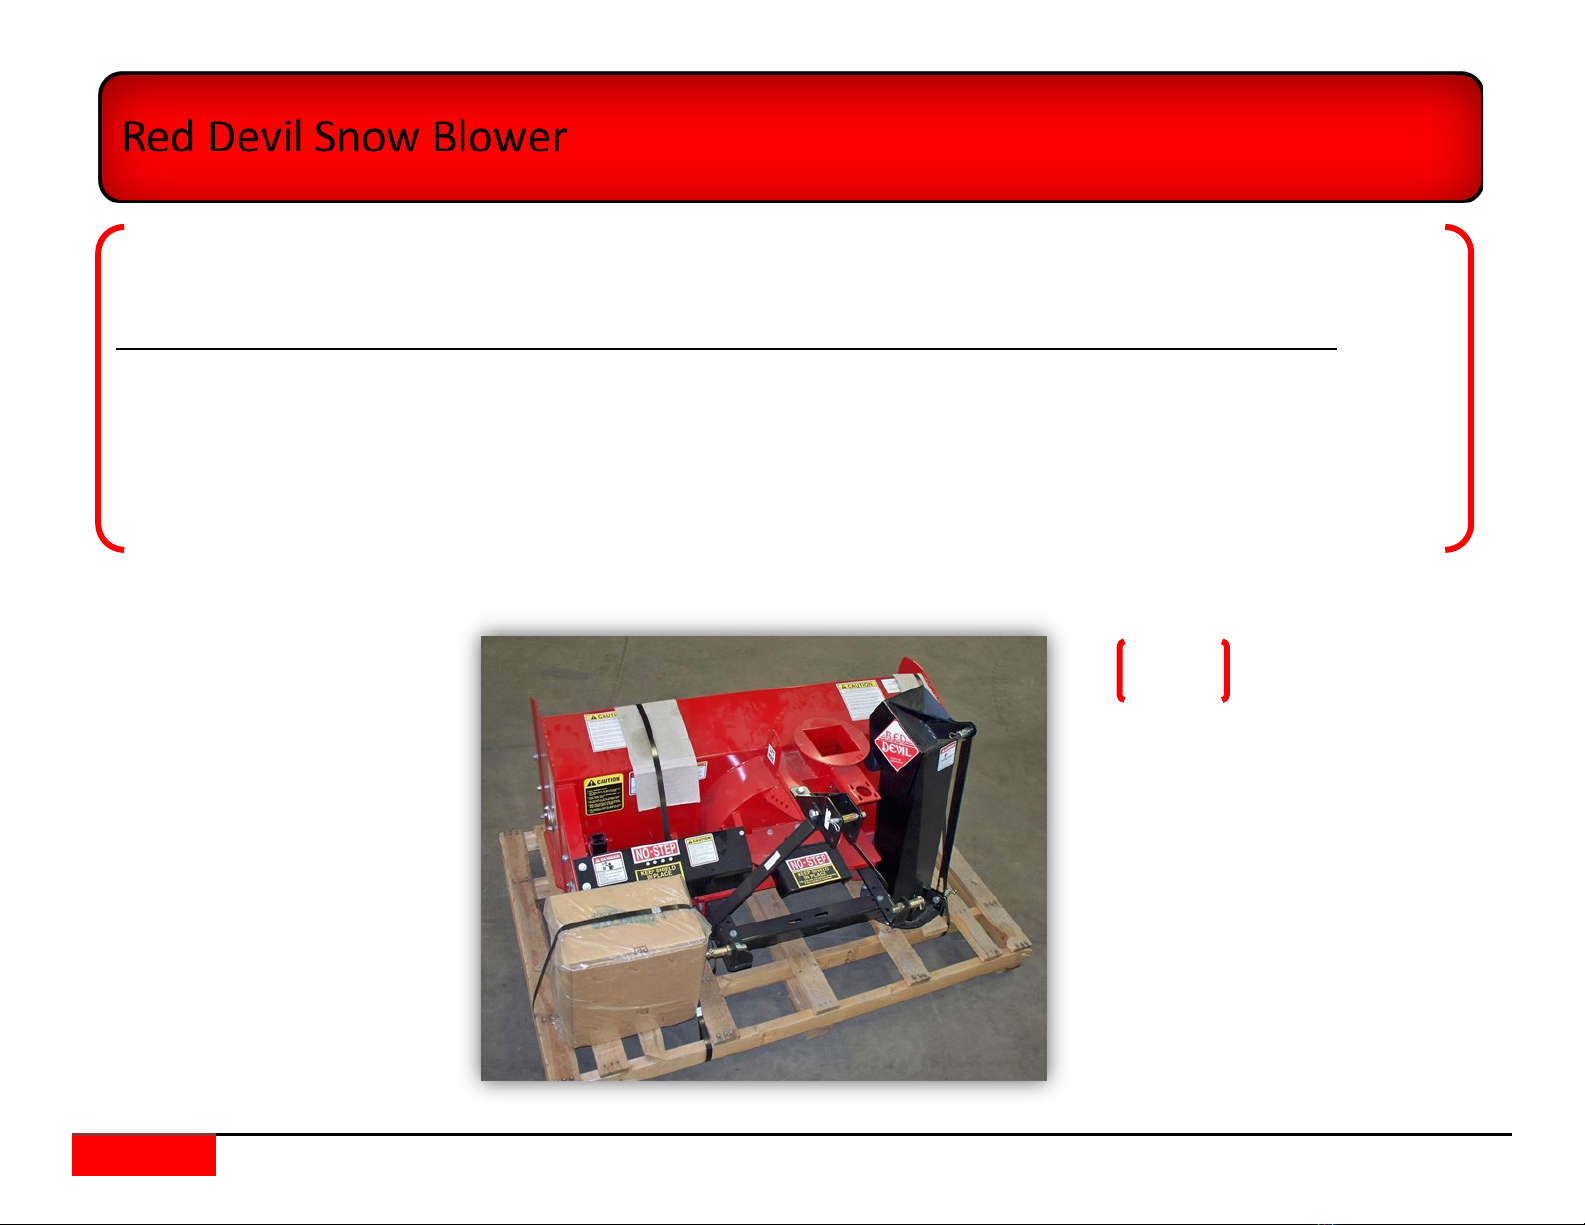
See Figure 1.
1. The Red Devil Snow Blower will arrive on a pallet as shown in Figure 1.
In the accompanying box you will nd the following:
Part Numbers Descripon Quanty
RED56SH-0007 Chute Gear Ring 1
RED56SH-0006 Half-Moon Chute Gear Clamps 2
Bag of Hardware 1
Figure 1

Page | 3 7/25/2017 www.reddevilsnowblowers.com | Red Devil Snow Blowers Red Devil Snow Blowers is a registered trademark of Lankota Group.
Page | 4 7/25/2017 www.reddevilsnowblowers.com | Red Devil Snow Blowers Red Devil Snow Blowers is a registered trademark of Lankota Group.
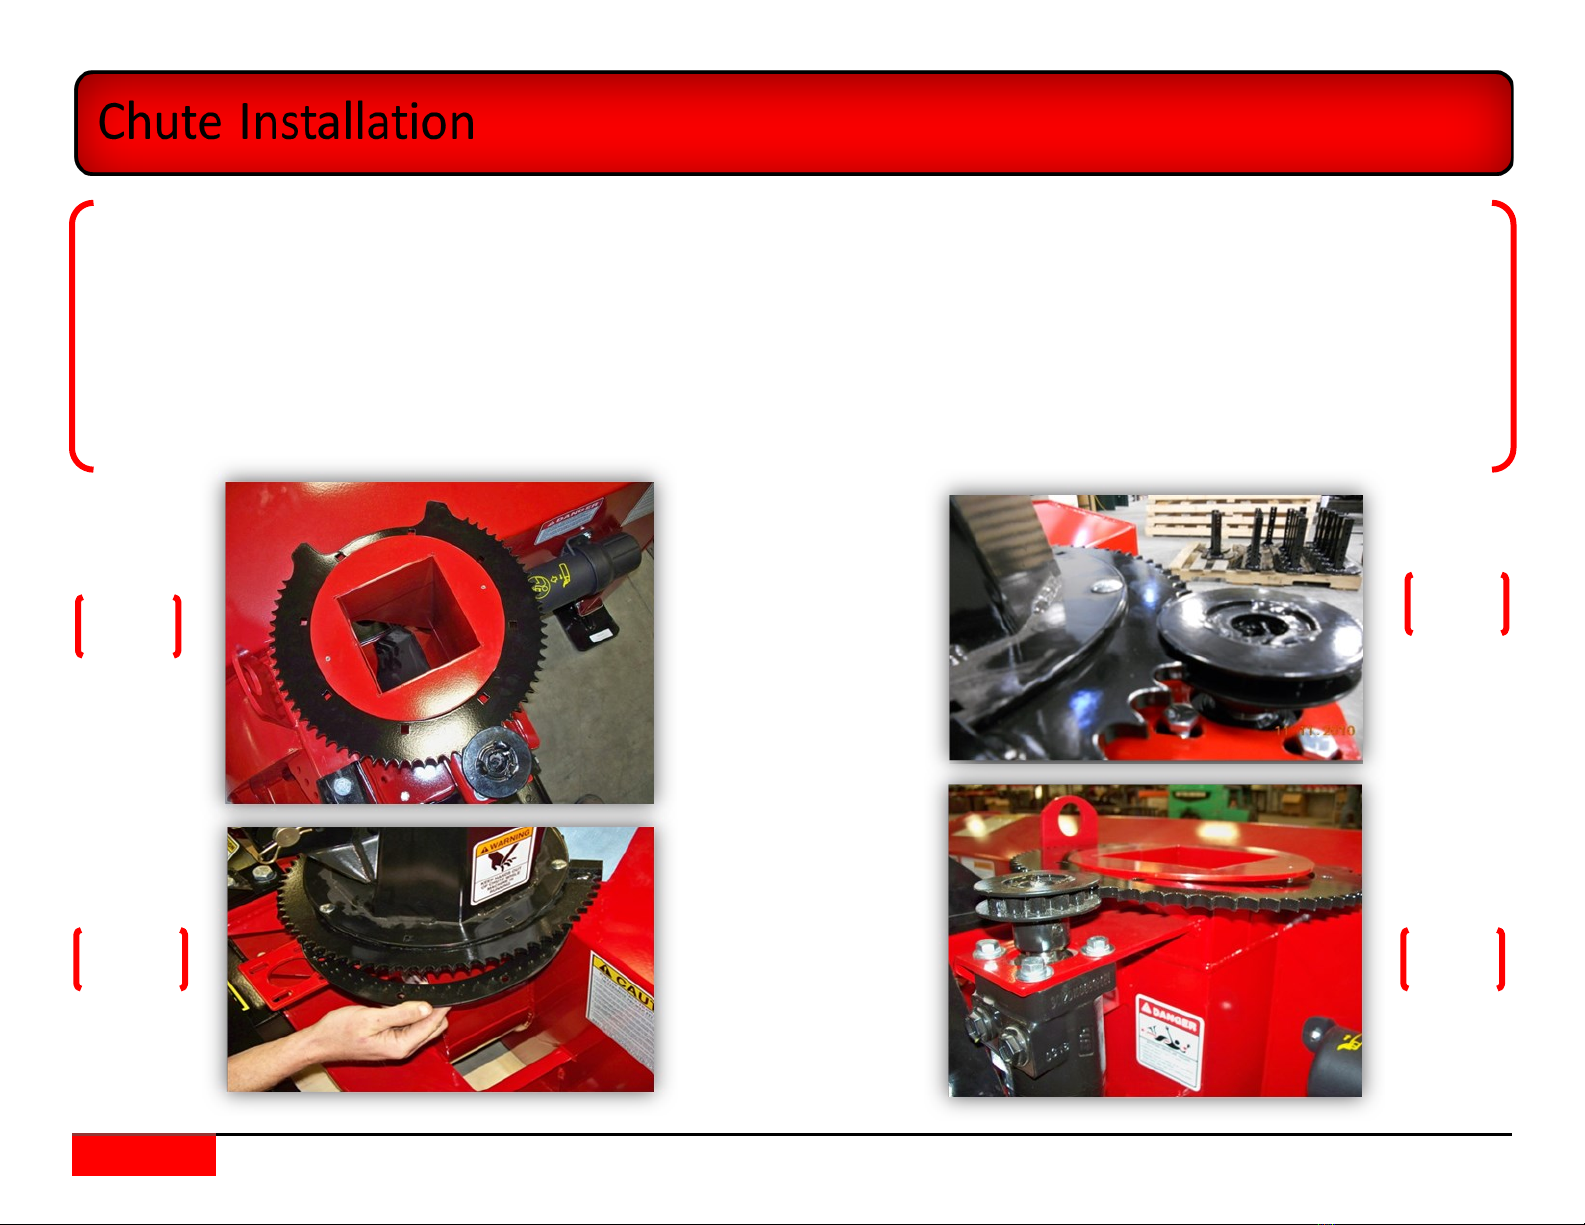
1. Slide the chute gear ring (RED56SH-0007) over the top of the impeller housing chimney as shown in gure 2. The teeth should engage with the sprocket as shown
in gure 3.
2. Place the two half moon chute gear clamps (RED56SH-0006) underneath the chute gear ring.
3. Set the chute on top of the impeller housing chimney and align bolt holes of all three components as shown in gure 4.
4. Use (8) bolts (LAN4A16A16) and (8) lock nuts (REDKRJ8) to aach chute gear, half moon clamps, and chute together to complete assembly.
5. Grease the ange with the zerk installed on the boom side of chimney ange. Rotate chute as you grease to ensure even grease distribuon.
6. Tighten or loosen nuts aer greasing to maintain a rm grip that will rotate easily.
7. Slide motor and gear assembly forward to make a ght t with the chute gear and ghten bolts aaching the motor to the housing as shown in gure 5.
Figure 2
Figure 4
Figure 3
Figure 5

Page | 5 7/25/2017 www.reddevilsnowblowers.com | Red Devil Snow Blowers Red Devil Snow Blowers is a registered trademark of Lankota Group.
Use the diagram for installaon assistance
1. Aach the orbital motor (RED10110) to the back of the snow blower housing
with the sha of the orbital motor pointed up.
2. Aach the ngs and hoses to the motor.
Page | 6 7/25/2017 www.reddevilsnowblowers.com | Red Devil Snow Blowers Red Devil Snow Blowers is a registered trademark of Lankota Group.
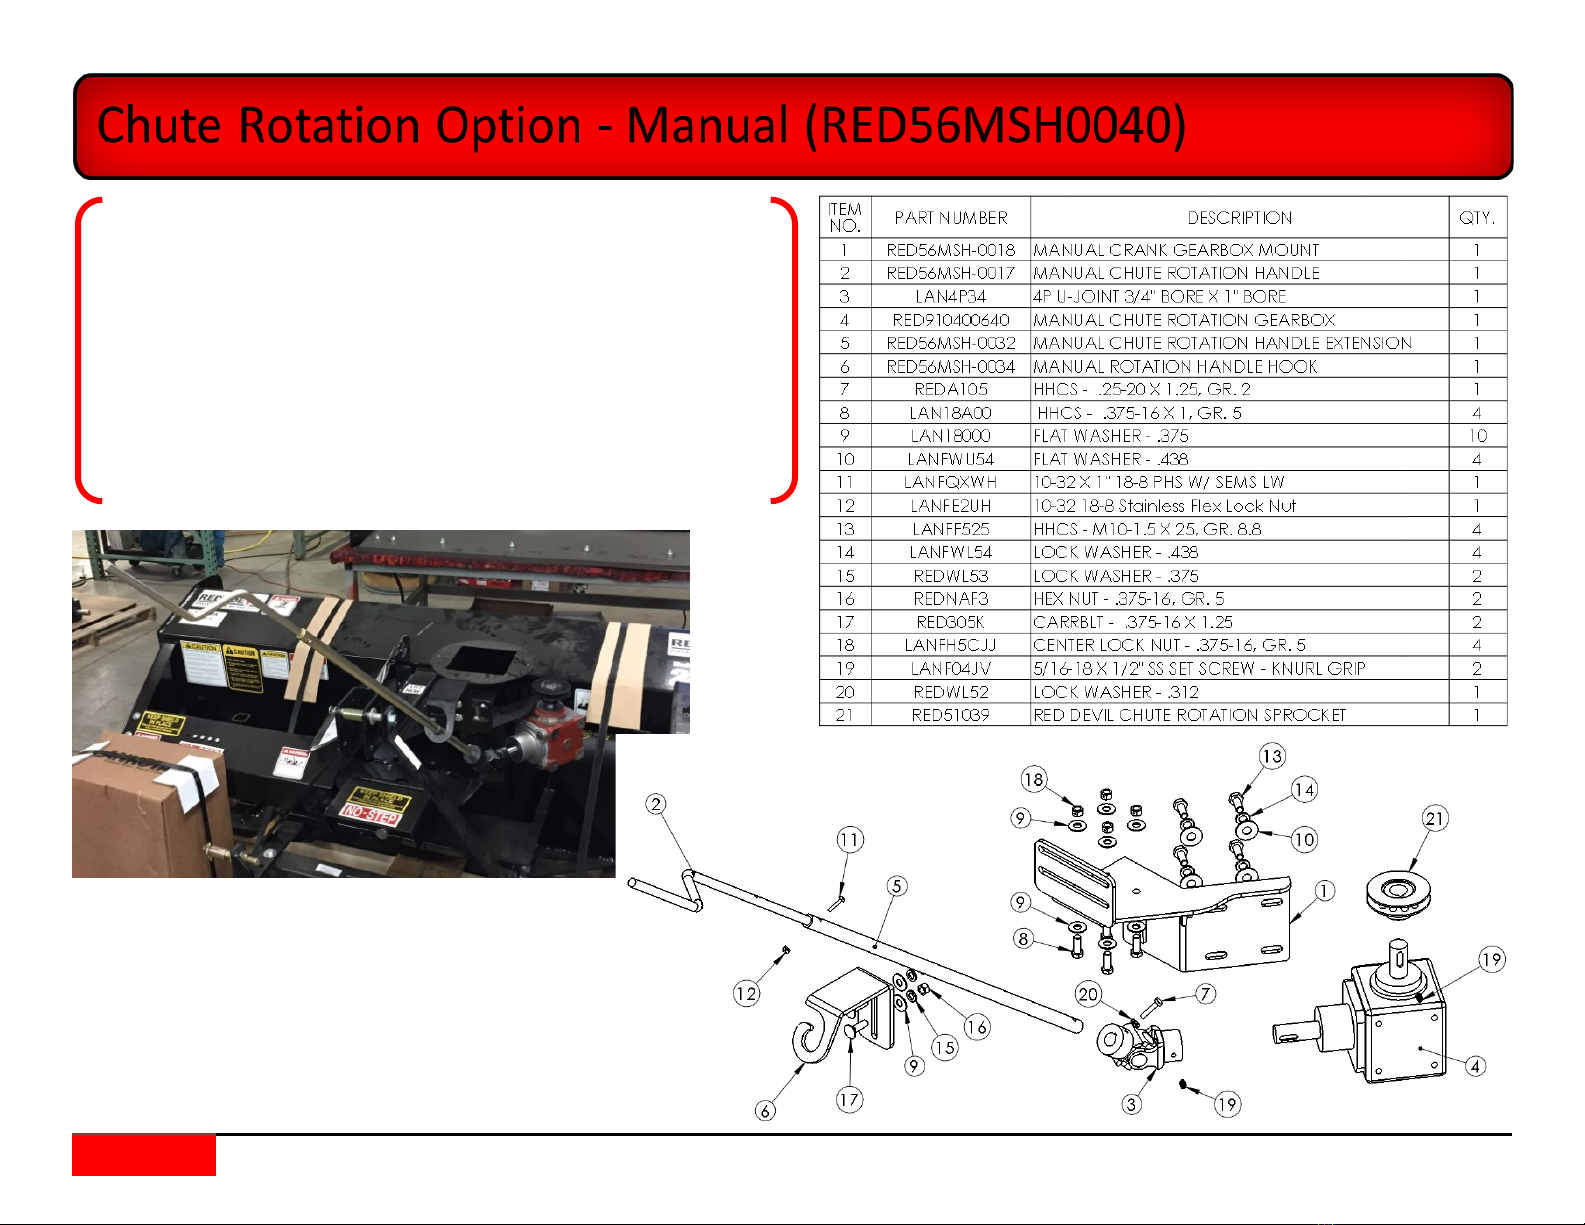
Use the diagram for installaon assistance
1. Aach the gearbox mount (RED56MSH-0018) to the back of the snow blower so
that it will hold the gearbox to the right side of the blower (when looking
from the tractor side).
2. Aach the gearbox (RED910400640) to the mount with the shorter sha
poinng upward and the longer sha pointed toward the tractor.
3. Aach the handle to the U-Joint and adjust it to the length that best suits your
applicaon.
4. Adjust the hook (RED56MSH-0034) so the handle sits in an ideal locaon for
your tractor - this will act as a holder for your handle during operaon.

Page | 7 7/25/2017 www.reddevilsnowblowers.com | Red Devil Snow Blowers Red Devil Snow Blowers is a registered trademark of Lankota Group.
Use the diagram for assembly assistance
Aach the hydraulic cylinder (RED2010111) to the snow blower chute (RED56SH). Then aach the hydraulic hoses and ngs to the cylinder.

Page | 8 7/25/2017 www.reddevilsnowblowers.com | Red Devil Snow Blowers Red Devil Snow Blowers is a registered trademark of Lankota Group.
Use the diagram for assembly assistance
Aach the manual chute deector assembly (REDMSH0030) to the snow blower chute (RED56SH).

Page | 9 7/25/2017 www.reddevilsnowblowers.com | Red Devil Snow Blowers Red Devil Snow Blowers is a registered trademark of Lankota Group.
1. A stainless steel serial number tag is located on the bracket that holds the Chute Rotaon
Motor.
2. This serial number is required for product registraon and is needed for all warranty issues. (As
shown in Figure 7)
Figure 7
Page | 10 7/25/2017 www.reddevilsnowblowers.com | Red Devil Snow Blowers Red Devil Snow Blowers is a registered trademark of Lankota Group.
Preliminary Check
MAKE SURE PTO IS DISENGAGED, ENGINE IS SHUT OFF AND KEYS ARE REMOVED
Visually check the shipping pallet and packaging for any shipping damage.
Unpack the snow blower from the shipping pallet.
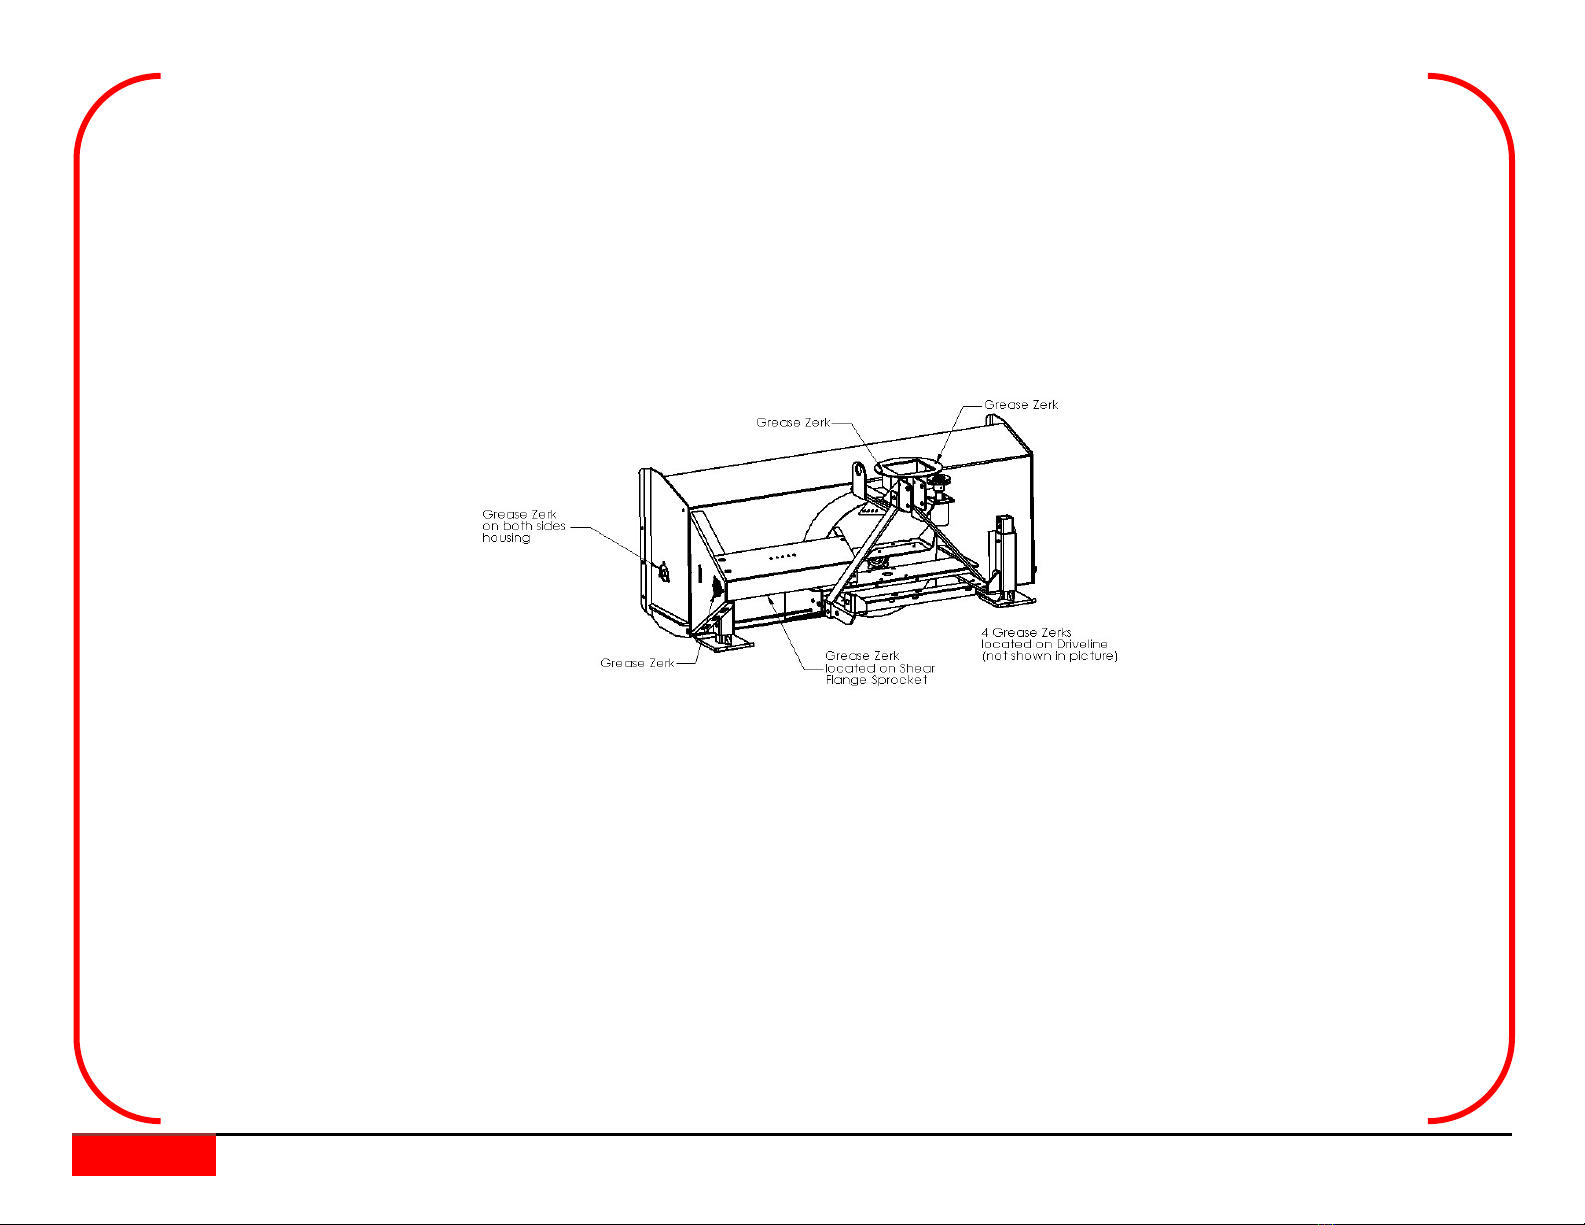
Grease all of the grease zerks on your snow blower. (See below drawing)
One on each end of the auger outer bearing holder.
One on the cross drive outer bearing holder.
One on the shear ange sprocket.
Two on chute rotaon.
Four on the driveline
Check the chain tension. Adjust idler sprocket if needed.
Check the gear box oil level by removing the ll plug and checking for 9 ounces of oil.
Make sure the chute rotaon mechanism is working freely.
Make sure the deector mechanism is working freely.
Make sure the impeller and auger are free of foreign objects.
Make sure all decals and safety signs are clean and readable.
Make sure all safety shields are in place and in good condion.
Make sure driveline shield spins freely.
Make sure the drive line is the proper length for your 3-Point setup.
Make sure all nuts, bolts, and pins are ghtened and secure in place.
Make sure the hydraulics are in good working condion by tesng each funcon and checking for leaks.
Use Synthetic 80/90 Gear Oil In Gear Box
Table of contents
Other RED DEVIL Snow Blower manuals

RED DEVIL
RED DEVIL RED23305 User manual

RED DEVIL
RED DEVIL RED23304 User manual

RED DEVIL
RED DEVIL RED23508 User manual

RED DEVIL
RED DEVIL RED23609 User manual

RED DEVIL
RED DEVIL RED2S304 User manual

RED DEVIL
RED DEVIL RED3K609 User manual

RED DEVIL
RED DEVIL RED2S307 User manual

RED DEVIL
RED DEVIL RED23608 User manual

RED DEVIL
RED DEVIL RED2S306 User manual

RED DEVIL
RED DEVIL RED23306 User manual


