Red Eagle Model DRAGONFLY-1 EPP User manual
mliftUiliAalJJiiualJJ]=t!
Before use, please read the explanations carefully!
DRAGONFLY-l
EPP
Instruction Manual
ualJJ]=t!
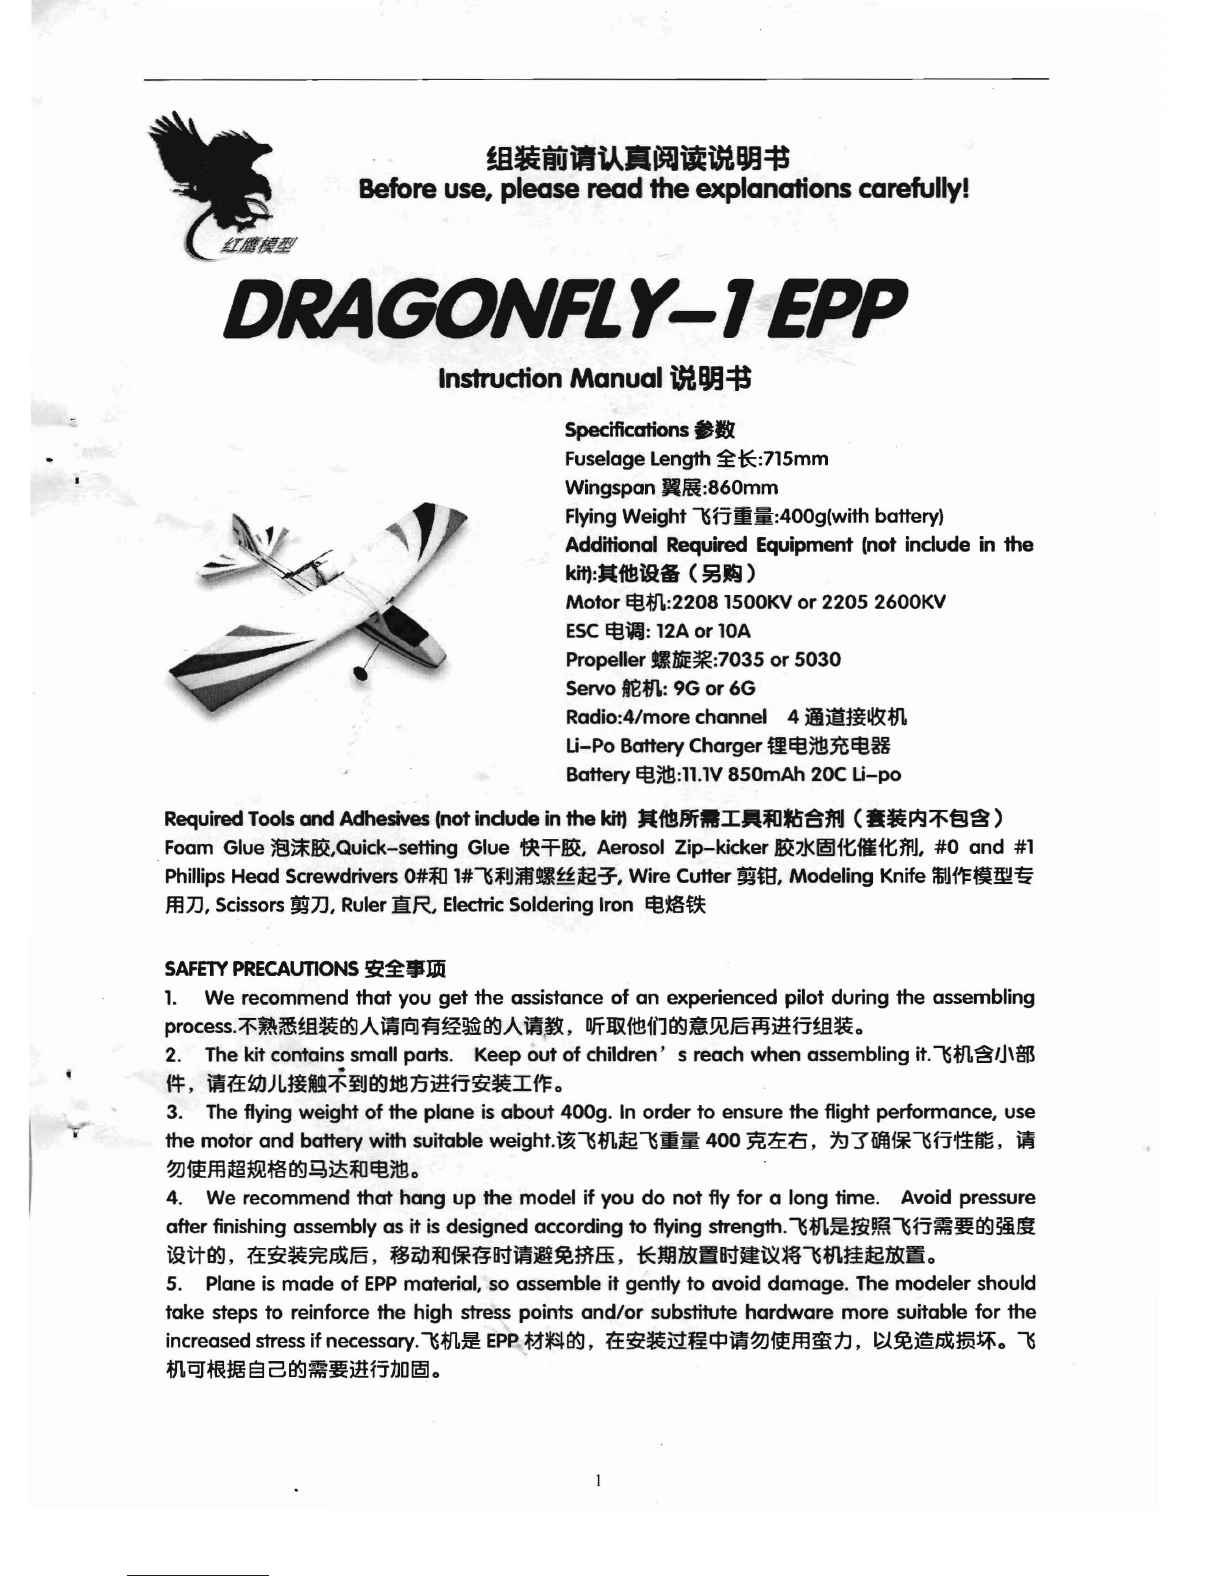
Specifications
••
FuselageLength
it*:715mm
Wingspan
JI@:860mm
FlyingWeight
lSBmm:400g(with
battery)
Additional Required Equipment (not
indude
in the
kit):~ftBm
..
(~Jj)
Motor
ltim:2208
1500KVor 2205 2600KV
ESC
Iti~:
12Aor lOA
Propeller
tlmE~:7035
or 5030
Servo
tBm:
9G or 6G
Radio:4/more channel 4
ilmml&m
U-Po
Battery Charger
mltijtlJ;eltiU
Battery ltijtlJ:ll
.lV
850mAh 20C
U-po
RequiredToolsand Adhesives (not
indude
in the kit)
JtftBIJiWI'UDfDa'1flj
(
••
I13;Y;:§~)
.Foam Glue
)'8~~,Quick-setting
Glue
~T.lBt
Aerosol Zip-kicker
~7.1<~itflitlflJ,
#0 and #1
PhillipsHead Screwdrivers
O#~
1#lS'U~.~lla.7,
Wire Cutter
~it
Modeling Knife
mtH'F~~~
mJJ,
Scissors
~JJ,
RulerHR, Electric Soldering Iron
ltima
SAFETY
PRECAUTIONS
~~.lDi
1. We recommend
that
you get the assistance of an experienced pilot during the assembling
process.::r:~~ffi~ASJA~[c]~~~ASJAi;1~,
DJTlN{tB{nASJ~.!ii!I5¥JittBffi~o
2. The kit contains small parts. Keep out of children' s reach when assembling
it.lSm~Jj\OO
1*,
iJj{£tJJJ~mM~~JASJttt!iJittB~~I1'Fo
3. Theflying weight of the plane is about 400g. In order to ensure the flight performance, use
the motor and battery with suitable
weight
.~lSmlla.lSmm
400
~~~
,
79]"OMf*lSB'~im
,
~
o/.J
fifm
1m1im~
ASJ.Q
ils~
ltijtlJ0
4. We recommend that hang up the model if you do
not
fly for a long time. Avoid pressure
after finishing assembly as it is designed according to flying
strength.lSm~mPffilSB~~ASJ~1!i
~TIASJ
,ft~~*~I5
,~~~~ff~iJj~~mffi,*~mm~~~~lSm~lla.mmo
5. Plane is made of
EPP
material, so assemble it gently to avoid damage. The modeler should
take steps to reinforce the high stress points
and/or
substitute hardware more suitable for the
increasedstressif
necessary.lSm~
EPP
t~~ASJ,
ft~~~m.ep~o/.Jfifmm1J,
1U~~~1m~o
lS
mqrmtl'SEl
aASJ~~itHJ'1JD~o
Fuselage
m~
1
Wing±R
2
Aileron ilJfl 2
Elevator
ft
Illlre
1
Rudder
n(OJte
1
Landing Gear
strut
~~~fljJff
2
Plywood Landing Gear
Mount
*~E~
~~
1
Control
Hom
~m
4
Heat-shrink Tubing
~~~
1
Wheel
m~
2
Plywood
Motor
Mount
*~Q,~~
1
Plywood Pushrod Support
iiH*~t;
2
Rear Furrow Wheel
PVC
Board Support
.I€~~m
PVC
~
1
Hinge
~fii
3
Vertical Stabilizer Fastener
mm~J~U§I~~
1
Steel Wire Z
¥~fljJff
4
lmm
Connecting Rod iiHfIil.lff 2
Pushrod Clip
iiff-F7
2
Steel Wire L
~fljJff
1
~
~~~~
~U
I
~
...
~",,~
~
==-
~
~
~
~
- - -
.
_
. •
__._
. •_ _
.__
_I .
-3
'/7
/
:J~
'7i
Carbon FiberRodS*990mm
~~~
S
Carbon FiberRod 6*430mm
~~~
1
Carbon FiberStrip S*200mm
~~h
1
Carbon FiberRod3*2*6Smm
~~~
2
Elastic
m&:Mi
4
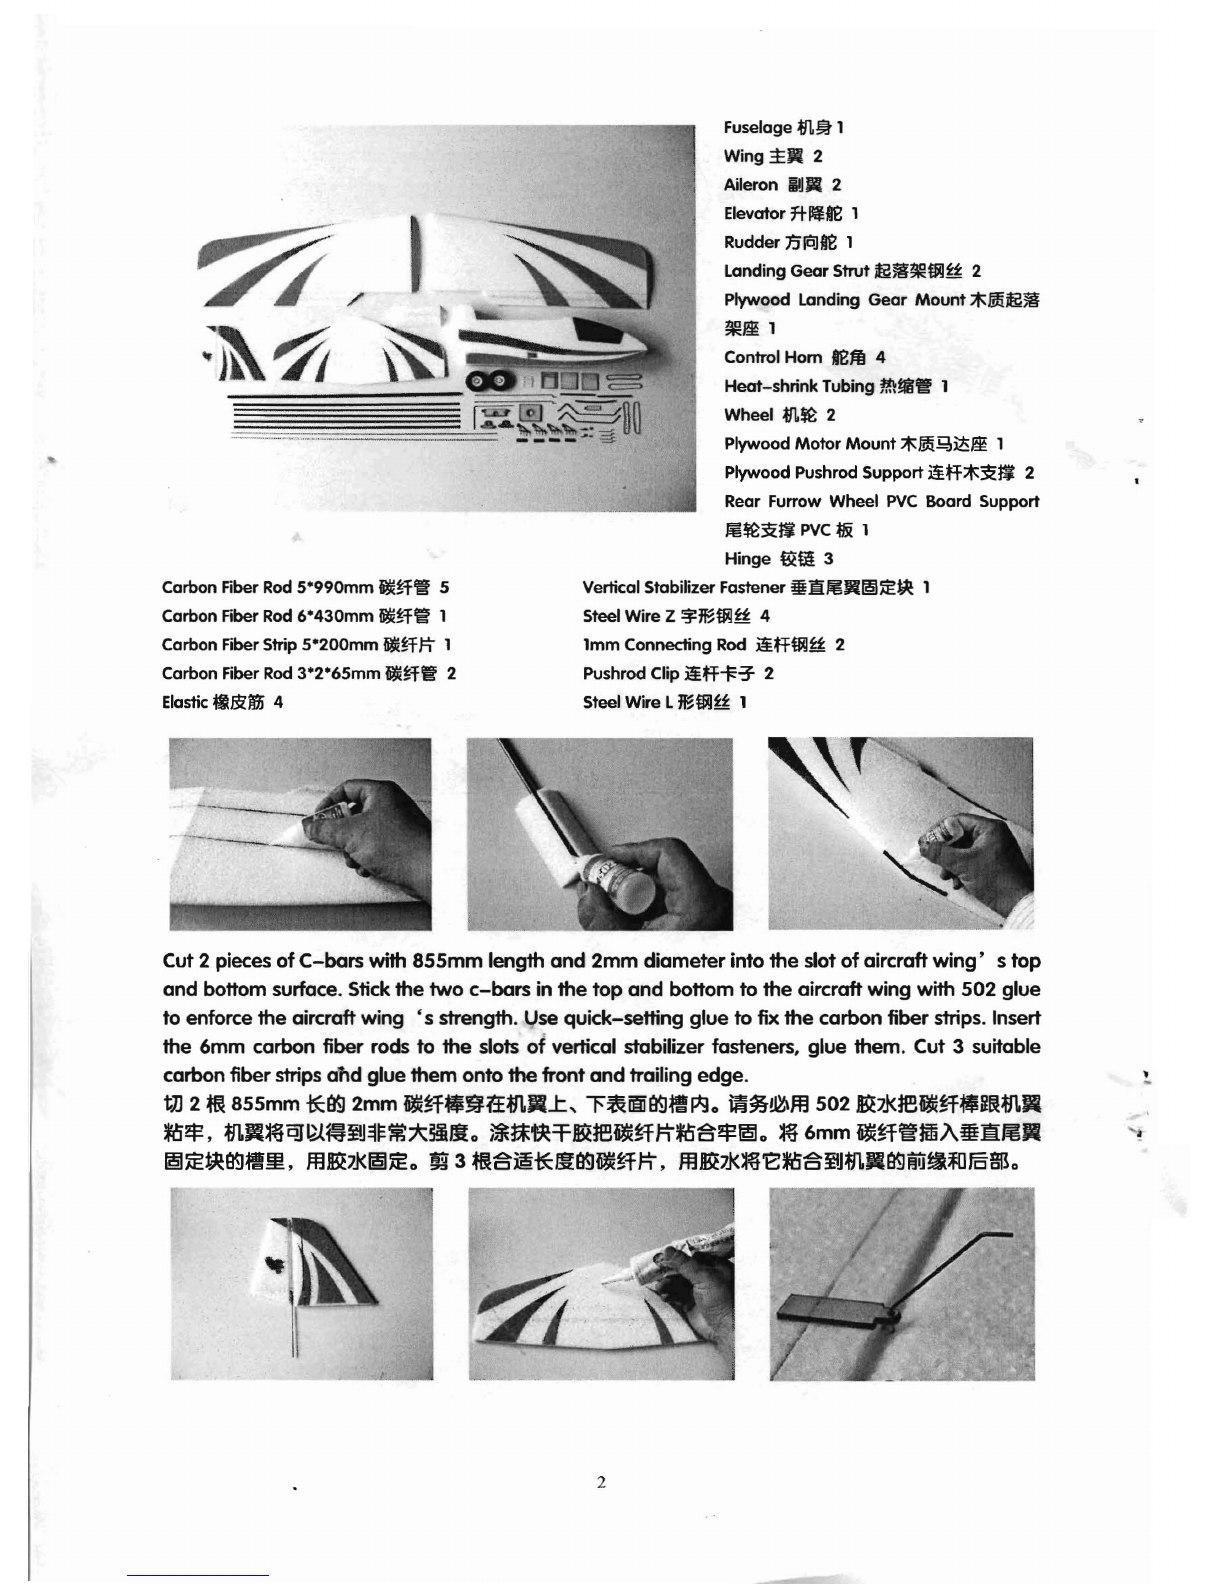
Cut 2 pieces of
C-bars
with 855mm length
and
2mm diameter into the slot of aircraft wing'
stop
and bottom surface. Stickthe two
c-bars
in the top
and
bottom to the aircraft wing with 502 glue
to enforce the aircraft
wing's
strength. Use quick-setting glue to fixthe carbon fiber strips. Insert
the 6mm carbon fiber rods to the slots of vertical stabilizer fasteners, glue them. Cut 3 suitable
carbon fiber strips
and
glue them onto thefront
and
trailing edge.
tD
2 m 855mm
*eg
2mm
~~H~J:n±mR...t,
l'~ii1!iieg~j1go
U\j~~m
502
~*re~~Hfmm.
~$,m.~~~~~$m*~mo~~~~~re~fi~~8$~o~6mm~fi~m~~mmR
~m~~~m,m~*~mo~3m8~*m~~fi~,m~*~E~8~m.~M~~~$o
2

Insertone end of the steel wire Lto the vertical stabilizer. Use glue on the midline of the horizontal
stabilizer, and fix it together with vertical stabilizer fastener. Put vertical stabilizer into the fastener.
Usenipper pliers to bend a 45 bevel of the steel wire L. Glue the rear furrow wheel
PVC
board to
the horizontal stabilizer.
~&L~~~~-~~Amm~.ott*~~R~~~~~*,*~mm~.~~~~8,~mm~
R~Amm~.~~~,m~.mL~~~m~45m,~~~~~P~W~8tt*~~Rko
Use glue to fix landing gear mount, insert landing gear strut and plywood. Fixwheel and
put
the
black plasticpipe onto the axle, use a little glue.
m~*~~a~~~~~,mA~~~~~,aA*ho~k~7,~~~m~~Btt~~k,m
f&1>_~~7.I<~Jt~~o
.Insertthe landing gearto the slots
of
the fuselage, use some glue. Drill a hole by a sharpen metal
rod, insert a carbon fiber rod (3mm) and fix it with glue.
~~m~~Am~~$~.~,m~*~~om~~~~.ttm~kffi-~~,~A3mm~~~,
*m~7.I<~~o
Put the plywood pushrod support on a 6mm carbon fiber rod. Use some glue to fix it at a
distanceof lOOmmfrom the horizontal stabilizer. Glue the other one to the back of the fuselage.
~&aff*~~Btt
6mm ~~~~k,
tt~~*SJZ~R
lOOmm
~it!JJJm~7.I<~~o
~&~9~-~a
ff~~~8~m~~6mom~7.I<~~o
3
I
~
I
--
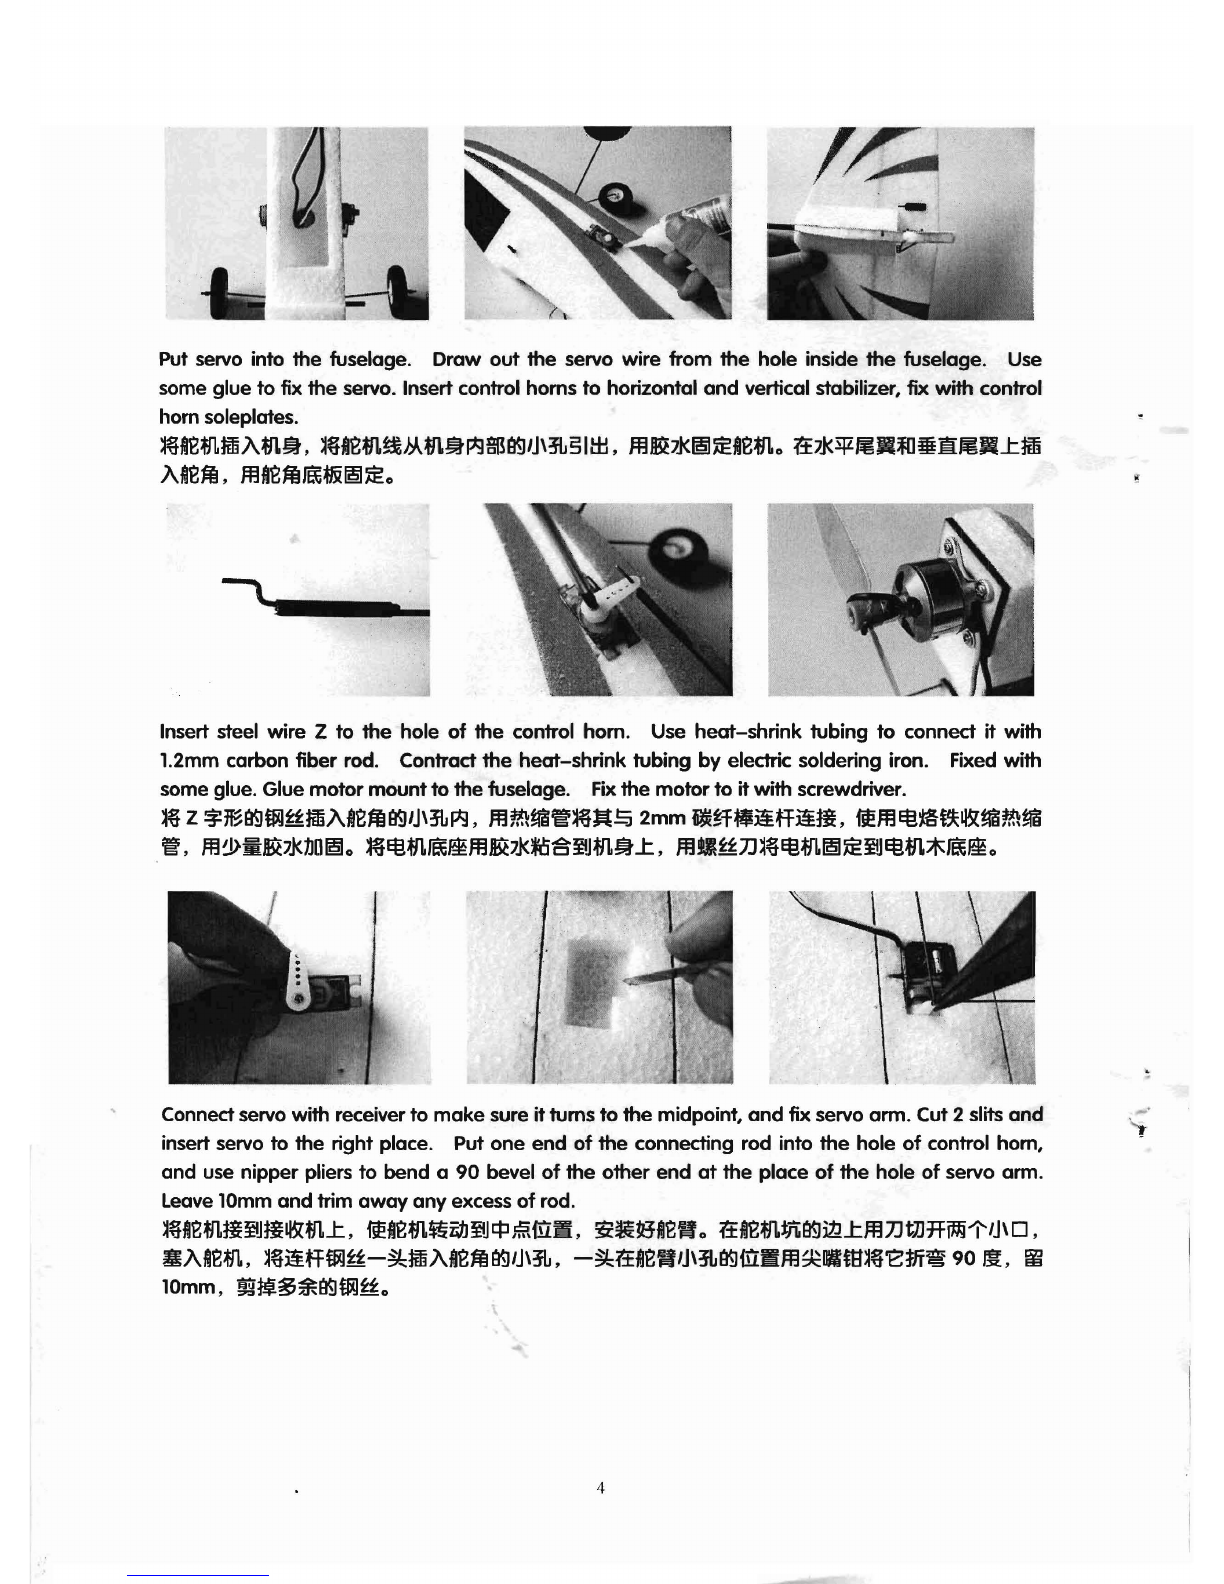
Put servo into the fuselage. Draw out the servo wire from the hole inside the fuselage. Use
some glue to fix the servo. Insert control homs to horizontal and vertical stabilizer, fix with control
hom soleplates.
~.emftllAm~,
~~~em~»..m~~$9~)1JHL5ItH,
m~J1<~~.emo
ttJ1<SlZ~Jn[]mI1l~Jt.tfffi
A~e~,
m.eM~~~~o
\"I_-~
Insert steel wire Z to the hole of the control hom. Use heat-shrink tubing to connect it with
1.2mm carbon fiber rod. Contract the heat-shrink tubing by electric soldering iron. Fixed with
some glue. Glue
motor
mountto the fuselage. Fixthe motorto
it
with screwdriver.
~
Z
¥~~tJijfftmA~e~~/JHL~,
m~~g;~~!:5
2mm
~m:~affati,
nem~:t§~I&~~~
g;,m~~~J1<M~o~~m~~m~J1<~8~m~k,mmffn.~m~~~~m*~~o
Connectservo with receiver to make sure it tums to the midpoint,
and
fix servo arm. Cut 2 slits and
insert servo to the right place. Put one end of the connecting rod into the hole
of
control hom,
and use nipper pliers to bend a 90 bevel
of
the other end
at
the place
of
the hole of servo arm.
Leave10mm and trim
away
any excess of rod.
~~.emti~Jtil&mk,
ne~em~WJ~Jep
ffitilli'i1L
~~!8~e'f!
0
tt.emtiL~ilJkmnt)J1fiJij"'i"/J\
0 ,
~Amem,
~~afftJijff-~ftIlA~e~
~/J\:flJ,
-~tt~e'f!/J\:flJ~illi!m~lrIm~~'8:m~
90
~,
~
10mm,
~~~*~tJijffo
4
-'

,
I
Fix
the rod with pushrod
clip.
Cut a slot (3mm deep) on the wing. Put into servo wire
and
glue it.
m~ff~~~~S~ffo~m.~mH-~3mm~~~,.~m~~~~~,mm*~~o
Cut slits in the front
edge
of the hatch. Insert hinges
and
fixed with some glue. Cut slits on the
fuselage.
~moo~7~~~mH~~,~~~m,mm*~~o~m~~mH~~o
<,
\
Use hinges to connect hatch withthe fuselage, use some glue. Cut slitson the rear
edge
of hatch,
insert and glue a lOmm carbon fiber strip, leave 4mm out. Cut a slit
at
the right place. Make sure
the carbon fiber strip can fit the slitas the hatch closed.
m~m.Jmoo~~~m~~m,
~~m~mm*fD8o
~mOO~~~J§~tDH~~
,
~~
lOmm~
~~h,~~hm~4mm,m~*~~o~m~8~~mmmnmH-~~~,~~OO~*~~
lM~~Hh:IES;m~~~~~o
5

Fixreceiver and
ESC
inside the fuselage. Put wing and fuselage together, fixed with elastic. Make
sure wing and horizontal stabilizer are parallel. Put Li-Po battery in the cabin and adjustthe place
of the battery to change the
C/G
.
ftm~~$~~~m~m~~~,~mR~~m~L,m.~~~~oMtt~~~m.~*~~R
m.~~~floft~~~~~W~~,~aw~~~~m~~~~m~~®o
MotorThrust
~~m1JM:
We suggest that you add 2 degrees
of
down-thrust
and 1 degrees of right-thrust. This can be
achieved by adding awasher or
two
behind the top and right side
of
the motor (between the
motor and the firewall). When set properly, the trim
for
the elevator and the rudder should be
neutral. Fine-tune the
down-thrust
and right-thrustuntil this trim is achieved.
~il1m~1mm1JD
2
m""'Fm~
1
m~mo
crr~aft~llsL$&~$~fci~m1JO
1
~
2
1'mh*~JJA!(
ft
Qlls~~lls~~2~~~~mW~fl~~&S~~o~~""'Fm~~mM,~~~fl~~o
BalancePoint
:5JZ1j~:
TheCenterof Gravity (CIG or Balance Point)is 65mm from the leading edge of the wing.
~/~\ftlf§~m.mi~~
65mm
~o
SeekAssistance: If you are a beginner in RIC, we suggest you find an experienced pilothelp you
with the first
few
flights. Thiswill prevent damage from your model and will speed up the learning
process.It makes your RICexperience more enjoyable. You can contact RICclubs or your dealerto
.obtain the names of experienced RICpilots who would be willing to help you in learning.
Contact usat:
E-Mail: info@wxhymx[email protected]
m~:~~~ftM~W~~1'~¥o~mm~ft~~~~fl~,~-1'~~$~~~fl~m~~o
~~~.~~M~~~~~\~m~,X~~~~~~m~o~~M~ffi~~~ft~~o~crr~Q~
~~mffi$~~~~~m~,~~-1'~~$=~M.~~~~o
RED
EAGLE
MODEL
www.wxhyrnx.com
Made
in China
6
Table of contents


