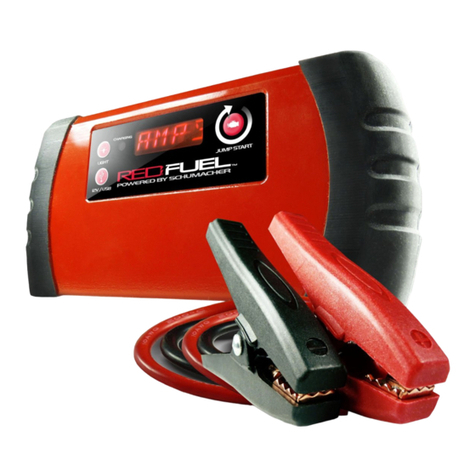
RED FUEL SL65I User manual

0099001628-01
English.............Page 02
Danske..............Side 12
Deutsch ...........Seite 23
Español ........Página 35
Français ..........Page 46
Italiano..........Pagina 57
Nederlands ..Pagina 68
Português....Pagina 79
Svenska..........Sidan 90
MODEL:
SL65I
Jump Starter
OWNER’S MANUAL

• 2 •
ENGLISH Original instructions
Model: SL65I
Jump Starter
OWNER’S MANUAL
PLEASE SAVE THIS OWNER’S MANUAL AND READ BEFORE EACH
USE. This manual will explain how to use the unit safely and effectively.
Please read and follow these instructions and precautions carefully.
1. IMPORTANT SAFETY INSTRUCTIONS - SAVE THESE INSTRUCTIONS
WARNING! RISK OF ELECTRIC SHOCK OR FIRE.
1.1 Read the entire manual before using this product. Failure to do so
could result in serious injury or death.
1.2 This jump starter and charger are not intended for use by children.
Persons with reduced physical, sensory or mental capabilities, or lack
of experience and knowledge, must be given supervision or instruction
concerning the use of the product by a person responsible for their safety.
1.3 Children should be supervised to ensure they do not play with the
jump starter or charger.
1.4 Do not put ngers or hands into any of the unit’s outlets.
1.5 Do not expose the unit to rain or snow.
1.6 The appliance is to be used only with the power supply unit provided
with the appliance.
1.7 Use only recommended attachments. Use of an attachment not
recommended or sold by Schumacher®Electric Corporation for the
SL65I may result in a risk of re, electric shock or injury to persons or
damage to property.
1.8 To reduce the risk of damage to the electric plug or cord, pull by the
adaptor rather than the cord when disconnecting the unit.
1.9 Do not operate the unit with damaged cables or clamps.
1.10 Do not operate the unit if it has received a sharp blow, been dropped or
otherwise damaged in any way; take it to a qualied service person.
1.11 Do not disassemble the unit; take it to a qualied service person when
service or repair is required. Incorrect reassembly may result in a risk of
re or electric shock.
WARNING! RISK OF EXPLOSIVE GASES.
1.12 WORKING IN THE VICINITY OF A LEAD-ACID BATTERY IS
DANGEROUS. BATTERIES GENERATE EXPLOSIVE GASES
DURING NORMAL OPERATION. IT IS IMPORTANT THAT YOU
FOLLOW THESE INSTRUCTIONS EACH TIME YOU USE THE UNIT.
1.13 To reduce the risk of a battery explosion, follow these instructions and
those published by the battery manufacturer and the manufacturer of
any equipment you intend to use in the vicinity of the battery. Review
the cautionary markings on these products and on the engine.

• 3 •
1.14 Do not set the unit on ammable materials, such as carpeting,
upholstery, paper, cardboard, etc.
1.15 Never place the unit directly above battery being jumped.
1.16 Do not use the unit to jump start a vehicle while charging the internal
battery.
2. PERSONAL PRECAUTIONS
WARNING! RISK OF EXPLOSIVE GASES. A SPARK NEAR THE
BATTERY MAY CAUSE A BATTERY EXPLOSION. TO REDUCE THE
RISK OF A SPARK NEAR THE BATTERY:
2.1 NEVER smoke or allow a spark or ame in the vicinity of a battery or engine.
2.2 Remove personal metal items such as rings, bracelets, necklaces and
watches when working with a lead-acid battery. A lead-acid battery
can produce a short-circuit current high enough to weld a ring to
metal, causing a severe burn.
2.3 Be extra cautious, to reduce the risk of dropping a metal tool onto the
battery. It might spark or short-circuit the battery or other electrical
part that may cause an explosion.
2.4 Do not permit the internal battery of the unit to freeze. Never charge a
frozen battery.
2.5 To prevent sparking, NEVER allow clamps to touch together or
contact the same piece of metal.
2.6 Consider having someone nearby to come to your aid when you work
near a lead-acid battery.
2.7 Have plenty of fresh water, soap and baking soda nearby for use, in
case battery acid contacts your eyes, skin, or clothing.
2.8 Wear complete eye and body protection, including safety goggles and
protective clothing. Avoid touching your eyes while working near the
battery.
2.9 If battery acid contacts your skin or clothing, immediately wash
the area with soap and water. If acid enters your eye, immediately
ood the eye with cold running water for at least 10 minutes and get
medical attention right away.
2.10 If battery acid is accidentally swallowed, drink milk, the whites of eggs
or water. DO NOT induce vomiting. Seek medical attention immediately.
2.11 Neutralize any acid spills thoroughly with baking soda before attempting
to clean up.
2.12 This product contains a lithium ion battery. In case of re, you may
use water, a foam extinguisher, Halon, CO2, ABC dry chemical, powdered
graphite, copper powder or soda (sodium carbonate) to extinguish the re.
Once the re is extinguished, douse the product with water, an aqueous-
based extinguishing agent, or other nonalcoholic liquids to cool the product
and prevent the battery from re-igniting. NEVER attempt to pick up or
move a hot, smoking, or burning product, as you may be injured.

• 4 •
3. PREPARING TO USE THE UNIT
WARNING! RISK OF CONTACT WITH BATTERY ACID. BATTERY
ACID IS A HIGHLY CORROSIVE SULFURIC ACID.
3.1 Make sure the area around the battery is well ventilated while the unit
is in use.
3.2 Clean the battery terminals before using the jump starter. During
cleaning, keep airborne corrosion from coming into contact with your
eyes, nose and mouth. Use baking soda and water to neutralize the
battery acid and help eliminate airborne corrosion. Do not touch your
eyes, nose or mouth.
3.3 Determine the voltage of the battery by referring to the vehicle
owner’s manual and make sure that the output voltage is 12V.
3.4 Make sure that the unit’s cable clamps make tight connections.
4. FOLLOW THESE STEPS WHEN CONNECTING TO A BATTERY
WARNING! A SPARK NEAR THE BATTERY MAY CAUSE A
BATTERY EXPLOSION. TO REDUCE THE RISK OF A SPARK
NEAR THE BATTERY:
4.1 Before plugging the clamps into the unit, attach the output cables to
the battery and chassis as indicated below. Never allow the output
clamps to touch each other.
4.2 Position the DC cables to reduce the risk of damage by the hood,
door and moving or hot engine parts. NOTE: If it is necessary to
close the hood during the jump starting process, ensure that the hood
does not touch the metal part of the battery clips or cut the insulation
of the cables.
4.3 Stay clear of fan blades, belts, pulleys and other parts that can cause injury.
4.4 Check the polarity of the battery posts. The POSITIVE (POS, P, +)
battery post usually has a larger diameter than the NEGATIVE
(NEG, N, -) post.
4.5 Determine which post of the battery is grounded (connected) to the
chassis. If the negative post is grounded to the chassis (as in most
vehicles), see step 4.6. If the positive post is grounded to the chassis,
see step 4.7.
4.6 For a negative-grounded vehicle, connect the POSITIVE (RED) clamp
from the jump starter to the POSITIVE (POS, P, +) ungrounded post
of the battery. Connect the NEGATIVE (BLACK) clamp to the vehicle
chassis or engine block away from the battery. Do not connect the
clamp to the carburetor, fuel lines or sheet-metal body parts. Connect
to a heavy gauge metal part of the frame or engine block.
4.7 For a positive-grounded vehicle, connect the NEGATIVE (BLACK)
clamp from the jump starter to the NEGATIVE (NEG, N, -) ungrounded
post of the battery. Connect the POSITIVE (RED) clamp to the vehicle
chassis or engine block away from the battery. Do not connect the
clamp to the carburetor, fuel lines or sheet-metal body parts. Connect
to a heavy gauge metal part of the frame or engine block.
4.8 When nished using the jump starter, disconnect the clamps from the
unit, remove the clamp from the vehicle chassis and then remove the
clamp from the battery terminal.

• 5 •
5. CONTENTS
• SL65I jump starter
• Battery clamps
with smart cable
• 100-240V AC wall charger
with multi-adaptor base
• Set of adaptors for C, G
and I plugs
• Carrying case
• Owners manual
6. FEATURES
1. SL65I
2. Battery clamps
with smart cable
3. Jump start button
4. Carrying case
5. 100V~240V AC wall charger
with multi-plug base
6. Adaptor for G plug
7. Adaptor for C plug
8. Adaptor for I plug
9. LCD display
10. ON/OFF switch
11. Input socket for recharging
12. USB port – 2.1A
13. USB port – 1A
14. Jump start output socket
15. Display ON/OFF button
16. LED light (on back)
1
4
567
2
3Plug types
PLUG C PLUG G PLUG I
9
8
11
10
12 13 14
15
7. CHARGING THE JUMP STARTER
IMPORTANT! CHARGE IMMEDIATELY AFTER PURCHASE,
AFTER EACH USE AND EVERY 30 DAYS, OR WHEN THE
CHARGE LEVEL FALLS BELOW 85%, TO KEEP THE INTERNAL
BATTERY FULLY CHARGED AND PROLONG BATTERY LIFE.
7.1 CHECKING THE LEVEL OF THE INTERNAL BATTERY
1. Slide the ON/OFF switch to the ON position. The LCD display will
show
the battery’s percentage of charge. A fully charged internal battery will read
100%. Charge the internal battery if the display shows it is under 85%.
2. To reduce the risk of electric shock, unplug the unit’s wall charger from the
outlet before attempting any maintenance or cleaning. Simply turning off the
controls will not reduce this risk.
3. When charging the internal battery, work in a well ventilated area and do not
restrict the ventilation in any way.

• 6 •
7.2 CHARGING THE INTERNAL BATTERY
WARNING! Use only the charger included with the unit to charge the
internal battery. Using any other charger will damage the unit.
1. Plug the AC wall charger into the unit’s 15V/1A input socket.
2. Connect the wall charger to a live electrical wall outlet.
3. The LCD display will light up, begin to ash and show “IN”, indicating
that charging has begun.
4. The jump starter will fully charge in 2-3 hours. When the unit is fully
charged, the display will show “100%”.
5. When the battery is fully charged, disconnect the wall charger from the
AC outlet, and then unplug the wall charger from the unit. Slide the ON/
OFF switch to the OFF position, if you are not using the unit immediately.
6. Charge the unit as soon as possible after use.
8. OPERATING INSTRUCTIONS
8.1 JUMP STARTING A VEHICLE ENGINE
IMPORTANT: Do not use the jump starter while charging its internal battery.
IMPORTANT: Using the jump starter without a battery installed in the
vehicle will damage the vehicle’s electrical system.
NOTE: The internal battery must have a charge if at least 40% to
jump start a vehicle.
1. Turn the ignition OFF.
2. Lay the DC cables away from any fan blades, belts, pulleys and other
moving parts. Make sure all of the vehicle’s electrical devices are turned off.
3. For a negative-grounded vehicle, connect the POSITIVE (RED) clamp
from the jump starter to the POSITIVE (POS, P, +) ungrounded post
of the battery. Connect the NEGATIVE (BLACK) clamp to the vehicle
chassis or engine block away from the battery. Do not connect the
clamp to the carburetor, fuel lines or sheet-metal body parts. Connect
to a heavy gauge metal part of the frame or engine block.
4. For a positive-grounded vehicle, connect the NEGATIVE (BLACK)
clamp from the jump starter to the NEGATIVE (NEG, N, -) ungrounded
post of the battery. Connect the POSITIVE (RED) clamp to the vehicle
chassis or engine block away from the battery. Do not connect the
clamp to the carburetor, fuel lines or sheet-metal body parts. Connect to
a heavy gauge metal part of the frame or engine block.
5. Plug the battery clamp cable into the jump starter’s output socket.
6. Slide the ON/OFF switch to the ON position. Press and hold the
button on the smart cable for 1 second. The green LED should light.
NOTE: If the vehicle battery is extremely discharged, the initial current
draw from the jump starter may activate short circuit protection in the
smart cable. When the condition is corrected, the smart cable will
automatically reset.
7. After a proper connection has been made, crank the engine. If the engine
does not start within 5-8 seconds, stop cranking and wait at least 1 minute
before attempting to start the vehicle again.

• 7 •
NOTE: If the car does not crank a second time, check the smart cable to
see if the green LED is lit. If an LED is ashing, refer to the information on
the back of the smart cable and note which error code is in effect. When
the condition is corrected, the smart cable will automatically reset.
NOTE: Cold weather may affect the performance of the jump starter’s
lithium battery. If you hear only a click and the engine does not turn
over, try the following:
With the jump starter connected to the car battery and the green
LED illuminated on the smart cable, turn on all lights and electrical
accessories for one minute. This draws current from the jump starter
and warms the battery. Now try to crank the engine. If it does not turn
over, repeat the procedure. Extremely cold weather may require two or
three battery warmings before the engine will start.
IMPORTANT: DO NOT attempt to jump start your vehicle more
than three consecutive times. If the vehicle will not start after three
attempts, consult a service technician.
8. After the engine starts, unplug the battery clamps from the jump starter
socket and then disconnect the black clamp (-) and the red clamp (+), in
that order. Slide the ON/OFF switch to the OFF position.
9. Recharge the unit as soon as possible after each use.
8.2 CHARGING A MOBILE DEVICE, USING THE USB PORTS
The SL65I includes two USB ports. One provides up to 2.1A at 5V DC, the
other provides up to 1A at 5V DC.
1. Consult your mobile device manufacturer for proper charging power
specications. Connect a mobile device cable to the appropriate USB port.
2. Slide the ON/OFF switch to the ON position. Charging should begin
automatically. The display will show which port is in use.
3. Charging time will vary, based on the mobile device’s battery size and the
charging port used.
NOTE:
Most devices will charge with either USB port, but may charge
at a slower rate.
4. When nished using the USB port, disconnect the charging cable from
your mobile device and then disconnect the charging cable from the unit.
Slide the ON/OFF switch to the OFF position.
5. Recharge the unit as soon as possible after each use.
NOTE: If no USB device is connected, power to the USB ports will
automatically shut off after 30 seconds.
8.3 USING THE LED LIGHT
1. Slide the ON/OFF switch to the ON position.
2. Hold down the display button for 3 seconds.
3. Once the LED light is on, press and release the display button to cycle
through the following modes:
• Flash for an SOS signal
• Flash in strobe mode
• Steady glow
4. When nished using the LED light, press and hold the display button
until the light turns off.
5. Slide the ON/OFF switch to the OFF position.
6. Recharge the unit as soon as possible after each use.

• 8 •
9. MAINTENANCE INSTRUCTIONS
1. After use and before performing maintenance, unplug and disconnect
the unit.
2. Use a dry cloth to wipe all battery corrosion and other dirt or oil from
the battery clamps, cords, and the outer case.
3. Do not open the unit, as there are no user-serviceable parts.
10. STORAGE INSTRUCTIONS
1. Charge battery to full capacity before storage.
2. Store this unit at temperatures between -20°C – +60°C.
3. Never completely discharge the battery.
4. Charge after each use.
5. Charge at least once every month, if not in frequent use, to prevent
over-discharge.
11. TROUBLESHOOTING
PROBLEM SOLUTION
The jump starter’s display will
not turn on.
Make sure the unit is charged.
Connect to AC power, using the provided
wall charger, to reset.
Make sure the ON/OFF switch is set to
the ON position.
The display backlight is
ashing.
The unit is too hot or cold. The light will stop
ashing when the condition is removed.
The jump starter will not
recharge.
Make sure to use only the provided wall
charger.
The jump starter turns on, but
won’t jump start my vehicle. Make sure you have pressed the smart
cable’s button.
Verify the charge level of the jump starter is
at least 40%.
Do not attempt to jump start your vehicle
more than three consecutive times. If
the vehicle still does not start, consult a
qualied service technician.
The green LED on the smart
cable does not light when its
button is pressed.
Check connections.
If an LED is ashing, refer to the table
below. When the condition is corrected,
the smart cable will automatically reset.

• 9 •
Smart Cable LED Behavior
Green LED lit solid Ready to jump start
Green LED ashes three times Reverse charging protection
Red LED ashes once Reverse polarity protection
Red LED ashes twice Short circuit protection
Red LED ashes four times Low voltage protection
Red LED ashes ve times High temperature protection
Red LED lit solid OK to press button to jump start
12. SPECIFICATIONS
Internal battery type .......................................... Lithium ion polymer
Charger ................................................100V~240V AC wall charger
Capacity ............................................................8,000 mAh/29.6 Wh
USB output.............................................................5V DC, 2.1A / 1A
Jump start ................................................400A peak/200A cranking
Charging temperature ........................................................0°-50 °C
13. REPLACEMENT PARTS
Battery clamp smart cable.......................................... 3899003548Z
AC wall charger with C and G plug adaptors ................. 93026958Z
AC wall charger with I plug adaptor ............................... 93026959Z
14. DISPOSAL INFORMATION
14.1 Internal Battery
• The battery must be removed from the appliance before it is scrapped.
• The appliance must be disconnected from the supply mains before
removing the battery.
• The battery must be disposed of safely.
14.2 WEEE Directive
This marking indicates that this product should not be
disposed with other household wastes throughout the EU. To
prevent possible harm to the environment or human health
from uncontrolled waste disposal, recycle it responsibly to
promote the sustainable reuse of material resources. To
return your used device, please use the return and collection
systems or contact the retailer where the product was purchased. They
can take this product for environmentally-safe recycling.
15. LIMITED WARRANTY
WARRANTY TERMS AND CONDITIONS
Schumacher Electric Corporation (the “Manufacturer”) or the resellers
authorized by the Manufacturer (the “Reseller”) warrant this Jump Starter
(the “Product”) for two (2) years), according to the following stipulations.
Any and all warranties, other than the warranty included herein,
are hereby expressly disclaimed and excluded to the fullest extent
permissible under applicable law. Legislation may imply warranties
or conditions or impose obligations on Manufacturer which cannot be
excluded, restricted or modied in relation to consumer goods.

• 10 •
Consumer End-User Warranty
Any claims under this warranty must be communicated to Reseller
within 2 months after discovery of the non-conformity.
Resellers/Professional End-User Warranty
The Manufacturer provides a limited warranty for hidden defects or
non-conformities. This warranty is subject to the following conditions:
a. The Manufacturer only warrants hidden defects in material or
workmanship present in their root cause at the moment of the
rst sale by the Manufacturer;
b. Manufacturer’s obligation under this warranty is limited to
repairing or replacing the Product with a new or reconditioned
unit at the sole option of the Manufacturer;
c. Manufacturer does not have any warranty obligations if the alleged
defects were caused by abnormal usage, fair wear and tear,
unauthorized use of the Product or use of the Product differing from
the description in the applicable manual or other specications
given by the Manufacturer, insufcient care, repairs carried out by
persons or entities or with parts not approved by Manufacturer,
poor care, accidents, unauthorized changes or modications,
incorrect transport, storage or treatment of the Product;
d. In order to exercise this right, the Product must be returned complete
and in its original state and packaging, with mail costs prepaid,
along with proof of purchase to the Manufacturer or its authorized
representatives in order for repair or replacement to occur.
Common Warranty Provisions
The warranty mentioned above only applies to the rst professional
or consumer user having legally acquired the Product from the
Manufacturer or a Reseller. No warranty is extended towards clients,
agents or representatives of those buyers.
The Product is sold under the specications, for the use and purpose
in accordance with the provisions of this manual, with express
exclusion and disclaimer of warranty of any other specications,
uses and purposes.
Authorized Resellers are prohibited from making any statements
or providing any warranty in excess of the above warranties Non-
authorized resellers may only sell the product under the condition
that they assume all warranty obligations with the total exclusion of
any warranty provided by the Manufacturer.
Manufacturer does not provide any warranty for any accessories
used with the Product that are not manufactured by Schumacher
Electric Corporation.
This warranty does not exclude or diminish any claims the
Manufacturer may have against the distributors of The Product.
THE MANUFACTURER NEITHER ASSUMES NOR AUTHORIZES
ANYONE TO ASSUME OR MAKE ANY OTHER OBLIGATION
TOWARDS THE PRODUCT OTHER THAN THIS WARRANTY.

• 11 •
Warranty, Repair Service and Distribution Centers:
For customers outside of the U.S.A., contact your local distributor.
North and South America: Hoopeston in U.S.A.
1-800-621-5485
Europe, North and South Africa: Ofce in Belgium
Rue de la Baronnerie 3, B-4920 Harzé-Belgium
+32 4 388 20 17
info@ceteor.com
Australia/New Zealand:
Enirgi Group Corporation
Unit 10/14 Hopper Avenue, Ormeau, 4208, Queensland, Australia
+61 7 55491978
Schumacher®is a registered trademark of Schumacher Electric Corporation.
DECLARATION OF CONFORMITY
We, Schumacher Electric Corporation
801 East Business Center Drive
Mount Prospect, Illinois, 60056, U.S.A.
certify that the Jump Starter Model SL65I complies with the following standards:
IEC 60335-1: 2010 + A1: 2013, IEC60335-2-29: 2002 + A1:2004 + A2: 2009
EN60335-1:2012 + A11:2014, EN60335-2-29: 2004 + A2:2010
EN62233:2008, AS/NZS 3112:2011 + A1: 2012 + A2: 2013
BS 1363-1:1995+ A4:2012, EN50075: 1990, EN 62471: 2008
and therefore conforms with the protection requirements relating to safety
and electromagnetic compatibility.
The year in which the CE marking was afxed is “2016”.
Manufacturer:
Cory Watkins
President
May 20, 2016
Hereby declares that the equipment Model SL65I is compliant to DIRECTIVE
2002/95/EC OF THE EUROPEAN PARLIAMENT AND OF THE COUNCIL
of 27 January 2003 (RoHS) on the restriction of the use of certain hazardous
substances in electrical and electronic equipment, and DIRECTIVE 2006/66/EC
OF THE EUROPEAN PARLIAMENT AND OF THE COUNCIL of 6 September 2006.
May 20, 2016
President, Schumacher Electric Corporation – U.S.A.

• 12 •
DANSKE Oversættelse af de oprindelige anvisninger
Model: SL65I
Booster
INSTRUKTIONSBOG
GEM VENLIGST DENNE INSTRUKTIONSBOG OG LÆS DEN FØR
HVER BRUG. Instruktionsbogen beskriver, hvordan du bruger enheden
på en sikker og effektiv måde. Læs venligst og følg omhyggeligt disse
anvisninger og forholdsregler.
1. VIGTIGE SIKKERHEDSANVISNINGER – GEM DISSE ANVISNINGER.
ADVARSEL! RISIKO FOR ELEKTRISK STØD ELLER BRAND.
1.1 Læs hele instruktionsbogen, før du bruger dette produkt. Undladelse
heraf kan medføre alvorlig personskade eller død.
1.2 Denne booster og oplader er ikke beregnet til, at børn bruger dem.
Personer med nedsatte fysiske, sensoriske eller mentale evner, eller
som mangler erfaring og viden, skal være under opsyn eller instrueres i
brugen af produktet af en person, der er ansvarlig for deres sikkerhed.
1.3 Børn skal være under opsyn for at sikre, at de ikke leger med
boosteren eller opladeren.
1.4 Stik ikke ngre eller hænder ind i enhedens stik.
1.5 Udsæt ikke enheden for regn eller sne.
1.6 Apparatet må kun bruges med den strømforsyningsenhed, som følger
med apparatet.
1.7 Brug kun anbefalet tilbehør. Brug af tilbehør, der ikke anbefales eller
sælges af Schumacher®Electric Corporation, sammen med SL65l kan
resultere i risiko for brand, elektrisk stød eller personskade eller tingskade.
1.8 For at reducere risikoen for skader på den elektriske stikkontakt eller
ledningen skal du trække i adapteren og ikke i ledningen, når du
afbryder forbindelsen til enheden.
1.9 Brug ikke enheden, når ledningerne eller klemmerne er beskadigede.
1.10 Brug ikke enheden, hvis den har været udsat for et hårdt slag, er
blevet tabt eller beskadiget på anden vis; aevér den til en kvaliceret
serviceperson.
1.11 Adskil ikke enheden; aevér den til en kvaliceret serviceperson, når
service eller reparation er påkrævet. Ukorrekt samling kan resultere i
risiko for brand eller elektrisk stød.
ADVARSEL – RISIKO FOR EKSPLOSIVE GASSER.
1.12 DET ER FARLIGT AT ARBEJDE I NÆRHEDEN AF ET
BLYSYREBATTERI. BATTERIER UDVIKLER EKSPLOSIVE GASSER
UNDER NORMAL ANVENDELSE. DET ER VIGTIGT, AT DU FØLGER
DISSE ANVISNINGER HVER GANG, AT DU BRUGER ENHEDEN.
1.13 For at reducere risikoen for batterieksplosion skal du følge disse
anvisninger tillige med dem, der er udgivet af batteriproducenten og
producenten af udstyr, som du har til hensigt at bruge i nærheden af
batteriet. Gennemgå advarselstavlerne på disse produkter og på motoren.

• 13 •
1.14 Anbring ikke enheden på brandbare materialer såsom tæpper,
betræk, papir, pap osv.
1.15 Anbring aldrig enheden direkte oven over batteriet, som bliver boosted.
1.16 Brug ikke enheden til at jumpstarte et køretøj, mens det interne batteri
er under opladning.
2. PERSONLIGE FORHOLDSREGLER
ADVARSEL! RISIKO FOR EKSPLOSIVE GASSER. EN GNIST TÆT PÅ
BATTERIET KAN MEDFØRE EN BATTERIEKSPLOSION. MED HENBLIK
PÅ AT REDUCERE RISIKOEN FOR GNISTER TÆT PÅ BATTERIET:
2.1 Ryg ALDRIG eller tillad gnister eller ammer at komme i nærheden af
et batteri eller en motor.
2.2 Fjern personlige genstande af metal såsom ringe, armbånd,
halskæder og ure, når du arbejder med et blysyrebatteri. Et
blysyrebatteri kan producere kortslutningsstrøm, der er kraftig nok til
at svejse en ring til metal, hvilket giver alvorlige forbrændinger.
2.3 Vær ekstra forsigtig med at reducere risikoen for at tabe et
metalværktøj ned på batteriet. Det kan skabe gnister eller kortslutte
batteriet eller andre elektriske dele, som kan forårsage en eksplosion.
2.4 Sørg for, at enhedens interne batteri ikke fryser. Oplad aldrig et
frossent batteri.
2.5 For at forhindre gnister må du ALDRIG lade klemmer røre ved
hinanden eller røre ved det samme stykke metal.
2.6 Overvej at have en hjælper i nærheden, når du arbejder med
blysyrebatterier.
2.7 Hav masser af frisk vand, sæbe og natriumbikarbonat i nærheden til
brug, hvis batterisyren kommer i kontakt med dine øjne, hud eller tøj.
2.8 Brug komplet øjen- og kropsbeskyttelse, inkl. sikkerhedsbriller og
beskyttelsesdragt. Undgå at røre ved dine øjne, når du arbejder i
nærheden af batteriet.
2.9 Hvis batterisyren kommer i kontakt med din hud eller dit tøj, skal du
straks vaske området med sæbe og vand. Hvis syren kommer ind i
dit øje, skal du straks skylle øjet med koldt rindende vand i mindst 10
minutter og søge lægehjælp med det samme.
2.10 Hvis du ved et uheld sluger batterisyre, skal du drikke mælk, æggehvider
eller vand. Fremkald IKKE opkastning. Søg straks lægehjælp.
2.11 Neutralisér spildt syre grundigt med natriumbikarbonat, før du
forsøger at tørre det op.
2.12 Dette produkt indeholder et litium-ion-batteri. I tilfælde af brand kan
du bruge vand, en skumslukker, halon, CO2, en ABC-brandslukker,
gratpulver, kobberpulver eller soda (natriumkarbonat) til at slukke ilden.
Når branden er slukket, skal du oversprøjte produktet med vand, en
vandbaseret brandslukningsagent eller alkoholfrie væsker for at afkøle
produktet og forhindre batteriet i at genantændes. Forsøg ALDRIG at
gribe fat i eller ytte et varmt, rygende eller brændende produkt, da du
kan komme til skade.

• 14 •
3. FORBEREDELSE AF ENHEDEN TIL BRUG
ADVARSEL! RISIKO FOR KONTAKT MED BATTERISYRE.
BATTERISYRE ER EN STÆRKT ÆTSENDE SVOVLSYRE.
3.1 Sørg for, at området omkring batteriet er godt udluftet, når enheden bruges.
3.2 Rengør batteriterminalerne, før du bruger jumpstarteren. Under
rengøring skal du undgå, at ætsende dampe kommer i kontakt med
dine øjne, næse og mund. Brug natriumbikarbonat og vand til at
neutralisere batterisyren og undgå ætsende dampe. Rør ikke ved
dine øjne, næse eller mund.
3.3 Fastslå batteriets spænding ved at referere til køretøjets
instruktionsbog og kontrollér, at udgangsspændingen er 12 V.
3.4 Kontrollér, at enhedens kabelklemmer fastgøres forsvarligt.
4. FØLG DISSE TRIN VED FORBINDELSE TIL ET BATTERI
ADVARSEL! EN GNIST TÆT PÅ BATTERIET KAN MEDFØRE
EN BATTERIEKSPLOSION. MED HENBLIK PÅ AT REDUCERE
RISIKOEN FOR GNISTER TÆT PÅ BATTERIET:
4.1 Før klemmerne sættes i enheden, skal udgangskablerne
fastgøres til batteriet og chassiset som vist nedenfor. Lad aldrig
udgangsklemmerne røre hinanden.
4.2 Placér jævnstrømskablerne således, at risikoen for beskadigelse af
motorhjelm, dør og roterende eller varme motordele formindskes.
BEMÆRK: Hvis det er nødvendigt at lukke motorhjelmen under
brugen af startkablerne, skal du sikre dig, at motorhjelmen ikke rører
ved batteriklemmernes metaldele eller skærer i kablernes isolering.
4.3 Hold afstand fra ventilatorvinger, remme, remskiver og andre dele,
som kan forårsager personskade.
4.4 Kontrollér batteriterminalernes polaritet. Den POSITIVE (POS, P, +)
batteriterminal har normalt en større diameter end den NEGATIVE
(NEG, N, -) terminal.
4.5 Fastslå hvilken batteriterminal, der er Jordforbundet (forbundet) til
chassiset. Se trin 4.6, hvis den negative terminal er jordforbundet
til chassiset (gælder for de este køretøjer). Se trin 4.7, hvis den
positive terminal er jordforbundet til chassiset.
4.6 Når det gælder et negativt jordforbundet køretøj, skal den POSITIVE
(RØDE) klemme fra jumpstarteren forbindes til den POSITIVE (POS, P, +)
batteriterminal, som ikke er jordforbundet. Forbind den NEGATIVE (SORTE)
klemme til køretøjets chassis eller motorblok væk fra batteriet. Forbind ikke
klemmen til karburatoren, brændstofslanger eller karrosseridele af metal.
Forbind til en kraftig, tyk metaldel på rammen eller motorblokken.
4.7 Når det gælder et positivt jordforbundet køretøj, skal den NEGATIVE
(SORTE) klemme fra jumpstarteren forbindes til den NEGATIVE (NEG, N, -)
batteriterminal, som ikke er jordforbundet. Forbind den POSITIVE (RØDE)
klemme til køretøjets chassis eller motorblok væk fra batteriet. Forbind ikke
klemmen til karburatoren, brændstofslanger eller karrosseridele af metal.
Forbind til en kraftig, tyk metaldel på rammen eller motorblokken.
4.8 Når jumpstarteren ikke længere bruges, skal klemmerne fjernes fra
enheden. Fjern klemmen fra køretøjschassiset og derefter klemmen
fra batteriterminalen.

• 15 •
5. INDHOLD
• SL65I jumpstarteren
• Batteriklemmer
med smartkabel
• 100 V~240 V vægoplader til
vekselstrøm med fod med
ere adaptere
• Sæt med adaptere til C, G
og I stik
• Bæretaske
• Instruktionsbog
6. FUNKTIONER
1. SL65I
2. Batteriklemmer
med smartkabel
3. Knap til jumpstart
4. Bæretaske
5. 100 V~240 V vægoplader til
vekselstrøm med fod med
ere adaptere
6. Adapter til G-stik
7. Adapter til C-stik
8. Adapter til I-stik
9. LCD-display
10. ON/OFF
11. Stikkontakt til genopladning
12. USB-port – 2,1A
13. USB-port – 1A
14. Udgangstik til jumpstarter
15. TIL/FRA-knap til display
16. LED-lys (på bagsiden)
1
4
567
2
3Stiktype
C-STIK G-STIK I-STIK
8
9
11
10
12 13 14
15
7. OPLADNING AF JUMPSTARTEREN
VIGTIGT! OPLAD STRAKS EFTER KØB, EFTER HVER BRUG OG
HVER 30. DAG, ELLER NÅR OPLADNINGSNIVEAUET FALDER
TIL UNDER 85 % MED HENBLIK PÅ AT HOLDE DET INTERNE
BATTERI FULDT OPLADET OG FORLÆNGE BATTERILEVETIDEN.
7.1 KONTROL AF NIVEAU AF DET INTERNE BATTERI
1. Skub ON / OFF-kontakten til ON-position. LCD-displayet viser
batteriets ladning i procent. Et fuldt opladet internt batteri viser 100 %.
Oplad det interne batteri, hvis displayet viser under 85 %.
2. For at reducere risikoen for elektrisk stød skal du trække enhedens
vægoplader ud af stikket, før der foretages vedligeholdelse eller
rengøring. Bare at slukke for kontrolanordningerne er ikke nok til at
reducere denne risiko.

• 16 •
3. Når du oplader det interne batteri, skal arbejdsområdet være godt
udluftet, og ventilation må ikke på nogen måde begrænses.
7.2 OPLADNING AF DET INTERNE BATTERI
ADVARSEL! Brug kun den oplader, der leveres sammen med
enheden, til at oplade det interne batteri. Brugen af andre opladere
beskadiger enheden.
1. Anbring jævnstrømsvægopladeren i enhedens 15V/1A inputstik.
2. Sæt vægopladeren i en strømførende vægstikkontakt.
3. LCD-displayet lyser op, begynder at blinke og viser “IN”, der indikerer,
at opladning er startet.
4. Jumpstarteren er fuldt opladet efter 2-3 timer. Når enheden er fuldt
opladet, viser displayet “100 %”.
5. Når batteriet er fuldt opladet, skal du tage vægopladeren ud af
jævnstrømsstikket og derefter trække vægopladeren ud af enheden.
Skub ON / OFF-kontakten til OFF, hvis du ikke bruger enheden med
det samme.
6. Oplad enheden så snart som muligt efter brug.
8. BETJENINGSANVISNINGER
8.1 SÅDAN JUMPSTARTES MOTOR I KØRETØJ
VIGTIGT: Brug ikke jumpstarteren, mens det interne batteri er under
opladning.
VIGTIGT: Brug af jumpstarteren uden, at der er et batteri installeret i
køretøjet, beskadiger køretøjets elektriske system.
BEMÆRK: Det interne batteri skal være mindst 40 % opladet for at
kunne jumpstarte et køretøj.
1. Slå tændingen FRA.
2. Placér jævnstrømskablerne væk fra ventilatorvinger, remme, remskiver
og andre roterende dele. Kontrollér, at alle elektriske anordninger i
køretøjet er slukket.
3. Når det gælder et negativt jordforbundet køretøj, skal den POSITIVE
(RØDE) klemme fra jumpstarteren forbindes til den POSITIVE
(POS, P, +) batteriterminal, som ikke er jordforbundet. Forbind
den NEGATIVE (SORTE) klemme til køretøjets chassis eller
motorblok væk fra batteriet. Forbind ikke klemmen til karburatoren,
brændstofslanger eller karrosseridele af metal. Forbind til en kraftig,
tyk metaldel på rammen eller motorblokken.
4. Når det gælder et positivt jordforbundet køretøj, skal den NEGATIVE
(SORTE) klemme fra jumpstarteren forbindes til den NEGATIVE (NEG, N, -)
batteriterminal, som ikke er jordforbundet. Forbind den POSITIVE (RØDE)
klemme til køretøjets chassis eller motorblok væk fra batteriet. Forbind ikke
klemmen til karburatoren, brændstofslanger eller karrosseridele af metal.
Forbind til en kraftig, tyk metaldel på rammen eller motorblokken.
5. Sæt batteriklemmekablet i jumpstarterens udgangsstikkontakt.
6. Skub ON / OFF-kontakten til ON-position. Tryk på og hold knappen
på smartkablet nede i 1 sekund. Den grønne LED-lysdiode lyser.
BEMÆRK: Hvis køretøjets batteri er fuldstændig aadet, kan den første
strøm, der trækkes fra jumpstarteren, udløse kortslutningsbeskyttelsen i
smartkablet. Når tilstanden er afhjulpet, vil det smartkabel automatisk reset.

• 17 •
7. Når der er etableret forsvarlig forbindelse, skal du tørne motoren. Hvis
motoren ikke starter i løbet af 5-8 sekunder, skal du stoppe med at tørne
og vente mindst 1 minut, før du forsøger at starte køretøjet igen.
BEMÆRK: Hvis køretøjet ikke tørner anden gang, skal du kontrollere
smartkablet for at se, om den grønne LED-lysdiode er tændt. Hvis en
LED-lysdiode blinker, skal du referere til oplysningerne bag på smartkablet
og notere den aktuelle fejlkode. Når tilstanden er afhjulpet, vil det
smartkabel automatisk reset.
BEMÆRK: Koldt vejr kan påvirke ydelsen i jumpstarterens litiumbatteri.
Hører du kun et klik, og motoren ikke tørner, kan du prøve følgende:
Mens jumpstarteren er tilsluttet til køretøjets batteri, og den grønne
LED-lysdiode på smartkablet er tændt, skal du tænde for alt lys og
elektrisk tilbehør i ét minut. Dette trækker strøm fra jumpstarteren og
opvarmer batteriet. Prøv nu at tørne motoren. Hvis den ikke tørner,
skal du gentage proceduren. Ekstremt koldt vejr kan kræve to eller tre
opvarmninger af batteriet, før motoren starter.
VIGTIGT: FORSØG IKKE at jumpstarte dit køretøj mere end tre gange
efter hinanden. Hvis køretøjet ikke starter efter tre forsøg, skal du
søge råd hos en servicetekniker.
8. Når motoren er startet, skal du fjerne batteriklemmerne fra stikket på
jumpstarteren og så fjerne den sorte klemme (-) og den røde klemme
(+) i den rækkefølge. Skub ON / OFF-kontakten på OFF.
9. Genoplad enheden så snart som muligt efter hver brug.
8.2 OPLADNING AF MOBIL ENHED VED BRUG AF USB-PORTENE
SL65l kommer med to USB-porte. Den ene yder op til 2,1 A ved 5 V
vekselstrøm, den anden yder op til 1 A ved 5 V vekselstrøm.
1. Rådfør dig med producenten af din mobile enhed om de korrekte
strømspecikationer for opladning. Tilslut et kabel til en mobil enhed til
den korrekte USB-port.
2. Skub ON / OFF-kontakten til ON-position. Opladning starter automatisk.
Displayet viser den port, der er i brug.
3. Opladningstiden varierer efter den mobile enheds batteristørrelse og
den anvendte opladningsport.
BEMÆRK:
De este enheder kan oplades med begge USB-porte,
men opladningen kan tage længere tid.
4. Når du ikke længere bruger USB-porten, skal du fjerne
opladningskablet fra din mobile enhed og så fjerne opladningskablet
fra enheden. Skub ON / OFF-kontakten på OFF.
5. Genoplad enheden så snart som muligt efter hver brug.
BEMÆRK: Hvis der ikke USB-enheden er tilsluttet, vil strømmen til
USB-porte automatisk slukke efter 30 sekunder.
8.3 BRUG AF LED-LYSDIODEN
1. Skub ON / OFF-kontakten til ON-position.
2. Hold displayknappen nede i 3 sekunder.
3. Når LED-lyset er tændt, skal du trykke på og slippe displayknappen
for at gennemløbe følgende tilstande:
• Blink for SOS-signal
• Blink når i stroboskoptilstand
• Konstant tændt

• 18 •
4. Når du ikke længere bruger LED-lyset, skal du trykke på og holde
displayknappen nede, indtil lyset slukkes.
5. Skub ON / OFF-kontakten på OFF.
6. Genoplad enheden så snart som muligt efter hver brug.
9. VEDLIGEHOLDELSESANVISNINGER
1. Efter brug og før udførelse af vedligeholdelse skal stikket på enheden
trækkes ud, og forbindelsen afbrydes.
2. Brug en tør klud til at tørre al batteriætsning og andet snavs eller olie
af batteriklemmerne, kablerne og den ydre kasse.
3. Åbn ikke enheden, da der ikke ndes dele, som brugeren skal udføre
service på.
10. OPBEVARINGSANVISNINGER
1. Oplad batteriet til fuld kapacitet før opmagasinering.
2. Opbevar enheden ved temperaturer mellem -20°C – +60°C.
3. Aad aldrig batteriet helt.
4. Oplad efter hver brug.
5. Oplad mindst én gang hver måned, hvis enheden ikke bruges ofte, for
at undgå for stor aadning.
11. FEJLFINDING
PROBLEM LØSNING
Jumpstarterens display tænder
ikke.
Kontrollér, at enheden er opladet.
Tilslut til vekselstrøm ved hjælp af den
medfølgende vægoplader for at nulstille.
Sørg for, at ON / OFF-kontakten er
indstillet til ON.
Displayet baggrundsbelysning
blinker. Enheden er for varmt eller koldt. Lyset
stopper med at blinke, når betingelsen
er fjernet.
Jumpstarteren genoplader
ikke.
Sørg for kun at bruge den medfølgende
vægoplader.
Jumpstarteren tænder men
kan ikke jumpstarte mit
køretøj.
Kontrollér, at du har trykket på knappen
på smartkablet.
Bekræft, at opladningsniveauet på
jumpstarteren er mindst 40 %.
Forsøg ikke at jumpstarte dit køretøj
mere end tre gange efter hinanden.
Hvis køretøjet stadig ikke starter, skal
du søge rådgivning hos en kvaliceret
servicetekniker.

• 19 •
PROBLEM LØSNING
Den grønne LED-lysdiode på
smartkablet lyser ikke, når
der trykkes på knappen på
kablet.
Kontrollér forbindelser.
Hvis en LED-lysdiode blinker, skal du
referere til nedenstående tabel. Når
tilstanden er afhjulpet, vil det smartkabel
automatisk reset.
Smartkablets LED-lysdioders opførsel
Grøn LED-lysdiode lyser konstant Parat til jumpstart
Grøn LED-lysdiode blinker tre gang Beskyttelse mod omvendt opladning
Rød LED-lysdiode blinker én gang Beskyttelse mod omvendt polaritet
Rød LED-lysdiode blinker to gange Beskyttelse mod kortslutning
Rød LED-lysdiode blinker re gange Beskyttelse mod lav spænding
Rød LED-lysdiode blinker fem gange Beskyttelse mod høj temperatur
Rød LED-lysdiode lyser konstant Klar til at trykke knappen for at
springe starten
12. SPECIFIKATIONER
Intern batteritype .................................................Litium-ion-polymer
Opladere ............................100 V~240 V Vekselstrømsvægoplader
Kapacitet ..........................................................8000 mAh / 29,6 Wh
USB-udgang............................................ 5 V jævnstrøm, 2,1 A / 1 A
Jumpstart ..................... 400 A spidsbelastning / 200 A tørn af motor
Opladning temperatur ....................................................... 0°- 50 °C
13. RESERVEDELE
Smartkabel med batteriklemme ................................. 3899003548Z
Vægoplader, vekselstrøm med C- og G-stikadaptere.... 93026958Z
Vægoplader, vekselstrøm med I-stikadapter.................. 93026959Z
14. BORTSKAFFELSESOPLYSNINGER
14.1 Internt batteri
• Batteriet skal fjernes fra apparatet, før det skrottes.
• Apparatet skal være frakoblet strømforsyningsnettet, før batteriet fjernes.
• Batteriet skal bortskaffes sikkert
14.2 WEEE-direktivet
Dette mærke viser, at dette produkt ikke må bortskaffes
sammen med andet husholdningsaffald i hele EU. For at
undgå mulig skade på miljøet eller menneskelig sundhed
fra ukontrolleret affaldsbortskaffelse skal det genbruges
ansvarligt for at fremme bæredygtig genbrug af materielle
ressourcer. Når du returnerer din brugte enhed, skal du
bruge retur- og opsamlingssystemer eller kontakte din forhandler, hvor
produktet blev købt. De kan modtage produktet til miljøsikker genbrug.

• 20 •
15. BEGRÆNSET GARANTI
GARANTI-HANDELSBETINGELSER
Schumacher Electric Corporation (“Producenten”) eller forhandlere
godkendt af Producenten (“Forhandleren”) garanterer denne oplader
(“Produktet”) for to (2) år, i henhold til følgende vilkår. Alle garantier,
ud over den her vedlagte garanti, frasiges og udelukkes udtrykkeligt i
det efter gældende lov mest tilladelige omfang. Loven kan indebære
garantier eller vilkår eller forpligtelse pålagt Producenten som ikke
kan udelukkes, begrænses eller ændres i forhold til forbrugsvarer.
Forbrugers Slutbrugergaranti
Alle reklamationer under denne garanti skal kommunikeres til
Forhandleren inden for 2 måneder efter opdagelsen af manglen.
Forhandlers / Professionelles Slutbrugergaranti
Producenten giver en begrænset garanti for skjulte fejl eller
mangler. Denne garanti er underlagt følgende betingelser:
a. Producenten garanterer kun skjulte fejl i materiale og udførelse
som ndes som hovedårsag ved første salg fra Producenten.
b. Producentens forpligtelse i henhold til denne garanti er begrænset
til reparation eller udskiftning af produktet med en ny eller
istandsat enhed som den eneste valgmulighed for Producenten.
c. Producenten erikke underlagt nogen garantiforpligtelsehvis den
påståede fejl er forårsaget af unormal brug, almindelig slid og
brug, uautoriseret brug af produktet eller brug af produktet som
er forskellig fra den beskrevne i den relevante brugervejledning
eller andre specikationer udgivet af Producenten, utilstrækkelig
pasning, ulykker, uautoriserede ændringer eller modikationer,
forkert transport, opbevaring eller behandling af produktet.
d. For at udøve denne rettighed skal produktet returneres
fuldstændigt og i sin oprindelige indpakning med forsendelsen
forudbetalt sammen med købsbevis til Producenten eller
dennes autoriserede repræsentanter for at en reparation eller
erstatning kan ske.
Almindelige Garantivilkår
Ovenstående garanti gælder kun for den første professionelle eller
kunde som på lovligt vis har erhvervet produktet fra Producenten eller
en forhandler. Der gives ingen yderligere garanti til kunder, agenter
eller repræsentanter for disse købere.
Produktet sælges ifølge specikationerne for brug og formål i
overensstemmelse med betingelserne i denne brugervejledning og
med udtrykkelig undtagelse og afvisning af garanti for alle andre
specikationer, brug og formål.
Table of contents
Languages:
Other RED FUEL Remote Starter manuals