Redback A 6531 User manual

Redback® A 6500A Programmable Control System
Redback® A 6500A Programmable Control System
www.redbackaudio.com.au Redback® Proudly Made In Australia 1
Redback® Programmable Control System
User manual revision number: 1.0 08/08/2022
Operating Manual
Programmable Touchscreen Wallplate
Models: A 6530, A 6531, A 6540, A 6541
Accessories
A 6505A 3 Relay, 2 Serial, IR Output Hub
A 6507 Serial Controlled 100V Line Attenuator
A 6510 Distribution Box - 12 Relay Output
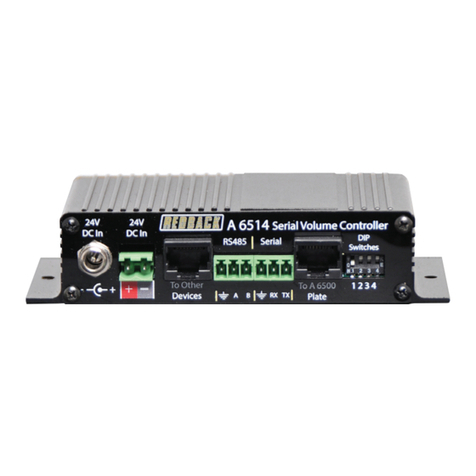
A 6512 Single Input Serial Volume Controller
A 6514 Two Input Serial Volume Controller
A 6515 Distribution Box - 2 Relay Output (High Current)
Redback® Proudly Made In Australia
Distributed by Altronic Distributors Pty. Ltd.
Phone: 1300 780 999 Fax: 1300 790 999 Internet: www.redbackaudio.com.au
A 6531 A 6541

www.redbackaudio.com.au
Redback® Proudly Made In Australia2
Redback® Programmable Control System
REDBACK is a registered trademark of Altronic Distributors Pty Ltd
You may be surprised to learn that Altronics is still manufacturing hundreds of product lines right here in Australia. We
have resisted the move offshore by offering our customers better quality products with innovations to save them time and
money.
Our Balcatta production facility manufactures/assembles:
Redback public address products
One-shot speaker & grill combinations
Zip-Rack 19 inch rack frame products
We strive to support local suppliers wherever possible in our supply chain, helping to support Australia’s manufacturing
industry.
Redback Audio Products
100% developed, designed & assembled in Australia.
Since 1976 we have been manufacturing Redback ampliers in Perth, Western Australia. With over 40 years experience
in the commercial audio industry, we offer consultants, installers and end users reliable products of high build quality with
local product support. We believe there is signicant added value for customers when purchasing an Australian made
Redback amplier or PA product.
Local support & feedback.
Our best product features come as a direct result of feedback from our customers, and when you call us, you speak to a
real person - no recorded messages, call centres or automated push button options.
It’s not only the assembly team at Altronics who are employed as a direct result of your purchase, but hundreds more at
local companies used in the supply chain.
Industry leading 10 year warranty.
There’s a reason we have the industry leading DECADE warranty. It’s because of a long tried and tested history of bullet-
proof reliability. We’ve heard PA contractors tell us they still see the original Redford amplier still in service in schools.
We offer this comprehensive parts & labour warranty on almost every Australian Made Redback public address product.
This offers both installers and end users peace of mind that they will receive prompt local servicing in the rare event of any
problems.

Redback® A 6500A Programmable Control System
Redback® A 6500A Programmable Control System
www.redbackaudio.com.au Redback® Proudly Made In Australia 3
Redback® Programmable Control System
CONTENTS
Page
1.0 Overview
1.1 Introduction 3
1.2 Features 3
1.3 What’s In The Box 3
2.0 Connection Guide
2.1 Wall Plate connection guide 4
2.2 A 6505A Serial Hub 5
2.3 A 6510 Twelve Relay Distribution Box 6
2.4 A 6515 Two Relay Distribution Box (High current) 7
3.0 System Wiring Congurations
3.1 Standard Serial, IR and Relay Setup 8
3.2 Twelve Relay Setup ,NO Serial or IR 8
3.3 Two Relay (High Current) Setup, NO Serial or IR 9
3.4 Third Party Relay Control 9
3.5 Serial and IR Control with Fifteen Output Relays 10
3.6 Serial and IR Control with Three Low Power and Two High Current Output Relays 11
3.7 Serial and IR Control with Fifteen Low Power and Two High Current Output Relays 12
3.8 A 6530 or A 6540 series wallplate Default Startup 13
3.9 Lecture Theatre Setup 14
4.0 Initial Power Up 15
5.0 Lecture Theatre Demo 15
6.0 System Wiring 15
7.0 Troubleshooting 15
8.0 Specications 19
Published by Altronic Distributors
© 2022 Altronic Distributors

www.redbackaudio.com.au
Redback® Proudly Made In Australia4
Redback® Programmable Control System
1.0 OVERVIEW
1.1 INTRODUCTION
This universal touchscreen wallplate is the perfect control system for commercial and domestic automation. Its stylish low
prole design lends itself to installation in new modern homes, classrooms, lecture theatres or corporate boardrooms. The
LCD panel can be congured from 1 to 12 buttons, which can be individually labelled. Conguration is performed using
the supplied software, which is then transferred to the plate via SD card. A library of button icons is included. Icons can be
customised by the user if required. Each button can be programmed for either serial with hex code commands, IR, or relay
control. For IR applications the plate can learn and capture IR strings from any remote control. User generated macros can
be created consisting of multiple commands in a single button press. This is ideal for performing multiple tasks at once ie:
turn on projector, turn on amplier, turn off lights, drop down projector screen etc.
For IR applications the plate can learn and capture IR strings from almost any remote control.
User generated macros can be created consisting of multiple commands in a single button press. This is ideal for perform-
ing multiple tasks at once ie: turn on projector, turn on amplifier, turn off lights, drop down projector screen etc. Wall
plate ts into a standard electrical wallbox for ease of installation.
1.2 FEATURES
Redback Programmable Wallplate
• User programmable buttons with customisable icons
• Multiple screen pages (12 max)
• Tandem operation
• Event splash screens
• Inbuilt icon library for commonly used buttons
• Multi-command macros
• IR learning facility
• SD card conguration upload
• Dual cover wallplate to suit existing decor
• Single U/UTP Cat5 cable connection
• Haptic and audible feedback of button presses
• Easy to program
• 10 Year Warranty (Cracked or broken screen excluded)
• Australian Designed and Manufactured
A 6505A Serial Hub (Not Supplied)
• Dual RS-232 or RS-485 serial outputs
• Infra-red control output
• PIR (or closing contact) trigger
•3 output relays (voltage free N/C & N/O contacts) 2A max (Note: Only 2 relay outputs available with the PIR option)
• U/UTP Cat5 cable connection to A 6530 or A 6540 series wallplate wallplate
•24V DC Input
• 10 Year Warranty
• Australian Designed and Manufactured
1.3 WHAT’S IN THE BOX
Controller Wall Plate
Micro SD Card
Mounting Bracket
Screws to suit Standard Australian Wall Box
M2.5mm countersunk screws to t mounting bracket
OTG Micro USB - USB socket lead
Cat6 patch lead
Operating Manual
Software Programming Guide

Redback® A 6500A Programmable Control System
Redback® A 6500A Programmable Control System
www.redbackaudio.com.au Redback® Proudly Made In Australia 5
Redback® Programmable Control System
2.0 CONNECTION GUIDE
2.1 WALL PLATE CONNECTION GUIDE
Figures 2.1a and 2.1b show the connection details of the A 6530 and A 6540 series wall plates.
The location of the RJ45 Connector, P1 jumper terminals, Micro USB Connector, Micro SD, IR sensor and DIP switches are
shown.
Fig 2.1a A6530 and A 6531 connections
Fig 2.1b A6540 and A 6541 connections
2) Micro SD Card
3) Micro USB Connector
1) IR Sensor
6) RJ45 Connector
Connect to the A 6505A
4) DIP Switches
5) P1 Jumper Terminal
7) RJ45 Connector
Connect to tandem
wall plate
Mounting Slots
Mounting Screw Holes
Use supplied M2.5mm countersunk bolts
2) Micro SD Card
3) Micro USB Connector
1) IR Sensor
6) RJ45 Connector
Connect to the A 6505A
4) DIP Switches
5) P1 Jumper Terminal
7) RJ45 Connector
Connect to tandem
wall plate
Mounting Slots
Mounting Screw Hole
Use supplied M2.5mm countersunk bolt

www.redbackaudio.com.au
Redback® Proudly Made In Australia6
Redback® Programmable Control System
1 IR Sensor
This sensor is used to learn IR codes.
2 Micro SD Card
The SD card is use to store all the icon and button conguration information. (Note: The Micro SD Card is inserted
with the contacts facing the rear of the wall plate).
3 Micro USB Connector
This connector is for the connection of a USB keyboard for inputting text when learning IR codes. An OTG (On
The Go) lead may be required for connection between the USB keyboard and the micro USB socket. A lead is
supplied with the wall plate.
4) DIP Switches
The A 6530 or A 6540 series wallplate wall plate has optional haptic and audible feedback of button presses.
These can be set by the DIP switches located on the rear of the wall plate as shown in gure 2.1b.
Switch 1: ON - Haptic Feedback active, OFF - Haptic Feedback disabled.
Switch 2: ON - Buzzer active, OFF - Buzzer disabled.
5 P1 Jumper Terminal
The A 6505A Serial Hub has three relay outputs and a PIR Trigger Input. The third relay output and the PIR
trigger use the same connection from the microcontroller inside the unit. This P1 jumper is used to congure the
A 6505A for use with the PIR trigger or with the relay 3 output. Using the shunt header supplied, t the shunt on
pins 1 and 2 for relay 3 operation. For PIR operation t the shunt to pins 2 and 3.
6 RJ45 Connector
This is used for the connection between the wallplate and Serial Hub or Distribution boxes. Connection is made
using Cat5/6 cable to a maximum distance of 50m.
7 RJ45 Connector
This is used when connecting two plates together for Tandem operation. (Note: Both plates need to be connected
to this socket).
2.2 WALL PLATE MOUNTING BRACKET
Figures 2.2a and 2.2b show the mounting brackets to suit the two different size wall plates.
The holes shown have the correct spacing for Australian standard wall boxes.
To mount the wall plate to a wall box use the supplied screws. If not using a wall box then mount the bracket using screws
suitable for the mounting surface (not supplied).
To t the wall plate to the mounting bracket, rst insert the hooks at the top of the bracket into the mouting slots on the
back of the wall plate. Then push the bottom of the wall plate against the wall making sure the bottom of the bracket
ts into the cutout on the rear of the wall plate. Using the supplied countersunk M2.5mm bolt/s, secure the plate to the
bracket (Note: the bolt/s will pull the plate upwards so that the hooks at the top of the bracket t tightly into the wall
plate).
Fig 2.2a Fig 2.2b

Redback® A 6500A Programmable Control System
Redback® A 6500A Programmable Control System
www.redbackaudio.com.au Redback® Proudly Made In Australia 7
Redback® Programmable Control System
2.3 A 6505A SERIAL HUB CONNECTION GUIDE
Fig 2.3a shows the layout of the front of the A 6505A Serial Hub.
Fig 2.3a
1 24V DC input
Connects to a 24V DC Plugpack with a 2.1mm Jack (Please observe the polarity, centre positive).
2 24V DC Input
Connects to a 24V DC source via a euro block (Please observe the polarity).
3 RJ45 interface
This RJ45 port is for connection to the A 6530 or A 6540 series wallplate wall plate.
4 PIR Trigger
This is used for connection to a PIR or other closing contact. (Note: When using the PIR trigger connection, the
jumper terminal (P1) on the A 6530 or A 6540 series wallplate has to be set to the PIR input (see section 2.1).
5 Power LED
Indicates the unit has power.
Fig 2.3b shows the layout of the rear of the A 6505A Serial Hub.
Fig 2.3b
1 Serial Output 1
This output is congurable via the software as either an RS232 or RS485 output. The LED will illuminate while
data is being transmitted. Follow standard RS232 or RS485 wiring when connecting these terminals.
2 Serial Output 2
This output is congurable via the software as either an RS232 or RS485 output. The LED will illuminate while
data is being transmitted. Follow standard RS232 or RS485 wiring when connecting these terminals.
3 IR Output
These terminals are provided for connection to IR repeaters. The LED above the terminals illuminate while the output
is active.
4 DIP Switches
DIP 1 changes the IR LED voltage output, ON = 5V Direct, OFF = 5V @20mA to standard IR LED. DIP 2 is not used.
5 Output 1
This output provides a voltage free output with a normally open and normally closed contact. This is congured via
the software as the relay 1 output. (The maximum current rating of these contacts is 2A.) The LED above the
terminals illuminate while the output is active.
6 Output 2
This output provides a voltage free output with a normally open and normally closed contact. This is congured via
the software as the relay 2 output. (The maximum current rating of these contacts is 2A.) The LED above the
terminals illuminate while the output is active.
7 Output 3
This output provides a voltage free output with a normally open and normally closed contact. This is congured via
the software as the relay 3 output. (The maximum current rating of these contacts is 2A.) The LED above the
terminals illuminate while the output is active. (Note: the jumper terminal (P1) on the A 6530 or A 6540 series
wallplate has to be set to the Relay 3 input (see section 2.1).
A 6505A Serial Hub
+_
+
-
Power
To Wall Plate
24V DC
IN
24V DC IN
1 2 3 5
4
PIR
+_Power
1
1 2
Out 1 Out 2 Out 3
DIP
SW
IR LED
RS485 2Serial 2RS485 1 Serial 1
3 4 5 6 7
N/C
N/O
COM
N/C
N/O
COM
N/C
N/O
COM
GND
BA
GND
BA
GND
TX
RX
GND
TX
RX
2

www.redbackaudio.com.au
Redback® Proudly Made In Australia8
Redback® Programmable Control System
2.4 A 6510 12 RELAY DISTRIBUTION BOX CONNECTION GUIDE
Fig 2.4a shows the layout of the front of the A 6510 12 Relay Distribution Box.
Fig 2.4a
1 24V DC input
Connects to a 24V DC Plugpack with a 2.1mm Jack (Please observe the polarity, centre positive).
2 24V DC Input
Connects to a 24V DC source via a euro block (Please observe the polarity).
3 RJ45 interface
This RJ45 port is for connection to other Redback®compatible devices.
4 Serial Input
This input takes either an RS232 or RS485 signal. This can be connected to one of the serial outputs of the
A 6505A or to a third party system. Follow standard RS232 or RS485 wiring when connecting these terminals.
5 RJ45 interface
This RJ45 port is for connection to the A 6530 or A 6540 series wallplate.
6 DIP Switches
1 ON: Accept serial codes through RS485 input.
2 ON: Accept serial codes through RS232 input.
3 ON: Accept serial codes from wall plate.
4: Not Used
NOTE: Only one of the DIP switches 1-3 can be on at any time.
Fig 2.4b shows the layout of the rear of the A 6510 12 Relay Distribution Box.
Fig 2.4b
1 Outputs 1-12
These outputs provide a voltage free output with a set of normally open contacts. They are congured via
the software as the relay 1-12 outputs (The maximum current rating of these contacts is 1A). The LED’s above the
terminals illuminate while the corresponding output is active.
A 6510 Distribution Box
+_
+
-
DIP
Switches
To Wall
Plate
24V DC
IN
24V DC IN
12 3 4
RS485 Serial
GND
BA
GND
TX
RX
To Other
Devices
1 2 3 4
1 2 3 4
5 6
1
Out 1
N/O
Com
Out 2
N/O
Com
Out 3
N/O
Com
Out 4
N/O
Com
Out 5
N/O
Com
Out 6
N/O
Com
Out 7
N/O
Com
Out 8
N/O
Com
Out 9
N/O
Com
Out 10
N/O
Com
Out 11
N/O
Com
Out 12
N/O
Com

Redback® A 6500A Programmable Control System
Redback® A 6500A Programmable Control System
www.redbackaudio.com.au Redback® Proudly Made In Australia 9
Redback® Programmable Control System
2.5 A 6515 TWO RELAY DISTRIBUTION BOX (HIGH CURRENT) CONNECTION GUIDE
Fig 2.5a shows the layout of the front of the A 6515 Relay Distribution Box.
Fig 2.5a
1 24V DC input
Connects to a 24V DC Plugpack with a 2.1mm Jack (Please observe the polarity, centre positive).
2 24V DC Input
Connects to a 24V DC source via a euro block (Please observe the polarity).
3 RJ45 interface
This RJ45 port is for connection to other Redback®compatible devices.
4 Serial Input
This input takes either an RS232 or RS485 signal. This can be connected to one of the serial outputs of the
A 6505A or to a third party system. Follow standard RS232 or RS485 wiring when connecting these terminals.
5 RJ45 interface
This RJ45 port is for connection to the A 6530 or A 6540 series wall plate.
6 DIP Switches
1 ON: Accept serial codes through RS485 input.
2 ON: Accept serial codes through RS232 input.
3 ON: Accept serial codes from wall plate.
4: Not Used
NOTE: Only one of the DIP switches 1-3 can be on at any time.
Fig 2.5b shows the layout of the rear of the A 6515 Relay Distribution Box.
Fig 2.5b
1 Output 1
This output provides a voltage free output with a normally open and normally closed contact. This is congured via
the software as the relay 13 output. (The maximum current rating of these contacts is 16A.) The LED above the
terminals illuminate while the output is active.
2 Output 2
This output provides a voltage free output with a normally open and normally closed contact. This is congured via
the software as the relay 14 output. (The maximum current rating of these contacts is 16A.) The LED above the
terminals illuminate while the output is active.
A 6515 Distribution Box
+_
+
-
DIP
Switches
To Wall
Plate
24V DC
IN
24V DC IN
12 3 4
RS485 Serial
GND
BA
GND
TX
RX
To Other
Devices
1 2 3 4
1 2 3 4
5 6
1 2
GNDN/C N/OGNDN/C N/O
Out 1
Out 2

www.redbackaudio.com.au
Redback® Proudly Made In Australia10
Redback® Programmable Control System
2.6 A 6507 SERIAL CONTROLLED 100V LINE ATTENUATOR CONNECTION GUIDE
Fig 2.6 shows the layout of the front of the A 6507 serial controlled 100V line attenuator.
Fig 2.6
1 DIP Switches
1 ON: Accept serial codes through RS485 input.
2 ON: Accept serial codes from Redback® A 6530 or A 6540 series wall plates.
3: Not Used
4: Must be set to OFF.
NOTE: Only one of the DIP switches 1-2 can be on at any time.
2 RJ45 interface
This RJ45 port is for connection to other Redback®compatible devices.
3 RJ45 interface
This RJ45 port is for connection to the Redback® A 6530 or A 6540 series wall plates.
4 Serial Input
This input takes an RS485 input signal. This can be connected to the RS485 serial output of the Redback® A 6505
or to a third party system. Follow standard RS485 wiring when connecting these terminals.
5 Failsafe/Normal Switch
This changes the function of the override in the attenuator circuit. When in “Normal” mode the output of the
attenuator will switch to full volume when 24V DC is applied to the Override Relay contacts. When in “Failsafe”
mode, the output is at full volume when 24V DC is removed from the Override relay contacts.
6 Override Relay Contacts
Apply 24V DC to these contacts when emergency/paging override is required. The output volume will be set to
maximum when the failsafe/normal switch is in “Normal” mode.
7 100V Out
These terminals connect to the output speaker load up to a maximum of 50 watts.
8 100V In
These terminals connect to the output of the 100V amplier.
A 6507 Serial Attenuator
1 2 3 4
To
A 6500
100V
OUT
Override Relay
24V DC IN
B
A
RS485
To Other
Devices
DIP
Switches
100V
IN
Failsafe
Normal _
+_
+_
+
_
1 2 3 4
1 2 3 4
5 6 7 8

Redback® A 6500A Programmable Control System
Redback® A 6500A Programmable Control System
www.redbackaudio.com.au Redback® Proudly Made In Australia 11
Redback® Programmable Control System
2.7 A 6512 SINGLE INPUT SERIAL VOLUME CONTROLLER CONNECTION GUIDE
Fig 2.7a shows the layout of the front of the A 6512 single input serial volume controller.
Fig 2.7a
1 24V DC input
Connects to a 24V DC Plugpack with a 2.1mm Jack (Please observe the polarity, centre positive).
2 24V DC Input
Connects to a 24V DC source via a euro block (Please observe the polarity).
3 RJ45 interface
This RJ45 port is for connection to other Redback®compatible devices.
4 RS485 Serial Input
This input takes an RS485 input signal. This can be connected to the RS485 serial output of the Redback® A 6505
or to a third party system. Follow standard RS485 wiring when connecting these terminals.
4 RS232 Serial Input
This input takes an RS232 input signal. This can be connected to the RS232 serial output of the Redback® A 6505
or to a third party system. Follow standard RS232 wiring when connecting these terminals.
6 RJ45 interface
This RJ45 port is for connection to the Redback® A 6530 or A 6540 series wall plates.
7 DIP Switches
1 ON: Accept serial codes through RS485 input.
2 ON: Accept serial codes through RS232 input.
3 ON: Accept serial codes from Redback® A 6530 or A 6540 series wall plate.
4: Not Used
Fig 2.7b shows the layout of the rear of the A 6512.
Fig 2.7b
1 Remote Volume
The output volume can be adjusted by connecting a 1kΩ potentiometer across these connections.
2 Input
This input accepts an RCA low level line input.
3 Output
This is the RCA line level output.
A 6512 Serial Volume Controller
+_
+
-
1 2 3 4
To Other
Devices
24V
DC In
24V
DC In
Serial
TX
RX
B
A
RS485
To A 6500
Plate
DIP
Switches
1 2 3 4 5 6 7
1 2 3 4
Input Output
L LR R
Rem.
Volume
1 2 3

www.redbackaudio.com.au
Redback® Proudly Made In Australia12
Redback® Programmable Control System
2.8 A 6514 TWO INPUT SERIAL VOLUME CONTROLLER CONNECTION GUIDE
Fig 2.8a shows the layout of the front of the A 6514.
Fig 2.8a.
1 24V DC input
Connects to a 24V DC Plugpack with a 2.1mm Jack (Please observe the polarity, centre positive).
2 24V DC Input
Connects to a 24V DC source via a euro block (Please observe the polarity).
3 RJ45 interface
This RJ45 port is for connection to other Redback®compatible devices.
4 RS485 Serial Input
This input takes an RS485 input signal. This can be connected to the RS485 serial output of the Redback® A 6505
or to a third party system. Follow standard RS485 wiring when connecting these terminals.
4 RS232 Serial Input
This input takes an RS232 input signal. This can be connected to the RS232 serial output of the Redback® A 6505
or to a third party system. Follow standard RS232 wiring when connecting these terminals.
6 RJ45 interface
This RJ45 port is for connection to the Redback® A 6530 or A 6540 series wall plate.
7 DIP Switches
1 ON: Accept serial codes through RS485 input.
2 ON: Accept serial codes through RS232 input.
3 ON: Accept serial codes from Redback® A 6530 or A 6540 series wall plate.
4: Not Used
Fig 2.8b shows the layout of the rear of the A 6512.
Fig 2.8b
1 Input 2
This input accepts an RCA low level line input.
2 Input 1
This input accepts an RCA low level line input.
3 Output
This is the RCA line level output.
A 6514 Serial Volume Controller
+_
+
-
1 2 3 4
To Other
Devices
24V
DC In
24V
DC In
Serial
TX
RX
B
A
RS485
To A 6500
Plate
DIP
Switches
1 2 3 4 5 6 7
1 2 3 4
Input 2 Input 1 Output
L L LR R R
12 3

Redback® A 6500A Programmable Control System
Redback® A 6500A Programmable Control System
www.redbackaudio.com.au Redback® Proudly Made In Australia 13
Redback® Programmable Control System
3.0 SYSTEM WIRING CONFIGURATIONS
The A 6530 or A 6540 series wallplate can be congured to operate with either the A 6505A, A 6507, A 6510, A 6512, A
6514 or A 6515 or a combination of these.
3.1 STANDARD SERIAL, IR and RELAY SETUP
Shown below is the standard setup with the A 6530 or A 6540 series wallplate Wall Plate connected to the A 6505A Serial
Hub via a CAT5e/6 cable. 24V DC power is connected to the A 6505A by a plugpack with a 2.1mm jack or through the euro
block terminals. The
A 6505A in turn powers the A 6530 or A 6540 series wallplate Wall Plate through the Cat5e/6 cable.
The A 6505A Serial Hub can then be connected to up to two RS232 or RS485 controlled devices. IR control of multiple de-
vices is available through the IR repeater output and a total of three relay outputs enable control of devices with a closing
contact. The relay contacts are rated at 2A maximum and a set of normally open and normally closed contacts are available
for each relay.
Fig 3.1
3.2 TWELVE RELAY SETUP (NO SERIAL or IR)
This simple setup provides up to twelve output relays for switching, with no serial or IR outputs. The A 6530 or A 6540 series
wallplate is connected to the A 6510 via a CAT5e/6 cable. 24V DC power is connected to the A 6505A by a plugpack with a
2.1mm jack or through the euro block terminals. The A 6510 in turn powers the A 6530 or A 6540 series wallplate through
the Cat5e/6 cable. The relay contacts are rated at a maximum of 1A with a set of normally open contacts only.
Fig 3.2
Redback® A 6541
Redback® A 6505A
24V DC PLUGPACK
(MINIMUM 1A)
(Cat5/6 Cable 50m Maximum)
A 1052 IR REPEATER
RS232/
RS485
RS232/
RS485
RELAY CONTROLLED DEVICES
(CONTACTS MAX 2A)
CLOSING CONTACT
Relay OUT
1 2 3
RS485-1
RS232-1
IR
RS485-2
RS232-2
TO A 6500A
PIR Trigger
Redback® A 6541
Redback® A 6510
24V DC PLUGPACK
(MINIMUM 1A)
(Cat5/6 Cable 50m Maximum)
Relay OUT
RS485
RS232
123456789101112
TO A 6500
TO REDBACK®
DEVICES
RELAY CONTROLLED DEVICES
(CONTACTS MAX 1A)

www.redbackaudio.com.au
Redback® Proudly Made In Australia14
Redback® Programmable Control System
3.3 TWO RELAY SETUP (HIGH CURRENT, NO SERIAL or IR)
The high power setup provides up to two output relays for switching, with no serial or IR outputs. The relays are high current
outputs rated at 16A maximum and a set of normally open and normally closed contacts are available for each relay.
The A 6530 or A 6540 series wallplate is connected to the A 6515 via a CAT5e/6 cable. 24V DC power is connected to the
A 6505A by a plugpack with a 2.1mm jack or through the euro block terminals. The A 6515 in turn powers the A 6530 or
A 6540 series wallplate through the Cat5e/6 cable.
Fig 3.3
3.4 THIRD PARTY RELAY CONTROL
The A 6510 and A 6515 relay distribution boxes can both be controlled by a third party device with either an RS232 or RS485
output, via serial commands which are described in the supplied programming manual.
NOTE: The A 6510 and A 6515 will receive serial only. They do not transmit any serial data.
See section 5.2 for serial wiring details.
Fig 3.4
Redback® A 6541
Redback® A 6515
24V DC PLUGPACK
(MINIMUM 1A)
(Cat5/6 Cable 50m Maximum)
RELAY CONTROLLED DEVICES
(CONTACTS MAX 16A)
Relay OUT
RS485
RS232
TO A 6500
TO REDBACK®
DEVICES
2 1
24V DC PLUGPACK
(MINIMUM 1A)
RS232/
RS485
RS232/
RS485
RELAY CONTROLLED DEVICES
(CONTACTS MAX 16A)
Relay OUT
RS485
RS232
TO A 6500
TO REDBACK®
DEVICES
2 1
Redback® A 6515
Redback® A 6510
Relay OUT
RS485
RS232
123456789101112
TO A 6500
TO REDBACK®
DEVICES
RELAY CONTROLLED DEVICES
(CONTACTS MAX 1A)
SERIAL OUT
SERIAL OUT
Third Party Device

Redback® A 6500A Programmable Control System
Redback® A 6500A Programmable Control System
www.redbackaudio.com.au Redback® Proudly Made In Australia 15
Redback® Programmable Control System
3.5 SERIAL and IR CONTROL with FIFTEEN OUTPUT RELAYS
This conguration expands the standard setup to provide serial and IR control with up to 15 output relays. The A 6530 or
A 6540 series wallplate is connected to the A 6505A Serial Hub via a CAT5e/6 cable. 24V DC power is connected to the A
6505A by a plugpack with a 2.1mm jack or through the euro block terminals. The A 6505A in turn powers the A 6530 or A
6540 series wallplate through the Cat5e/6 cable and powers the A 6510 by running a cable from the 24DC In terminals of
the A 6505A to the A 6510 24V In terminals.
The A 6505A Serial Hub can then be connected to up to two RS232 or RS485 controlled devices. IR control of multiple devic-
es is available through the IR repeater output and a total of fteen relay outputs enable control of devices with a closing con-
tact. The relay contacts on the A 6505A are rated at 2A maximum and a set of normally open and normally closed contacts
are available for each relay. The relay contacts on the A 6510 are rated at 1A maximum with normally open contacts only.
Fig 3.5
Redback® A 6541
Redback® A 6505A
24V DC PLUGPACK
(MINIMUM 1A)
(Cat5/6 Cable 50m Maximum)
A 1052 IR REPEATER
RS232/
RS485
RS232/
RS485
RELAY CONTROLLED
DEVICES
Relay OUT
RS485
RS232
123456789101112
TO A 6500
TO REDBACK®
DEVICES
Redback® A 6510
RELAY CONTROLLED DEVICES
(CONTACTS MAX 1A)
CLOSING CONTACT
Relay OUT
1 2 3
RS485-1
RS232-1
IR
RS485-2
RS232-2
TO A 6500A
PIR Trigger

www.redbackaudio.com.au
Redback® Proudly Made In Australia16
Redback® Programmable Control System
3.6 SERIAL and IR CONTROL with THREE LOW POWER and TWO HIGH CURRENT RELAYS
This conguration expands the standard setup to provide serial and IR control with 3 low power output relays and two high
current output relays.
The A 6530 or A 6540 series wallplate is connected to the A 6505A Serial Hub via a CAT5e/6 cable. 24V DC power is con-
nected to the A6505 by a plugpack with a 2.1mm jack or through the euro block terminals. The A 6505A in turn powers the
A 6530 or A 6540 series wallplate through the Cat5e/6 cable and powers the A 6515 by running a cable from the 24DC In
terminals of the A 6505A to the A 6515 24V In terminals.
The A 6505A Serial Hub can then be connected to up to two RS232 or RS485 controlled devices. IR control of multiple
devices is available through the IR repeater output and a total of ve relay outputs enable control of devices with a closing
contact. The relay contacts on the A 6505A are rated at 2A maximum and a set of normally open and normally closed con-
tacts are available for each relay. The relay contacts on the A 6515 are rated at 16A maximum with a set of normally open
and normally closed contacts for each relay.
Fig 3.6
Redback® A 6541
Redback® A 6505A
24V DC PLUGPACK
(MINIMUM 1A)
(Cat5/6 Cable 50m Maximum)
A 1052 IR REPEATER
RS232/
RS485
RS232/
RS485
RELAY CONTROLLED
DEVICES
RELAY CONTROLLED DEVICES
(CONTACTS MAX 16A)
Relay OUT
RS485
RS232
TO A 6500
TO REDBACK®
DEVICES
2 1
Redback® A 6515
CLOSING CONTACT
Relay OUT
1 2 3
RS485-1
RS232-1
IR
RS485-2
RS232-2
TO A 6500A
PIR Trigger

Redback® A 6500A Programmable Control System
Redback® A 6500A Programmable Control System
www.redbackaudio.com.au Redback® Proudly Made In Australia 17
Redback® Programmable Control System
3.7 SERIAL and IR CONTROL with FIFTEEN LOW POWER and TWO HIGH CURRENT RELAYS
This conguration expands the standard setup to provide serial and IR control with 15 low power output relays and two high
current output relays.
The A 6530 or A 6540 series wallplate is connected to the A 6505A Serial Hub via a CAT5e/6 cable. 24V DC power is con-
nected to the A 6505A by a plugpack with a 2.1mm jack or through the euro block terminals. The A 6505A in turn powers
the A 6530 or A 6540 series wallplate through the Cat5e/6 cable and powers the A 6510 and A 6515 by running a cable
from the 24DC In terminals of the A 6505A to the 24V In terminals of the A 6510 and A 6515.
The A 6505A Serial Hub can then be connected to up to two RS232 or RS485 controlled devices. IR control of multiple
devices is available through the IR repeater output and a total of seventeen relay outputs enable control of devices with
a closing contact. The relay contacts on the A 6505A are rated at 2A maximum and a set of normally open and normally
closed contacts are available for each relay. The relay contacts on the A 6510 are rated at 1A maximum with normally open
contacts only. The relay contacts on the A 6515 are rated at 16A maximum with a set of normally open and normally closed
contacts for each relay.
Fig 3.7
Redback® A 6541
Redback® A 6505A
24V DC PLUGPACK
(MINIMUM 1A)
(Cat5/6 Cable 50m Maximum)
A 1052 IR REPEATER
RS232/
RS485
RS232/
RS485
RELAY CONTROLLED
DEVICES
RELAY CONTROLLED DEVICES
(CONTACTS MAX 16A)
Relay OUT
RS485
RS232
TO A 6500
TO REDBACK®
DEVICES
2 1
Redback® A 6515
Redback® A 6510
Relay OUT
RS485
RS232
123456789101112
TO A 6500
TO REDBACK®
DEVICES
RELAY CONTROLLED DEVICES
(CONTACTS MAX 1A)
CLOSING CONTACT
Relay OUT
1 2 3
RS485-1
RS232-1
IR
RS485-2
RS232-2
TO A 6500A
PIR Trigger

www.redbackaudio.com.au
Redback® Proudly Made In Australia18
Redback® Programmable Control System
3.8 SERIAL CONTROLLED 100V LINE ATTENUATOR
This setup utilises a Redback®A 6507 seven step 100V 50 Watt line speaker attenuator/volume control which can be re-
motely adjusted via RS485 serial control. A 24V DC override relay is included for emergency paging applications, ensuring
the volume is switched to maximum regardless of the volume setting.
The unit is suitable for all 100V line ampliers and connects between the amplier output and the speakers to be controlled.
The Redback®A 6507 will interface directly to the Redback®A 6530 or A 6540 series wallplate or any other third party
control system which utlises RS485 serial codes. The attenuator circuit includes a 22uF BP capacitor for line monitoring ap-
plications.
The gure below illustrates a typical connection diagram when using the Redback® A 6530 or A 6540 series wallplate
wallplate to control the
Redback®A 6507 Attenuator. The Redback® A 6530 or A 6540 series wallplate connects via a Cat5e/6 lead into the “To A
6500” RJ45 connection port. 24V DC power is supplied to the Redback® A 6507 via a 24V DC plugpack or other 24V DC
source (minimum24V DC 1A).
Serial control of the attenuator circuit is provided by the A 6530 or A 6540 series wallplate which is programmed with the
serial codes using the PC software supplied with the wallplate.
The audio into the attenuator is provided by an amplifer with a 100V line output. The attenuated signal is then output out
of the attenuator into the speaker load up to a maximum of 50 watts of load.
Emergency or paging override of the audio can be achieved by applying 24V DC to the Override Relay terminals. Once
activated the output volume will switch to maximum regardless of the volume setting.
For more information refer to the Redback® A 6507 Instructions or the Redback website - www.redbackaudio.com.au
Fig 3.8
Redback® A 6541
Redback® A 6507
24V DC PLUGPACK
(MINIMUM 1A)
(Not Supplied)
(Cat5/6 Cable 50m Maximum)
A 6507 Serial Attenuator
1 2 3 4
To
A 6500
100V
OUT
Override Relay
24V DC IN
B
A
RS485
To Other
Devices
DIP
Switches
100V
IN
Failsafe
Normal _
+_
+_
+
_
1 2 3 4
240V AC @ 50Hz
LineMic
L
R
100V
OUTPUT
+
–
2 1
3
24V DC Emergency
Output Unit
100V Amplier

Redback® A 6500A Programmable Control System
Redback® A 6500A Programmable Control System
www.redbackaudio.com.au Redback® Proudly Made In Australia 19
Redback® Programmable Control System
3.9 SINGLE LINE LEVEL INPUT SERIAL VOLUME CONTROLLER
This setup utilises a Redback® A 6512 Serial Volume Controller which has been designed to alter the volume of any low level
signal source feeding any amplier or mixer remotely, via RS 232 or RS 485, or via the Redback®A 2280B remote volume
wallplate.
The Redback®A 6512 will interface directly to the Redback®A 6530 or A 6540 series wallplate or any other third party
control system which utilises RS232 or RS485 serial codes.
The gure below illustrates a typical connection diagram when using the Redback® A 6530 or A 6540 series wallplate or a
third party controller to control the Redback®A 6512 Serial Volume Controller.
The Redback® A 6530 or A 6540 series wallplate connects via a Cat5e/6 lead into the “To A 6500” RJ45 connection port of
the Redback®A 6512. 24V DC power is supplied to the Redback® A 6512 via a 24V DC plugpack or other 24V DC source
(minimum24V DC 1A).
Serial control of the volume circuit is provided by the A 6530 or A 6540 series wallplate which is programmed with the serial
codes using the PC software supplied with the wallplate.
The third party controller sends RS232 or RS485 codes directly to the corresponding RS232 or RS485 input connector of the
Redback® A 6512.
The output volume of the Redback® A 6512 is set by the serial codes sent to the unit.
For more information refer to the Redback® A 6512 Instructions or the Redback website - www.redbackaudio.com.au
Fig 3.9
Redback® A 6541
Redback® A 6512
24V DC PLUGPACK
(MINIMUM 1A)
(Not Supplied)
(Cat5/6 Cable 50m Maximum)
240V AC @ 50Hz
LineMic
L
R
100V
OUTPUT
+
–
2 1
3
Amplier
REMOTE
VOLUME
RS 485
RS232-2
TO A 6500
LEFT IN
RIGHT IN
LEFT OUT
RIGHT OUT
DVD
REDBACK
RS232
or
RS485
THIRD PARTY
CONTROLLER
RS232/
RS485
DVD Player

www.redbackaudio.com.au
Redback® Proudly Made In Australia20
Redback® Programmable Control System
3.10 DUAL LINE LEVEL INPUT SERIAL VOLUME CONTROLLER
This setup utilises a Redback®A 6514 Serial Volume Controller which has been designed to alter the volume of any low
level signal source feeding any amplier or mixer remotely, via RS 232 or RS 485. The unit includes two RCA inputs which
are selectable by serial control and remote volume which is also serial controlled.
The Redback®A 6514 will interface directly to the Redback®A 6530 or A 6540 series wallplate or any other third party
control system which utilises RS232 or RS485 serial codes.
The gure below illustrates a typical connection diagram when using the Redback® A 6530 or A 6540 series wallplate or a
third party controller to control the Redback®A 6514 Serial Volume Controller.
The Redback® A 6530 or A 6540 series wallplate connects via a Cat5e/6 lead into the “To A 6500” RJ45 connection port of
the Redback®A 6514. 24V DC power is supplied to the Redback® A 6514 via a 24V DC plugpack or other 24V DC source
(minimum24V DC 1A).
Serial control of the volume circuit is provided by the A 6530 or A 6540 series wallplate which is programmed with the serial
codes using the PC software supplied with the wallplate.
The third party controller sends RS232 or RS485 codes directly to the corresponding RS232 or RS485 input connector of the
Redback® A 6514.
Either Input 1 or Input 2 can be selected by serial control and the output volume of the Redback® A 6514 can also be set
by the serial codes.
For more information refer to the Redback® A 6514 Instructions or the Redback website - www.redbackaudio.com.au
Fig 3.10
Redback® A 6541
Redback® A 6514
24V DC PLUGPACK
(MINIMUM 1A)
(Not Supplied)
(Cat5/6 Cable 50m Maximum)
240V AC @ 50Hz
LineMic
L
R
100V
OUTPUT
+
–
2 1
3
Amplier
DVD
REDBACK
RS232
or
RS485
THIRD PARTY
CONTROLLER
RS232/
RS485
DVD Player 1
RS 485
RS232-2
TO A 6500
INPUT 1LEFT
INPUT 1 RIGHT
LEFT OUT
RIGHT OUT
INPUT 2 LEFT
INPUT 2 RIGHT
DVD
REDBACK
DVD Player 2
This manual suits for next models
3
Table of contents
Other Redback Controllers manuals
Popular Controllers manuals by other brands
Mitsubishi Electric
Mitsubishi Electric MELSEC iQ-F Series Quick connection guide
Danfoss
Danfoss ECL Comfort 210 operating guide
LEGRAND
LEGRAND 0 766 22 Installation and user guide
Honeywell
Honeywell MS4120F Product data
Pentair
Pentair HOME SUMP CONTROLLER Homeowner's guide
Siemens
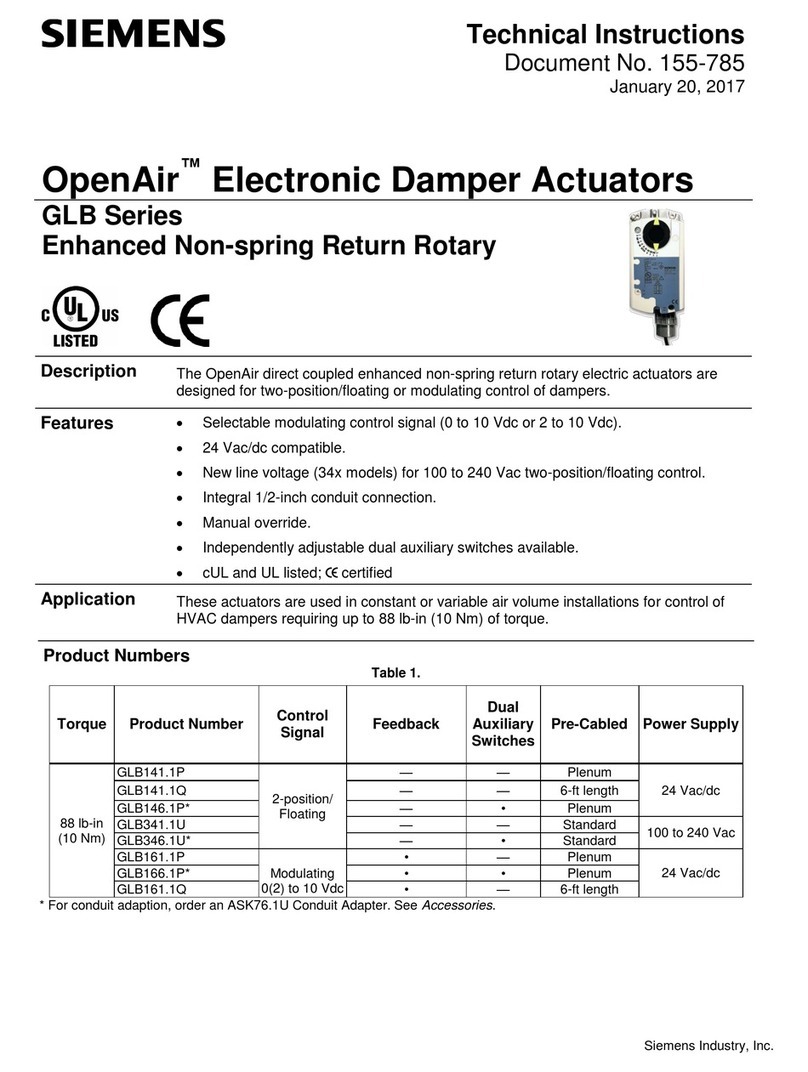
Siemens OpenAir GLB141.1P Technical instructions
Zener
Zener SMARTSTART 6000 Networking guide
LEGRAND
LEGRAND Wattstopper DCLV2 installation instructions

Emerson
Emerson Fisher 1052 Safety manual
Vostermans Ventilation
Vostermans Ventilation MASTER-5N Installation instructions operating instructions

Projecta
Projecta SC420/ND manual
Hayward
Hayward HLXPLCONTROL installation manual
