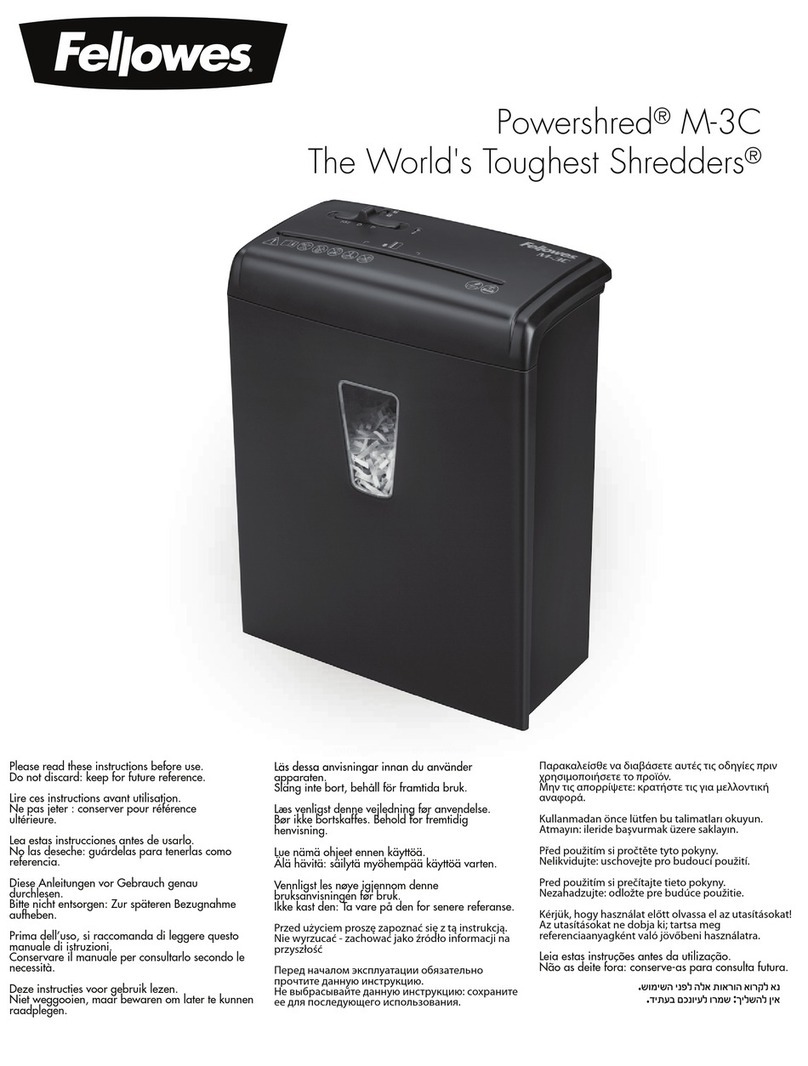
Redgum GX200 User manual

RedGum Chipper Shredder
Owner’s Manual
Image for illustration purposes only, engine type may vary.
WARNING
Read this manual, before operating the RedGum Chipper Shredder.
This manual accompanies the RedGum Chipper Shredders
powered by the Honda GX200 engine
Chipper
RedGum Chipper Sh
r
edder
Owner
’
s Manual
Image for illustration purposes onl
y
Image for illustration purposes onlyImage for illustration purposes onl
, engine type may var
y, engine type may vary
This manual accompanies the RedGum Chipper Sh
r
edders
powe
r
ed by the
Honda GX200 engine
Chipper
RGCHGX200-0717 Rev 1

Check if any fuel spills or leaks. Stop the engine before
refueling.
Exhaust gas contains poisonous carbon monoxide.
Never run the generator in an enclosed area. Be sure
to provide adequate ventilated place, protection is to be
observed to avoid to work downwind of exhaust.
Recommended oil type: SAE 10W30 / SAE 10W40
T
o adjust the reolution speed of engine.
To adjust the reolution speed of engine.T
The rabbit
direction for speeding up and the tortoise direction for
slow down.
The fuel can be controlled.
Read this operation manual carefully before attempting to assemble, adjust
or operate the machine. Please read the included Honda GX200 engine
manual for more information on the engine.
Danger - Rota
t
ing blades. Keep hands and feet out of
openings whil
e
machine is running.
Exhaust gas contains poisonous carbon monoxide.
Never operate this product in an enclosed area.
Be sure the work area has adequate ventilation.
Also avoid working downwind from exhaust.
Recommended oil type: SAE 10W30 for Honda
engine & SAE 30 for Briggs & Stratton engine
Moving the level will adjust the revolution speed of engine.
Move lever towards the rabbit icon for speeding up and
towards the tortoise direction for slowing down.
IMPORTANT: READ BEFORE USE
PLEASE KEEP THIS MANUAL FOR FUTURE REFERENCE
Keep bystanders awa
y
.
Attention & Warning
This label is for the engine switch. If you want to start the
engine, put the switch to ‘ON’ position. Turn the switch to
‘STOP’ position to stop the engine.
1

Safety Warnings
Operating Instructions
- Training
- Preparation
- While Chipper is being used
- Chipping Branches
- Shredding Leaves & Grass
Correct Operation Diagram
Maintenance and Storage
- Replacing the Blades
- Adjusting the Belt Tension
- Replacing the V-Belt
- Your Local RedGum Dealer
3
4
4
4
4
5
6
6
7
8
8
8
8
- Warranty Information 9
16
2

1.) Upper Hopper - material (less then 10mm diameter) to be shredded in here
2.) Handles x 2
3.) Storage Compartment
4.) Side Chute Chipping Tube - material (up to 75mm diameter) to be chipped in here
5.) Wheels - For easy maneuverability
6.) Rear Wheel Axle
7.) Front Support Legs
8.) Discharge Chute
9.) Engine
10.) Belt & Pulley Cover
11) Blade Cover
12) Chipper Body
1
2
3
4
5
6
7
8
9
10
11
12
3

1. Never allow hands, feet, or any other part of the body to enter the upper hopper (1).
2. Never place hands, feet, or any other part of the body close to discharge chute
opening (8) while machine is in operation.
3. Do not peer into hopper (1) or discharge chute opening (8) when the machine is running.
4. Never allow metal objects or other similar hard objects into machine.
5. Never allow children to operate machine.
7. Never assemble or disassemble any parts of the machine while machine is operating.
8. Never allow children, pets or bystanders in operation zone. Keep them to a
minimum of 10 metres away.
9. Never run machine in an enclosed area since exhaust from engine contains carbon
monoxide which is poisonous.
10. Never wear loose clothes or long jewellery when operating machine and keep long
hair under headgear. Do not wear shoes with high heels.
11. Wear ear protection, safety goggles and gloves at all times while operating the
machine.
12. Be extremely cautious of rotating blades in machine.
Training
Make sure you fully understand the RedGum Chipper owner’s manual and engine
owner’s manual before attempting to operate this machine.
1. Put the machine securely on a level surface
2. Keep the operator area clear of other objects
4. Before operating the machine, please check the direction of the wind to avoid
working downwind of exhaust.
5. Examine the machine to make sure it is in good condition. Check that all the
screws, nuts and other fasteners are properly secured and screens are in place.
explosive. The points below should be followed at all times.
- Never remove the fuel cap or add fuel while the machine is operating.
- Stop the engine, and allow the engine and exhaust to cool before refuelling
- Never add fuel to the machine while indoors.
- Do not smoke while adding fuel.
ignition objects.
- Always ensure the fuel cap is in place & securely tightened before starting
the engine.
- If the fuel tank needs to be drained, it should be done outdoors.
working condition, before starting chipper.
4


1. Make sure the plastic cover in upper hopper (1) is closed when your shredder is
running. Flying chips are very hazardous.
2. Do not use hands or metal tools to push material into the feed hopper.
3. Keep your face and body away from the upper hopper opening.
4. Do not allow body parts or clothing inside the upper hopper, discharge chute,
or near other rotating parts.
burns.
6. Keep proper balance and footing at all times. Do not overreach and never stand at
a higher level than the base of the machine when feeding material into it.
7. Check if there is abnormal noise, smoke or shaking of machine. If so, please turn
tighten any loose parts and ensure damaged parts are replaced or repaired before
continuing to operate the chipper.
8. The chipper will chip branches up to 75mm in diameter. Branches with large
diameters (closer to and up to 75mm) will need to be fed comparatively slowly than
branches with a small diameter.
with ongoing discharge and can result in kickback of material back through the feed
intake openings.
Keep the engine clean.
11. Never put something on the cover of the hopper in case it falls into the machine.
12. Make sure the opening of the chipping tube (4) is always covered, while not at
work, in case children place objects into the tube. This can cause trouble in restarting
the machine.
13. Do not move or tilt the machine while the engine is running.
wheel axle (6) with one foot, and lean the machine backward. Pay attention to keeping
control of the machine & walk slowly into position.
5

1. Start engine & allow engine to gain optimum revs - slide rev lever to rabbit.
2. Feed long stems and long branches (ie. shrub and tree branches) into the
side chipping tube for chipping by the rotating blades.
3. Shoots and branches may have to be trimmed from the main branch to allow
4. When feeding branches listen to the machine & watch chips exit from the
bottom of the discharge chute (8). Thicker branches will take longer and need to
be fed be more slowly than thin ones.
5. Short stubs of branches may need to be pushed through the chipper tube
with the next branch (never use your hand).
6. Push the last branch you are chipping for the day all the way inside the tube
with a tool (ie. wooden stick), and ensure it has been completely chipped before
cause problems when next starting the chipper.
provided.
1. Start the engine and allow engine to gain optimum revs - slide rev lever to
rabbit.
2. Feed leaves and thin stalks (nothing thicker than 1cm) into the hopper.
3. Do not open the plastic cover when adding material.
4. Keep your face and body away from the feed hopper to avoid being struck
by any material that may bounce back.
5. If the material is too moist the discharge screen can become clogged. If
clogging occurs stop the engine before cleaning.
IMPORTANT: Never attempt to clear an accumulation of processed
material when engine is still in operation.
6. When feeding material into the hopper listen to the engine revs of the
machine & watch mulch exit from the bottom of the discharge chute (8). If the
machine sounds like it is struggling, stop feeding material until normal operation
sound resumes.
7. Increasing the output (productivity) of the chipper can be achieved by
removing the screen from the discharge chute. The material coming out of the
discharge chute will be courser. If you want to reduce particle size refeed the
6

machine with spade, rake or long handle tool.
Do not clear discharge area while machine is
operating. Never place any part of your body
into discharge area while machine is operating.
If material bridges in hopper use stick or
wooden tool to move material down into
the hopper.
Do not allow pets, children or by standers in
operating area.
operating machine. Feed material into
chipper from a safe working distance.
Don’t allow hands to enter into hopper.
Don’t peer into hopper while it is operating.
7
Right Way Wrong Way
Right Way
Right Way
Wrong Way
Wrong Way

1. When the machine needs servicing, parts replaced, inspection, or needs to go into
allow the machine to cool before doing so.
storage for a long period of time, drain the fuel out of the machine.
3. To assess if the cutting blades need servicing, or replacing, they can be accessed
through the side of the chipper body (12) by removing blade cover (11).
4. For information regarding the maintenance of the engine please refer to the engine
operations manual.
The cutting blades will become dull after being used for some time.
When the chipping speed slows, remove the blade and check if it is dull by:
- Remove the plate covering the blade (11)
- Fully open the discharge chute (8)
- Remove the discharge screen
2. Wear safety gloves and turn the blade tray inside the chipper body (12) so
the blades align into the proper position (So they can be accessed through
opening under the blade cover (11)).
3. Remove the two location screws on the blade. Please note each blade has
one cutting edge.
4. Remove blade & replace with new blade.
5. Put new blades back to the place where the old blades were removed from
and tighten.
6. Replace the plate covering the blade.
7. Replace the discharge screen.
8. Re-adjust the outlet of the discharge chute (8).
There is a ‘V’ belt under the belt cover (10). This belt connects the engine to the blade
tray. The belt will loose tension over time. To re-adjust tension:
2. Loosen the four engine location nuts
3. Move engine forward till the ‘V’ belt is tight.
to measure if lack of experience). Tighten the four location nuts holding the engine.
5. Replace the belt cover.
2. Remove the old belt.
4. The new belt will be tighter than the old belt. If you need to adjust the belt
tension, see information above (points 2 - 4).
5. Replace the belt cover.
8

15.
Warranty Information
Please note down for future reference
RedGum Chipper Model: Chipper Shredder
Date of Purchase:..............................................................................................
Serial Number:...................................................................................................
Purchased from: ................................................................................................
The manufacturer reserves the right to make improvements in design and/or changes in
eviously
sold.
Warranty and Service Information
Congratulations on the purchase of your new RedGum product. RedGum products assist
you to complete the “job at hand” in an economical, safe and efficient manner.
This brochure explains the warranty and maintenance information for your product. This
combined with your Owner’s Manual and the knowledge and expertise offered to you by
your RedGum Dealer, should provide you with the confidence that your decision to
purchase a RedGum product was a good one.
STATEMENT OF WARRANTY
This statement of warranty applies to RedGum products and has been offered by the
RedShed. The RedShed provides warranty to the initial purchaser of this product (who has
purchased it from the RedShed directly or an authorised RedGum dealer) for a period
commencing from the date of purchase.
If the product is found to be defective, in the RedShed’s opinion (due to fault of the
manufacturer) within the warranty period, the RedShed will carry out the repair or
replacement to the customer Free of charge, providing;
- The fault is reported directly to the RedShed or place of purchase.
- Proof of purchase is provided.
- The fault is not caused by misuse, neglect or incorrect adjustment by the user.
- The failure has not occurred through normal wear and tear.
- The product has not been serviced, repaired or alterations made by any one not
authorised by the RedShed.
ENGINE COMPONENTS
SPECIFICATIONS

WHAT IS NOT COVERED BY WARRANTY
ENGINE COMPONENTS
SPECIFICATIONS
16.
The following items are not covered by this warranty;
- Normal maintenance items which become worn through
use, including, but not limited to, belts, blades, oil, blade
ropes, clutches and sprockets.
- Natural discoloration of material due to sunlight.
- Engines not manufactured by RedGum, these items
are covered by the respective original equipment
manufacturers’ warranty, all claims must be sent to the
appropriate manufacturer’s agents.
- Using stale or contaminated fuel in the product.
- Damage or failure caused by accident, misuse and/or
neglect, including, ingress of dirt, abrasives, moisture, rust
& corrosion, and damage due as a result of inadequate
maintenance.
- Failure to operate or maintain the unit in accordance
with the Owners/Operators manual, this handbook or
instruction given by a RedGum dealer.
use of the product or affect the product’s performance,
operation, safety or durability, or causes the product to
fail to comply with any applicable laws.
- Damage due to incorrect usage such as incorrect log
placement as shown in the product’s Owners Manual.
- Additional damage to parts or components due to
continued use occuring after any of the above.
The following list is a guide to the types of items for which
a charge will be made (unless failure is caused by a
Service:
replaced in line with the maintenance schedule shown in
this handbook.
Mechanical Adjustments: Including engine tuning,
adjusting brakes, belts & clutches, etc.
Drive System: Sprockets, belts, clutches, pulleys and
.tnemecalpereriuqerlliwdnaraewllasgniraeb
Cutting Equipment: Blades, cutting discs and hammers
wear during use and sharpening/replacement is required
as a matter of normal maintenance.
ITEMS FOR WHICH A CHARGE WILL
BE MADE
YOUR RIGHTS AS A CUSTOMER
The New Product Warranty that is provided by the
RedShed on RedGum products is in addition to the rights
and remedies conferred on consumers by the relevant
authorities and/or legislation. The warranty does not affect
those rights or remedies, except to the extent that their
application may lawfully be excluded.
Any consequential, direct or incidental loss or damage is
not covered by the warranty. Any statutory or other rights or
remedies available in connection with a claim for such loss
or damage should be pursued separately.
Spark Plugs: Periodic replacement is required to ensure
maximum engine performance and best fuel economy.
Induction/Combustion System: The removal of deposits
and cleaning may be required from time to time and should
be performed as necessary.
Tyres: Are subject to wear and with contact from external
not a warrantable
item.
External Surfaces, Paint, Trim and other Appearance
items: Are affected by normal wear and tear and exposure
to environmental conditions. A charge will be made for paint
and trim items that require attention due to causes outside
the manufacturer’s control.
Hydraulics:
The frequency of replacement, repair or adjustment will
depend mainly on where and how you use your product,
weather, atmospheric and environmental conditions and
frequency of use.
CUSTOMER RESPONSIBILITIES
The customer must provide to the Authorised RedGum
Dealer proof of purchase information such as a receipt.
The product must exhibit reasonable care in the
maintenance, operation, storage and general upkeep
pratices as explained in the maintenance section of the
Owners/Operators Manual or this handbook. This includes
the whole product or any general wear item or component
on the product. Any costs incurred to obtain warranty
consideration or services is the customer’s responsibility,
including shipping and handling, travel expenses, lost time,
lost production or pickup and delivery.
NOTES

THE WARRANTY PERIODS
The warranty periods below commence on the date of purchase.
WHERE TO GO FOR WARRANTY REPAIRS
Take your product to any authorised RedGum Dealer if it needs warranty repairs. All authorised
RedGum Dealers will honour the New Product Warranty, and will repair, replace or adjust free of
charge any part of your product that is defective in factory materials or workmanship. Please
note that RedGum is unable to reimburse the cost of repairs carried out during the warranty
period by a repairer other than an Authorised Servicing Dealer.
For your nearest authorised RedGum servicing dealer visit
www.RedGumProducts.com.au or Call Toll Free 1300 136 572
Customer RedGum
Splitter
RedGum
Chipper
Private/Domestic 24 months 12 Months
Commercial 3 months 3 Months
NOTE:
- Engines are covered by the respective original equipment
manufacturers warranty and claims are made direct to the
manufacturer agent.
- Replacement parts and accessories fitted during a repair under
terms of warranty will enjoy cover for the remainder of the warranty
period of the finished product.
- Warranty claims may only be made through an Authorised
RedGum Dealer.
COMPONENT L/S C/S Interval
1 2 3 4
Complete Unit
On Off Switch
Choke/Primer
Engine Oil
Throttle Lever
Cables and
Connections
Fuel Filter
Carburettor
Air Filter
Clutch
Spark Plug
Cooling Fins
Starter Cord
Starter Housing
Vents
Spark Arrestor
All Screws, Nuts &
Linkage
I I I/C I
I I I I
I/A I I/A I
I R R I
I I I I
I/A I I/A I
I I R
T T T
I I C/R I/C
I I I
I I/C R I
I I/C C C
I I I I
I I/C C C
I I I/R I
I I I I
Yes
Yes
Yes
Yes
Yes
Yes
Yes
Yes
Yes
No
Yes
Yes
Yes
Yes
Yes
Yes
Yes
Yes
Yes
Yes
Yes
Yes
Yes
Yes
Yes
Yes
Yes
Yes
Yes
Yes
Yes
Yes
MAINTENANCE SCHEDULE
COMPONENT L/S C/S Interval
1 2 3 4
Anti Vibration
Mounts
Hydraulic Oil
Hydraulic Oil Pump
Hoses
Hydraulic Fittings
Beam
Control Valve
Belts
Blades
Flails/Hammers
I I I
I I I/R I
I I I I/A
I I I I
I I I/C I/C
I I I I
I I I I
I I I/A
I I I/R
I I I/R
Yes
Yes
Yes
Yes
Yes
Yes
Yes
No
No
No
Yes
No
No
No
No
No
No
Yes
Yes
Yes
LEGEND: L/S = Log Splitter, C/S = Chipper Shredder
I = Inspect, T = Tune, R = Replace, C = Clean, S = Sharpen, A = Adjust,
L = Lubricate
INTERVAL:
1 = Pre Delivery, 2 = First Service, 3 = Dealer Service, 4 = Every time the
machine is used
DEALER SERVICE:
17.

18.
NOTES

18.
NOTES

18.
NOTES

www.RedGumProducts.com.au
1300 039 251
You can engage your local in order to repair, service or
to carry out maintenance tasks. Your local RedGum Dealer will also be able to
supply replacement parts for your RedGum Product. For more information about
your RedGum Product visit or call
Accessories available:
RedGum Chipper Cover - Protects your Chipper from dust and rain.
RedGum Chipper Feeding Tool - Helps to push branches through the chipper
Prevents chipper blades from becoming clogged
Follow us on Facebook: facebook.com/redgumproducts
The manufacturer reserves the right to make improvements in design and/or
them on units previously sold.
Follow us on Facebook: facebook.com/
9
Table of contents