Redrock Micro Navigator User manual

REV. 1.2
USER GUIDE

OVERVIEW
E170001
CANON
LP-E6
IRIS
FOCUS
ZOOM
LENS MOTOR
CONTROLS:
ECLIPSE
PORT
LANC
PORT
S.BUS
PORT
50
50
50
CAMERA
RUN/STOP
MENU
ROTARY
SWITCH
LP-E6
BATTERY
DOCK
ON/OFF
SWITCH
LENS
LOCK
MOUNTING
CLAMP
THUMB-
SCREWS
SOFTKEYS
1
23
3

Place Navigator into
position on grip and tighten
thumbscrews completely.
OFF
ON
Navigator is powered
from a single LP-E6
battery. Slide battery
into Navigator’s
battery dock and
turn the power
switch to ‘ON’.
Navigator is
optimized for
mounting to a grip,
but can also mount
to a rod. Use the
included insert and
mount as described
above.
The Lens Lock switch
engages fixed hard stops to
limit travel of the focus
fingerwheel when desirable.
When lens lock is
engaged, Navigator focus
wheel is limited to 270
degrees of travel.
When lens lock is not
engaged, Navigator focus
wheel has a full 360 degrees
of travel (freewheel).
SETUP POWER
LENS LOCK
E170001
CANON
LP-E6
E170001
CANON
LP-E6
Li-ion BATTERY PACK
4

I
Z
F
x3
x3
x3
NAVIGATOR CALIBRATION Don’t hate, calibrate
1. Reboot Navigator
2. When the Navigator logo
screen appears, press in
and hold the joystick.
The Eclipse ring will
flash blue. Release the
joystick, the ring will
turn green. Navigator
will boot but you will not
see a display.
3. Rotate the Focus wheel
to each endpoint, 3
times.
4. Rotate the Iris wheel to
each endpoint, 3 times.
5. Rotate the joystick 360
degrees, 3 times.
6. Press in Joystick.
Navigator will reboot.
7. Confirm that the FIZ
status sliders respond
when you move their
respective controls:
E170001
CANON
LP-E6
E170001
CANON
LP-E6
50
50
50
5

SLIDERS
FIZ Sliders represent critical focus and travel distance for each motor assigned to each
mode (FIZ). i.e. F indicates the critical focus and throw for your calibrated focus motor.
LENS LOCK
GIMBAL MODE
BATTERY LEVEL
MOVI PRO MODE Indicates that MoVI Pro mode has been enabled. Enter MoVI
Pro mode through the Setup Menu
CANON MODE Indicates that Canon mode is been enabled. Enter Canon mode through the Setup Menu
RADIO SIGNAL Indicates the signal strength of the wireless radio signal.
AC POWER Indicates the Navigator is plugged into an external power source.
Indicates that the lens lock is engaged. See page 4 for more details.
Live visual battery feedback, when using an LP-E6 battery directly on the Navigator.
RUN/STOP Indicates that camera is recording. ***For this feature to be accessible, Run/Stop cable
must be connected from camera to Navigator.
LENS MODE If LENS Mode is underlined, Navigator’s joystick controls the Zoom motor.
Navigator’s focus and iris rings control Focus and Iris motors.
If GIMBAL Mode is underlined, Navigator’s joystick controls the pan and tilt of the
connected gimbal. Navigator’s focus and iris rings control Focus and Iris motors.
THE HOMESCREEN Guide to icons you will find on
the Navigator home screen
50
50
50
6

AUDIO
RADIO
DIAGNOSTICS
MOVI PRO MODE
EXIT
The Atlas diagnostics screen
Enable or disable the Atlas audio feedback. Default audio is on.
GIMBAL Set the pan/tilt speed from 1-10
Change the radio channel to match your wireless controller. Channels range
from 1 - 10. Default channel is 0.
Navigate to the Exit screen and press joystick in to return to the home screen.
DIM Enabling power save mode dims your display when you haven’t used it in a
while, extending your battery life.
Canon mode enables Canon-specific features like autofocus and run/stop.
Cable must be attached from camera to Navigator. Cable not included.
Full gimbal and lens control via MoVI API. Joystick controls gimbal, focus and iris
wheels control focus and iris. Ideal when using standard motors (not Atlas)
LENS Sets the zoom speed from 1-10.
In ORBIT Mode, Navigator’s focus and iris rings
CANON MODE
SETUP MENU Press in Rotary Dial for one second to enter
setup menu. Turn Rotary Dial to scroll,
press in Rotary dial to select.
5ETUP
LENS
7

ATLAS CONTROL
DIRECT (WIRED)
WIRELESS
Set the radio channel to 0 in both the
Navigator and Atlas.
Connect the Navigator to the Atlas
with an Eclipse cable.
Navigator’s focus wheel will now control
the Atlas motor (set to mode ‘F’).
To Activate Navigator’s full FIZ features, daisy-chain additional Atlas motors
to the focus motor you’ve just connected. Change each Atlas’ respective
mode to IRIS and/or ZOOM*. Navigator will now control all three motors.
Set the radio channel to your preferred
channel in BOTH the Navigator and Atlas.
Navigator’s focus wheel will now control
the Atlas motor (set to mode ‘F’).
*See Atlas User Guide for help changing modes.
CHANNEL
0
CHANNEL
6
0
6
8

TECH SPECS
The Eclipse system complies with Part
15 of the FCC Rules. Operation is
subject to the following two conditions:
(I.) this device may not cause harmful
interference and (II.) this device must
accept any interference received,
including interference that may cause
undesired operation.
Minimum Voltage 12VDC, 3A
Maximum Voltage 18VDC, 3A
Redrock Micro provides a one year limited warranty
for Redrock products that contain electronic
components. This limited hardware warranty covers
defects in workmanship and materials of our products
for up to one year, and does not cover damage to this
product that results from improper installation,
accidents, abuse, misuse, negligence, natural
disaster, insufficient or excessive electrical supply (if
applies), damage from incorrect cabling, abnormal
mechanical or environmental conditions, dust or any
unauthorized disassembly, repair or modification.
POWER
12VDC to 18VDC
Connector 1
Connector 2
Connector 3
Eclipse Net Power and Communications
Mini Control Port 4 PIN JST GH
2.5mm (LANC)
General
Connectors
199 GramsAircraft Grade Aluminum L: 72mm W: 95mm D: 79mm
MATERIAL DIMENSIONS WEIGHT
Clamp
Min OD: 19mm Max OD: 31mm
Rigging
Eclipse NetLP-E6
Optional Power Optional Power
EclipseNet
Yes
Communications
No802.11n 2.4Ghz Yes Yes
WiFi RF S.Bus MoVI Pro API Bluetooth
9

TROUBLESHOOTING
1. Intermittent communications:
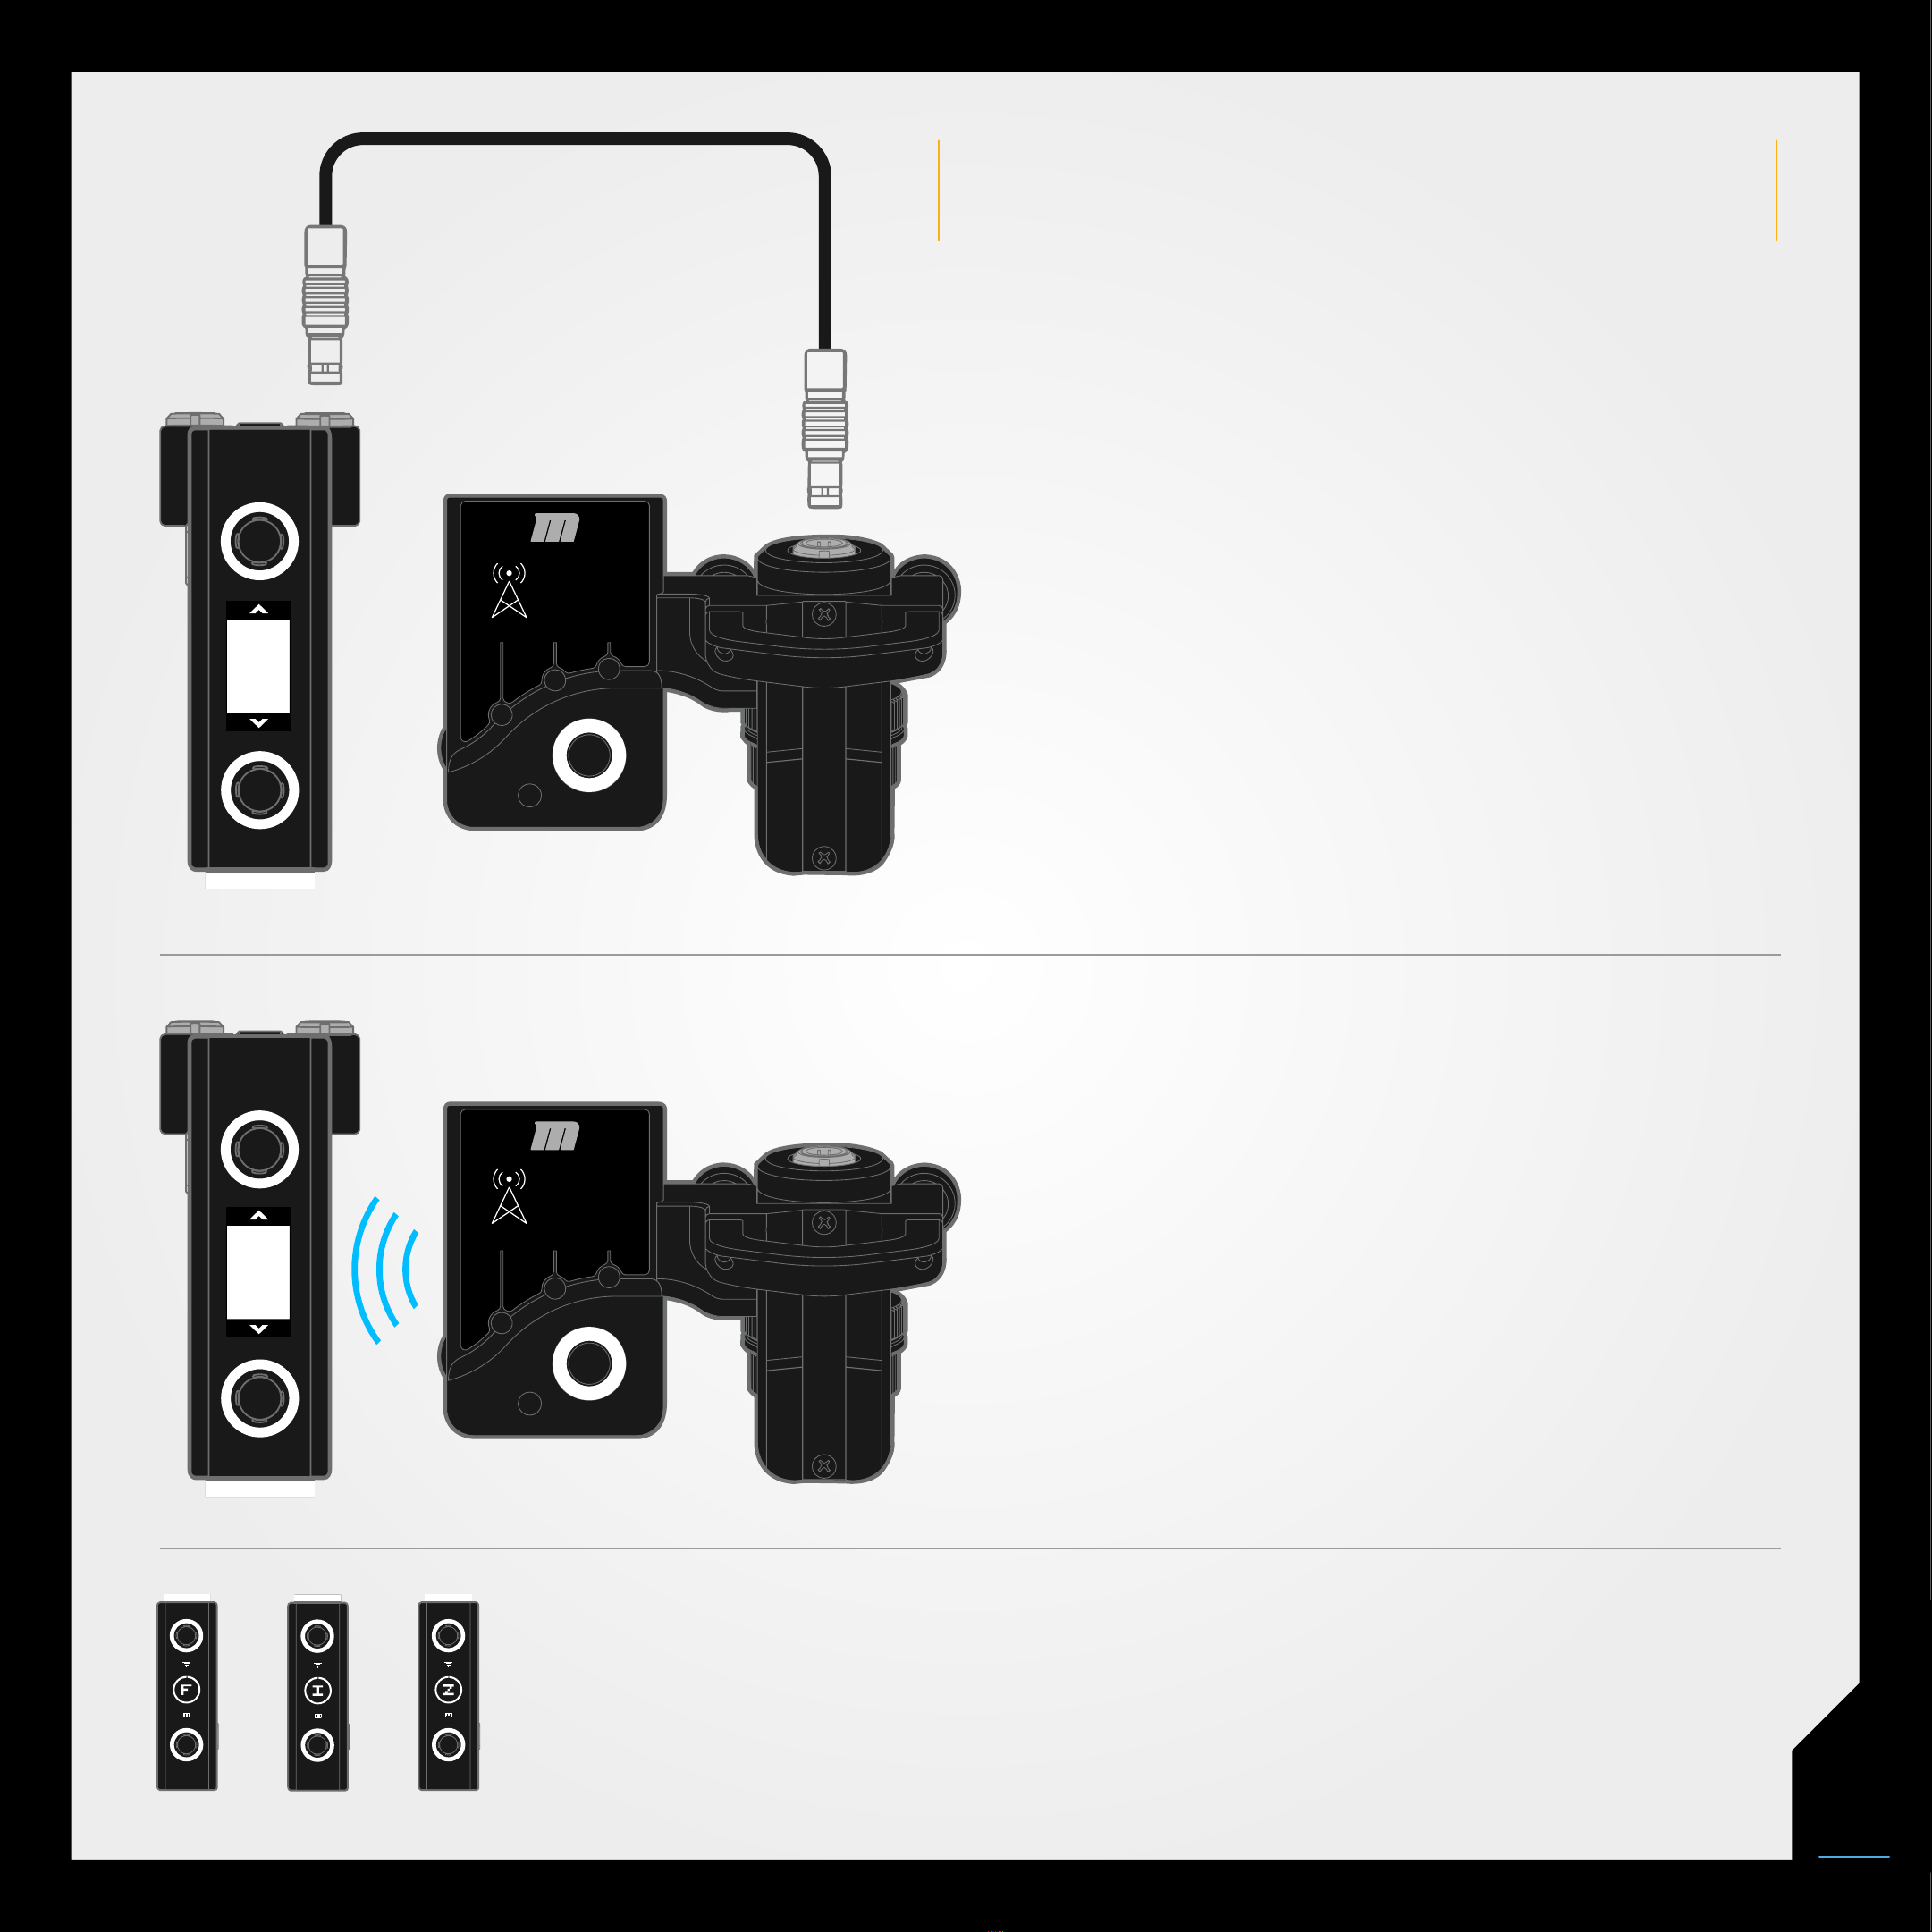
Wireless:
a. Make sure you are not connected via Eclipse Cables
b. Make sure your Atlas and controller are set to the same channel
c. Possible wireless interference. Change to a different radio channel
Wired:
a. Make sure radio channel on Atlas and controller are set to 0
2. No communication/control:
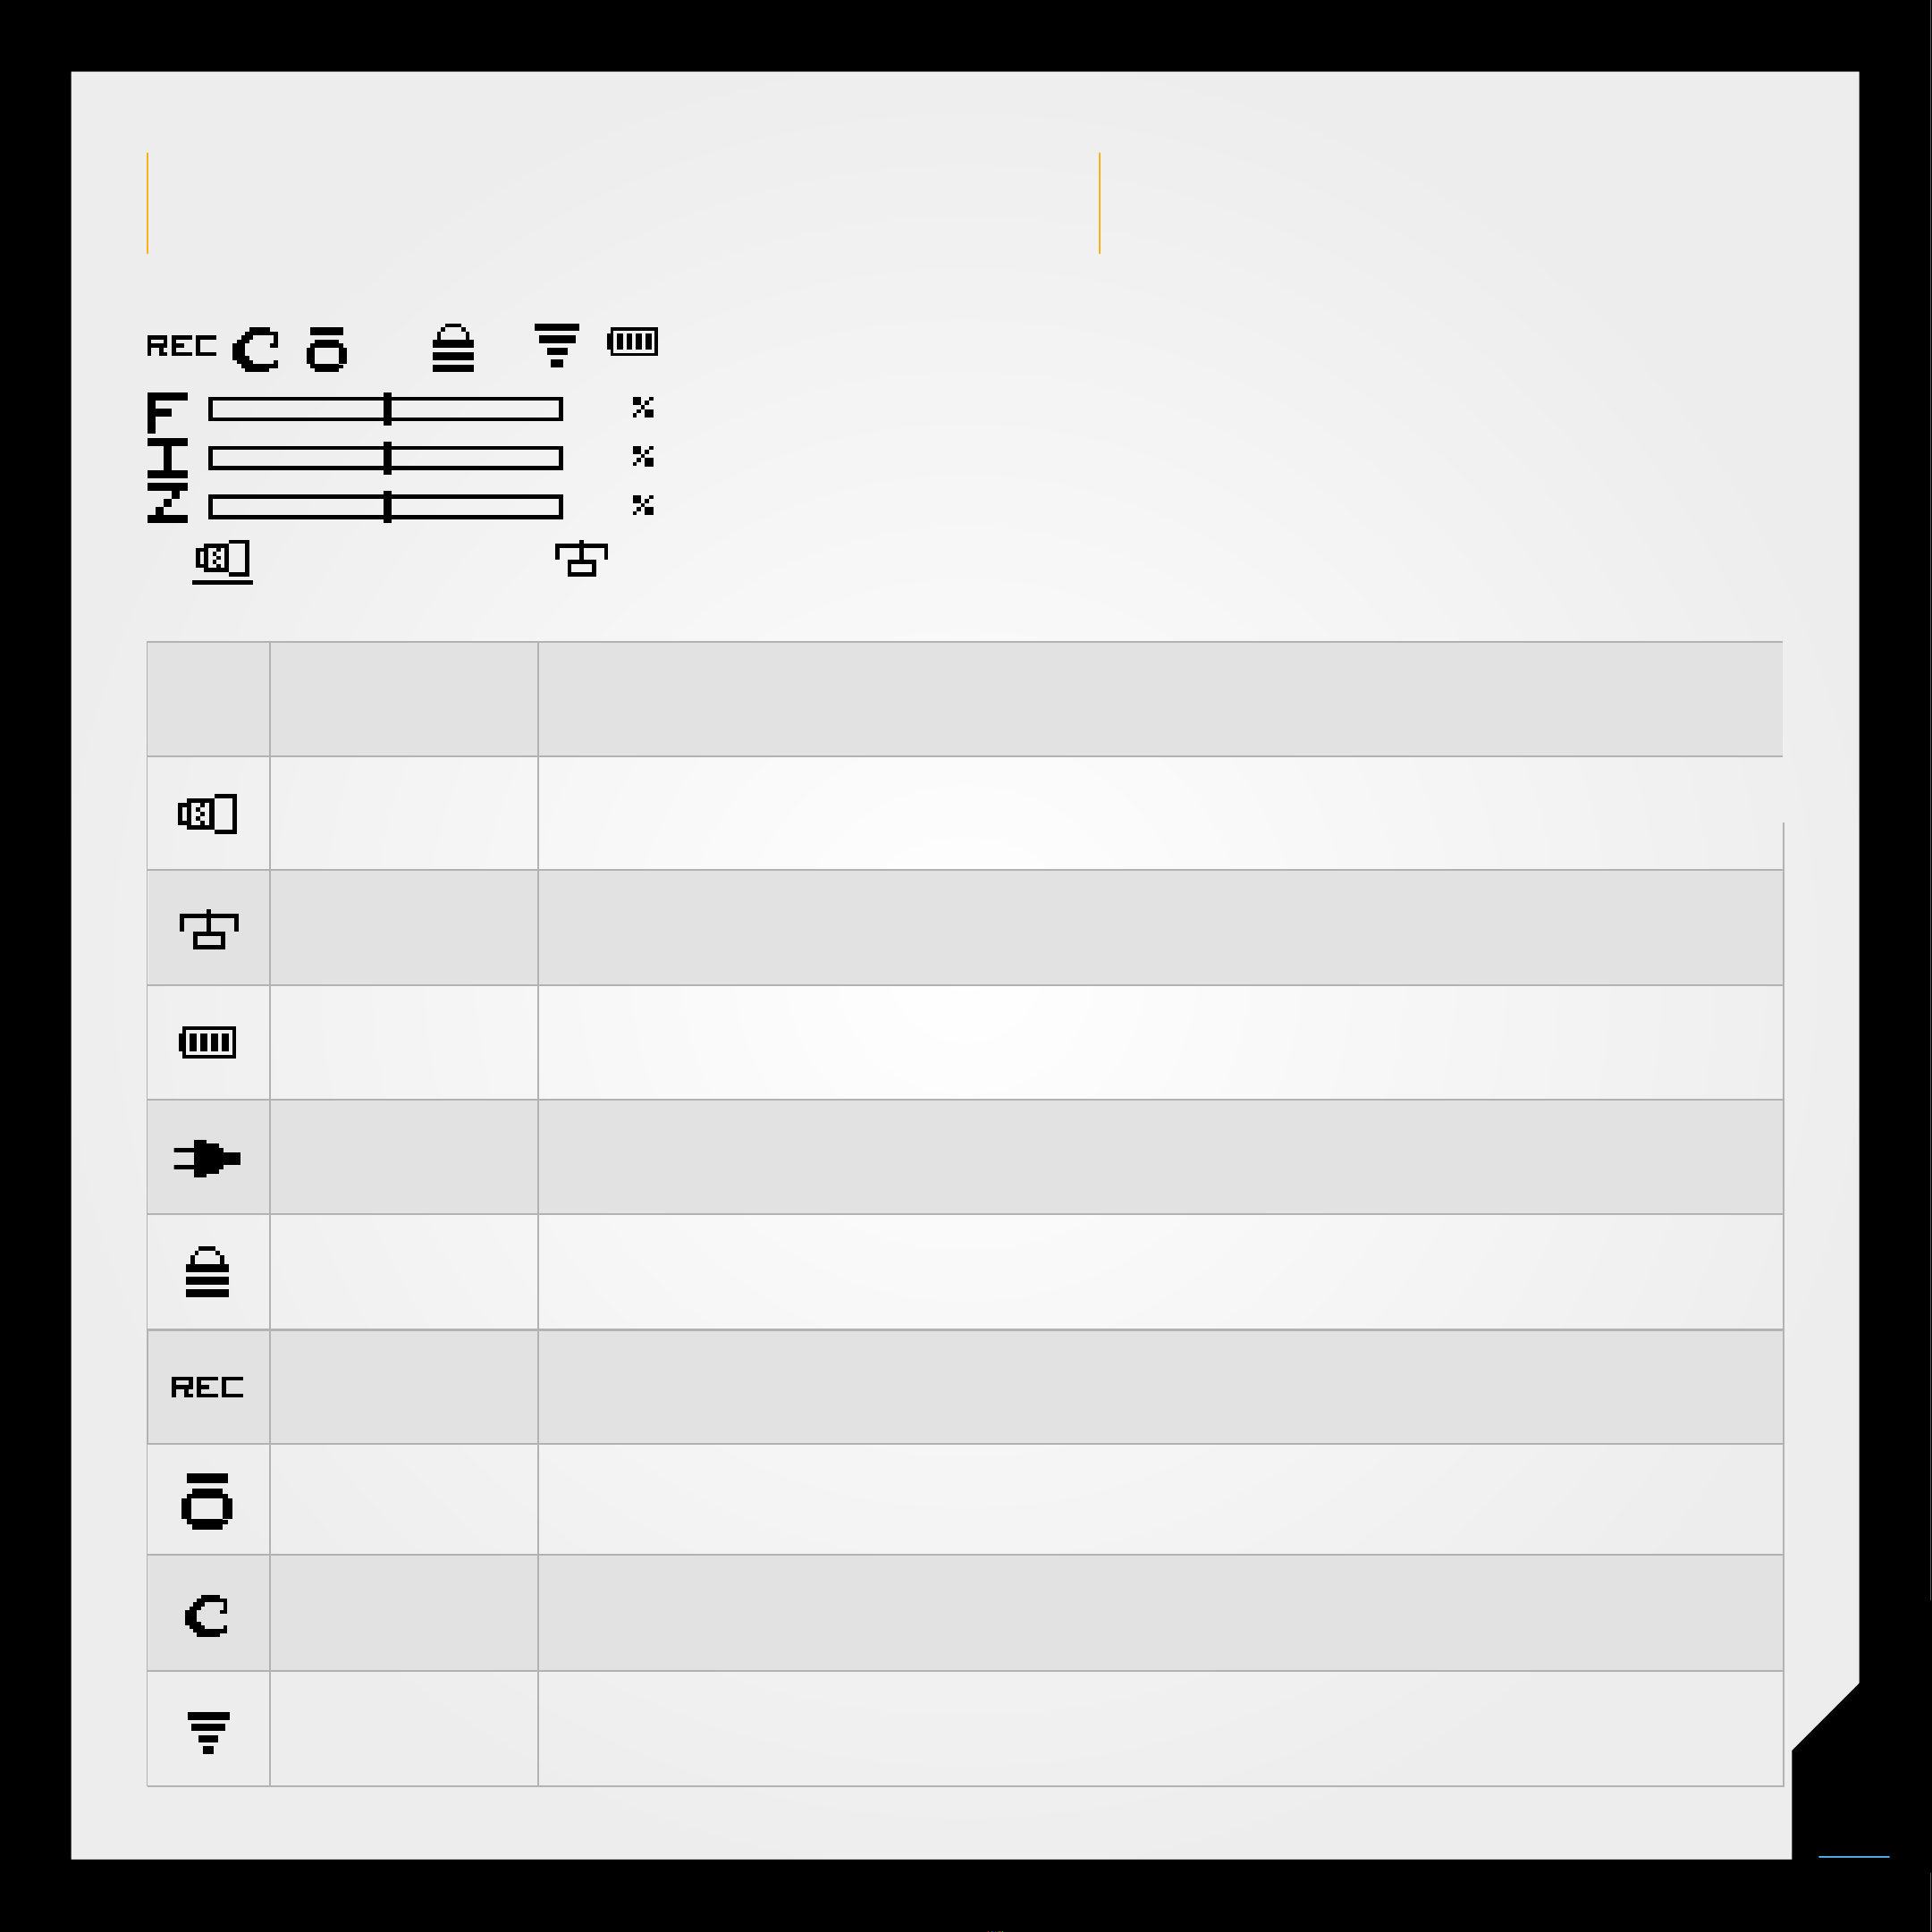
a. Confirm you are connected with the correct controller. Atlas
indicates the connected controller via display icon
b. Make sure your Atlas and controller are set to the same channel
c. Check to be sure you are using the correct control. i.e. Atlas top
wheel = Focus, top wheel = Iris, and joystick = Zoom.
3. Controls not reaching 0 / 100% on display
Calibrate Navigator (detailed steps page ##). Calibrate Navigator by cycling
power, once the Navigator logo is displayed, press in and hold joystick until
Eclipse light flashes blue. Release joystick. Eclipse light should now be green.
Rotate focus knob fully in both directions, rotate Iris knob fully in both
directions. Rotate Joystick in a complete circle. Press joystick Navigator will
reboot.
Troubleshooting Checklist
• Power cycle system
• All batteries are fully charged
• Check that all cables are plugged in
to correct ports and fully seated
• Check for radio interference
• Make sure wireless channel matches
on Navigator and Atlas
• Calibrate motor after any lens
change or motor reposition
Most potential issues that you may
encounter with your Navigator can
be solved by reviewing this list.
If you are still experiencing issues
with your Navigator after consulting
the Troubleshooting section
please contact Redrock Support
toll free at 1-888-214-3903 or
support@redrockmicro.com.
10
Other manuals for Navigator
1
Table of contents
Other Redrock Micro Camera Accessories manuals

Redrock Micro
Redrock Micro Halo Solo Complete User manual

Redrock Micro
Redrock Micro Scout HS User manual

Redrock Micro
Redrock Micro microRemote System User manual

Redrock Micro
Redrock Micro ATLAS User manual

Redrock Micro
Redrock Micro DIGIBOOM User manual

Redrock Micro
Redrock Micro Scout HS Troubleshooting guide