Redrock Micro ATLAS User manual

USER GUIDE
REV. 1.1

0.8
0.8
OLED
DISPLAY
JOYSTICK
ECLIPSE
LIGHT
0.8 PITCH
DRIVE GEAR
LENS LIGHT
15/19mm
ROD CLAMP
QUICK-RELEASE
MOUNTING BLOCK
ADJUSTABLE
LEVER
OVERVIEW
3
Unlike traditional systems, Atlas does not
require a separate brain or MDR. The entire
system is built into the motor housing.
WHAT IS A SMART MOTOR?
The two joysticks
are linked, their
function is
identical. This
provides maximum
functionality in all
mounting scenarios.
Can accommodate
out-of-spec rods. Tighten
screw for desired hold.
Sliding design allows you
to remove Atlas from your
rig while leaving
everything in tact.
Indicates Atlas
status and operation
Both cable ports are
Eclipse Ports. They are
universal: each port is
an input and an output.
CABLE PORTS
Cable ports swivel 90
degrees for maximum
mounting flexibility.
PLEASE READ ENTIRE
USER GUIDE BEFORE
FIRST CALIBRATION

7
S.BUS CHANNEL
AUDIO
RADIO
DIAGNOSTICS
EXIT
4
MODE
Set Atlas to the mode it is to perform: Focus, Iris, or Zoom. Set the mode first,
BEFORE lens calibration. The letter indicating your current mode, F,I, or Z, appears
on the home screen. Default Mode is Focus.
TORQUE
Set your desired torque (gain) level. 0 is the lowest, 10 is the highest. Set the
gain higher for stiffer lenses, lower for smoother action. Default Torque
setting is 5.
DIRECTION Change the direction of motor operation, Forward or Reverse. Default setting
is Forward.
FLIP DISP Flip Atlas display 180 degrees. This allows you to mount Atlas to the top or
bottom rails of your rig. Default orientation is Up.
The Atlas diagnostics screen
LED LITES Set the brightness of the Eclipse lights. 0 is off, 10 is the brightest. Default
brightness is 5.
LENS LITE Set the brightness of the Lens Light. 0 is off, 10 is the brightest. Default
brightness is 5.
Enable or disable the Atlas audio feedback. Default audio is on.
Change the radio channel to match your wireless controller. Channels range
from 1 - 10. Default channel is 0.
Assigns the channel used for motor control when using Futaba etc. controllers.
CALIBRATE Choose between Auto and Manual Lens Calibration. More info page 7.
Navigate to the Exit screen and press joystick in to return to the home screen.
POWER SAVE Enabling power save mode dims your display when you haven’t used it in a
while, extending your battery life.
SETUP MENU Press joystick right or left to enter the Setup
Menu. To exit, navigate to the Exit screen.

OPTIONAL:
Use a Redrock Dogbone for increased
mounting flexibility. The Dogbone can help
position the Atlas more precisely and securely,
especially when using multiple motors. The
Dogbone also makes it possible to position the
Atlas at nearly any angle, so the screen is
always visible.
Dogbone Rail Clamp PN 2-135-0001
Mount Atlas to your rig’s
top or bottom rail, or
gimbal rail system. Use
the sliding rail clamp to
get Atlas positioned
correctly. If necessary,
adjust the lever screw to
make sure the mount is
tight and secure.
1
5
ATLAS SETUP

Make sure motor is positioned
somewhere in the middle of
the lens’ focus/iris/zoom
range. Avoid starting at
either end of the lens’ range.
Press drive gear against the
lens using light pressure until
teeth interlock, then tighten
clamp. Avoid mounting motor
with excess pressure on lens.
See Figure Below
Cable Up. Connect your
battery to the Focus motor as
outlined below. Follow the
instructions per your motor
controller on page 8.
Power Atlas via a Redrock
powerDock, battery (with a p-tap to
Eclipse cable), or by daisy-chaining
with another Eclipse product (i.e.
Navigator, with built-in LP-E6 port.)
IF USING MULTIPLE ATLAS
MOTORS: Connect your battery to
the FOCUS motor directly. Then
daisy-chain the other motors from
the Focus motor in any order.
POWER
2 3 4
5
2
ATLAS SETUP
6
Redrock Eclipse
Jumper Cables
are ideal for
daisy-chaining
between FIZ
motors.
PN 2-100-3003
JUMPER
CABLES

6
CALIBRATION
7
Atlas default mode is Focus (F). If using multiple Atlas motors, set each mode
BEFORE calibration. From the Atlas home screen, navigate to the ‘Mode’ screen
and choose between Focus, Iris, or Zoom. Press in joystick to select.
SPECIFY MODE BEFORE CALIBRATING MOTOR
1. Mount motor to lens as explained on Page 6, with light
pressure and in the middle of the lens.
2. Navigate to the Calibration screen in the Setup Menu.
Press joystick down to choose Manual Calibration.
3. Press joystick UP until you reach the end of your lens.
Press joystick IN to set.
4. Press joystick DOWN until you reach the end of your lens.
Press joystick IN TO set.
AUTO CALIBRATION
Mount motor to lens as explained on Page 6, with light pressure
and in the middle of the lens. Press in and hold joystick for 2
seconds. Atlas will perform auto calibration.
Alternatively, you can navigate to the Calibration screen in the
Setup Menu. Press joystick up to choose Auto Calibration.
MANUAL CALIBRATION
GREEN Successful
Calibration
Calibration
In Progress
YELLOW RED Unsuccessful
Calibration,Try Again
Eclipse lights temporarily
indicate Calibration status:

6
8
ECLIPSE MOBILE APP
Free WiFi controller for Atlas and
configuration tool for all Eclipse products.
Coming soon for Android and iOS. Subscribe
to our newsletter for more info.
Full featured controller includes wireless or wired connectivity to
Atlas.
To control Atlas wirelessly, set the radio channel on both the Atlas
and Navigator to your desired channel. See Navigator User Guide
for more info, troubleshooting, and tips.
To control Atlas wired, set the radio channel on both devices to 0,
and connect them with an Eclipse cable.
NAVIGATOR COMMAND MODULE
microREMOTE HANDHELD
Atlas can be controlled by several different controllers.
Read below to find out how to connect to yours.
CONTROLLERS
Professional wireless remote lens controller, compatible
with the single channel Atlas setup.
Set the radio channel on your microRemote Handheld
and the Atlas to your desired channel. See microRemote
User Guide for more information on radio channels.

7
9
TECH SPECS
The Eclipse system complies with Part
15 of the FCC Rules. Operation is
subject to the following two conditions:
(I.) this device may not cause harmful
interference and (II.) this device must
accept any interference received,
including interference that may cause
undesired operation.
Minimum Voltage 12VDC, 3A
Maximum Voltage 18VDC, 3A
Redrock Micro provides a one year limited warranty
for Redrock products that contain electronic
components. This limited hardware warranty covers
defects in workmanship and materials of our products
for up to one year, and does not cover damage to this
product that results from improper installation,
accidents, abuse, misuse, negligence, natural
disaster, insufficient or excessive electrical supply (if
applies), damage from incorrect cabling, abnormal
mechanical or environmental conditions, dust or any
unauthorized disassembly, repair or modification.
POWER
12VDC to 18VDC
Connector 1
Connector 2
Connector 3
Eclipse Net Power and Communications
Mini Control Port S.Bus
General
Connectors
238 GramsAircraft Grade Aluminum L: 96mm x W: 29mm x D: 71mm
MATERIAL DIMENSIONS WEIGHT
Rod Clamp
15/19 mm
Rigging
Removable0.8 Yes
Lens Gear Run/Stop Capable Clamp Style
WiFi
Yes
Other
1 Year2.4Ghz Yes OLED Yes Click Here to Check
RF NFC Display Audio Firmware Updates Warranty

7
TROUBLESHOOTING
10
1.
LED’s are constantly blinking
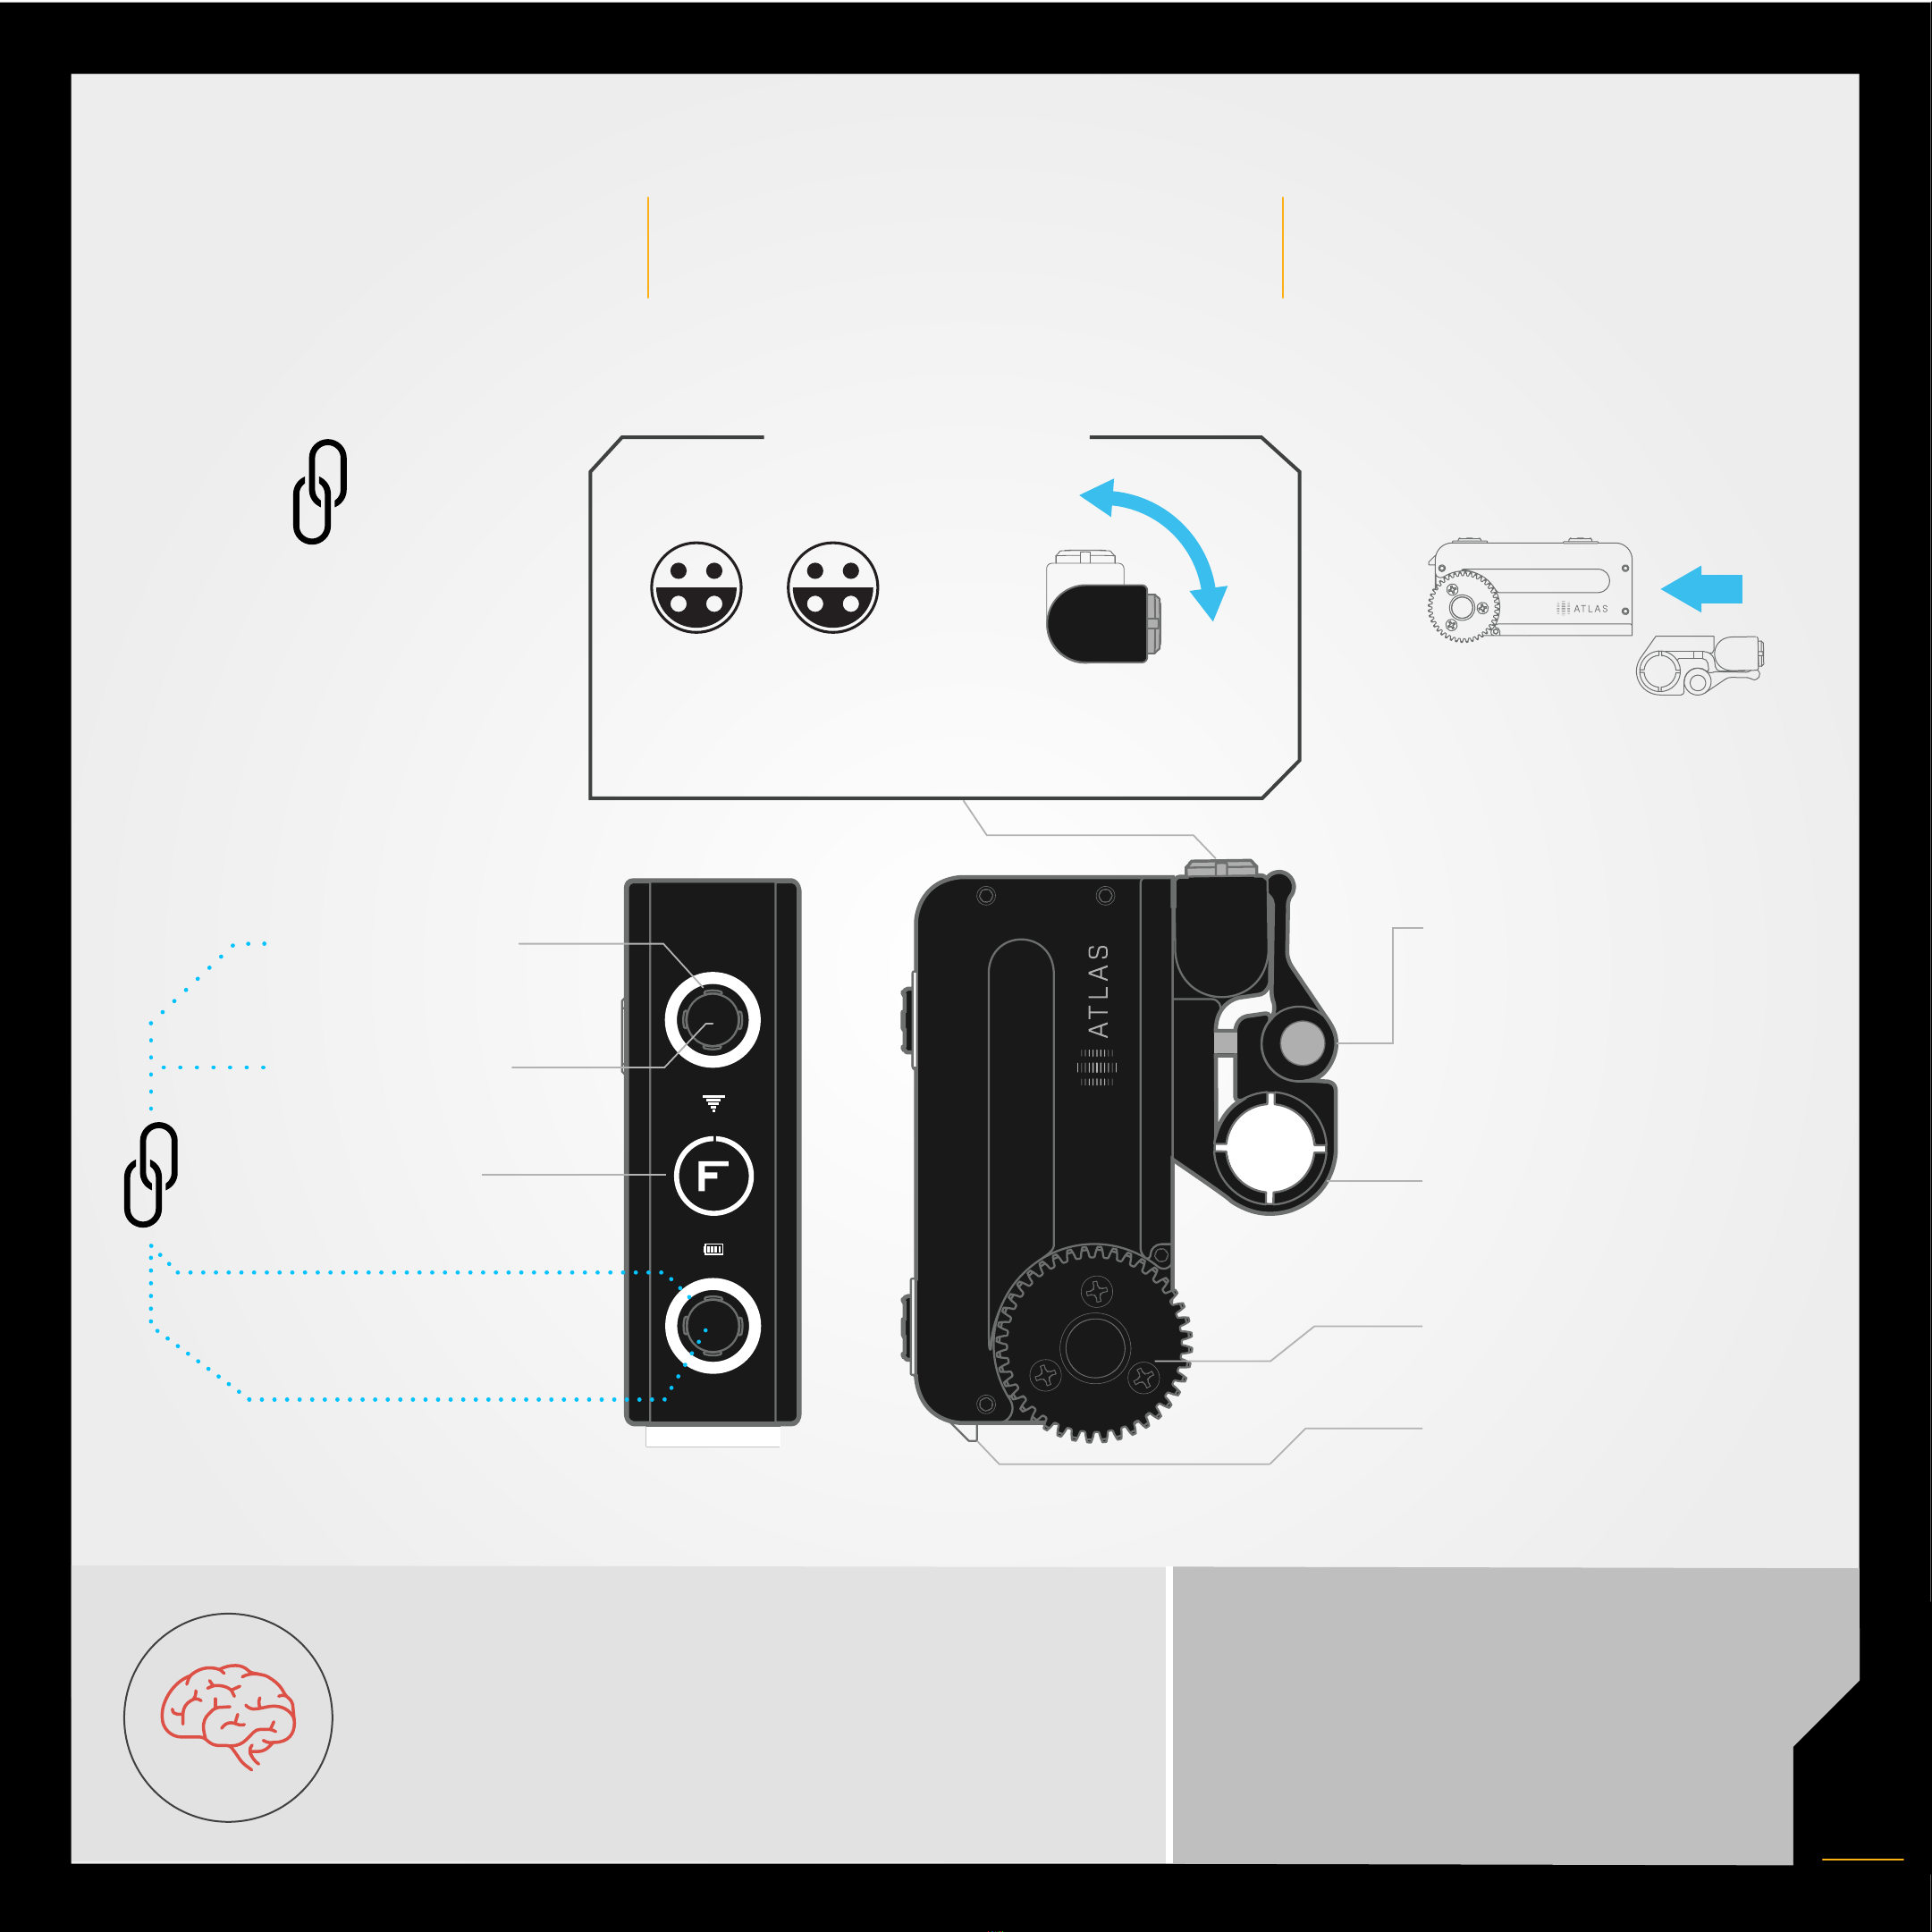
Atlas requires calibration. See page 7.
2.
Motor movement is jittery/too sensitive
Torque level is likely too high for your lens. Reduce the torque value.
3.
Motor movement is weak/slow/under-responsive
Torque level is likely too low for your lens. Increase the torque value.
4.
Motor won’t reach the endpoints of your lens
Increase torque level.
5.
Intermittent communications:
Make sure S.Bus Channel is set to 0 if not using S.Bus Controller
Wireless:
a. Make sure you are not connected via Eclipse Cables
b. Make sure your Atlas and controller are set to the same channel
c. Possible wireless interference. Change to a different radio channel
Wired:
a. Make sure radio channel on Atlas and controller are set to 0
6. No communication/control:
a. Confirm you are connected with the correct controller. Atlas
indicates the connected controller via display icon
b. Make sure your Atlas and controller are set to the same channel
c. Check to be sure you are using the correct control. i.e. Atlas top
wheel = Focus, top wheel = Iris, and joystick = Zoom.
7. Display is blank
Automatic power saving feature is engaged. Press joystick.
8. Display/LED/Lens Lights are dim
Turn the Power Save feature to OFF in the setup menu. You can also customize the
brightness of the lights in the setup menu.
9. Display is upside down
Depending on how you mount Atlas, the display may need to be flipped.
Navigate to FLIP DISP in the setup menu.
10. Motor direction is backwards
When using Nikon lenses and others, the Atlas direction may feel reversed. Enter
the Motor Settings screen, select ‘Direction’ and set to ‘Reverse.’
Troubleshooting Checklist
• Power cycle system
• All batteries are fully charged
• Check that all cables are plugged in to
correct ports and fully seated
• Make sure lens is calibrated properly
• Check that torque setting is not too
high or low
• Check for radio interference
• Make sure wireless channel matches
on Atlas and controller
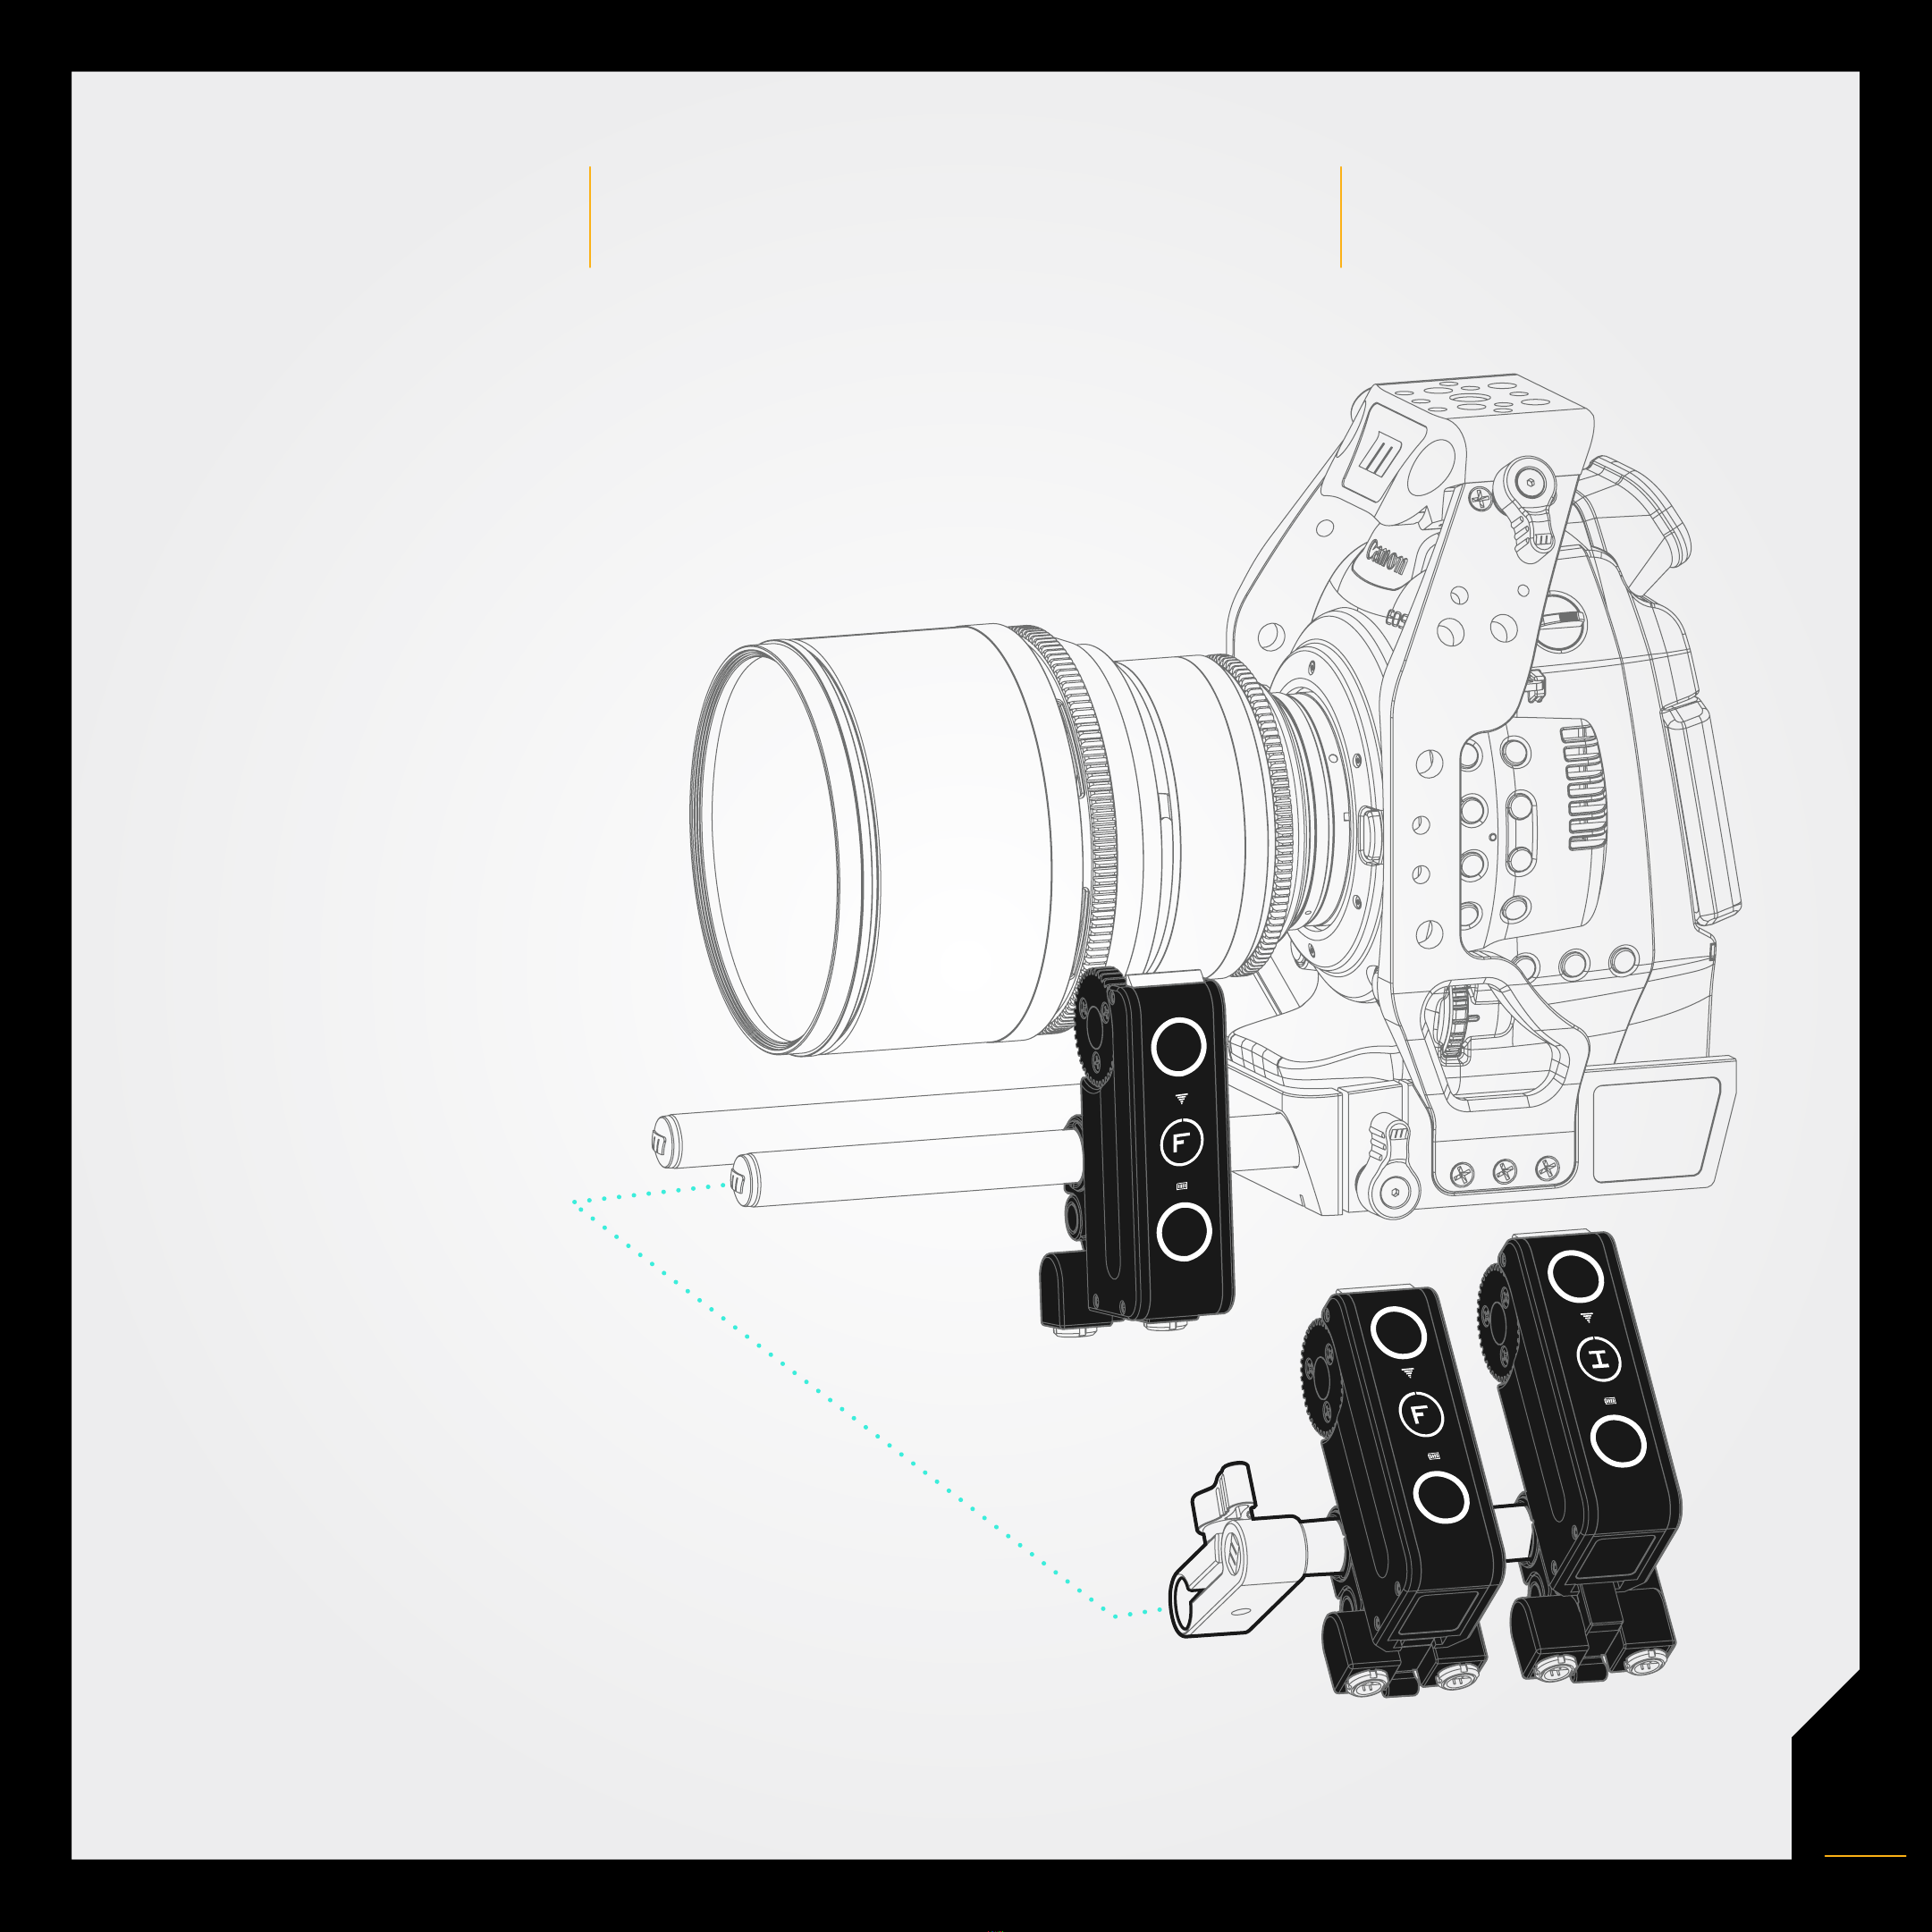
• Make sure lens gear and motor gears
are properly meshed
• Calibrate after any lens change or
motor reposition
Most potential issues that you may
encounter with your Atlas can be
solved by reviewing this list.
If you are still experiencing issues with
your microRemote after consulting the
Troubleshooting solutions
please contact Redrock Support toll free
at 1-888-214-3903 or
support@redrockmicro.com.
0.8
Table of contents
Other Redrock Micro Camera Accessories manuals

Redrock Micro
Redrock Micro DIGIBOOM User manual

Redrock Micro
Redrock Micro Scout HS Troubleshooting guide

Redrock Micro
Redrock Micro Halo Solo Complete User manual

Redrock Micro
Redrock Micro Navigator User manual

Redrock Micro
Redrock Micro Scout HS User manual

Redrock Micro
Redrock Micro microRemote System User manual
Popular Camera Accessories manuals by other brands

Nauticam
Nauticam N100 X1024-Z instruction manual

Kyocera
Kyocera YASHICA 28-85mm F3.5-4.5 MAGRO instruction manual

Ikelite
Ikelite 5510.45 instruction manual

Aquatica Digital
Aquatica Digital Pro Digital 20062 operating manual

PROAIM
PROAIM LB230 Assembly manual

Xiaomi
Xiaomi FunSnap Capture instruction manual