Redwood CA900FE User manual

Installation & User Manual Instructions
Models: CA900FE, CA180FE, CA2400FE

Thank you for purchasing your Redwood Panel Heater. Before the installation and
operation of the heater, please read the Installation and Operation Manual carefully.
Any operation not complying with the Instructions may cause personal injury or property damage.
Please register your warranty at www.theheatingcompany.co.nz/warranty
The Redwood Panel heaters are a high quality product and will provide you with many years of comfort. The
Redwood Panel Heater is covered by a comprehensive 2 Year Manufacturer’s Warranty.
For further information or technical advice please contact:
www.theheatingcompany.co.nz
Ph: 0800 432 846
The following reasons are not included in the warranty service:
The heater is damaged because of the customer’s incorrect operation, poor storage and maintenance.
The heater has been repaired by people not designated by our company.
The warranty period has expired
Proof of purchase is required
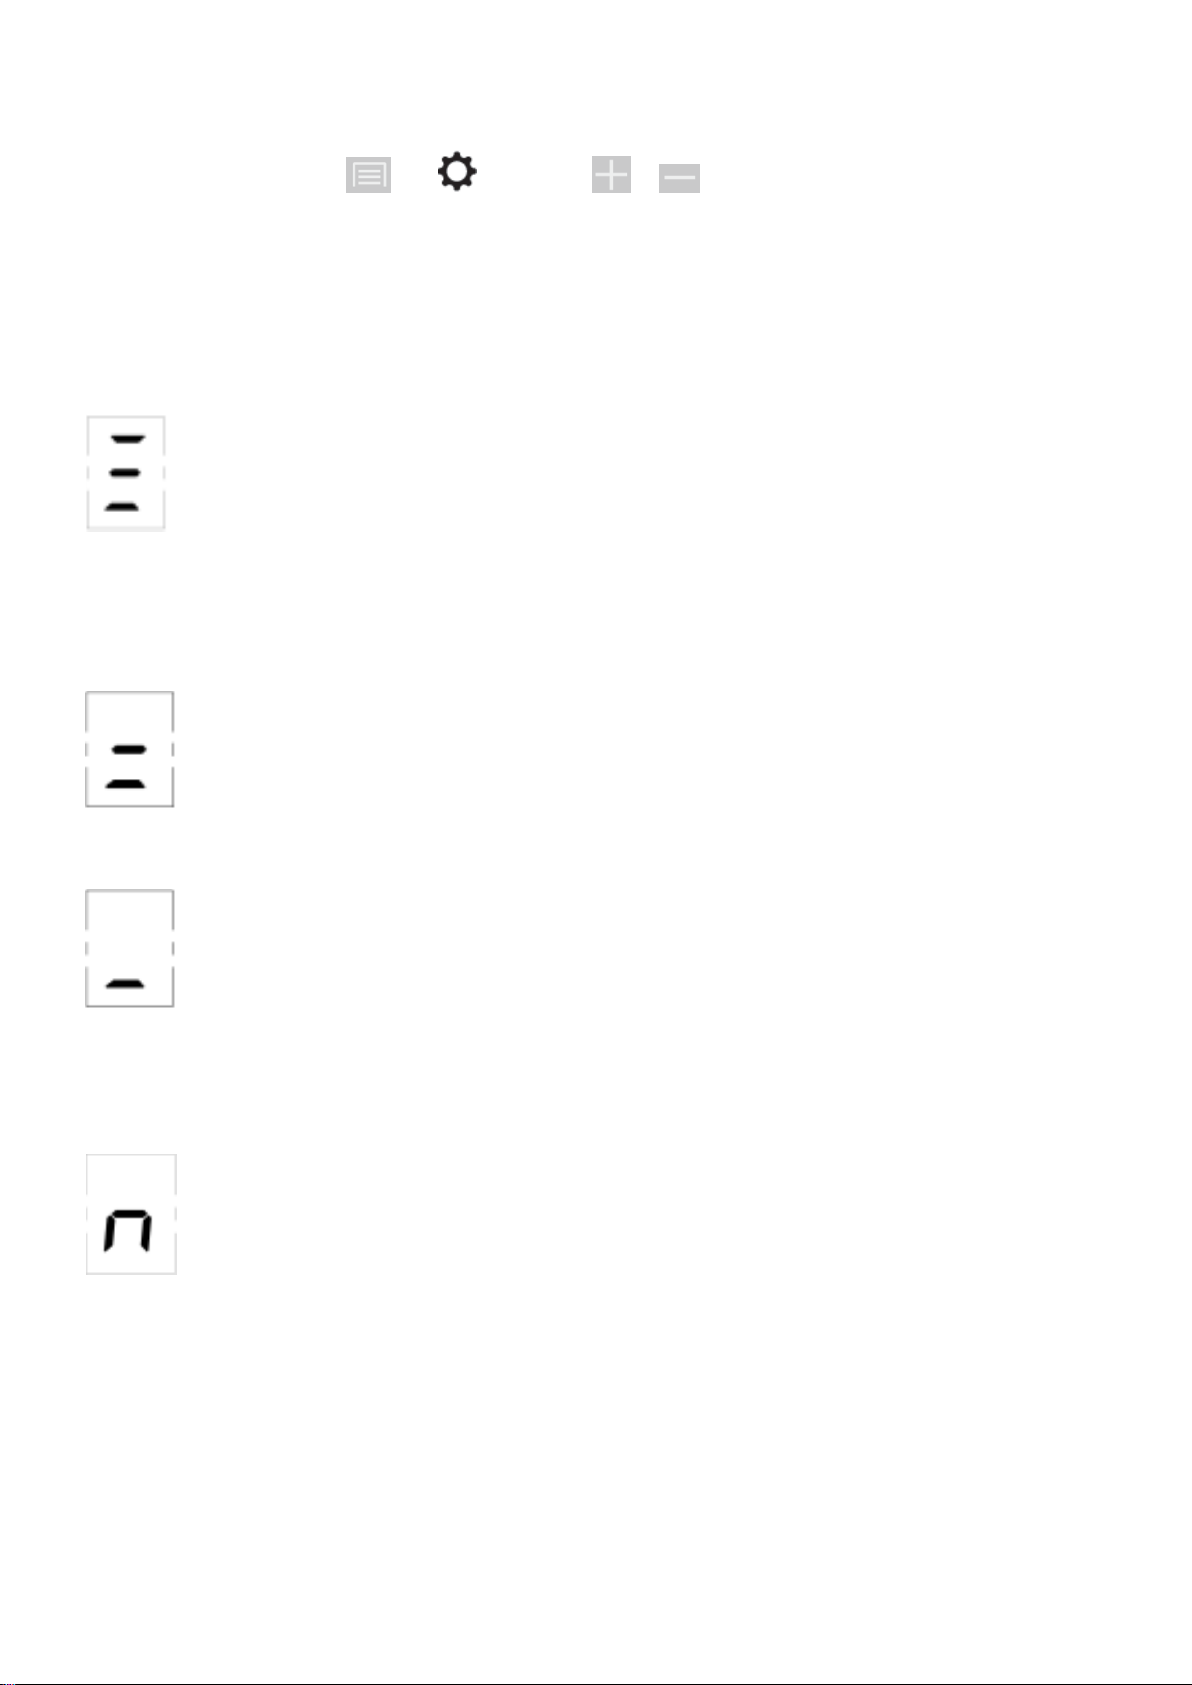
Safety requirements:
In order to avoid any fire, electric shock or injury risk, please read and comply with the following instructions. Our
quality assurance doesn’t cover damage caused by non-compliance with this operation manual.
1. The appliance must be connected to power with the voltage equivalent to the rated voltage on the label of
the electrical appliance.
2. Never use the heater near gas, explosives or inflammable goods.
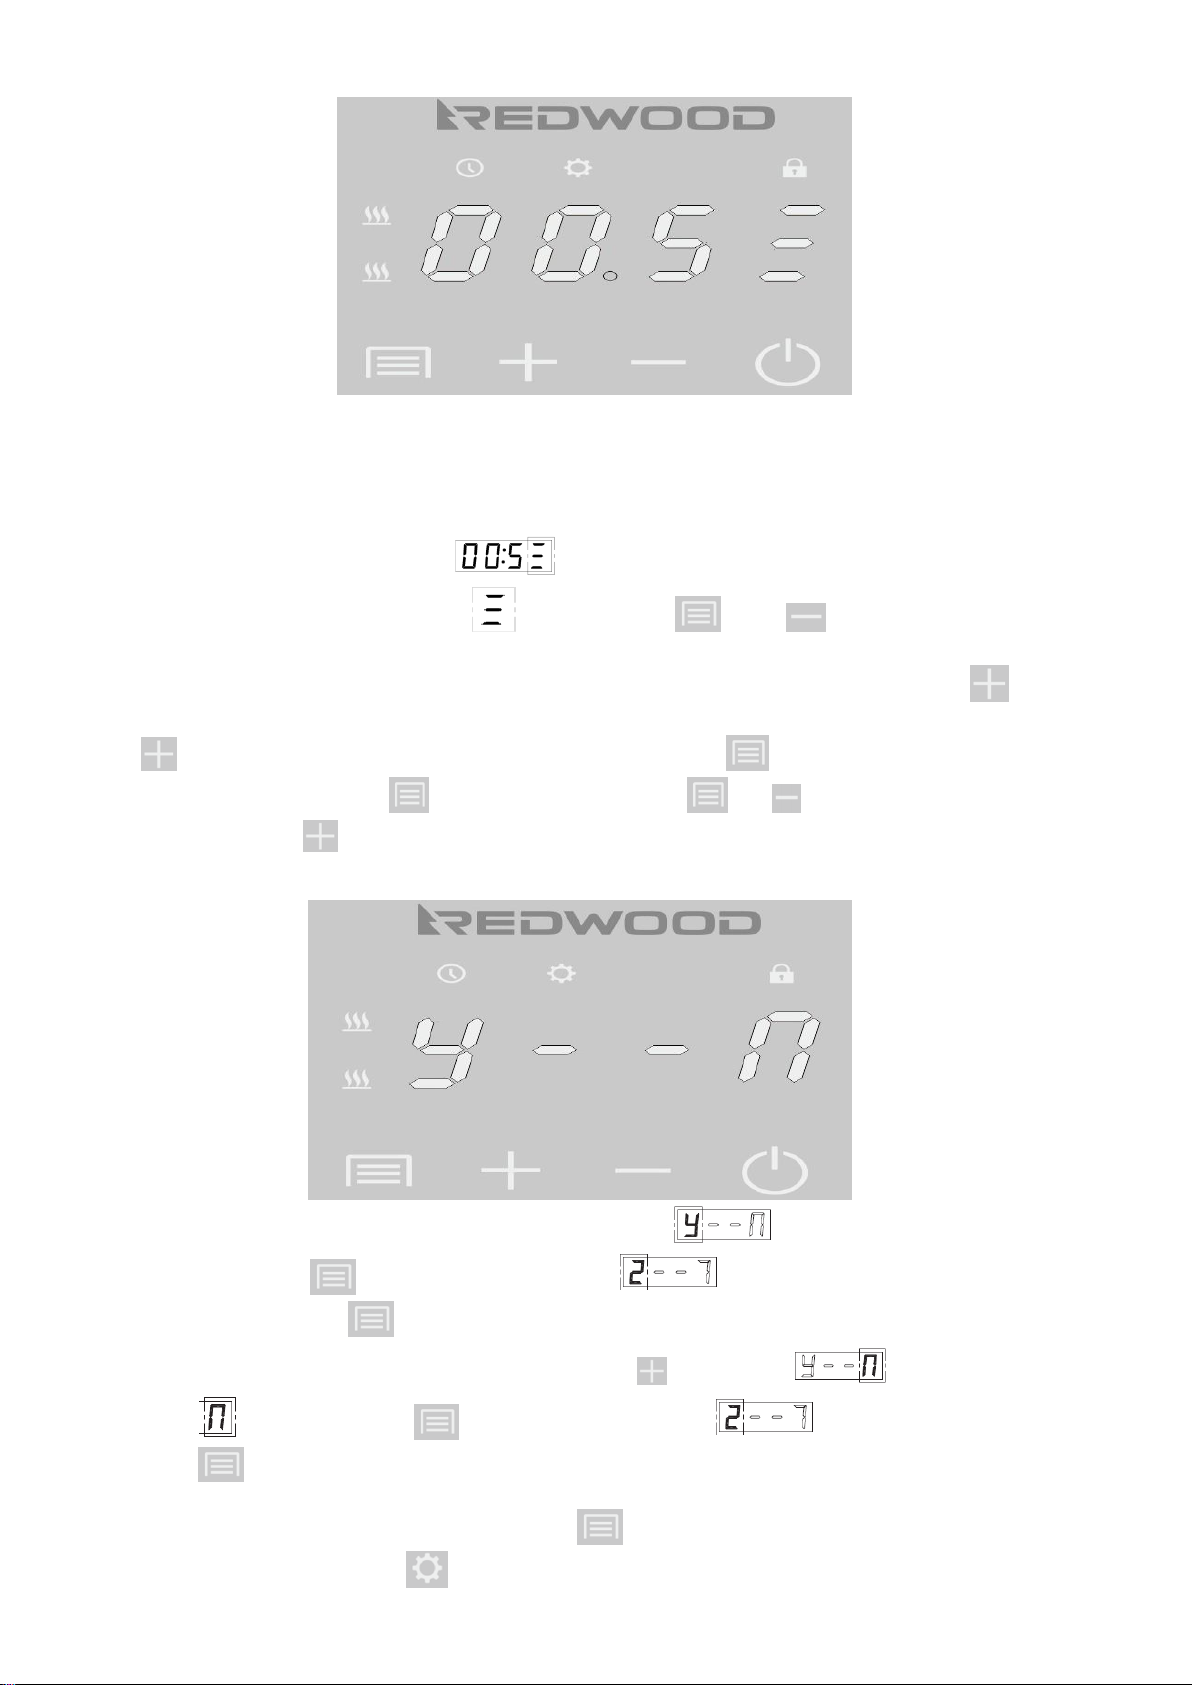
3. Warning: to avoid overheating, clothing, blankets etc are prohibited from covering the heater.
4. When operating the appliance the surface temperature will increase.
5. The appliance is not intended for use by persons (including children) with reduced physical sensory or
mental capabilities or lack of experience and knowledge unless they have been given supervision or
instruction how to use the appliance by a person responsible for their safety.
6. Children being supervised not to play with the appliance.
7. Do not place the appliance directly beneath a plug or socket.
8. Any faulty appliance should be disconnected immediately and returned to the sales agent.
9. If the supply cord is damaged, it must be replaced by the manufacturer, service agent or qualified person in
order to avoid hazard
10. Before any maintenance or cleaning of the product is carried out please ensure the appliance is
disconnected from the power.
11. The appliance is not designed to be used in bathrooms, shower rooms or wet areas.
12. Make sure the device is installed horizontally. Angle error is within +/-5 degrees.
13. The appliance is for indoor use only.

Accessory Packaging List
Please check everything is in the package. Please note the parts are in the sides of the polystyrene packing
supports.
4 x tapping screws ( ST5X60) –To fix U wall brackets
2 x Tapping screws (ST4X10) –To fix U wall brackets
4 x Screw expansions –To be put into the mounting holes
4 x U wall brackets –To install the heater
1 x Sticky wall screw template
Note: Free standing feet are available separately on request
Installation Location:
1. This appliance can be wall-mounted or free-standing.
2. Do not install this product near furniture, curtains or any other appliances.
3. The installation height needs to be more than 20cm from the floor.
1. Display Screen
4. On/Off Switch
7. Room Temperature Sensor
2. Display Frame
5. Rear Panel
8. Front Panel
3. Bracket Fixing Position
6. Panel
9. Top Grill
Model
Nominal Voltage
Rated Frequency
Rated Current
Number of Fins
CA900FE
240V
50Hz
4.1A
6
CA180FE
240V
50Hz
8.2A
10
CA240FE
240V
50Hz
10A
14

Installation Method
1. Check the installation accessories according to the attached list.
2. Select the installation wall according to requirements of installation size.
3. Drill holes on the wall according to product model.
4. It is highly recommended that you use a level to ensure the heater sits straight.
5. Take out the installation sticker template provided. Place the sticky template on desired position
on the wall.
6. Mark your drill holes on the wall according to the template hole positions. The drill size
dia10mm x length 60mm.
7. Remove the sticker template.
8. If required (No solid back fixing) put the plastic expansion screws provided into the holes drilled
on the wall.
9. Install the U shaped brackets onto the wall with the ST5X60 tapping screws provided.
10. Align the loop hooks on the back of the heater with the U bracket on the wall and the heater
should now be in the fitted position.
11. Align the loop hooks to U brackets
12. Screw the 2 ST4X10 screws provided to the top of the U bracket to secure.
Plug into the power socket tightly. The wall mounting of the heater is now complete.
On the right hand side of the heater, locate the black power switch. Push to turn on the power. The heater is now
ON.
60m
m
Φ
10m
m

Manual Setting
Turn the power on and press until is off. Press or until the temperature desired is displayed.
The heater will now operate in manual mode and will heat up the room until the temperature set is reached. Now
the heater will switch itself off and will turn itself on again if the room temperature drops below the temperature set.
Understanding your temperature settings
Comfort Mode:Temperature range: 20-35 degrees
This is the top temperature you want the heater to reach. The heater will turn off when it reaches your set
temperature. The heater will automatically turn back on when the room temperature reaches the Economy Mode
setting below. This makes for efficient operation.
Economy Mode: Temperature range: 13-19 degrees
This is the lower range, so when the room reaches this lower temperature, the heater will automatically turn on.
Defrost Mode: Temperature range: 5–12 degrees
Outside of programming schedule’ this is the lowest room temperature you desire. When the room temperature
drops to this set temperature the heater will automatically turn on. This is designed to not allow bedrooms to
become cold overnight.
Standby Mode: Will not work during this period
Timing Options:
You have the option of setting your timing to whatever suits your personal requirements.
For efficient power consumption 2 settings per day suits most households.
For example the heater is set to come on in the morning and then turn off and then to turn on again in the evening.

1. Press “ ” plus “ ”and hold 2 seconds , until the display shows “ ”and
set the current digit.
HOW TO SET UP LOCK-IN MODE PASSWORD AND UNLOCK
Getting to Know your LCD Panel
Heater is in Lock mode.
Heater is in programme mode
Heater is operating in time off mode
To enter programme setting and to switch modes (prog/manual)
On/Off
3. To unlock the heater ,press “ ” and hold , until the display shows “ ”and flashes.
Press the “ ” or “ ” button to set the current numeric input password.
2. When the display shows “ ”and flashes. Press the“ ” or “ ” to setup the
current digit ,press " " button to confirm the password after setting and the display shows “ ”.
4. When the display shows “ ”and flashes. Press the“ ” or “ ” to setup the
current digit ,press " " button to unlock and the “ ” disappear .
(The password of heater is four digits . And the universal password is "3721")
the first digit represents the “current digit” and flashes. Press the “ ” or “ ” button to

1. In the standby state, press “ ” plus “ ” and hold 2 seconds, buzzer sounds, all the
lights on the display screen turn on for 1 second, and all the settings in the product are empty.
1. In the boot state , press “ ” plus “ ” and hold , buzzer sound, the display screen
shows the current time, after loosening, immediately switch to the current ambient
temperature.
HOW TO RESTORE FACTORY SETTINGS
HOW TO VIEW THE CURRENT TIME

Set up Instructions (hour/minute)
1. Press “ ” until “ ” is lit up.
2. Press the “ ” button for 5 seconds to enter the time setting mode. The display shows the current time
“ ”. Hour flashes, and press the “ ” or “ ” button to adjust the current hour.
3. When the hour is set, press “ ” button to confirm and the heater will beep. At this point, the display shows
“ ”. The Minute now flashes, and press “ ” or “ ” button to adjust the current minute. Press
“ ” button to confirm after setting. If you only wanting to use the heater in manual mode, press and hold
to exit.
How to Set Up The Current Day of the week
1. The display shows “ ” (this = Friday). The first digit represents the “current day” and flashes.
Press the “ ” or “ ” button to set the current day.
2. (Monday = 1, Tuesday = 2, Wednesday = 3, Thursday = 4, Friday = 5, Saturday = 6, Sunday = 7)
3. Press “ ” to confirm after setting.

How to Set the Temperature Modes
1. ” (comfort mode) and “ ” flashes.
2. Press “ ” or “ ” to set the desired temperature of the comfort mode, and press “ ” button to confirm.
3. Then repeat Step 2 to set the desired temperature in each mode.
Modes:
Comfort Mode 20°C - 35°C
Economy Mode13°C - 19°C
Anti Frost Mode5°C - 12°C
Standby Mode
How to Set the Weekly Programme
1. The display shows “ ” (1 of 7 days) and “ ” flashes to indicate that it is Monday.
2. You are now setting the programme for Monday. Press “ ” to confirm entry
The display shows “

Note: The below settings are based on a 24 hour clock and therefore we have to start 12.30am.
Time Settings:
1. The display automatically shows “ ”, which means that it runs in comfort mode at AM00:30
(12.30am). At this time, the symbol “ ” flashes. Press “ ” plus “ ” buttons at the same time to
switch modes.
2. Once you have selected your Mode the Mode symbol will keep flashing. At this stage, press “ ” button, to
set your time period for this Mode (Time increments are set in 30 minute intervals). You can hold down the
“ ” to speed up the sequence to reach your desired time. Press to confirm and now the next half hour
sequence is blinking, press to access the mode. Press and to change the mode for the next
time period. Press to set your time period for this mode and repeat the process until time showing 24.00
and day 1 is now complete.
1. When the program is set on the Monday, the display shows “ ” and flashes.
2. You can now press to save. The display shows “ ” If you wish all days to be the same as
Monday press and hold all other days of the week will be programmed the same as Monday…. Or if
you wish to set individual day settings then… Press “ ” to switch to “ ”.
3. When “ ” is flashing, press “ ” button. The display shows “ ” for Tuesday.
Press “ ” button to enter the programming of the day.
4. Repeat the time settings as per above and press “ ” to finish programming. The heater now will display
current room temperature and is on.

Instruction for time off function in Manual Mode
This is to be used when you want the heater to automatically turn off at a designated future time.
Please note: You will need to set up the time to be able to use this function, please see Initial Setup Instructions
(hour/minute)
For example: the current time set is 21:00 set 24:00, the machine will shut down after 3 hours.
For example: the current 21:00 set 06:00, the machine will be turned off after 9 hours.
When the heater is on manual mode, press the “ ” button for 2 seconds to enter the timing setting. The display
show “ ”. Hour flashes. Press the “ ” or “ ” button to set the hour you want it to turn off.
After the hour is set, press “ ” button to confirm and the heater will beep and the display shows “ ”.
Minute flashes. Press the “ ” or “ ” button to set the minutes. Press “ ” to confirm after setting.
At this time, the “ ” light is on. The display shows the set off time and the current temperature set.
www.theheatingcompany.co.nz
0800 432 846
Other manuals for CA900FE
1
This manual suits for next models
2
Table of contents
Other Redwood Heater manuals
Popular Heater manuals by other brands

Profile
Profile ANTARES instructions

Thermoscreens
Thermoscreens TX36AFAL006D INSTALLATION, OPERATION & MAINTAINANCE ORIGINAL INSTRUCTIONS

MILL
MILL SG2000MEC Assembly and instruction manual

NuTone
NuTone 9192NT installation instructions

Soleus Air
Soleus Air HM5-15-30 operating instructions

Raider
Raider RD-EFH11 user manual