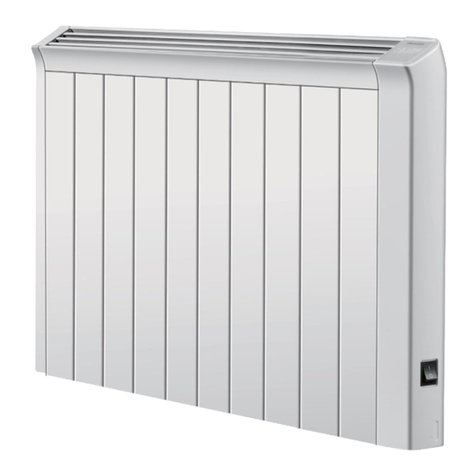
Redwood CA900FI Instruction sheet

P R O DUC T
INSTRUCTIONS
Models: CA900FI CA180FI CA240FI

Thank you for purchasing this Redwood Heater.
Please register your warranty at https://www.theheatingcompany.co.nz/warranty-registration/
Before the installation and operation, please read the Installation and operation manual
carefully.
Any misuse of the Instructions may bring about personal injury or property damage. Please
keep this manual for your future reference.
The Heater is covered by a 2 year manufacturers guarantee.
For further information or technical advice please contact:
www.theheatingcompany.co.nz
PH: 0800 432 846
The following are not included in the warranty service:
•If the heater is damaged because of the customer’s incorrect operation, poor storage and
maintenance.
•The heater has been repaired by people not designated by our company.
•The warranty period has expired.
•Without providing purchase receipt or proof of purchase.
Safety requirements:
In order to avoid any fire, electric shock or injury risk, please read and comply with the following
instructions. Our quality assurance doesn’t cover damage caused by non-compliance with this
operation manual.
1. The appliance must be connected to power with the voltage equivalent to rated voltage on
the label of the electrical appliance.
2. Never use the heater near gas, explosives or inflammables.
3. Warning: in order to avoid overheating , don't cover the heater with clothes, blankets, etc.
4. When operating the heater, the surface temperature will rise.
5. This product should not be used by people (including children) who are physically or
6. mentally impaired or lack experience and knowledge, unless they are supervised or
7. instructed by the person responsible for their safety.
8. Please supervise the children not to play with the appliance.
9. Do not place the appliance under the plug or socket.
10.Any defective electrical appliances should be disconnected immediately and returned
11.to the sales agent.
12.If the supply cord is damaged, it must be replaced by the manufacturer, service
13.agent or qualified person in order to avoid hazard.
14.Before any maintenance or cleaning of the product please ensure the appliance is
disconnected from the power.
15.The appliance is not designed to be used in bathrooms, shower rooms or wet areas.
16.Make sure the device is installed horizontally. Angle error is within +/-5 degrees.
17.The appliance can only be used indoors.

Accessory Packaging List
Please check everything is in the package. Please pay attention to the parts in the sides of the
polystyrene package.
•4 x tapping screws ( ST5X40) –To fix U wall brackets.
•2 x Tapping screws (ST4X10) –To fix U wall brackets.
•4 x Screw expansions –To be put into the mounting holes.
•4 x U wall brackets –To install the heater.
•1 x Wall screw template.
Note: This is a single brown piece of cardboard. Confirm wall position, pin to the wall and
mark screw positions)
Installation Location:
1. This appliance can be wall-mounted or free-standing.
2. Do not install this product near furniture, curtains or any other appliances.
3. The installation height needs to be more than 20cm from the floor.
1. Display Screen
4. On/Off Switch
7. Room Temperature Sensor
2. Display Frame
5. Rear Panel
8. Front Panel
3. Bracket Fixing Position
6. Panel
9. Top Grill
Model
Nominal Voltage
Rated Frequency
Rated Current
Number of Fins
CA900FI
240V
50Hz
4.1A
6
CA180FI
240V
50Hz
8.2A
10
CA240FI
240V
50Hz
10A
14

Installation Method
1. Check the installation accessories according to the attached list.
2. Select the installation wall according to requirements of installation size.
3. It is strongly recommended that you use a level to ensure the heater straight.
4.Take out the installation cardboard template provided.
5. Mark your drill holes on the wall according to the template hole positions. Then drill
the hole size dia. 8 mm x length 60mm.
6.If there is no solid wall frame available, put the plastic expansion screws provided
into the holes drilled in the wall. (Always try and fix one end to solid wall frame)
7.Install the U-shaped brackets onto the wall with the ST5X60 tapping screws
provided.
8. Align the loop hooks on the back of the heater with the U bracket on the wall.
9.Align the loop hooks to U brackets
10.Screw the 2 ST4X10 screws provided to the top of the U bracket to secure.
11.Plug in 3 pin plug into the wall socket. (Note: Hidden power supply can be completed by
registered electrician).
The wall mounting of the heater is now complete.
On the right-hand side of the heater, locate the black power isolation switch. Push to turn on the
power. The heater is now ON.

LCD panel description
Display symbol description:
When the lock symbol is displayed, it indicates that the device is locked. In
this state, all buttons are invalid. To unlock the heater press and hold “ -“
button & input the 4-digit pin number (if the 4 digit password set).
When the symbol is blinking, it indicates the heater searching for WIFI
connection. When the symbol is on all the time, it indicates that the device has
been successfully connected to WIFI connection.
When the symbol light is on, the heater on weekly programming model.
If the symbol light is off, the heater on manual mode.
The heater is operating on timer (manual mode).
Heating status.
Network
indicator
Programme
Full heat
Digital display
Half heat
Set/ Enter Plus Minus
Power
Lock
Timer
Programme

Key function description:
Enter
Press to switch between manual / weekly
programming.
Plus
Increase the temperature (When it’s on manual mode)
Minus
Decrease the temperature (When it’s on manual mode)
Power
Power ON/ OFF
Manual Mode
If you wish to continue on manual mode, please press “enter” till symbol is off on the display.
When the heater is operating in manual mode, the heating elements (heating status) will be on till the
room temperature reach the desired set temperature. You can set the desired temperature by pressing
“plus” & “minus” buttons. When the room temperature reach to set temperature the heating elements
(heating status) will switch off itself and will turn itself on again if the room temperature drops below
the set temperature.
Instruction for time off function in Manual Mode
This is to be used when you want the heater to automatically turn off at a designated future time.
Please note: You will need to set up the time to be able to use this function, please see Initial Setup
Instructions (hour/minute)
For example: the current time set is 21:00 set 24:00, the machine will shut down after 3 hours.
For example: the current 21:00 set 06:00, the machine will be turned off after 9 hours.

When the heater is on manual mode, press the “ ” button for 5 seconds to enter the timing setting.
The display show “ ”. Hour flashes. Press the “ ” or “ ” button to set the hour you want
it to turn off.
After the hour is set, press “ ” button to confirm and the heater will beep and the display shows “
”. Minute flashes. Press the “ ” or “ ” button to set the minutes. Press “ ” to confirm
after setting.
At this time, the “ ” light is on. The display shows the set off time and the current temperature set.
Password note
When the heater leaves the factory, it can be unlocked directly without a password.
If you wish to set a password, you can set this on the APP and then unlock the heater. You must
enter a password.
If you wish to cancel the password this can only be carried out on the APP.
Weekly programming and manual mode switching:
When the power is short press “ ” button to switch between the manual & weekly
programming settings.
Restore factory settings:
If you wish to reset the heater to factory settings, please press power “ ” button
and turn off the heater then press & hold enter “ ” & minus“ ” buttons
simultaneously for 3 seconds. All the lights on the display screen will be on and will
flash for 2 times and then go out, indicating that the factory settings are restored
successfully.

The description of how to add the heater to mobile App
Search as “REDWOOD HOME” to find the mobile in App stores. The App is available to download on Apple app
store (IOS version) & Google play store (Android version).
Make sure your mobile device is connected to the 2.4 GHz WIFI network prior adding heaters into the mobile
app.
1. Registration.
2. Sign In.
Please enter your email address and click on “send
verification code” to get send the 6-digit verification
code to your email address to continue the
registration process.
Once you get the verification code, please enter it
on verification code box and enter your “own
password” to complete the registering process.
Note: Please check your spam folder, if you don’t
receive verification code within 30 seconds.
Please enter your email and password to sign in.

3. Adding device.
4. Configure the WIFI network.
Please click on “+” to add the
devices and follow the
instructions.
Important: Your mobile device must be connected to WIFI
connection and it has to be 2.4 GHz WIFI connection prior you
follow this step.
Your mobile currently connected WIFI network name will be
appeared on the screen therefore you would only require entering
the WIFI password and go to the next step.

5. Scanning devices
6. Editing device details
Once the device is discovered, please click on little circle to select
the discovered device and press “Next” to continue the process.
Final step: Feel free to edit & customized the device details before
complete device adding process.
Other manuals for CA900FI
2
This manual suits for next models
2
Table of contents
Other Redwood Heater manuals
Popular Heater manuals by other brands

Suntec Wellness
Suntec Wellness Klimatronic Heat Flow 2000 manual

Frico
Frico Infralu IHAL Series Original instructions

Olimpia splendid
Olimpia splendid CALDO UP Instructions for installation, use and maintenance

Empire Heating Systems
Empire Heating Systems DV-25-4SG Installation instructions and owner's manual

simatherm
simatherm IH 210 Instructions for use

Comfee
Comfee NTH20-17BR owner's manual