Reef Factory Dosing pump Application guide

Dosing pump device manual
1/16
Thank you for purchasing our device
Dosing pump
Dosing pump device manual
2/16
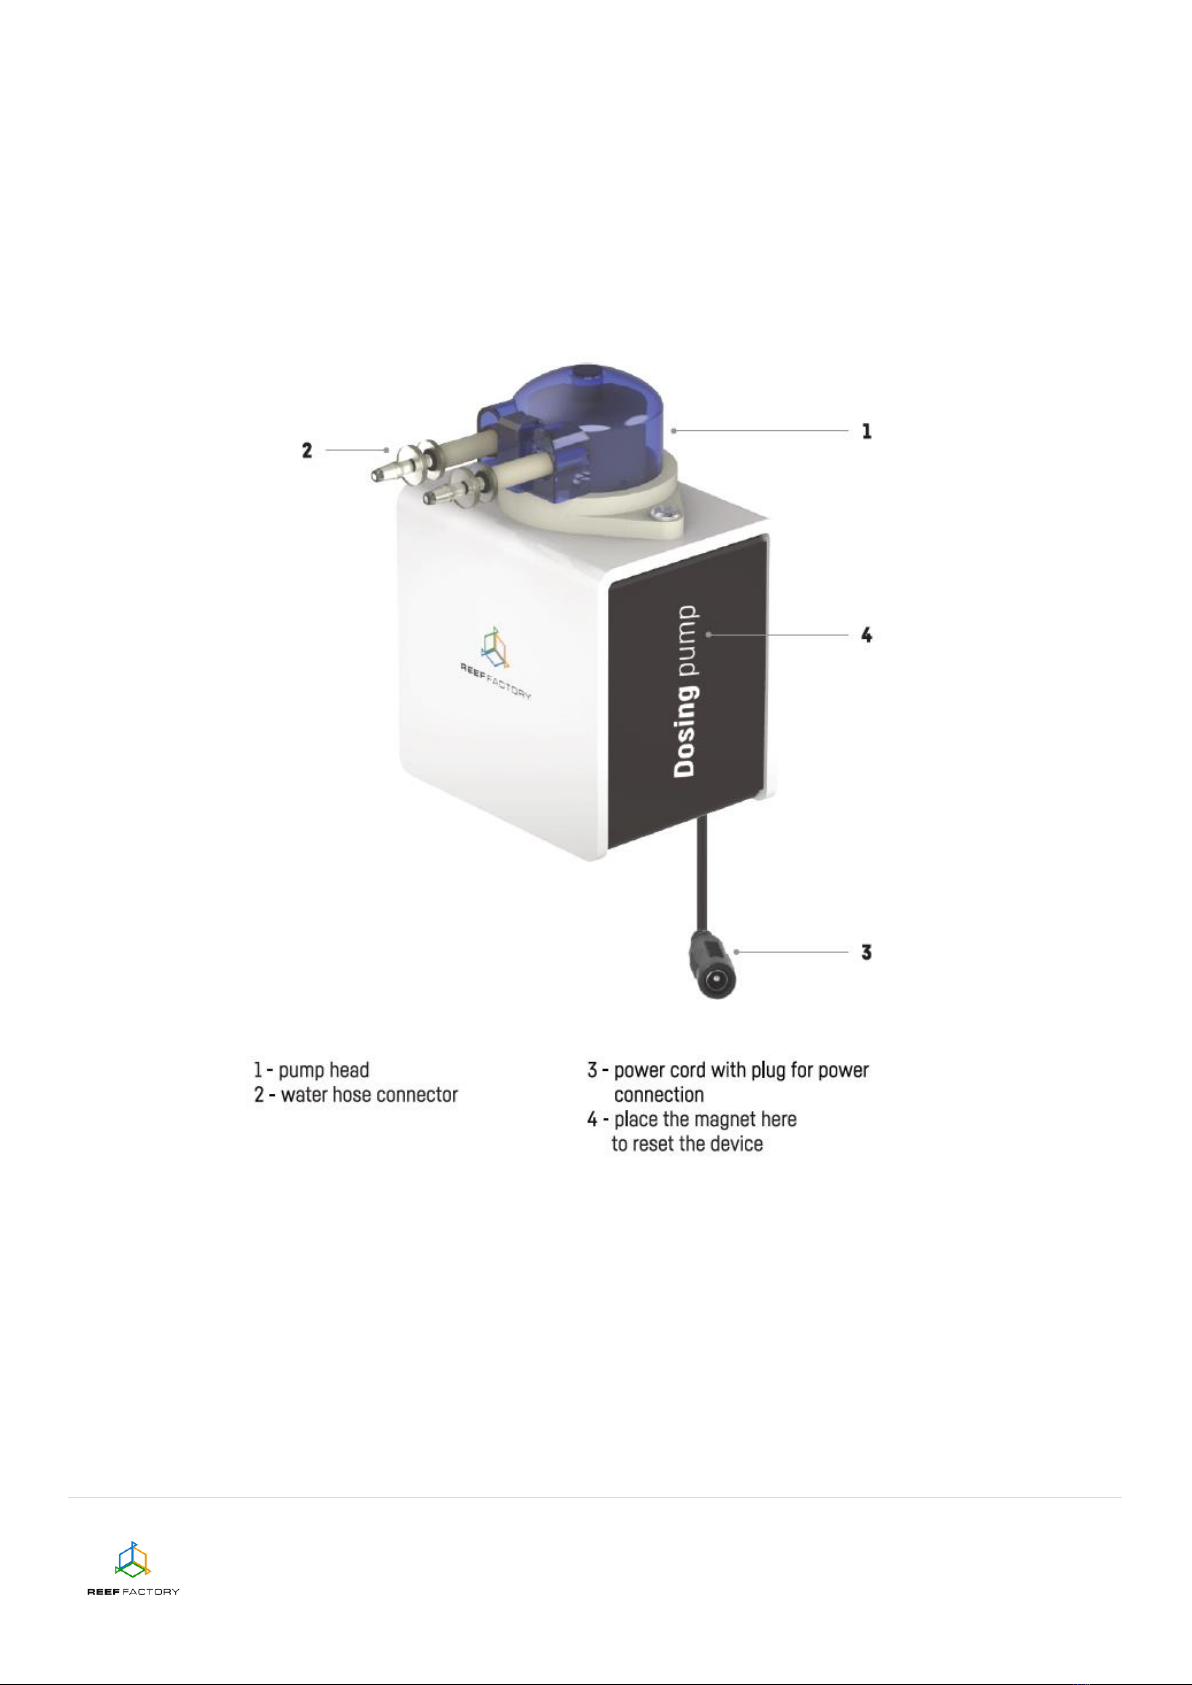
Apart from the Dosing pump device itself, the package contains the following elements: a pump, a
pump cylinder head, a 12 V power supply unit, a magnet that can be used to reset the device, an
abbreviated manual and a silicone hose for dosing liquids. In order to set up the device correctly,
follow the steps below.
1. See the figures below to learn how to connect the peripherals to the Dosing pump device
correctly. Notice the designations of individual elements, so as not to confuse them while
connecting.
2. Install the dosing head on the pump, cut the silicone hoses to appropriate length, remove the
connector guards from the pump cylinder head and then connect the hoses to the connectors.
Place the ends of silicone hoses in the tank with a liquid to be dosed and in the aquarium
tank.
CAUTION: check whether the pump flow direction is correct, that is whether the liquid
is pumped to the aquarium and not the other way around.
3. After performing these actions, place the pump in a safe location in a convenient position (the
pump may operate in any position) and connect the power supply using a dedicated 12 V
power supply unit.
Dosing pump device manual
3/16
NOTE: the dedicated power supply unit has a different supply voltage than our other
products and it must not be replaced by another power supply unit. If you use a power
supply unit from one of our other devices, the pump may not operate correctly or
become permanently damaged.
4. The device can be set up via a browser on a computer, laptop, tablet or smartphone. To do
so, you’ll first need to view the list of Wi-Fi networks available on the device. Then connect to
the network with the name corresponding to the serial number of your device, in accordance
with the following pattern: RFDPXXXXXXXXXXXX. Our device is compatible with 2.4 GHz
networks.
To log in, enter the following password:
reeffactory
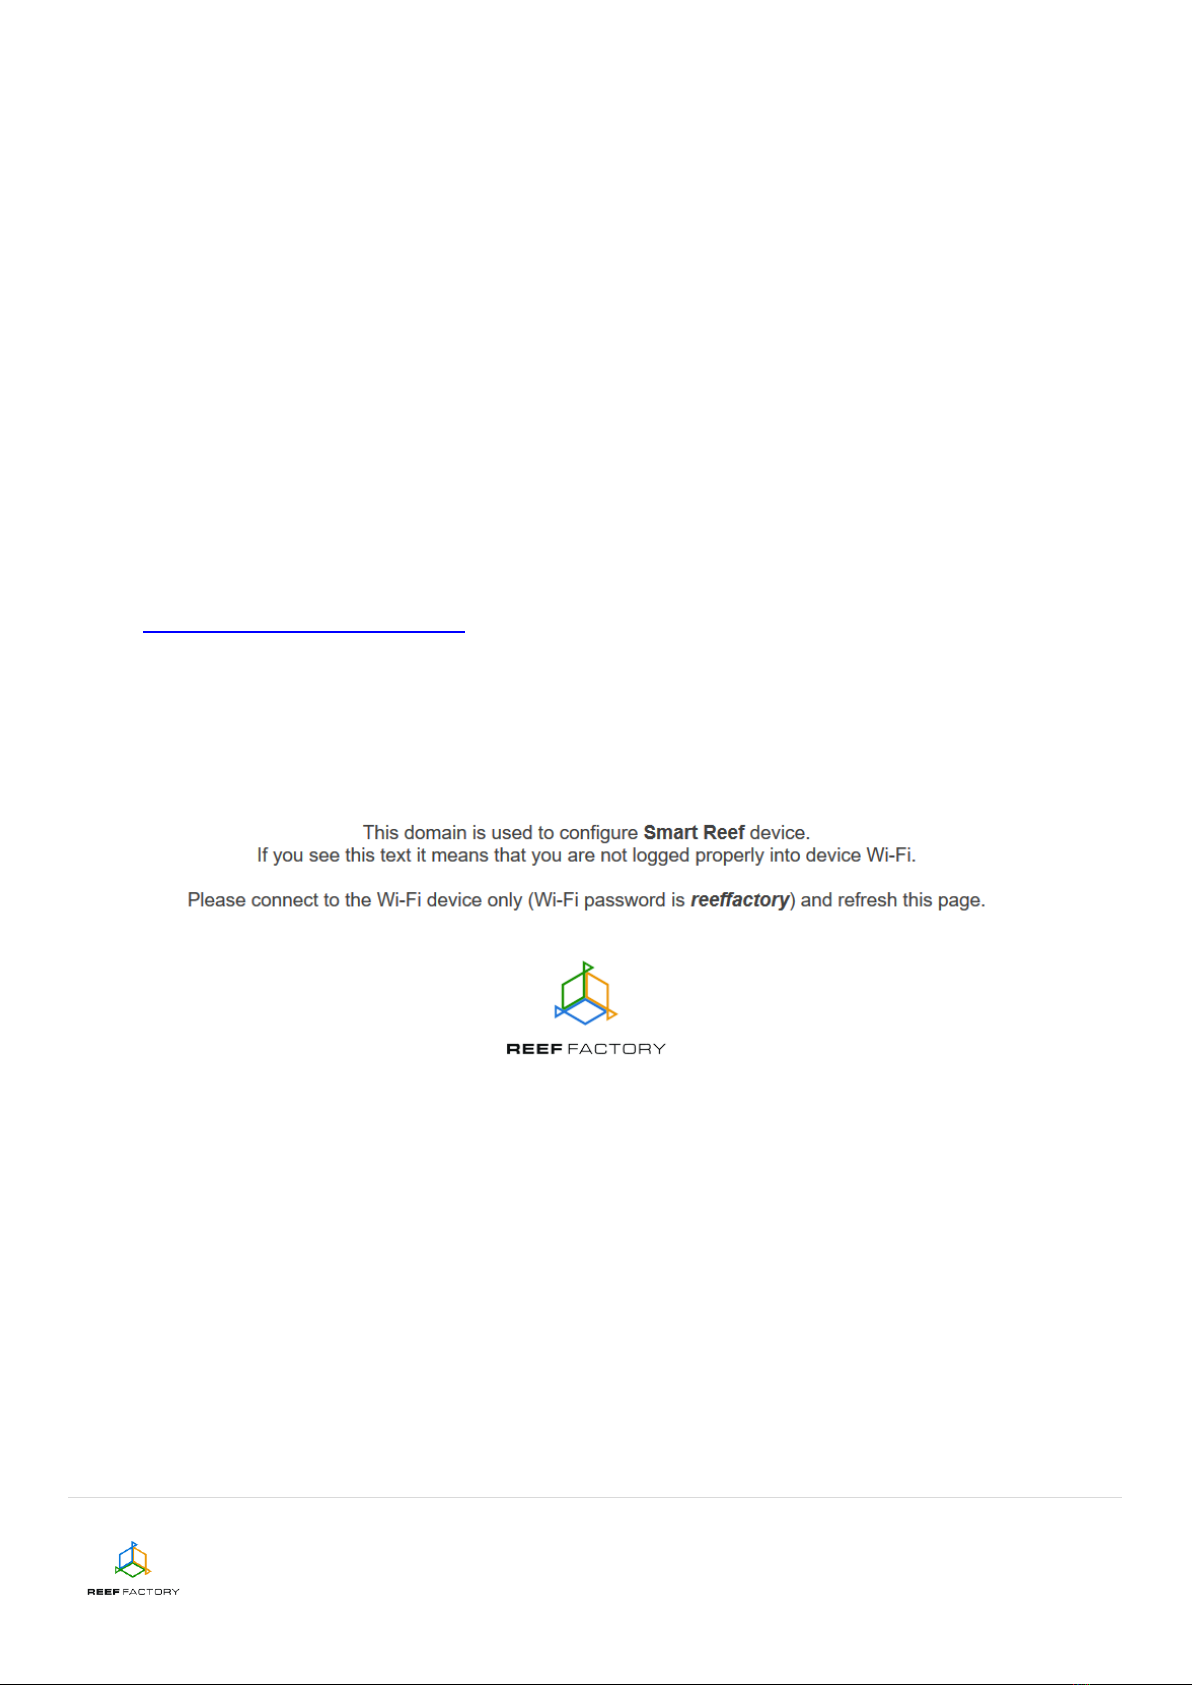
5. Open an Internet browser on the same device and type the following address in the “website
address” field:
www.dosingpump.io
If you entered the address correctly and you see the following message, it means that a
connection with the device couldn’t be established, and the connection with your home
Internet network (wired or wireless) is still active.
Try to reconnect to the device and repeat the steps described above.
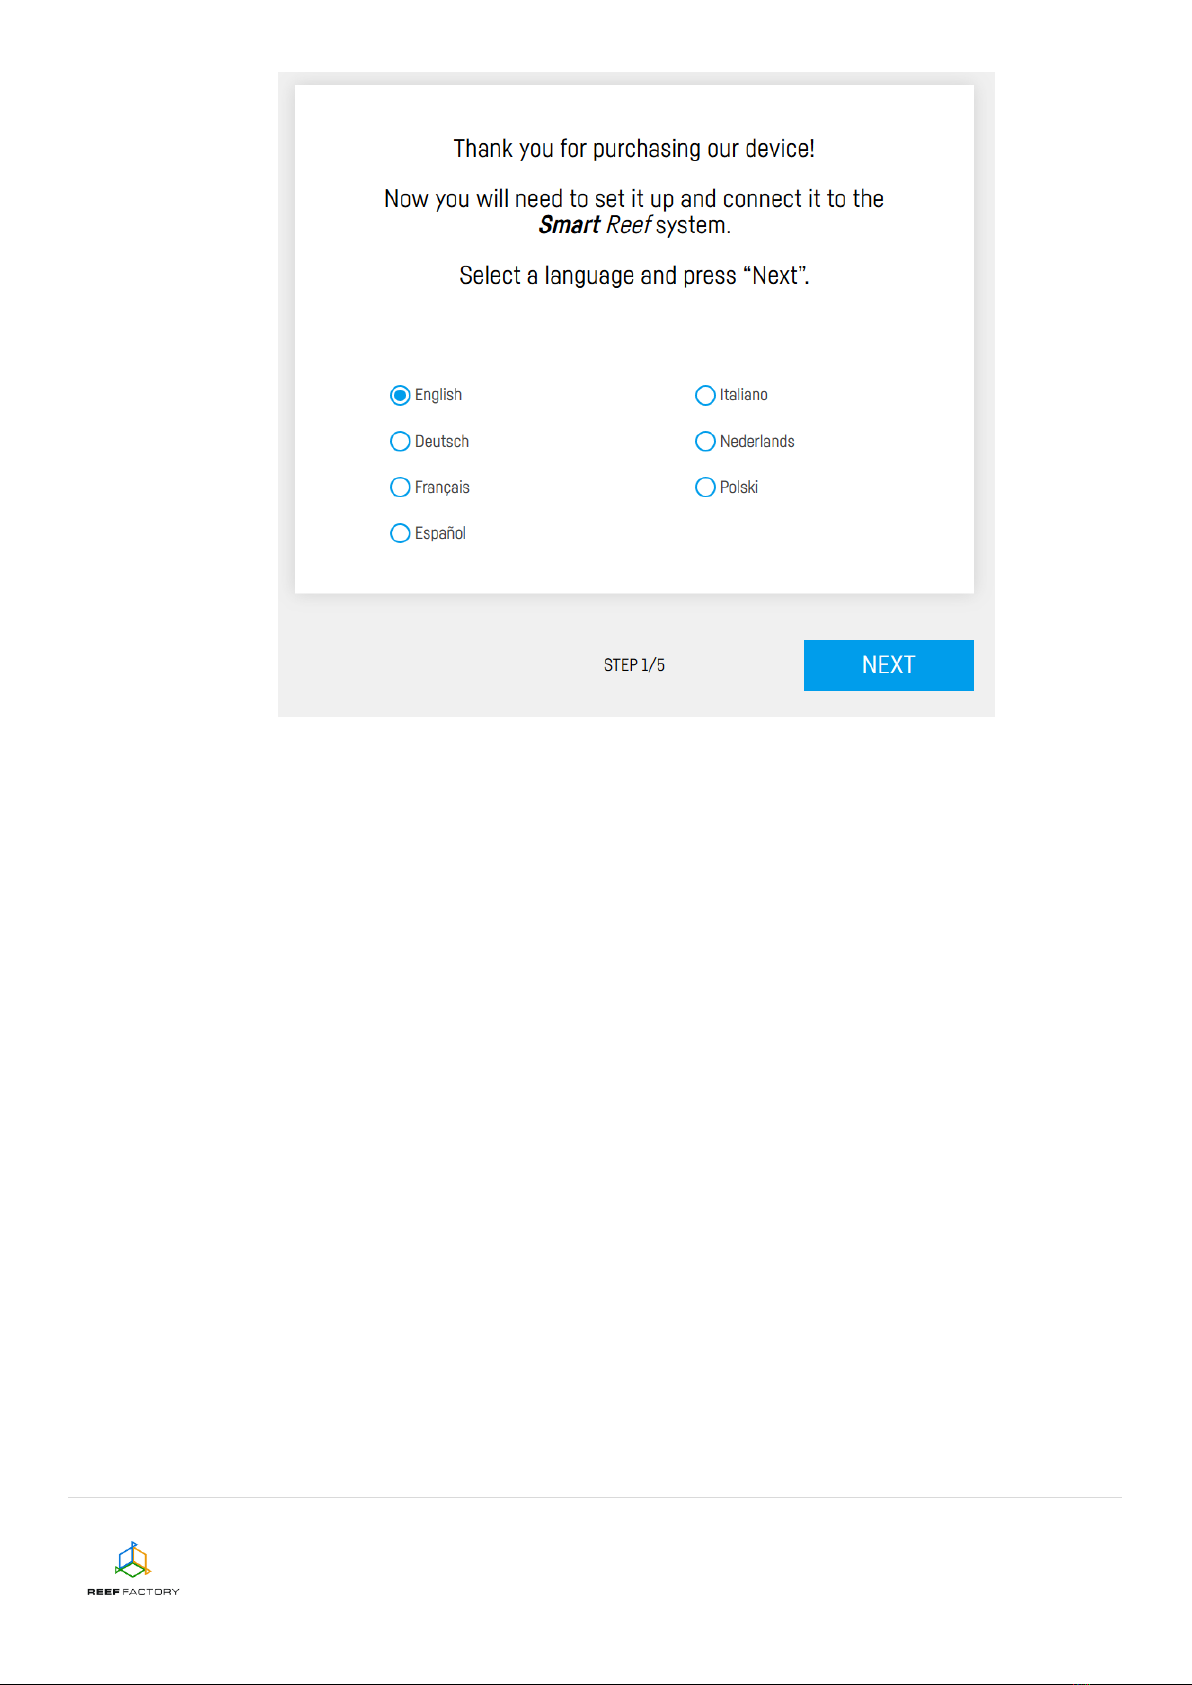
Set up your device in five simple steps.
Step one - choose the language you want to use when operating the device.
Dosing pump device manual
4/16
Dosing pump device manual
5/16
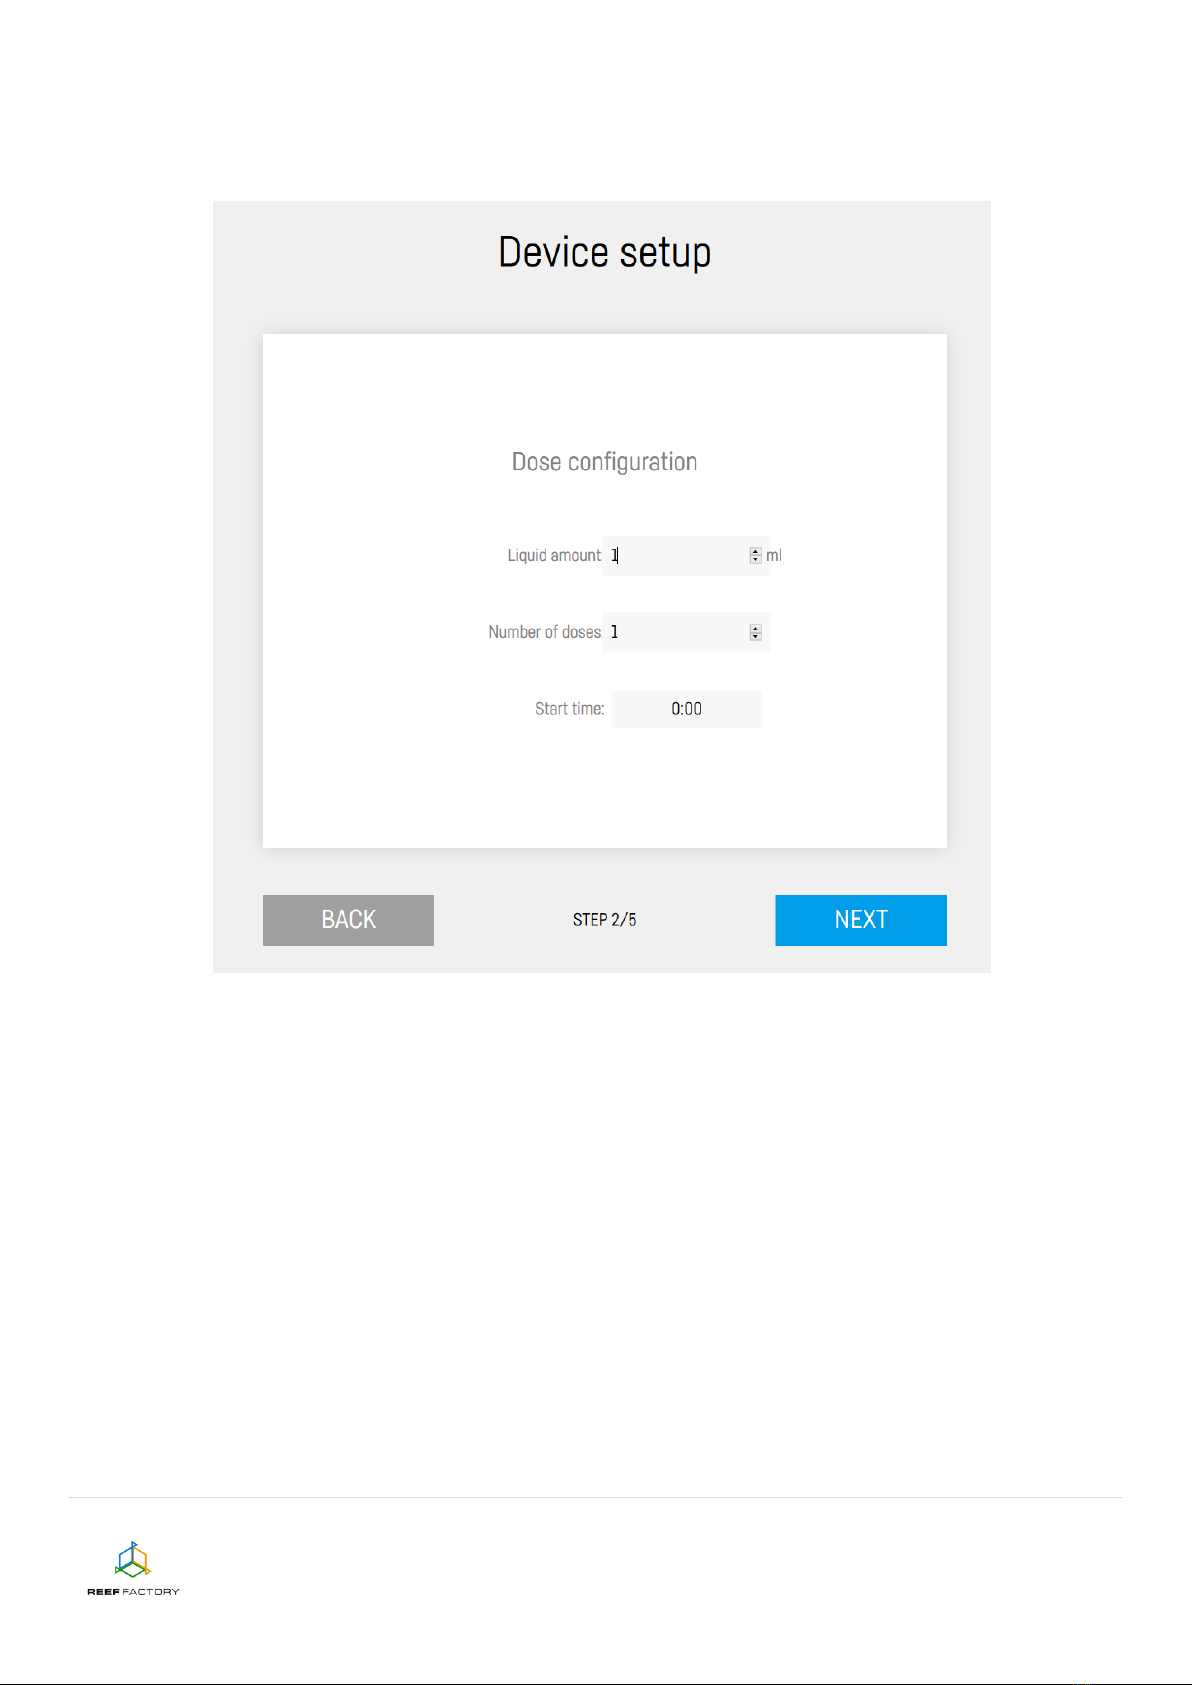
Step two - set the amount of a selected liquid to be dosed during a day, the number of dosing cycles
and the hour of the first dosing. Using this information, the pump will automatically calculate the size
and frequency of doses.

Dosing pump device manual
6/16
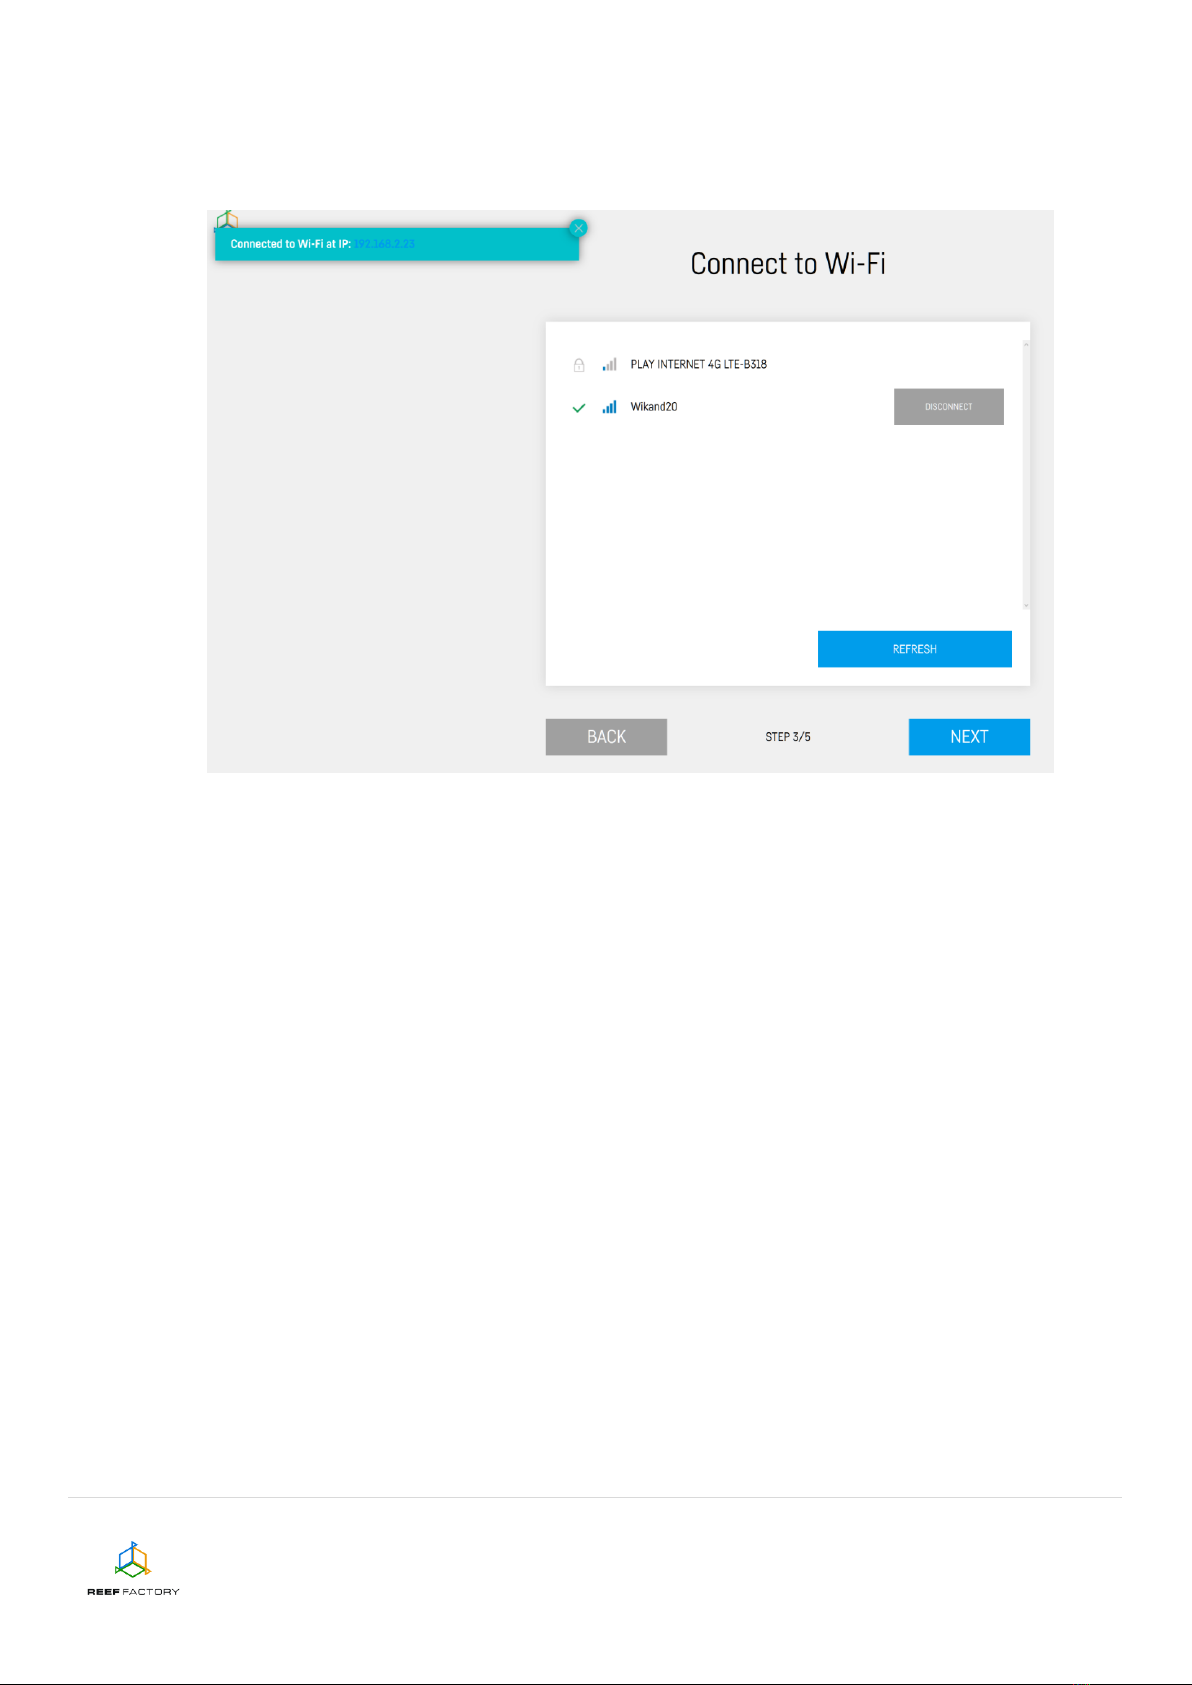
Step three - connect the device to your home Wi-Fi network. If the network is secured, enter the
password that protects your home network against unauthorized access.
If the device cannot connect to your home Wi-Fi network at first, repeat the procedure. Successful
connection may depend on the type of network device you use and its manufacturer. The signal of
your wireless network should be as strong as possible. Remember that in order to enable
communication with the Smart Reef system, the network device which is connected to Dosing pump
needs to have Internet access.
Dosing pump device manual
7/16
When the Dosing pump device successfully connects to your Wi-Fi network, its IP number will
appear in the upper left corner of the screen. The appearance of the IP number means that
everything is alright.

Dosing pump device manual
8/16
Step four - create a free Smart Reef account, by pressing the “Create a free account” button. Please
note that in order to do so, you will need to connect to the wireless Internet network via your home
Wi-Fi router.
Your account password should be appropriately obscure and difficult to crack.
Connecting the device to your Smart Reef account will enable you to operate the device remotely,
control the water purity and use additional functionalities. If you already have a Smart Reef account,
enter your login data to add your new device. If you don’t need to manage your device remotely, you
may ignore this step. However, by doing so you will miss out on several additional features, such as
access to device updates.

Dosing pump device manual
9/16
Step five - congratulations, you have successfully set up your Dosing pump device.
Dosing pump device manual
10/16
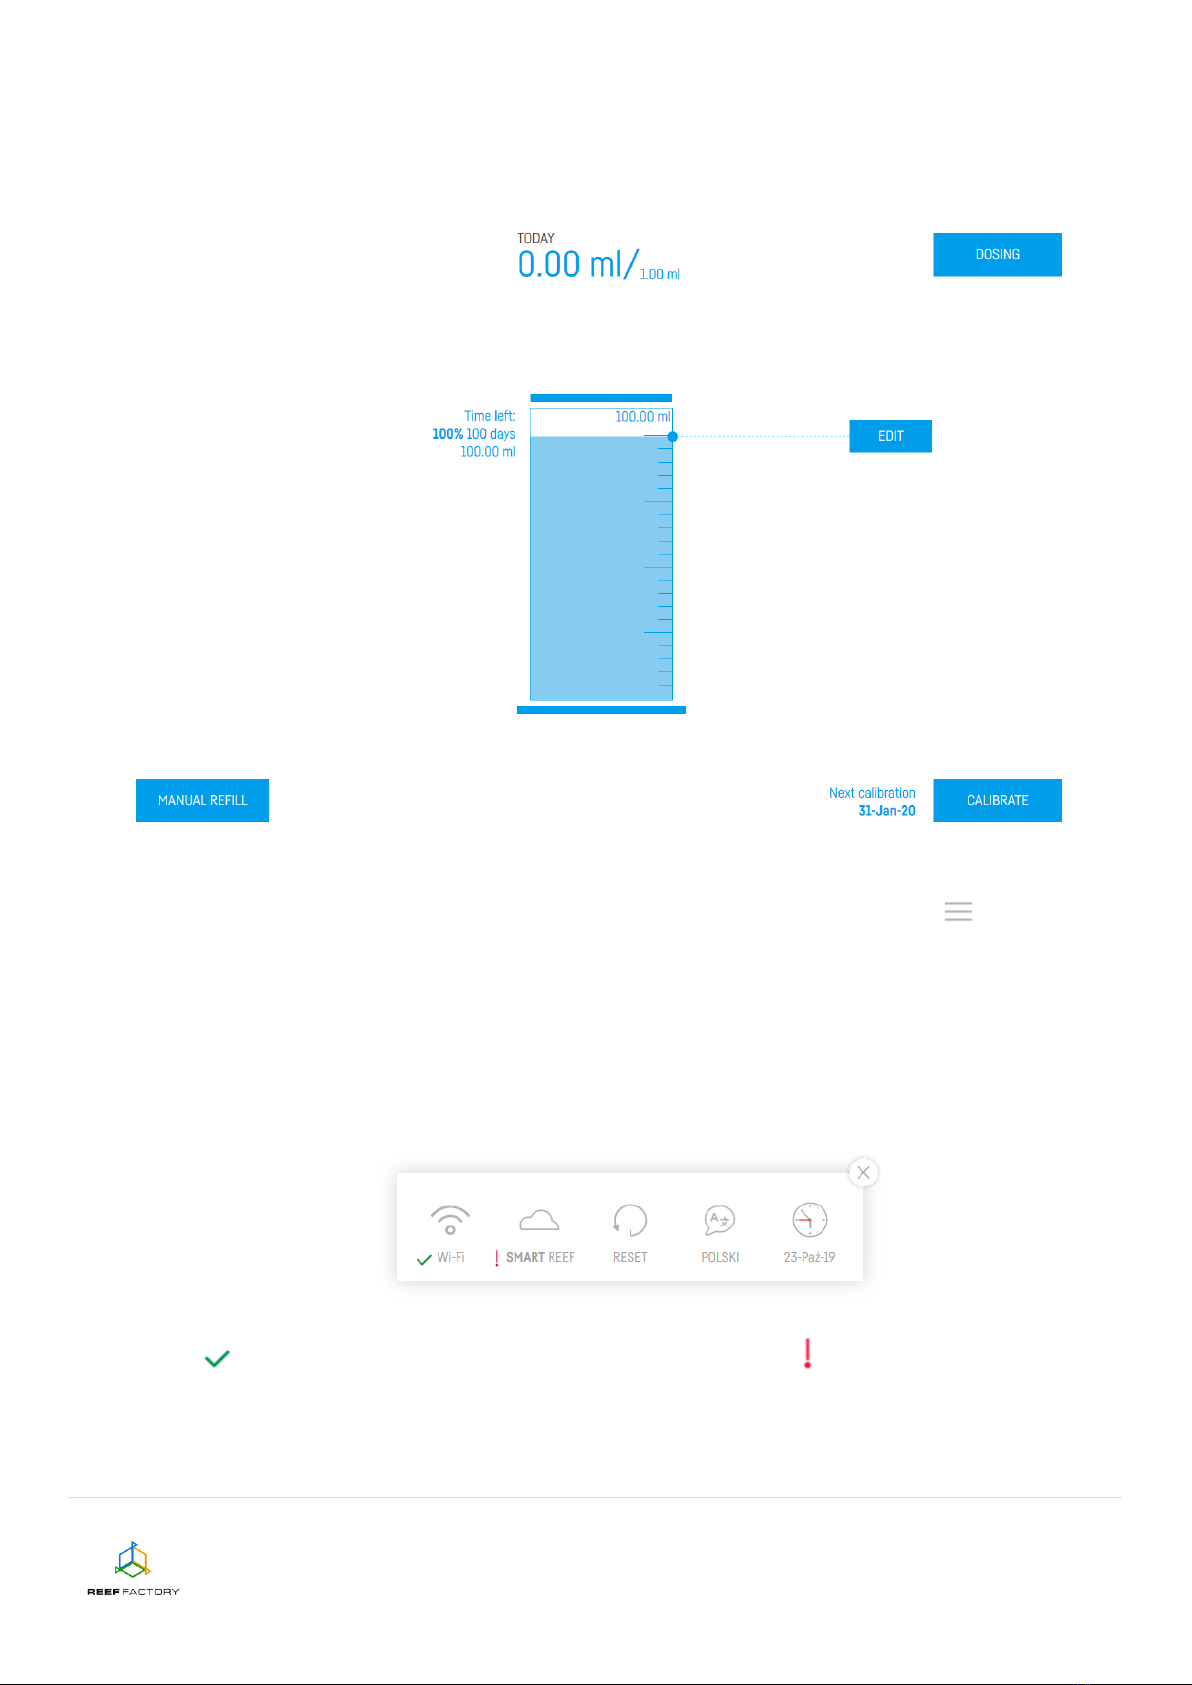
6. After the setup procedure is finished (after pressing the “FINISH” button), the current status
of your device will appear on the screen. Please note that your new smart dosing pump has
some additional features. They will be described in the following sections of this instruction.
7. In the upper right corner of the screen you will find a drop-down menu icon . There you
can introduce any necessary changes or repeat the device setup procedure. It also contains
additional functions, including options for Wi-Fi network management, device network
password, which protects your device against any unauthorized remote access, Smart Reef
account management, time and date setting, language selection and the possibility to restore
your device to default settings. Moreover, the icons show the current status of connection to
your wireless network and to the Smart Reef system.
The symbol means that the connection is OK, while the symbol means that there is
no connection.
Table of contents
Other Reef Factory Water Pump manuals

Popular Water Pump manuals by other brands


Sykes AmeriPumps
Sykes AmeriPumps GP100M Operation and maintenance instructions

DUROMAX
DUROMAX XP WX Series user manual

BRINKMANN PUMPS
BRINKMANN PUMPS SBF550 operating instructions

Franklin Electric
Franklin Electric IPS Installation & operation manual

Xylem
Xylem e-1532 Series instruction manual

Milton Roy
Milton Roy PRIMEROYAL instruction manual