8 Configuration E-BACNET2-V manual, revision B
Upgrading the software version of the unit
1. Power off the unit by removing the power cord.
2. Remove the cover by unscrewing the screws on each side (see photo below).
3. If a SD card is already present, eject it at the right-hand side of the unit by pressing and
then releasing the card. Mail the card back to Regin.
4. Insert the new SD card labeled “E-BACNET2-V 2.0-1-09” or later and firmly press it.
Release pressure once a click is heard.
5. Reattach the power cord and power up the E-BACNET2-V.
6. Immediately after power is turned on, the unit will beep once. The upgrade procedure has
now started.
7. Wait between 30 and 60 seconds and the unit will beep again. The procedure is now
finished, and the E-BACNET2-V unit has been upgraded.
8. If communication with the Corrigo is working, the Ready LED will be lit some 20 seconds
after the beep and the S0/P1 TX and RX LEDs will flash. If no Corrigo is connected, only
the S0/P1 TX led is flashing (about 1 Hz).
9. Power off the E-BACNET-V by removing the power cord.
10. Eject the SD card.
11. Replace the cover.
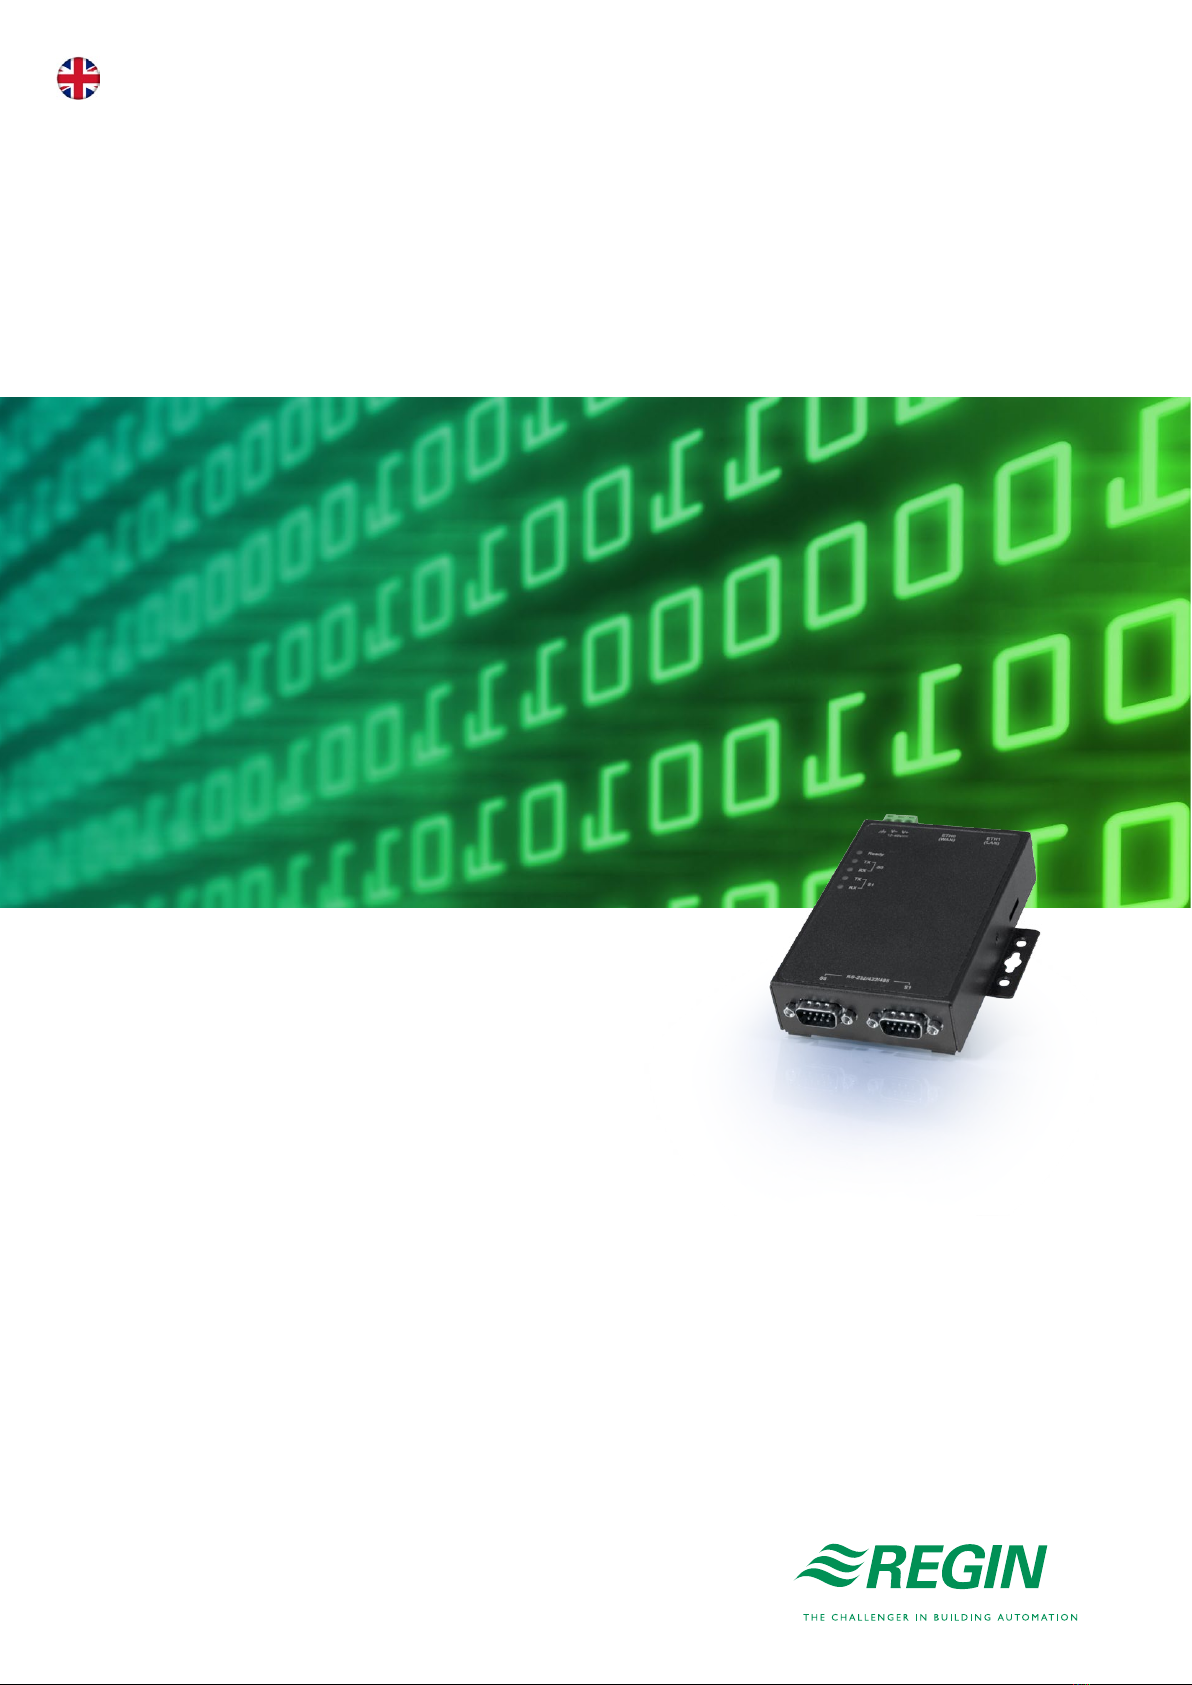
The E-BACNET2-V now has factory default IP settings, but any user configuration, such as
BACnet device ID, location, etc., is left unchanged. Run the E-BACNET2 configuration software to
change IP settings and to verify the firmware version.