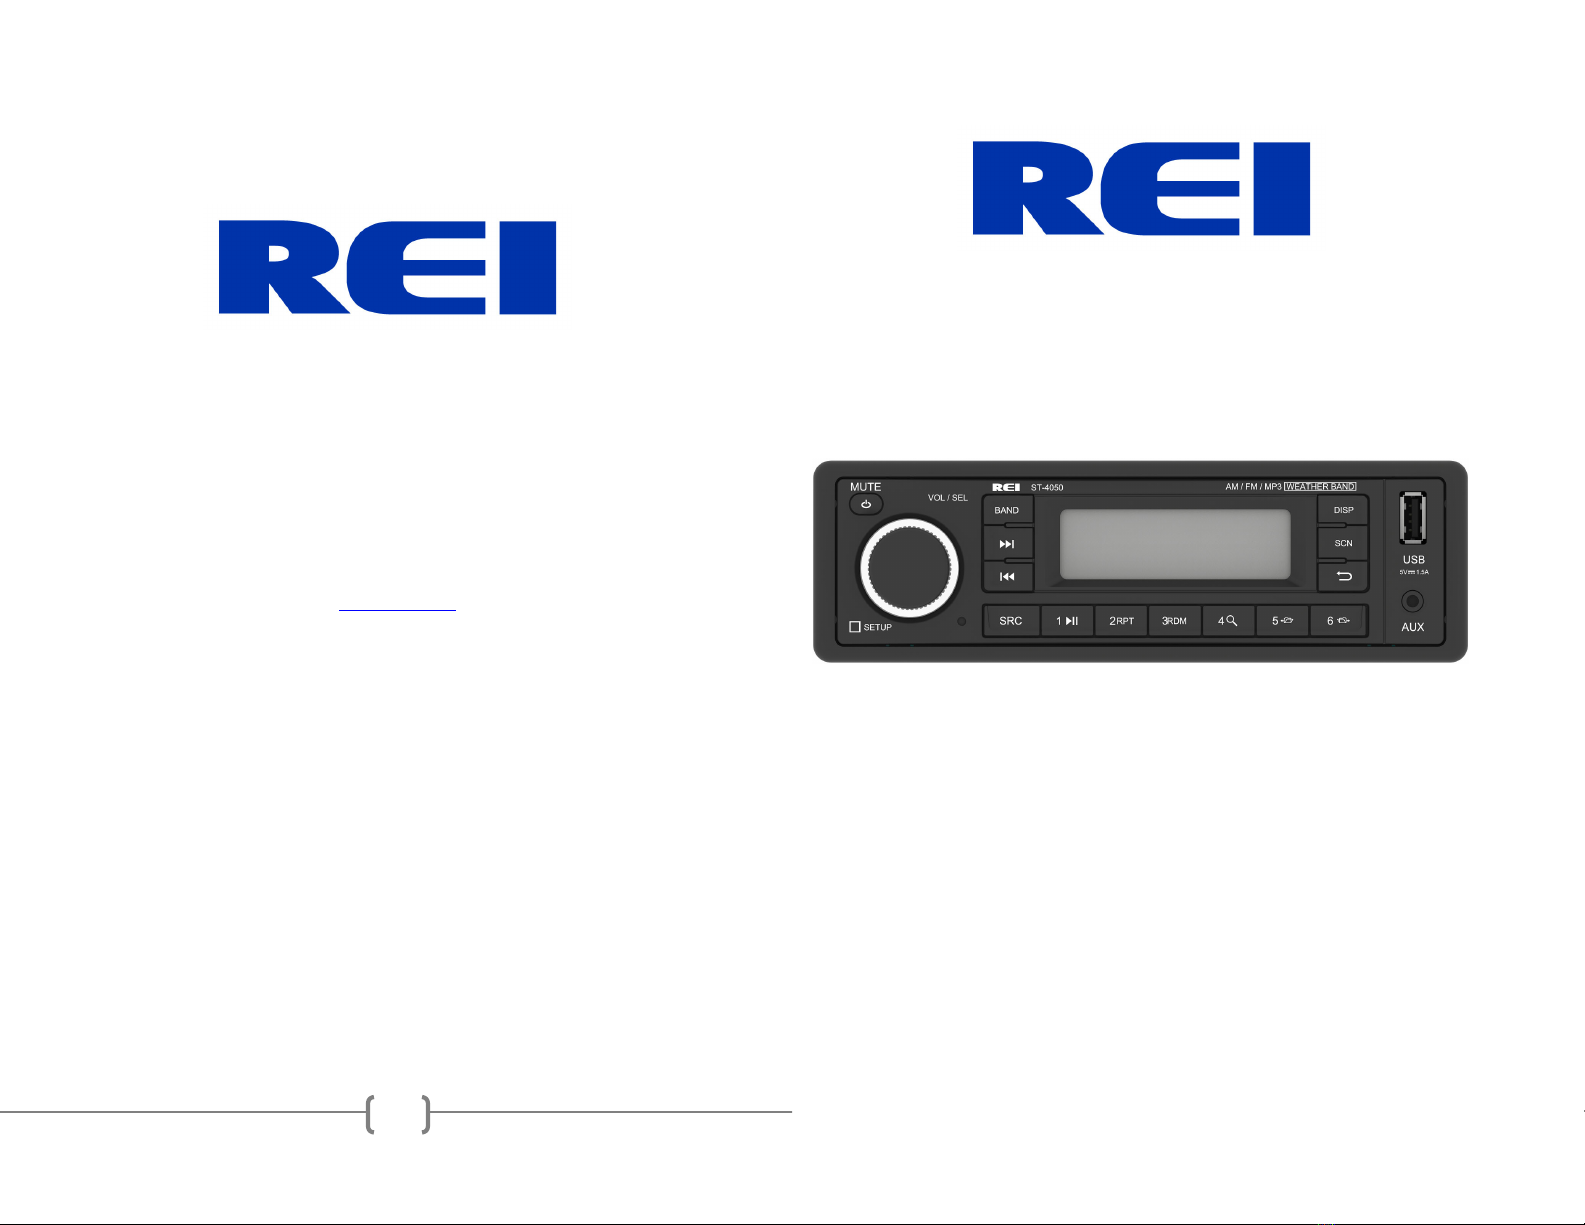
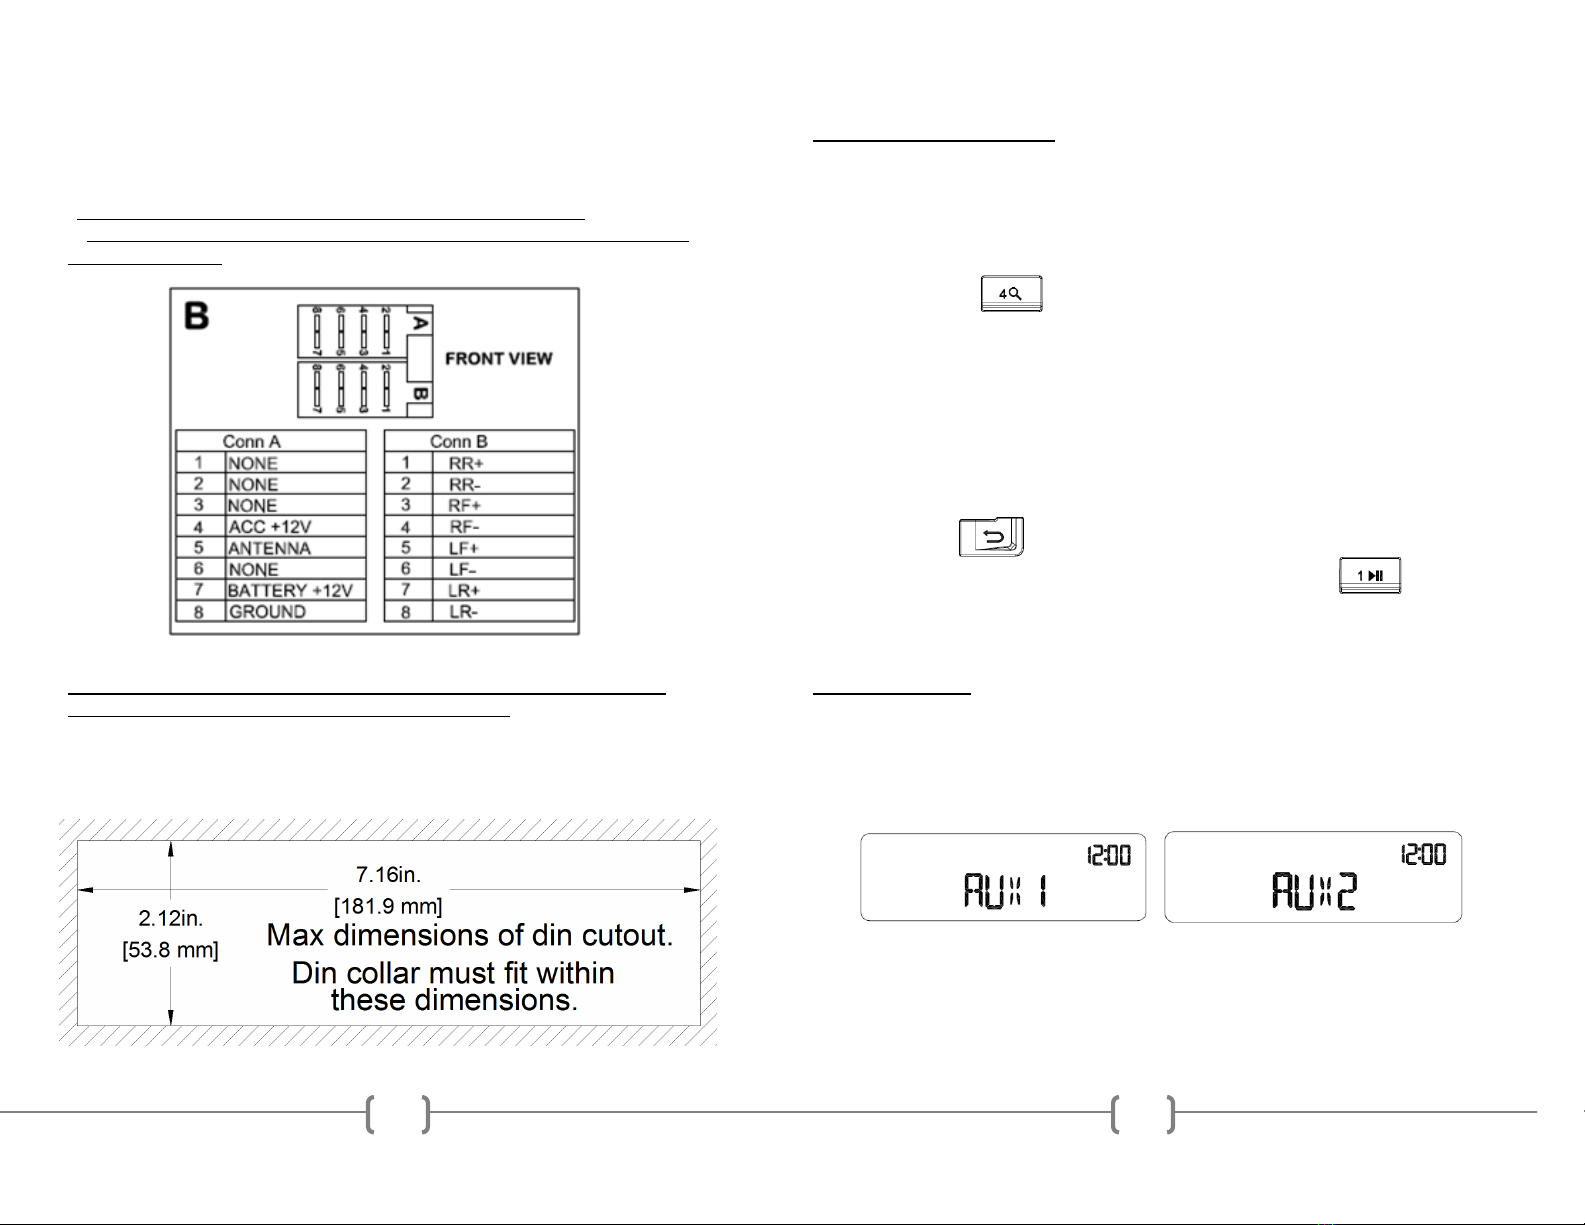
6
WEATHER BAND MODE
NOAA National Weather Radio Broadcasts from over 380 Locations throughout
the U.S. on seven VHF/FM frequencies. Tune to receive continuous weather
information 24 hours a day on one of the following frequencies.
For local station listing see: http://www.nws.noaa.gov/nwr/nwrbro.htm
Press preset 1 to select weather band channel 1 - 162.400MHZ
Press preset 2 to select weather band channel 2 - 162.425MHZ
Press preset 3 to select weather band channel 3 - 162.450MHZ
Press preset 4 to select weather band channel 4 - 162.475MHZ
Press preset 5 to select weather band channel 5 - 162.500MHZ
Press preset 6 to select weather band channel 6 - 162.525MHZ
**Press SEEK UP/DOWN to select weather band channel 7 - 162.550 MHz
SETUP MENU
With the unit ON, press and hold the VOL/SEL button for 2 seconds. LCD will
display MENU. Rotate the VOL/SEL knob to choose the option, then press to make
a selection:
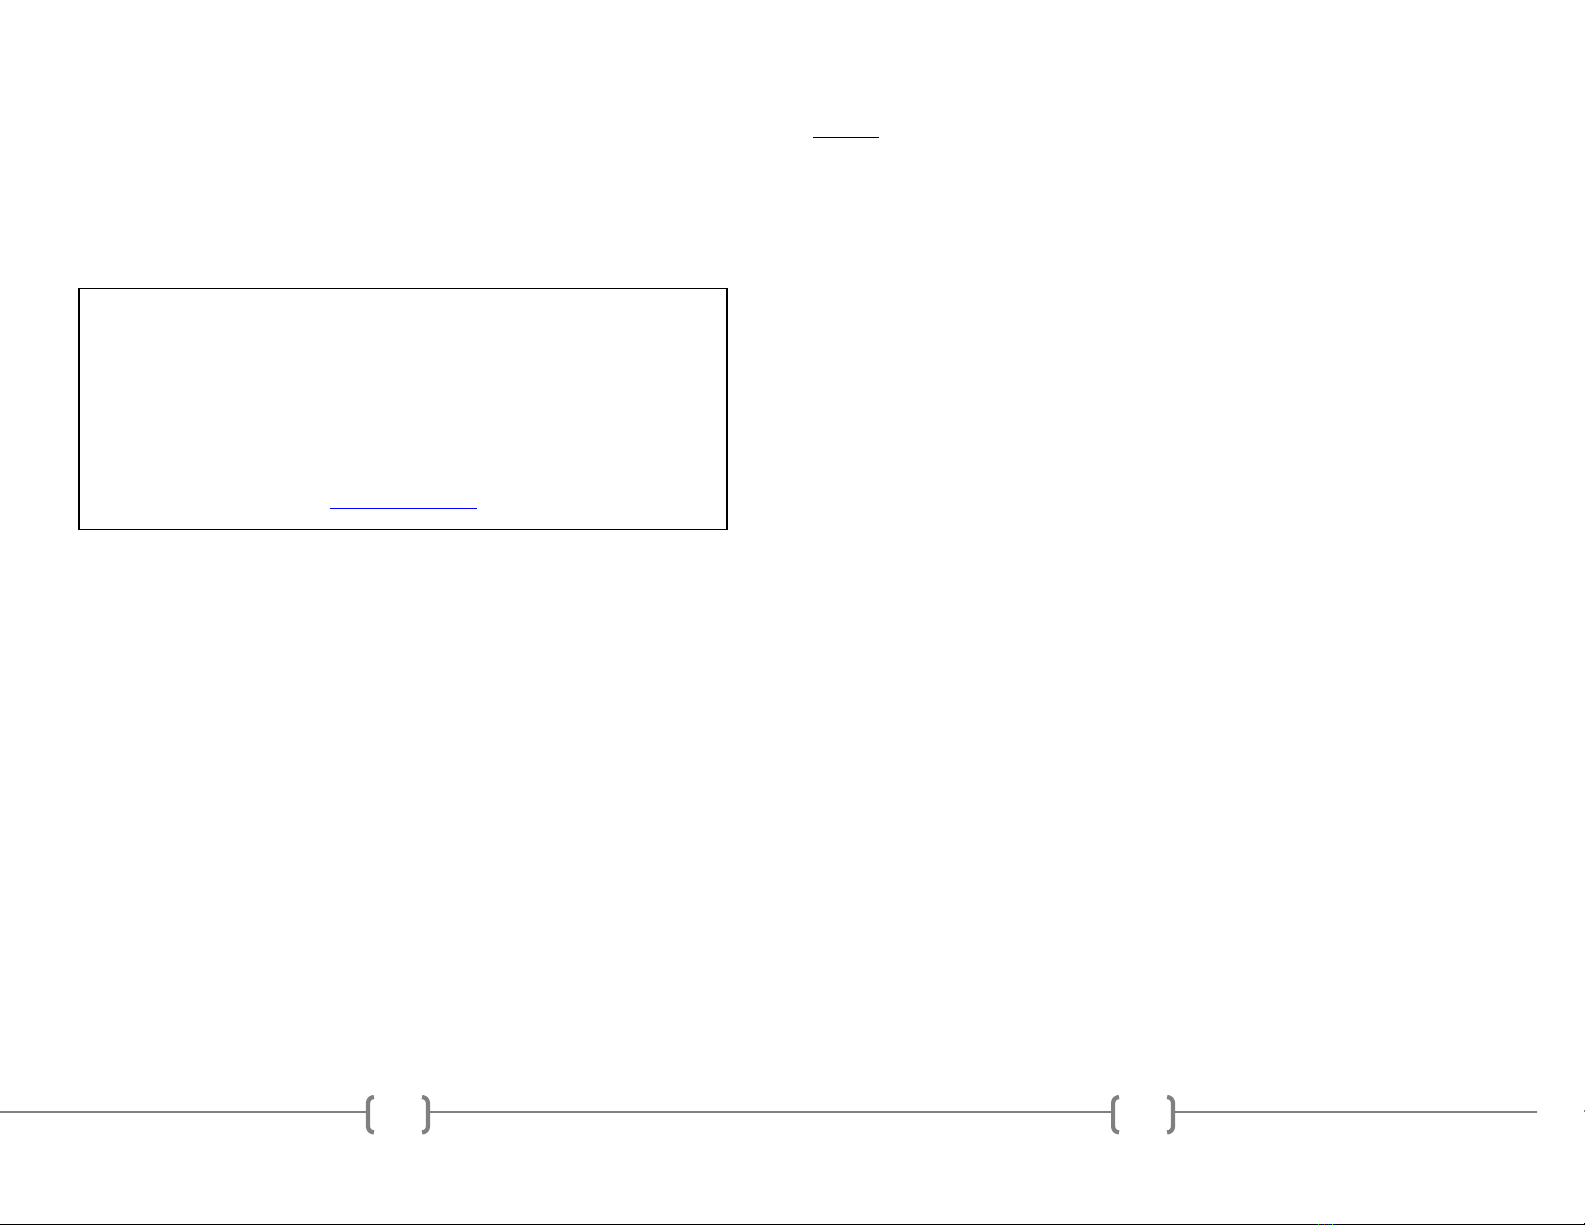
SCROLL ON/OFF
Choose how iPod/iPhone®, and ID3 tag information is displayed on the LCD. With
the scroll set to ON, information is repeated continuously on the front display. When
set to OFF, information is not displayed unless the user presses the DISPLAY button.
LOUD ON/OFF
Choose to turn LOUNDNESS ON or OFF.
RDS ON/OFF
Choose to turn the RDS (Radio Broadcast Data System) Scrolling display ON or OFF.
MIC CARBON/DYNAMIC
The first option is to select a correct PA input based on the microphone type you are
using. Rotate VOL/SEL button to choose type:
DYNAMIC
Microphone does NOT have on on-board volume control. PA volume
control is built into the radio. Key the microphone to make adjustments.
CARBON
Microphone has on on-board volume control. Radio will not control the
volume.
15
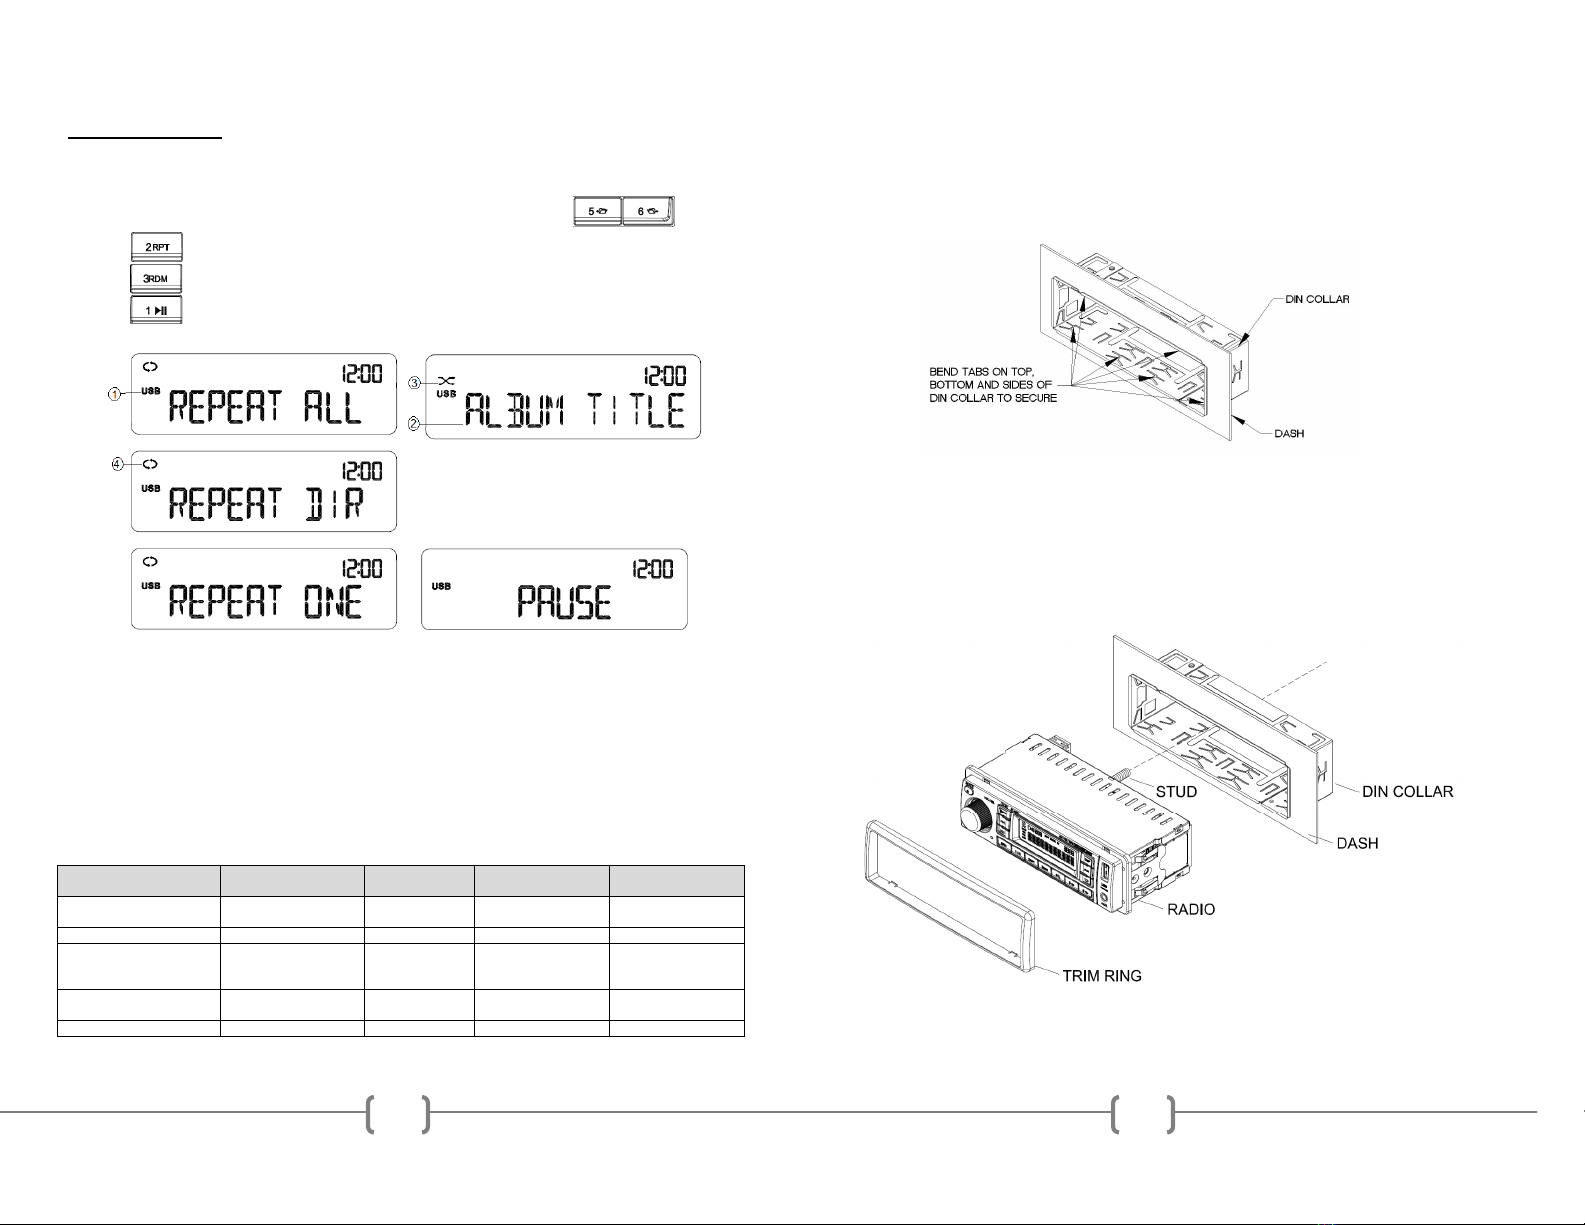
TROUBLE SHOOTING
Problem Cause Solution
Radio will not power up No power to BATTERY wire or blown 10A
main fuse.
Check for both ACC & BATTERY voltage
with Multi-meter, check all fuses.
No sound Speakers not connected; speakers connected
with bad splices; Speakers shorted to ground;
speaker load is not within 4-8 Ω.
Connect speakers to harness; check all
spliced wires; verify speakers not shorted to
chassis; verify total speaker impedance.
Check volume level.
Public Address can NOT be audible over
speakers
PA setting in MENU is wrong; microphone is
pinned wrong; wrong microphone type is used.
Microphone is defective.
Turn the volume up on the microphone or
radio when the LCD display’s MIC; Check
that the correct microphone type is
connected. Check the PA setting’s in the
radio’s menu.
LCD Display says MIC and front controls
are locked
PA system is triggered Remove microphone connection and verify
correct pinning and or type, replace
microphone. Reset the unit.
Cannot tune radio stations The antenna cable is not connected. The signal
is too weak. The radio is in the wrong
frequency steps.
Connect the antenna cable. Check the
frequency spacing in the radio’s SERVICE
menu.
USB media not playing, or says loading. Media is the wrong file type. Convert files to a usable format, see file
requirements section of the manual.
Audio is distorted or low. Source audio level is too weak or overdriven.
Bitrate of audio file is too large.
Adjust the volume level of the auxiliary
source. Change the sample frequency or
Bitrate of the file.
iPod® screen displays “loading” for a long
period of time.
Device is not a supported device. The radio
supports a majority of iPod® models, but not all
are guaranteed.
Wait for iPod® to load or reconnect 30-pin
plug. If still loading, then device is not
supported, or has low battery. Use the
AUX input or a Bluetooth® connection
instead.
The Radio does NOT respond to the front
buttons
An error in operation has occurred Reset the unit from the front panel.
The Radio does not charge my device The device requires additional current via the
USB to charge the device
Unplug and try again. The USB cannot
support more than 5V/1.5A.