Kramer 631R User manual

Kramer Electronics, Ltd.
USER MANUAL
Models:
631T,
HDMI Optical Transmitter
631R,
HDMI Optical Receiver

Contents
i
Contents
1
Introduction 1
2
Getting Started 1
3
Overview 2
3.1
About HDMI 2
3.2
Recommendations for Best Performance 3
4
Your 631T / 631R 4
4.1
Your DigiTOOLS® 631T HDMI Optical Transmitter 4
4.2
Your DigiTOOLS® 631R HDMI Optical Receiver 6
5
Using the 631T/631R HDMI Optical Transmitter/Receiver 8
5.1
Connecting the 631T/631R HDMI Optical Transmitter/Receiver 8
5.2
Operating the 631T/631R HDMI Optical Transmitter/Receiver 10
5.3
Wiring the DDC (CAT5) RJ-45 Connectors 11
5.4
Avoiding Pitfalls using the 631T / 631R 11
6
Technical Specifications 12
Figures
Figure 1: 631T HDMI Optical Transmitter 4
Figure 2: 631T HDMI Optical Transmitter (Top Side Panel) 4
Figure 3: 631T HDMI Optical Transmitter (Lower Side Panel) 5
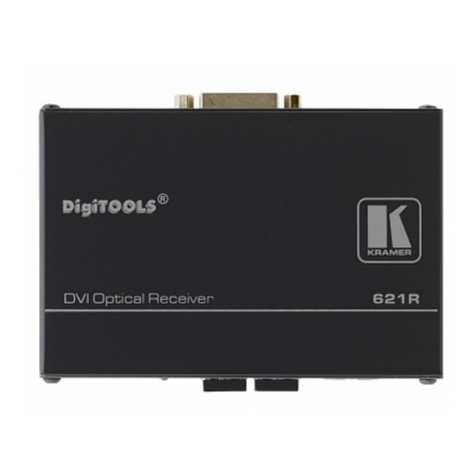
Figure 4: 631R HDMI Optical Receiver 6
Figure 5: 631R HDMI Optical Receiver (Top Side Panel) 6
Figure 6: 631R HDMI Optical Receiver (Lower Side Panel) 7
Figure 7: Connecting the 631T/631R (Source and Acceptor Perspective) 9
Figure 8: Connecting the 631T/631R (OPTIC and DDC Cables Perspective) 10
Figure 9: CAT5 PINOUT 11
Tables
Table 1: 631T HDMI Optical Transmitter (Top Side Panel) Features 5
Table 2: 631T HDMI Optical Transmitter (Lower Side Panel) Features 5
Table 3: 631R HDMI Optical Receiver (Top Side Panel) Features 6
Table 4: 631R HDMI Optical Receiver (Lower Side Panel) Features 7
Table 5: CAT5 PINOUT 11
Table 6: Technical Specifications of the 631T / 631R 12

P/N: 2900 – 9999991 A1
ADDENDUM: Included with user manuals for machines with a CAT5 connector
This addendum describes the Power Connect feature used with Kramer
machines, and the choice between STP and UTP CAT5 cables.
Power Connect Feature
1
The Power Connect feature lets you power a transmitter / receiver system by
connecting just one power adapter to either the transmitter or the receiver. The
other unit is fed over the same CAT5 cable.
The Power Connect feature applies as long as the CAT5 cable is heavy gauge
cable (that is, it can carry power). The distance does not exceed 50 meters on
standard cable.
For a distance of 100 meters, separate power supplies must be connected to the
transmitter and to the receiver simultaneously, unless using heavy gauge CAT5
cable.
Shielded Twisted Pair (STP) / Unshielded Twisted Pair (UTP)
The decision whether to use shielded twisted pair (STP) cable or unshielded
twisted pair (UTP) cable depends on the nature of the application.
It is recommended that in applications with high interference, shielded twisted
pair (STP) cable will give better results. However, the shield itself does create a
capacitance that degrades the frequency response of the machines. For shorter
distances, of 50m or so, shielded twisted pair (STP) cable is preferred because it
provides protection from interference (degradation is non-apparent).
For a long range application, unshielded twisted pair (UTP) cable is preferred.
However, the unshielded twisted pair (UTP) cable should be installed far away
from electric cables, motors etc., which are prone to create electrical interference.
1 This section of the addendum is only relevant to machines that support this feature (for example, the TP-104; not the
TP-100)

P/N: 2900 – 0001051 A1
ADDENDUM: 631T/631R
This addendum adds further information to section 5.3 in the 631T / 631R
HDMI Optical Transmitter/Receiver user manual:
Table 1A defines the CAT 5 Power PINOUT:
Table 1A: CAT 5 PINOUT
PIN Symbol Description
1 DDC Data GND DDC Data line return ground
2 DDC Data DDC Data line for (HDMI Digital Display Channel) DDC2B communication
3 DDC Clock GND DDC Clock line return ground
4 Power GND Main power return ground
5 Power Main power for Kramer module
6 DDC Clock DDC Clock line for (HDMI Digital Display Channel) DDC2B communication
7 5V_IN DVI 5V (DVI No. 14 pin for Display)
8 HPD Signal is driven by monitor to enable the system to identify the presence of a
Display

Introduction
1
1 Introduction
Welcome to Kramer Electronics (since 1981): a world of unique, creative and
affordable solutions to the infinite range of problems that confront the video, audio
and presentation professional on a daily basis. In recent years, we have redesigned
and upgraded most of our line, making the best even better! Our 350-plus
different models now appear in 8 Groups
1
, which are clearly defined by function.
Congratulations on purchasing your Kramer DigiTOOLS® 631T HDMI
2
Optical Transmitter and 631R HDMI
2
Optical Receiver! The 631T / 631R
pair has a transmission range of more than 300 ft. (more than 100 meters).
The 631T / 631R are ideal for:
Home theater, presentation and multimedia applications
Long range multimedia distribution for cinemas, stores, and entertainment
centers
The 631T HDMI
2
Optical Transmitter and 631R HDMI
2
Optical Receiver are
available as two separate packages:
The 631T package includes the following items:
631T HDMI
2
Optical Transmitter
Power adapter (12V DC 500mA Input)
3
and this user manual
4
The 631R package includes the following items:
631R HDMI
2
Optical Receiver
Power adapter (12V DC 2.1A Input)
3
and this user manual
4
One HDMI/HDMI
2
male-to-male cable
2 Getting Started
We recommend that you:
Unpack the equipment carefully and save the original box and packaging
materials for possible future shipment
1 GROUP 1: Distribution Amplifiers; GROUP 2: Video and Audio Switchers, Matrix Switchers and Controllers; GROUP 3:
Video, Audio, VGA/XGA Processors; GROUP 4: Interfaces and Sync Processors; GROUP 5: Twisted Pair Interfaces;
GROUP 6: Accessories and Rack Adapters; GROUP 7: Scan Converters and Scalers; and GROUP 8: Cables and Connectors
2 High-Definition Multimedia Interface
3 When setting up a transmitter / receiver system you can connect the 12V power supplies to the transmitter and to the
receiver simultaneously. However, the power connect feature does let you connect just one power supply to either the
transmitter or receiver. In such a case, use the 2.1A power supply
4 Download up-to-date Kramer user manuals from the Internet at this URL: http://www.kramerelectronics.com

KRAMER: SIMPLE CREATIVE TECHNOLOGY
Overview
2
Review the contents of this user manual
Use Kramer high performance optical cables
1
. Note that the units are
designed for use with MULTI-MODE optical cables.
3 Overview
This user manual describes the Kramer DigiTOOLS® 631T HDMI
2
Optical
Transmitter and the Kramer DigiTOOLS® 631R HDMI
2
Optical Receiver.
3.1 About HDMI
High-Definition Multimedia Interface (HDMI) is an uncompressed all-digital
2
audio/video interface, widely supported in the entertainment and home
cinema industry. It delivers the highest image and sound quality.
In particular, HDMI:
Provides a simple
3
interface between any audio/video source, such as a
set-top box, DVD player, or A/V receiver and an audio and/or video monitor,
such as a digital television (DTV), over a single lengthy
4
cable
Supports standard, enhanced, high-definition video, and multi-channel
digital audio
5
on a single cable
Transmits all ATSC HDTV standards and supports 8-channel digital
audio, with bandwidth to spare to accommodate future enhancements and
requirements
Benefits consumers by providing superior, uncompressed digital video
and audio quality via a single cable
6
, and user-friendly connector
Is backward-compatible with DVI (Digital Visual Interface)
Supports two-way communication between the video source (such as a
DVD player) and the DTV, enabling new functionality such as automatic
configuration and one-button play
1 The complete list of Kramer cables is on our Web site at http://www.kramerelectronics.com
2 Ensuring an all-digital rendering of video without the losses associated with analog interfaces and their unnecessary digital-
to-analog conversions
3 With video and multi-channel audio combined into a single cable, the cost, complexity, and confusion of multiple cables
currently used in A/V systems is reduced
4 HDMI technology has been designed to use standard copper cable construction at up to 15m
5 HDMI supports multiple audio formats, from standard stereo to multi-channel surround-sound. HDMI has the capacity to
support Dolby 5.1 audio and high-resolution audio formats
6 HDMI provides the quality and functionality of a digital interface while also supporting uncompressed video formats in a
simple, cost-effective manner

Overview
3
HDMI has the capacity to support:
Existing high-definition video formats (720p, 1080i, and 1080p/60), as
well as standard definition formats such as NTSC or PAL
3.2 Recommendations for Best Performance
When setting up the 631T / 631R, be aware that:
The Media Receiver or graphic controller card must have an HDMI port
that matches the maximum graphic resolution feature of the display to be
connected. When using a computer, there are no special hardware
requirements concerning memory size, CPU speed or chipsets
There are no special software requirements
1
We recommend that you test the entire platform with its application using
a short length copper cable, before you install the optical link
The power connect feature lets you power the 631T /631R system by
connecting just one power adapter to either the 631T or the 631R. The other unit
is fed via the CAT5 cable
CAUTION: Never look directly into the LC receptacles of the 631T /
631R, while it is powered on
2
To achieve the best performance
3
:
Connect only good quality connection cables, thus avoiding interference,
deterioration in signal quality due to poor matching, and elevated noise levels
(often associated with low quality cables)
Avoid interference from neighboring electrical appliances and position
your Kramer DigiTOOLS® away from moisture, excessive sunlight and dust
Be sure to keep the optical cable’s connectors clean. Close them when not
in use, to protect them against exposure to dirt and dust
1 However, the HDMI graphic controller and display peripheral should be operational with the operating system and the
application
2 Even though this product is regulated strictly enough to operate under the Laser Class 1, classified by the CDRH/FDA for
eye safety
3 See also section 5.4

KRAMER: SIMPLE CREATIVE TECHNOLOGY
Your 631T / 631R
4
4 Your 631T / 631R
This section describes the:
631T HDMI Optical Transmitter (see section 4.1)
631R HDMI Optical Receiver (see section 4.2)
4.1 Your DigiTOOLS® 631T HDMI Optical Transmitter
The 631T is a high performance HDMI optical transmitter that accepts an
HDMI input signal, and transmits to a 631R HDMI Optical Receiver. The
631T / 631R pair has a transmission range of more than 300 ft. (more than
100 meters). In addition, the 631T:
Supports up to 1.65Gbps bandwidth per graphic channel
1
Can power or be powered by the 631R receiver over the same CAT5 cable
Is 12VDC fed
Figure 1 illustrates the 631T HDMI Optical Transmitter:
Figure 1: 631T HDMI Optical Transmitter
Figure 2 and Table 1 define the top side panel:
Figure 2: 631T HDMI Optical Transmitter (Top Side Panel)
1 Suitable to resolutions up to UXGA at 60Hz, and for all HD resolutions

Your 631T / 631R
5
Table 1: 631T HDMI Optical Transmitter (Top Side Panel) Features
# Feature Function
1 HDMI IN Connects to the HDMI source
2 12V DC +12V DC connector for powering the unit
Figure 3 and Table 2 define the lower side panel:
Figure 3: 631T HDMI Optical Transmitter (Lower Side Panel)
Table 2: 631T HDMI Optical Transmitter (Lower Side Panel) Features
# Feature Function
3 LINK LED Illuminates when receiving a valid input signal
4 POWER LED Illuminates when receiving power
5 OPTIC CABLE Connect to the connector on the 631R
6 DDC RJ-45 Connector Connects to
1
the DDC RJ-45 connector on the 631R
1 Using a UTP CAT5 cable with RJ-45 connectors at both ends (the PINOUT is defined in Table 5 and Figure 9)

KRAMER: SIMPLE CREATIVE TECHNOLOGY
Your 631T / 631R
6
4.2 Your DigiTOOLS® 631R HDMI Optical Receiver
The 631R is a high performance HDMI optical receiver that outputs an
HDMI signal. The 631T / 631R pair has a transmission range of more than
300 ft. (more than 100 meters).
In addition, the 631R:
Supports up to 1.65Gbps bandwidth per graphic channel
1
Can power or be powered by the 631T transmitter over the same CAT5 cable
Is 12VDC fed
Figure 4 illustrates the 631R HDMI Optical Receiver:
Figure 4: 631R HDMI Optical Receiver
Figure 5 and Table 3 define the lower side panel:
Figure 5: 631R HDMI Optical Receiver (Top Side Panel)
Table 3: 631R HDMI Optical Receiver (Top Side Panel) Features
# Feature Function
1 HDMI OUT Connects to the HDMI acceptor
2 12V DC +12V DC connector for powering the unit
1 Suitable to resolutions up to UXGA at 60Hz, and for all HD resolutions

Your 631T / 631R
7
Figure 6 and Table 4 define the lower side panel:
Figure 6: 631R HDMI Optical Receiver (Lower Side Panel)
Table 4: 631R HDMI Optical Receiver (Lower Side Panel) Features
# Feature Function
3 LINK LED Illuminates when receiving a valid input signal
4 POWER LED Illuminates when receiving power
5 OPTIC CABLE Connect to the connector on the 631T
7 DDC RJ-45 Connector Connects to
1
the DDC RJ-45 connector on the 631T
1 Using a UTP CAT5 cable with RJ-45 connectors at both ends (the PINOUT is defined in Table 5 and Figure 9)

KRAMER: SIMPLE CREATIVE TECHNOLOGY
Using the 631T/631R HDMI Optical Transmitter/Receiver
8
5 Using the 631T/631R HDMI Optical Transmitter/Receiver
You can use the 631T and 631R to configure an HDMI optical transmitter and
receiver system. In particular, this section describes how to:
Connect the 631T/631R transmitter and receiver system (see section 5.1)
Operate the 631T/631R transmitter and receiver system (see section 5.2)
Wire the DDC
1
(CAT5) RJ-45 connectors (see section 5.3)
Avoid pitfalls (see section 5.4)
5.1 Connecting the 631T/631R HDMI Optical Transmitter/Receiver
The example in Figure 7 shows how to configure an HDMI optical transmitter
and receiver system from the perspective of connecting the source and
acceptor. The example in Figure 8 shows how to configure an HDMI optical
transmitter and receiver system from the perspective of connecting the OPTIC
and DDC cables.
To connect the 631T with the 631R, as the examples in Figure 7 and Figure 8
illustrate, do the following:
1. On the 631T, connect the HDMI source (for example, a set top box
2
) to the
HDMI IN connector, using the Kramer HDMI copper cable.
Note: Ensure that the system is not powered up when connecting the HDMI
source.
2. On the 631R, connect the HDMI OUT connector to the HDMI acceptor
(for example, a display), using the Kramer HDMI copper cable.
Note: Do not look directly into the LC receptacles of the 631T, while
powered on, although this product is regulated strictly enough to operate
under the Laser Class 1, classified by CDRH/FDA for eye safety.
3. Remove the module dust covers and connect each duplex LC fiber cable
one-by-one to each of the four LC receptacles of the 631T and 631R. The
4 LC patch cord fiber bundled cable lets you transmit 4 channels (R, G, B,
and CL (CLOCK)) of graphic data and multi-channel audio data over it.
Note: Carefully recheck the polarities and ensure that the duplex
connectors are fully engaged.
4. Connect the DDC RJ-45C connector on the 631T to the DDC RJ-45C
connector on the 631R, via UTP cabling, see section 5.3.
1 Digital Display Channel
2 Alternatively, you could connect a computer or other HDMI media source

Using the 631T/631R HDMI Optical Transmitter/Receiver
9
5. Connect the 12V 2.1A DC power adapter to the power socket of either
1
the 631T or 631R, and connect the adapter to the mains electricity.
The signal from the HDMI source is transmitted via CAT5 and fiber optic
cables, decoded and converted at the HDMI OUT connector to the HDMI
acceptor.
Figure 7: Connecting the 631T/631R (Source and Acceptor Perspective)
1 The power connect feature lets you connect just one power adapter to either the transmitter or receiver. Alternatively,
connect the separate power supplies to the transmitter and to the receiver simultaneously

KRAMER: SIMPLE CREATIVE TECHNOLOGY
Using the 631T/631R HDMI Optical Transmitter/Receiver
10
Figure 8: Connecting the 631T/631R (OPTIC and DDC Cables Perspective)
5.2 Operating the 631T/631R HDMI Optical Transmitter/Receiver
To operate the 631T /631R HDMI Optical Transmitter/Receiver system:
Turn ON the power on the set-top box and the display
Note: Avoid “hot plugging” the 631T or 631R. This is not a recommended
practice with live digital voltages (but it can be done)

Using the 631T/631R HDMI Optical Transmitter/Receiver
11
5.3 Wiring the DDC
1
(CAT5) RJ-45 Connectors
Table 5 and Figure 9 define the UTP DDC CAT5 PINOUT, using a straight
pin-to-pin cable with RJ-45 connectors:
Table 5: CAT5 PINOUT
EIA /TIA 568A EIA /TIA 568B
PIN Wire Color PIN Wire Color
1 Green / White 1 Orange / White
2 Green 2 Orange
3 Orange / White 3 Green / White
4 Blue 4 Blue
5 Blue / White 5 Blue / White
6 Orange 6 Green
7 Brown / White 7 Brown / White
8 Brown 8 Brown
Pair 1 4 and 5 Pair 1 4 and 5
Pair 2 3 and 6 Pair 2 1 and 2
Pair 3 1 and 2 Pair 3 3 and 6
Pair 4 7 and 8
Pair 4 7 and 8
Figure 9: CAT5 PINOUT
5.4 Avoiding Pitfalls using the 631T / 631R
Be aware of the following:
If the display device shows only a black screen – be sure that the AC
plugs and the DC jacks used by external power supplies are firmly connected;
that the power bars are live; and that the 631T / 631R are connected correctly
to the media receiver or computer and display, respectively. Also, check if the
media receiver or computer and display are powered on and properly booted.
In addition, reboot the system after reconnecting the optical system cable
If the screen is distorted or displays noise - check if the graphics
resolution is properly set. Go to the Display Properties of Windows and click
on the Settings. Be sure that the resolution is set at equal to or less than UXGA
(1600x1200) at 60Hz refresh ratio. In addition, reset the system. Power down,
disconnect and reconnect the optical system cable and/or the DC power
adapter(s), and power up
1 Digital Display Channel

KRAMER: SIMPLE CREATIVE TECHNOLOGY
Technical Specifications
12
Maintenance
- these cables contain sensitive fiber optic materials
that can be damaged through rough handling. Use caution during the
installation and use of these cables to ensure that you do not damage
them. Avoid installing the cables in an environment where it could be
stepped on, run over, pinched or crushed
6 Technical Specifications
Table 6 includes the technical specifications
1
of the 631T and 631R:
Table 6: Technical Specifications
2
of the 631T / 631R
631T 631R
INPUTS: HDMI Connector 1 RJ-45 DDC (CAT5) connector
OUTPUTS: 1 RJ-45 DDC (CAT5) connector HDMI Connector
BANDWIDTH: Supports up to 1.65Gbps bandwidth per graphic channel
COMPLIANCE WITH
HDMI STANDARD: Supports HDMI 1.0, using fiber optic communication links and DDC2B
EXTENSION LIMIT: 100m (>320 feet) for UXGA (1600x1200) at 60Hz refresh rate in ultimate operation
FIBER-OPTIC
CONNECTION: Each has 2 duplex LC receptacles connected to four 62.5/125µm or 50/125µm
Multi-Mode glass fibers cables
INDICATOR LEDs: POWER LED and LINK LED
POWER SOURCE: 12 VDC 140mA
DIMENSIONS: 12cm x 7.95cm x 2.76cm (4.7" x 3.1" x 1.08", W, D, H)
WEIGHT: 0.3 kg. (0.67 lbs.) approx.
ACCESSORIES: Power supply, bracket installation kit, 1 HDMI/HDMI male-to-male cable
1 Specifications are subject to change without notice
2 Environmental Specifications: Operating temperature: –10°C to 50°C; storage temperature: –30°C to 60°C

13
LIMITED WARRANTY
Kramer Electronics (hereafter Kramer) warrants this product free from defects in material and workmanship under the
following terms.
HOW LONG IS THE WARRANTY
Labor and parts are warranted for seven years from the date of the first customer purchase.
WHO IS PROTECTED?
Only the first purchase customer may enforce this warranty.
WHAT IS COVERED AND WHAT IS NOT COVERED
Except as below, this warranty covers all defects in material or workmanship in this product. The following are not covered
by the warranty:
1. Any product which is not distributed by Kramer, or which is not purchased from an authorized Kramer dealer. If you are
uncertain as to whether a dealer is authorized, please contact Kramer at one of the agents listed in the web site
www.kramerelectronics.com.
2. Any product, on which the serial number has been defaced, modified or removed.
3. Damage, deterioration or malfunction resulting from:
i) Accident, misuse, abuse, neglect, fire, water, lightning or other acts of nature
ii) Product modification, or failure to follow instructions supplied with the product
iii) Repair or attempted repair by anyone not authorized by Kramer
iv) Any shipment of the product (claims must be presented to the carrier)
v) Removal or installation of the product
vi) Any other cause, which does not relate to a product defect
vii) Cartons, equipment enclosures, cables or accessories used in conjunction with the product
WHAT WE WILL PAY FOR AND WHAT WE WILL NOT PAY FOR
We will pay labor and material expenses for covered items. We will not pay for the following:
1. Removal or installations charges.
2. Costs of initial technical adjustments (set-up), including adjustment of user controls or programming. These costs are the
responsibility of the Kramer dealer from whom the product was purchased.
3. Shipping charges.
HOW YOU CAN GET WARRANTY SERVICE
1. To obtain service on you product, you must take or ship it prepaid to any authorized Kramer service center.
2. Whenever warranty service is required, the original dated invoice (or a copy) must be presented as proof of warranty coverage,
and should be included in any shipment of the product. Please also include in any mailing a contact name, company, address, and
a description of the problem(s).
3. For the name of the nearest Kramer authorized service center, consult your authorized dealer.
LIMITATION OF IMPLIED WARRANTIES
All implied warranties, including warranties of merchantability and fitness for a particular purpose, are limited in duration to
the length of this warranty.
EXCLUSION OF DAMAGES
The liability of Kramer for any effective products is limited to the repair or replacement of the product at our option. Kramer
shall not be liable for:
1. Damage to other property caused by defects in this product, damages based upon inconvenience, loss of use of the product, loss
of time, commercial loss; or:
2. Any other damages, whether incidental, consequential or otherwise. Some countries may not allow limitations on how long an
implied warranty lasts and/or do not allow the exclusion or limitation of incidental or consequential damages, so the above
limitations and exclusions may not apply to you.
This warranty gives you specific legal rights, and you may also have other rights, which vary from place to place.
NOTE: All products returned to Kramer for service must have prior approval. This may be obtained from your dealer.
This equipment has been tested to determine compliance with the requirements of:
EN-50081: "Electromagnetic compatibility (EMC);
generic emission standard.
Part 1: Residential, commercial and light industry"
EN-50082: "Electromagnetic compatibility (EMC) generic immunity standard.
Part 1: Residential, commercial and light industry environment".
CFR-47: FCC Rules and Regulations:
Part 15: “Radio frequency devices
Subpart B – Unintentional radiators”
CAUTION!
Servicing the machines can only be done by an authorized Kramer technician. Any user who makes changes or modifications to
the unit without the expressed approval of the manufacturer will void user authority to operate the equipment.
Use the supplied DC power supply to feed power to the machine.
Please use recommended interconnection cables to connect the machine to other components.

Kramer Electronics, Ltd.
Web site: www.kramerelectronics.com
P/N: 2900-000105 REV 1
For the latest information on our products and a list of Kramer
distributors, visit our Web site: www.kramerelectronics.com,
where updates to this user manual may be found.
We welcome your questions, comments and feedback.
Caution
Safety Warning:
Disconnect the unit from the power supply before
opening/servicing.
Class 1 Laser Compliance
CLASS 1 LASER PRODUCT
Thisproduct complieswith “21CFR 1040.10” and “EN 60825-1”.
This manual suits for next models
1
Table of contents
Other Kramer Receiver manuals

Kramer
Kramer KDS-EN2T User manual

Kramer
Kramer TP-31 User manual

Kramer
Kramer 640T User manual

Kramer
Kramer WP-580T User manual

Kramer
Kramer PT-571HDCP-MD User manual

Kramer
Kramer 712N User manual

Kramer
Kramer KIT-400 User manual

Kramer
Kramer WP-580Txr User manual

Kramer
Kramer WPN-12 User manual

Kramer
Kramer PT-110 User manual

Kramer
Kramer VP-427 User manual

Kramer
Kramer TP-873xr User manual

Kramer
Kramer WP-571 User manual

Kramer
Kramer PT-571 User manual

Kramer
Kramer EXT3-U-KIT User manual

Kramer
Kramer 602T User manual

Kramer
Kramer 670T User manual

Kramer
Kramer VP-427H2 User manual

Kramer
Kramer WP-580T User manual

Kramer
Kramer 602T User manual