REMEHA EL 110 SL Troubleshooting guide

MW-4000029-3
en
Installation, User and Service Manual
Domestic hot water tank
EL 110 SL

Dear customer,
Thank you for purchasing this appliance.
Please read this manual carefully before using the product and keep it in a safe place for future reference.
In order to ensure continued safe and efficient operation we recommend that the product is regularly maintained. Our Service
and After Sales organization can assist with this.
We hope you will receive many years of satisfactory service.

Contents
1 Safety . . . . . . . . . . . . . . . . . . . . . . . . . . . . . . . . . . . . . . . . . . . . . . . . . . . . . . . . . . . . . . . . . . . . . . . . . . 5
1.1 General safety instructions . . . . . . . . . . . . . . . . . . . . . . . . . . . . . . . . . . . . . . . . . . . . . . . . . . . . . . 5
1.2 Recommendations . . . . . . . . . . . . . . . . . . . . . . . . . . . . . . . . . . . . . . . . . . . . . . . . . . . . . . . . . . . . 7
1.3 Specific safety instructions . . . . . . . . . . . . . . . . . . . . . . . . . . . . . . . . . . . . . . . . . . . . . . . . . . . . . . 8
1.4 Liabilities . . . . . . . . . . . . . . . . . . . . . . . . . . . . . . . . . . . . . . . . . . . . . . . . . . . . . . . . . . . . . . . . . . . . 8
1.4.1 Manufacturer's liability . . . . . . . . . . . . . . . . . . . . . . . . . . . . . . . . . . . . . . . . . . . . . . . . . . . 8
1.4.2 Installer's liability . . . . . . . . . . . . . . . . . . . . . . . . . . . . . . . . . . . . . . . . . . . . . . . . . . . . . . . .8
1.4.3 User's liability . . . . . . . . . . . . . . . . . . . . . . . . . . . . . . . . . . . . . . . . . . . . . . . . . . . . . . . . . . 9
2 About this manual . . . . . . . . . . . . . . . . . . . . . . . . . . . . . . . . . . . . . . . . . . . . . . . . . . . . . . . . . . . . . . . . . . . . . . . . . . . . . . . . . . 10
2.1 General . . . . . . . . . . . . . . . . . . . . . . . . . . . . . . . . . . . . . . . . . . . . . . . . . . . . . . . . . . . . . . . . . . . . . . . . . . . . . . . . . . . . . 10
2.2 Symbols used . . . . . . . . . . . . . . . . . . . . . . . . . . . . . . . . . . . . . . . . . . . . . . . . . . . . . . . . . . . . . . . . . . . . . . . . . . . . . . . . 10
2.2.1 Symbols used in the manual . . . . . . . . . . . . . . . . . . . . . . . . . . . . . . . . . . . . . . . . . . . . . . . . . . . . . . . . . . . . . 10
2.2.2 Symbols used on the domestic hot water tank . . . . . . . . . . . . . . . . . . . . . . . . . . . . . . . . . . . . . . . . . . . . . . . 10
3 Technical specifications . . . . . . . . . . . . . . . . . . . . . . . . . . . . . . . . . . . . . . . . . . . . . . . . . . . . . . . . . . . . . . . . . . . . . . . . . . . . . 11
3.1 Homologations . . . . . . . . . . . . . . . . . . . . . . . . . . . . . . . . . . . . . . . . . . . . . . . . . . . . . . . . . . . . . . . . . . . . . . . . . . . . . . . 11
3.1.1 Directives . . . . . . . . . . . . . . . . . . . . . . . . . . . . . . . . . . . . . . . . . . . . . . . . . . . . . . . . . . . . . . . . . . . . . . . . . . . .11
3.2 Technical data . . . . . . . . . . . . . . . . . . . . . . . . . . . . . . . . . . . . . . . . . . . . . . . . . . . . . . . . . . . . . . . . . . . . . . . . . . . . . . . .11
3.2.1 Domestic hot water tank . . . . . . . . . . . . . . . . . . . . . . . . . . . . . . . . . . . . . . . . . . . . . . . . . . . . . . . . . . . . . . . . 11
3.2.2 Performances of the domestic hot water tank for use in combination with floor-standing oil-fired boilers . . .11
3.2.3 Domestic hot water sensor specifications . . . . . . . . . . . . . . . . . . . . . . . . . . . . . . . . . . . . . . . . . . . . . . . . . . .12
3.2.4 Specifications of the magnesium anode . . . . . . . . . . . . . . . . . . . . . . . . . . . . . . . . . . . . . . . . . . . . . . . . . . . . 12
3.3 Dimensions and connections . . . . . . . . . . . . . . . . . . . . . . . . . . . . . . . . . . . . . . . . . . . . . . . . . . . . . . . . . . . . . . . . . . . . 12
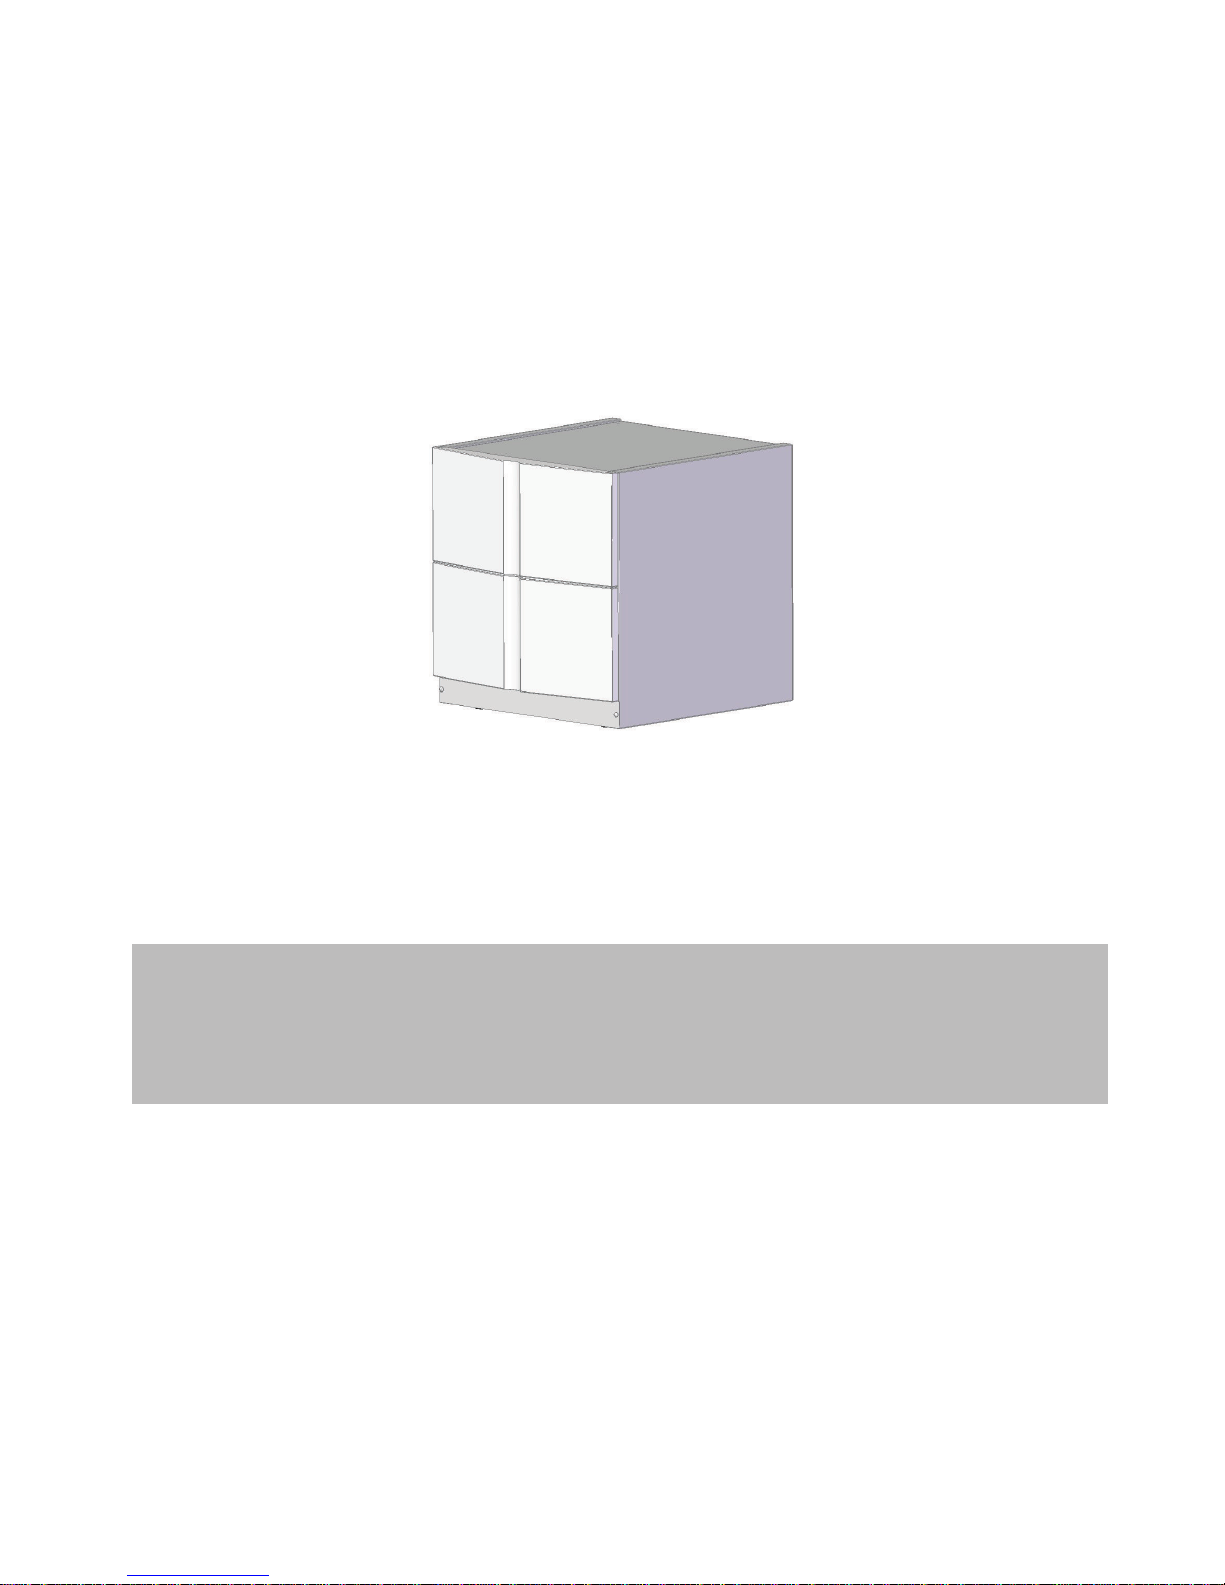
4 Description of the product . . . . . . . . . . . . . . . . . . . . . . . . . . . . . . . . . . . . . . . . . . . . . . . . . . . . . . . . . . . . . . . . . . . . . . . . . . . . 13
4.1 General description . . . . . . . . . . . . . . . . . . . . . . . . . . . . . . . . . . . . . . . . . . . . . . . . . . . . . . . . . . . . . . . . . . . . . . . . . . . .13
4.2 Main components . . . . . . . . . . . . . . . . . . . . . . . . . . . . . . . . . . . . . . . . . . . . . . . . . . . . . . . . . . . . . . . . . . . . . . . . . . . . . 13
4.3 Standard delivery . . . . . . . . . . . . . . . . . . . . . . . . . . . . . . . . . . . . . . . . . . . . . . . . . . . . . . . . . . . . . . . . . . . . . . . . . . . . . 13
5 Before installation . . . . . . . . . . . . . . . . . . . . . . . . . . . . . . . . . . . . . . . . . . . . . . . . . . . . . . . . . . . . . . . . . . . . . . . . . . . . . . . . . . 15
5.1 Regulations governing installation . . . . . . . . . . . . . . . . . . . . . . . . . . . . . . . . . . . . . . . . . . . . . . . . . . . . . . . . . . . . . . . . 15
5.2 Installation requirements . . . . . . . . . . . . . . . . . . . . . . . . . . . . . . . . . . . . . . . . . . . . . . . . . . . . . . . . . . . . . . . . . . . . . . . .15
5.2.1 Water operating pressure . . . . . . . . . . . . . . . . . . . . . . . . . . . . . . . . . . . . . . . . . . . . . . . . . . . . . . . . . . . . . . . 15
5.2.2 Domestic water quality . . . . . . . . . . . . . . . . . . . . . . . . . . . . . . . . . . . . . . . . . . . . . . . . . . . . . . . . . . . . . . . . . .15
5.3 Choice of the location . . . . . . . . . . . . . . . . . . . . . . . . . . . . . . . . . . . . . . . . . . . . . . . . . . . . . . . . . . . . . . . . . . . . . . . . . . 16
5.3.1 Data plate . . . . . . . . . . . . . . . . . . . . . . . . . . . . . . . . . . . . . . . . . . . . . . . . . . . . . . . . . . . . . . . . . . . . . . . . . . . 16
5.3.2 Overall space needed for the domestic hot water tank . . . . . . . . . . . . . . . . . . . . . . . . . . . . . . . . . . . . . . . . . 16
5.3.3 Discharge . . . . . . . . . . . . . . . . . . . . . . . . . . . . . . . . . . . . . . . . . . . . . . . . . . . . . . . . . . . . . . . . . . . . . . . . . . . .16
5.4 Unpacking & initial preparation . . . . . . . . . . . . . . . . . . . . . . . . . . . . . . . . . . . . . . . . . . . . . . . . . . . . . . . . . . . . . . . . . . . 17
5.4.1 Unpacking the domestic hot water tank . . . . . . . . . . . . . . . . . . . . . . . . . . . . . . . . . . . . . . . . . . . . . . . . . . . . .17
5.4.2 Positioning the domestic hot water tank . . . . . . . . . . . . . . . . . . . . . . . . . . . . . . . . . . . . . . . . . . . . . . . . . . . . 17
6 Installation . . . . . . . . . . . . . . . . . . . . . . . . . . . . . . . . . . . . . . . . . . . . . . . . . . . . . . . . . . . . . . . . . . . . . . . . . . . . . . . . . . . . . . . . 19
6.1 General . . . . . . . . . . . . . . . . . . . . . . . . . . . . . . . . . . . . . . . . . . . . . . . . . . . . . . . . . . . . . . . . . . . . . . . . . . . . . . . . . . . . . 19
6.2 Mounting . . . . . . . . . . . . . . . . . . . . . . . . . . . . . . . . . . . . . . . . . . . . . . . . . . . . . . . . . . . . . . . . . . . . . . . . . . . . . . . . . . . . 19
6.2.1 Mounting the domestic hot water sensor . . . . . . . . . . . . . . . . . . . . . . . . . . . . . . . . . . . . . . . . . . . . . . . . . . . . 19
6.2.2 Mounting the front panel . . . . . . . . . . . . . . . . . . . . . . . . . . . . . . . . . . . . . . . . . . . . . . . . . . . . . . . . . . . . . . . . 19
6.2.3 Mounting the boiler on the domestic hot water tank . . . . . . . . . . . . . . . . . . . . . . . . . . . . . . . . . . . . . . . . . . . 20
6.3 Water connections . . . . . . . . . . . . . . . . . . . . . . . . . . . . . . . . . . . . . . . . . . . . . . . . . . . . . . . . . . . . . . . . . . . . . . . . . . . . 21
6.3.1 Connecting the domestic hot water tank to the drinking water mains . . . . . . . . . . . . . . . . . . . . . . . . . . . . . . 21
6.3.2 Connecting the domestic hot water tank to the boiler . . . . . . . . . . . . . . . . . . . . . . . . . . . . . . . . . . . . . . . . . . 22
6.3.3 Connecting the domestic hot water circuit . . . . . . . . . . . . . . . . . . . . . . . . . . . . . . . . . . . . . . . . . . . . . . . . . . . 22
6.4 Electrical connections . . . . . . . . . . . . . . . . . . . . . . . . . . . . . . . . . . . . . . . . . . . . . . . . . . . . . . . . . . . . . . . . . . . . . . . . . . 23
6.4.1 Recommendations . . . . . . . . . . . . . . . . . . . . . . . . . . . . . . . . . . . . . . . . . . . . . . . . . . . . . . . . . . . . . . . . . . . . .23
6.4.2 Connecting the domestic hot water sensor . . . . . . . . . . . . . . . . . . . . . . . . . . . . . . . . . . . . . . . . . . . . . . . . . . 23
6.5 Filling the system . . . . . . . . . . . . . . . . . . . . . . . . . . . . . . . . . . . . . . . . . . . . . . . . . . . . . . . . . . . . . . . . . . . . . . . . . . . . . 23
6.5.1 Filling the domestic hot water circuit . . . . . . . . . . . . . . . . . . . . . . . . . . . . . . . . . . . . . . . . . . . . . . . . . . . . . . . 23
6.5.2 Filling the heating water circuit (coil) . . . . . . . . . . . . . . . . . . . . . . . . . . . . . . . . . . . . . . . . . . . . . . . . . . . . . . . 24
6.6 Completing the installation . . . . . . . . . . . . . . . . . . . . . . . . . . . . . . . . . . . . . . . . . . . . . . . . . . . . . . . . . . . . . . . . . . . . . . 25
7 Commissioning . . . . . . . . . . . . . . . . . . . . . . . . . . . . . . . . . . . . . . . . . . . . . . . . . . . . . . . . . . . . . . . . . . . . . . . . . . . . . . . . . . . . 26
Contents
7626247 - v03 - 29042016 EL 110 SL 3

7.1 Checklist before commissioning . . . . . . . . . . . . . . . . . . . . . . . . . . . . . . . . . . . . . . . . . . . . . . . . . . . . . . . . . . . . . . . . . . 26
7.1.1 Hydraulic circuits . . . . . . . . . . . . . . . . . . . . . . . . . . . . . . . . . . . . . . . . . . . . . . . . . . . . . . . . . . . . . . . . . . . . . . 26
7.1.2 Electrical connections . . . . . . . . . . . . . . . . . . . . . . . . . . . . . . . . . . . . . . . . . . . . . . . . . . . . . . . . . . . . . . . . . . 26
7.2 Commissioning procedure . . . . . . . . . . . . . . . . . . . . . . . . . . . . . . . . . . . . . . . . . . . . . . . . . . . . . . . . . . . . . . . . . . . . . . 26
7.2.1 Commissioning the domestic hot water tank . . . . . . . . . . . . . . . . . . . . . . . . . . . . . . . . . . . . . . . . . . . . . . . . . 26
8 Maintenance . . . . . . . . . . . . . . . . . . . . . . . . . . . . . . . . . . . . . . . . . . . . . . . . . . . . . . . . . . . . . . . . . . . . . . . . . . . . . . . . . . . . . . 27
8.1 General . . . . . . . . . . . . . . . . . . . . . . . . . . . . . . . . . . . . . . . . . . . . . . . . . . . . . . . . . . . . . . . . . . . . . . . . . . . . . . . . . . . . . 27
8.2 Standard inspection and maintenance operations . . . . . . . . . . . . . . . . . . . . . . . . . . . . . . . . . . . . . . . . . . . . . . . . . . . . 27
8.2.1 List of standard maintenance operations to be performed . . . . . . . . . . . . . . . . . . . . . . . . . . . . . . . . . . . . . . 27
8.2.2 Removing and remounting the inspection hatch . . . . . . . . . . . . . . . . . . . . . . . . . . . . . . . . . . . . . . . . . . . . . . 27
8.2.3 Checking the safety valve or unit . . . . . . . . . . . . . . . . . . . . . . . . . . . . . . . . . . . . . . . . . . . . . . . . . . . . . . . . . .28
8.2.4 Checking the magnesium anode . . . . . . . . . . . . . . . . . . . . . . . . . . . . . . . . . . . . . . . . . . . . . . . . . . . . . . . . . . 28
8.2.5 Descaling the domestic hot water tank . . . . . . . . . . . . . . . . . . . . . . . . . . . . . . . . . . . . . . . . . . . . . . . . . . . . . 28
8.2.6 Cleaning the casing . . . . . . . . . . . . . . . . . . . . . . . . . . . . . . . . . . . . . . . . . . . . . . . . . . . . . . . . . . . . . . . . . . . . 29
9 Disposal . . . . . . . . . . . . . . . . . . . . . . . . . . . . . . . . . . . . . . . . . . . . . . . . . . . . . . . . . . . . . . . . . . . . . . . . . . . . . . . . . . . . . . . . . .30
9.1 Scrapping and recycling . . . . . . . . . . . . . . . . . . . . . . . . . . . . . . . . . . . . . . . . . . . . . . . . . . . . . . . . . . . . . . . . . . . . . . . . 30
10 Spare parts . . . . . . . . . . . . . . . . . . . . . . . . . . . . . . . . . . . . . . . . . . . . . . . . . . . . . . . . . . . . . . . . . . . . . . . . . . . . . . . . . . . . . . . 31
10.1 General . . . . . . . . . . . . . . . . . . . . . . . . . . . . . . . . . . . . . . . . . . . . . . . . . . . . . . . . . . . . . . . . . . . . . . . . . . . . . . . . . . . . . 31
10.2 Exploded views . . . . . . . . . . . . . . . . . . . . . . . . . . . . . . . . . . . . . . . . . . . . . . . . . . . . . . . . . . . . . . . . . . . . . . . . . . . . . . . 31
11 Warranty . . . . . . . . . . . . . . . . . . . . . . . . . . . . . . . . . . . . . . . . . . . . . . . . . . . . . . . . . . . . . . . . . . . . . . . . . . . . . . . . . . . . . . . . . 33
11.1 General . . . . . . . . . . . . . . . . . . . . . . . . . . . . . . . . . . . . . . . . . . . . . . . . . . . . . . . . . . . . . . . . . . . . . . . . . . . . . . . . . . . . . 33
11.2 Terms of warranty . . . . . . . . . . . . . . . . . . . . . . . . . . . . . . . . . . . . . . . . . . . . . . . . . . . . . . . . . . . . . . . . . . . . . . . . . . . . . 33
Contents
4 EL 110 SL 7626247 - v03 - 29042016

1 Safety
1.1 General safety instructions
Danger
This appliance is not intended for use by persons (in
cluding children) with reduced physical, sensory or
mental capabilities, or lack of experience and knowl
edge, unless they have been given supervision or in
struction concerning use of the appliance by a person
responsible for their safety. Children should be super
vised to ensure that they do not play with the appli
ance.
Danger of electric shock
Before any work, switch off the mains supply to the
domestic hot water tank.
Caution
Only genuine spare parts may be used.
Warning
Only qualified professionals are authorised to work on
the domestic hot water tank and the heating installa
tion.
Note
Allow the space required to install the appliance cor
rectly, referring to the chapter Dimensions of the Ap
pliance.
Hydraulic safety
Caution
The appliance is intended to be permanently connec
ted to the domestic water mains network.
Note
Respect the minimum and maximum water inlet pres
sure to ensure correct operation of the domestic hot
water tank: refer to the chapter Technical Specifica
tions.
Caution
Draining the domestic hot water tank:
1. Shut off the domestic cold water inlet.
2. Open a hot water tap in the installation.
3. Open a valve on the safety unit.
4. When the water stops flowing, the domestic hot
water tank has been drained.
1 Safety
7626247 - v03 - 29042016 EL 110 SL 5

Caution
The pressure limiter device (safety valve or safety
unit) must be regularly operated in order to remove
limescale deposits and ensure that it is not blocked.
A pressure limiter device must be fitted to a dis
charge pipe.
As water may flow out of the discharge pipe on the
pressure limiter device, the pipe must be kept open
to the air, in a frost-free environment, and at a con
tinuous downward gradient.
To ascertain the type, specifications and connection of
the pressure limiter device, refer to the chapter Con
necting the Domestic Hot Water Tank to the Drinking
Water Mains in the Installation and Service Manual.
Caution
A pressure reducer (not provided) is required when
the supply pressure exceeds 80% of the safety valve
or safety unit calibration and must be located up
stream of the appliance.
Caution
There must be no cut-off devices between the safety
valve or unit and the domestic hot water tank.
Electrical safety
Caution
A disconnection method must be allowed in the fixed
pipes in accordance with the rules on installation in
force in the country.
Caution
If a power cord comes with the appliance and it turns
out to be damaged, it must be replaced by the manu
facturer, its after sales service or persons with similar
qualifications in order to obviate any danger.
Caution
Install the appliance in accordance with national rules
on electrical installation.
Caution
If the appliance is not wired in the factory, carry out
the wiring according to the wiring schematics descri
bed in the chapter Electrical Connections in the appli
ance's instructions manual.
1 Safety
6 EL 110 SL 7626247 - v03 - 29042016

Caution
The boiler must always be connected to the protec
tive earthing.
Earthing must comply with the prevailing installation
standards.
Earth the appliance before making any electrical
connections.
For the type and calibre of the protective equipment:
refer to the chapter Recommended Cable Cross-sec
tions in the Installation and Service Manual.
Caution
To connect the appliance to the electricity mains, refer
to the chapter Electrical Connections in the applian
ce's instructions manual.
Caution
Do not neglect to service the domestic hot water tank.
Contact a qualified professional or take out a mainte
nance contract for the annual domestic hot water tank
service.
Note
This manual can also be found on our internet site.
1.2 Recommendations
Caution
Do not neglect to service the domestic hot water tank.
Contact a qualified professional or take out a mainte
nance contract for the annual domestic hot water tank
service.
Caution
Do not bring the heating water and the domestic water
into contact with each other in the the heating system.
Caution
Do not allow domestic water to circulate in the ex
changer, which is reserved for the heating water.
Note
Insulate the pipes in the system to reduce heat losses.
Note
Remove the casing only to perform maintenance and
repair work. Put the casing back in place after mainte
nance and repair work.
Caution
Do not make any modifications to the domestic hot
water tank without the written consent of the manufac
turer.
1 Safety
7626247 - v03 - 29042016 EL 110 SL 7

Note
Never remove or cover labels and data plates affixed
to the appliances. Labels and data plates must be
legible throughout the entire lifetime of the appliance.
Immediately replace damaged or illegible instructions
and warning stickers.
Note
Only qualified professionals are authorised to assem
ble, connect, commission and service the installation.
1.3 Specific safety instructions
Warning
In order to limit the risk of being scalded, the installa
tion of a thermostatic mixing valve on the domestic hot
water flow pipes is obligatory.
Warning
Take precautions with the domestic hot water. De
pending on the boiler settings, the domestic hot water
temperature may exceed 65°C.
Note
The domestic hot water temperature setting is made
from the boiler control panel.
See
Boiler installation, service and user manual.
1.4 Liabilities
1.4.1 Manufacturer's liability
Our products are manufactured in compliance with the re
quirements of the various Directives applicable. They are
therefore delivered with the marking and any documents
necessary. In the interests of the quality of our products, we
strive constantly to improve them. We therefore reserve the
right to modify the specifications given in this document.
Our liability as manufacturer may not be invoked in the fol
lowing cases:
Failure to abide by the instructions on installing the appli
ance.
Failure to abide by the instructions on using the appliance.
Faulty or insufficient maintenance of the appliance.
1.4.2 Installer's liability
The installer is responsible for the installation and initial com
missioning of the appliance. The installer must abide by the
following instructions:
Read and follow the instructions given in the manuals pro
vided with the appliance.
1 Safety
8 EL 110 SL 7626247 - v03 - 29042016

Install the appliance in compliance with prevailing legisla
tion and standards.
Carry out initial commissioning and any checks necessary.
Explain the installation to the user.
If maintenance is necessary, warn the user of the obliga
tion to check the appliance and keep it in good working or
der.
Give all the instruction manuals to the user.
1.4.3 User's liability
To guarantee optimum operation of the system, you must
abide by the following instructions:
Read and follow the instructions given in the manuals pro
vided with the appliance.
Call on a qualified professional to carry out installation and
initial commissioning.
Get your installer to explain your installation to you.
Have the required inspections and maintenance carried out
by a qualified installer.
Keep the instruction manuals in good condition close to the
appliance.
1 Safety
7626247 - v03 - 29042016 EL 110 SL 9

2 About this manual
2.1 General
These instructions are intended for the installer and the user of a EL 110
SL domestic hot water tank.
2.2 Symbols used
2.2.1 Symbols used in the manual
This manual uses various danger levels to draw attention to special in
structions. We do this to improve user safety, to prevent problems and to
guarantee correct operation of the appliance.
Danger
Risk of dangerous situations that may result in serious personal
injury.
Danger of electric shock
Risk of electric shock.
Warning
Risk of dangerous situations that may result in minor personal in
jury.
Caution
Risk of material damage.
Note
Please note: important information.
See
Reference to other manuals or pages in this manual.
2.2.2 Symbols used on the domestic hot water tank
1Alternating current
2Protective earthing
3Read the manuals provided before installing and commissioning
the domestic hot water tank
4Dispose of used products in an appropriate recovery and recycling
structure
Fig.1 Symbols used on the domestic hot
water tank
MW-4000095-1
1
2
3
4
2 About this manual
10 EL 110 SL 7626247 - v03 - 29042016

3 Technical specifications
3.1 Homologations
3.1.1 Directives
This product complies with the requirements of the following European Di
rectives and Standards:
Low Voltage Directive 2014/35/EU
Generic standard: EN 60335-1
Relevant standards: EN 60335-2-40, EN 60335-2-21
Electromagnetic Compatibility Directive 2014/30/EU
Generic standards: EN 61000-6-3, EN 61000-6-1
Relevant Standard: EN 55014
Apart from the legal provisions and Directives, the additional Directives de
scribed in these instructions must also be observed.
For all provisions and Directives referred to in these instructions, it is
agreed that all addenda or subsequent provisions will apply at the time of
installation.
3.2 Technical data
3.2.1 Domestic hot water tank
Tab.1 Heating water circuit
Unit EL 110 SL
Maximum operating temperature °C 95
Maximum operating pressure bar (MPa) 3 (0.3)
Exchanger capacity litres 4.6
Exchange surface m² 0.68
Tab.2 Domestic hot water circuit
Unit EL 110 SL
Maximum operating temperature °C 70
Maximum operating pressure bar (MPa) 10 (1.0)
Water capacity litres 110
Tab.3 Weight
Unit EL 110 SL
Shipping weight kg 72
3.2.2 Performances of the domestic hot water tank for use in
combination with floor-standing oil-fired boilers
Tab.4 Performances in combination with condensing boilers
Unit 19 kW 24 kW
Specific flow rate (EN 13203) l/min 17.5 18
Draw-off capacity (EN13203) l/10 min 190 192
Hourly flow rate (ΔT = 35°C) l/h 440 530
Number of housing units (DIN 4703) NL 1.2 1.3
3 Technical specifications
7626247 - v03 - 29042016 EL 110 SL 11

Unit 19 kW 24 kW
Cooling constant CC (EN 625) Wh/d/°C/l 0.30 0.30
Standby losses ΔT = 45 K (EN 625) W 65.6 65.6
Maintenance consumption (EN 12897) kWh/24h 1.18 1.18
Tab.5 Performances in combination with non-condensing boilers
Unit 22 kW
Specific flow rate (EN 13203) l/min 18.5
Draw-off capacity (EN13203) l/10 min 190
Hourly flow rate (ΔT = 35°C) l/h 550
Number of housing units (DIN 4703) NL 1.3
Cooling constant CC (EN 625) Wh/d/°C/l 0.30
Standby losses ΔT = 45 K (EN 625) W 65.6
Maintenance consumption (EN 12897) kWh/24h 1.18
3.2.3 Domestic hot water sensor specifications
Tab.6 Sensor specifications
Temperature (in °C) 10 20 25 30 40 50 60 70 80
Resistance (in ohms) 19691 12474 10000 8080 5372 3661 2536 1794 1290
3.2.4 Specifications of the magnesium anode
Initial diameter of the anode 40 mm
Initial length of the anode 305 mm
3.3 Dimensions and connections
Fig.2 Dimensions and connections
4
620
300
500
78
303
333
420
533
150 150
85
685
745
2
1
53
6
MW-4000015-2
1Domestic hot water outlet G 1"
2Domestic cold water inlet G 1"
3Mounting point for recirculating loop G 3/4” (optional)
4Heating water flow from the boiler G 3/4”
5Heating water return to the boiler G 3/4”
6Adjustable feet (10 to 20 mm from the floor)
3 Technical specifications
12 EL 110 SL 7626247 - v03 - 29042016

4 Description of the product
4.1 General description
The EL 110 SL domestic hot water tank comes ready for connection to a
condensing or non-condensing oil boiler.
EL 110 SL domestic hot water tanks can be connected to boilers used for
heating domestic hot water.
Main components:
The tank is made of high quality steel and is lined with food safe quality
enamel vitrified at 850°C, which protects the tank from corrosion.
The tank is protected against corrosion by a magnesium anode.
The coil-shaped heat exchanger welded into the tank is made of smooth
piping, its external surface, which comes into contact with drinking wa
ter, being enamelled.
The appliance is insulated by CFC-free (chlorofluorocarbon-free) polyur
ethane foam, which helps to reduce heat losses to a minimum.
The outside casing is made of painted steel sheets.
This domestic hot water tank is offered exclusively as a package with the
products listed in the table below and cannot be used as an independent
tank.
Note
The energy labels, product fiches and technical specifications per
taining to product packages are available on our internet site.
Range Appliances
NeOvo EcoNox EF 22 - EFU 22 - EFU 22 FF
NeOvo Condens EFU C 19 - EFU C 24
OEcOil FS.22 - FSB.22 - FSB.22 FF
OEcOil Condens FSC.19 - FSC.24
Lava, Lava Plus L 22 - LP 22 - LP 22 FF
Hera Condens HC 19 - HC 24
4.2 Main components
1Hatch
2Location for sensor
3Magnesium anode
4.3 Standard delivery
The domestic hot water tank comes in a package comprising:
Fig.3 Main components
MW-4000016-2
1
2
3
4 Description of the product
7626247 - v03 - 29042016 EL 110 SL 13

The complete DHW tank;
One front panel;
One trim panel;
One insulated cover;
One data plate;
Boiler retaining screws;
An instructions bag containing:
Adjustable feet;
One drain valve;
One domestic hot water sensor;
One screws bag;
Clips;
One installation, user and service manual.
4 Description of the product
14 EL 110 SL 7626247 - v03 - 29042016

5 Before installation
5.1 Regulations governing installation
Note
The installation must comply on all points with prevailing regula
tions and directives, which govern work and interventions in indi
vidual homes, blocks of flats and other buildings.
Note
Only qualified professionals are permitted to install the domestic
hot water tank, in accordance with prevailing local and national
regulations.
Caution
In compliance with the safety rules, fit a sealed safety valve to the
domestic cold water tank inlet on the domestic hot water tank.
Caution
The components used for the connection to the cold water supply
must comply with the prevailing standards and regulations in the
country concerned.
5.2 Installation requirements
5.2.1 Water operating pressure
The tanks on our domestic hot water heaters can run at a maximum oper
ating pressure of 1.0 MPa (10 bar). The recommended operating pressure
is under 0.7 MPa (7 bar).
5.2.2 Domestic water quality
In regions where the water is very hard (Th > 20°f), we recommend fitting
a softener.
The water hardness must always be between 12°f and 20°f to be capable
of providing effective protection against corrosion.
The softener does not bring about a derogation from our warranty provi
ded that it is approved and set pursuant to the codes of practice and the
recommendations given in the instructions for the softener and is regularly
inspected and maintained.
5 Before installation
7626247 - v03 - 29042016 EL 110 SL 15

5.3 Choice of the location
5.3.1 Data plate
The data plate must be accessible at all times.
The data plate identifies the domestic hot water tank and provides the fol
lowing information:
Type of product
Date of manufacture (Year — Week)
Serial number
CE identification number
Note
Never remove or cover labels and data plates affixed to the appli
ances. Labels and data plates must be legible throughout the en
tire lifetime of the appliance.
Immediately replace damaged or illegible instructions and warning
stickers.
5.3.2 Overall space needed for the domestic hot water tank
AHeight of the boiler (varies depending on the boiler model).
Install the domestic hot water tank beneath the boiler. To ascertain the
space to be allowed around the domestic hot water tank in order to facili
tate access and maintenance, refer to the boiler's installation and service
manual.
Set the domestic hot water tank on a raised base frame to facilitate
cleaning of the premises.
Install the domestic hot water tank as close as possible to the draw-off
points in order to minimise energy losses through the pipes.
Caution
Install the domestic hot water tank in a frost-free environment.
5.3.3 Discharge
Install a water discharge device in the boiler room, as well as a funnel-si
phon, for the safety unit.
Fig.4 Data plate
MW-4000017-1
Fig.5 Overall space needed for the domes
tic hot water tank
MW-4000018-3
1100
min.500 685
min.500
A
640
5 Before installation
16 EL 110 SL 7626247 - v03 - 29042016

5.4 Unpacking & initial preparation
5.4.1 Unpacking the domestic hot water tank
1. Remove the packaging from the domestic hot water tank but leave
the tank on the shipping pallet.
Note
The domestic hot water tank is shipped in the vertical position.
2. Remove the protective packaging.
5.4.2 Positioning the domestic hot water tank
Have two people available.
Handle and manoeuvre the domestic hot water tank with gloves.
1. Screw the 4 adjustable feet to the bottom of the domestic hot water
tank.
Note
The 4 adjustable feet are delivered in the instructions bag.
Fig.6 Unpacking
MW-4000019-2
1
2
Fig.7 Fitting the 4 adjustable feet
MW-4000020-2
1
5 Before installation
7626247 - v03 - 29042016 EL 110 SL 17

2. Put the domestic hot water tank in position and tilt on the ground.
Note
Be careful to lift the domestic hot water tank slightly in order not to
damage the bottom of the panels.
3. Level the domestic hot water tank with the adjustable feet.
a Adjustment range: 10 to 20 mm from the floor
Fig.8 Positioning the domestic hot water
tank
MW-4000021-1
2
Fig.9 Levelling the domestic hot water tank
MW-4000022-2
a
3
5 Before installation
18 EL 110 SL 7626247 - v03 - 29042016

6 Installation
6.1 General
Installation must be carried out in accordance with the prevailing regula
tions, codes of practice and the recommendations in this manual.
6.2 Mounting
6.2.1 Mounting the domestic hot water sensor
1. Remove the insulated cover
2. Put the domestic hot water sensor in place.
3. Put the insulated cover back in place, feeding the sensor cable
through the notches in the cover.
6.2.2 Mounting the front panel
1. Slide the clips (provided in the instructions bag) into the grooves on
the inside of the front panel.
Fig.10 Mounting the domestic hot water
sensor
2
MW-4000023-2
1
3
2
Fig.11 Putting the clips in place
MW-4000031-3
1
1
6 Installation
7626247 - v03 - 29042016 EL 110 SL 19

2. Insert the bottom of the panel into the notches on the domestic hot
water tank.
3. Press firmly on the top of the panel to secure it to domestic hot water
tank.
6.2.3 Mounting the boiler on the domestic hot water tank
Note
Have 2 people available.
Handle and manoeuvre the domestic hot water tank with gloves.
1. Install the boiler on the front of the domestic hot water tank, taking
care to correctly align the side panels of the boiler and the domestic
hot water tank.
2. Secure the boiler to the domestic hot water tank using the screws
provided in the instructions bag.
Fig.12 Fitting the hooks
MW-4000025-3
3
2
Fig.13 Aligning the boiler and the domestic
hot water tank.
MW-4000024-5
1
Fig.14 Securing the boiler to the domestic
hot water tank.
MW-3000224-1
2
2
6 Installation
20 EL 110 SL 7626247 - v03 - 29042016
Table of contents
Other REMEHA Water Heater manuals
Popular Water Heater manuals by other brands

Kunstocom
Kunstocom Premium instruction manual

Haier
Haier TP180REL Manual for installation and operation

Giant Factories
Giant Factories UG50-65(-59) Owner's manual installation and operating instructions

Raypak
Raypak FlexGas Features

Galmet
Galmet SGW(S) Mini Tower 100 Installation and operating manual

Bosch
Bosch PowerStar AE125 Handbook

HTW
HTW BIBLOCK PLUS HTW-A60CGN8PLUS Owners and installation manual

TESY
TESY GCV7/4S 150 44 30 B11 TSRCP Appendix

TriangleTube
TriangleTube Challenger User's information manual

STIEBEL ELTRON
STIEBEL ELTRON DHA 4/8 L OPERATING AND INSTALLATION Manual

Bosch
Bosch 660 EF user manual

Solahart
Solahart 250E5X Owner's guide and installation instructions