UG081 Rev 0.00 Page 2 of 11
June 27, 2016
ISL29501-CS-EVKIT1Z
Functional Description
The ISL29501-CS-EVKIT1Z is both a reference design and
evaluation board set that provides a single platform to evaluate
the features of the ISL29501. The ISL29501-CS-EVKIT1Z circuit
board and supplied enclosure have been designed to deliver
maximum electrical and optical performance.
The system sends out light pulses through the emitter LED and
receives returned light pulses that reflect off a target on the
optics board. The difference in phase of the emitted signal and
the return signal is converted to distance by the ISL29501 and is
graphed in the evaluation software. The magnitude of the return
signal is graphed as well. This and additional data are available
in the chip registers, see UG054, “ISL29501 Evaluation Software
User Guide” for additional details.
Operating Features
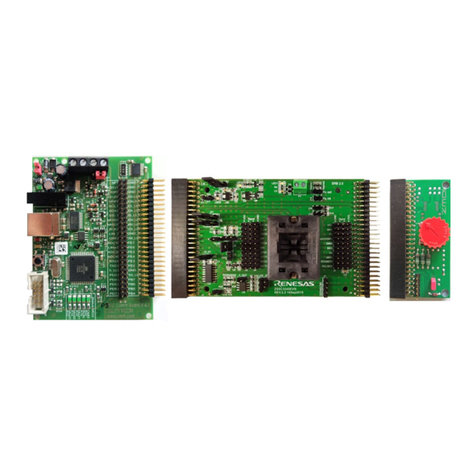
The ISL29501-CS-EVKIT1Z evaluation kit is shown in Figures 2
and 3. The hardware enable function is controlled by a software
switch. A Power-Good (PG) LED indicates that the LDO is
regulating properly when not lit.
External Power Supply
For high current/high duty cycle setups USB power may not be
able to power the board.
External Microprocessor
For debugging of customer written software, it might be useful to
connect the Cat Shark to a different microprocessor. All signals
are available on the optics board connector J1. See the
schematic for details. SCL and SDA are compatible with 1.8V
microprocessors but unfortunately the support pins require 3V
signaling.
System Calibration
Before meaningful measurements can be made the calibration
registers in the chip need to be loaded. This can be done in two
ways. The first is to load a profile that contains data into the GUI.
This can be one of the Intersil provided profiles or one that was
saved previously by the user. See UG054, “ISL29501 Evaluation
Software User Guide” for further details. The second is to
calibrate the board directly.
Calibrating Cat Shark
There are 3 separate standard calibrations that need to be
executed in order to calibrate the system. These are magnitude,
crosstalk and distance calibrations.
MAGNITUDE CALIBRATION
Magnitude calibration is done after the emitter current and duty
cycle settings are programmed. It is a dark (no light) calibration
that takes less than 1s to run. Run this calibration from the GUI.
CROSSTALK CALIBRATION
Crosstalk is defined as a signal that reaches the ISL29501 chip
directly without bouncing off the target. This can be electrical or
optical. At close range and large return signal values, crosstalk
has a minor impact on distance measurements. At the far end of
the distance range, the crosstalk might exceed the signal, adding
error to measurements.
For this calibration, the user makes a distance measurement
with the return signal blocked from reaching the photo-diode.
This can be done in two ways. The first is to cover the emitter or
photo-diode optically preventing any of the emitted signals from
reaching the photo-diode. The second is to point the board
toward infinity so there is no return signal. Care must be taken
since small amounts of signal will be returned by objects up to 4
meters away. The emitting angle of the light is ±3° so you must
be sure that there are no objects within this cone when doing this
calibration.
Since the chip sees none of the emitted signal, anything received
is crosstalk. Run this calibration from the GUI after running
Magnitude calibration.
DISTANCE CALIBRATION
Variation in delay of emitters, photo-diodes and the ISL29501
will change the signal path delay. To compensate for this a
reference point at a known distance needs to be established.
This reference is calculated during distance calibration. The
process involves making a distance measurement at a known
distance. While it is not critical it is best to use a reference
distance about 25% of the intended range. The GUI will write the
correct registers that establish the reference distance inside the
chip.
It is important that there are no objects inside the ±3° emitting
angle other than the target.
Once these calibration registers are written, all succeeding
distances will have this measured value subtracted from the
real-time value. Run this calibration from the GUI after running
crosstalk calibration. See UG054, “ISL29501 Evaluation
Software User Guide” for details on how to run the calibrations in
the GUI.
Operating Range
The controller circuit board contains an LDO to convert the input
voltage to the ISL29501 operating voltage range, 2.7V to 3.3V.
By default, the controller board is configured for USB power. The
LDO resistors are rationed to create a 3.0V power rail. All other
set-up conditions can be configured through the chip registers
and evaluation software.
PCB Layout Guidelines
The ISL29501-CS-EVKIT1Z PCB layout has been optimized for
electrical and thermal performance. Care needs to be placed in
decoupling circuits and noise isolation. Cat Shark follows good
design techniques but additional suggestions are available in
AN1917, “ISL29501 Layout Design Guide” (see Figures 6 and 9).
NOTE: Visible on the bottom side of the board are the emitter LED
and photo-diode. Each is surrounded by a brass tube. These tubes
are grounded and serve as terminators for any electric fields. They
prevent crosstalk from the emitter to the photo-diode.
