P/N PM01.13 10/03/2017
PG 1
ExactFit - Magnetic Phone Mount
FX 802-893-7311
PH 802.893.7366
Order Online: WWW.RENNLINE.COM
READ BEFORE INSTALLATION
The use of any Rennline product is the sole responsibility of the end user. Rennline Inc. accepts no responsibility for
warranty voids or damage resulting from the use of these products. Due to the varying location of wiring harnesses and
other components, carefully inspect any area prior to drilling. All Rennline products are intended for off road use only and
should be installed by a qualified automotive technician.
Cayenne 2017 -
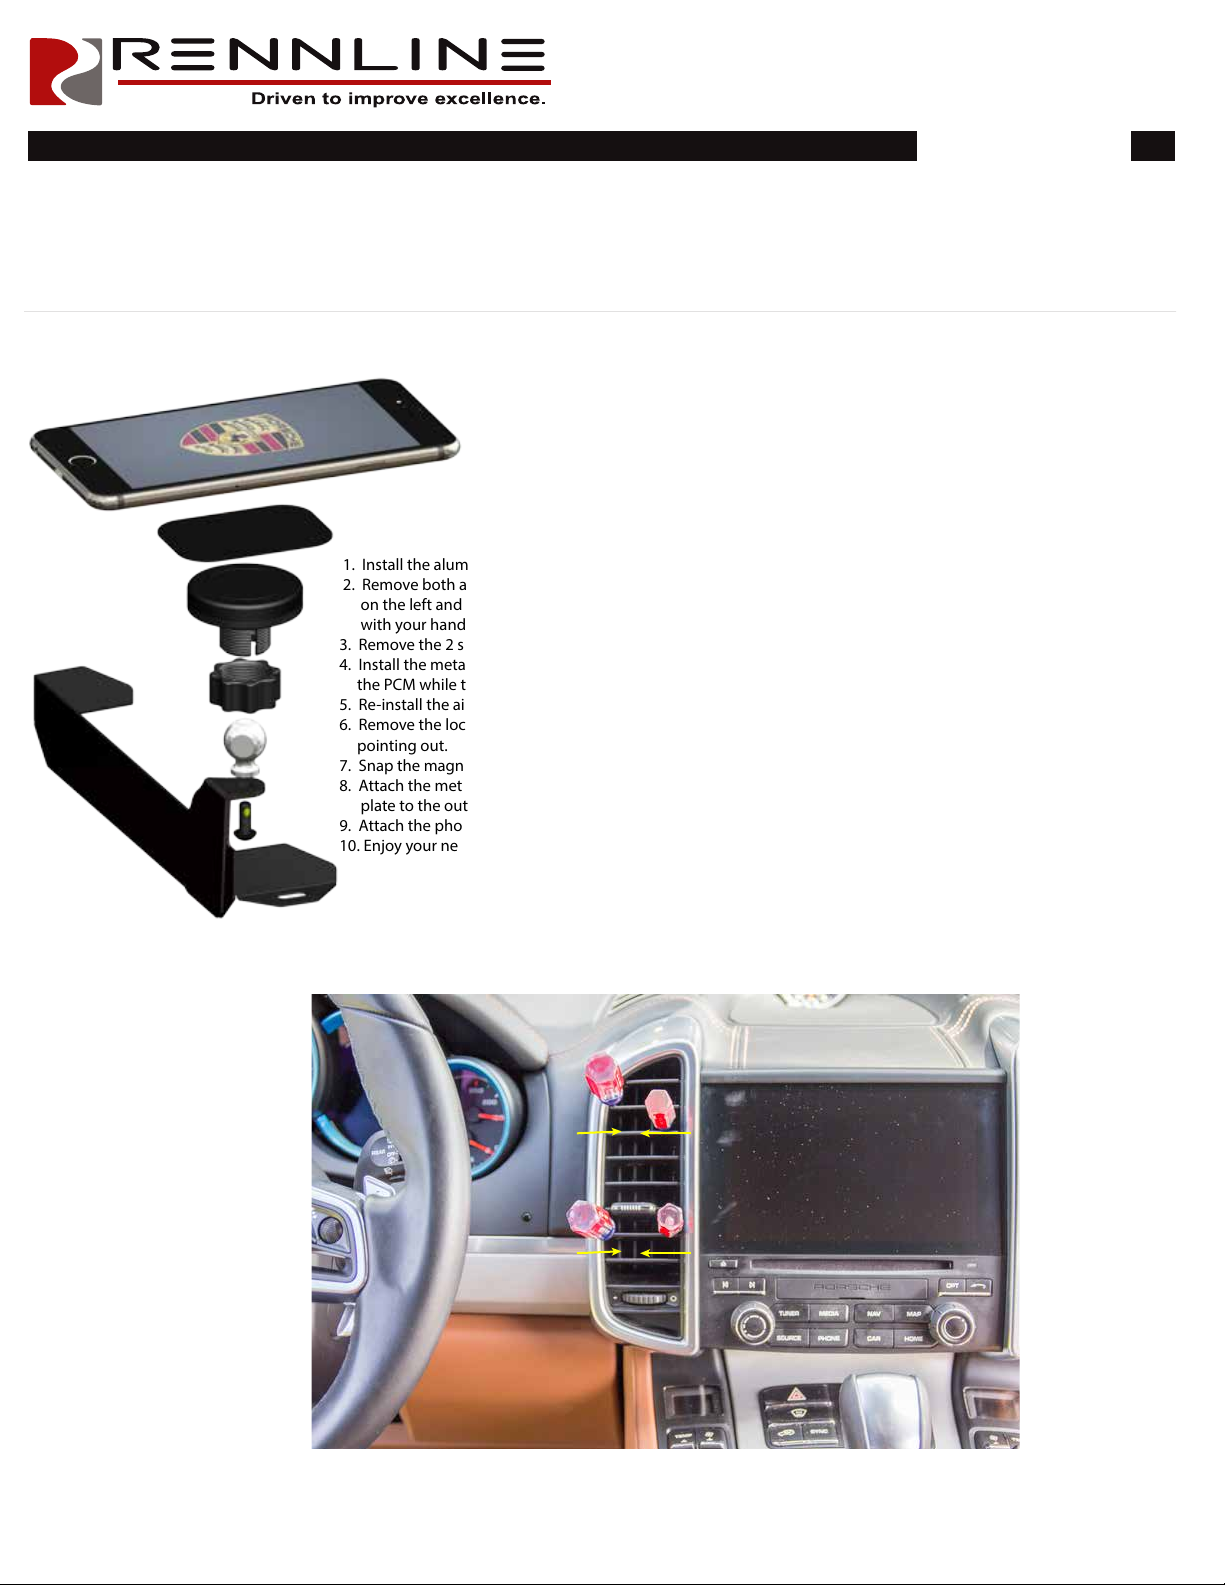
1. Install the aluminum ball onto the metal bracket as shown using the supplied screw.
2. Remove both air vents next to the PCM. To do so, insert 4 screwdrivers into the 4 slots located on the inside of the vents
on the left and right side, near the top and bottom. Pull the screw drivers torward each other while pulling the vent out
with your hand. (Photo 1)
3. Remove the 2 screws located at the bottom on the sides of the PCM. (Photo 2)
4. Install the metal bracket using the factory screws removed in step 3. Make sure to push the bracket rmly up towards
the PCM while tightening the screws. The bracket should conform to the bottom curvature of the PCM. (Photo 3)
5. Re-install the air vent.
6. Remove the lock nut from the magnetic pad assembly, install the nut over the top of the aluminum ball with the threads
pointing out.
7. Snap the magnetic pad assembly over the aluminum ball and secure by tightening the lock nut.
8. Attach the metal plate to your phone case or phone. If you have a thick phone case, we recommend applying the metal
plate to the outside of the phone case for maximum magnetic pull.
9. Attach the phone to your mount.
10. Enjoy your new Rennline product.
Photo 1
Part List:
(1) Mounting Bracket - P/N - PM13
(1) P/N - PM01
- Aluminum Ball
- Magnetic Pad Assembly
- Steel pads
(1) Black S/S Socket Head Screw - 10/32 x .5”- MC91255A265
Squeze
Squeze


